Project: 'Troy's Arcade' - Scratch Build MAME Mod
Having been practically raised on arcade and console video games I've wanted to build a MAME system for a really long time. When I was a kid I would collect bottles and cans along the roadside for deposits and then ride my bike ten miles round trip to hit the local video arcade and play the awesome games from the eighties... yep, Galaga.
I would have preferred building a full sized stand up arcade machine, but I'm severely space limited and there's no room for one in my home. Small and cheap is so far the loose plan for creating a self contained dedicated MAME system and pinball emulator. I've ordered all of the necessary computer hardware for the build and plan to pull the whole thing off for around $500.
I've owned almost every home video game system since the Atari2600 (including the TurboGraphix16 and 3DO), the biggest difference between playing on an actual arcade machine versus any home console arcade port is that arcade controls have a tactile feel and response that can't be recreated by any home gaming systems handheld controller.
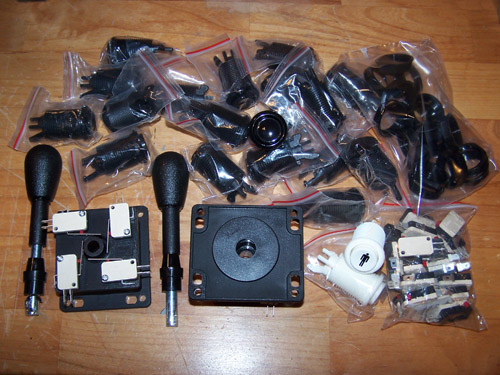
Building a computer that can run MAME is no big deal, the hardware required doesn't need to be high end, the controls however are another story entirely. I plan to build a seriously small - authentic feeling arcade emulator PC... that said, I found this deal on two joysticks and a bag of 20 buttons for $42USD shipped, it smelled like a bargain.
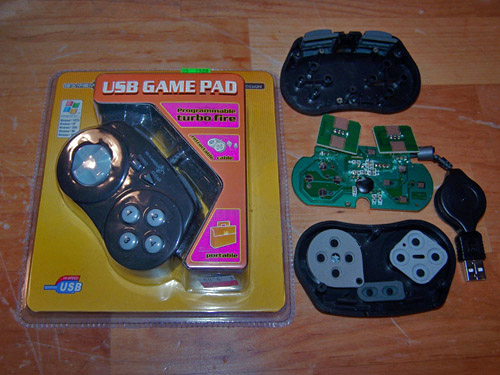
I had researched building my own arcade controls and then debated over just buying a ready made solution instead of hacking my own. Seeing how much cheaper it is to just do it myself I figured I'd give that a shot first. I found some really small game pads, ten button w/retractable USB cable, I bought the last two Wal-mart had on clearance for $9.00USD apiece, these things are seriously freakin' tiny.
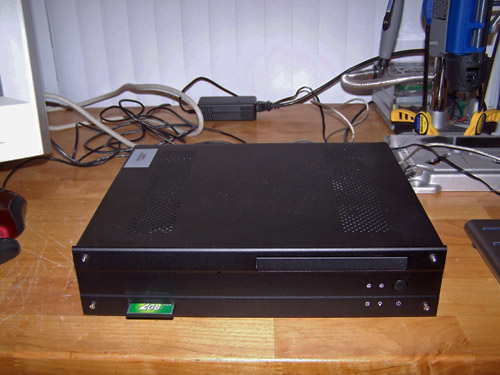
This next bit is taken directly from the ebay listing of the mini-ITX HTPC system I bought for $99USD with free shipping...
CPU : Intel Pentium M 1.80-GHz
Memory Total : 1GB PC2100 DDR SDRAM
HD : 2GB CompactFlash Installed.
Optical Drive : None
Network : Onboard integrated One (1) 10/100/1000Base-T Gigabit Ethernet and One (1) 10/100Base-TX Fast Ethernet NIC
Floppy : None
Power Supply : Included 100V - 240V
Video : Onboard integrated video controller
Ports : Four (4) USB, Four (4) Serial, One (1) PCMCIA and Two (2) PS/2
Form Factor : Mini-ITX
Memory Config. : 1x1GB
Audio : Onboard integrated sound (Line-In and Mic)
Dimensions : 13" x 11" x 3" inches
Model Number : i3368G-LF
Condition : Used, tested, working, and sold with warranty, Power Adapter Included
I almost considered using it in the project as is, but I'm trying to use every bit of space I'll have wisely, the HTPC case is far bulkier than this project requires.
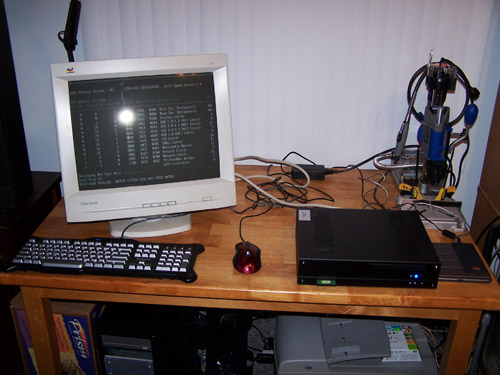
Before I could move on I had to be sure the computer works, and it does...
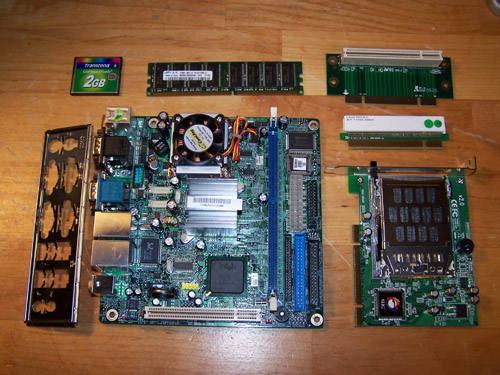
Everything gets unplugged and the fun part begins, time to dig in and see exactly what my $99 scored. Clockwise from the top left there is a 2GB 120X compact flash card, 1GB Samsung DDR PC3200 (listed as PC2100), two different PCI riser cards, a PCI PCMCIA adapter card and a mini-ITX motherboard with a P4 1.8GHz processor. It's actually a pretty nice board with features a modder might find useful... like dual LVDS connectors, that's just crazy.
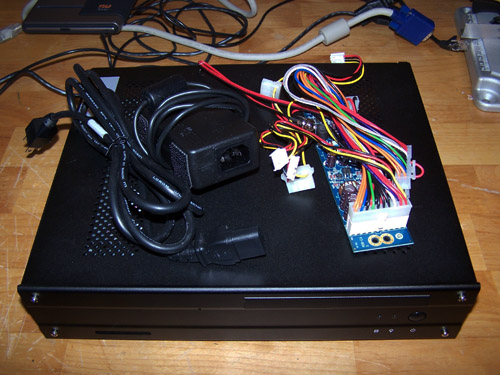
But wait, there's more... like a seven foot power cord and power brick, a small 80W power supply and a neat little HTPC case. I could have ripped out the front mounted CF reader, power button, blue LED's and 60mm fan from the case, but didn't because I'll be using it in a future project. I checked and the PCI risers alone are worth $20... the PC is a great deal at $99.
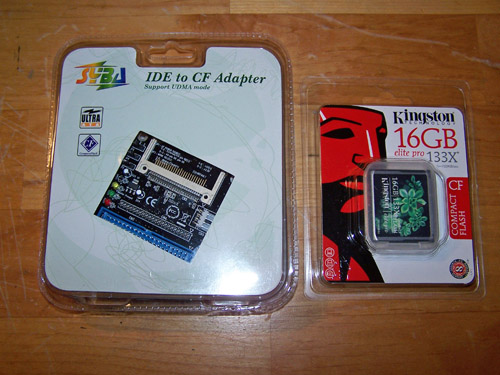
Below is what I plan to use instead of a hard drive, a poor mans SSD. 16GB should be plenty of space for WinXP, pinMAME, MAME32 and a few gigabytes of ROMs. The adapter was $14 and the CF card was $31, so far the project total is $206... not too bad.
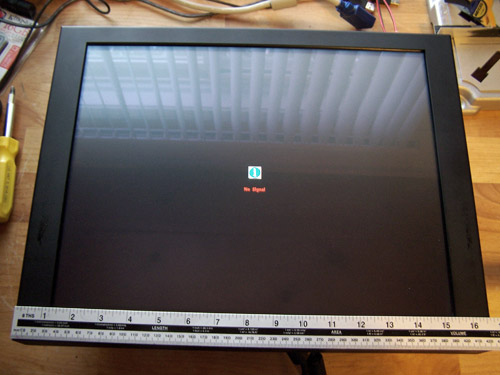
I knew this next part would be pricey, but I decided early on that this project deserved a touch screen. I found an ebay for an 18" commercial LCD touch screen with power cable for $175USD, it was too good a deal to pass up - here are the specs:
Part Number: EFL-1801X
LCD Panel: 18.1" Active Matrix (TFT)
Native Resolution: 1280 x 1024 @ 60 Hz / 75 Hz
Display Area: 360.4 mm X 288.9 mm
Pixel Pitch: .264 mm X .264 mm
Display Color: 16.7M
Contrast Ratio: 500:1
Brightness: 250 cd/m2 typ.
Viewing Angle: -80 ~ 80 (H), -80 ~ 80 (V)
Signal Input: Analog VGA (DB15)
Power Input: 12V DC, 3.8A
Touchscreen: 3M Cleartek 19.18" (13-5361-01MA)
Touchscreen Connector: Standard 9-Pin Serial (RS232) Cable
Touchscreen Controller: 3M Capacitive Serial EXII (5406120)
Dimensions(mm): 423.9(W) X 335.0(H) X 61.9(D)
I didn't have a DB9 serial cable so I haven't tested out the touch screen part of it, but the monitor itself works great, I ordered the serial cable off ebay for $6.99 with free shipping from Hong Kong... the project is at $388 so far.
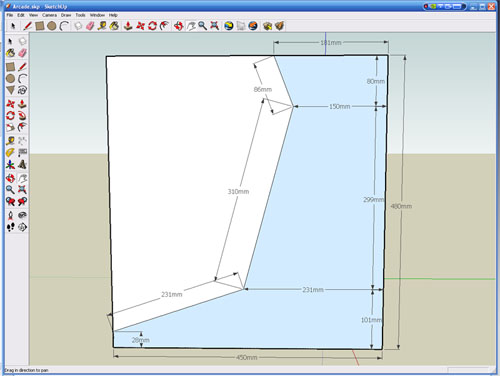
Other than speakers, all of the parts are here. Time to do some measuring, this time I'm going to skip the usual pencil sketches and jump right into Google SketchUp. Here's a side measurements view...
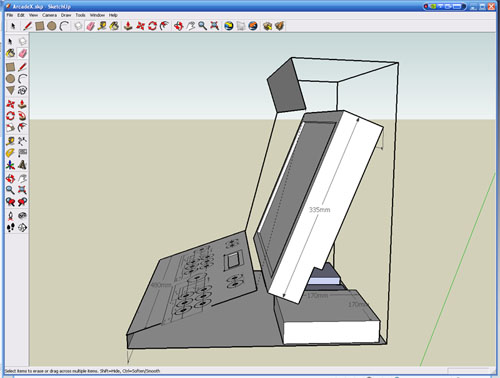
3/4 side view showing parts placement...
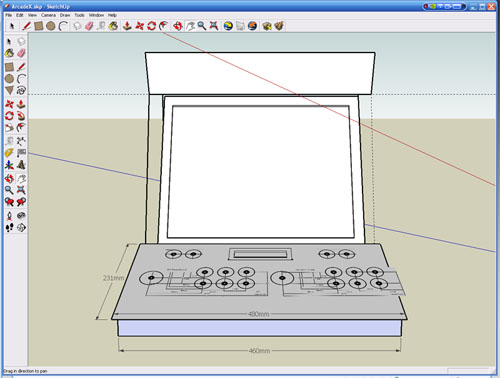
Front view showing joystick and button placement...
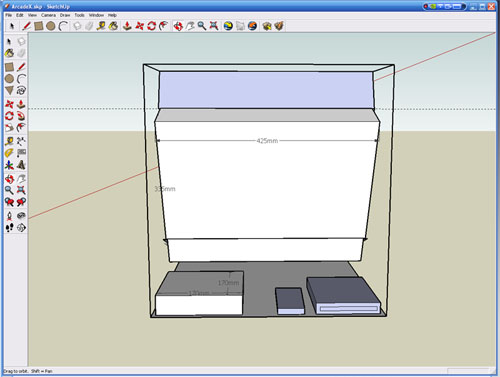
And lastly the back view...
I still have to order speakers and the materials for the construction of the case, as soon as it all gets here this mods on like Donkey Kong.
Re: Project: 'Troy's Arcade' - Scratch Build MAME Mod
Nice. It looks like you found some good deals. I will be watching to see how this turns out.
Re: Project: 'Troy's Arcade' - Scratch Build MAME Mod
MAME boxes are awesome. This guy over at Bit-Tech made one a while back. It had PC, Xbox, nintendos, playstations, SEGAs, you name it it had it.
Good luck.
Re: Project: 'Troy's Arcade' - Scratch Build MAME Mod
Quote:
Originally Posted by
The boy 4rm oz

MAME boxes are awesome. This guy over at Bit-Tech made one a while back. It had PC, Xbox, nintendos, playstations, SEGAs, you name it it had it.
Good luck.
I have lots of all of those (but real ones) around 30-40 NESes, 5 xboxes, 4 PSXs, 3 PS2s (and 1 PS/2 FTW!), 5 SEGA Genesises, etc. I don't even need emulators. Except I like playing N64 on the computer for the unmatched HD graphics.
I still like playing with the emulators on my computer.
Re: Project: 'Troy's Arcade' - Scratch Build MAME Mod
Thanks nevermind1534 and The boy 4rm oz.
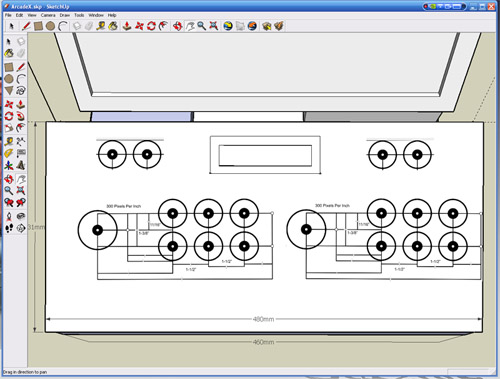
The small Logitech 2.0 speakers are ordered and on their way, but I still have to order the materials for the construction of the case. When the acrylic arrives I'm most likely going to have it all laser cut, below shows the sticks and buttons configuration I plan to use, it's a slightly condensed version of the 'Street Fighter' layout. The rectangle up top is where I plan to place a Matrix Orbital 2x16 character display... not really as anything useful, more just to look cool.
Re: Project: 'Troy's Arcade' - Scratch Build MAME Mod
You have any questions about Keyboard controllers and that sort of stuff you can ask me. although its pretty straight forward.
should check out the arcade i made.
Re: Project: 'Troy's Arcade' - Scratch Build MAME Mod
Quote:
Originally Posted by Twigsoffury
should check out the arcade i made.
I'd like to, where is it?
Re: Project: 'Troy's Arcade' - Scratch Build MAME Mod
I'm interested to see how this turns out. I love MAME projects.
Re: Project: 'Troy's Arcade' - Scratch Build MAME Mod
not another one!!!! lol jokes.... looking 4wrd to it :P good luck
Re: Project: 'Troy's Arcade' - Scratch Build MAME Mod
I've decided not to use the touch screen monitor for this project, I was entirely wrong in thinking that MAME would or could in any way benefit from it. In all honesty I had hoped to score Megatouch software either by purchase or download, or a reasonable touch screen MAME type alternative. Sadly I have found nothing, and the touch screen would be totally wasted on this system... thankfully I have other plans and it will fit nicely into my next build.
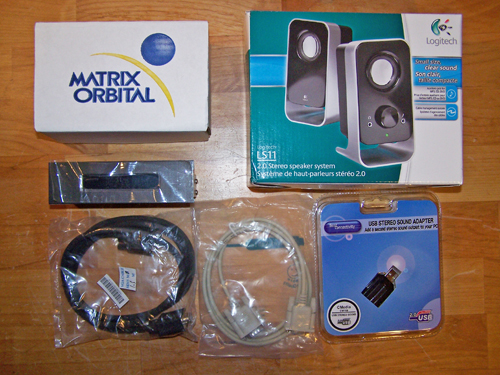
Below is the Matrix Orbital display I plan to use, a pair of small speakers, a USB sound port adapter, a serial cable and VGA cable... not counting the Matrix Orbital (since I already had it) the total for the below shown parts is $32.
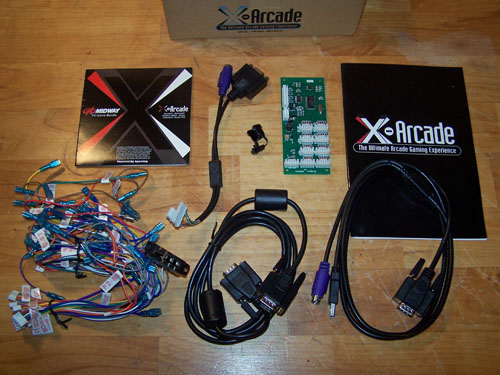
Big thanks to XGaming.com for sponsoring one of their cool BYO Arcade Kits (shown below) for this project. The nice thing about the BYO Arcade kit is that it only occupies a single USB port and it's geared to control two joystick/button layouts, whereas the game pads net a single layout and require a USB port each. I still plan on building arcade style controllers out of the two small USB game pads, but they will be built later as an add on to this project to enable four player games.
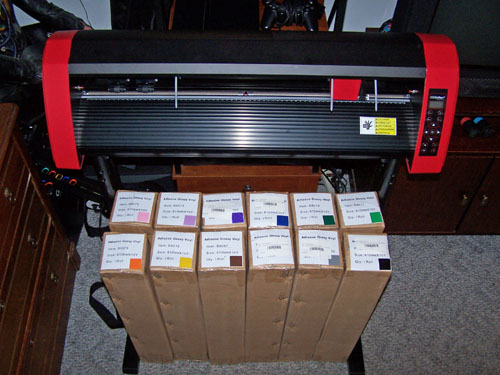
Overkill? Well, maybe. I bought a 24" vinyl cutter/plotter and 120 yards of adhesive backed vinyl. I figured it'd come in handy for making the yet to be designed project panel graphics. I've wanted to buy a vinyl cutter for a while, it actually cost less than the very first inkjet printer I bought... and that's exactly how I rationalized getting one. Ok, time to start putting this thing together - on to the build.
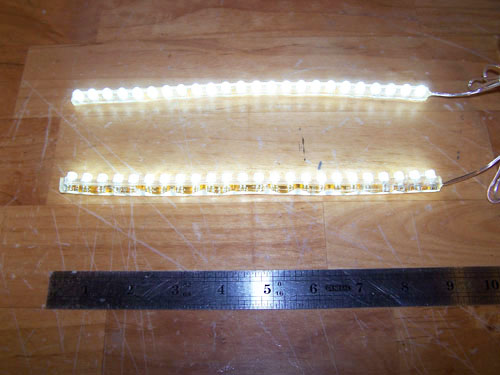
I bought a pair of 24 LED strips for $5.99 shipped off ebay, they measure 9 inches long each. I wired them up then fired them up, they are plenty bright and will be used to back light the front marquee.
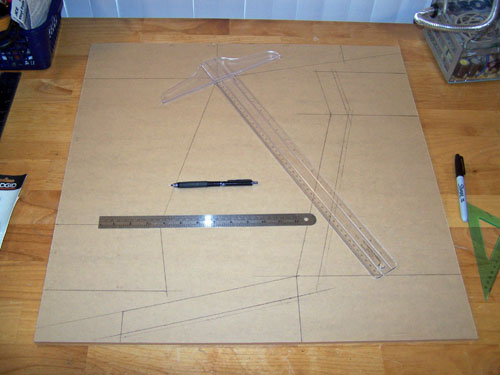
I transferred my side panel measurements onto a sheet of 3/8" thick clear acrylic in preparation for cutting.
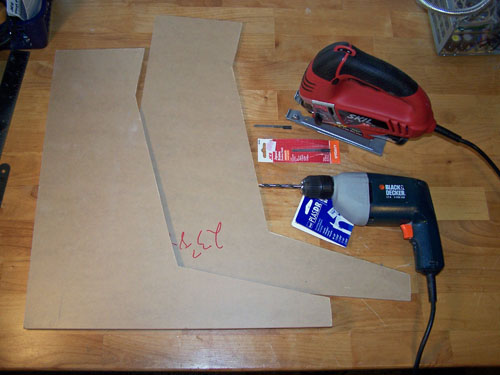
I used a jigsaw with a plastic cutting blade and a drill with a specialized plastic cutting bit and carefully cut out both side panels.
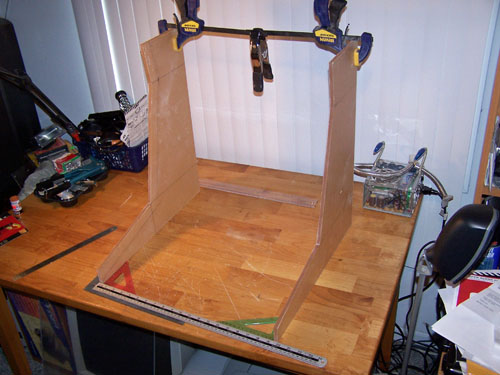
I set both side panels up, measured it out and then sloppily clamped them together just to get an idea of size and also to help me better visualize things.
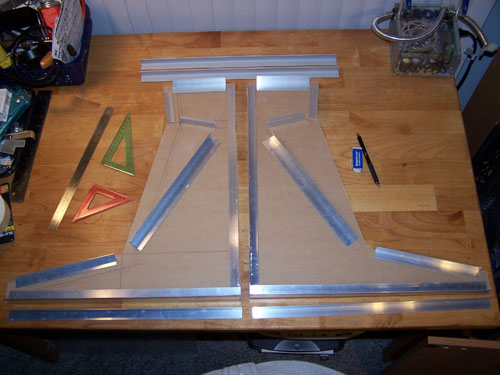
I cut a few lengths of Aluminum Angle to size and roughly arranged them on the side panels, when attached they will be the framework upon which everything else will be built.