Re: Mini-ITX Scratchbuild
Cool idea. good work on the corners, It's very VERY difficult and time consuming to get perfect miter joins with only hand tools. You seem to have done all your sums regards what you can fit in the case. I'm fortunate with my current project in that I have stacks of space and keep changing the plan when I realize I can fit more in.
Good luck :up:
Edit: Nice to see a work area like mine, no workshop, so things are photographed on the carpet, kitchen floor etc. LOL
Re: Mini-ITX Scratchbuild
That bench PSU will definitely come in handy! I loved mine until I fried it by forgetting to screw the board back down. When I moved I jostled it and the next time I plugged it in...POP! I may copy your layout when I redo it since yours is nice and simple.
Nice use of aluminum angle, that case looks ridiculously strong! Keep up the good work!
Re: Mini-ITX Scratchbuild
Quote:
Originally Posted by
CMH

But my reasoning is that I haven't sat on my computer ever anyway.
Pffh. Noob. ;) I've used my computers for chairs, tables, shelves, desks, and even structural support for shelves and/or other computer. :P
Seriously though, nice work, especially for a first mod (and a scratch-build at that). Good job on the frame, it looks great! (And I would be willing to bet that it wouldn't have any problem at all if you do try sitting on it. :D )
That sucks about the first rotary tool dying on you, but, well, no you know...there's a reason those of us who can afford them have Dremels. (Incidentally, Dremel has awesome customer support if yours ever dies.)
What are your plans for the body panels?
EDIT:
Oh, and welcome to TBCS!
Re: Mini-ITX Scratchbuild
Thanks for all the replies.
Yeap, I've got no workshop as such, and my current "workbench" is a foldable plastic table. I seriously can't even clamp anything on it, and if I managed to, the table moves.
About the sitting part. Well, I wouldn't have a problem sitting on it if it was positioned vertically, but horizontally, its kinda long, and I'm really not sure the kind of forces the aluminum angles can take. I know I can bend the angles by hand if I really tried (I had to to get it to fit into the car :D), and if I wanted to, I can do what I originally planned to, which is to reinforce it with MORE aluminum pieces. I didn't have to since it was already stronger than I anticipated.
As for body panels...
I've bought a Lian-Li removable m/b tray sometime back for this project. This is the only part of the case which isn't scratch made lol. It was a real shame to have to hack it, but I had no choice....
Someone decided that my spare computer cases were junk and threw them out :(.
I'll post pics when I've got it nice and ready.
Anyway, its not going to be removable, since I can't figure out a good way to get everything to connect safely, and securing it in place is another worry of mine.
As for the sides, I'm thinking a single piece aluminum cover. 3 seperate pieces doesn't make sense, as for installation, I would need access from at least the top and right side. A single piece makes for less work constructing it too.
The back piece will be glued into place. Being a permanent piece is the norm anyway for computers.
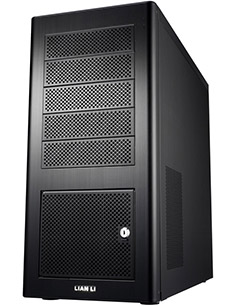
The front will be simple, unless someone can give me ideas. My current idea is a kinda-simple flat front, which curves to the sides. Something like this.
Just like the lian-li linked, I will have the bottom half meshed (different mesh to be used). Unfortunately due to the graphics card, the PSU and Optical drive is pushed to the right. This gives me space to put other things like the PWM fan controllers and power/reset buttons on the left.
I might put a piece of plexi over it, depending on how it might turn out.
Also hoping I have the skills to put USB ports on the top of the front panel (as in, you can see from top-down, not from the front). Will have to scavenge some case USB ports somewhere.
Bottom will be a nice flat piece of aluminum. I may even put a slim 120mm fan under the motherboard, if there's space. As it is, I will be cutting a BIG hole under the motherboard, and covering with mesh for air. Another "hole" will be cut on top of the optical drive. This hole will more probably be decorative, maybe a cutout pic or something.
Yet another hole will be cut out on the left for air for the graphics card. Again, not sure what I'll do with that. May even cut out enough for a window, but all it'll be able to see is the graphics card, which is boring. A top window makes more sense, but it wouldn't be able to see the whole graphics card in that case. Besides, with mini-ITX boards, there's not much to see once everything is connected. With a Venomous X put in, that'll cover just about the whole board. Being able to see the RAM is iffy at this point.
Again, open to suggestions and ideas.
Re: Mini-ITX Scratchbuild
Gahh... I bought everything to put into the case, and found that the m/b was faulty.
Given that it took forever for DFI to ship one of these over to Aus, its gonna be awhile before I update this.
Working on a few things, lighting, fan controllers, etc, might post pics of that when done.
Re: Mini-ITX Scratchbuild
That sucks, hopefully you don't have any trouble getting the new one.