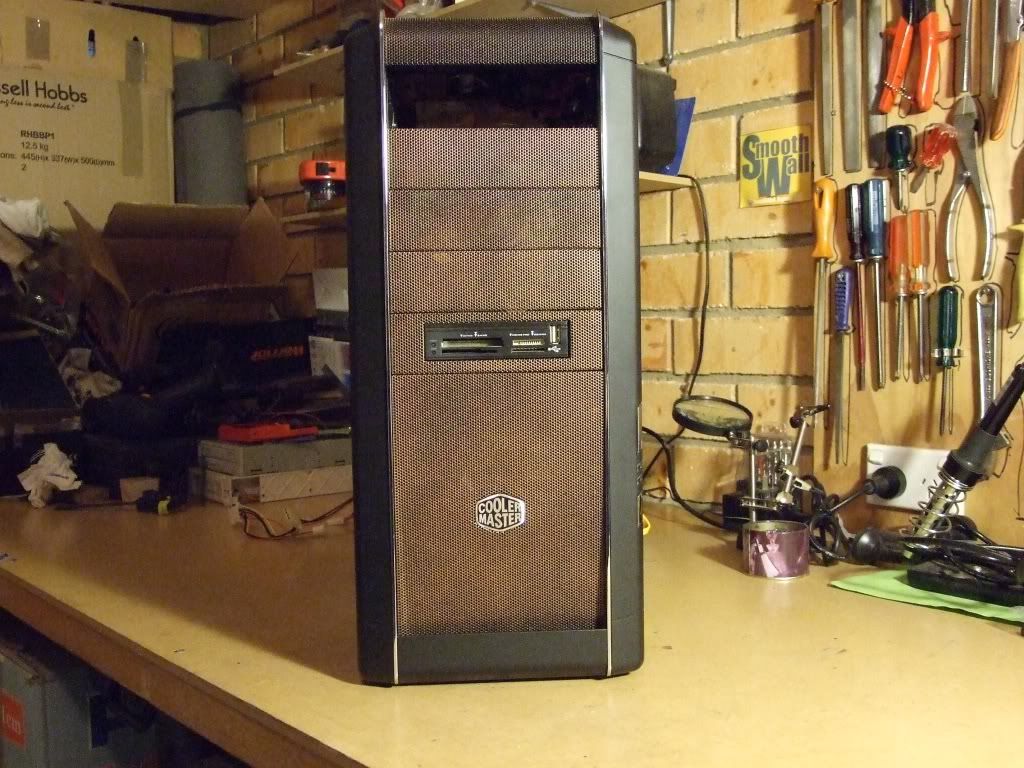
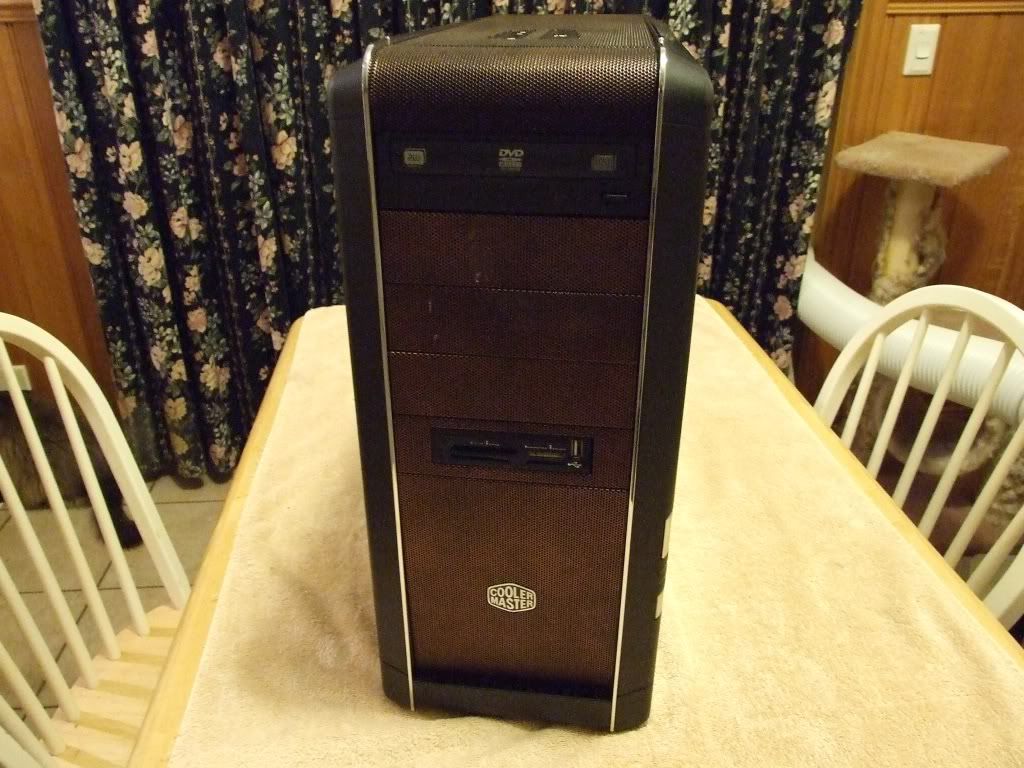
Well its been 3 years now since I got this CM-890 Case, and with its current hardware configuration has served me well,
But alas its time to move Forward and Update both the Case and some of the Hardware,
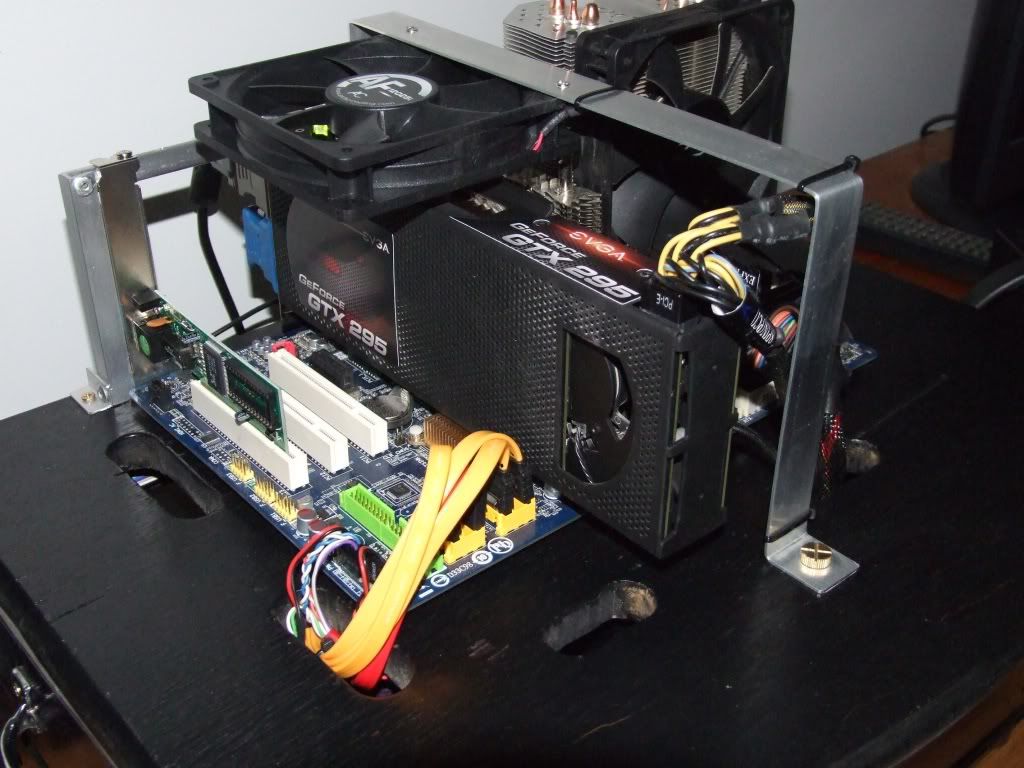
Current Rig Specs
Mobo = GA-P35-DS3L
CPU = Q6600 GO @ 3.2GHZ
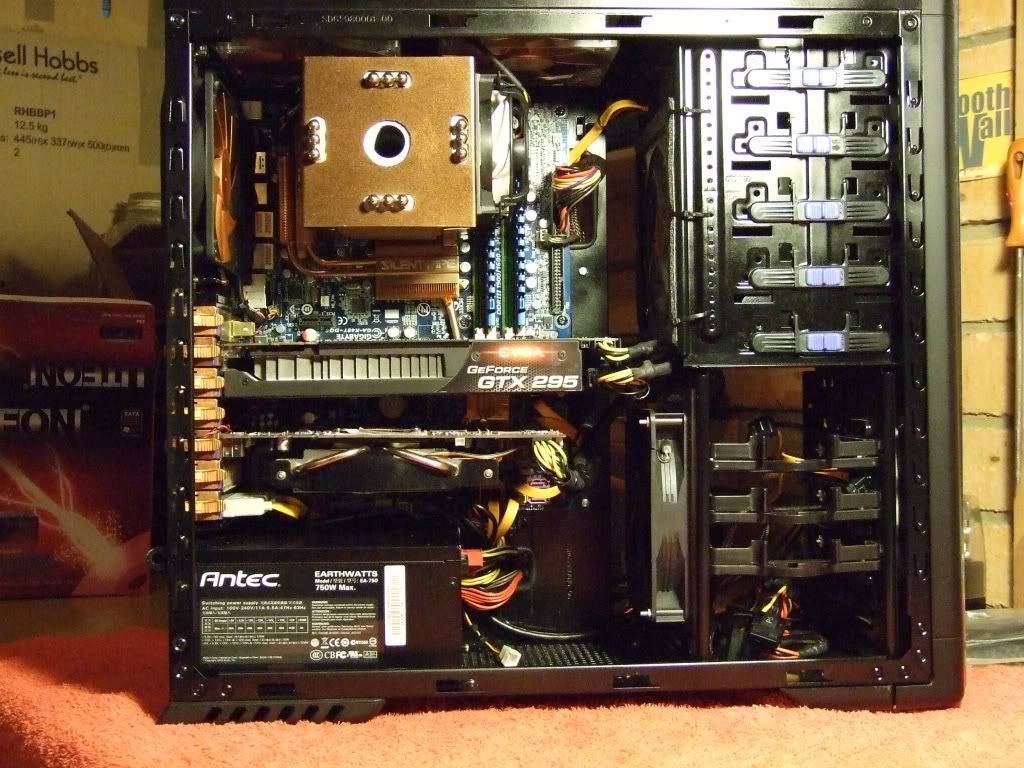
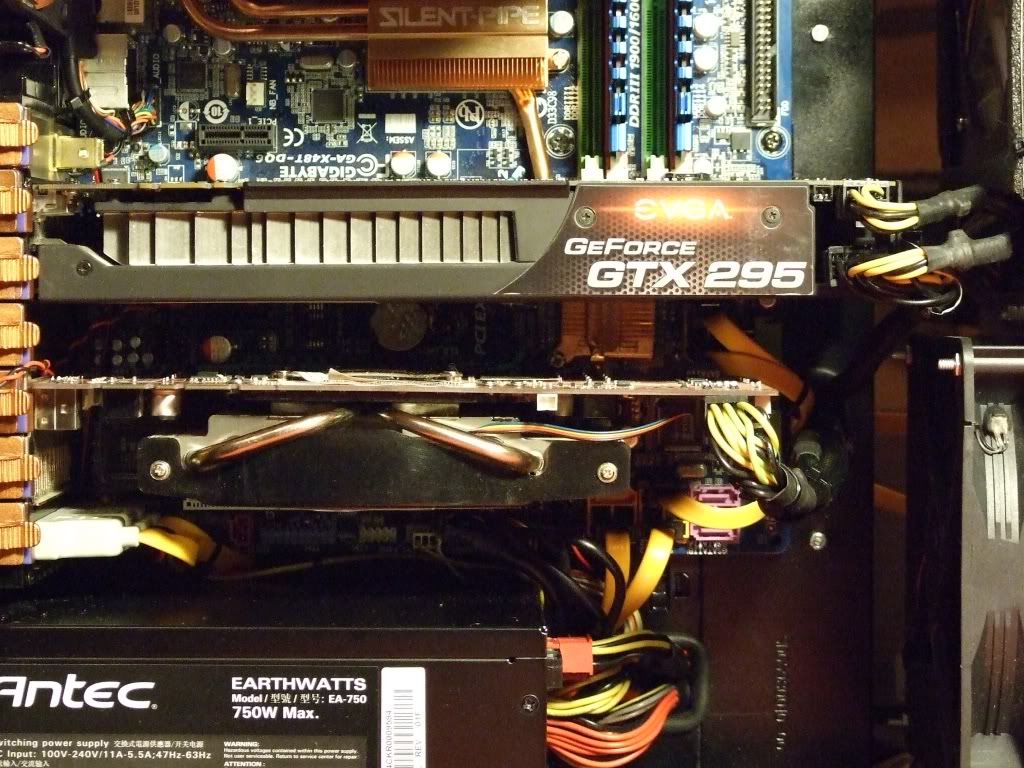
GPU = EVGA GTX-295
RAM DDR2 = 4 Gig XMS2 6400 4-4-4-12
Optical = Liteon DVD-RW Lightscribe
Multi CardReader
HDD,s + 2 x 250GB Sata + 320GB sata
The Plan
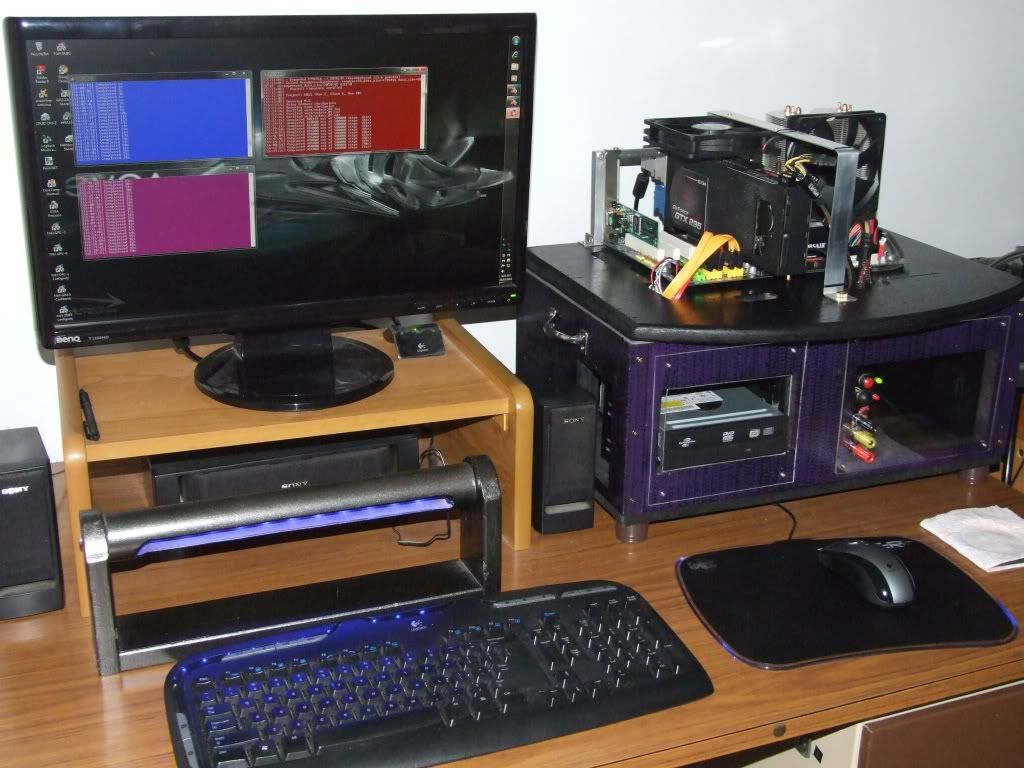
First I will be transferring all the current hardware to Jolly's Tech bench 2010 so all can be still used as functioning PC, while work is being done to CM-690
Then the CM-690 will get a new lease of life Transformation, to include New Paint Work,
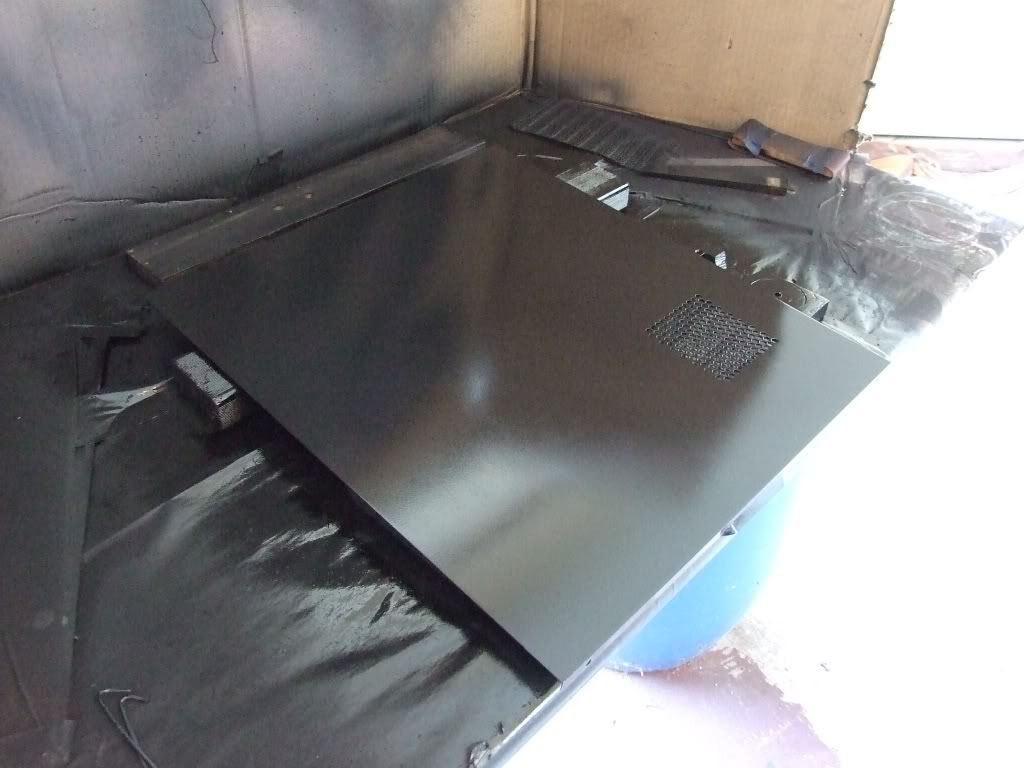
Both inside and out, Modded for better Cable management see below in current state.
The Inside will be Modded for better Cable management adding /enlarging Mobo Tray cable slots for rear cable entry, and the the inside will get re-painted in Matt Back with Satin Clear coat for protection, after of course the prep work and re-undercoating,
The main panel frames Outside Case, still not sure whether staying with the Black or maybe the Gun Metal like I did on the P4 Case Makeover (Undecided make even be different Colour all together ?)
The Hardware Change list
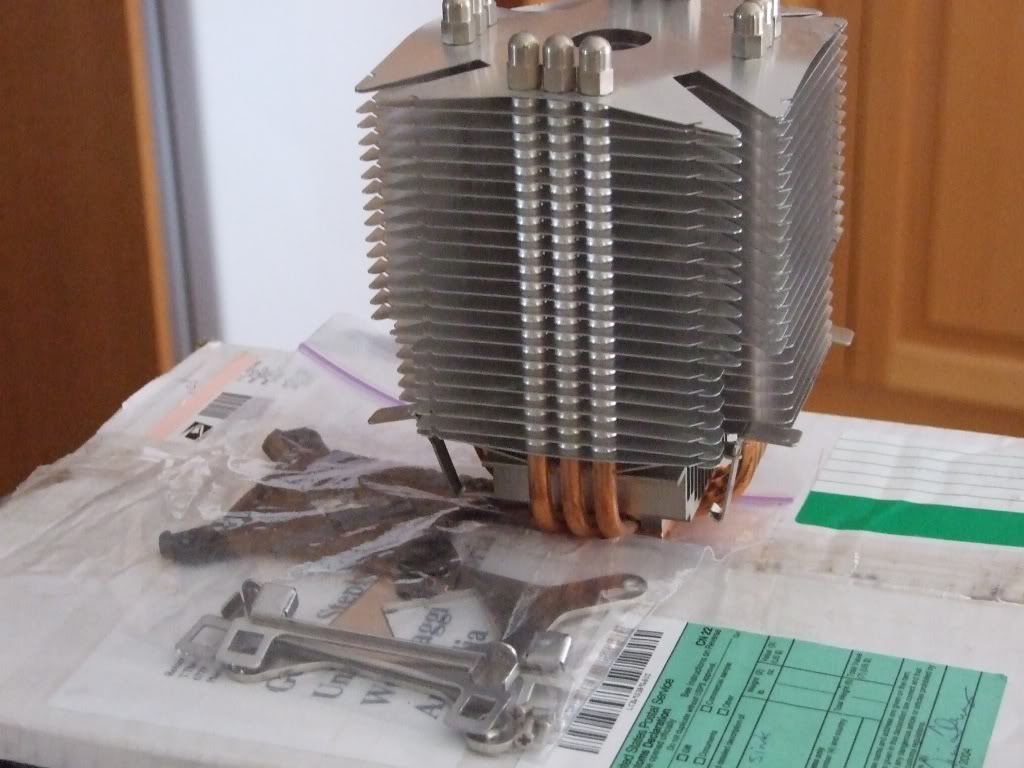
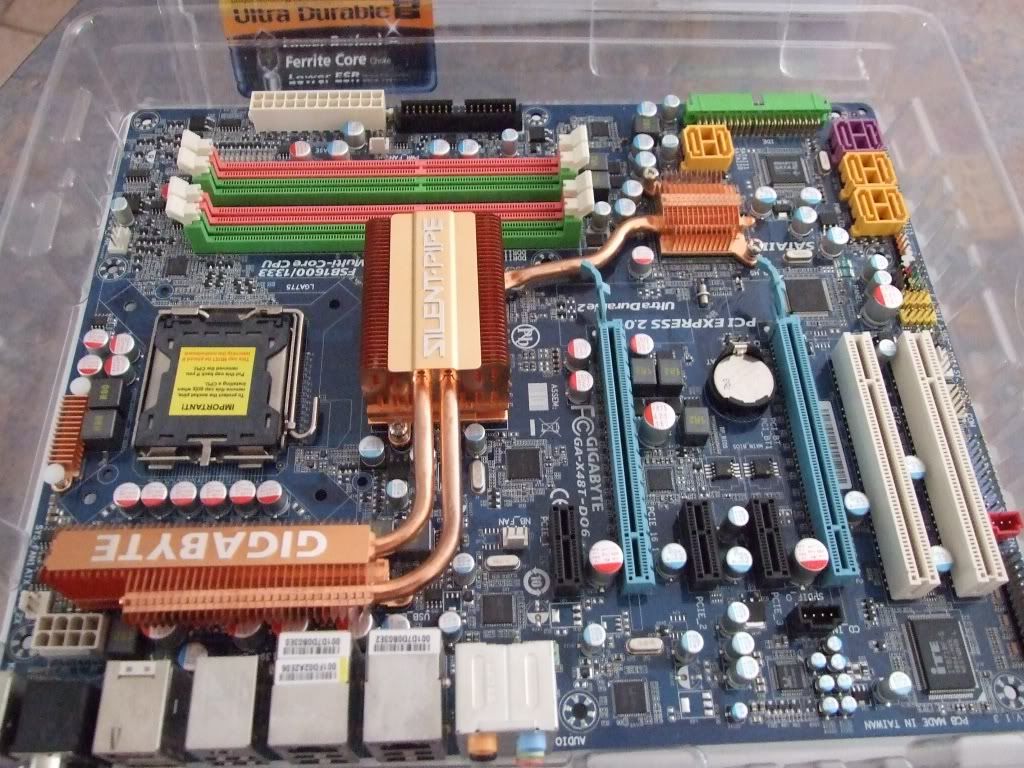
Motherboard = Gigabyte X48T-DQ6 CPU = E8500 EO 3.16GHZ DDR3 Ram = ??????? (still need to get) CPU HSF = Scythe Ninja
will also be still using current
GPU = EVGA GTX-295
DVD-RW Drive = Liteon Lightscribe
3.5 Multi CardReader
Scythe Ninja HSF
Gigabyte X48T-DQ6 Mobo
This will Start within the next week or so and will need to get the DDR3 Ram before Hardware goes into Revamped CM-690 Case!
Update #2 18 March 2010
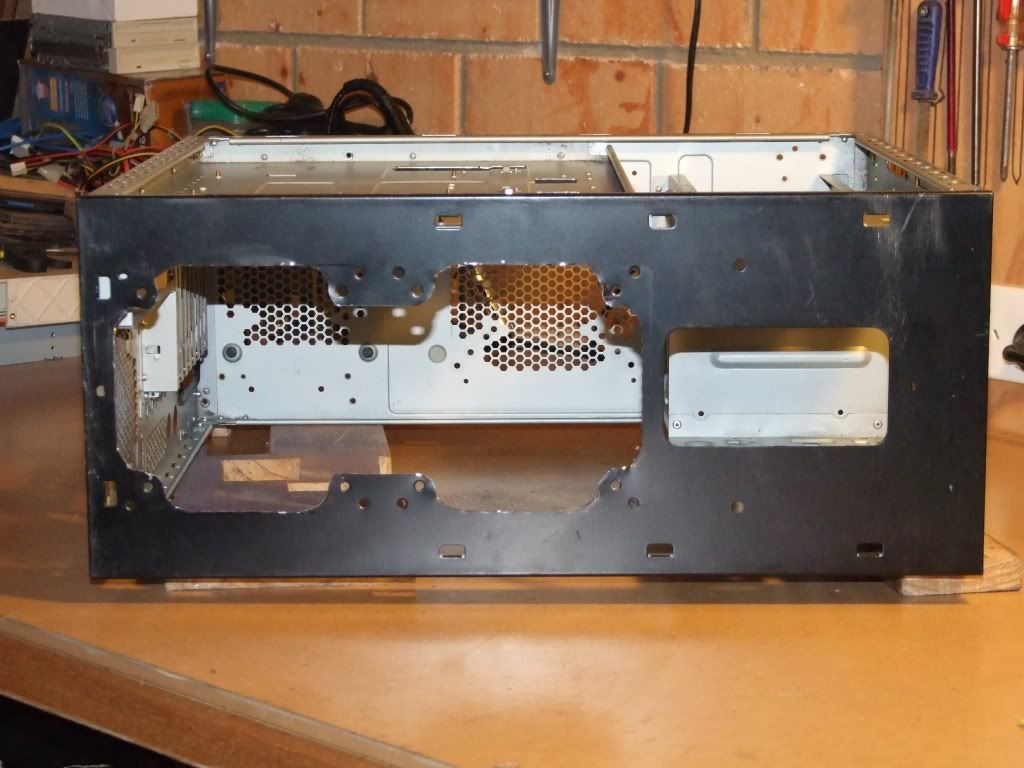
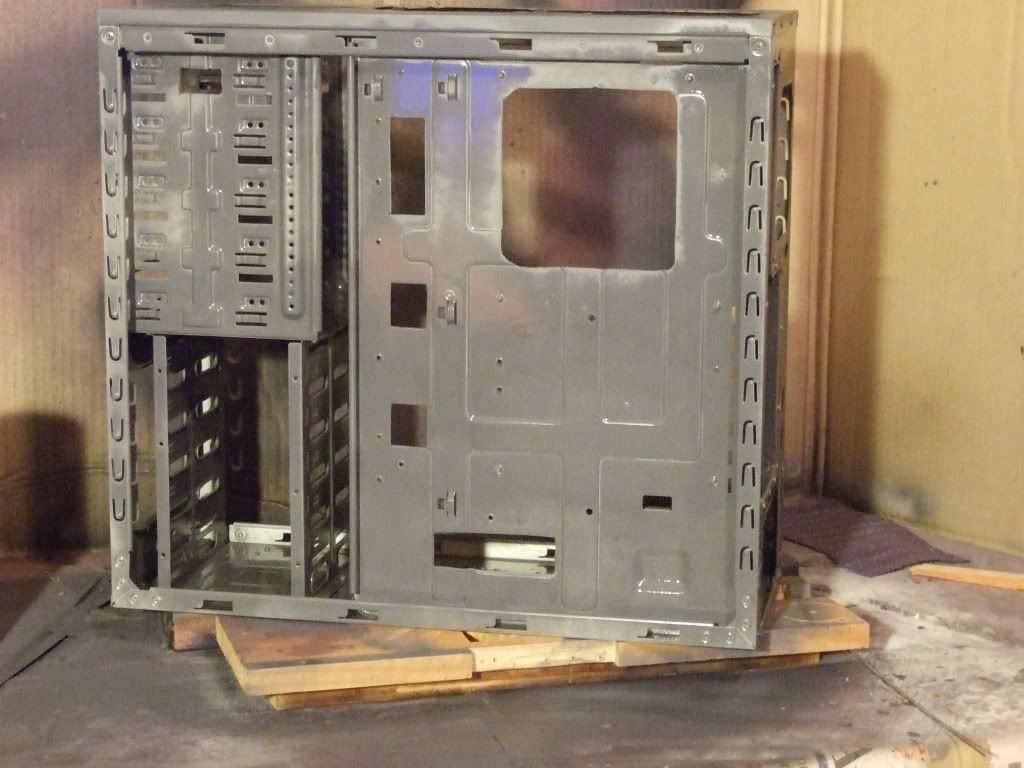
Started on the CM-690, first Removed Hardware -HDD's GPU - Motherboard - PSU from Rig,
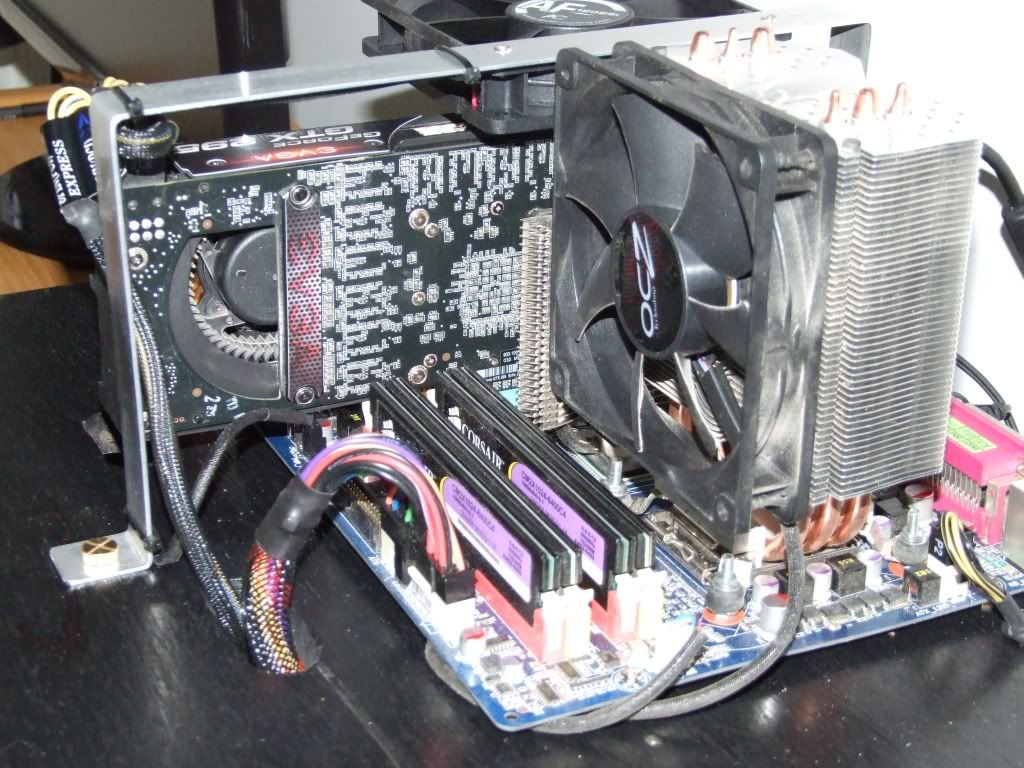
Then also added A cooling gantry to Jolly's Tech Bench2010 to help aide in cooling GPU ect.
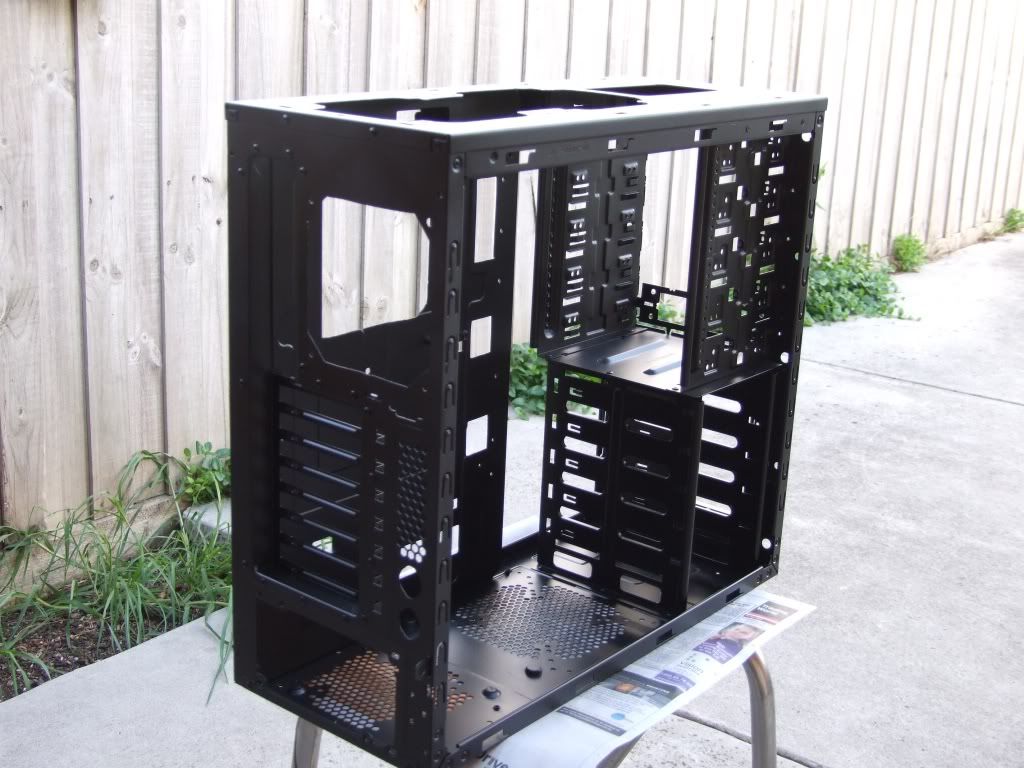
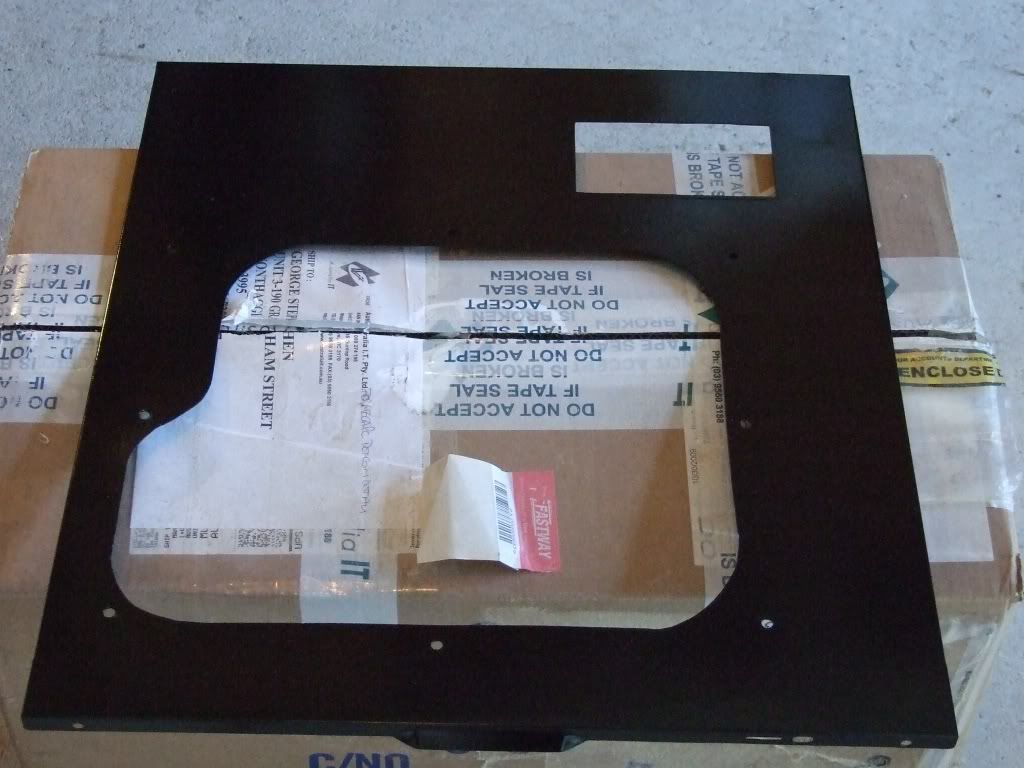
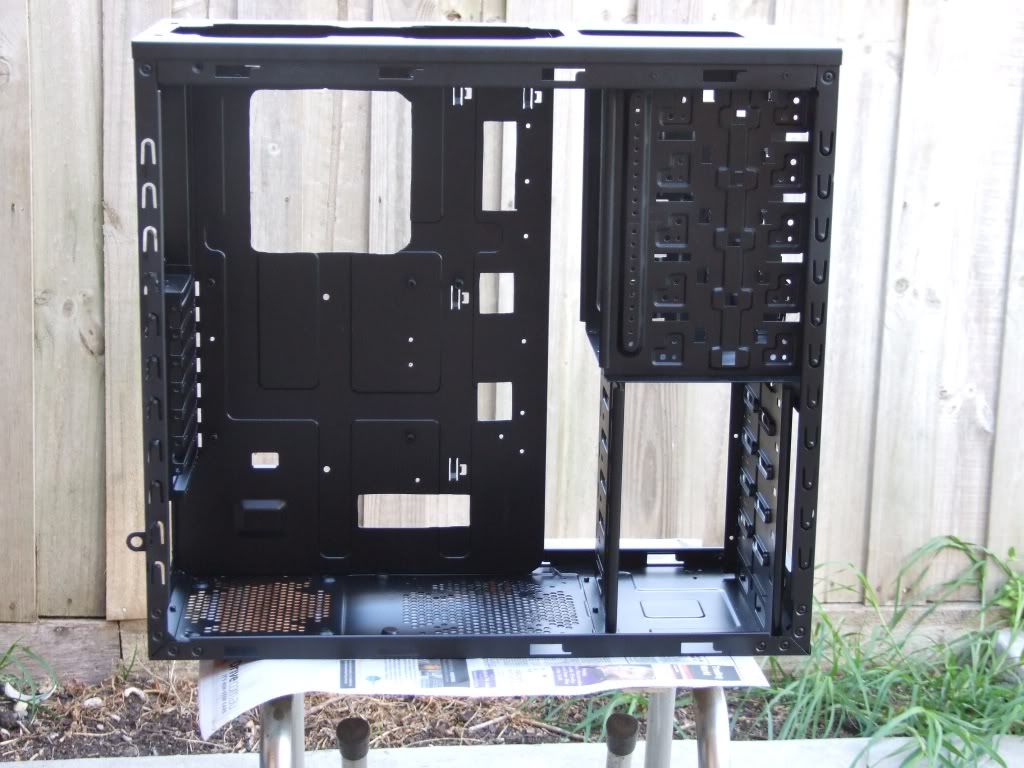
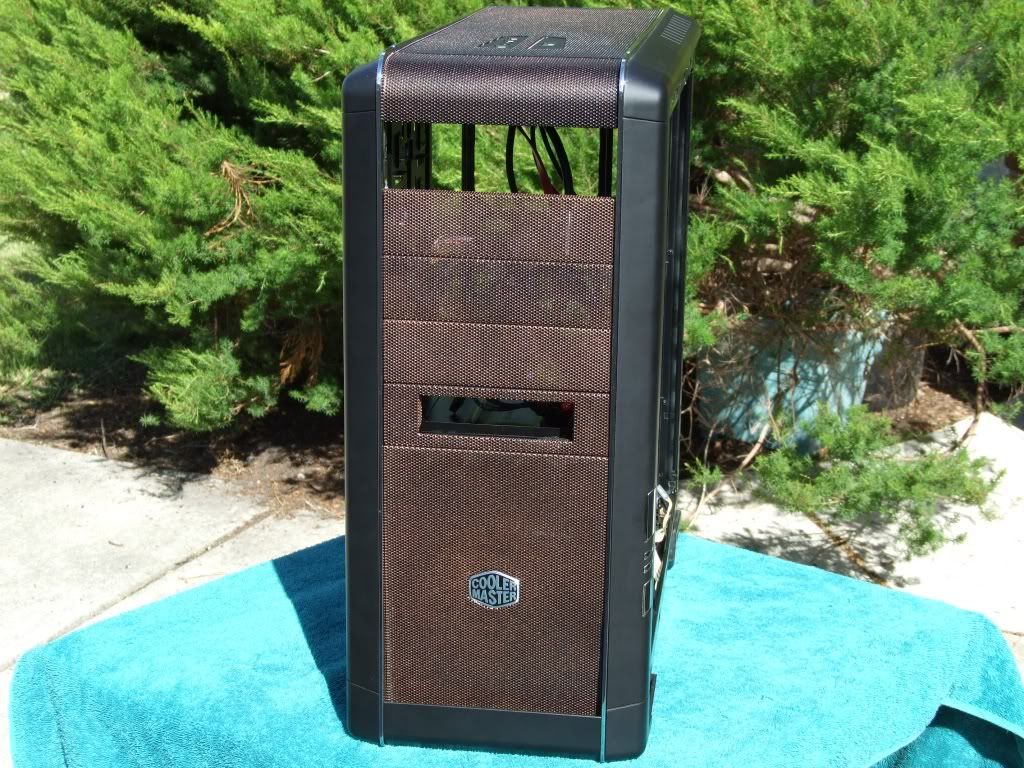
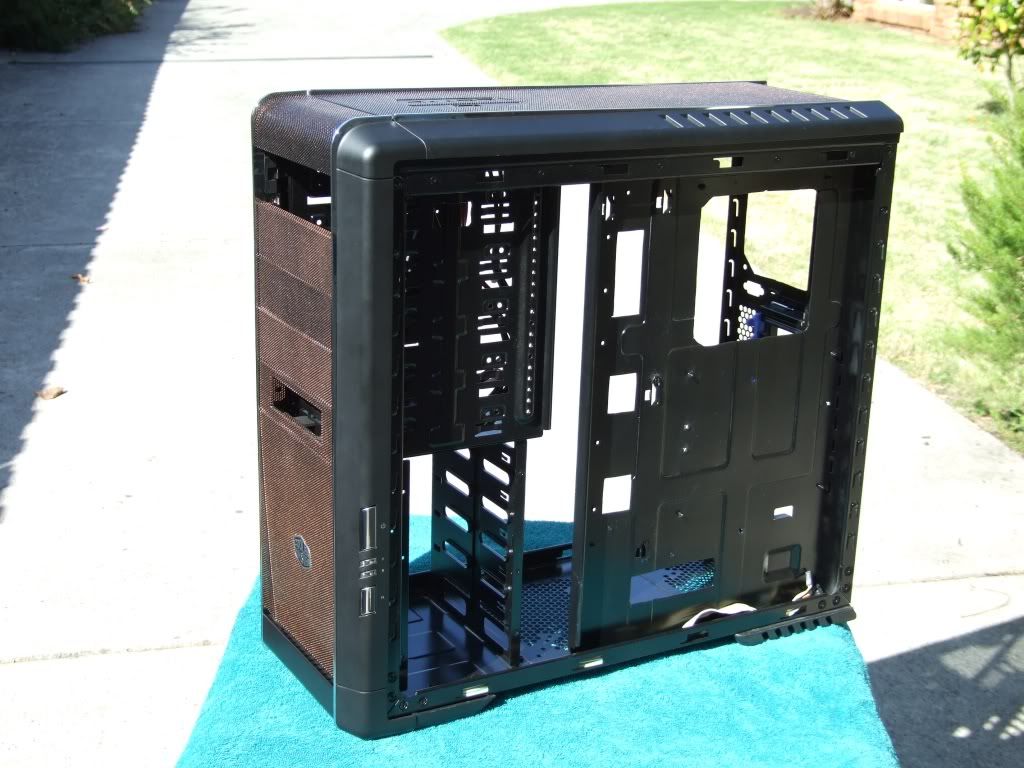
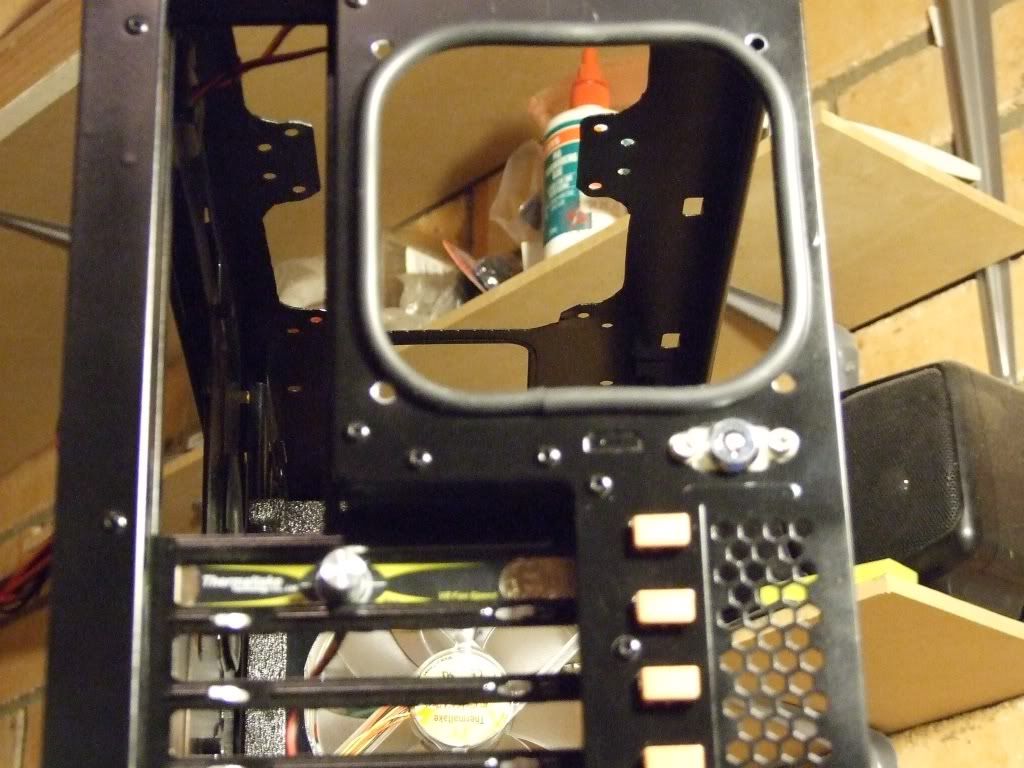
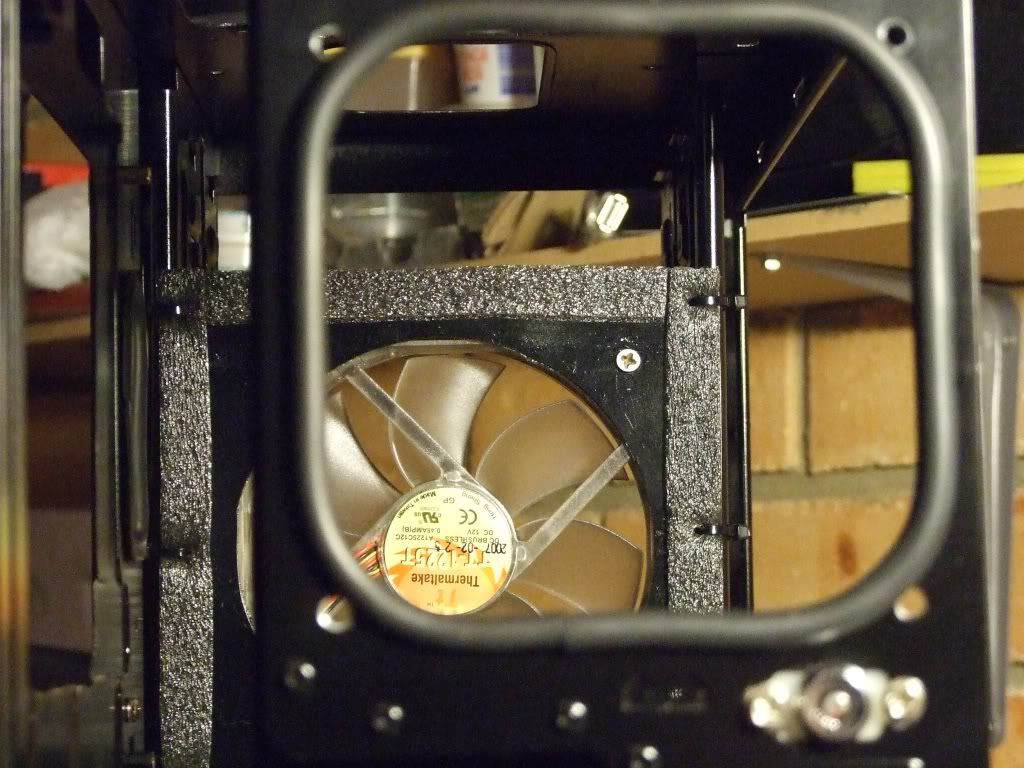
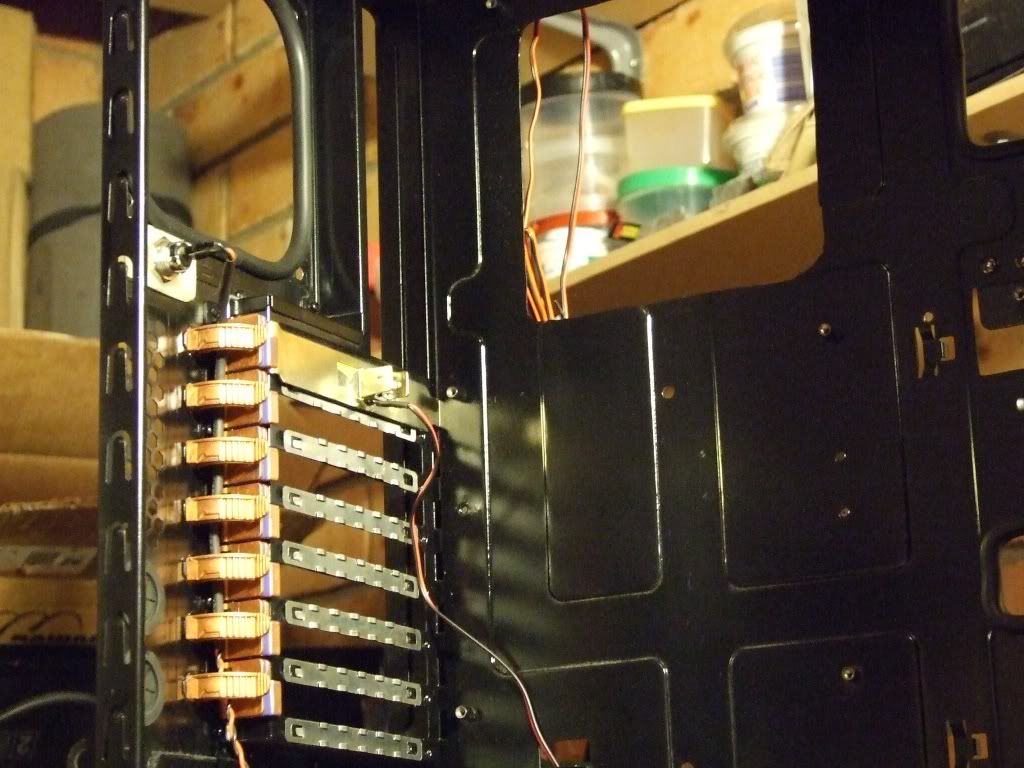
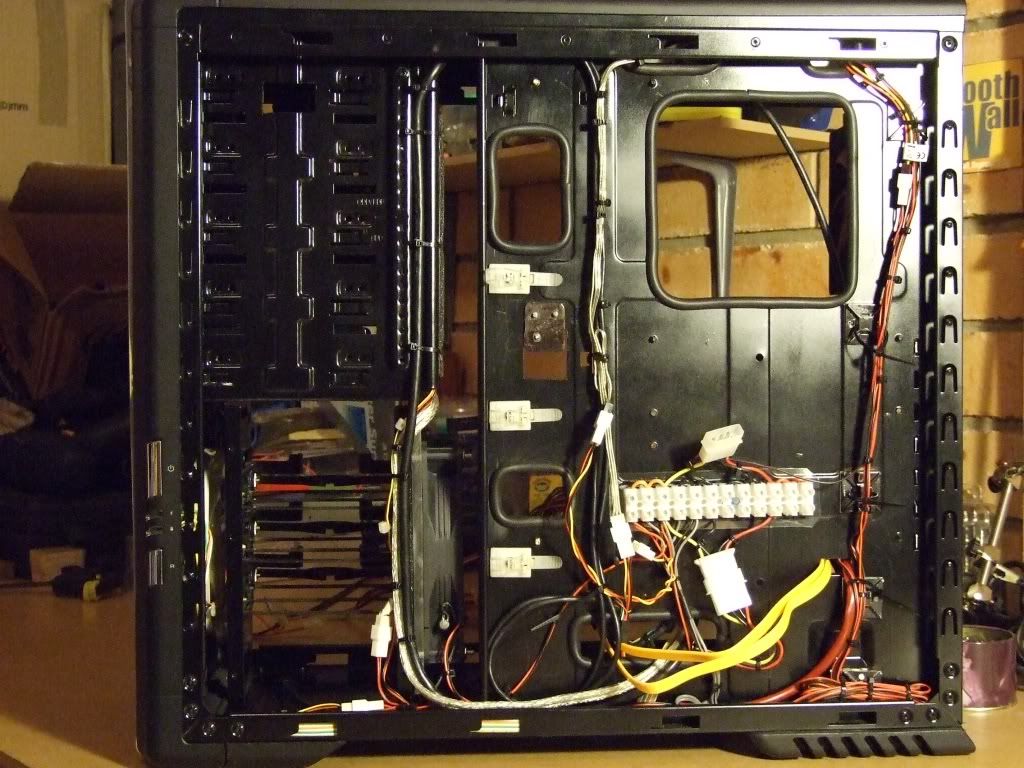
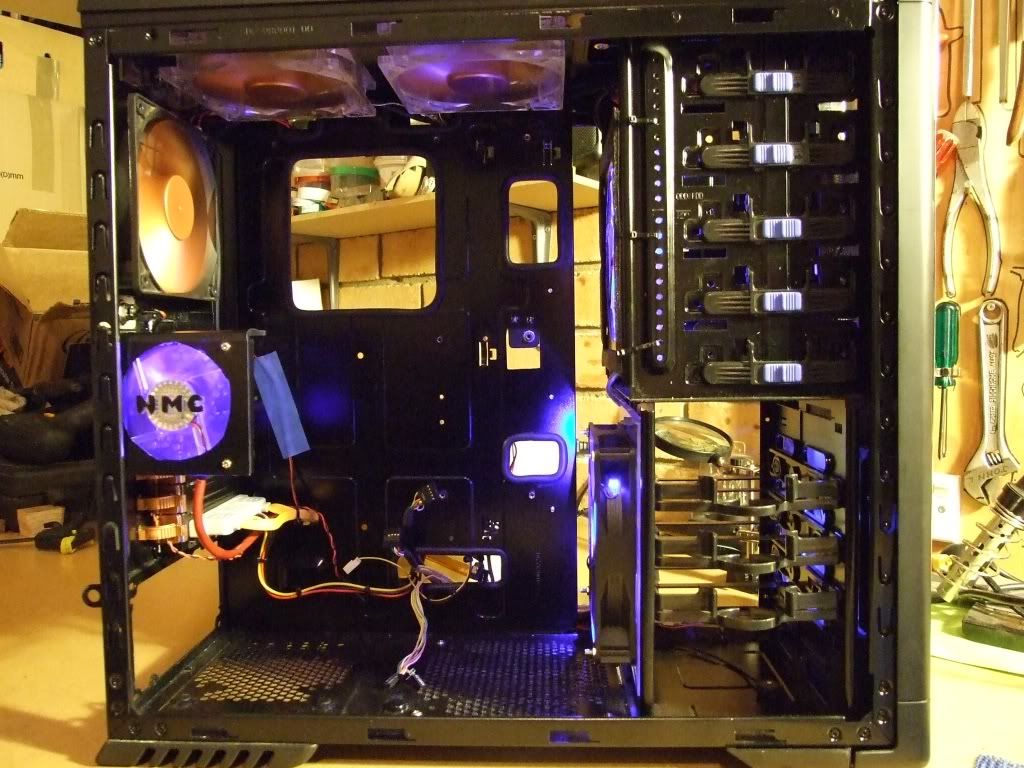
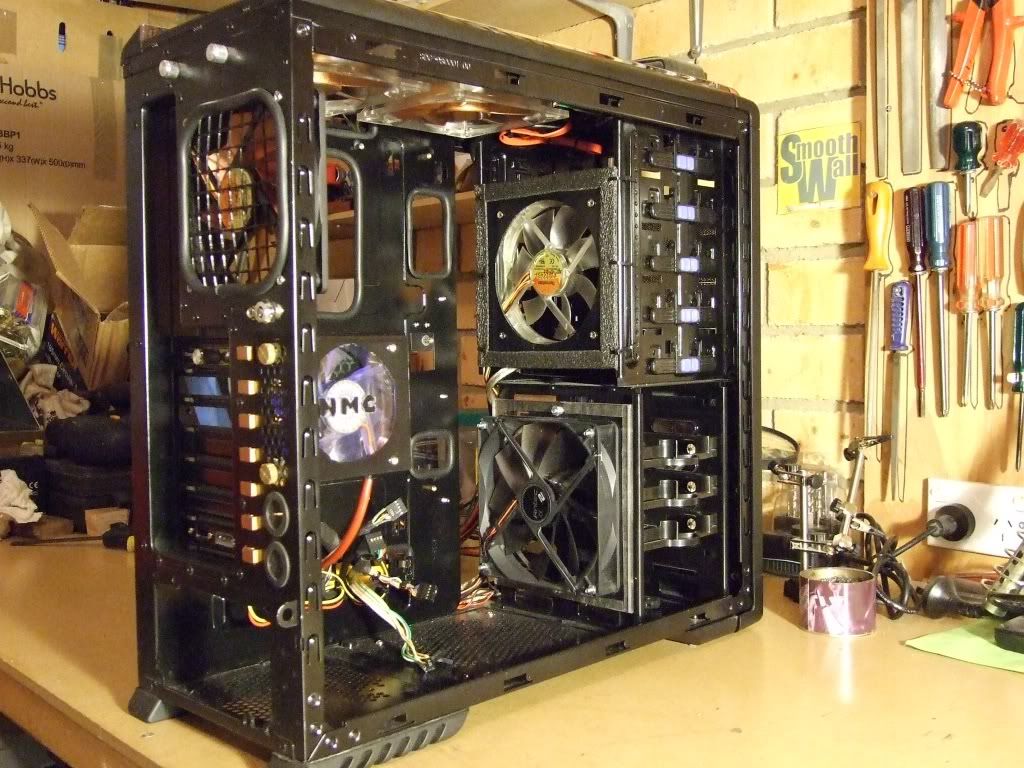
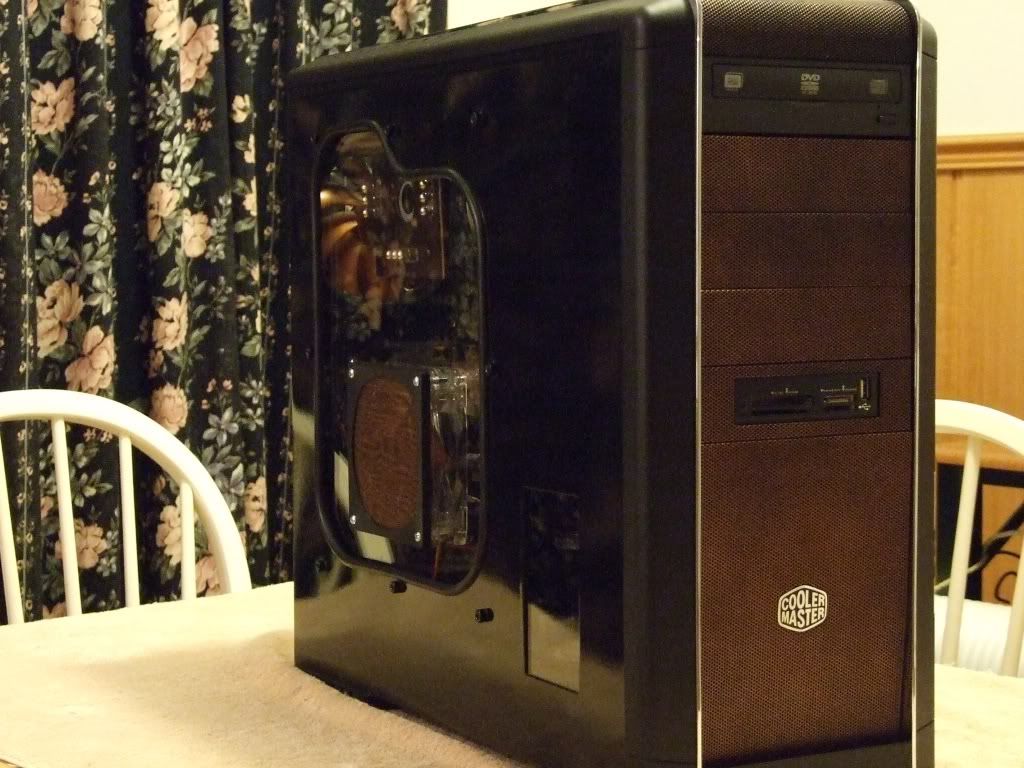
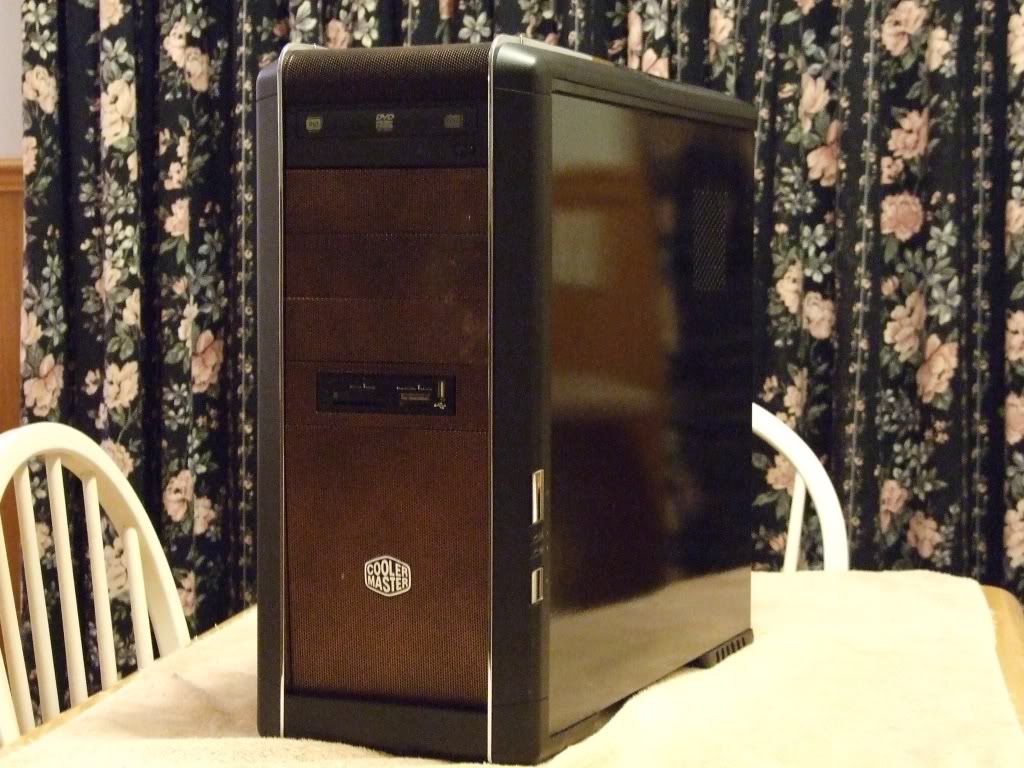
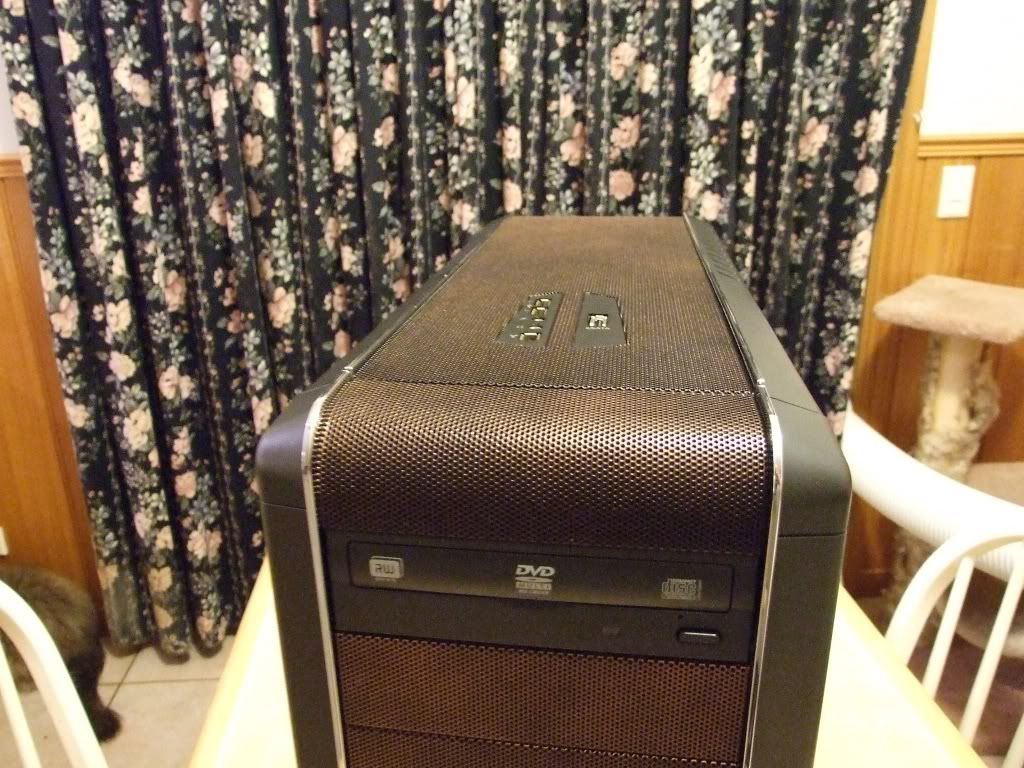
The CM-690
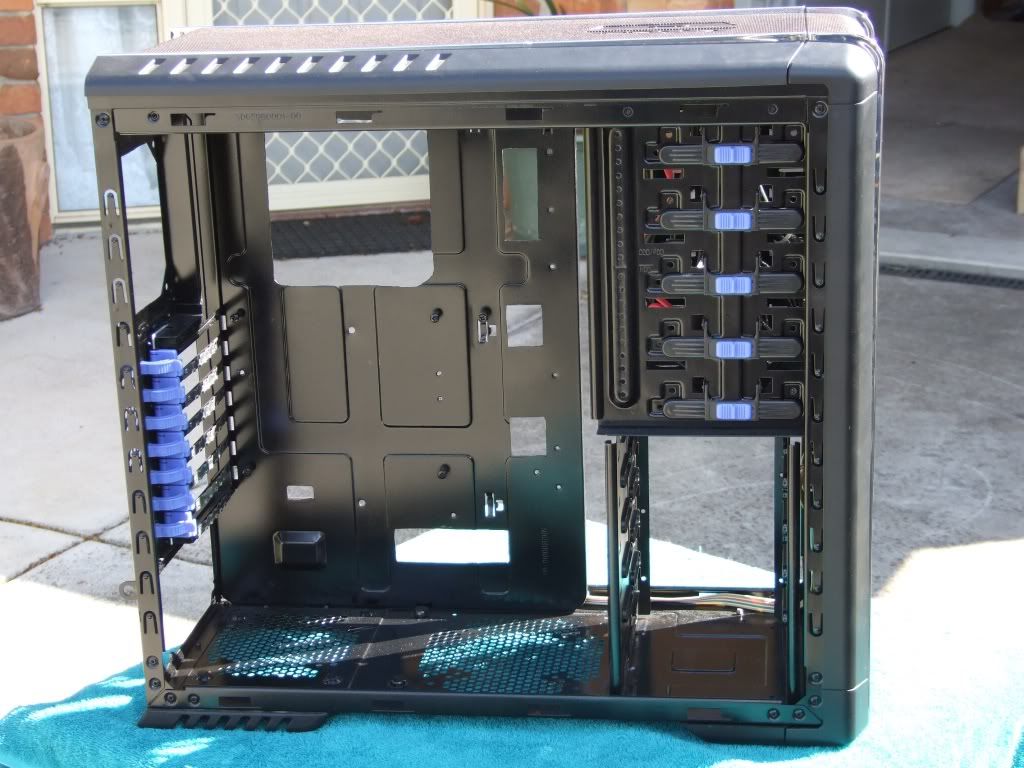
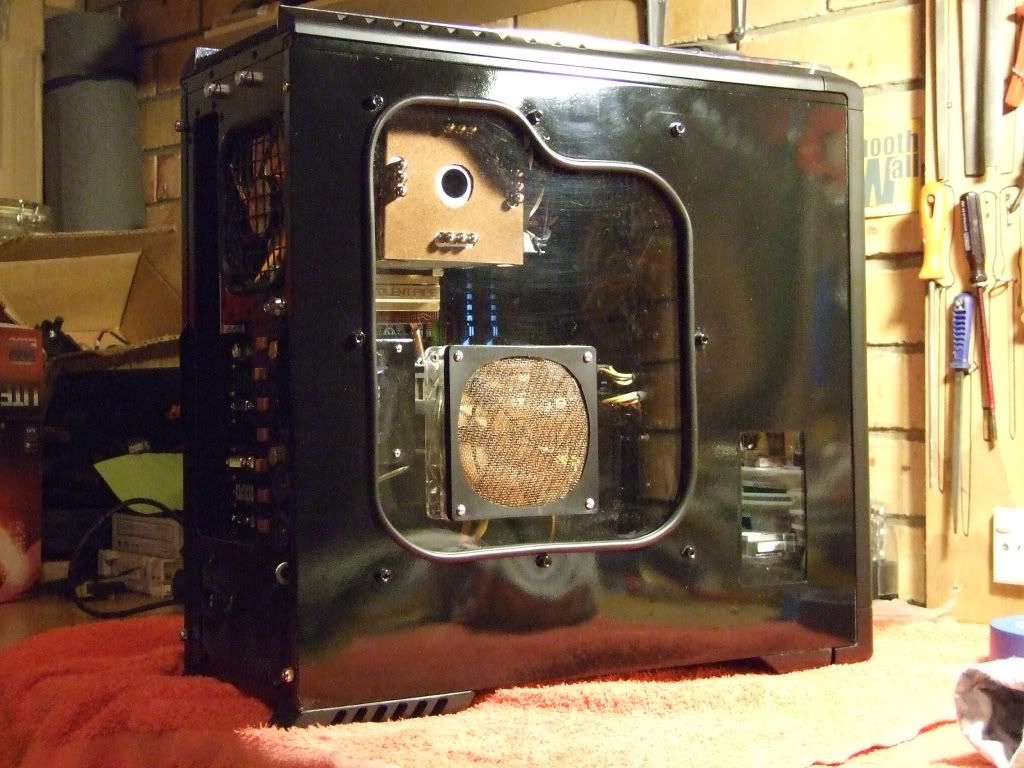
Inside CM690
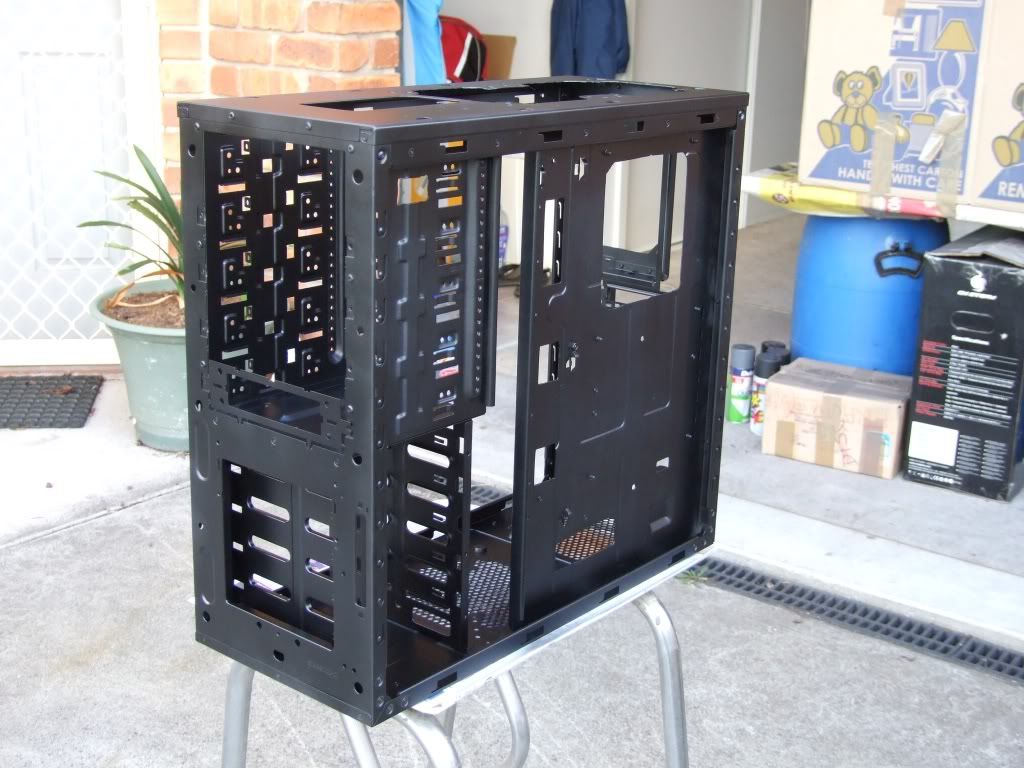
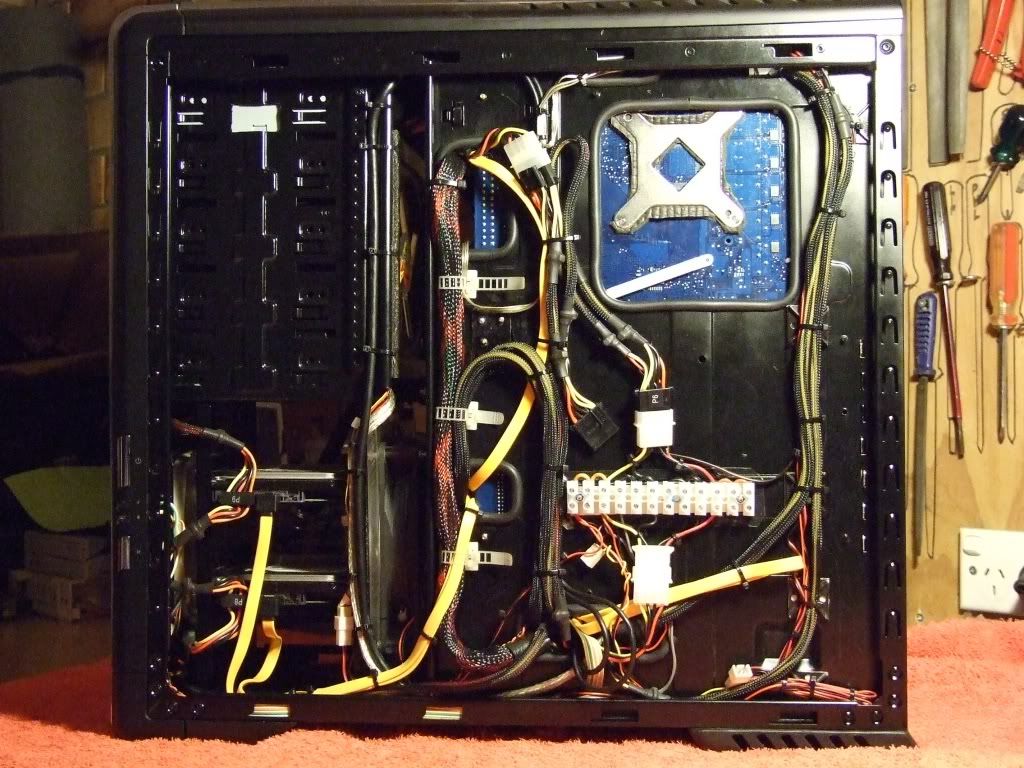
The Rear Cable Management
Installed new cooling gantry and Hardware into JTB 2010
Vendetta 2 HSF View
Back up Running and Folding again on Jolly's desk
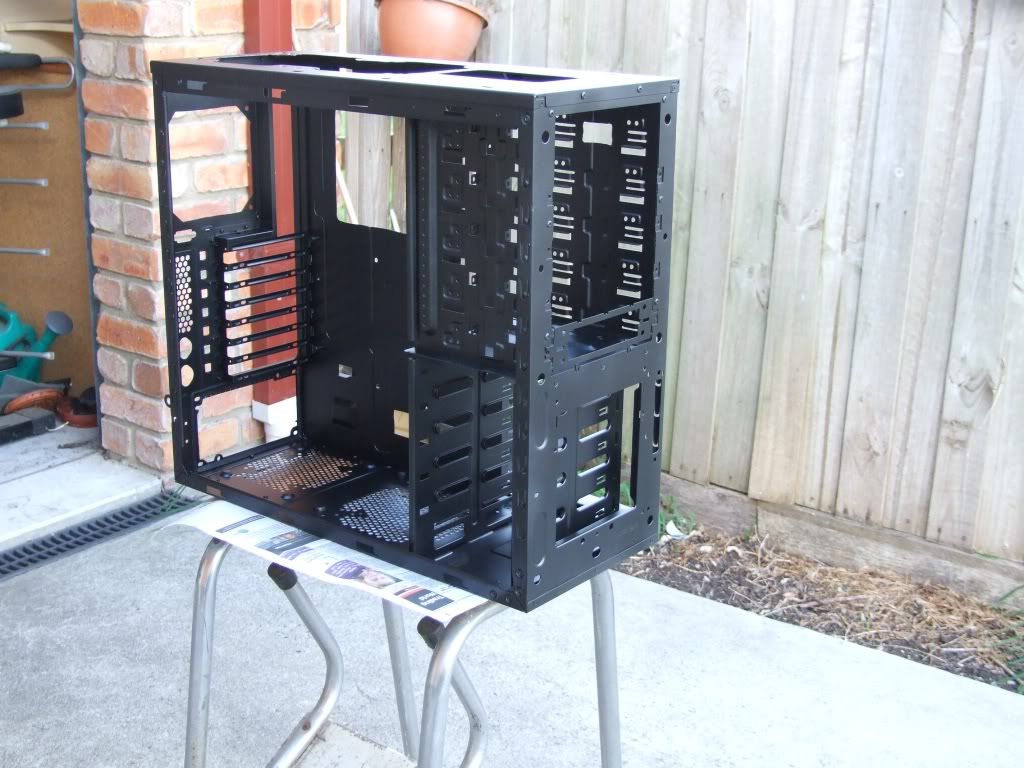
Now I am in the Process of stripping down the rest of CM-690, fans front bezel switches ect, getting ready to do some more Cable management modding and prep for Primmer Undercoat
Update #3 - Fri 19 March 2010
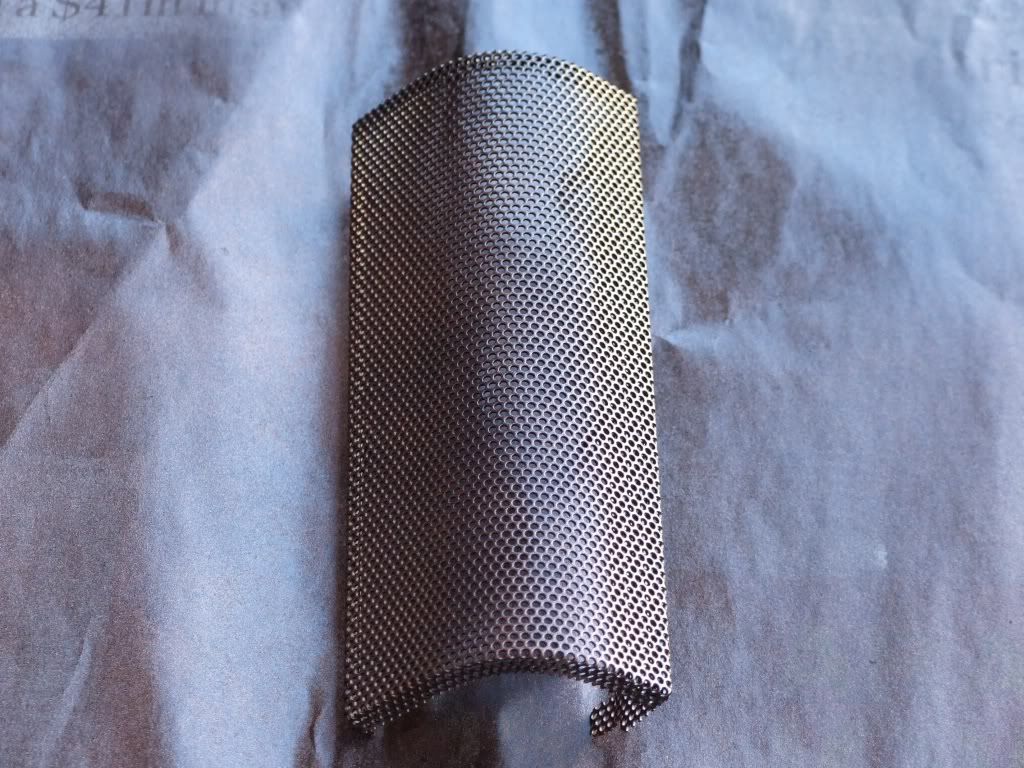
Today finished off cutting Cable Management holes/slots widened on some existing also cut more from top 2x 120/140 Fan grill area, and removed Rear exhaust fan grill.
Cut-outs
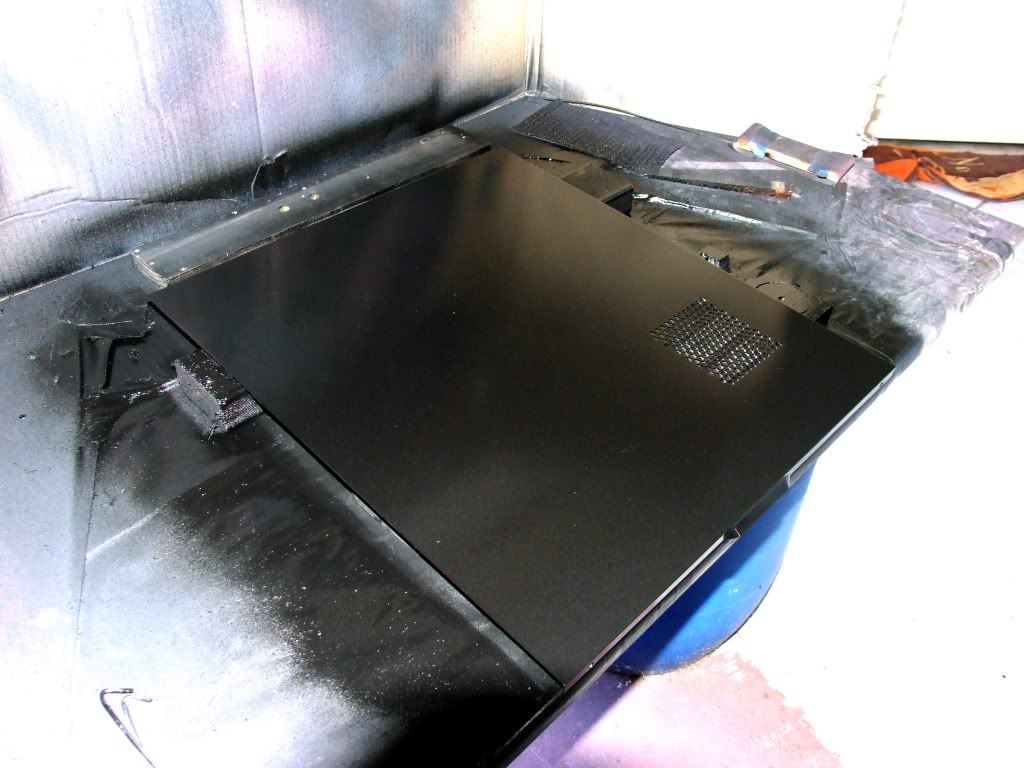
Also prepped for Primer coat
Primer Coat done
Update #4 Sat 20 March
Today I did a little more work on a few things to the Revamp of the CM-690 Case, not a lot as have had bit of a headache all Day!
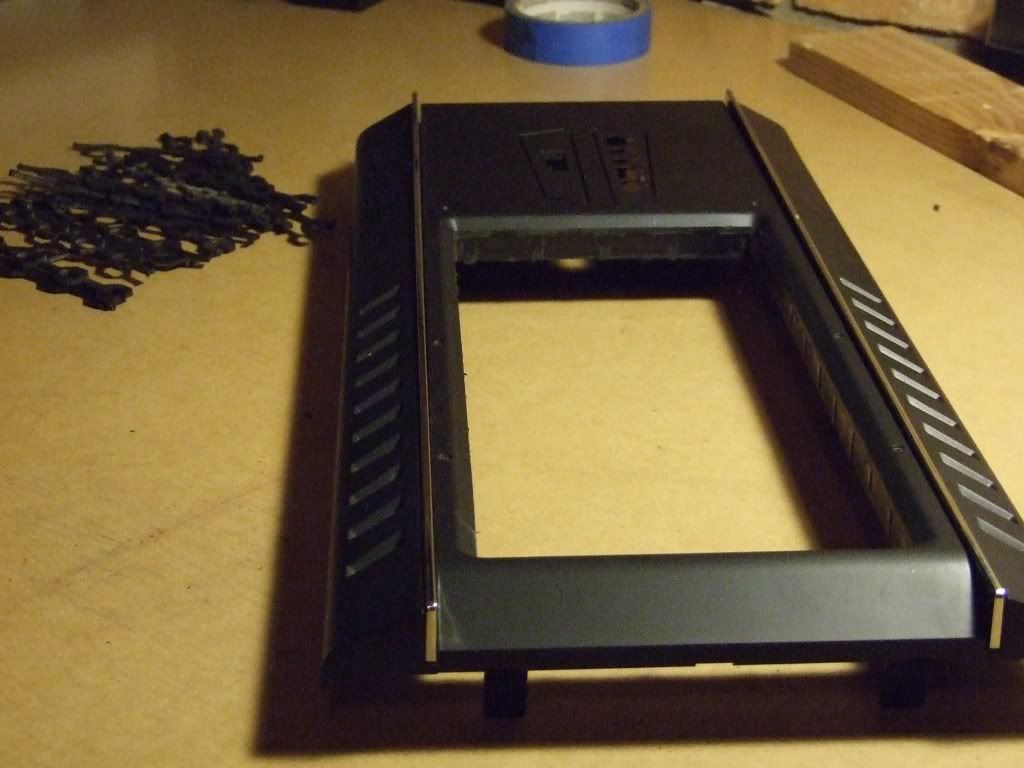
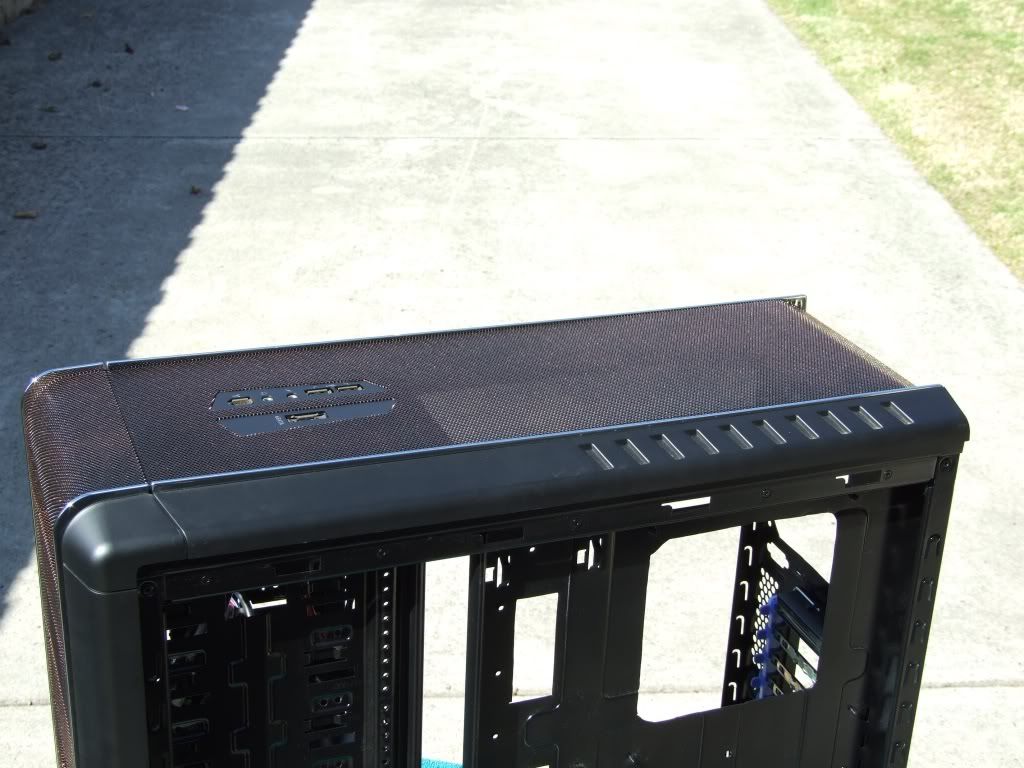
First up I removed the top I/O ports and the Top perforated Grill, Dam thing nearly took forever getting it off too!
Then cut away the Top Bezel Plastic Honeycomb Grill area, as this causes fan buffering and that in turn leads to noise, will now be also better for air flow too!
Top Bezel
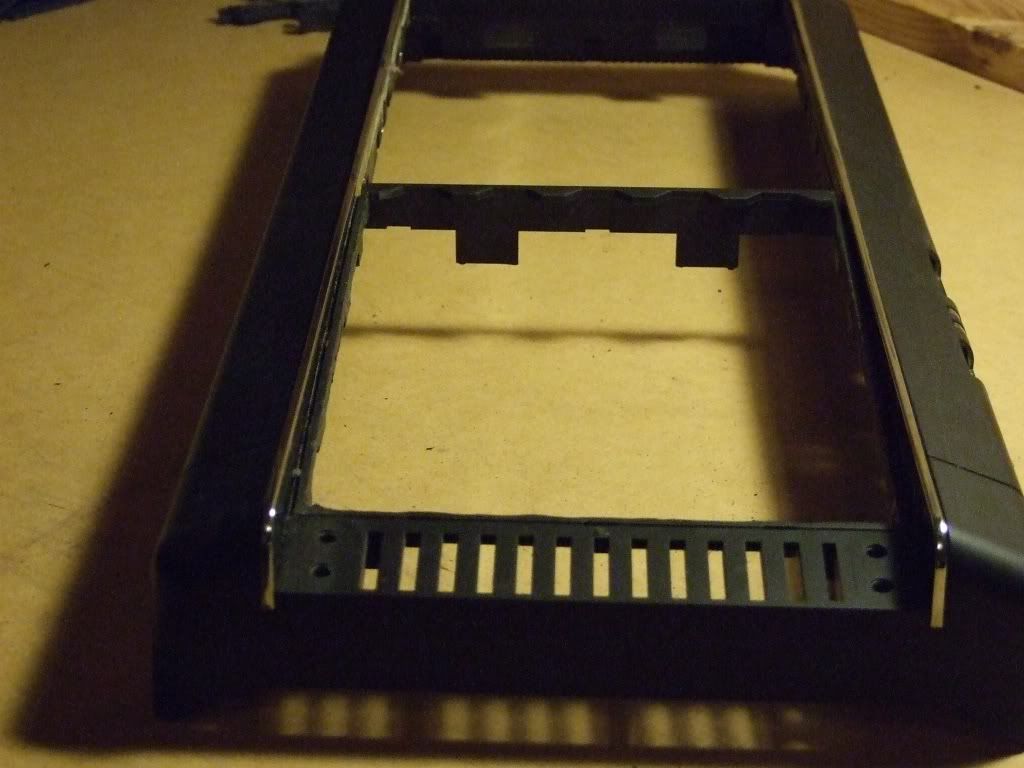
Them I also did the same with the Front Bezel, this one came out allot easier than the Top did.
Front Bezel
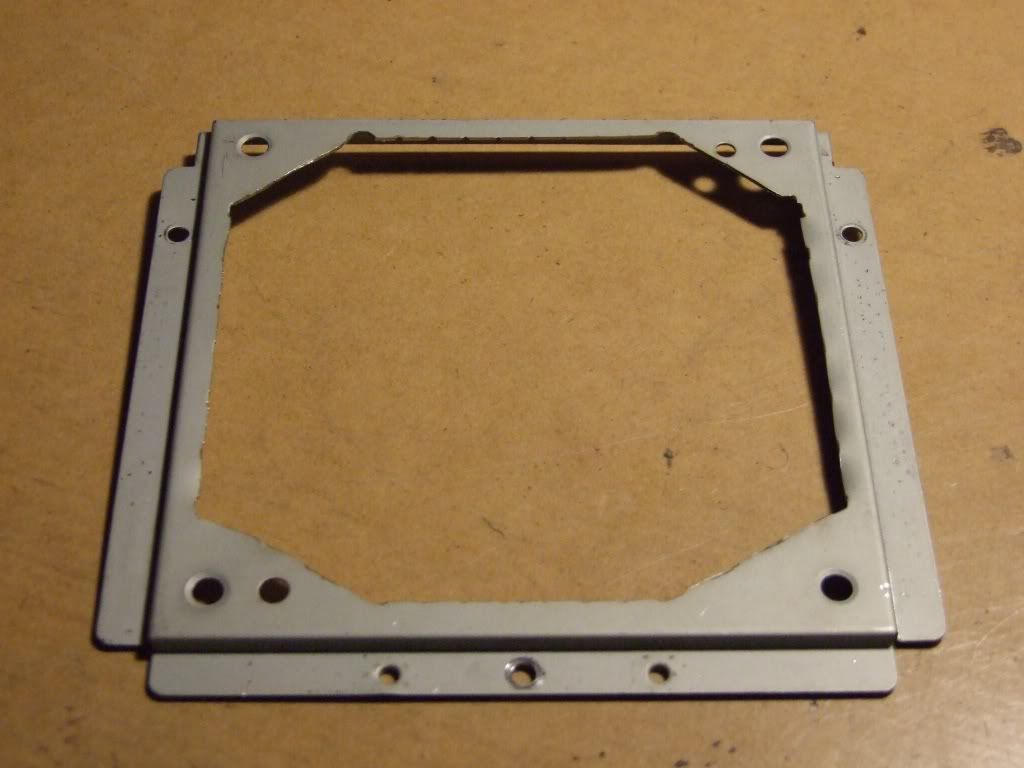
Also cut away the mesh grill on the front intake fan holder, too!
Fan Holder
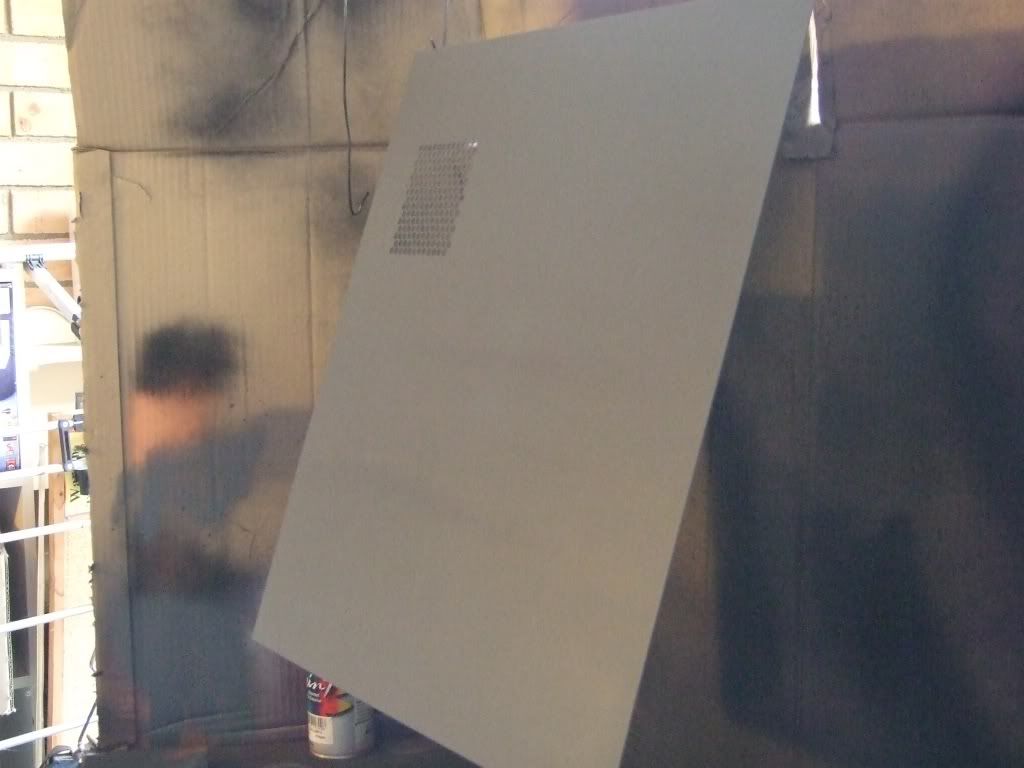
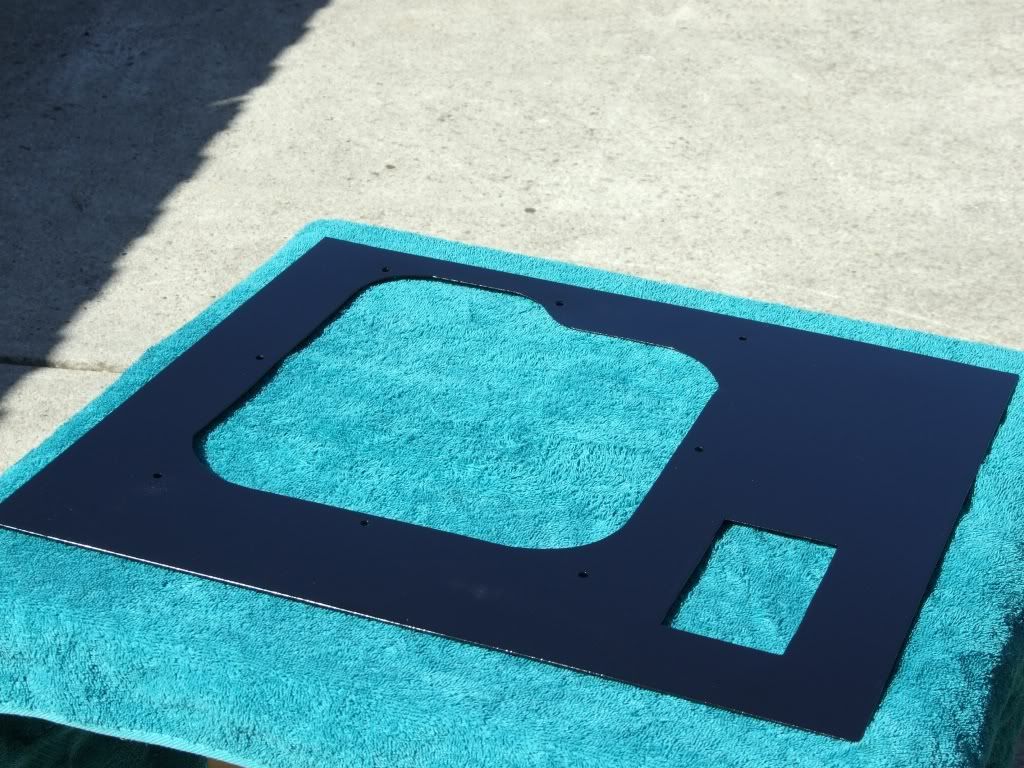
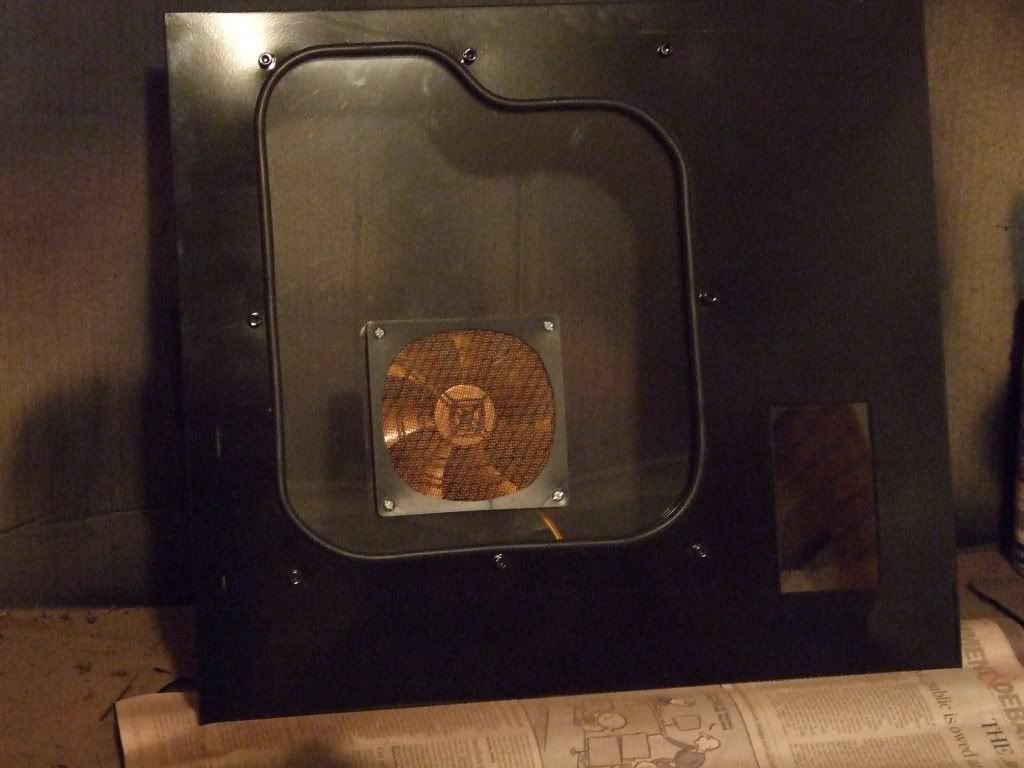
Then got down to doing some alterations to the Side Window Panel, with the Addition of another small Window to the Bottom right where the HDD's are.
The after a sanding down, did the first Primer Undercoat,
Dam Spray Can was playing up too, think is nearly empty as started coming out thin and made some runs, but this is easily fixed once dry, just sand back and Re-Undercoat
Window Side Panel
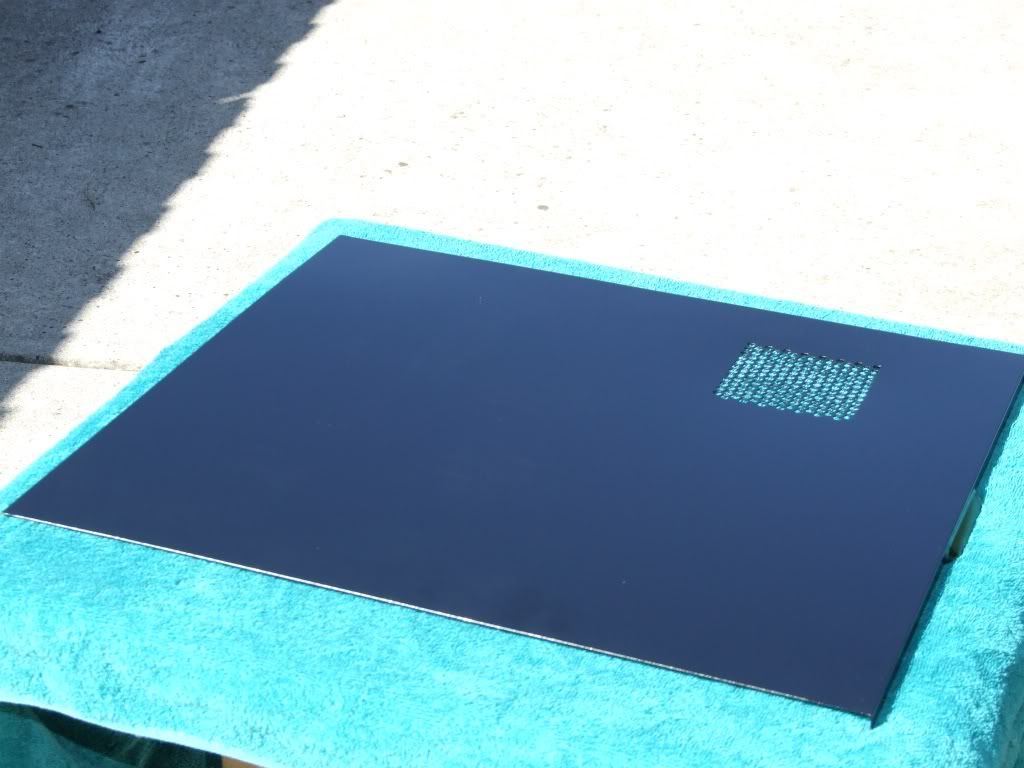
The other Side Panel has also been Sanded back ready to Undercoat, when I get some more on Monday
Update #5 Sun 21 March
Today just re-sanded Side Panels with P1000 wet-n-dry paper, and applied second coat of Primer, all nice and smooth now!
Side Panel's 2nd Primer Coat
Have also be toying with some ideas as to what I,m going to do with the Front and top Bezels covers/ grill areas.
Below is one sample I have in mind - Black base coat - with 2 light (@ 30cm distance) passover with Copper Metallic Paint
Colour Sample-1
Its only an idea so let me know what you think,, still not sure myself
Actually looks better in person especially at different angles, if you know what I mean!
Stay Tuned for more to come soon! :)
07-21-2010, 09:17 PM
Jolly-Swagman
Re: Jolly's CM-690 Case - Acentos de Cobre
Update #6 Mon 22 March 2020
Today went an picked up some more DULUX etch Primer and some Black Gloss and more Flat Black Spray cans,, (Dam they were out of the Clear Coat till Thursday maybe)
First after another quick rub down with P1000 wet-n-dry paper , Put the final coat of Primer to both Side Panels
Window Panel
Other Side Panel
Then while they were drying did the First Coat of Matt Black to CM-690 Case Frame
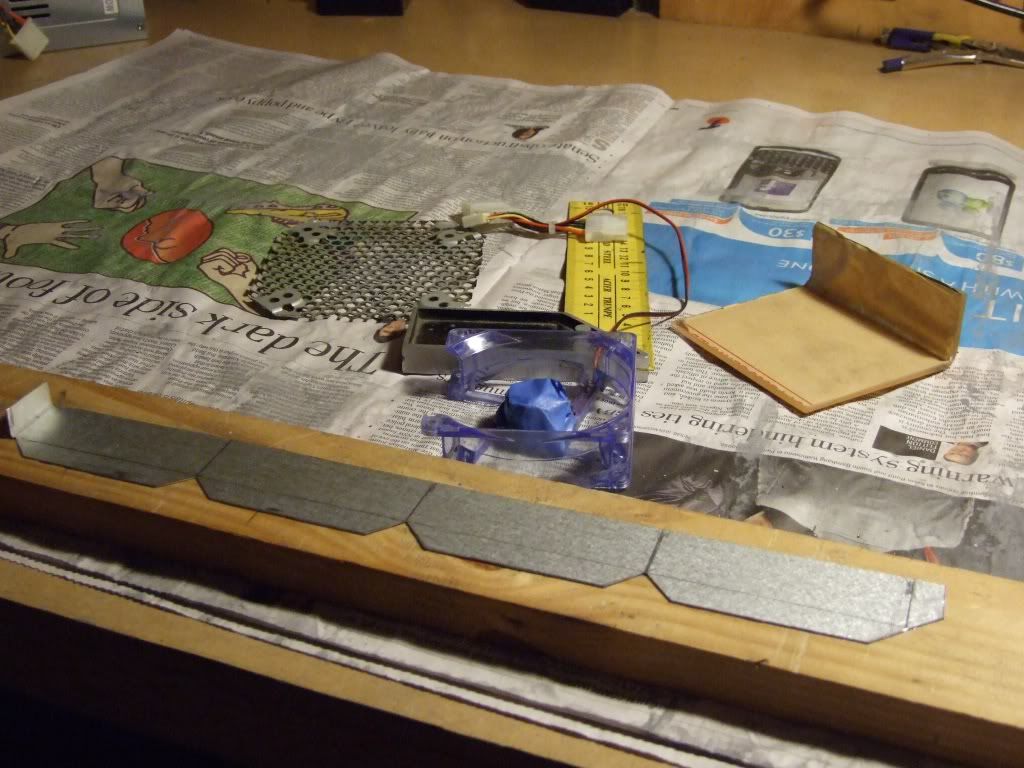
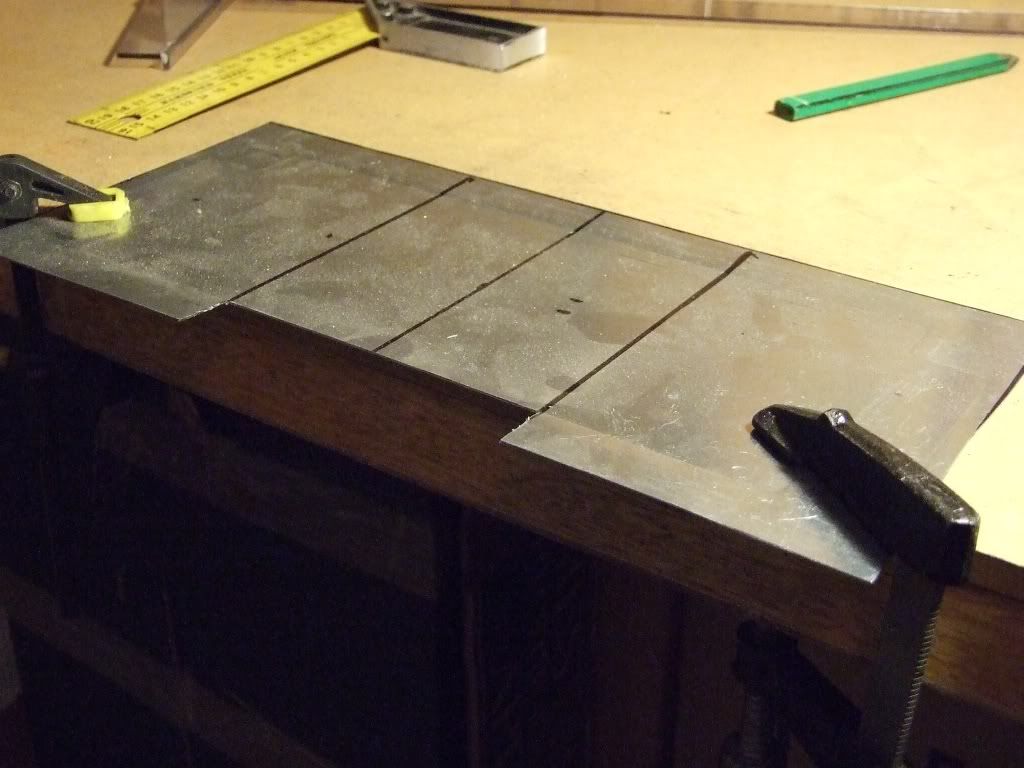
Then while waiting for Case to Dry, had an idea to make a Rear Case slot Fan to aide in cooling for GTX-295 exhaust
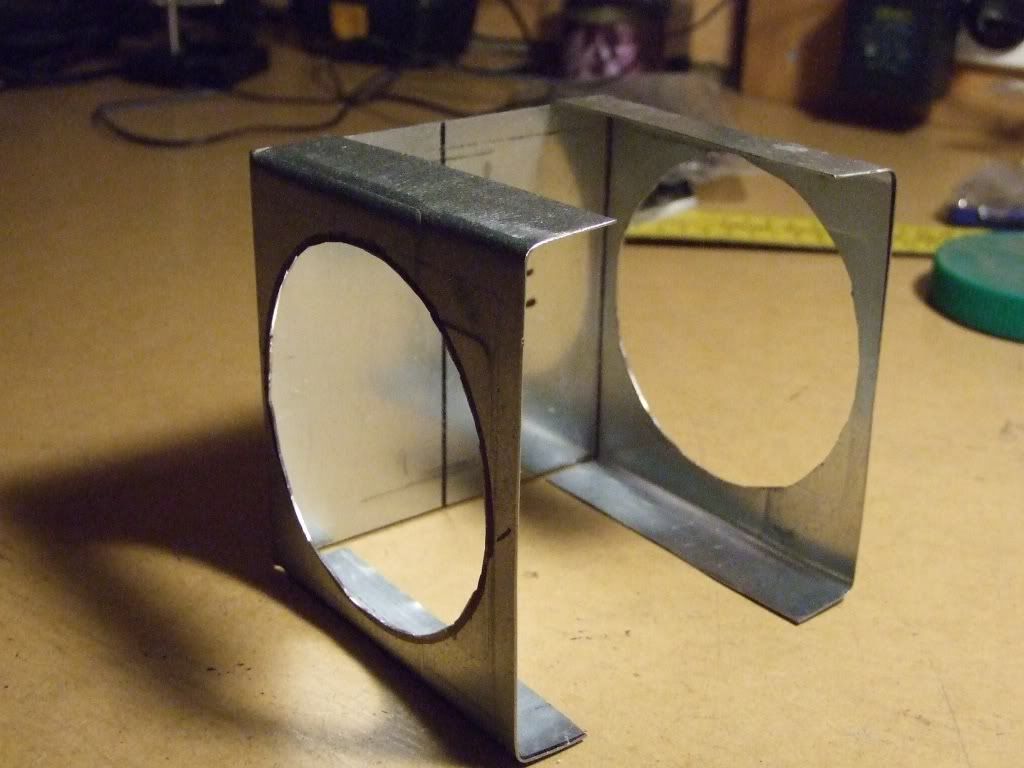
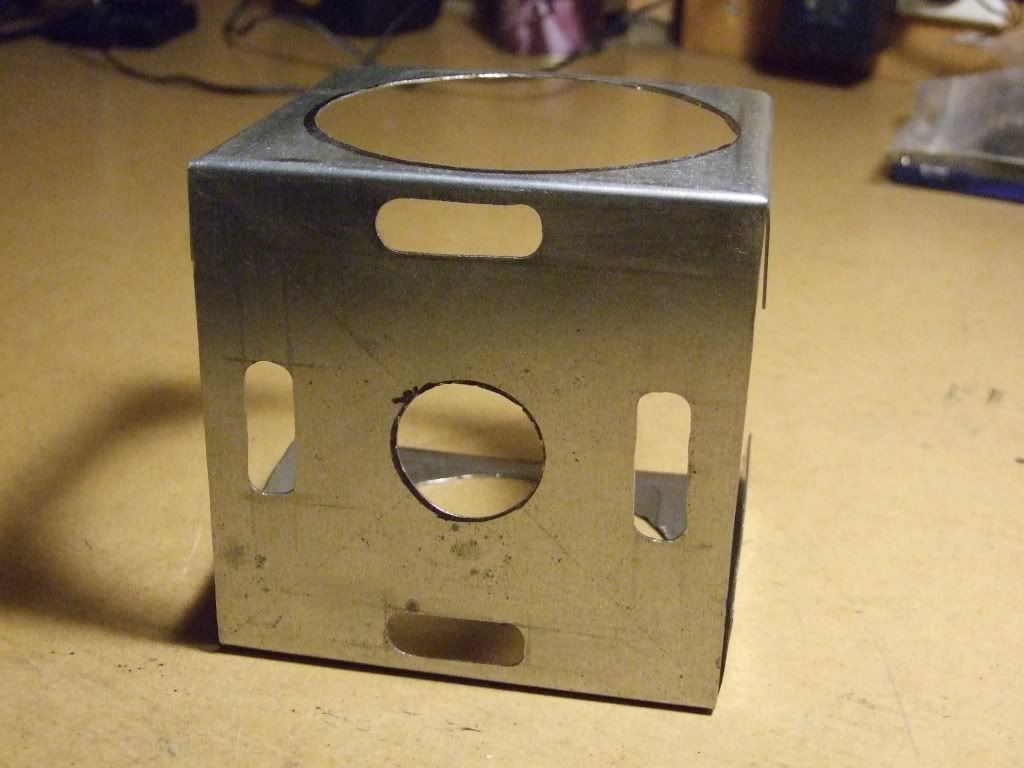
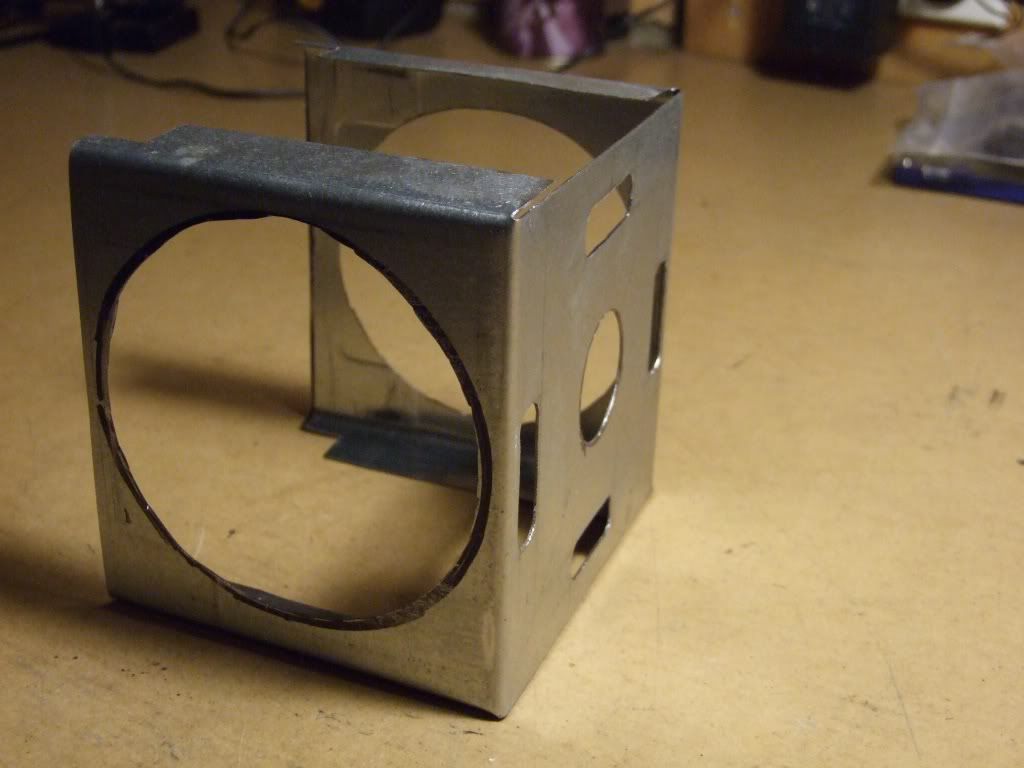
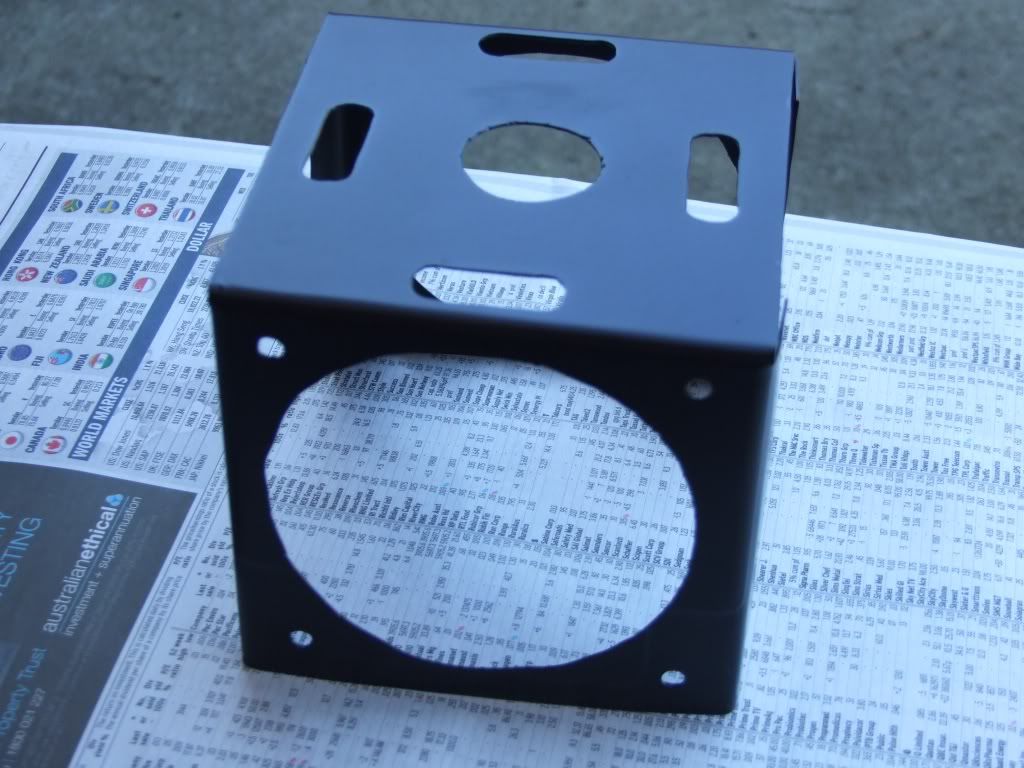
First cut up some Side panel Sheet metal still have laying around, and made a little holder box for the 80mm Fan,
Cut one side from 80mm fan to turn it into a Slot Cooler Side Blowing Fan
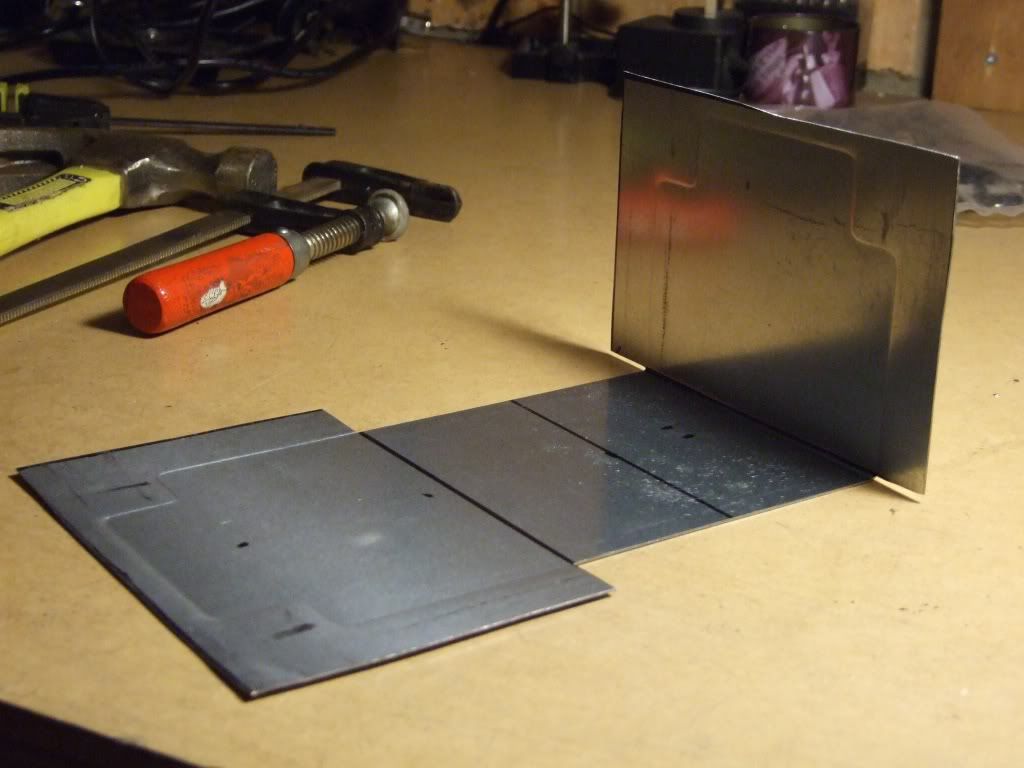
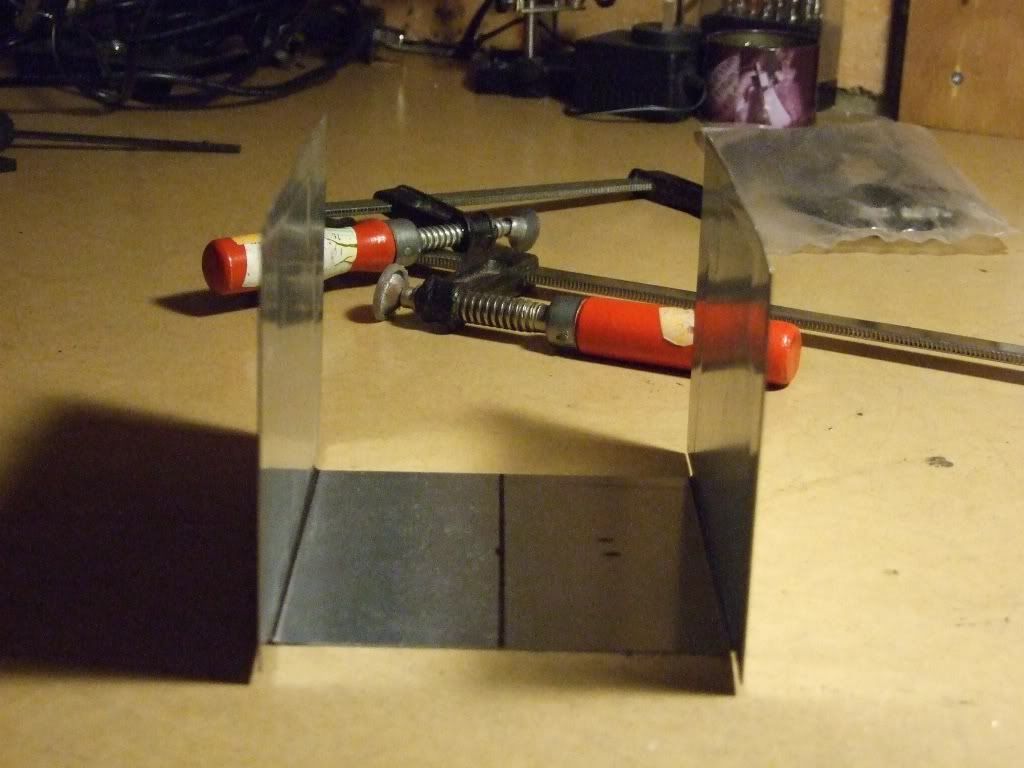
Now proceeded to bend and form into a box shape
Then with some Fan grill Mesh that was cut from the CM-690 Case made a fan grill for the Slot cooler,
with some 3mm Plexi had left over from previous Mods made the other Side of the Slot cooler.
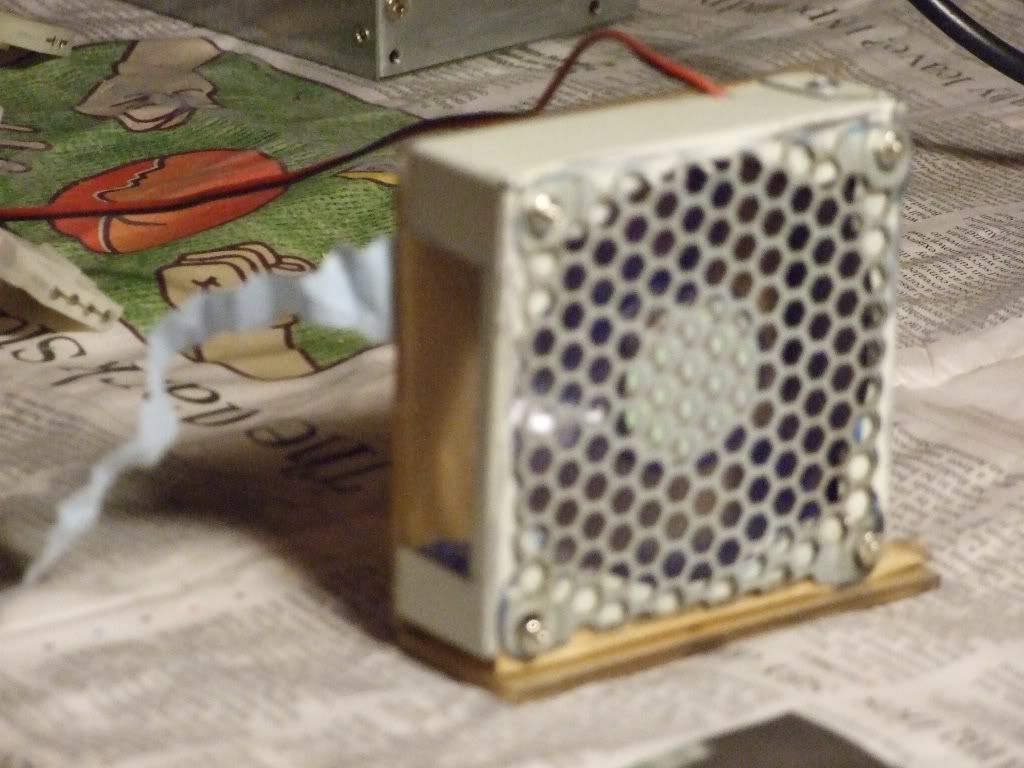
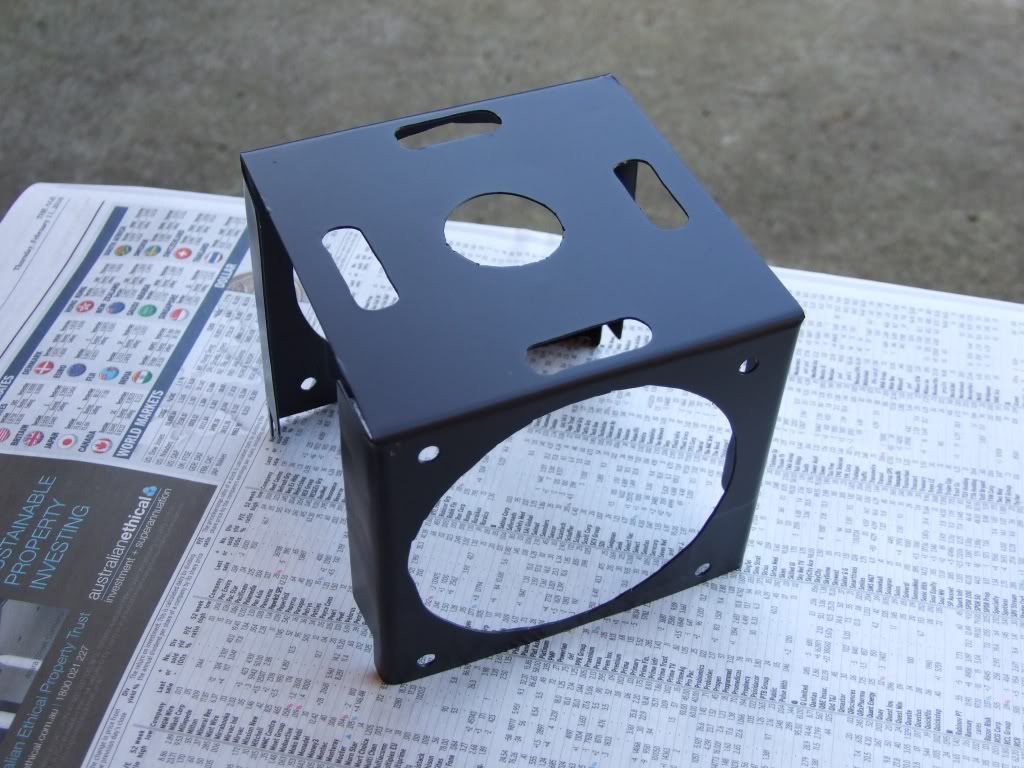
Now for some testing of the output of Slot Cooler
Testing
As you can see from the blue piece of paper billowing it works fine.
Plexi Side Cover Slot Cooler
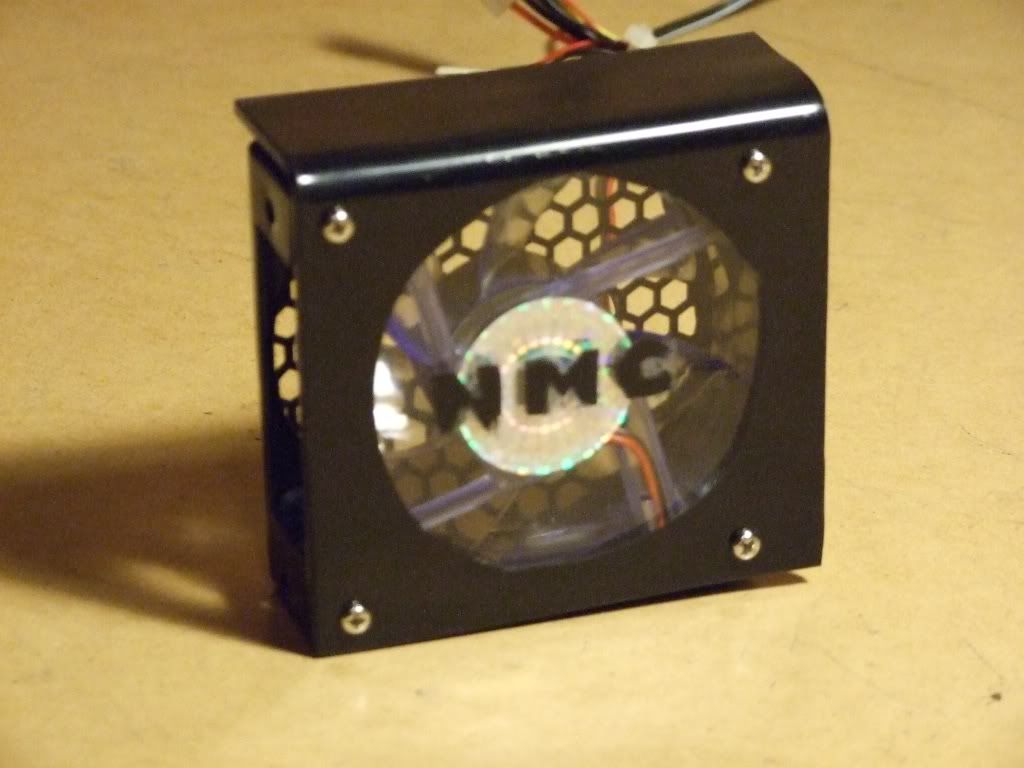
The Finished Slot Cooling Fan
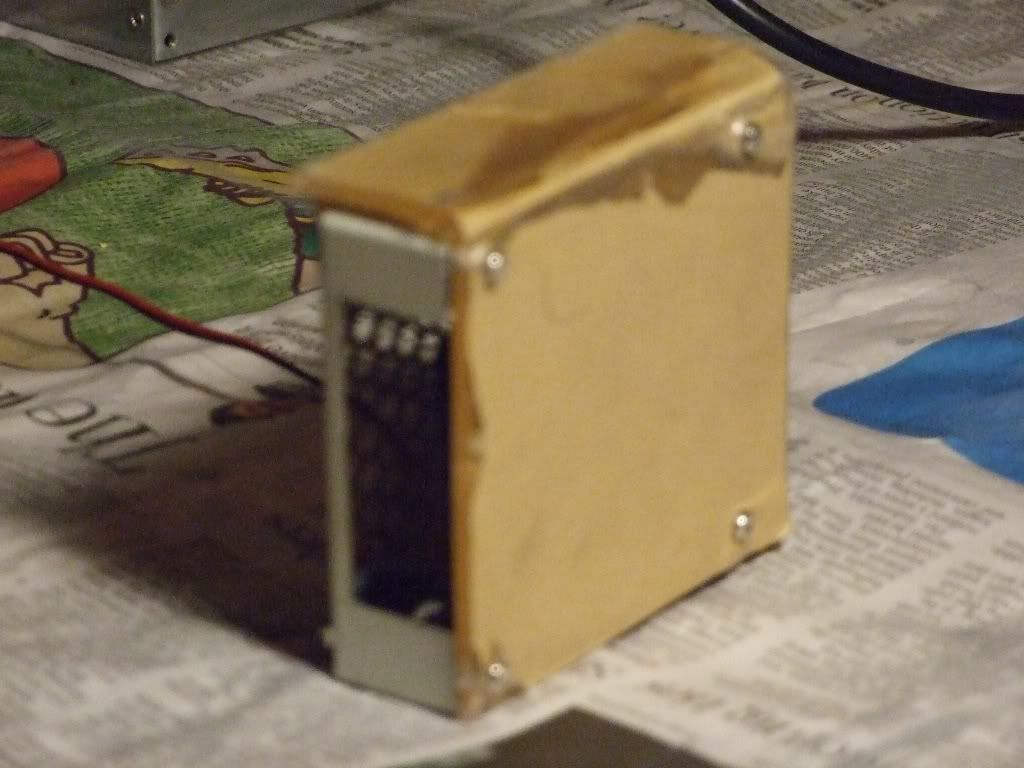
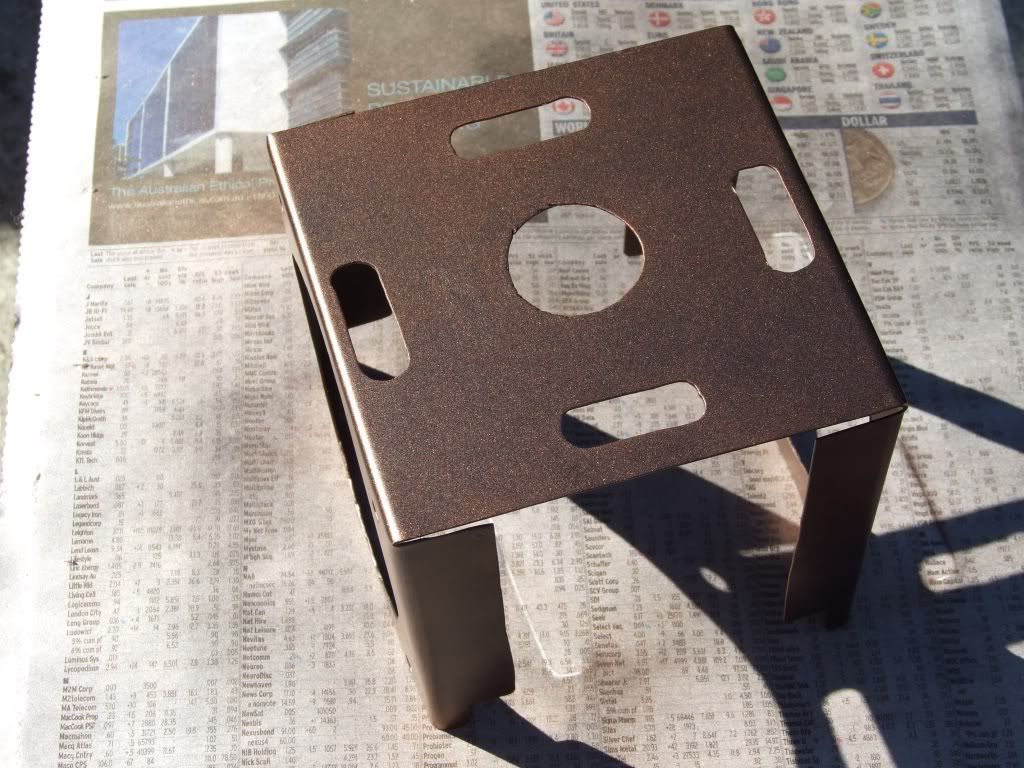
Now all that is needed is to give it a Coat of Paint ( undercoat the Black) also drill and tap mounting points either side of the Slot
Update #7 Wed 24 March 2010
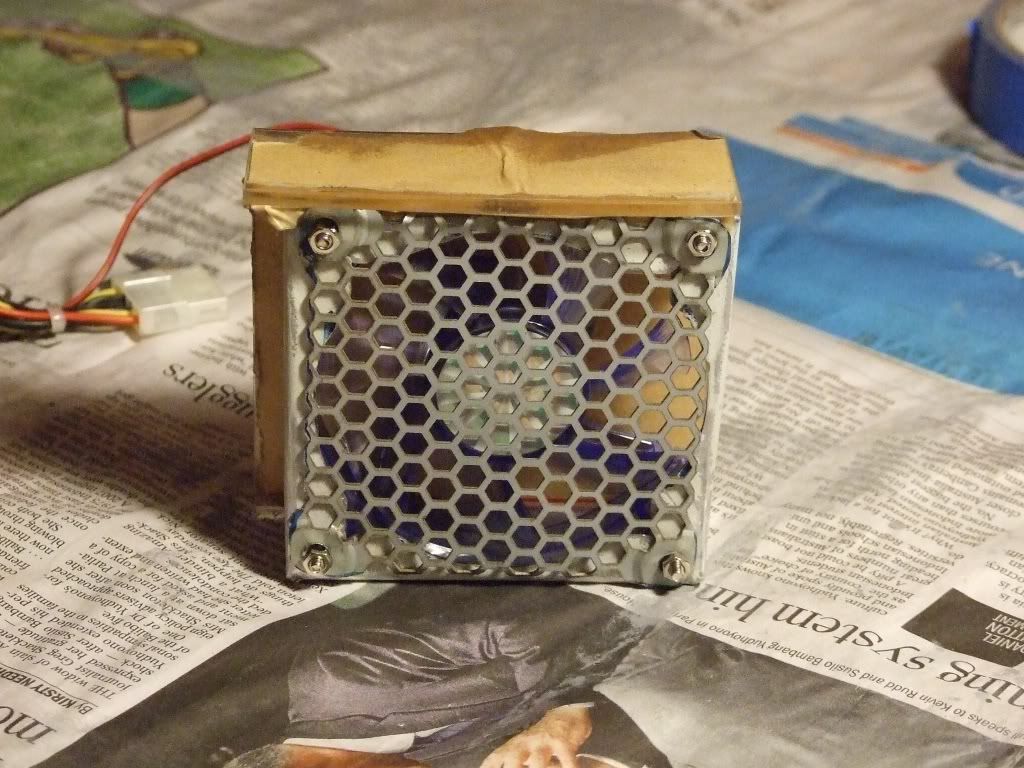
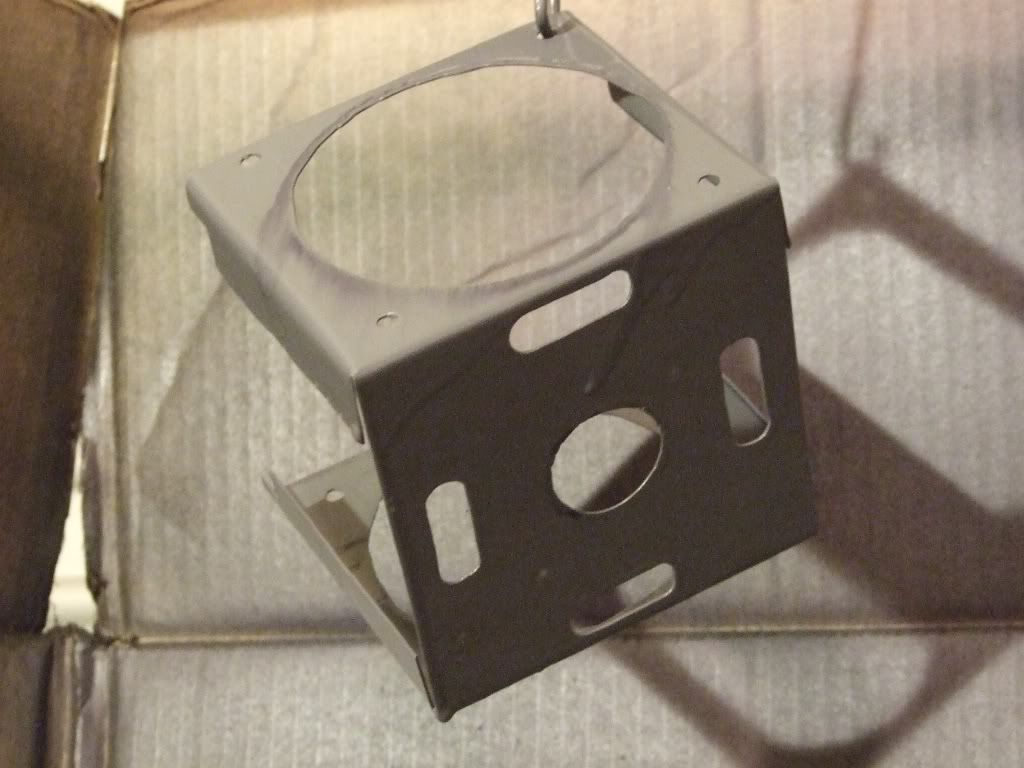
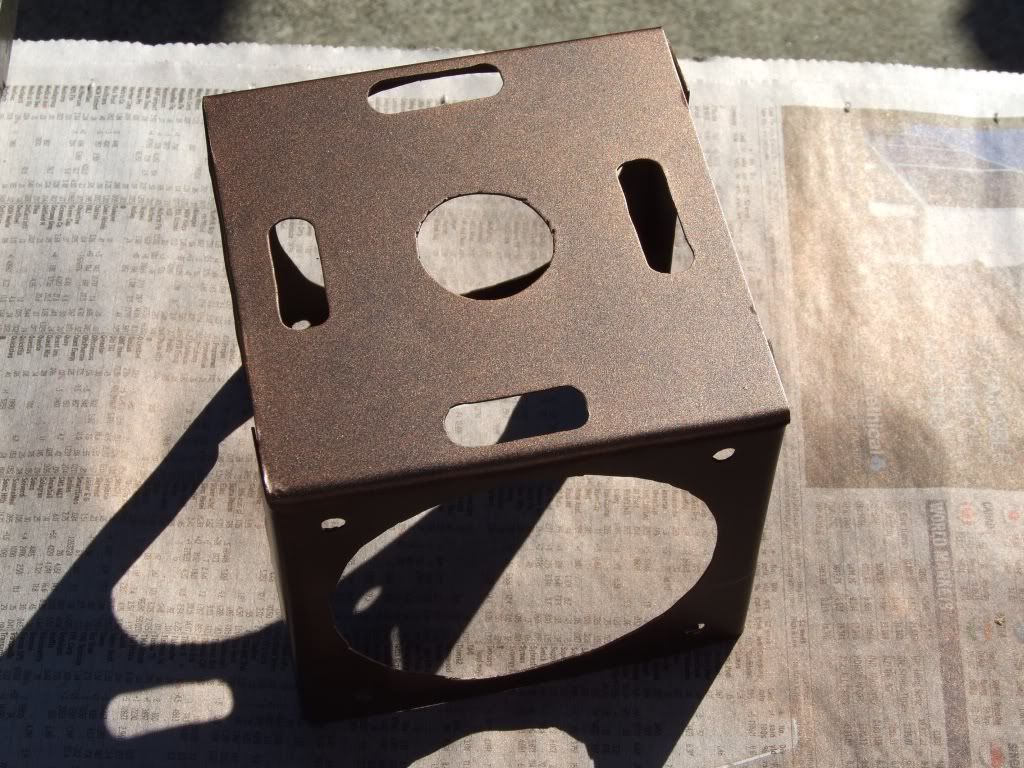
Today early this morning I Finished off the Slot Cooler, painted the Plexi Cover, Grill and housing Black,
and NMC in the middle of window
Front Cover View
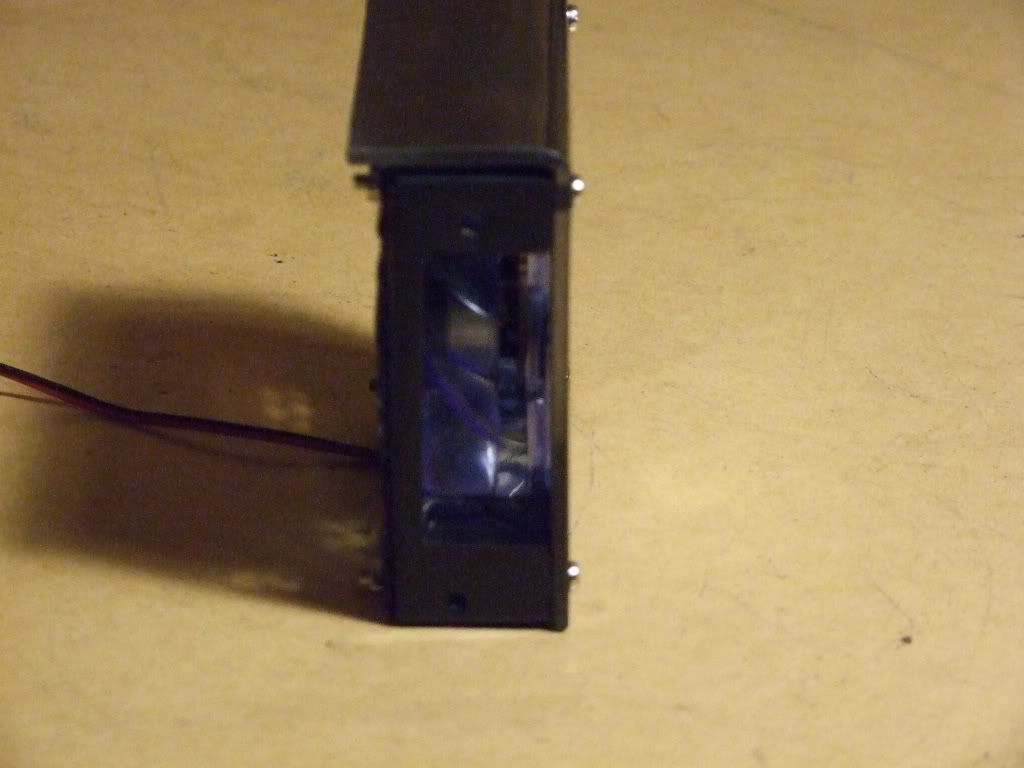
Grill Intake View
Exhaust Slot View
Continued
Also Today Painted Side Panels Black Gloss and the rubbed back between coats
Windowed Panel (3rd Black Gloss coat)
Other Side Panel (3rd Black Gloss coat)
(Side Panel 4th Coat)
Then this Afternoon Clear Gloss coated the CM-690 Frame
Side Rear View
Rear M/B Tray View
Interior View
No More Painting Today as giving Wife Headache from the Fumes Smell, and I need more Paint too!
Will continue probably Friday for more Black Gloss coats and Clear coat
Thats all I have for Today, Stay Tuned for more soon!
07-21-2010, 09:18 PM
Jolly-Swagman
Re: Jolly's CM-690 Case - Acentos de Cobre
Update #8 Thurs 25 March
Today I went got some more cans of paint and seeing as was such a beautiful Day did some more painting outside, less Fumes!
4th & 5th black gloss coats to both Side Panels,
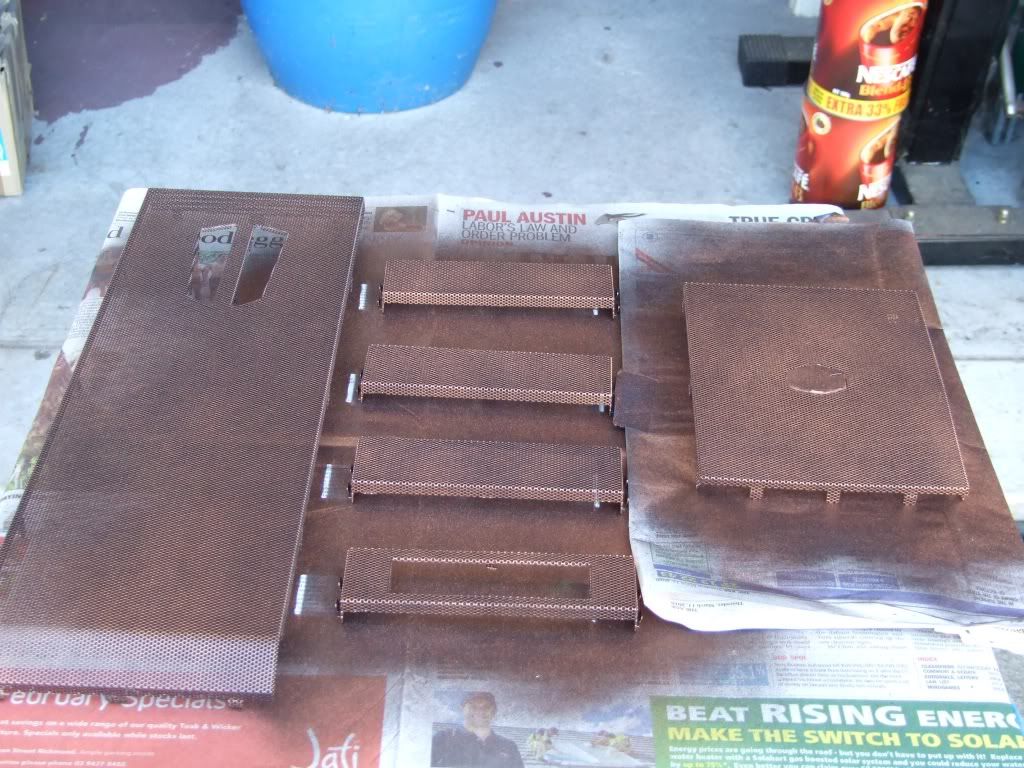
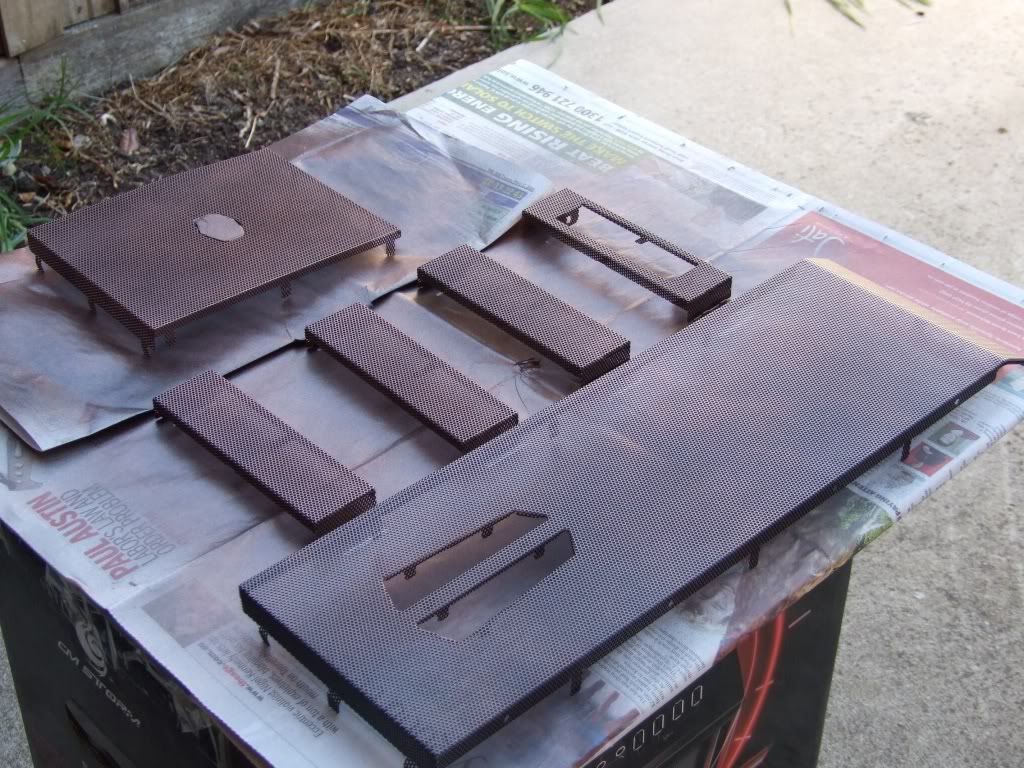
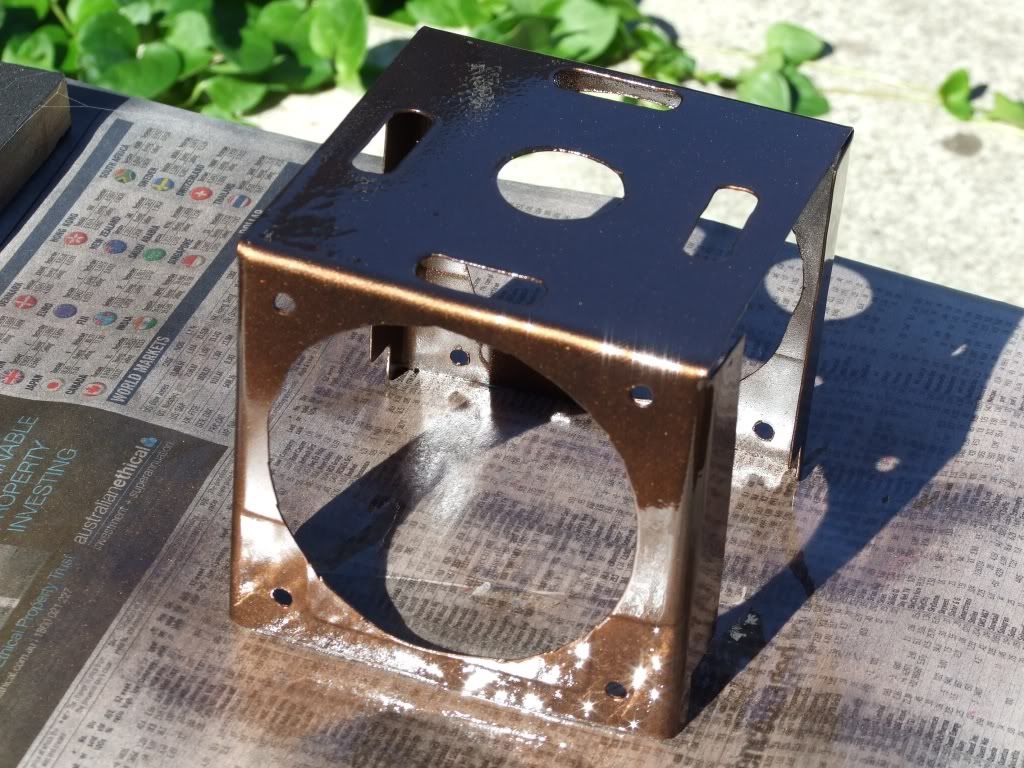
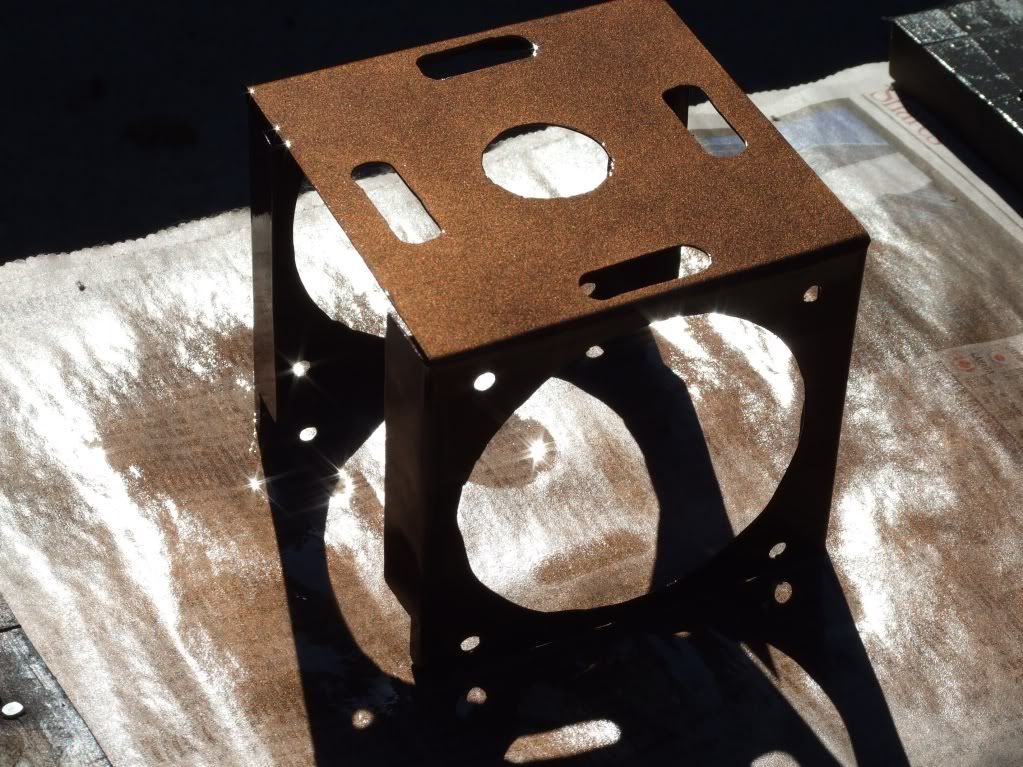
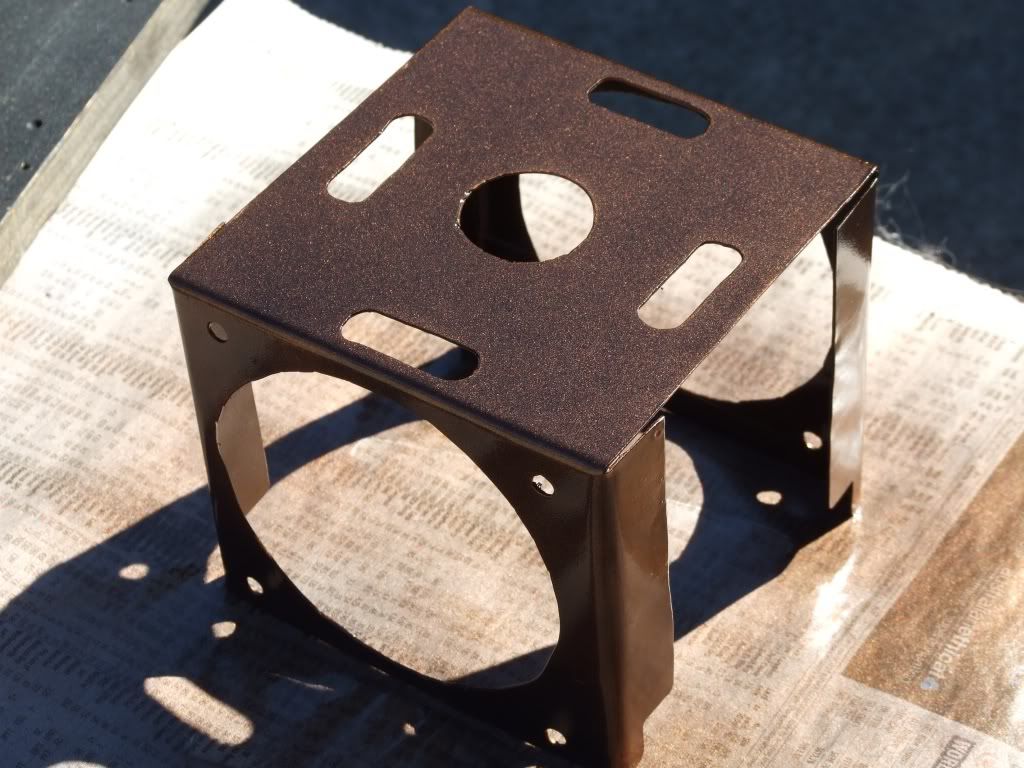
then Painted the CM-690 Mesh Grills with Gloss Black with Metallic Cooper overtones, then when dry Clear Gloss Coated
Top mesh End Cap
CM -690 mesh Grills
Angled View
Depending at what angle you are viewing the Grills give different depth of Metallic Copper showing.
Update #9 Fri 26 March
Time AU- 23:58
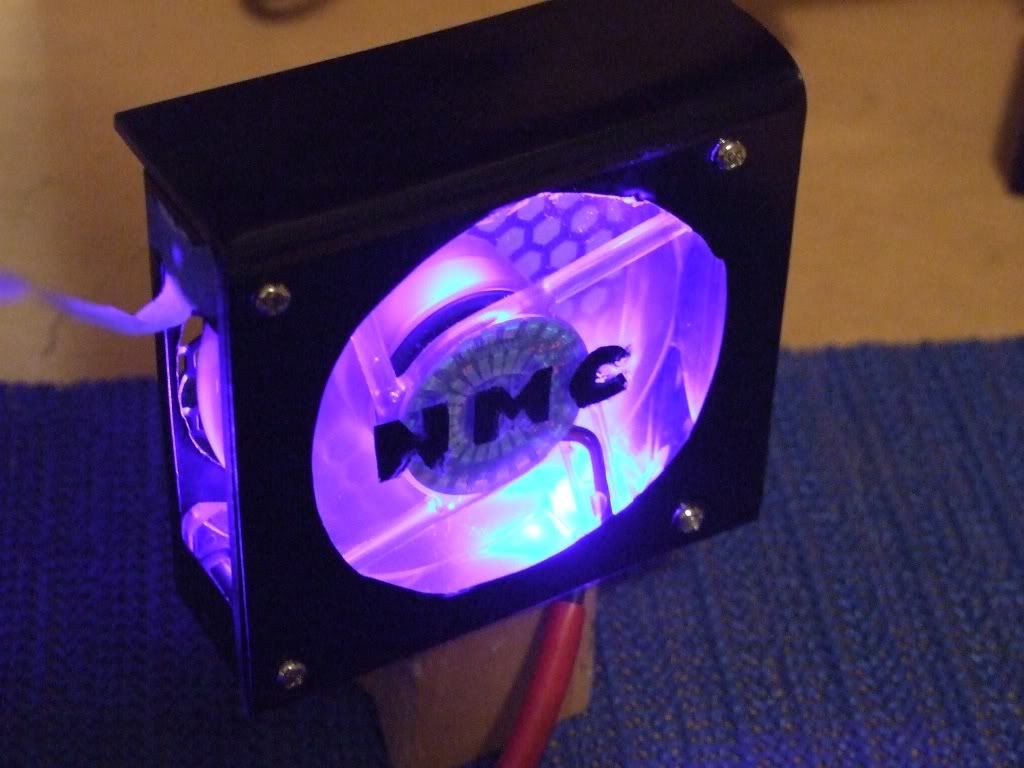
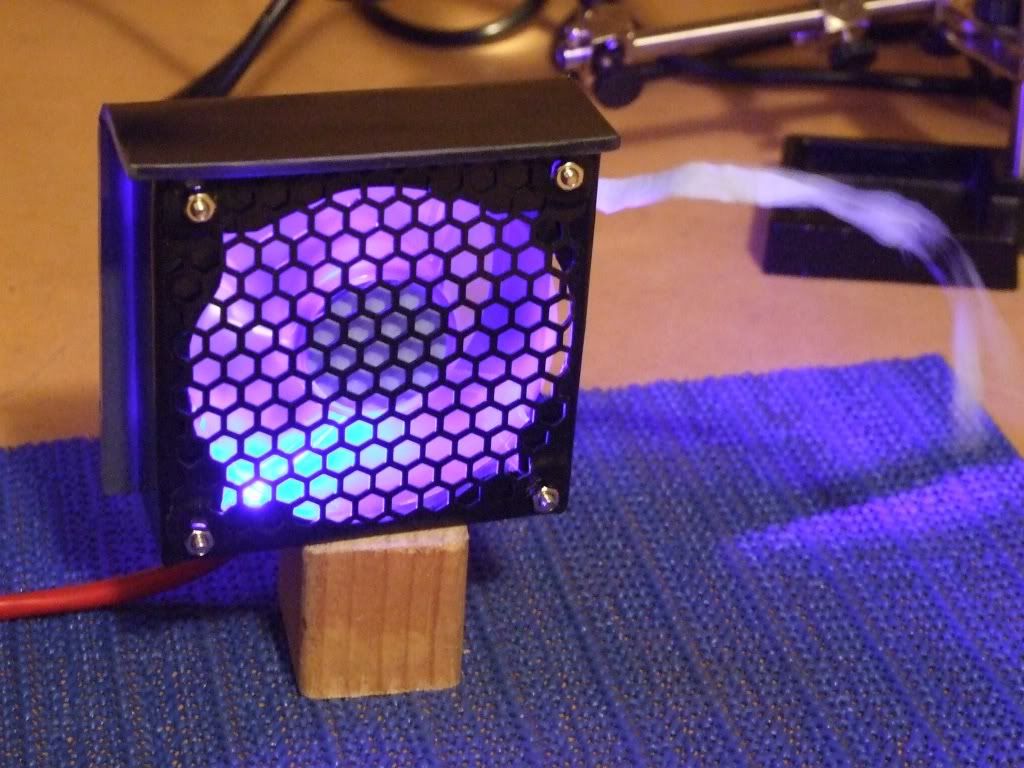
Here are the Pcs of the LED's that I have installed into the Slot Coloer,
One in the Top Corner and One in the Bottom Corner, being that they are Bright Blue LED's two was sufficient enough for lighting the Cooler,
Slot Cooler with LED's
You can also see the piece of paper in the next shot showing the Air is flowing out of the exhaust slot
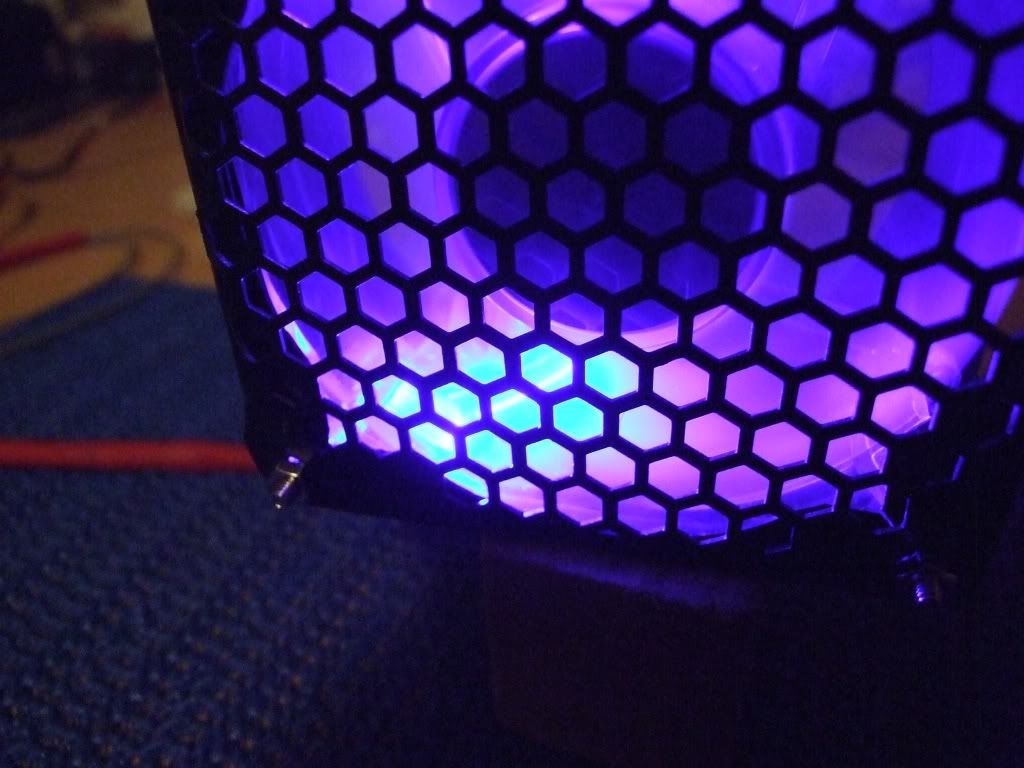
Grill View
Close Up of Bottom LED
Grill View Top LED
LED,s are wired in and have 526ohm resistor and Fan connection to New Leads coming from fan to cut down on the amount of wires also sleeved with Red PVC wiring tube
Update # 10 Sun 28 March
Today just small update, did another Black Gloss Coat to both Side Panels after a light rub down with P1500 wet n dry, that should be enough,
will be doing the Clear coat on these next, after 24HR drying time
Also another Clear Coat Gloss to the Bezel Grills has been done, they will now be mounted back into the Top and Front Bezels,
Can also start putting back all the PCI slot holding mechanisms and Drive bay ones too!
( No pics this Update as you have seen the Panels Painted Black Gloss Previous Posts, so will wait till Clear Gloss Coated for more Side Panel Pics)
Update #11 Wed 31 March
Today have put back together all the PCI and Drive Bay tooless locking catches
Reinstalled the Mesh Grill ,Top and Front Bezels, and I/O panel and also gave the Side Panels there Final Black Gloss Coat of paint,
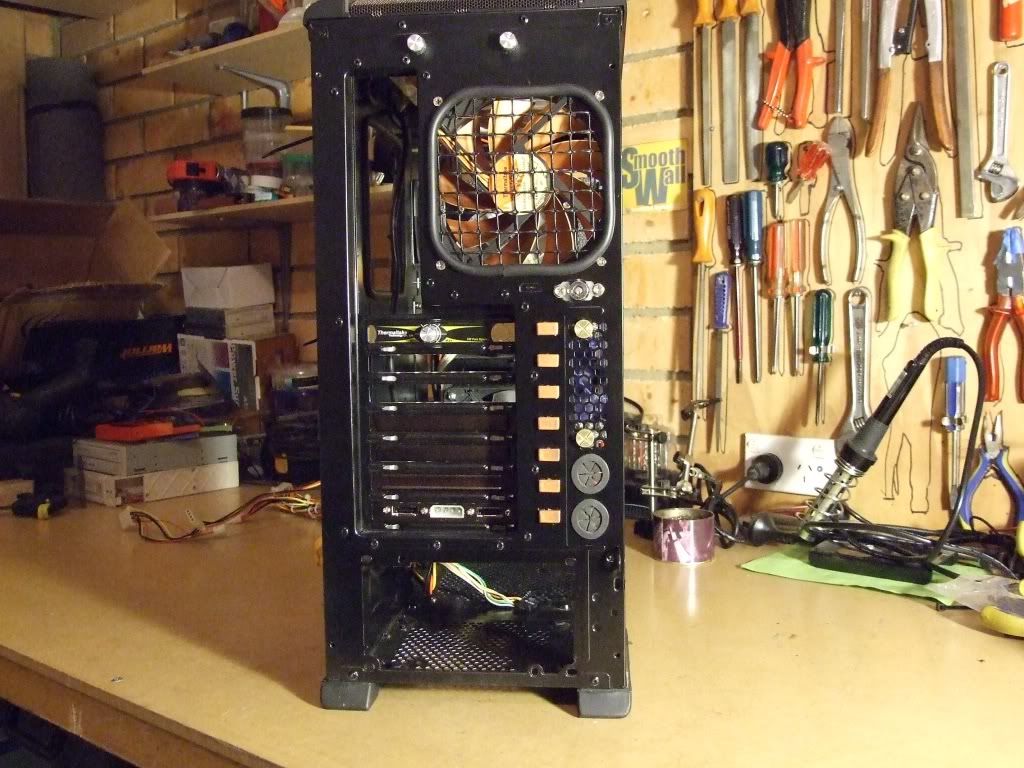
So here are some Preview Pics of Case with the Bezels back on with the Mesh grills
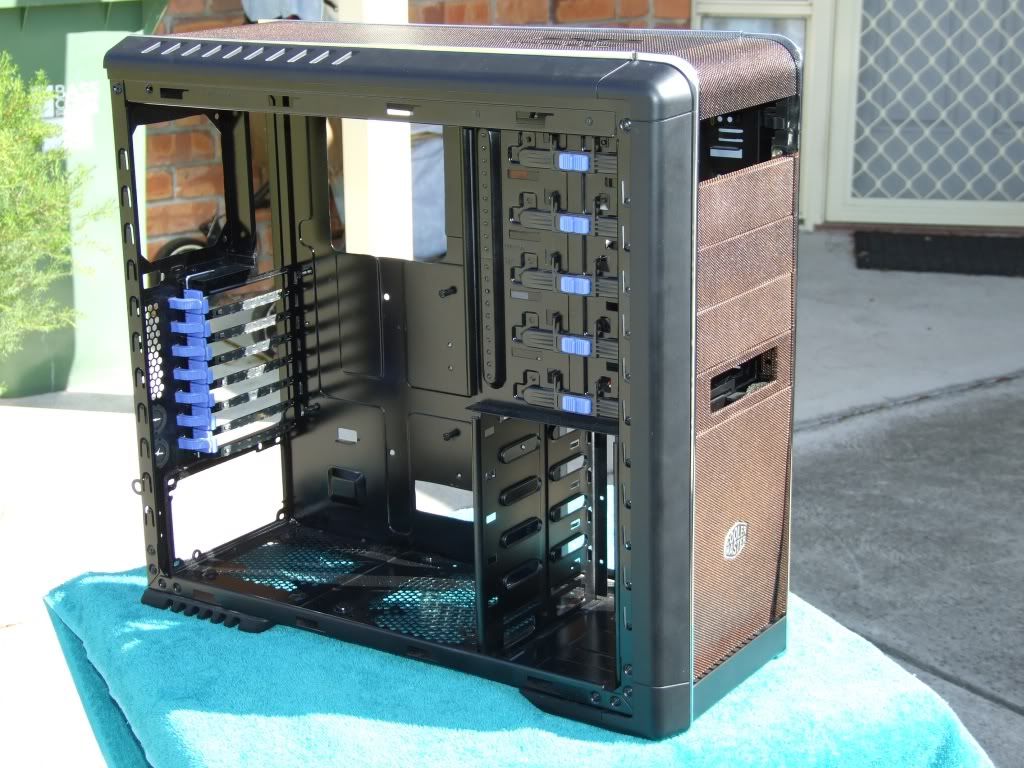
CM-690 Preview shots
Final Black Gloss Paint Side Panels
have also just Done the Clear Gloss Coat on both the Side Panels when dry will give another Coat
Thats all for this Update for now, Stay Tuned for more soon!
07-21-2010, 09:20 PM
Jolly-Swagman
Re: Jolly's CM-690 Case - Acentos de Cobre
Update #12 Sun 4 April
Sprayed Side Panels Final coat Clear Gloss after light Wet N Dry 2000, just needs to be polished and swirl remover
Side Panel
Window Side Panel
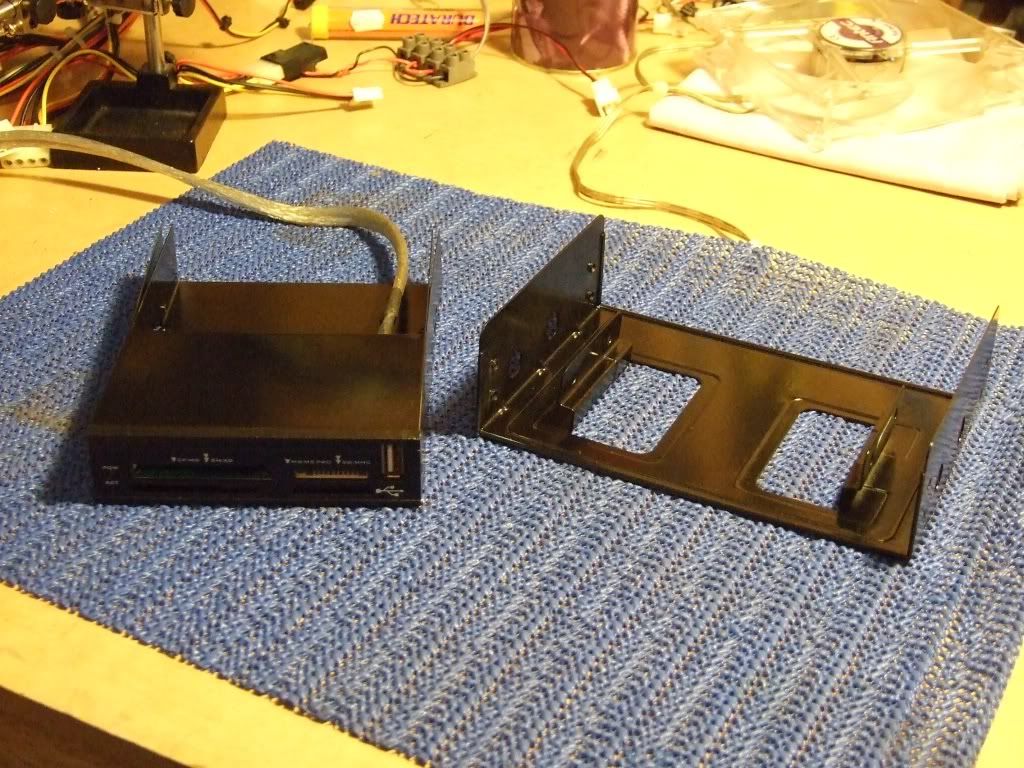
Decided to pull apart Media Multi Card reader and paint black as it stood out like a sore thumb in the 5.25 Bay, also painted the 5.25-3.5 Bay adapter plate too!
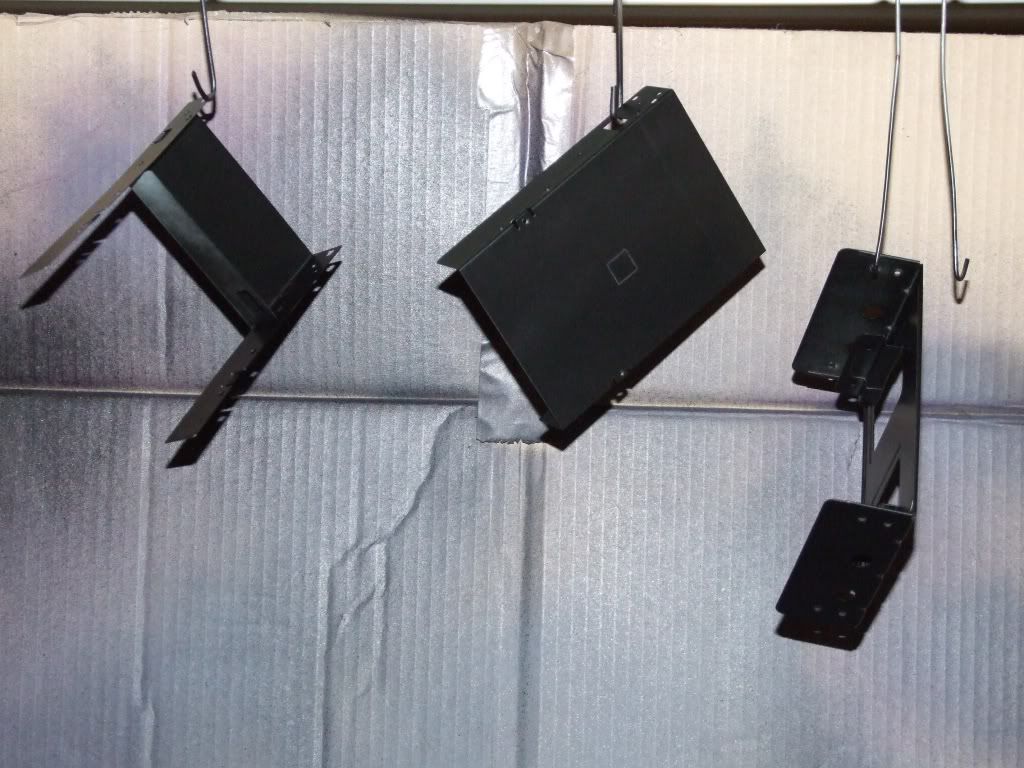
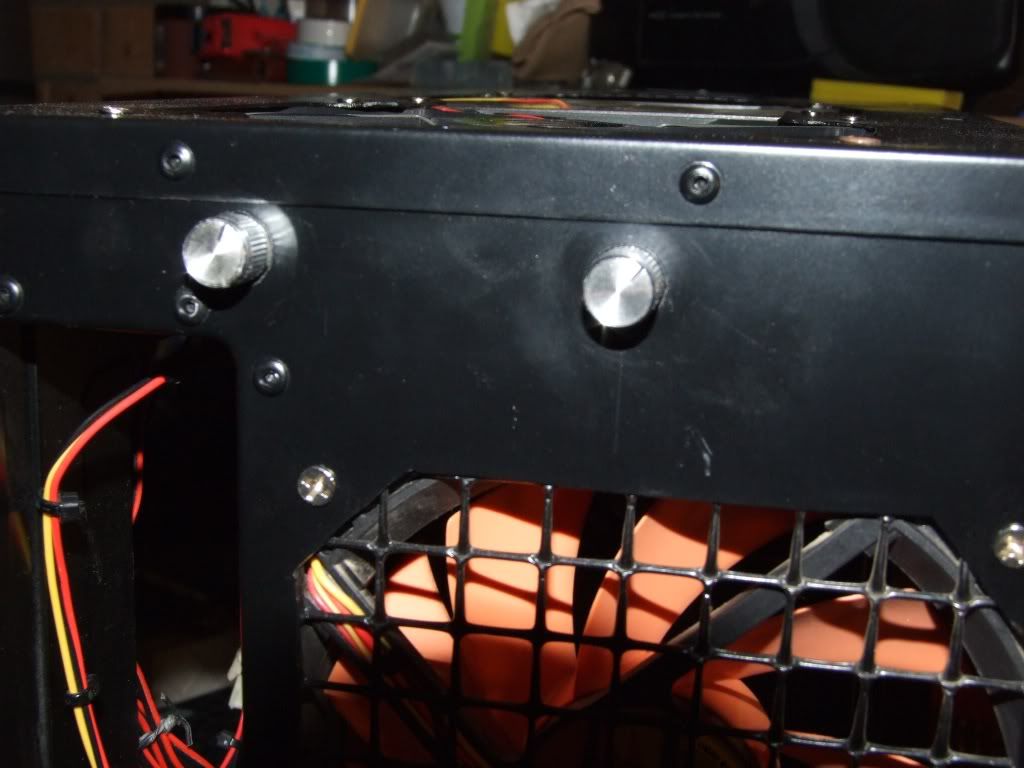
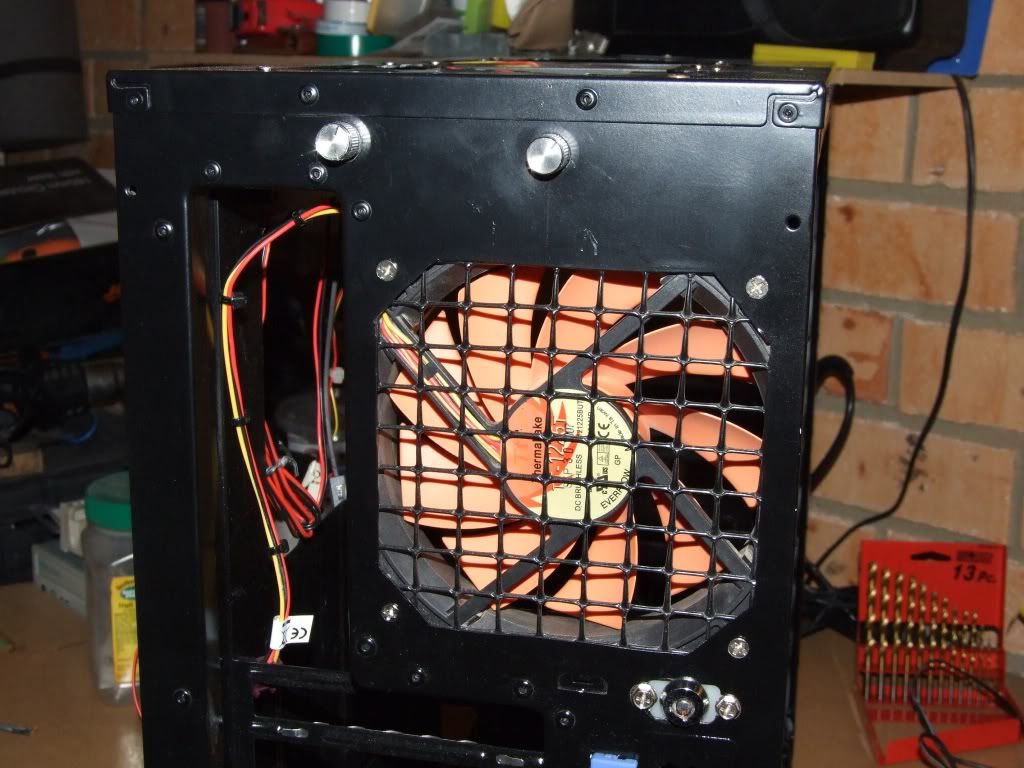
Then since the X48T DQ6 has allot more features and extra PCIe slots also PCI adapter headers ) ESata and Molex PWR out will need some of the slots that were previously taken up by Fan control knobs, so I decided to move two Fan conrollers to the Top Rear of the CM-690 Case, just below the Top section.
Fan Control Repositioned
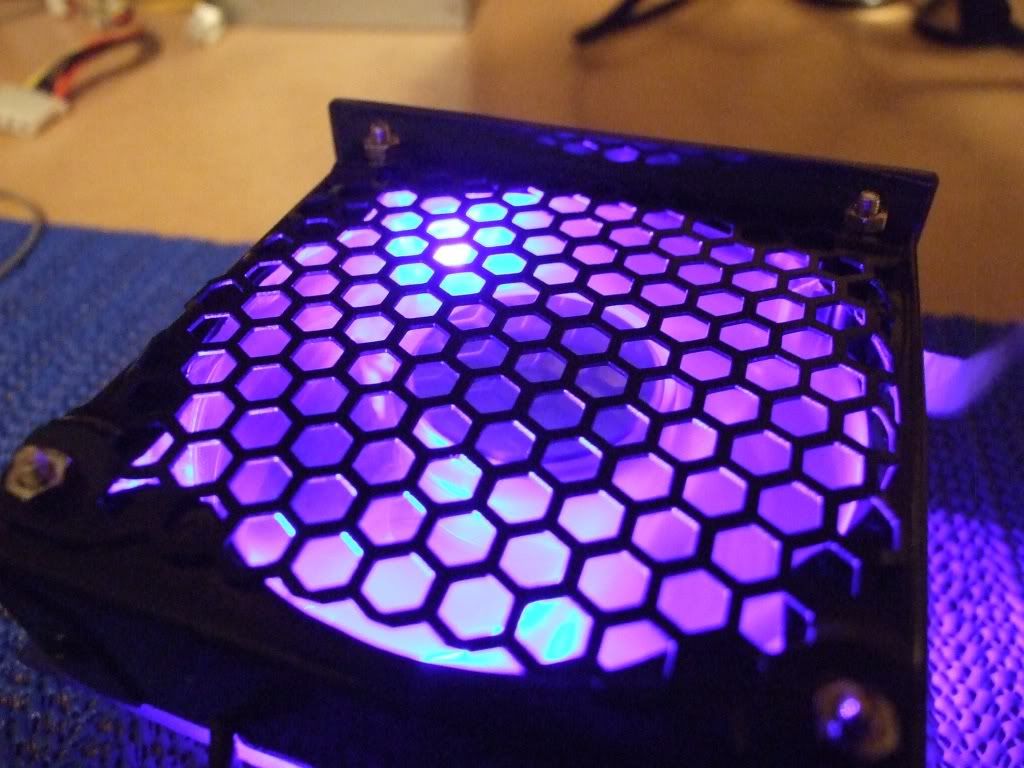
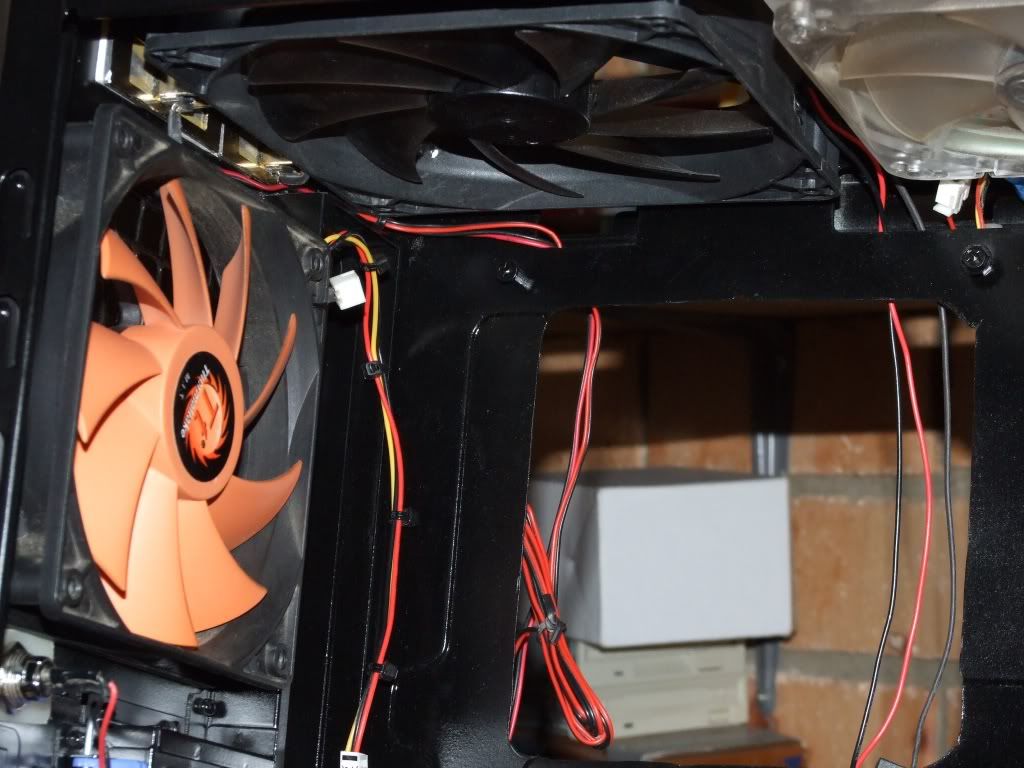
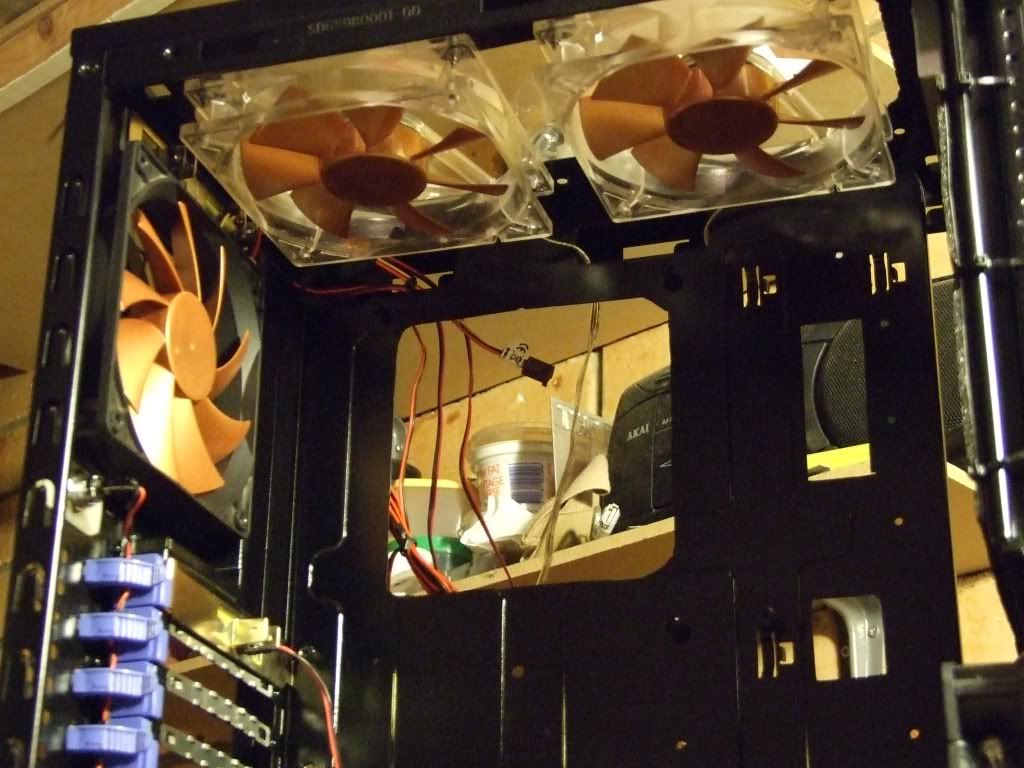
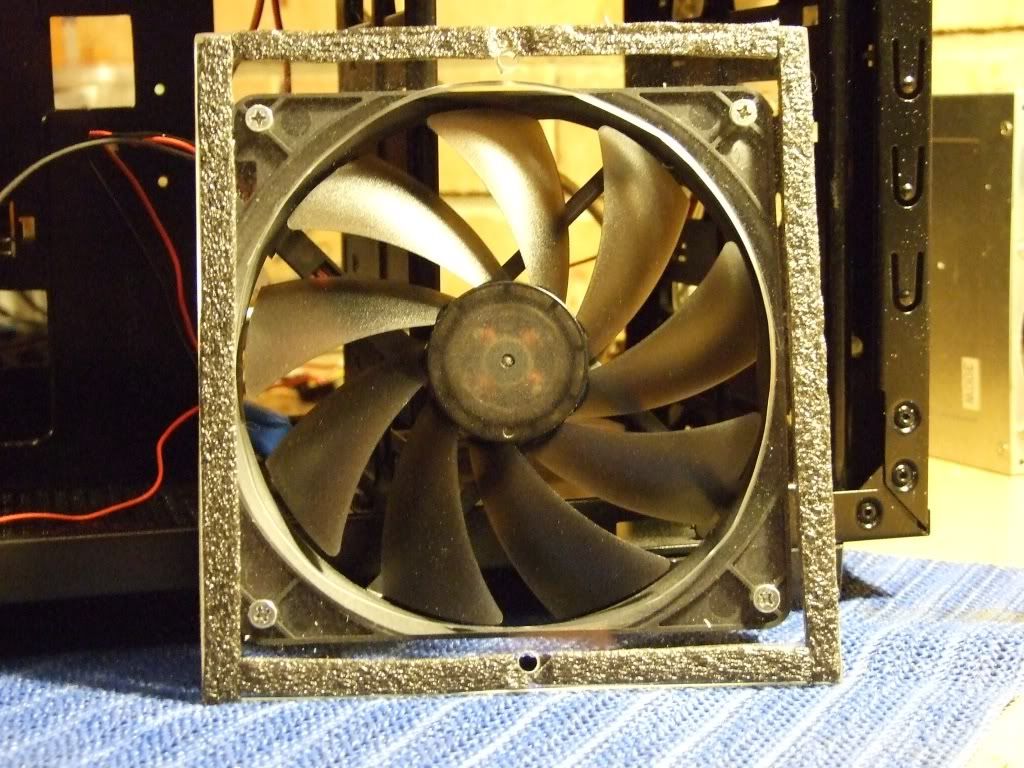
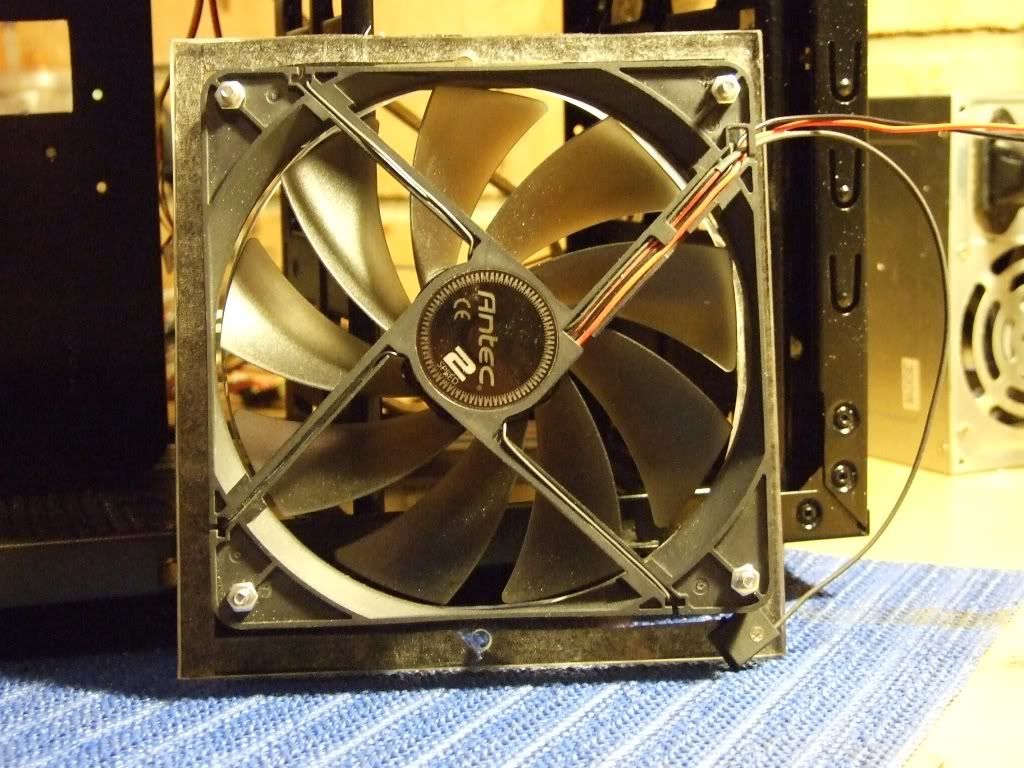
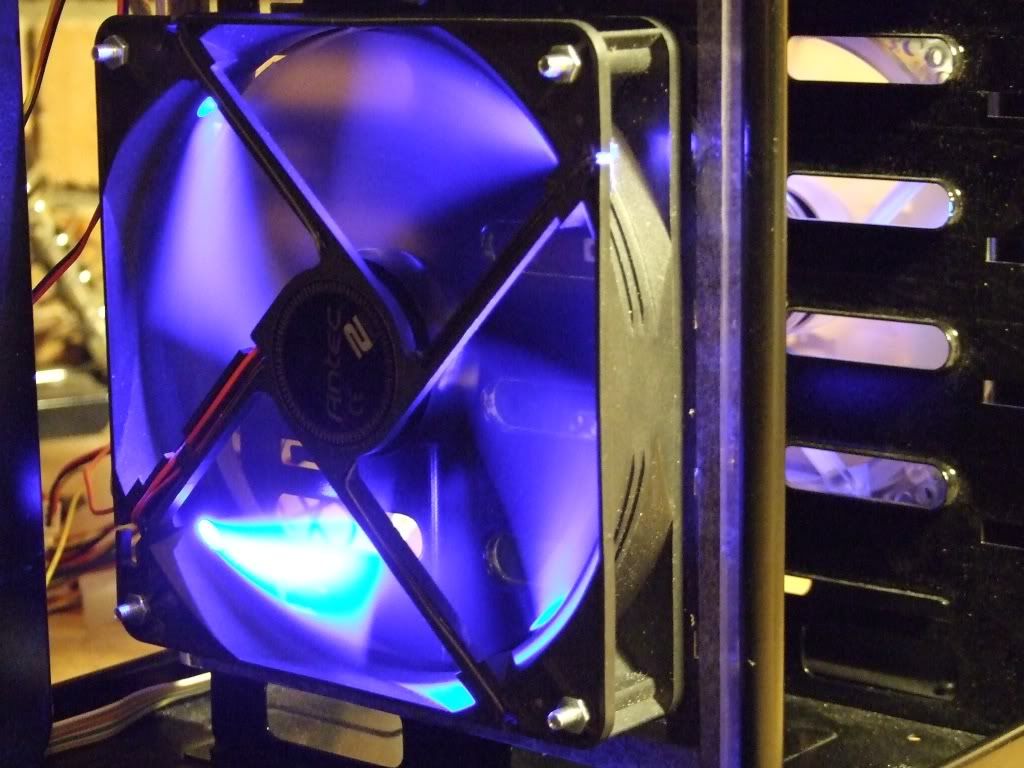
Also installed some of the 120mm TT Blue LED Fans (top + rear) and the 140mm Fan LED Fan, also the Front 120mm TT Blue LED Fan
Reinstalled the External CMOS Key Switch to Rear panel,
Update #13 Monday 5th April
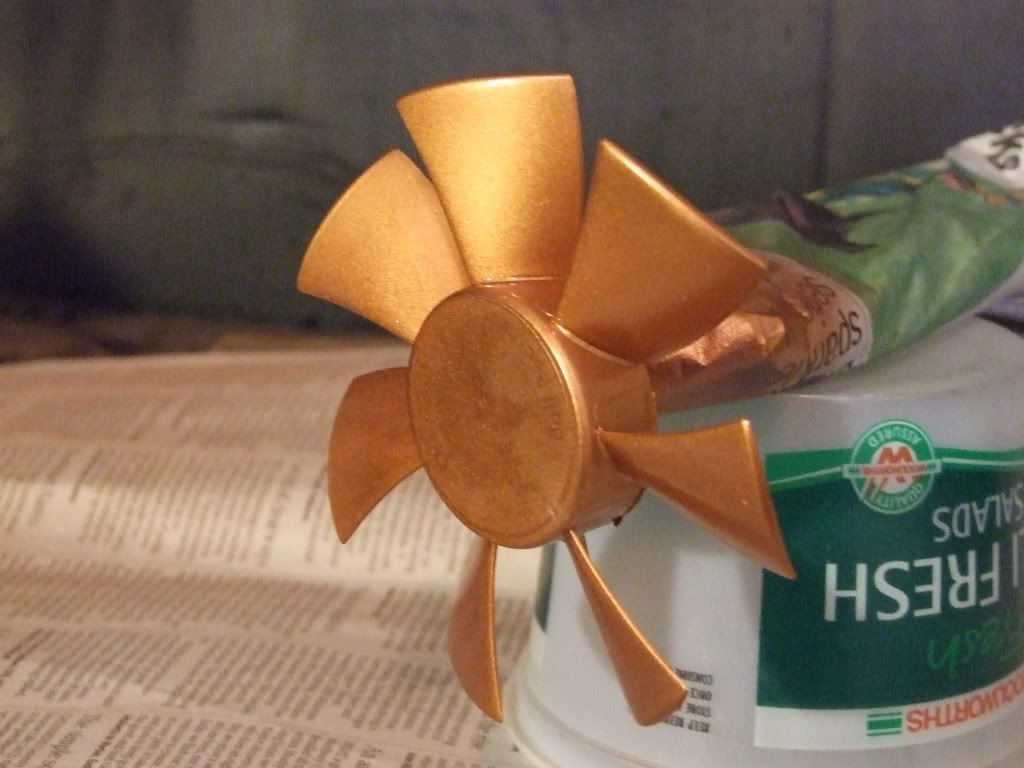
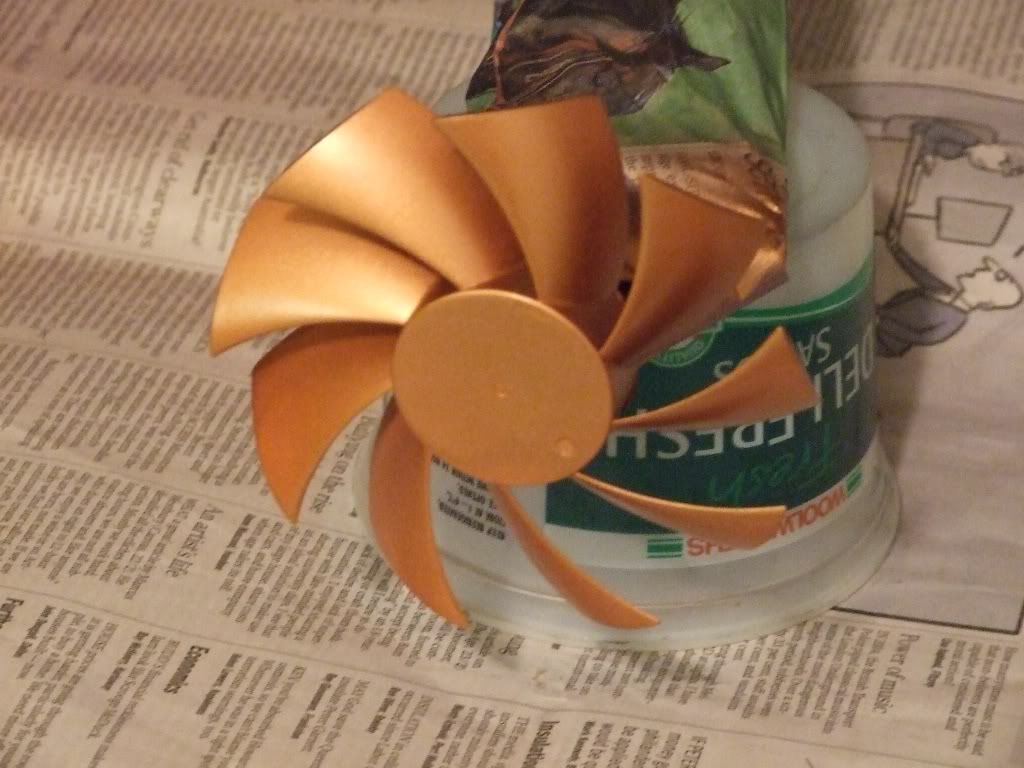
Today I painted the TT 120mm Thermal Fan Blades also the TT Smart Fan-11 Blades Copper colour, first time I have actually painted Fan Blades too!
TT Thermal Fan Blades
TT Smart Fan Blades
TT Smart-11 Fan
TT Fans Re-installed TT Fans Closer View
Also Today made Holding plate for the bay mounted Fans, insulated the for vibration!
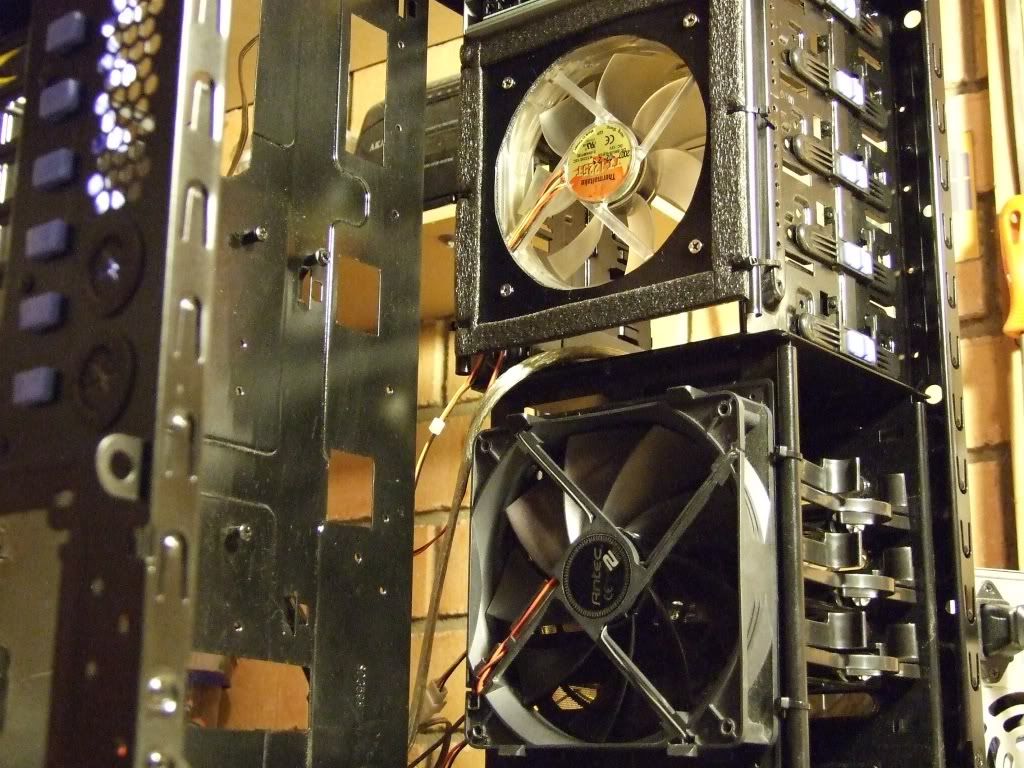
Drive Bay Fans 120mm TT Smart-11 Fan Blue LED,s
Put back together the Multi-Card reader after was painted Black, and Re-installed back in Bay 5,25-3.5 Adapter
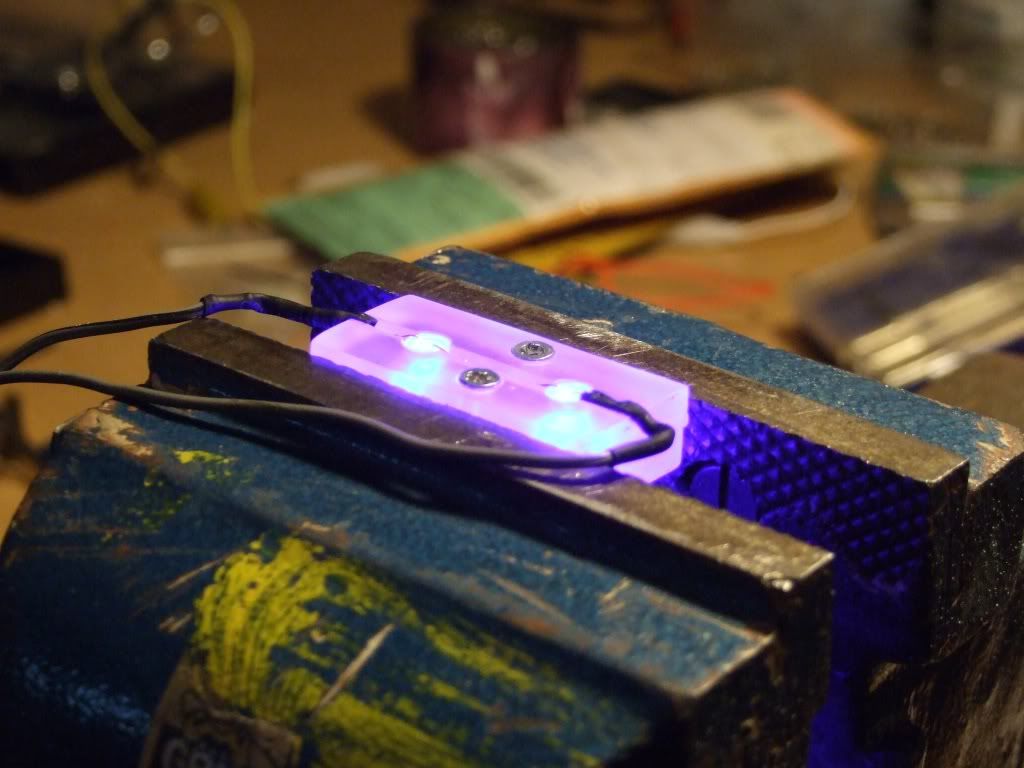
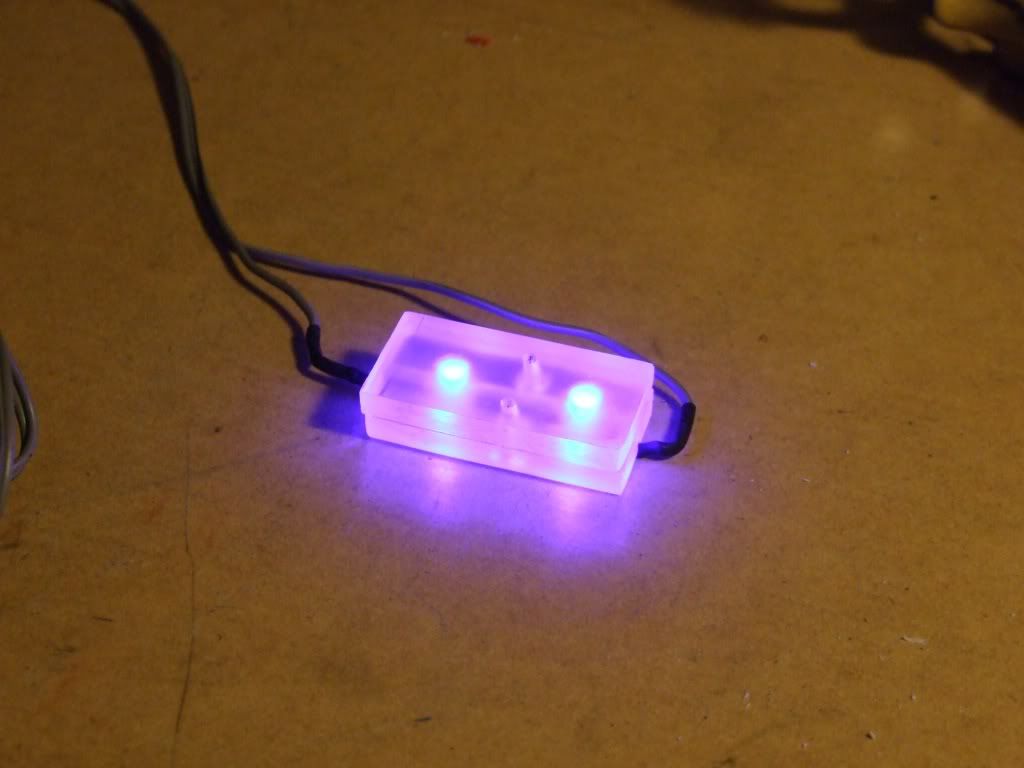
Also today made a 2 x Blue LED light block
Making LED light block
Finished and Testing Light Block
Update #14 Thur 8th April
Today just a few little changes and Modding,
First up didnt like the 140mm Fan holder where it was in front of HDD Bays as found it a little restrictive to Airflow,
so out of piece of spare 6mm Plexi I Custom made my own.
Plexi 140mm Custom Fan Holder
Fan side view
Installed and tested
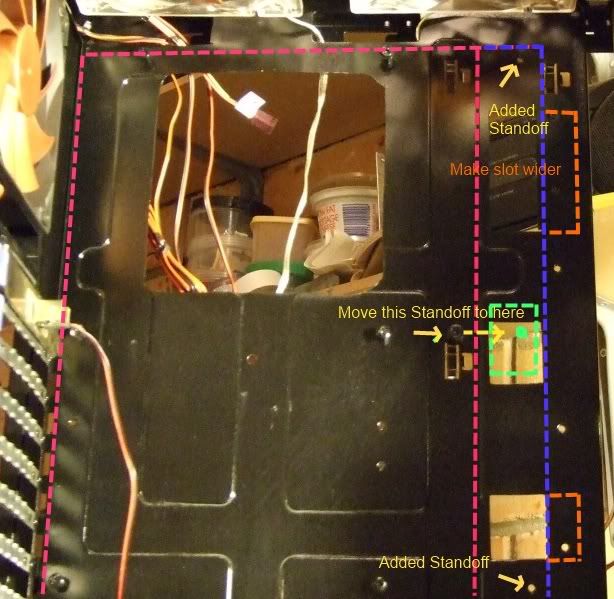
Second on the agenda was I test fitted the GA-X48T-DQ6 Mobo as wanted to see what was like with the case modding so far,
Well to my surprise as I hadn't seen the mobo before I started Modding Case, (just went from dimensions of my p35 mobo)
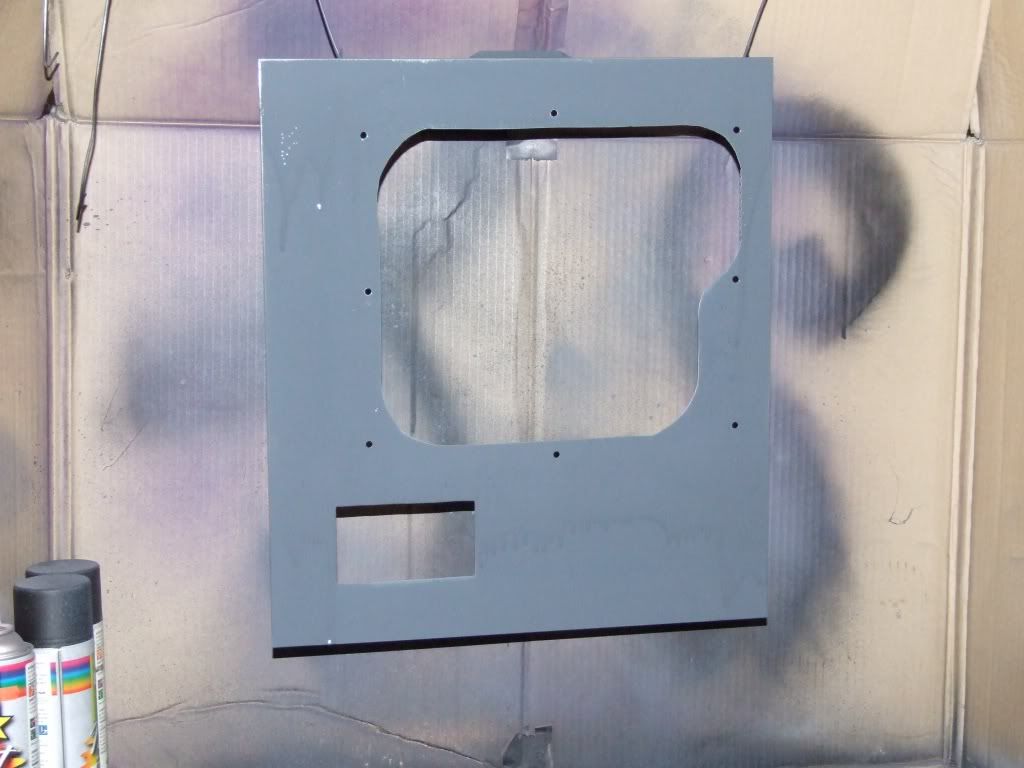
I found that this X48 mobo is slightly wider than the P35 (see pic RED line P35 BLUE line X48 width) so some alterations were in order.
First added two more standoffs top and bottom corners,(shown in Yellow) then the middle outer one had to be moved over
,,, ahh thats where I made a cut out, so have made a mounting plate to go there ( green lined in pic) with stanoff.
Also seeing mobo is now wider and covers the slot where the ATX 24 pin would have been this needs to also be widened slightly to accommodate,
same with the lower slot where the GPU and Sata cable would emerge from
Motherboard Alterations
.
Update #15 Fri 9th April
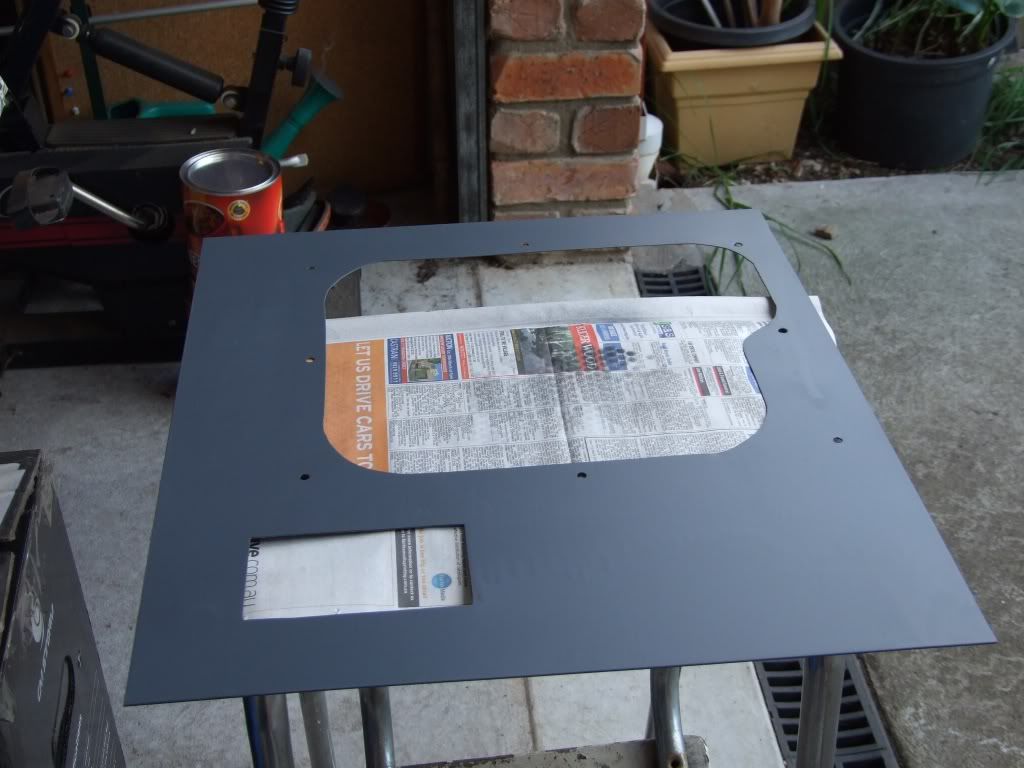
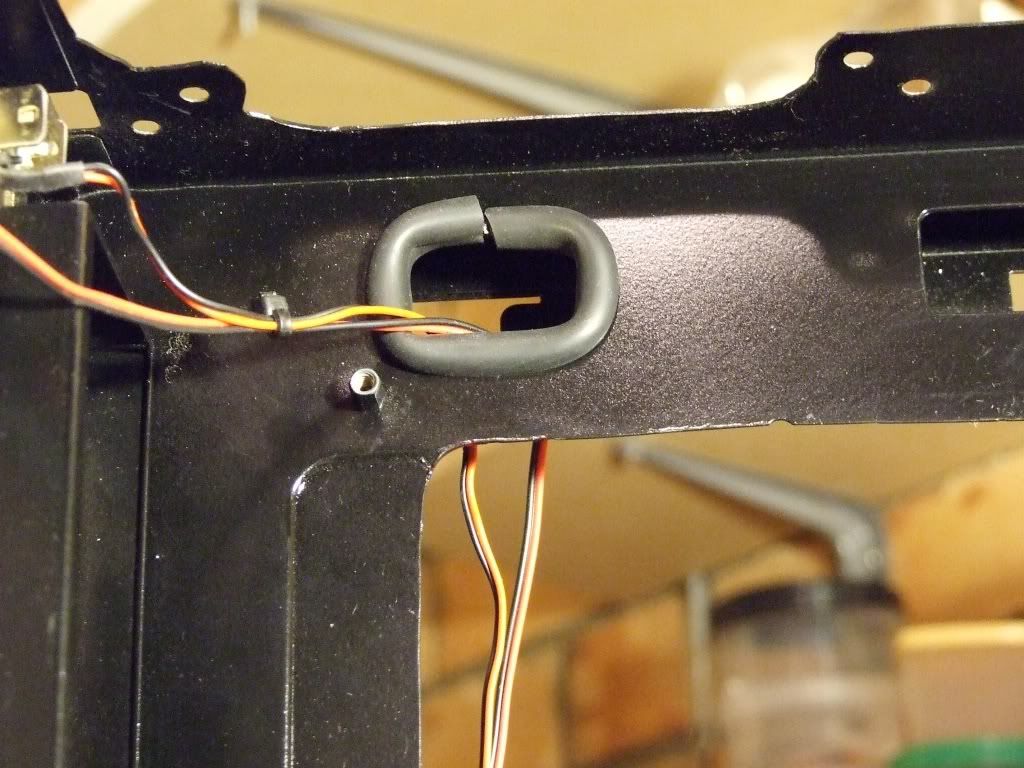
Today made the necessary Motherboard Tray Adjustments and also added Rubber Molding around the cut-outs and Rear 120mm Fan Exhaust Hole,
Have also painted the PCI Slot Latches Copper colour, and slot covers Copper/Black (like the Mesh Grills)
Also did the Window Side Panel with Rubber Molding to (No Pic as Camera Batteries need Re-Charged)
Mobo Tray Adjustments and Molding
Top Tray Cut-out Molding
Rear120mm Fan Hole Molding
Close-up 120mm Fan Hole Molding
PCI Slot Latches Painted Copper Colour
Also painted another 120mm Fan Blade for Window Fan and Grill Mesh, and will install and take pictures of Window molding then, when Camera Batteries Re-Charged.
Will also need to get some more Molding (8mm Vacuum Hose) later today, hopefully to finish off the CPU inspection Cut-out, ect!
Stay Tuned for more soon!
07-21-2010, 09:20 PM
Jolly-Swagman
Re: Jolly's CM-690 Case - Acentos de Cobre
Update #16 13th April
Finished doing the Cable and CPU inspection cutouts molding
Window molding also added to Window side panel.
Started on the Pre wiring and terminal block for fan wiring, and leds ect
Block has both 12volt and 5 volts connections
All fans now installed and Fornt and Top Bezels reinstalled
PCI slot Covers Painted Copper/Black effect, and installed E-Sata and Molex power out PCI bracket
CPU Inspection Cutout Molding
Rear Case Pre wiring
All Fans now installed
Rear Pci slots
PCI Slots Closeup
All pre-wiring done
Front & Top bezels installed
Window panel Molding
[CENTER] Update #17 Sun 18th April
Just a short Video showing the making of the Slot Cooler for the CM-690 case , to expel the exhaust from the GPU
Slot Cooler Video
Update #18 Mon 19 April
Today I have been working on a custom Cooling Fan shroud for the Sythe Ninja Heatsink that will be using for this Build,
Fabricated from sheet-metal left over from a previous Case,
First Cut Sheet-Metal was cut to size marked out where the Cutting and Bending would be
Marking out and Cutting
Now onto the bending,
First Bend
Second Bend
Next was bending the 4 side bends and also cutting out the Fan holes for 92mm fans
Side bends and Fan holes
Now for the top of the heatsink need to allow for the Heat-pipes to come through, so a little more cutting
Heat-Pipe slots
Then on over to the Spray booth for an Undercoat, the will spray Black with hints of copper like the pci slot covers were done
Undercoated
Next up will be some light sanding back undercoat (remove runs) and then painting the Shroud Black with Copper Highlights
Update #19 Thur 22 April
Last Night Painted the Scythe Ninja Custom Dual Fan holder matte Black,
This is the Base Colour two coats where applied with light rubdown with Wet-n-Dry 1500.
Painted Matte Black
Then seeing this morning is such a beautiful Day did the Copper Highlighting Coats
Copper Highlight Coat
When this was Dry which Today was mighty Quick, did the Gloss Clear Coats
Clear Coated
Now its off down the Street to get some screws for the Fans, to be mounted,
when all the Gloss Clear Coat has Dried which will be by the time I get back,
but will be leaving for 24-48hrs to cure off properly before Mounting Fans!
Update #20 May 5th 2010
Just waiting on some parts arriving from the USA, hopefully next week ,
Another Fine Member Brolloks) from OCF had a GPU for sale an Un-Opened New MSI GTS-250 OC 1GB edition so got it for the Wife"s Rig,
Also Brolloks offered to get the G-Skill DDR3 1333 Ripjaw Ram from The Egg I needed and send at the same time,
So that was a bonus,
MSI GTS-250 OC 1GB
4GB G-Skill DDR3 1333 (2 x 2GB) Ripjaw Ram
So now just waiting for the parts to arrive to get all the Hardware installed and up Running!
Thats all for now , working on another Video for the Case Mooding done so far.
07-21-2010, 09:21 PM
Jolly-Swagman
Re: Jolly's CM-690 Case - Acentos de Cobre
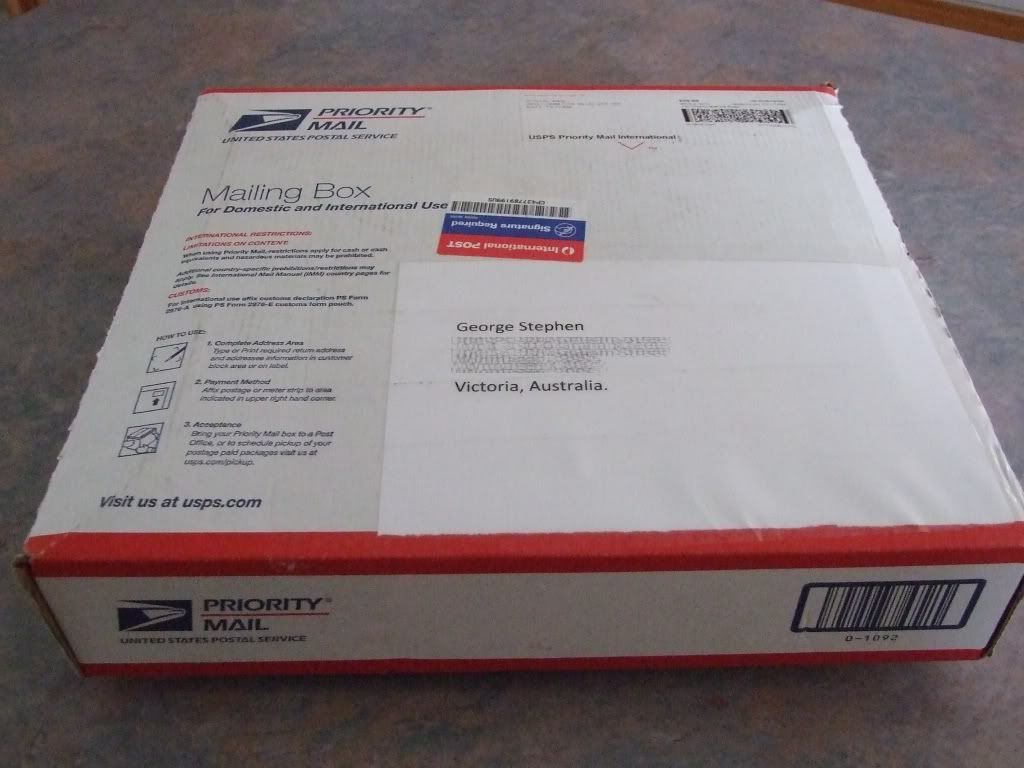
Update #21 May21st 2010
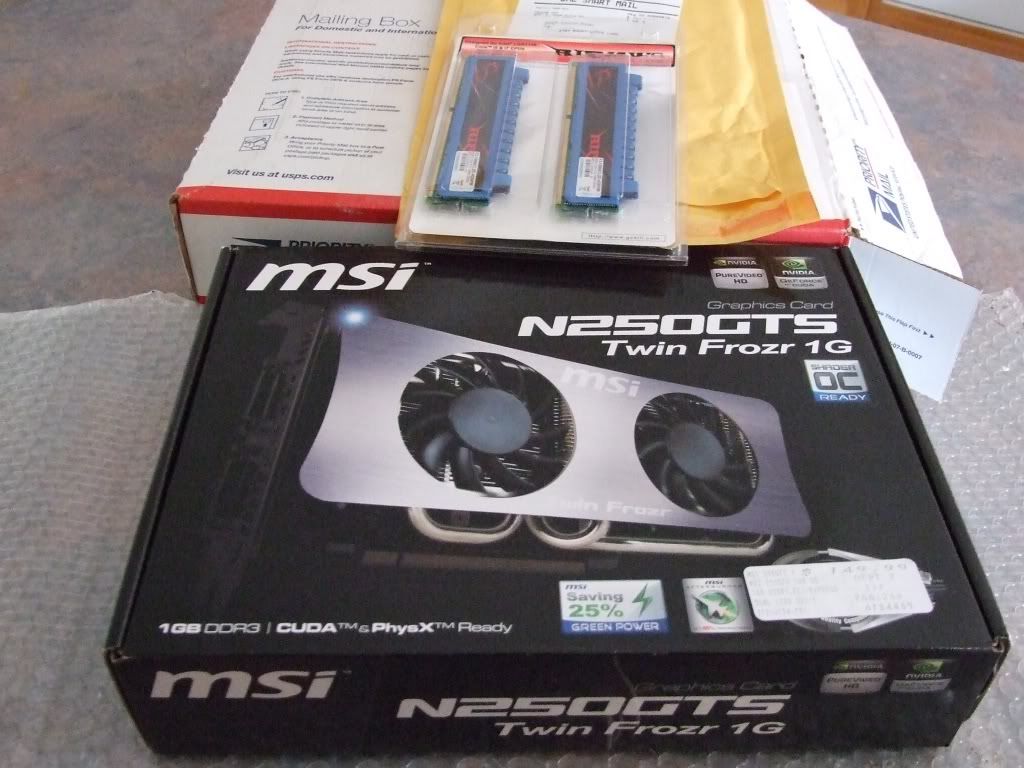
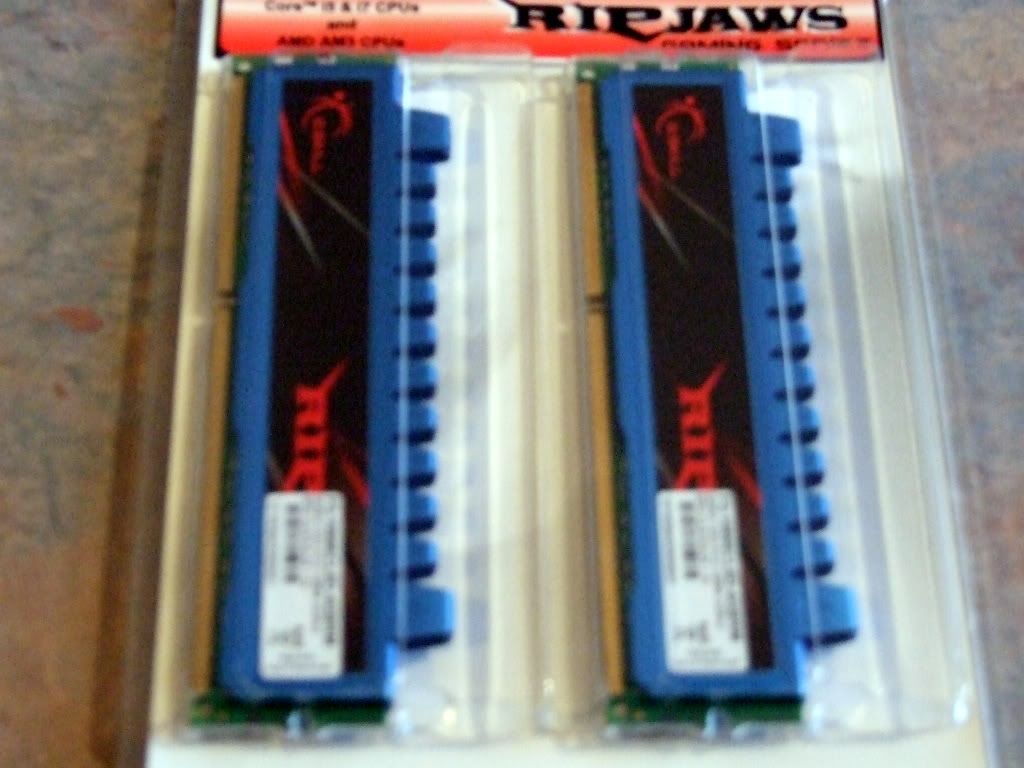
Received my parcel from Brollocks OCForums, for the MSI GTS-250 1GB Twin Frozr that I got for Wife, also Brolloks got some DDR3 G-Skill Ripjaw Ram for me from NewEgg.com and sent them along in the Parcel
The Parcel
Un-boxing Parcel
The G-Skill DDR3 Ripjaw's
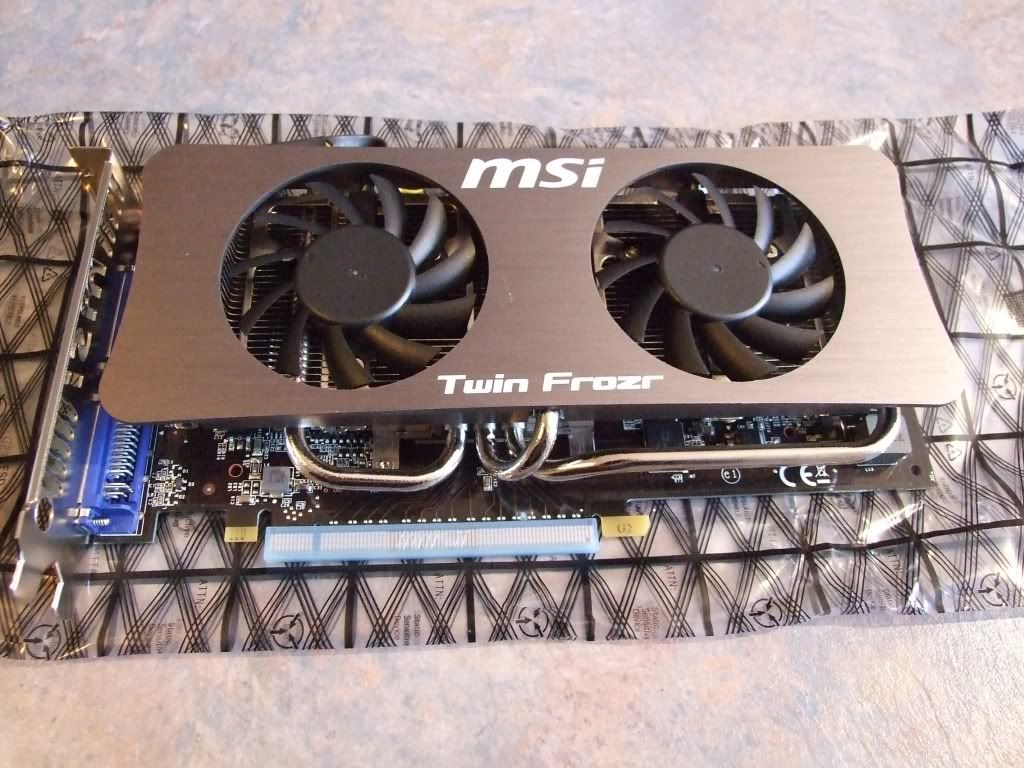
Here is a Quick pic of What the MSI 250-GTS 1GB Twin Frozr looks like un-boxed
GTS-250
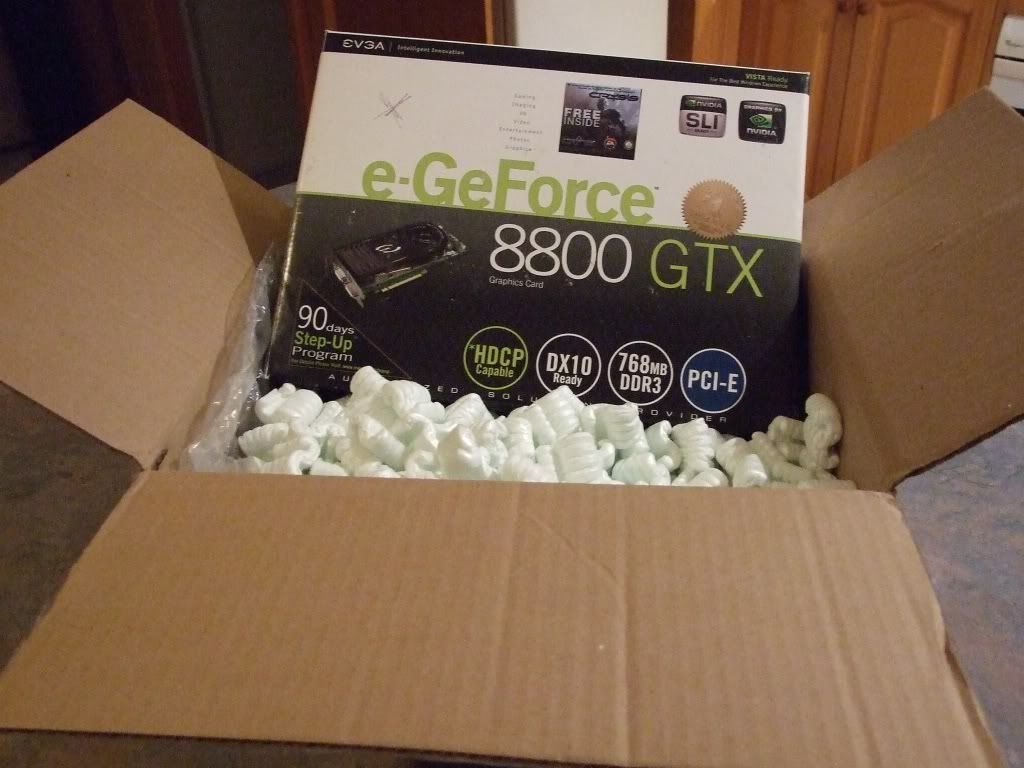
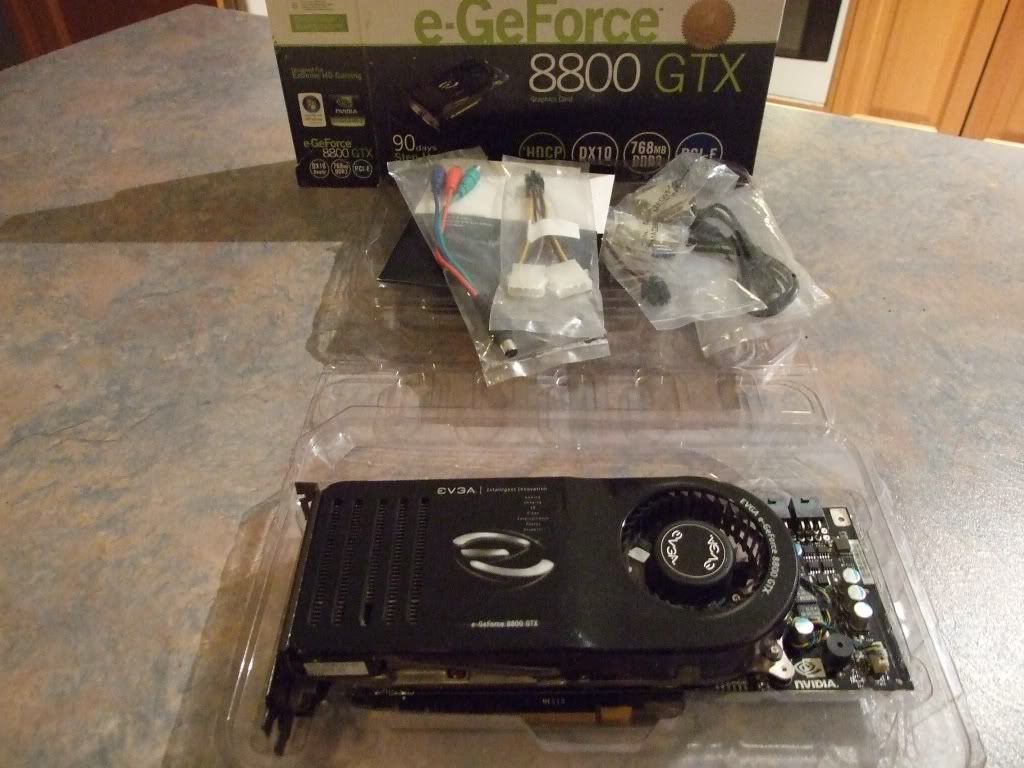
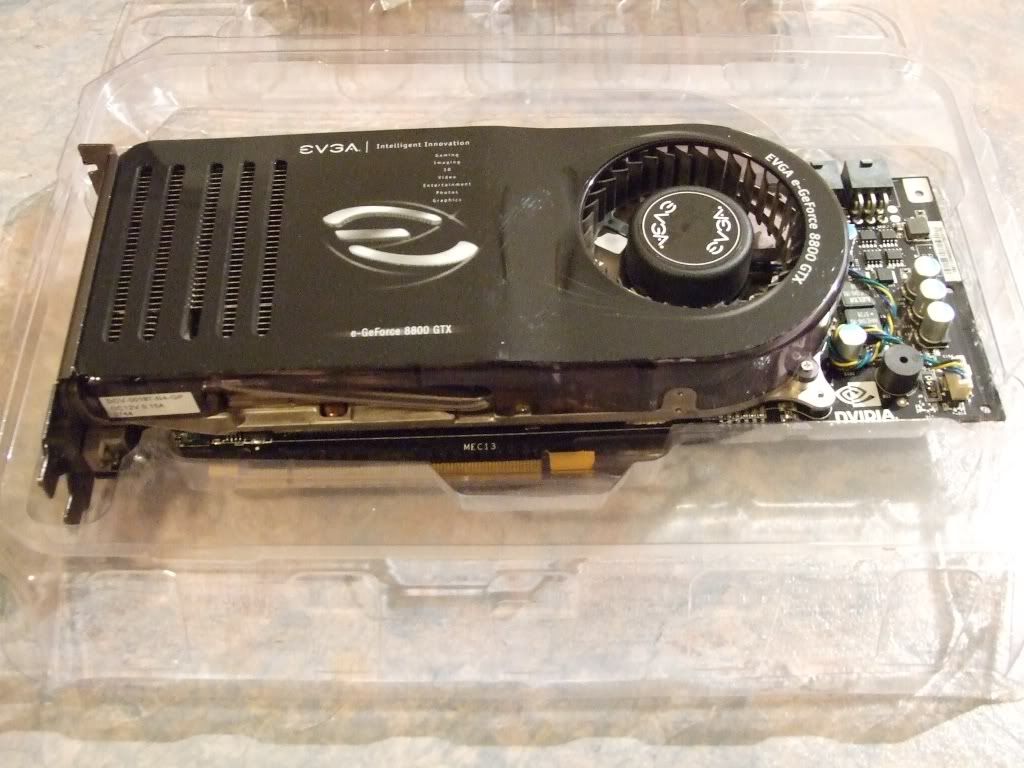
Also last week I received another Parcel too, from CatkickerOCForums with a Nice EVGA 8800GTX that will be used in the Quad Core Q6600 system that was my current Main Rig,
EVGA 8800-GTX
So hopefully a little later Today will get some more work done on this Project, now that I have the DDR3 Ram.
and also install the GTS-250 into Wife's Rig
Update #22 Sun 23 May 2010
Finally I have the DDR3 G-skill Ram so its to work on getting all this loverly
Hardware put into the CM-690
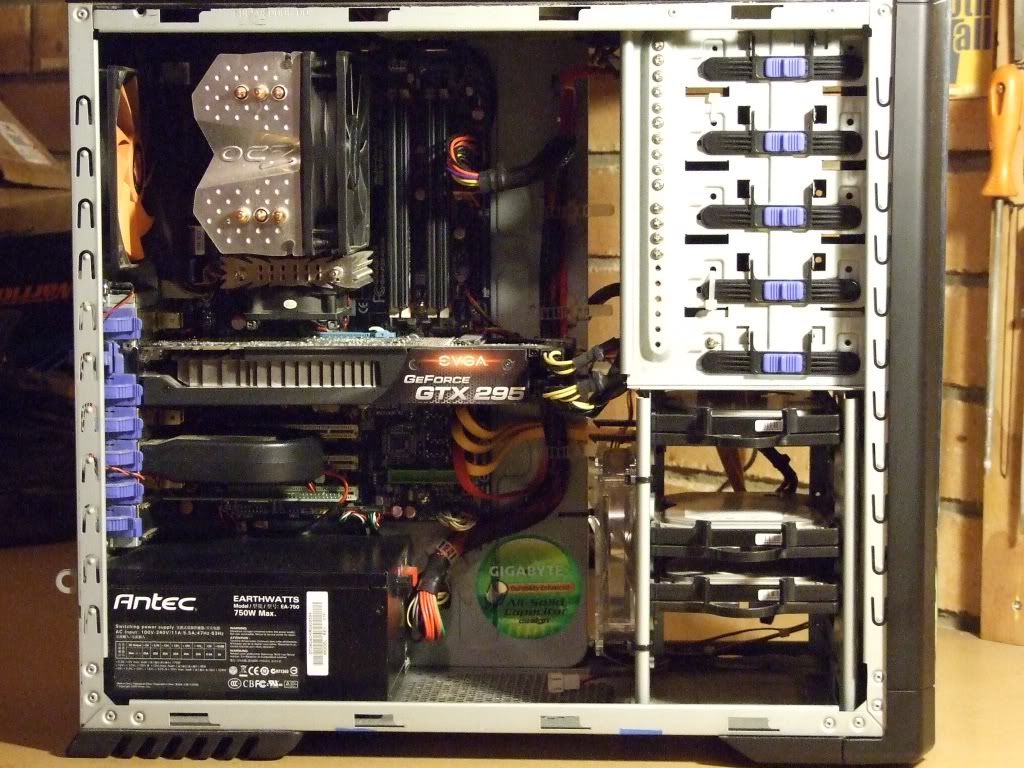
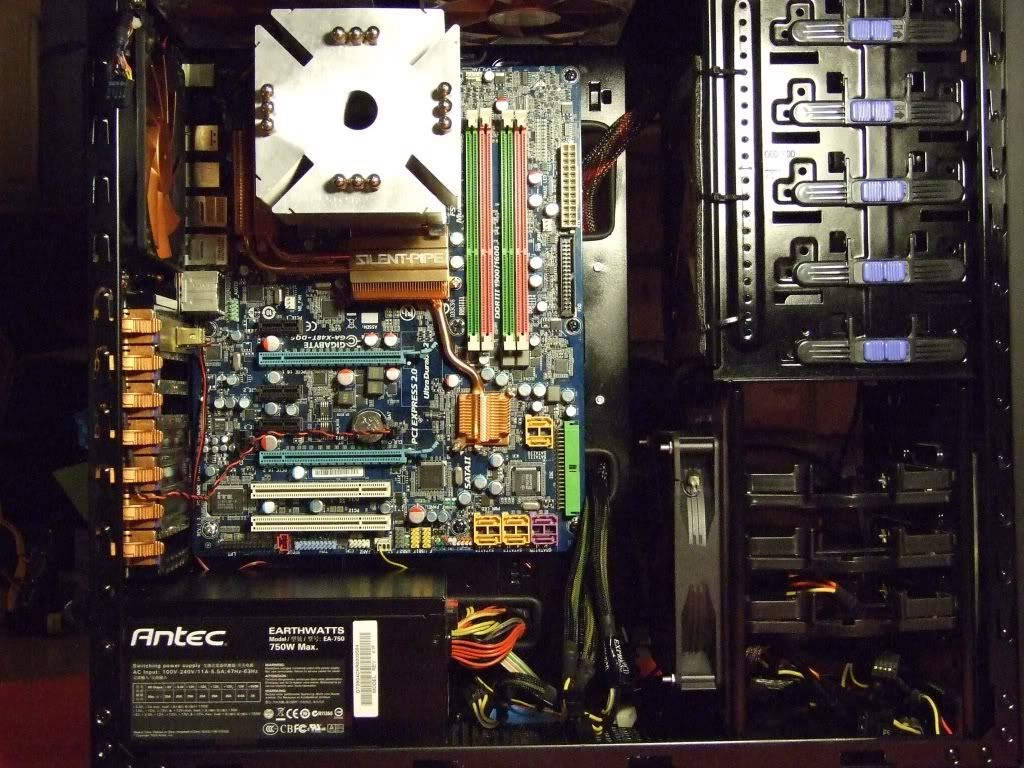
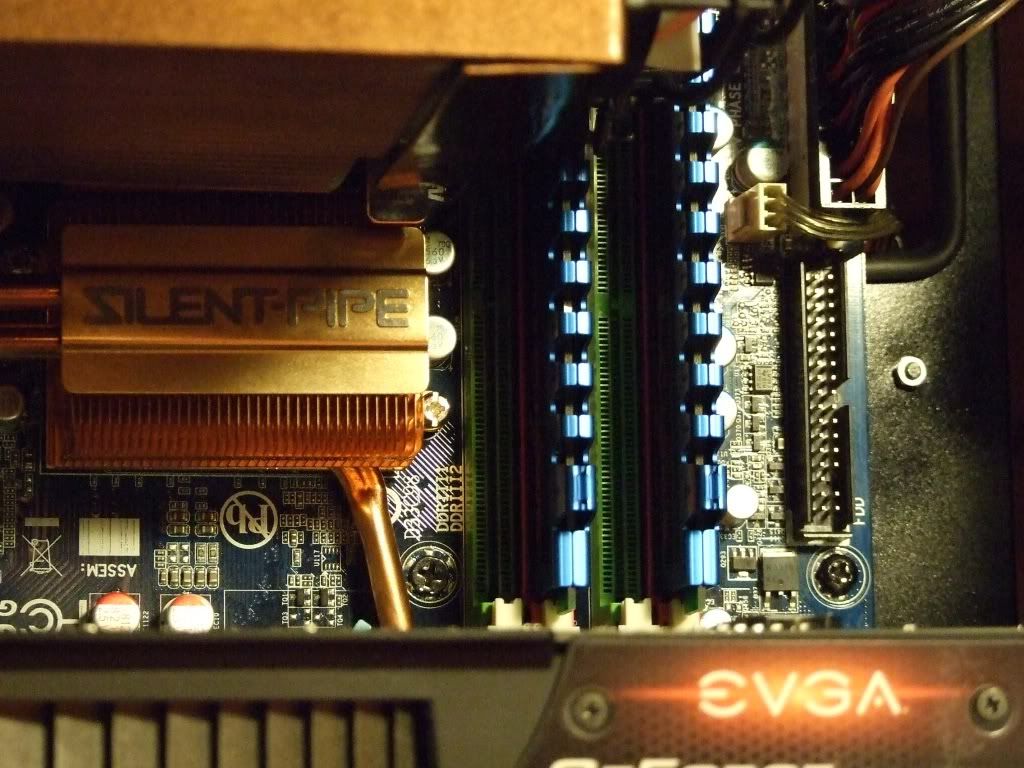
First off was Install the GA-X48T-DQ6 Motherboard, then E8500 -EO 3.16 Ghz CPU, and the Scythe Ninja Heatsink with some ICD7 TIM
Then also the Antec 750W Modular PSU, then the G-Skill DDR3 1330 Ram
Next up was the Custom made Heat Sink Cover I made for the Ninja to Hold the 92mm cooling Fans, this was made for two Fans that can be arranged in a Push-Pull configuration, but seeing as I have adequate Case Cooling and limited room ,I'm going with the one Fan for this Case
Next up we have the first GPU my EVGA GTX-295
Also Have now since the Upgrade to Wife's GPU, I have her Palit 9800GT 512 SC Sonic GPU that will be going in too!
Then Installed the HDD's 250GB main and 320GB Storage
Some cable management on the Rear and custom connector block for the Fans and Rear PCI Molex Bracket
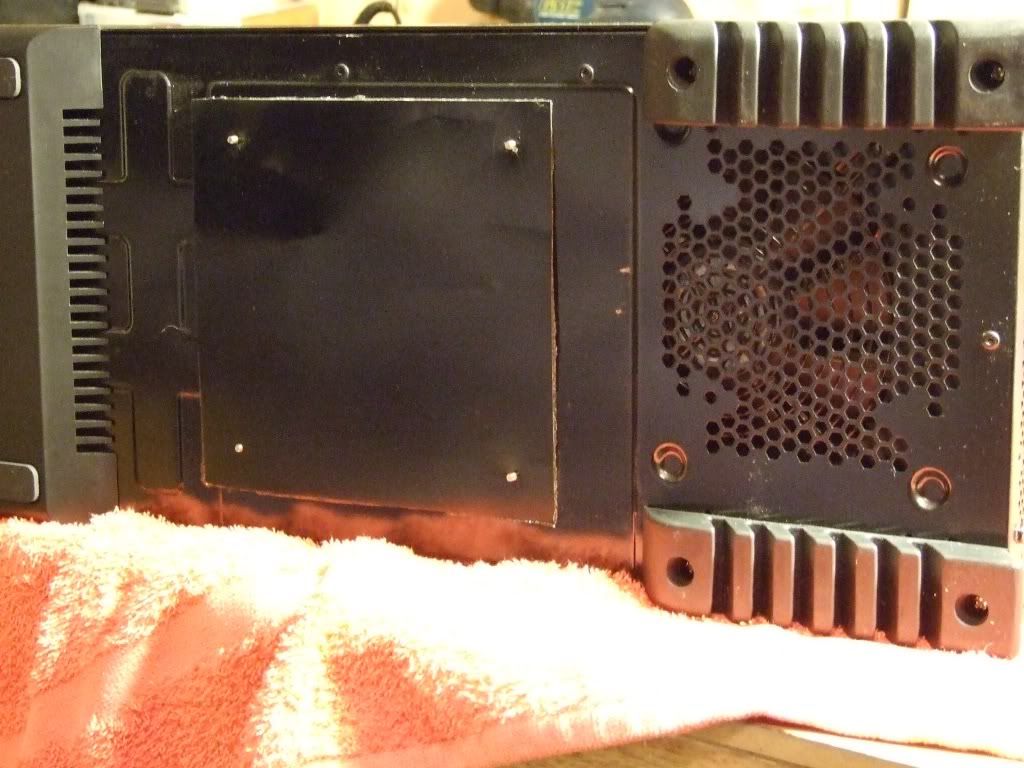
Made a Bottom plate for the unused 120mm intake also has adhesive soun deadening installed on it too.
Continued
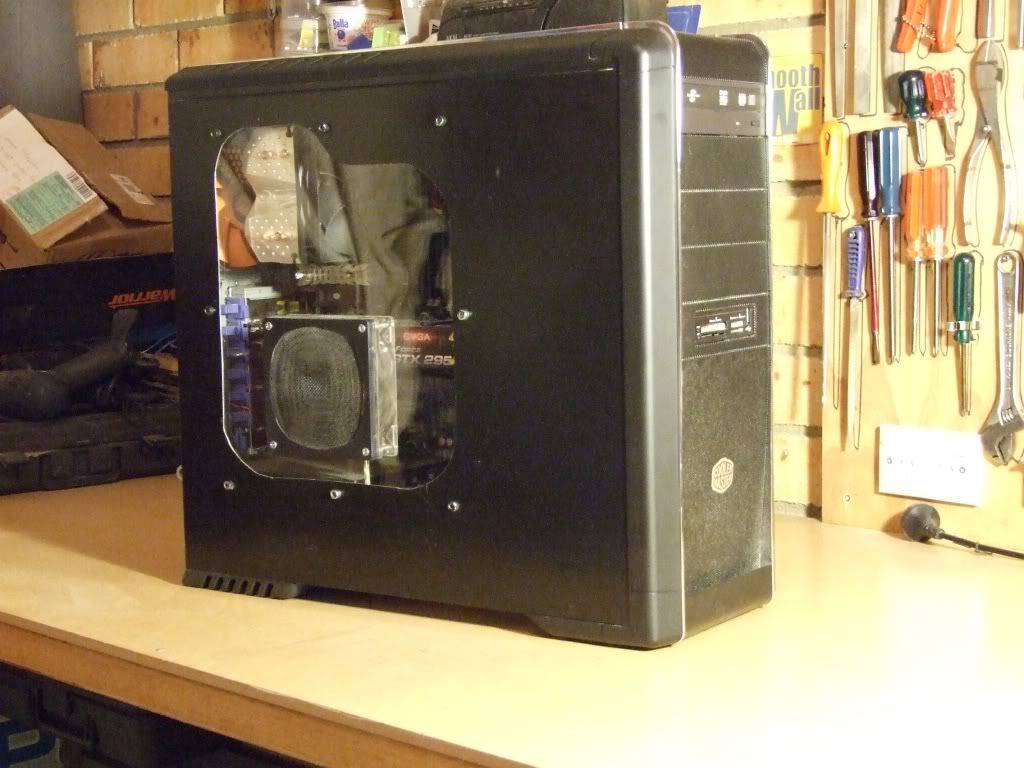
Now for some Case Shots
Front View
Front and Widowed Panel View
Front & Right Sid Panel View
Window Panel View
Top Panel View
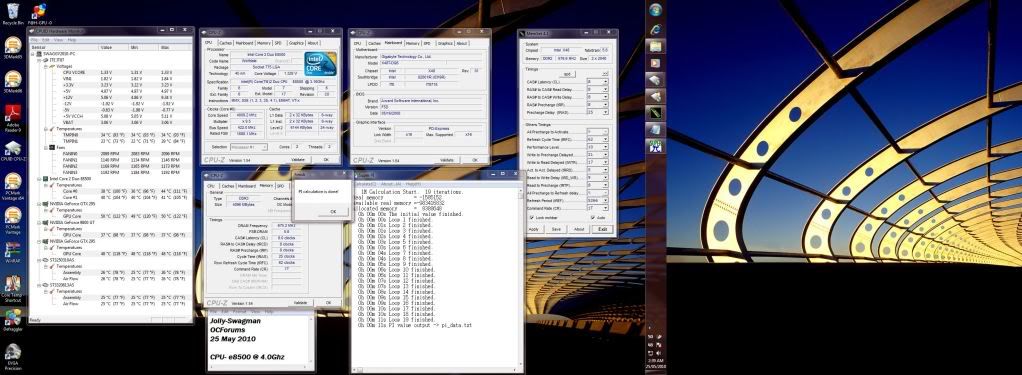
Pretty happy with the way this has turned out and have just Installed Win 7 Ultimate x64 and the Temps on the Ninja are very nice indeed Idle 18C,
Cant wait to see what there like OC'd a bit should be nice,
That all for now will take some screen shots when have instaled the rest of the programs ect and done a little OC'ing
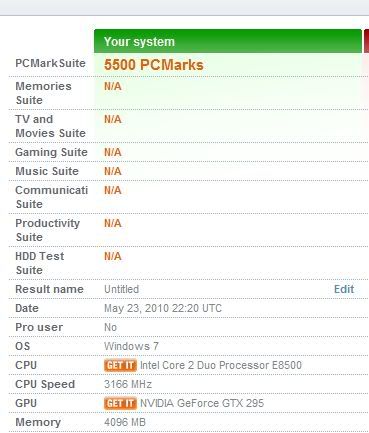
Benchmarks
Super-Pi-32M = 12m 34s
Super-Pi-8M = 2m 34s
Super-Pi-1M = 11s
PC Mark-Vantage
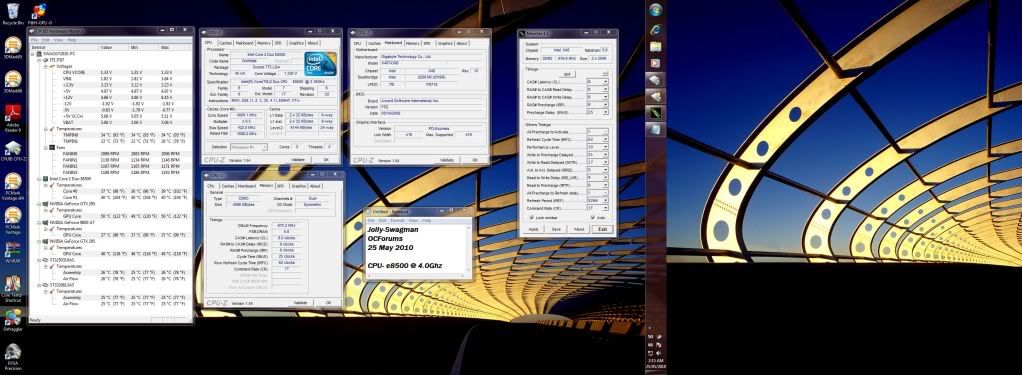
Jollys OC @ 4.0Ghz
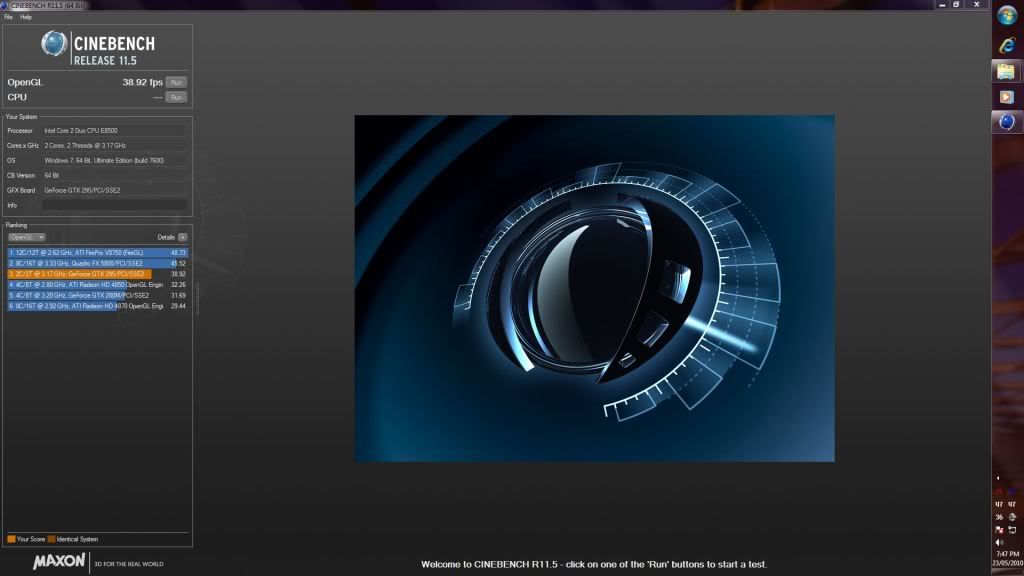
CinebenchOGL.
CinebenchOGL-CPU
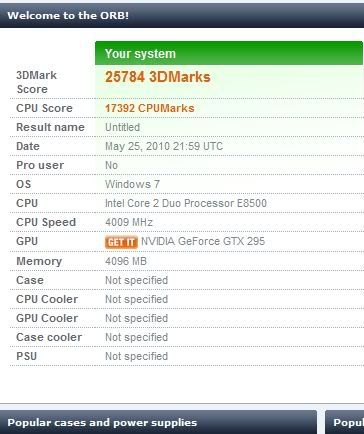
3D Mark-06
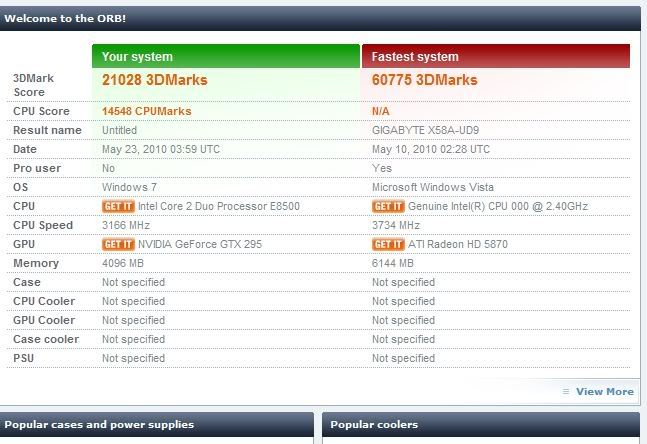
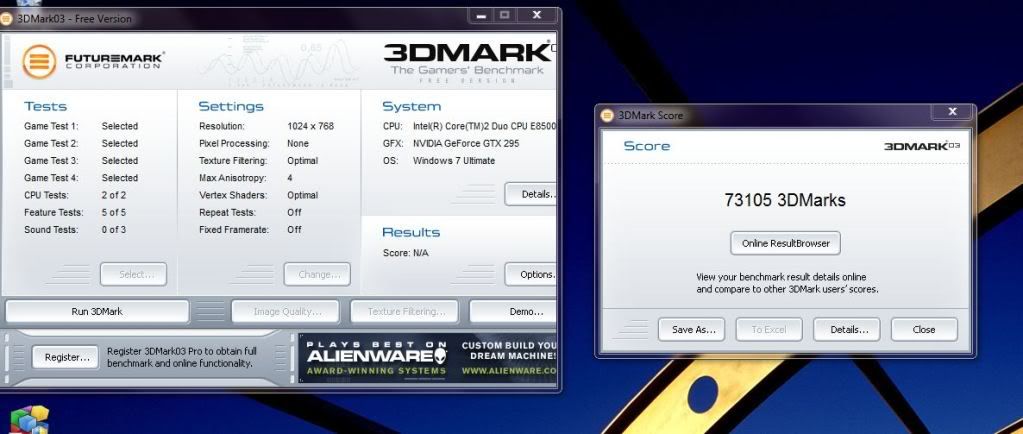
3D Mark-05 @ 4.0Ghz
3D Mark-05
3D Mark-03
That's all for Now!
Till then Stay Tuned and thanks for Looking and following Build !!
07-21-2010, 10:38 PM
SXRguyinMA
Re: Jolly's CM-690 Case - Acentos de Cobre
nice work! clean and cool! +rep for a sweet rig!
07-22-2010, 01:27 AM
diluzio91
Re: Jolly's CM-690 Case - Acentos de Cobre
Nice! im working on a 690 too. Lovely case isnt it? now your idea for the mesh... i love that... anyone know how to do that with a silver color? Got me all excited, heres a link to my worklog if u wanted to look
Nice! im working on a 690 too. Lovely case isnt it? now your idea for the mesh... i love that... anyone know how to do that with a silver color? Got me all excited, heres a link to my worklog if u wanted to look
Thanks diluzio91, also for the comments and Rep too, I think Silver on your CM-690 would look great
08-13-2010, 06:28 AM
Jolly-Swagman
Re: Jolly's CM-690 Case - Acentos de Cobre
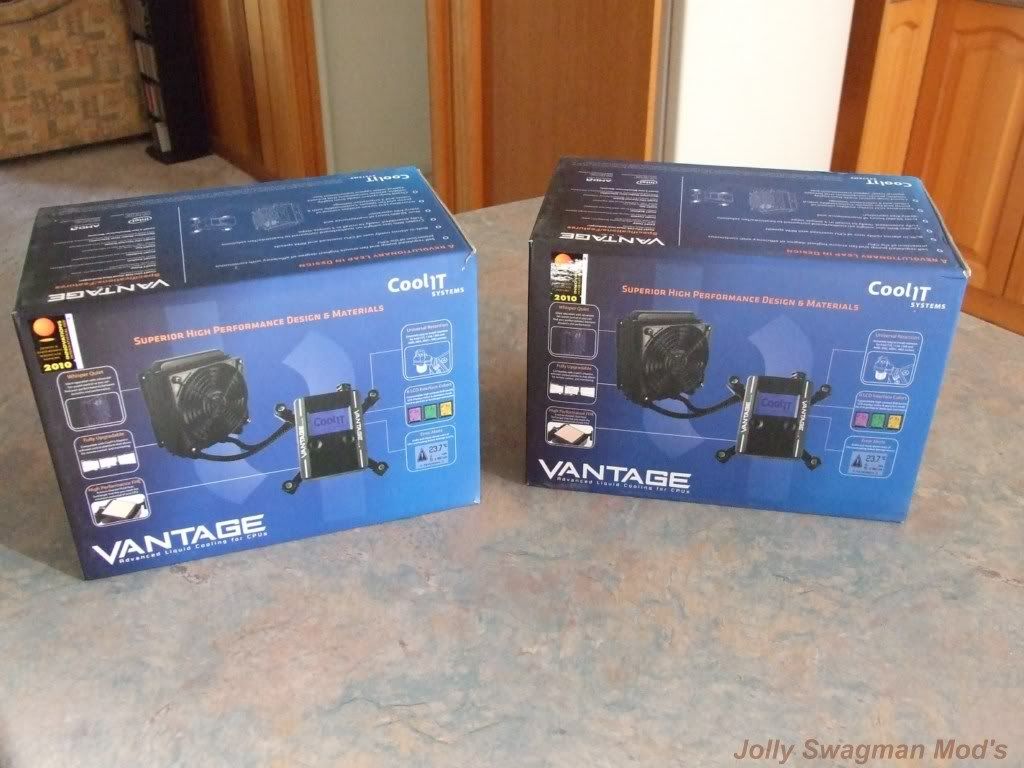
Update FRI August 13th 2010
Some exciting Hardware Additions are going into this Case Mod
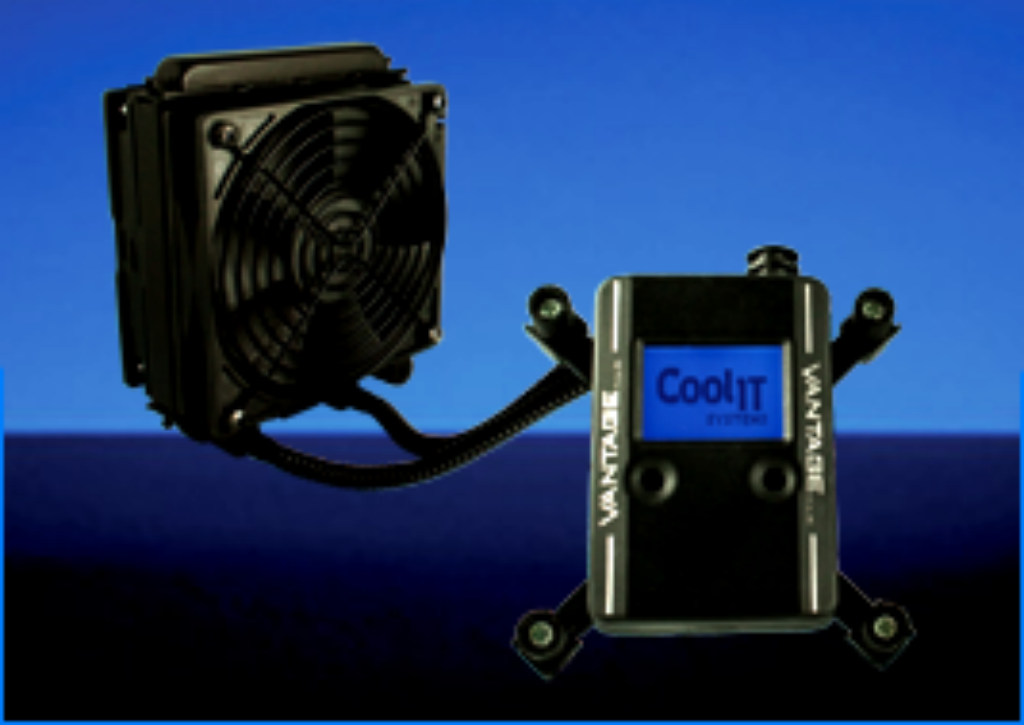
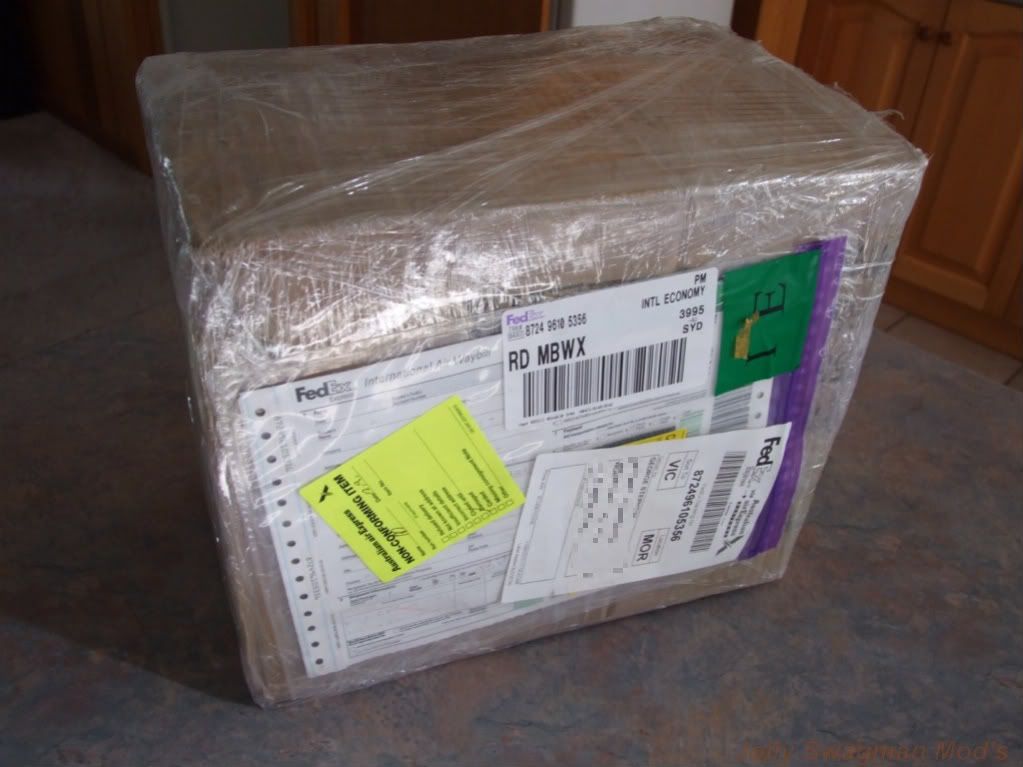
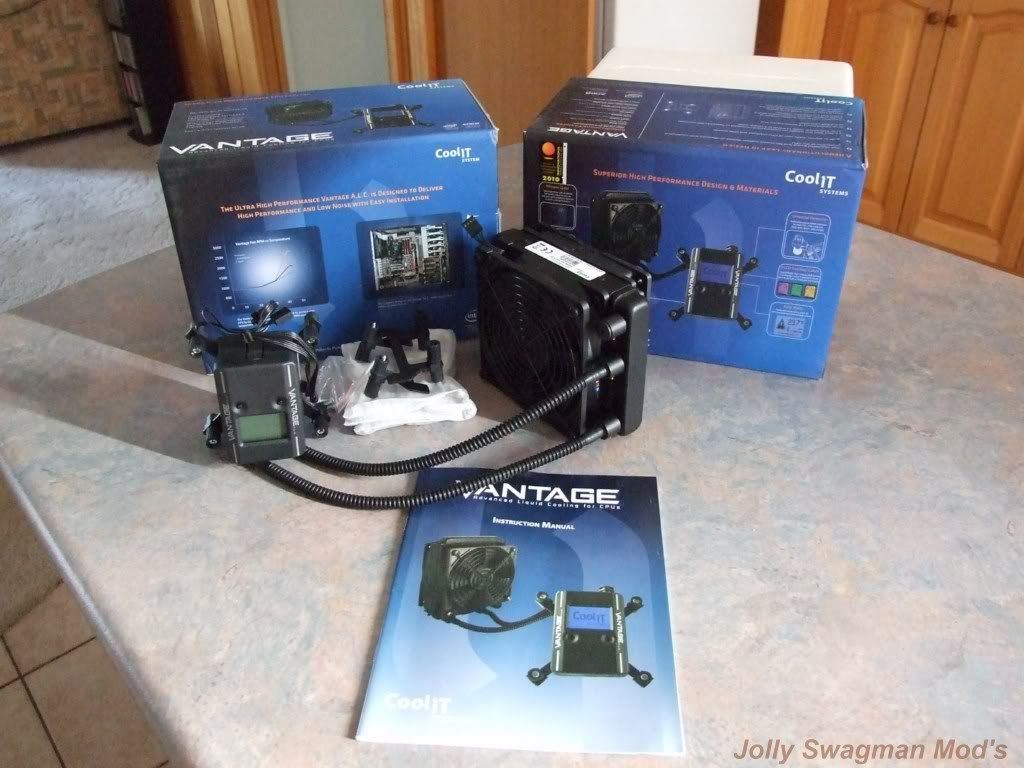
Received my Package from CoolIT Systems, containing 2 x CoolIT VANTAGE-ALC Cooler's
Now looking forward to Installing and Testing on a Couple of my Rigs,
One will go into This Case Mod Project and the other will be Tested on
Jolly's Tech Bench 2010 ,
Then will eventually find its home in my Wife's Storm Scout Rig
A very Big Thank You to Barry Reicker (CoolIT Systems)
For supplying these Wonderful Cooling Systems :thup:
Also I am the First International Receiver and the First and Only in Australia to receive these CoolIT VANTAGE ALC Coolers to date!
So Stay Tuned for some Testing and a Review of the CoolIT VANTAGE ALC