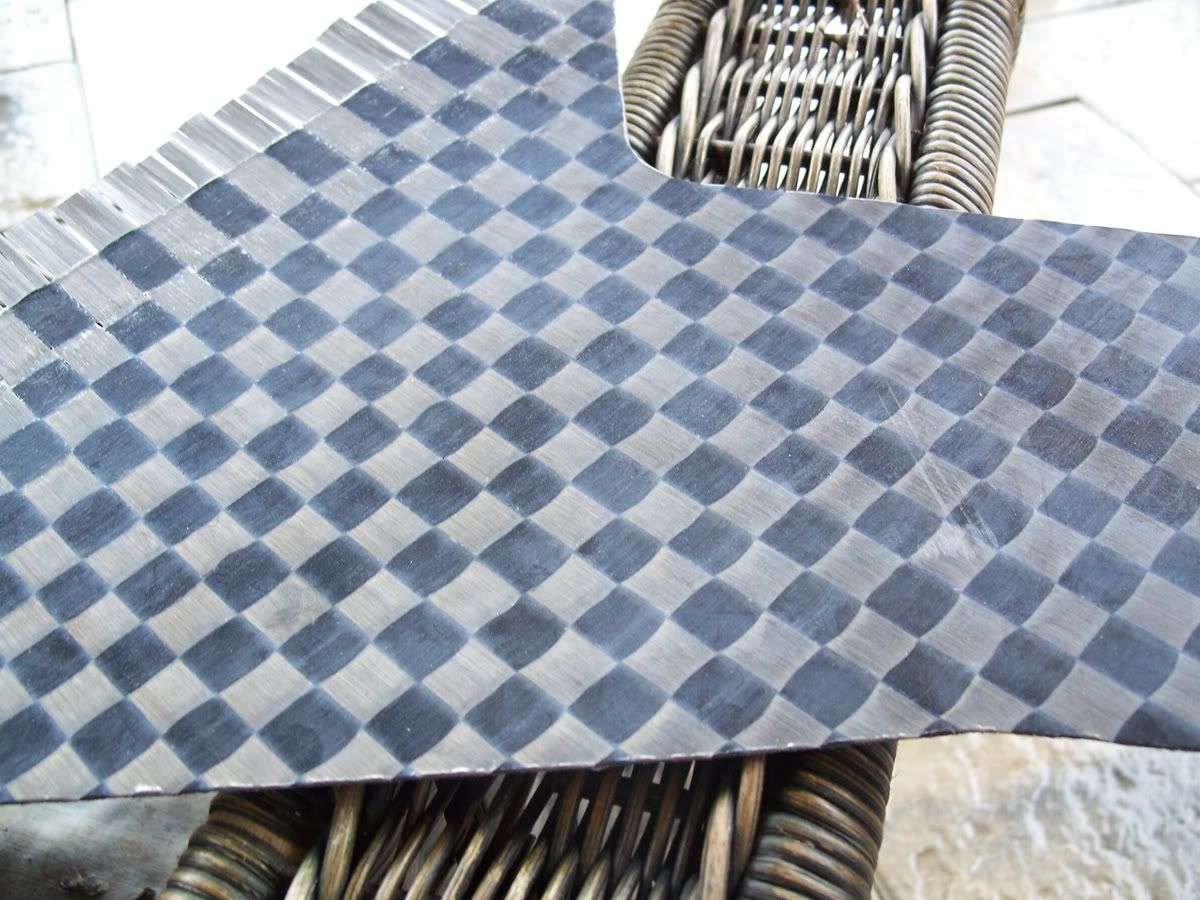
I cant imagine how many end mills you went through to cut those. I went through a spiral cutting bit and a ton of cutting wheels to cut out the carbon that I layed up

Printable View
I cant imagine how many end mills you went through to cut those. I went through a spiral cutting bit and a ton of cutting wheels to cut out the carbon that I layed up
lol, yeah.
Carbon > Carbide.
I started with the cutter plunged all the way up to the shank then every ~50inches I had to raise the cutting height about 1/16th - to take advantage of a fresh spot. Carbon is tough ****, it'll actually dull a 2 flute 1/8" carbide cutter down to an almost perfectly smooth shaft if you aren't paying attention - or so I learned.
The beauty is that with a sharp cutter you can deburr the edge with your finger nail... it makes a PERFECT cut.
I tried 'high speed stainless steel' cutters today... they lasted all about 10inches. Ironically SB Simpson charges $12 for 1/8" carbide cutters and $15 for the ss ones.
You know you're getting too complicated with your design when your 'test fit' takes you an hour to setup...
More teasing below:
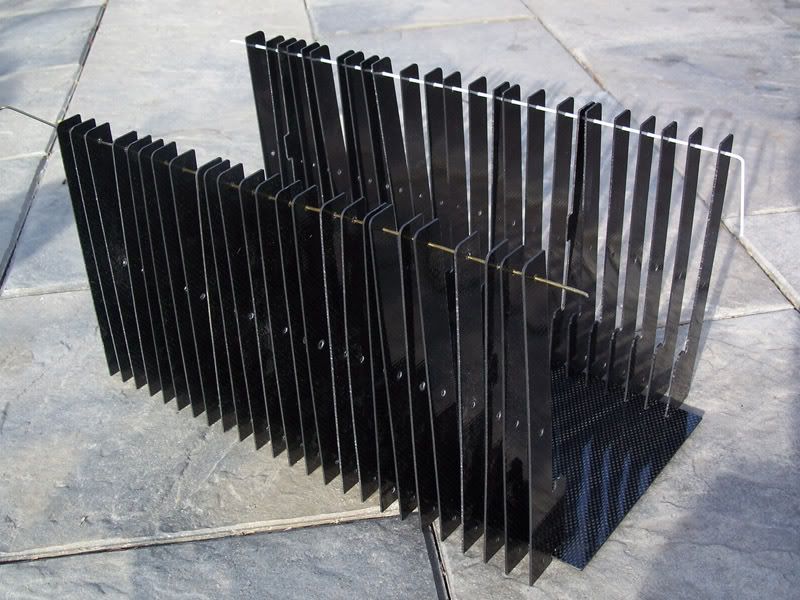
This was just a 'quick' mock-up using coat hangers to hold the pins in alignment. The final setup will have additional support below the 'pretty bottom plate' that the fins are slotted into. There will be a piece cut from 8.5mm thick carbon plate in the exact same cutout pattern as the 'pretty bottom plate' that will offer more support for the fins and also more bottom stability.
Enough chit chat... here are the pics:
There are 3 different types of fins that will be positioned in specific places in final construction.
You can see the random order - this was done just to make sure all the fins fir properly... oddly enough a few needed some filing.
Normally I wouldn't share this stage but I've been hounded for more pictures on most of my worklogs for this project. Of course the fins will all be cleaned, filed, polished, and spaced parallel (and illuminated!) when all's said and done... but that comes later.
Tune in soon for more. ;)
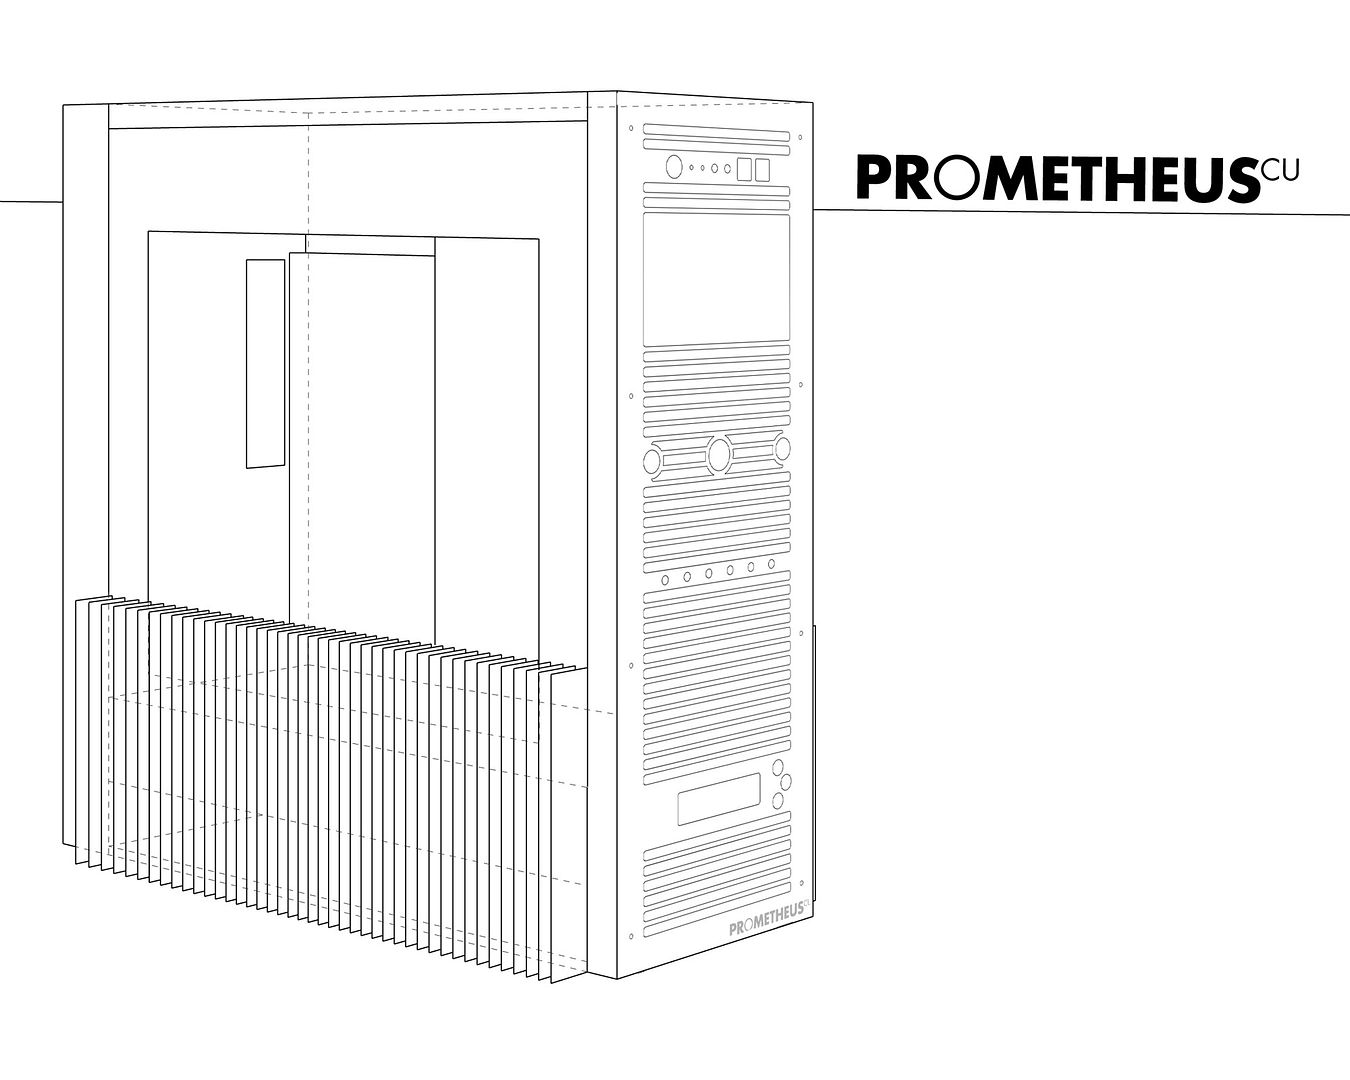
I thought that I should post some updated sketches showing the final outcome - more or less:
Exploded:
*click for big - 2000x1600*
Assembled:
*click for big - 2000x1600*
I don't know if I would say that. But gawd this is going to be pure awesome. :banana: Looking forward to seeing the copper added.Quote:
Originally Posted by Langer
No pics :(, gotta wait until I get home from uni ;) lol.
Dude it looks amazing. That is odd though that even though every fin was cut the same that some need that filing. it happens though everything is not always the same. Cant wait to see the case actually nestled in there. It is going to look hotttt!
/\ enough said...
Dude, you are a mod god.
Teaser pics:
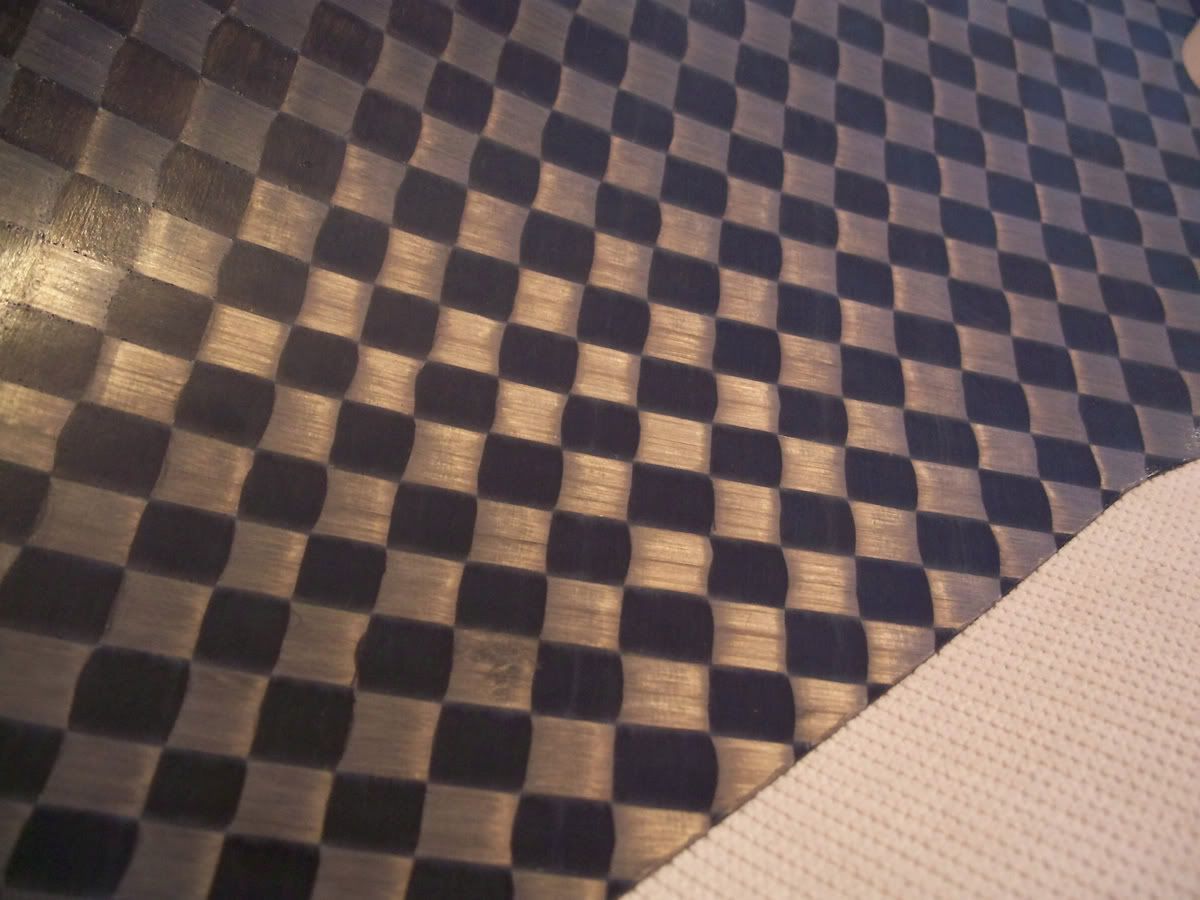
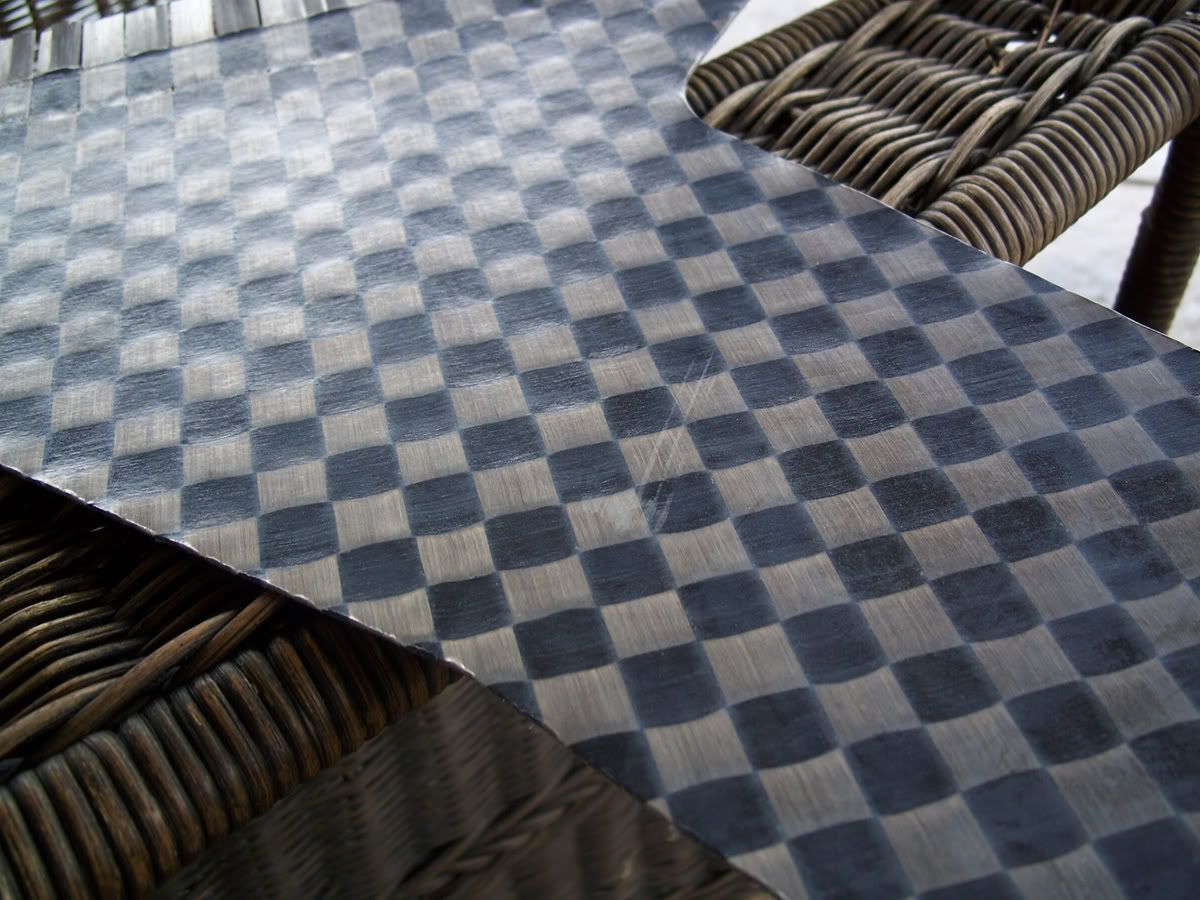
EMI shielding that was actually made for shielding the U.S. Presidential helicopter. The sheet in the images below is some of the remaining cutouts - the rest of it is inside the 'dashboard' protecting the radios and other instruments.
I will be using some of the 'scrap pieces' to shield my sound card, SSDs, and my ZenHead portable amp (lol).
Excuse the crappy images, my point and shoot isn't good in... well... any light.
yummy
looks awsome dude!
maybe the reason it needed filling was that the bits were worn down?
anywhooo, cant wait to see it more asembled!
... where the hell did you get that :)
Hey guys. I'm a member of bar-none the most over-the-top watercooling forums on the planet. RealRedRaider.com
Like a geeky Jehovah's Witness I'm here to conscript.
For the past several months myself and about 200 of the top minds in watercooling from around the globe have been posting discussing and sharing our knowledge. I've learned so much from the few over there - it's unreal.
My intention is not to pull anyone away form this great community here at TBCS, I'm just inviting you all to come and check it out, (admittedly I do have a darker purpose but I'll get to that below)
The time has now come to branch out and seek new posters.
We are gearing ourselves to be the best 1-stop shop for watercooling on the web.
I cannot express to you all enough to what an extreme degree the enthusiasts over at RRR take the hobby of watercooling. No-where else is there a community of specialist so keen to help and share, (and of course give each other a hard time along the way).
We've decided to hold a recruitment competition - one that I plan on winning =). The one to pull in the most recruits is set to win a $100 gift card for www.sidewindercomputers.com
Check it out, sign up, start posting and tell them LANGER sent you:
RealRedRaider
Gonna check it out now mate, I have heard a few good things about that forum and it's always to get more info on W/C.
well... i planned on signing up anywhoo so why not use it for your advantage:P you can always send 50% of that gift card to me;P
No fair, I want some gift card lovin lol.
you can have the other 50% :P? deal:D
Sounds good to me haha.
Already a member, so sorry, can't help ya on that one
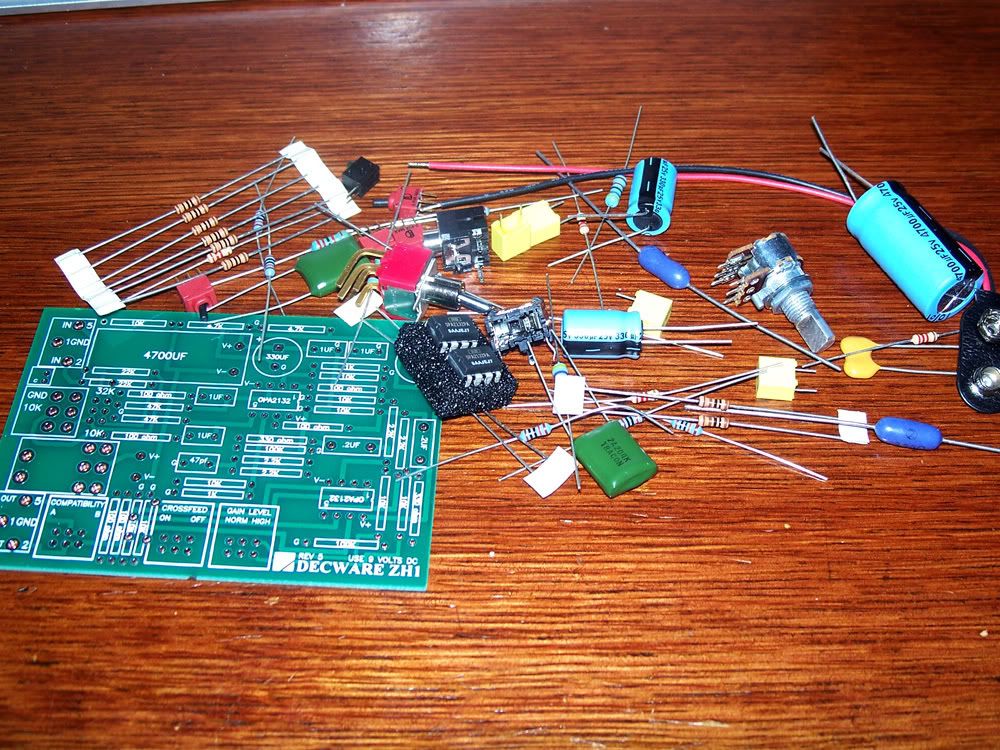
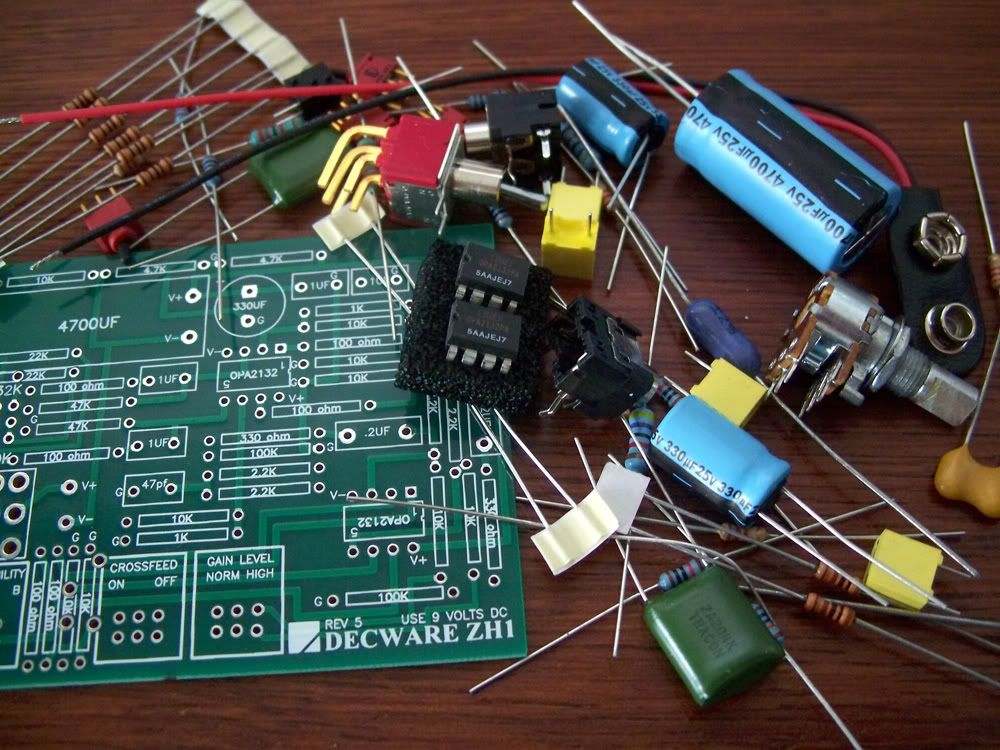
My portable headphone amp has arrived. It's a Decware ZenHead kit.
I can't wait to get this baby put together... I hope to make my own carbon case for it this week.
Here it is... sort-of
If you'll excuse me I have a date with my soldering iron.
[later that day]
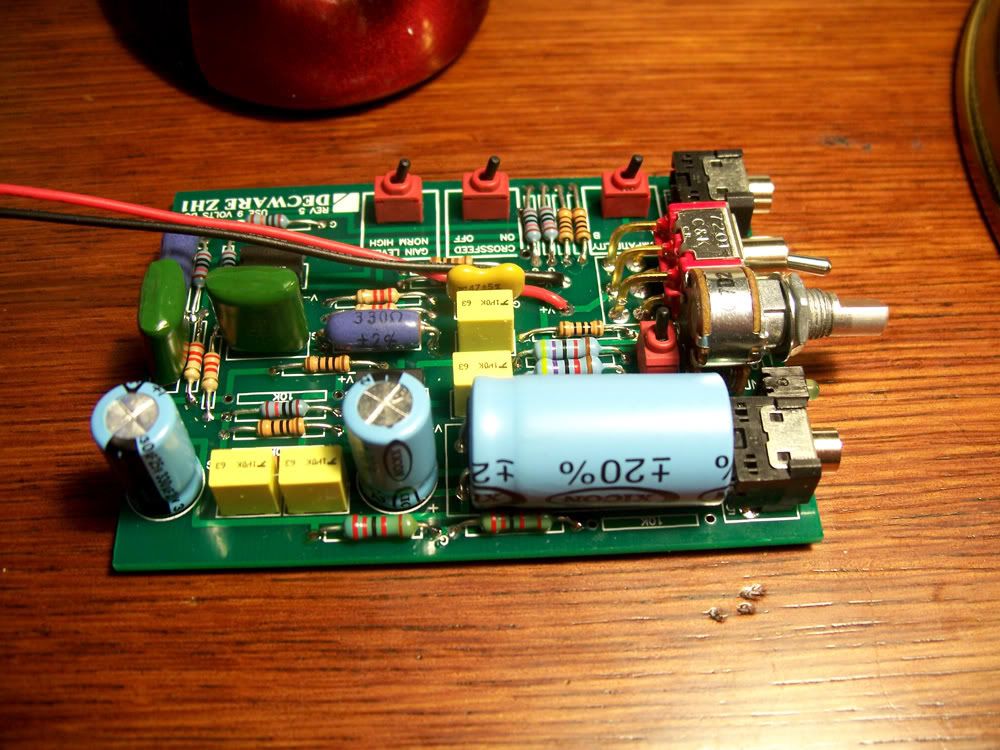
Progress + Caveat:
First the Progress
The the Caveat:
Bloody Decware forgot to pack 3x10k resistors!
Ahhh, but as chance has it I have a collection of resistors.
However chance is a real son-of-a-gun - my 10k drawer is empty.
Message sent to Decware requesting expedited replacements - but I'll just take a trip to the hobby shop tomorrow.
ahh... looks cool... bl with the resistors...
one of the kits from school did that
but just went to the draw :P
Nice soldering mate. How much does one of those kits cost? I may get one to plug into my sound card, ultimate headphone goodness lol. Then when I get my Seinhesser HD800 canns (when I have a space 2Klol, yeah right) it will sound insane.
*EDIT*
Just had a look at the link properly, an introductory price of $295 is pretty good considering stuff like that usually costs around $1,000AUD lol. The only downside for me is the fact that it uses a 9v battery instead of mains power.
DC power has it's advantages though - no AC squeal at high volumes (something very hard to get rid out in low-mid range gear). The kit is only $135, and the PCB can be had for only $25 - considering it's currently ranked 7th best portable amp in the world (according to Head-Fi) the price is FANTASTIC.
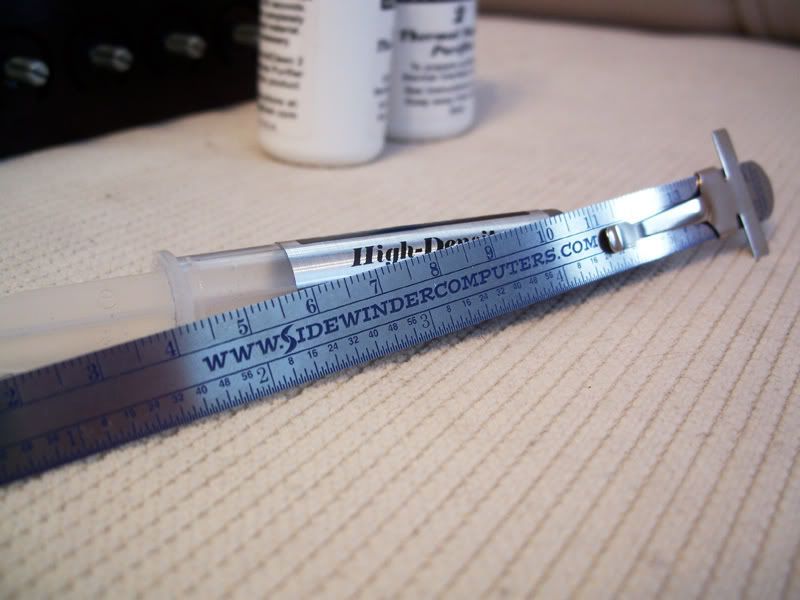
I got my package from Sidewindercomputers.com. I HIGHLY recommend this eTailer - I made this order at about 10pm on a Sunday evening. Gary, the owner, personally responded via email and thanked me. I then amended the order at about 1am, and again Gary immediately responded with the revised quote. Thanks Gary!
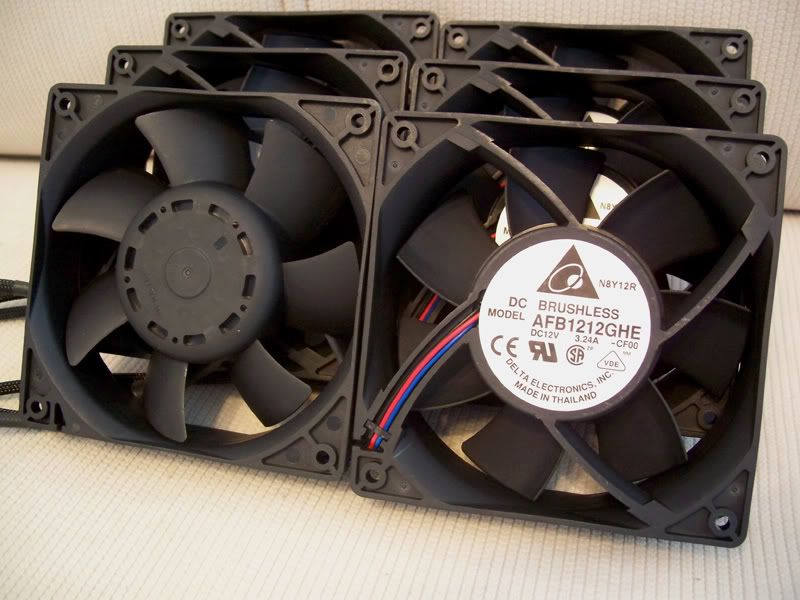
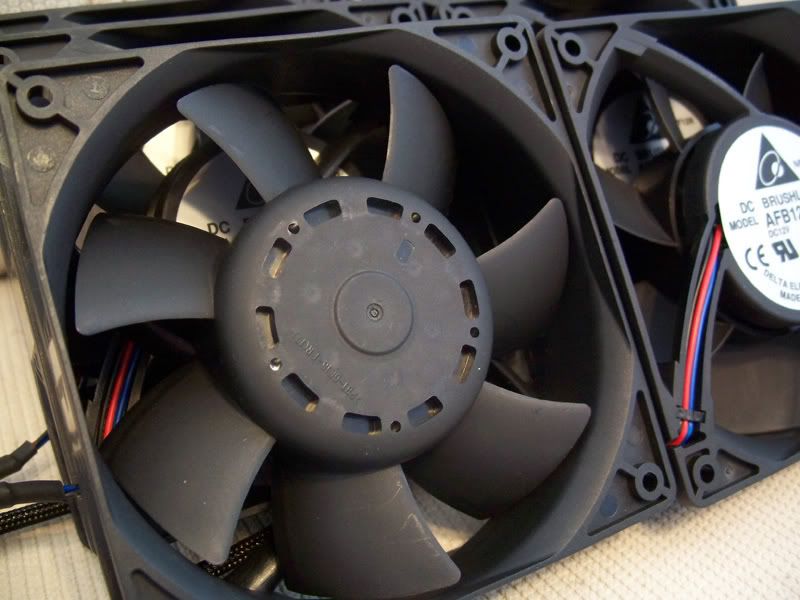
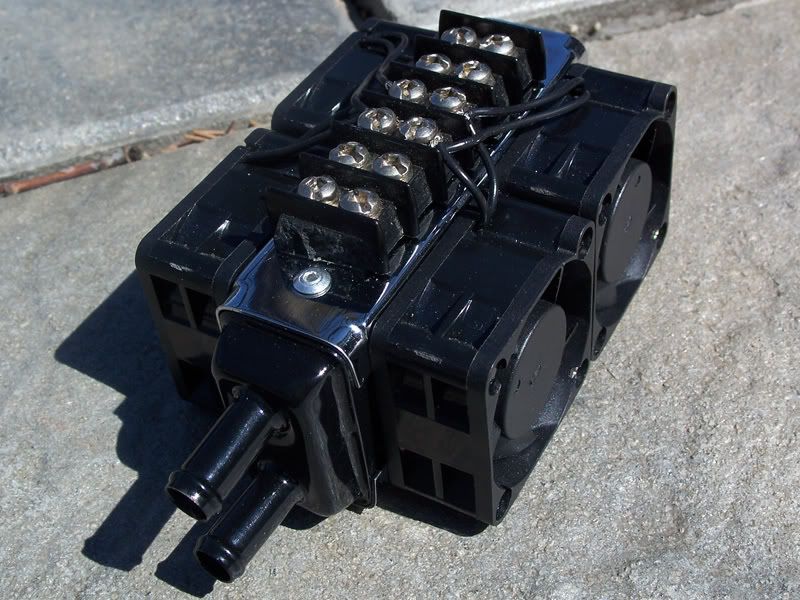
I got my Uber Fans!
Quote:
Originally Posted by Sidewinders
All 6 fans actually hover.
6 in a row run at 19-21dB at min and 67-71dB on MAX (~1 away).
Even at min setting the row throws over 85CFM at any point (~5cm away).
They have a power spike of ~40W and pull 29.4W at 12V
Which means I need to have 270W of power overhead just to turn on my fans, and another 180W to keep 'em running.
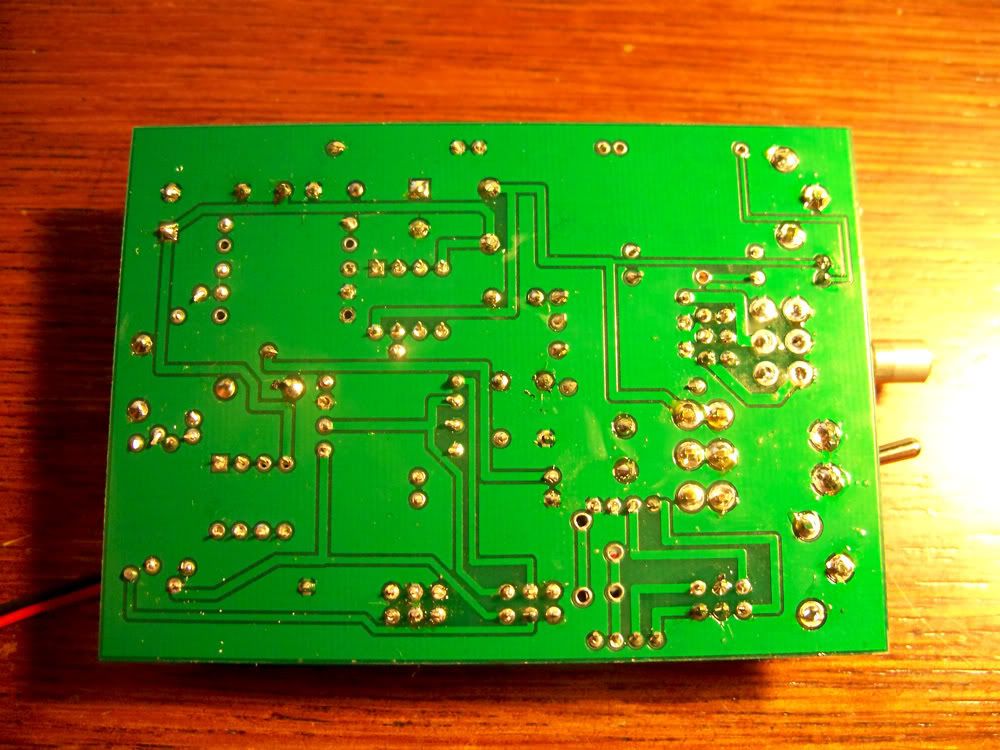
The fan controller - the build quality is nothing to write home about but I'll straighten out the components, clean off the acetone, add new heatsinks, and make a new frame.
I went with this controller because it's the only controller -that I could find- that can offer up-to 45Watts per channel.
Most 120mm case fans will draw no-more than about 2-3W - so a low wattage controller will more than do you.
The Delta Fans I'm using however draw 29.4W w/ an on spike as high at 40W so they need more beef!
Also some arctic silver TIM and TIM remover - some of which will be used in this project... most will go elsewhere.
Lastly a free gift from Gary - this little treat which I rather enjoyed because I happen to love little metal machinist rulers. =)
You are going to need some really beefy heat sinks on those TO-220s not to burn up the regulators, when you slow the fan speed down, those regulators will be dumping all of the extra voltage off as heat. I also don't know what the pins are rated for on the connectors coming off of the PCB, might want to look that up.
You are doing an amazing job on this case. I keep coming back to this site almost daily to see if you have updated or added any photos! Thanks for keeping me, and I am sure many other people, on the edge of their seats!
Cheers,
James
You seem quite a capable builder :rolleyes: obviously.
Have you though of building a pwm controller for the fans?
You'll lose alot less watts in heat. but I guess heat isn't a concern behind a set of deltas.
Those fans are insanely powerfull lol. You are going to definitely need to add bigger heatsinks to those regulators.
I did it this afternoon actually - heatsinks a la Enzotech for all. They didn't even use any TIM on the stock cheapo painted black aluminum heatsinks.Quote:
Originally Posted by me
Like said the build quality is ****ty... but I can always swap out the parts and expand of the existing design using the existing PCB in a worst case scenario... and I was expecting to have to do this when I ordered it TBH. I also tossed around the idea of making a controller if the Lamptron failed. But it seems to be working just fine. I gave it a 'burn in' for a few hours today just to be safe at a few different speeds.
Considering that my new fans frighten me, it occurred to me that someone might get hurt.
So I decided to add redundant safety protocols, just in case:
lol nice
UPDATE:
Today was an intimate day between myself and my scroll-saw. =)
I started making some carbon accents from .8mm sheet - I had a few of these sheets left over from an earlier project. Their intended purpose was the outer shell of the Acer Ferrari series laptop ;).
I popped out the stainless steel - and cut out a replacement on my scroll saw:
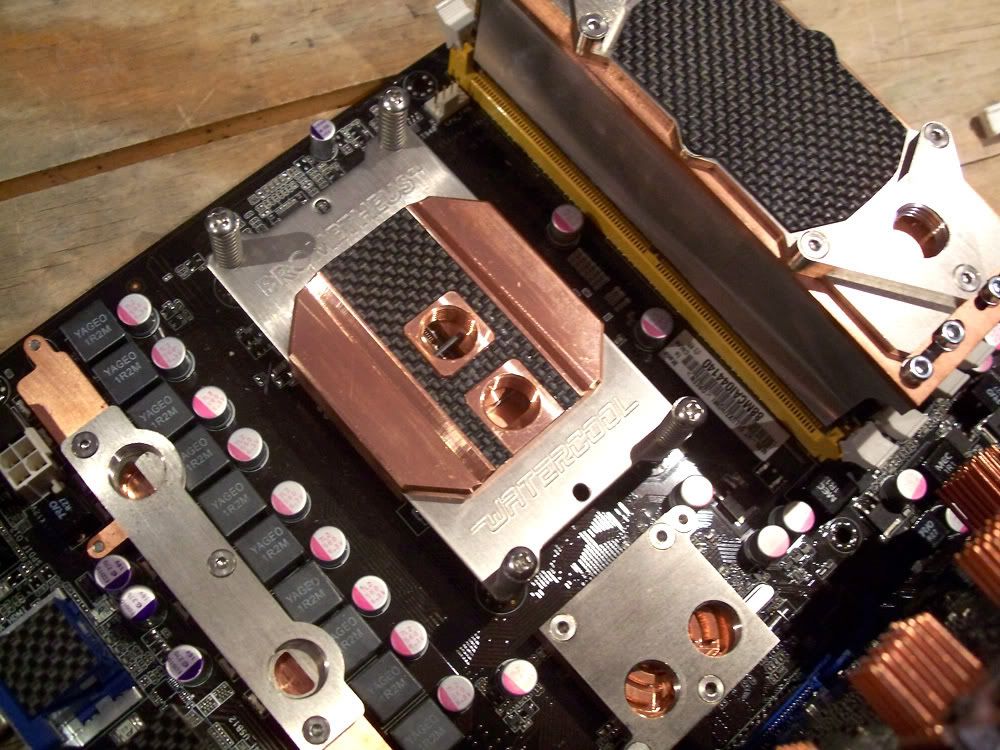
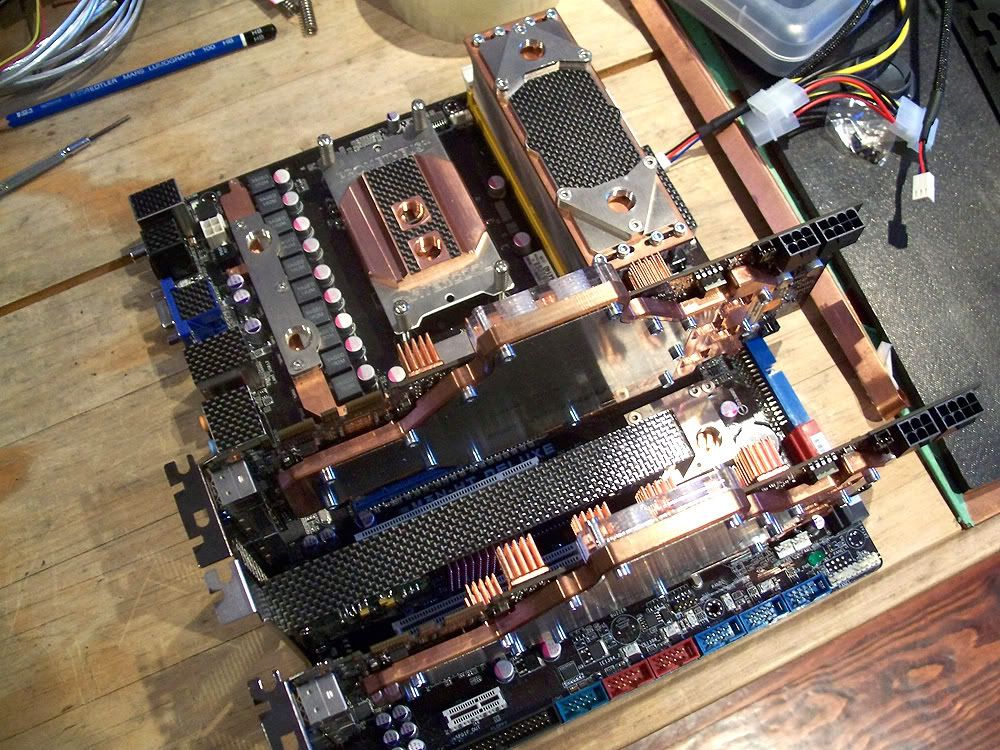
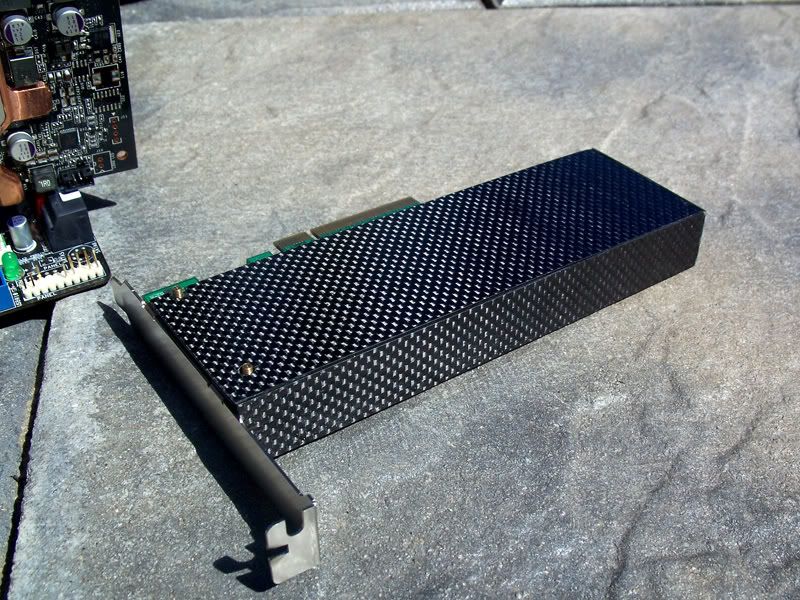
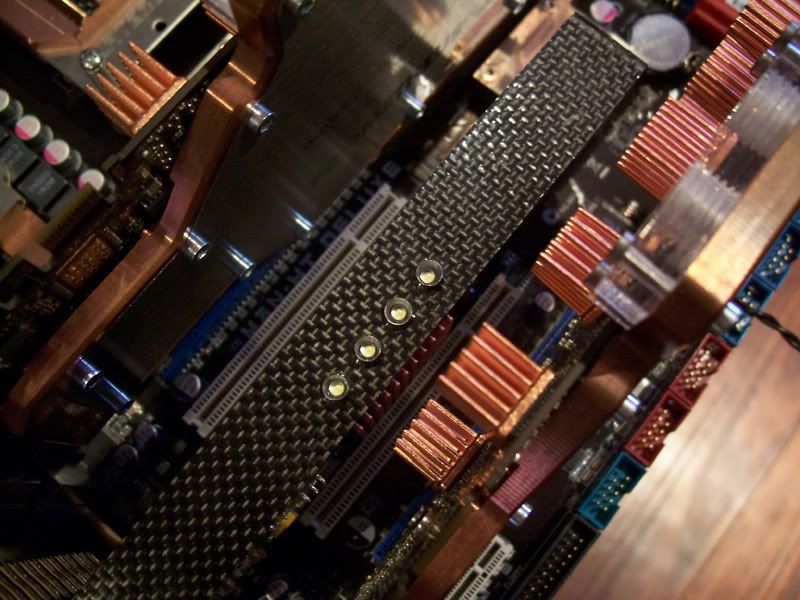
I made some more carbon covers for the I/O and the RAM.
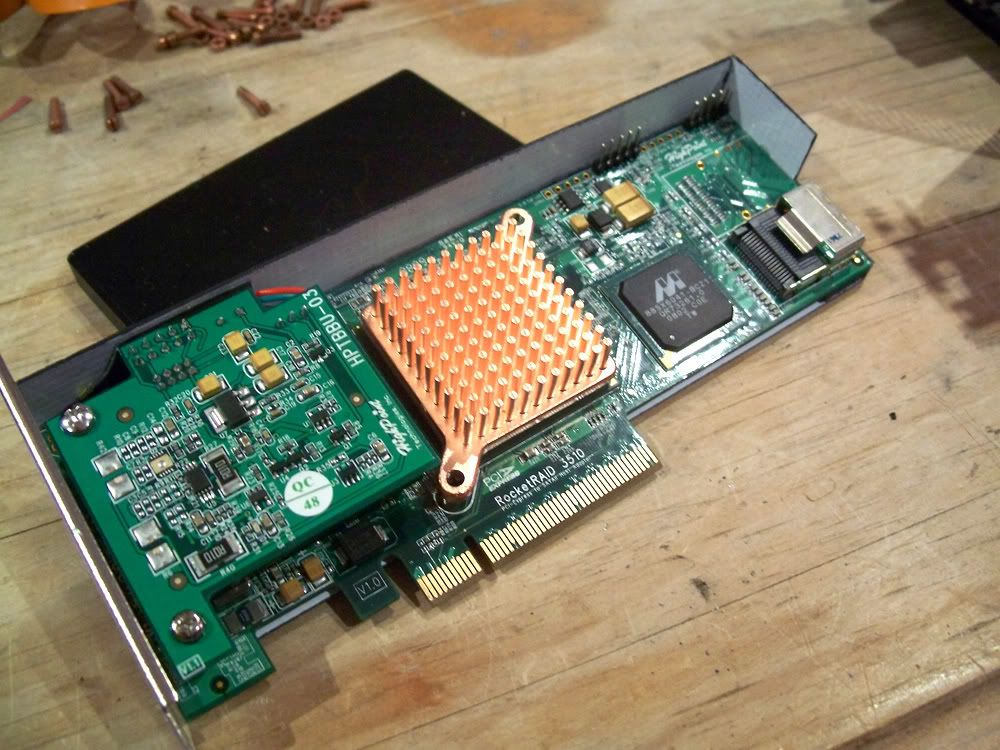
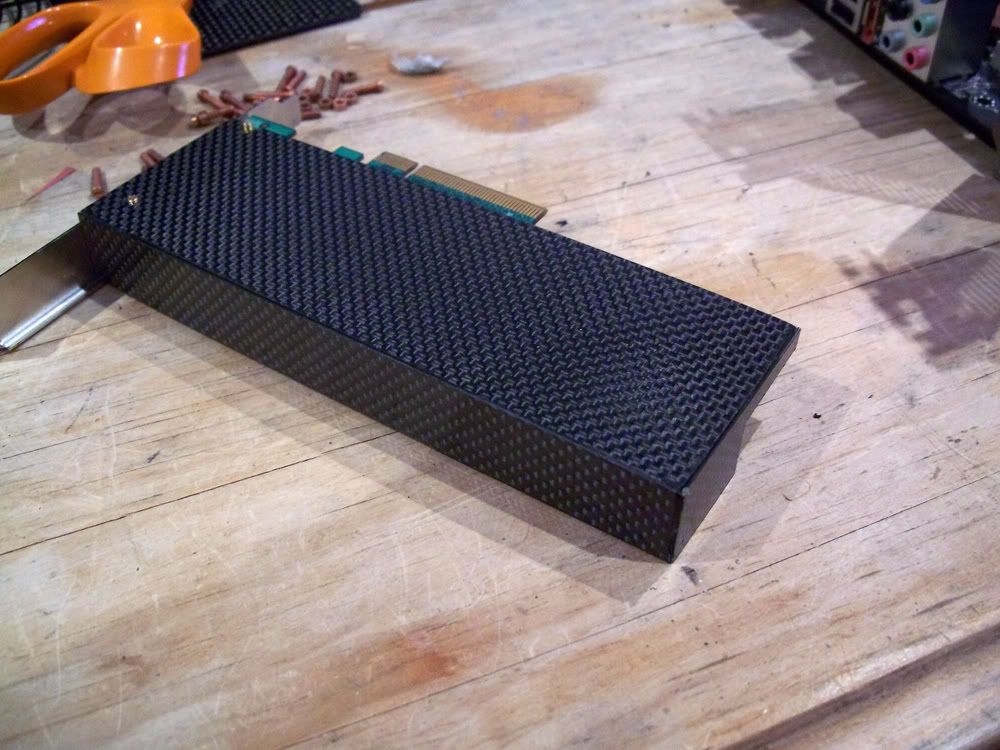
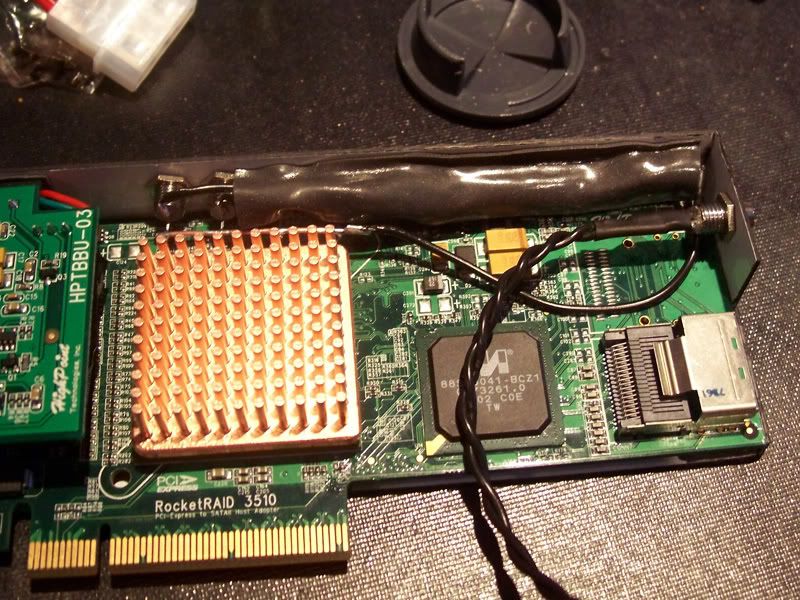
And another for the RAID card, because it's PCB was green:
I also covered the ATX plug with a little cover - because I wont be needing it:
A little overview:
I made little circles for all the fan motors as well, but I forgot to take pics. I'll take some with next update.
Tune in soon for more.
-Jesse
looks amazing! I've got some spare carbon cloth left...I thik I may just resin up a single sheet and try that...looks great! +rep
oh, what kind of blade did you use? and how long did it last?
Sheet metal snips, followed by lots of filing.
On the scroll say I just used whatever blade was on it when I arrived. This stuff is really thin, it cuts easily
I'll give that a shot. I know the fabric is easy to cut with sharp scissors. thanks!
:EDIT: have yer 2nd lt green rep bar my friend :)
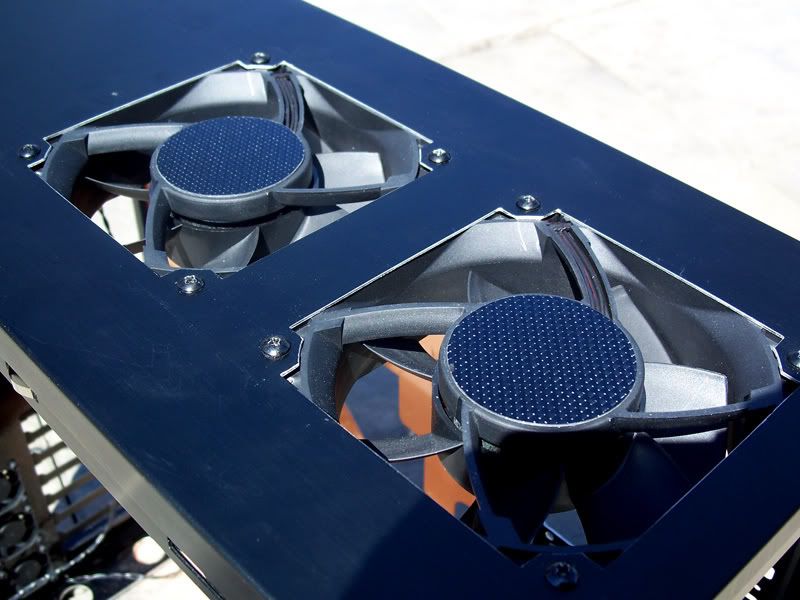
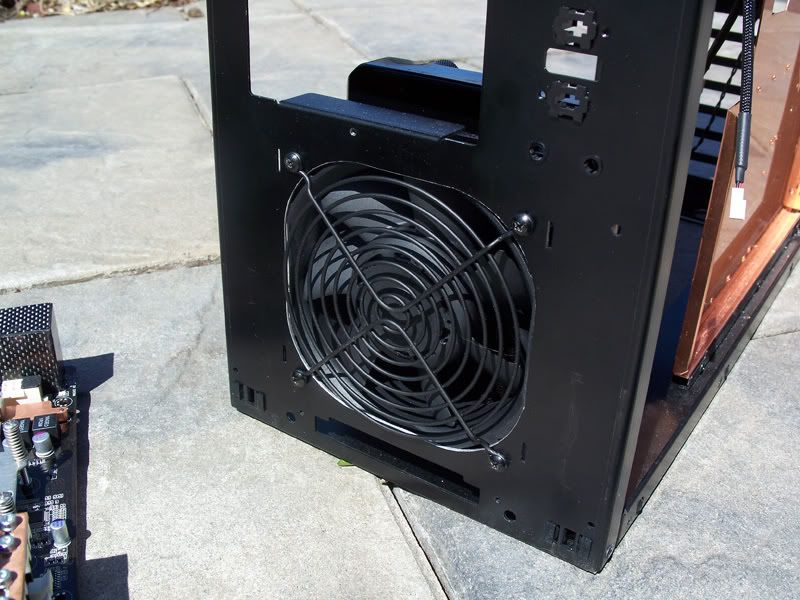
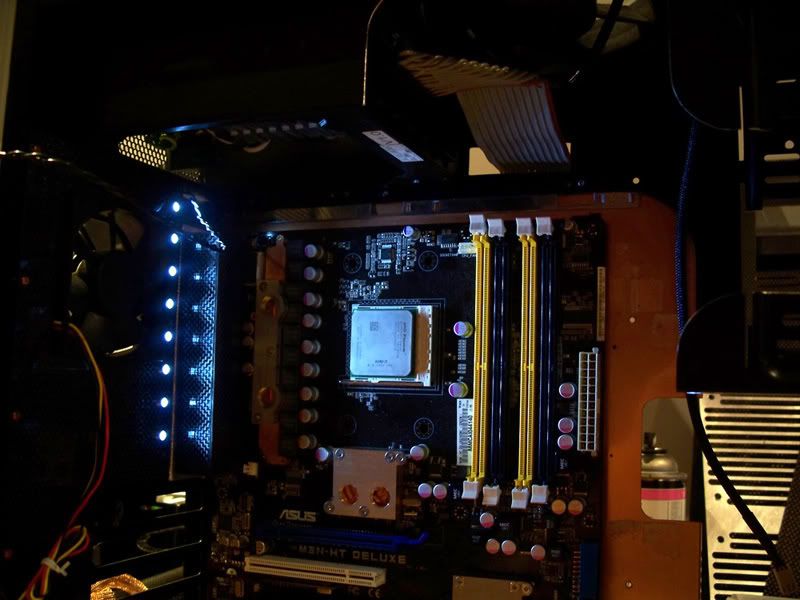
Here are some slightly better pics now that the sun is out.
The Pico's rad - push pull Kama Kaze fans (great 40mm fans, nearly silent)
=)
-Jesse
pure hottness! love it!
:stupid:
I decided to add HDD Activity Indicators to the 'RAID Box', 1 per drive. =)
I also added an LED that will just be on all the time to add a bit of internal p'zaz.
More soon
- Jesse
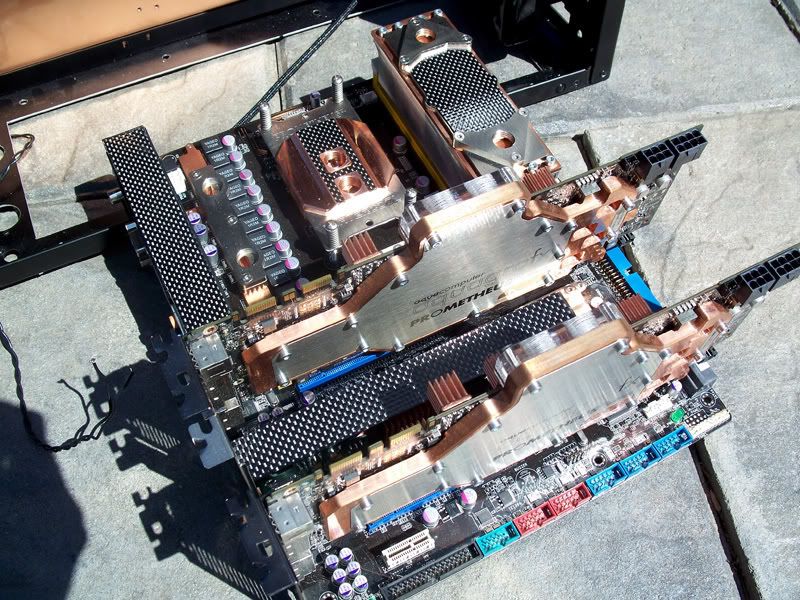
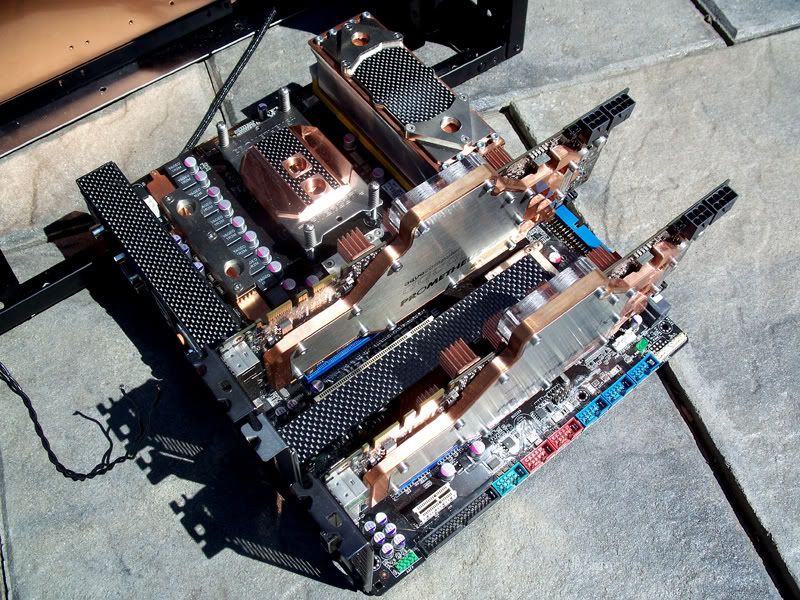
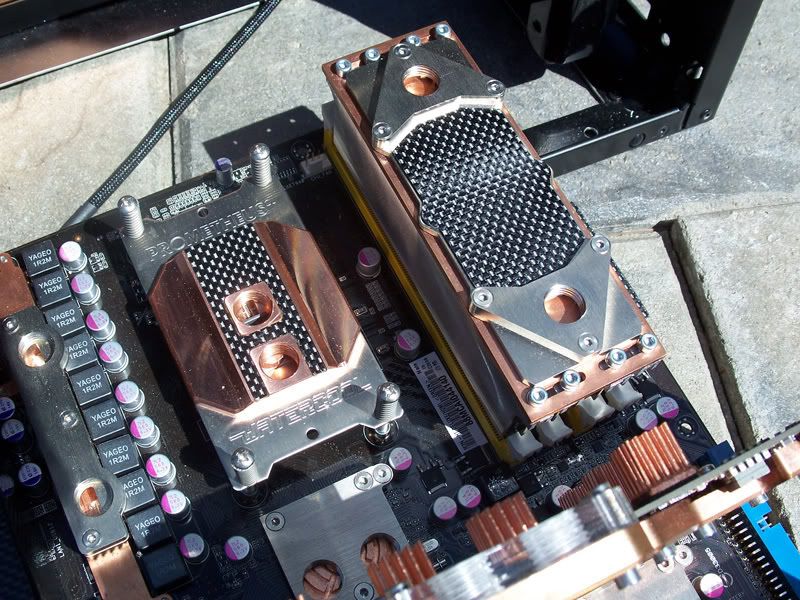
Im not entirely sure on what word describes that mountain of toned carbon fiber and copper...
+rep
5 minutes later and I still cant stop staring at these.. its..
Thanks a lot mate... and if that's the case, you'd better pull up a chair:
JUST A TEASER:
Anyone who has ever sleeved an ATX plug knows its a pain in the ass...when you have a half inch of wire to work with it becomes a painful... when you then have to cut, crimp and solder the pins onto the little stumps it elevates maddening... if not enough - getting the ATX plug onto that mess could drive a man suicidal... and don't even get me started on the soldering end.
Suffice to say - won't be doing this again with a ribbon cable!!! It made the process about a million times more difficult.
The ribbon cable will be coated in black rubber so as to keep things perdy.
More soon. I need to run the 12V power and make the ATX power black, amung other things.
Tune in tomorrow kids - same bat time; same bat channel!