Um, Hey man great work so far. But I do have a question. It looks like you put a rivet directly into the radiator. Is there something there I'm not seeing?Quote:
Originally Posted by Langer

Printable View
Um, Hey man great work so far. But I do have a question. It looks like you put a rivet directly into the radiator. Is there something there I'm not seeing?Quote:
Originally Posted by Langer
Factory rivet. I just used VHB tape to hold the power distribution in place.
Keen eye though, points for that.
langer it is really looking awesome! Last night I was laying in bed, thinking about this build and I had a brainstorm! Then I woke up and saw that you got the wires successfully soldered to the board. My idea was to make a 90 adapter for the 24 pin plug so it would come of the board to the side. But I must say that you do an amazing soldering job! I like the HDD activity LEDs, I was really wondering how you were going to wire them up. just using the mobo's activity plug, or is there one on the raid card? Awesome job man, so happy you came back to the mod!
Ah, ok, I figured you would not have done that yourself. LOLQuote:
Originally Posted by Langer
Espo - Check out markkleb's (aka MKmods) work - he's the pioneer of the soldered ATX power trick.
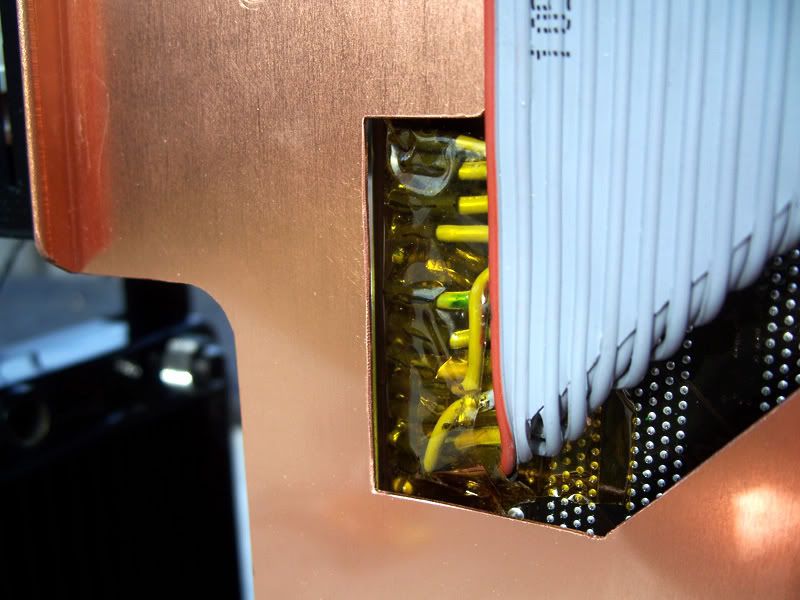
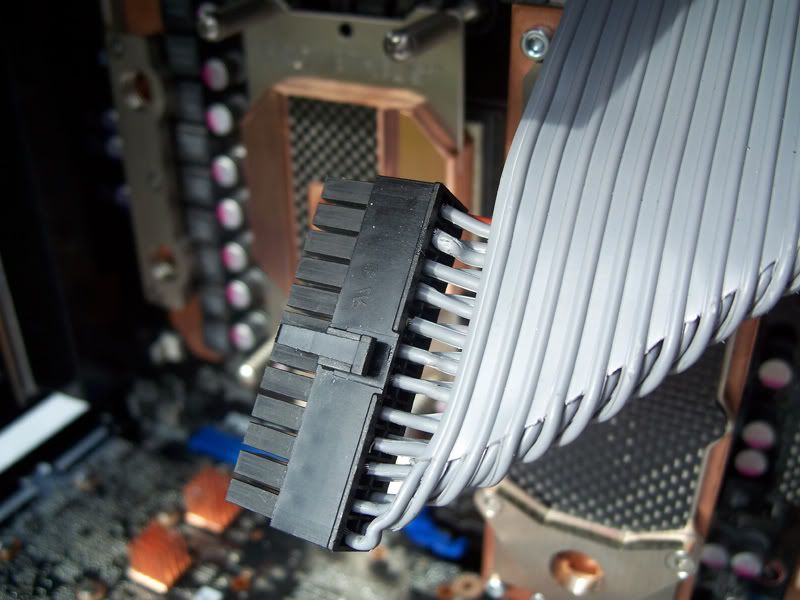
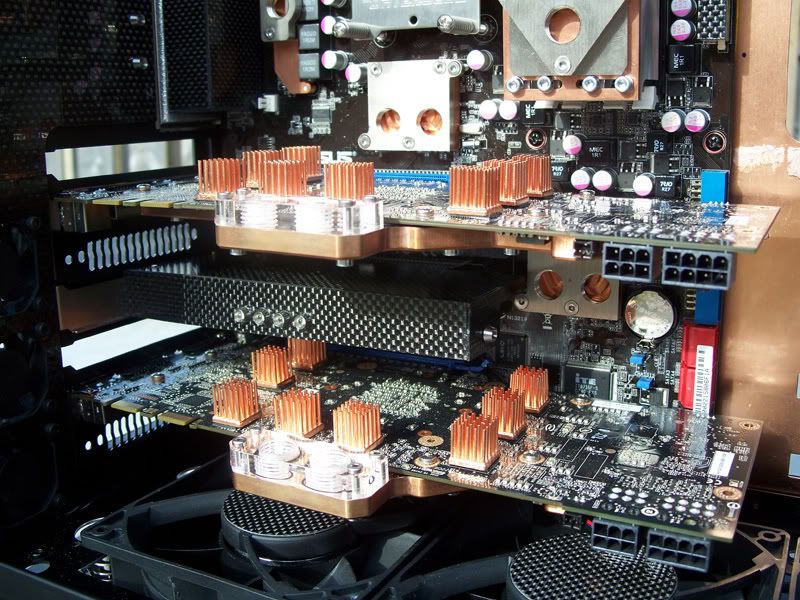
Here are some better images of the ATX wire - still without a black rubber coating. I tried to get pics of the solder joints but it'll have to wait until I next remove the motherboard.
This wire probally took me 5-6hours to fabricate... and another 45mins or so to solder it in place.
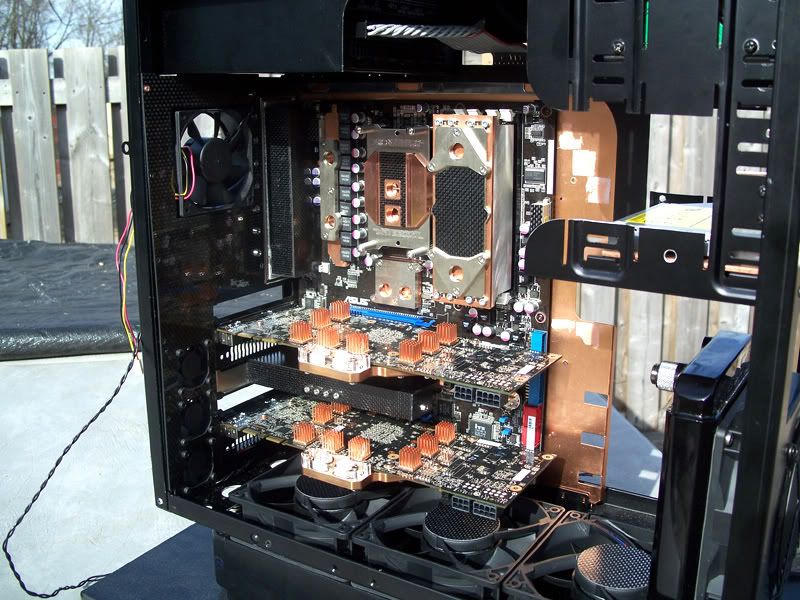
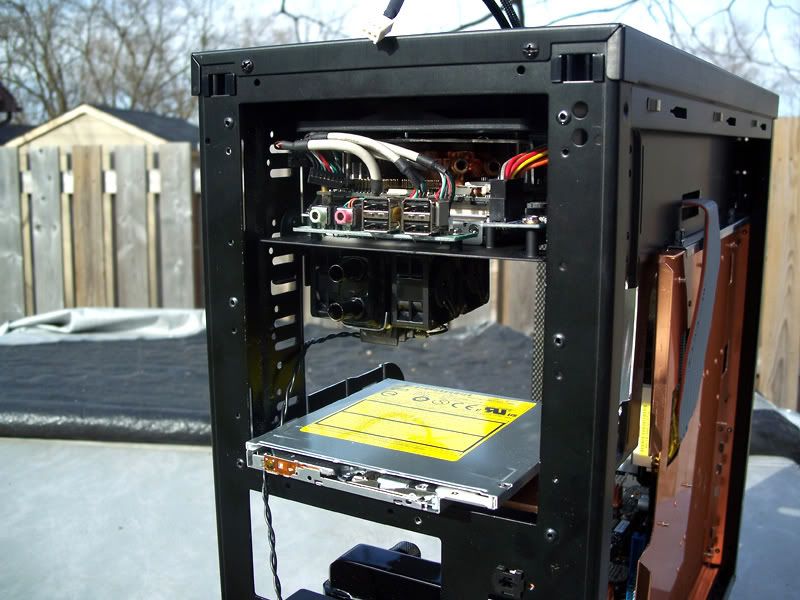
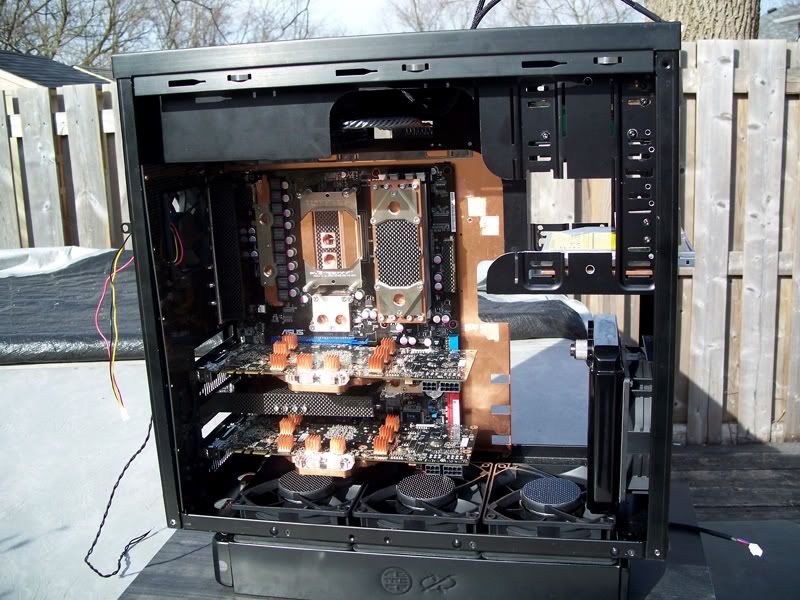
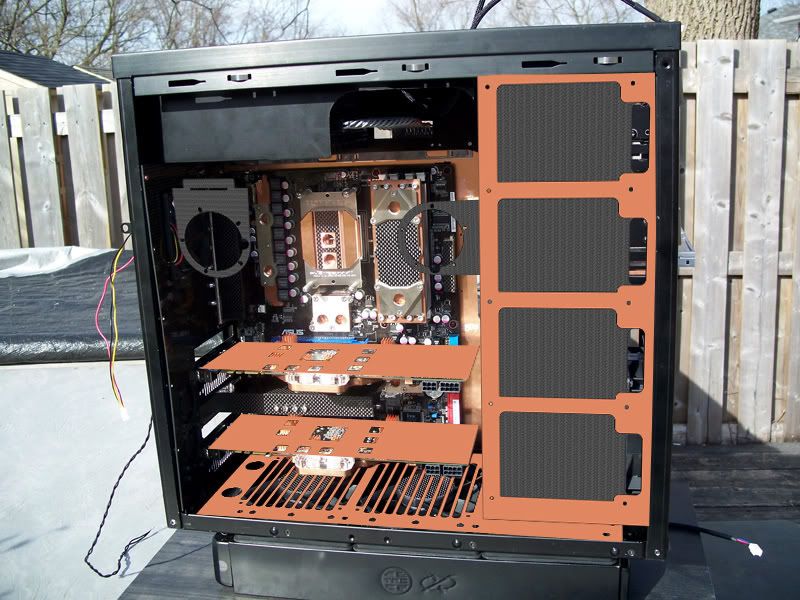
The sun was out, so I did a fit test today. I'm pleased, I hope you will be as well:
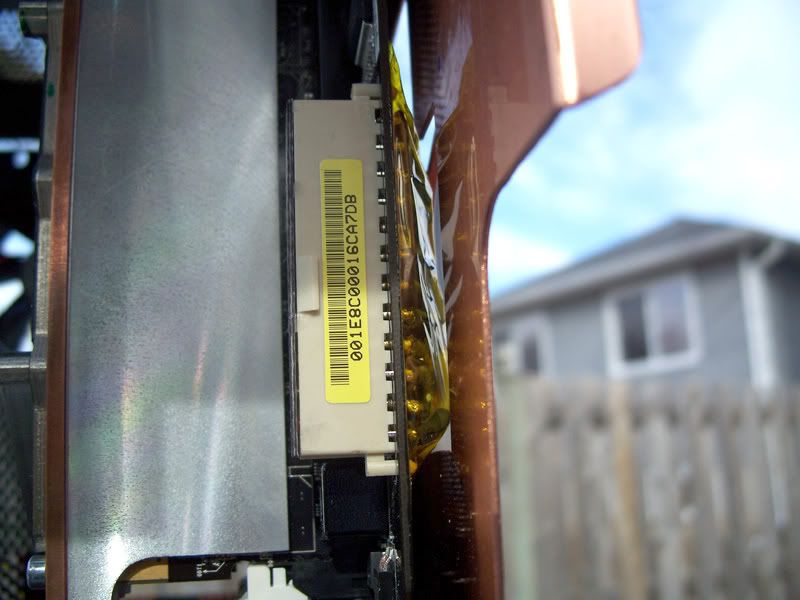
Here's the Pico-ITX w/ it's 40mm rad hanging below via VHB tape:
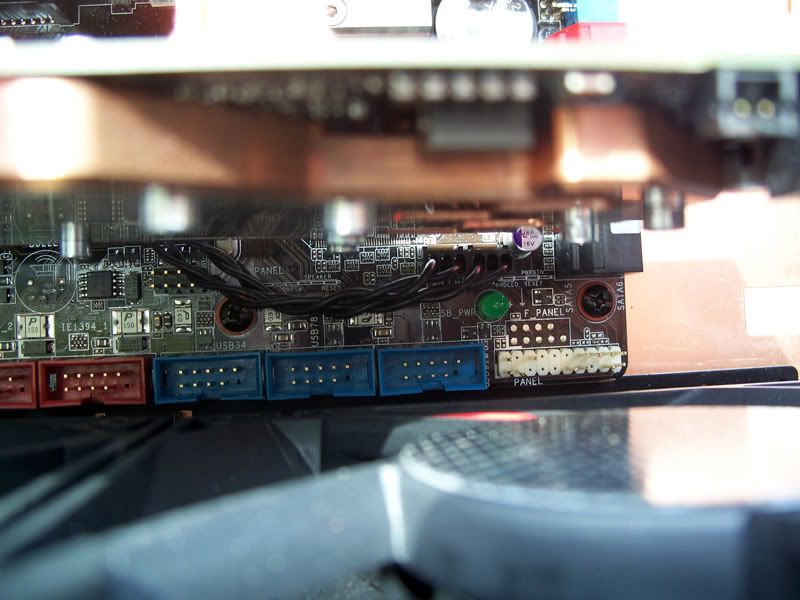
Power source for the 40mm fans on the rear chassis wall, and the LED on the rear of the RAID card:
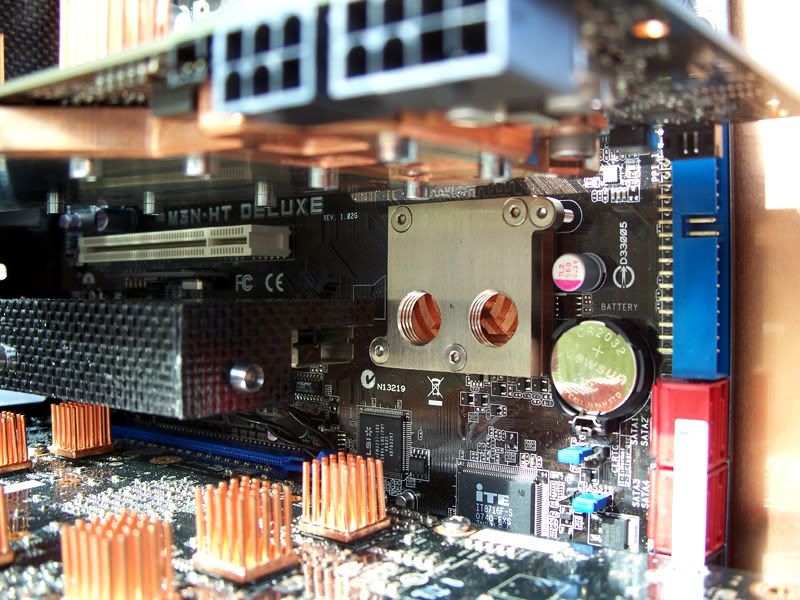
Note the SATA port location... right smack in the way of the watercooling ports - I'll have to flip this block 180degrees
I'll leave you with this for now:
More proper updates later. I'm going to do a little experimenting with the Ethernet port -among other things- this evening
one of the things i respect the most is the fact that you have taken this thing apart, and then put it all back together just to take it apart again more times than i remember...
i like this build, and looks foreward to the day i can see it finished:)
Thanks man. It's only a few weeks from completion now.
Every time it goes together I learn something new. I tried estimating my sizing in the beginning - the pcs worked but I demand higher tolerances.
this thing is gorgeous, I cant wait to see it done!!
Soon... soon.
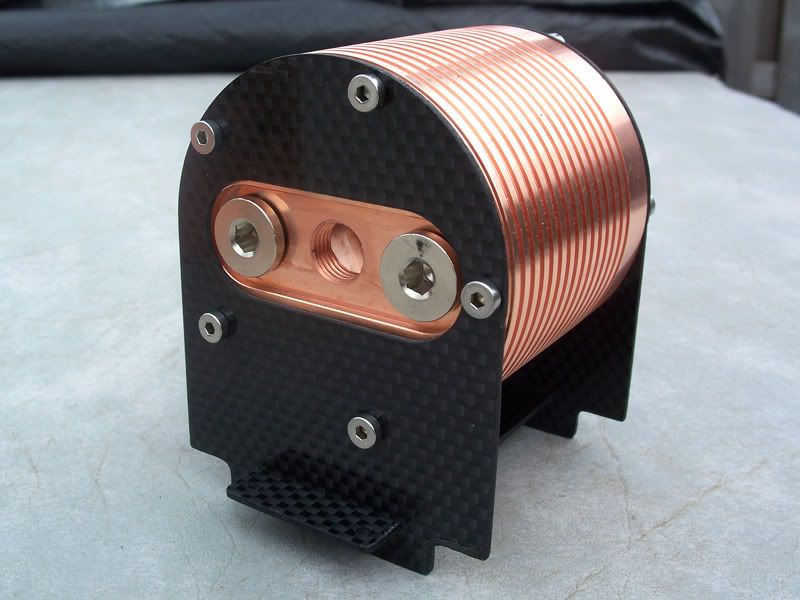
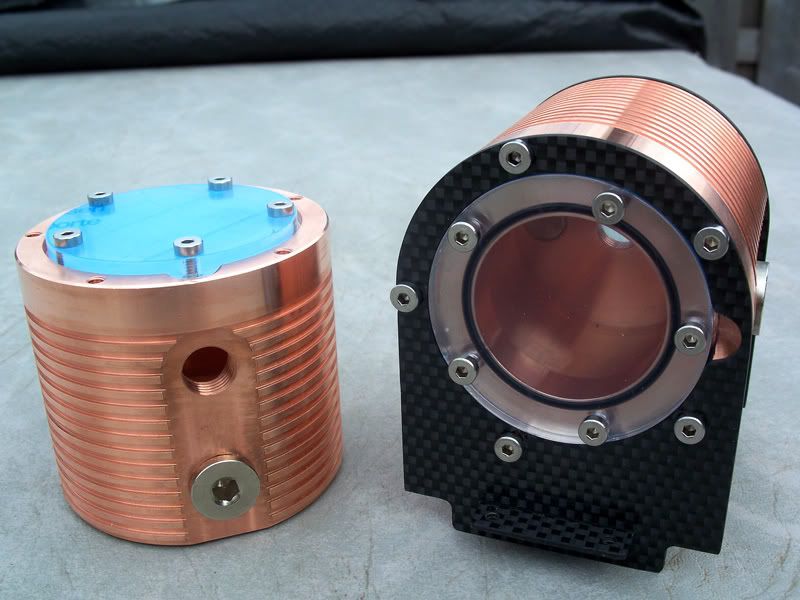
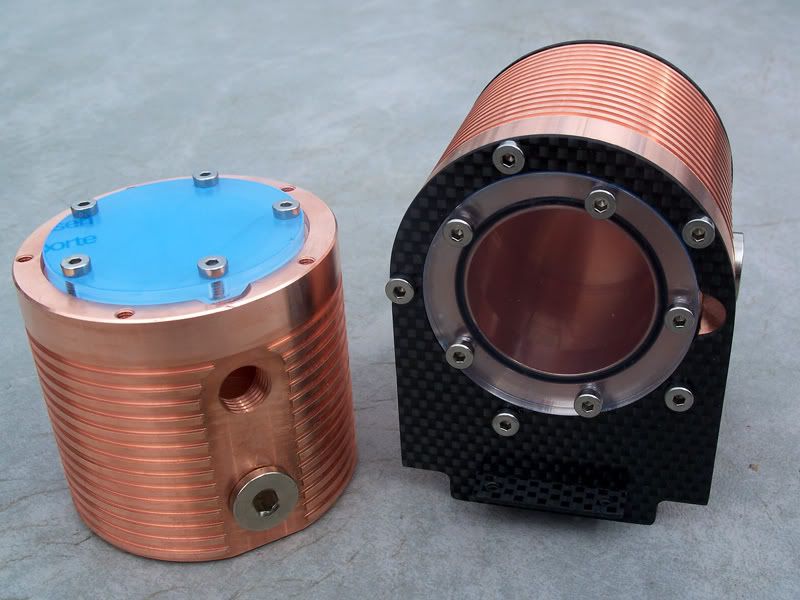
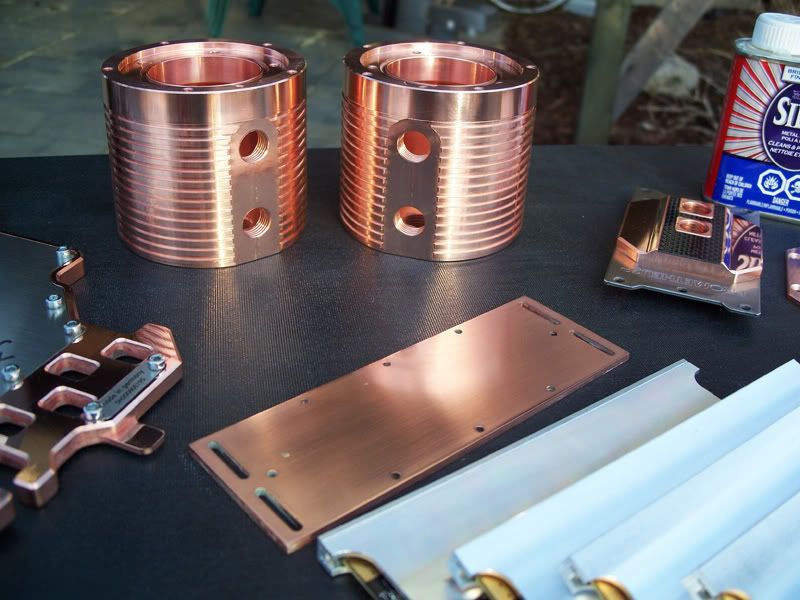
So I FINALLY received by two Copper AquaComputer AquaTube reservoirs today...
These are MAGNIFICENT - they weight a tonne but they are so sexy. Lots of respect for AquaComputer!
tasty
Simply Amazing. Love your work! Can't wait to see the final glamor shots.
i love this build. its kinda "sad" that it takes so longe to see it be finished hehe because i wanna see it done now.. been drooling over this project a long time now, you du have skills when it comes to build. rep to you
Many thanks gentlemen. Completion will be soon upon us. =)
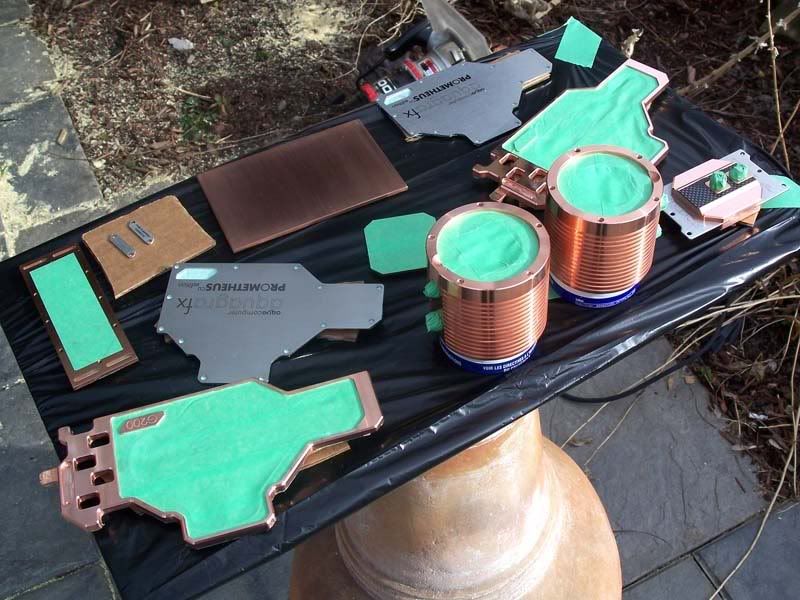
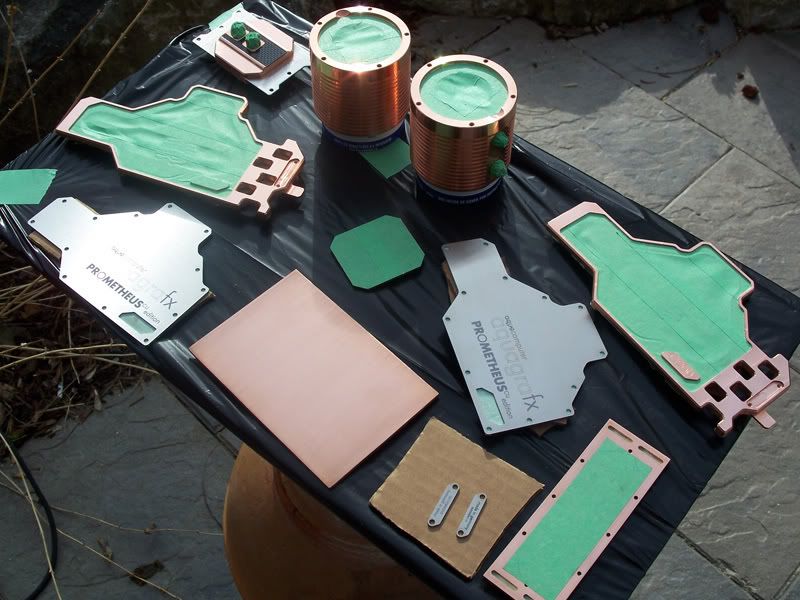
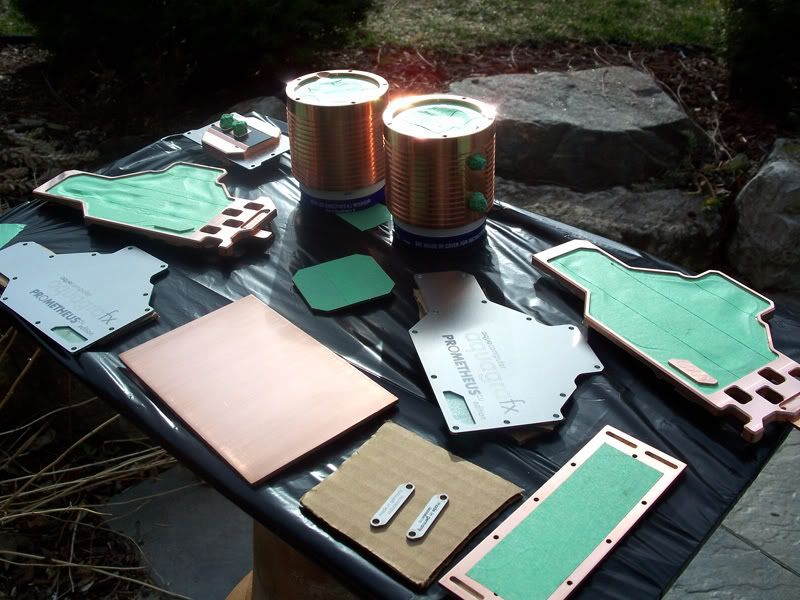
This is far from the prettiest thing I ever put together - but it gets the point across and I did it very quickly.
I crudely added in some of the parts. Including a very rough idea of the final reservoir locations:
Here are the latest iteration of the reservoir mounts - it took about 5hours of measuring and remeasuring to be certain that they are level with one another. I don't want 2kilos of copper throwing off the visual balance.
The "right" res will hang from the PSU area in the front and the back will mount to the fan - it's mounted so that it flows straight into the mosfet block. I'll need 4 spacers at the back to keep the reservoir fronts flush with one another.
The "left res fits into the slots on the hdd bay cover plate.
More soon.
:bowdown:
I have only been off the forums for about a week now but I can't believe your progress. Everything is looking simply amazing. Those reservoirs are nice, have they been pre coated with a copper finish? You wouldn't want them to tarnish.
The Boy 4rm Oz - Thanks a lot man, as always. The reservoirs are solid copper - and they weigh 1.9kilos each. I'm going to polish them then coat them in Varathane.
This is one phenomenal build bro, just excellent design and methodical detailing. Great job!
This build keeps getting better and better. Keep up the good work!
Thank your both very much. As always - much appreciated.
So; I made a 'little' spreadsheet this evening.
It's a complete itemized list of every part and component in Prometheus - it's price, retailer, SKU, etc.
It turns out that Prometheus consists of 227 different parts (meaning duplicate parts are not counted).
This composes a total of *1413 individual pieces (not including the molex pins 1642 pieces if you count the pins.)
The total MSRP value of this project is a fair bit higher than I had expected actually... My heart jumped a couple beats when I totaled the bottom line.
Turns out I'm bat sh*t crazy afterall.
*edit 1413 individual pieces not including pins. I miscalculated.
OMFG, that is an insane amount of parts lol, still, well worth it IMO lol.
Damn, 1.9Kg each for the reservoirs, that's insane lol.
crazy :bowdown:
crazy, yet soooooo sexy,
i want to do the best wire job anyone has ever seen on my next computer, but i don't think its going to be as clean as yours there,
I might get an old board and try soldering the ATX power to the back.
keep up the good work man
Thanks a lot guys.
Today I added another 144 pcs to the list.
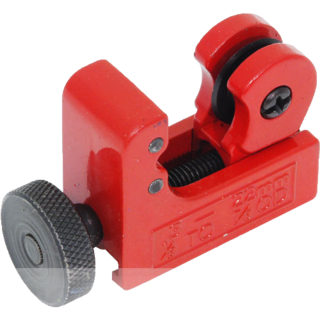
I spent the past 5-hrs using a mini 22mm pipe cutter to fabricate 144x 17mm long spacers.
My hands are now crippled and blistered.
I used some old copper pipe I had laying around - the scratches and corrosion made the job about 10x harder than it needed to be.
The spacers were cut from 10mm OD copper pipe and will be used 72per side to keep the copper fins evenly distributed.
Here are the fins in question:
*click for big*
Here's a really quick Teaser:
Thanks for reading - tune in soon.
Dude I really feel for your crippled hands but the end result was perfect.
Here are some detail shots showing the pain in the ass that was.
Here's the making-of the spacers:
First up some dimensions:
Here are the tools involved:
The stages of construction - because I used a displacement style cutter I'm left with a large burr on the edge. I used a countersink bit to ream out the inner edge.
Note the funky looking tool on the right.
I made this little device using some plastic washers, some old hardware, a micro nut driver, and a broken dremel bit. (The nut driver was replaced with a drill for most of the sanding). When you tighten the screw the rubber expands ans holds the spacer nice and firmly to make sanding easier:
Repeat process 144 times... and as my joints stiffened and as the blisters grew in number I soon learned to loathe these items:
The spacers do look damn good though.
indeed, +rep for your hard work :bowdown:
That is an awesome little invention you have there! I feel you on the blisters and what not. Copper can sometimes be a pain in the but to cut, and those pipe cutters suck sometimes haha. They look awesome man, great great work!
If I hadn't pushed my physical limits on my poor hands enough this week...
I was trying to remove the inner burrs on 1 last errant spacer.
I had already disassembled my little assembly line and figured I could just hold onto it.
This method worked on the first end of the spacer - making it razor sharp in the process.
The second side grabbed the countersink bit and drove itself into my hand.
Specifically it got to the 'pad of fat' on the palm, at the base of the index finger.
The result... I took a nice core sample of my hand. OW!
==== Morning ====
No breaks...I can honestly barely move my left wrist and my joints on my right hand are all but seized but there's work to be done.
There are 25fins along each side of the case, 50 total.
Each fin has 3 holes for support rods.
Each hole had to be drilled larger...
If not enough I had to step my hole size 3x to ensure they remained centered...
That which makes for a total of 450 holes.
Then -oh yes there's a 'then'- to clean the edges of each hole I had to go at them with a countersink bit (on both sides of the fin no less) which makes for another 300 'holes'.
To wrap it up - last night I made a whopping 750 'drills' and needed to cycle my 12v DeWalt battery 6xtimes.
For now I'm going to soak my hands. I've been working at it all night. More progress later I'm going to rest for a couple hours.
==== Afternoon ====
I ordered another sheet of copper this morning as well.
The weight of the pieces would be far too great if I went ahead and cut them from the 1/8" plate I have now.
You'll note that my latest part revisions focused on copper layered over carbon fiber... well there's method to this madness.
I'm going to now use 1/16th inch copper plate (48"x48") to fabricate my parts - and it'll be reinforced from behind with carbon fiber where necessary. This works two ways structurally and most definitely aesthetically as well. This will also half the weight of those parts.
==== Evening ====
Spacers are all complete now - they have been given a coat of Varathane and are currently drying. Pics will follow tomorrow - or soon after.
I ordered a special gauge of threaded rod. 1/32" larger than the ID of my spacers.
I put the rods in my drill and filed them to the exact size of the spacer ID.
The size of the holes I drilled in the carbon fiber fins is 1/32" under the ID of the spacers.
This means that I actually have the "thread" the rod into the fins and the copper spacers fit between.
I did a test fit before I cleaned and painted the spacers - the fit is so perfect that it becomes quite a pain in the ass to assemble. 0 tolerance. =)
I estimate 4-5solid days on this fin assembly (from cutouts, to cleanup) but I'm very pleased with the results.
Thanks for reading... much more to come. Copper arrives Wednesday. ;)
OMG, you have been busy haven't you.
thats just awsome dude. but...
we want pics of any damage related to modding:D
:stupid:
You see I'm moving to Vancouver to go to School.
I leave on the 27th.
School Starts on the 3rd.
I don't even have an apartment for my first month (May) - I'll be living in a hotel.
What this means - I need to get all my major fabrication done before I leave/ship my stuff.
I'm not going t have access to my shop for over a year, and for the next month I wont even have a place to do simple fabrication.
...therein lies the reasoning behind my haste, and willingness to push forward regardless.
I see. awesome work, especially being in such a hurry :bowdown:
Many thanks.
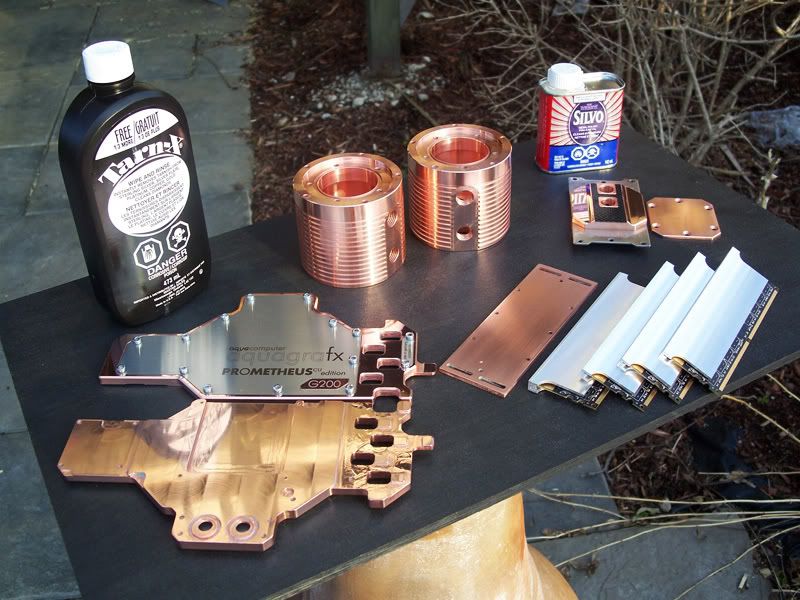
Today I did some polishing.
First up... I NEED to share today's discovery:
I went to Canadian Tire today looking for some more Tremclad anti-oxidation clear cloat.
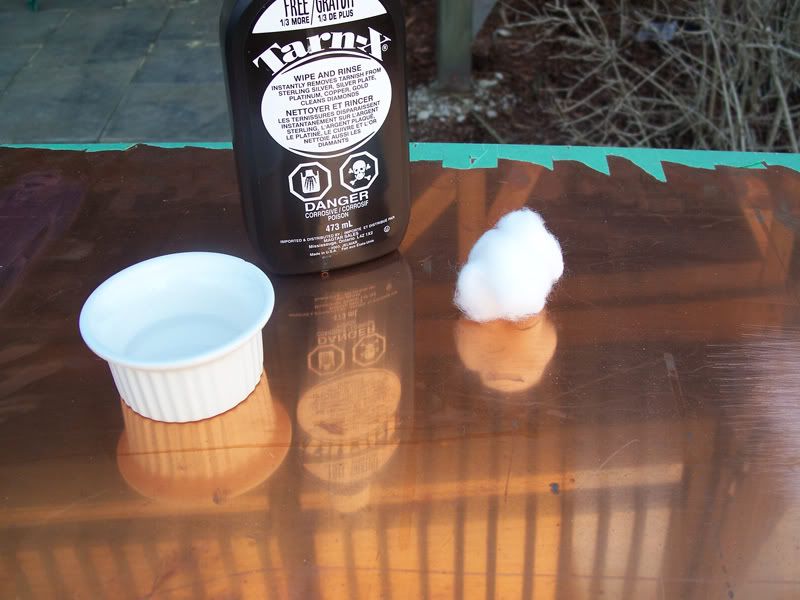
While looking I found a product called Tarn-X... and this stuff is unreal!
It's only 8.99 for LOTS, it has the consistency of rubbing alcohol and it smells like death.
{edit}"That lovely stink is thiourea. This is probably what your piss would smell like if you were a sulfur-based organism and not a carbon-based one." -Rubidium{/edit}
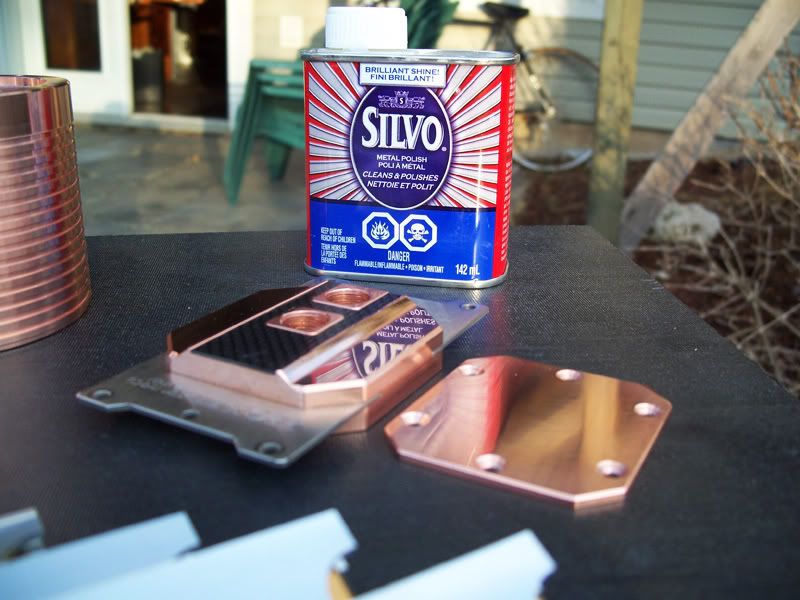
Here's my little demo.
BEFORE:
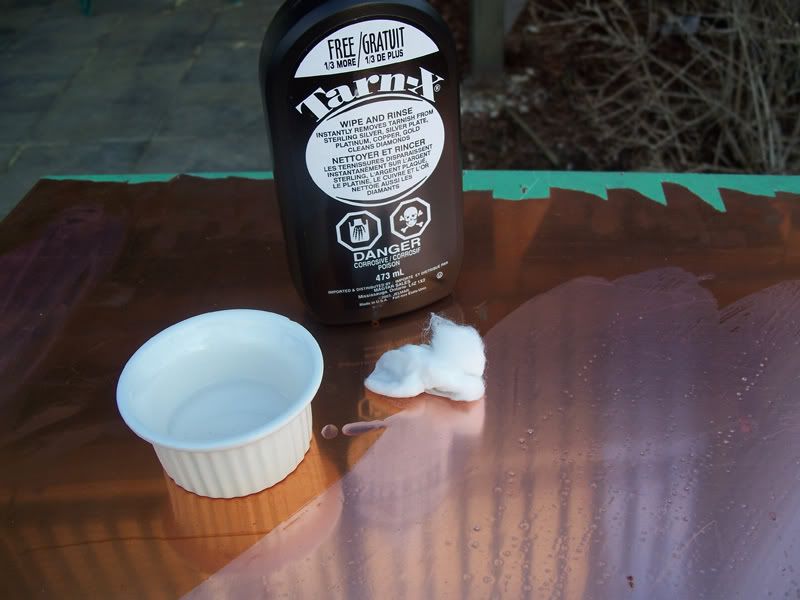
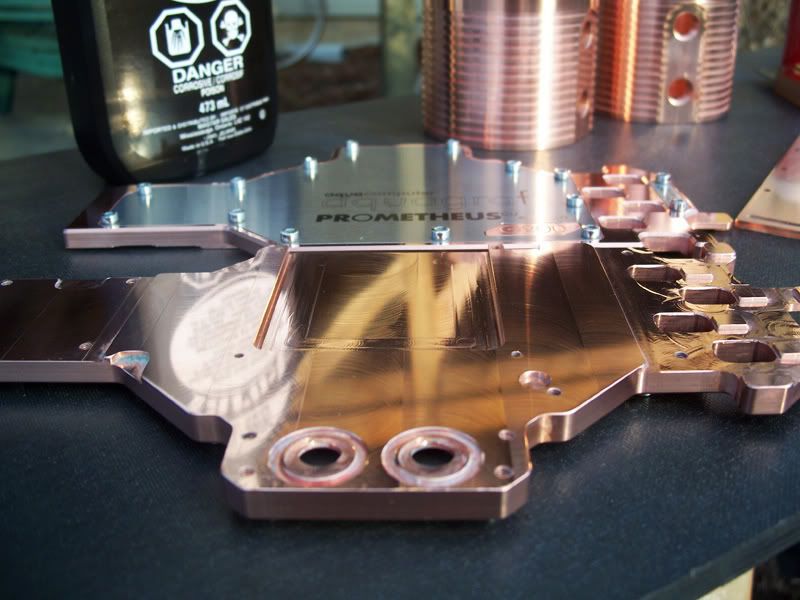
AFTER: (elapsed time... 1second)
Unreal, eh? I know you wont believe it until you see it, so I took a video with my berry:
VIMEO.COM VIDEO LINK
===
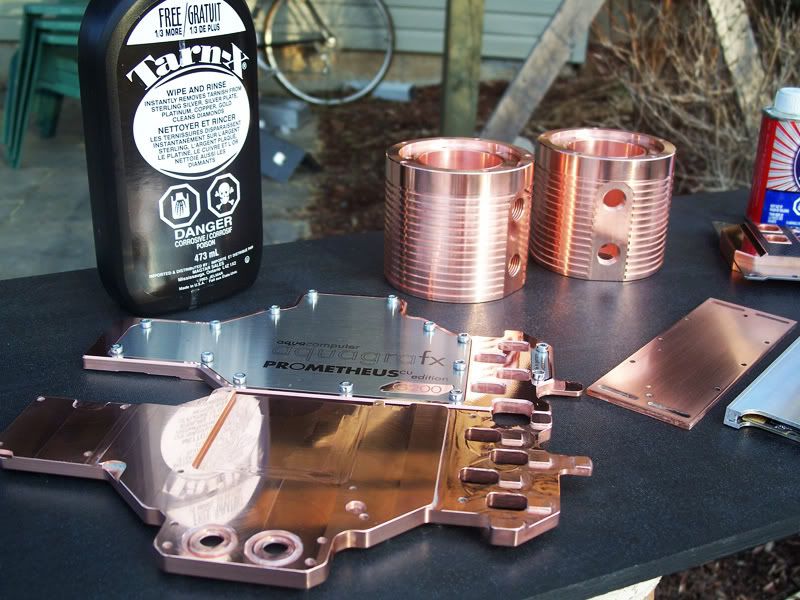
note: I'm not finished polishing yet, but I wanted to get the pics in before the sun went down.
Here are some incomplete results:
and before I forget, here are the fin spacers drying:
Thanks for reading, tune in soon for more.
That polish does an insane job, I must try to find some. Have you tried it on a scrap piece of plexi? I have tried different products (Windex works awesomly) to clean plexi for pictures but a lot of them make the plexi go chalky and powdery, I wonder if this has the same effect.
probably, I use novus (use it all the time in the motorcycle busniess, for windscreens and such)
Parts ready for a coat of anti-oxidization clear enamel. Permanent bling anyone?
A great deal more copper pron coming tomorrow. Tomorrow is a new day with new parts to share. =)
Gotta love permanent bling lol.
very nice bling! :O omg... thats great man.... good good work