Where Have All The Pictures Gone?! Ahhhhh!!!!

Printable View
Where Have All The Pictures Gone?! Ahhhhh!!!!
What do you mean? i see them all clearly?Quote:
Originally Posted by a.Bird
Mmmk, I took a break from tbcs for too long.. (school)
The first thing I did, upon returning to the forums here, was check out your mod. After reading through 15 pages worth of entertaining, stunning, and beautiful content, I have finally arrived to the present posts.
First off, amazing work! The case is almost done, and I'm loving it!:D
I read about your fan grill dilemma, and am glad that you put it on the outside, you definately need to show that bad boy off. Also, the grill is dark, so when you have the silver/white background it brings out the logo.
Is it just me or is your watercooling setup a little complicated? It just looks like it could be simplified or something. Since I know little about watercooling I will stand back and... learn.
Anywho, great work on the mod, and a.bird you're rediculous.
They are all there. Don't know why your browser isn't showing them. Just paid for another year at the file holding site too. Sorry.Quote:
Originally Posted by a.Bird
Well, I did get all 3 water blocks painted. And I'm about to set them up. I'll upload some shots tonight. On the workshop too. I know this is taking a long time. But I promise to finish this. :) Only one other mod that I know of (another site) is taking this long. I'll try not to get the record for the longest one. :) :)
**SLAP** sent to MDCS!!
Don't be silly! Take your time I mean the case looks brilliant atm after how long you have spent on it. Even if you did spent the same amount of time that you have already again, the end product will be the same high quality level it is now which would be brilliant!
-gaz
I have 3 Zalman waterblocks. 2 of their low profile WB's for the GPUs,
and the gold plated CPU waterblock.
They will go on the FX60 and these cards.
Which were almost top of the line when I got them. Now they are about 6
down the line.:p
Painting ...
Started with self etching primer on all 3 waterblocks. Then about 3 light coats
of red so far ...
A few more coats ...
Finished painting ...
Now that the clear has cured. I can start putting the plumbing together;)
:)
And for the shots of the work area requested. No big deal really, and kind of
messy since I was painting the house and moving stuff into the garage while I
did it.
First, some paint left over from the house painting.
As you can see, by the time I was done (some rooms twice) I didn't care
about cleaning the brushes again:p I hope I don't have to do that again for
awhile.
A lot of the good stuff is in the cabinets.
Anyway ... some of the paint stuff ...
Side I do most cutting and big stuff.
From other side ...
Other side ...
Long shot ...
:)
Nice job on the paint! That looks excellent! :up:
Are you sure you have enough stuff? No, I think you need a bit more. lol Just messin with you. I wish I had all of that! I'd be a pretty happy camper. Maybe we should play the "I spy with my little eye" game? Hmmm, oh look! A PSU with a 120mm (80mm?) bottom intake fan! lol
Keep up the good work! Can't wait for those final pictures! The suspense is almost too much! :)
-SF
Very nice... the paint job on the water blocks match the case mod perfectly, Clean and sleek. Nice choice on your graphics card, althought i am swaying to ATI's side recently after their whole link up with AMD. As for your painting, since you seem to be so good at it, could you give some tips on how you could get such great results if you have a dirty garage? Everything i paint in my garage seems to have **** stick to it no matter how well i enclose it lol. Great mod
Quote:
Originally Posted by NocturnaL
:D :D
I used to have the same problem. If you close the garage door, you get
fumes to no end (don't forget to use those respirators), and over-spray on
everything.
If you keep the garage door open, you get dust, pollen, bugs and annoy your
neighbors with paint fumes. Which is why I like the booth. No dust, no fumes
outside the booth (much:redface: ),no bugs, and no over-spray settling on
everything in the garage.
Did you try getting a drop cloth, getting underneath it, and spraying:D
Maybe make a little drop cloth pup tent:D :D
(and again, don't forget to use those respirators):D ;)
Shot with the WBs and all their children. :D
Cleaned up the VC with ...
Put it together ...
One down, one to go.
:D
Ok, does that look a little christmasieish? Why can't we order the boards in the colors we want. :D :D
shoulda waited a month on it....then it woulda been perfect timing
lookin great mdcs.....ive been watchin this since it started....love all the work youve done
Yeah, i think im going to try the drop cloth tent idea you gave me, except with some plastic wrap you use for painting. And once again, your water blocks look sexy as hell... lol
You're asking, what's going on? Why are the GPU WBs already set up? :D
Because ... I'm going for a short hose set up like the last one, and it will be
installed right in the case. I'm using mct-40, and I'm good at covering the
parts just in case during the testing.
Both ...
And the only solution I can come up with that will actually have the fan
(remember, there will be a 120mm in front of the Xchanger) useful for the
Xchanger, and not crimp the hose. The res, pump, rad, & xchanger all all set
up.
The rest will be easy. The one rad output to the CPU WB, up to the 1st GPU,
right down to the next GPU and back to the input on the res.
So, the way it looks though is iffy too me. I've tried lots of ways. And if it
looks too crowded and just funky. I'm going to ditch the Xchanger.
And, even though I was going to go 1/2", everything is 3/8". With the WB's and the res bottlenecks, it looks easier to just go 3/8". So, I just reduced the pump, and different fittings on the rad.
:)
When did you buy the EVGA 7900GT video cards and how much did you pay for them? Because if it has been less than 90 days, you could use their Step-Up Program and get a better video card. If you want, you could get the 8800GTX (I think one of those beats 2 7900GTXs in SLI on most occasions). I'll have to check the benchmarks again.
Long time ago. As soon as the 7900's came out.Quote:
Originally Posted by Silenced_Coyote
It's the last time I get the parts first (VC, mobo, CPU).
Mobo & CPU ...
This is why I do so many dry runs on everything ...
It just won't work where the pump is now. It's in the way of the second VC.
I'm going to have to ditch the Xchanger, and put the pump somewhere else.
This case is way too small. Smallest I've worked on.
Something has to work. Any ideas:think:
:)
I don't know. I may have to put the pump where the rad is, and put the rad on the outside. I really wanted it all inside. Maybe on the inside back. I'll try that
too. Then the outside back. I could move to the smaller Swifttech pump again (oh boy, re-painting). I'll try what I can first.
can't you just put the pump closer to the rad (not in front of it) when you ditch that xchanger?? and maybe turn the pump 90 degrees, so that the tube from the res-thingie goes into the pump straight. Also I don't think it would be really bad if the pump is a few cm in front of the rad... but I'm no WaterCooling-expert.
hope you can work this out in the case... Would be a shame to put the rad on the slick looking outside...
Came up with a solution. And it's pretty good. I get to keep everything inside
the case. No kinks, and I still have room for the 120mm fan in front. And it's a
very nice cut without the clutter. The Xchanger is gone. But I'll save that for
a bigger case.
Nice fit ...
And nice short bends without kinks.
Looks like the plan.:banana:
I don't know about those coolcoils though. They are NOT red like they say.
More of a dark pink if you ask me.
And the tubing needs to be washed clean and shiny. See ... what happens if
you paint and leave stuff out without a booth.:p
I put the Velcro around it to hold it in place while I set it up. But it looks kinda
nice. Maybe a thinner piece?
I don't care for the blue tips on the GPU WBs, but I wasn't about to paint the
inside. Last thing I want is paint chipping off, and going through the
plumbing:D
I'll have to cut a new piece of leather. This one has holes now from where
the pump used to be. No big deal, I think I have half a cow left.:devious:
Now, before I put the pump in, I better make sure I have all wires connected
in front of it. It looks like I can connect them anyway, but why take chances.
:)
Ditch the coolcoils maybe? Or maybe dye/paint them a better color?
Yeah, i was wondering why the tubes looked dirty... and i know all about stuff getting tainted when painting in an enclosed garage. I got a mist of red paint on my Mom's BF's 1965 White Gloss Rambler, Boy was he pissed :). The coil does look cool, but would look 100x cooler if it was actually red. You gotta watch out for those red colors when buying stuff half the time its pink :mad:
I think painting would chip them when I wrap them around the tubing. But ... the dying idea is something. Think I'll get some and put a small test piece in a bucket of dye and see if I can get them red. Good idea!Quote:
Originally Posted by Silenced_Coyote
Wow, Rambler, that's a car you don't see many of anymore.;)Quote:
Originally Posted by NocturnaL
I think I'll try the dye idea. Worth a shot. If it doesn't work or looks crappy. I think I'll try white coils, and red dye in the water.
Hey MDCS-
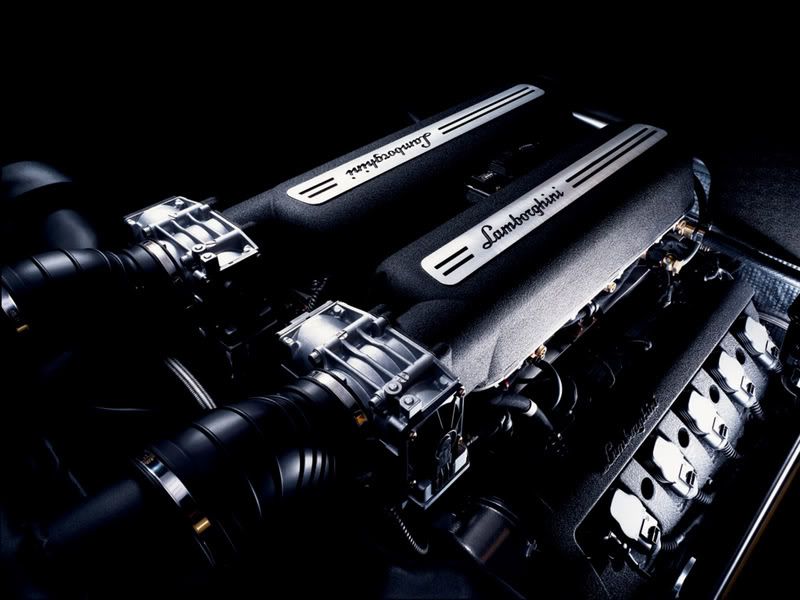
It's looking great and I've been watching for a long while. In my absolutely unsolicited opinion, yes those cards look Christmasy (but damn sexy too), loving almost eveything here...but... I really think you gotta lose those spiral thingy's from your water tubes. The rest of your build is so home-made, just like a special order Italian Sports car, personal, elegant, and free from convention. Those spiral thingy's are taking away from the originality of your theme I think, they just don't say Lamborghini to me. Maybe if you made them look like rubber intake shrouds? e.g.
jdbnsn has a great idea, I agree with him as well - we musn't forget, this IS a Lamborghini mod...
That's funny, I was thinking the same. They just don't really fit, and are not
original. But ... I thought I would try the dye thing.
AND, while I was at the store. I noticed a paint I never saw before. I've seen
those chrome paints before, and even tried a few of them. But they always
look more like silver paint to me. But I noticed this ones color was called
bumper chrome. What arrogance:eek: .And yes, I bought it of course.:) What
do you think?
I like your idea on the rubber though. I was thinking of doing that with a
distributor cap mod. And I know just where to go to get the rubberised paint.
So ... if the red dye doesn't work, or the chrome paint, or they both just still
look so blah. I'll try the rubber spray. I also saw some cool steel coils at a
custom auto site and may try those.
Dye test ...
Chrome paint test ...
Maybe with a coat of clear on top, it might look cool?
;)
That was weird. I applied some clear, and for the first time the part I was
painting went dark. I even did another test of the chrome paint next to it to
show you. And yes, I always use enamel on enamel and lacquer on lacquer clear.
:?
Strange.
That chrome paint does look sharp. When dry, I think I'll put it on to see how
it looks.
For the dye. I think I'll let it sit all night to try and get it as red as possible.
I was thinking about the rubber spray. If I did the whole tubing, don't you
think it will keep heat inside? The tubing must dissipate some of the heat?
And tomorrow I think I'll go get some rubber spray and test the tubing and
the coils.
;)
I wouldn't worry about spraying the whole tubing. Tubing won't do much heat dissipating. It shouldn't make a difference. If you are worried about heat, then maybe you can stick in another radiator in the water loop.
I dont know how, but this is getting even more interesting lol, keep it up
yeah, the heat transfer through the tubes is pretty minimal compared with heat transfer at the rad. i wouldn't worry too much about that.
i had actually thought earlier "wow, that'd be neat with vacuum hoses" but decided not to say anything about it for some reason.
go fig. lookin good tho :P
The dye didn't turn out. Maybe wrong kind of dye. Looks the same to me.
Already changed my mind on red coils anyway.
Did some sleeving with my special sleeves.
Was a little worried about the VC plug. Took out the PSU and made sure.
Tight fit, but it works. I'll pull the wire back behind the pump.
And notice the SATA wire. 6" and clear. Will also hide behind the pump as much as I can.
I ran the other wires behind the rad, and you can hardly see them.
That takes care of the reset/power/power LED/HDD/USB/mic-headphones/
wires.
New leather was added.
Now to drill a hole for the pump, and holes for the 120mm fan again.
Looks like everything will fit now.
The tubing was washed, and should be dry enough to re-install today.
;)
I think I'll try the rubber spray and see how it looks. So far, I like the chrome paint the best. Hope it doesn't chip off when I put it on.Quote:
Originally Posted by ajmilton
ooh, i like that sleeving.Quote:
Originally Posted by MDCS
Yeah, that's some awesome stuff. I can't remember the site I got it from. But I
bought the last 3 bags of it. They said it was discontinued. I actually tried
looking for the site once (one I only went to that single time - found through
Google) but my list of sites is kind of big, and I tired of looking for it. I'll just
keep trying my bookmarks until I find it again. They had some other unique stuff you don't see on most sites.
:)
WOW.. just have to sign up to say.. wow! :banana: :bunny: :banana:
(50+ pages so far, spend about 1hour reading them all) :)
MDCS, is there anything you can't do?
Build a great work area and do an awsome casemod, can't wait to see the finished job.
I wiss I had your skills.
Too bad about all your bad luck (falling table, camera.....), but that's not stopping you. Great!:up:
Are you planning on modding mouse, keyboard and/or monitor to follow up on this great box?
btw. I really like that fan too :)
(And the scoop, and the leatherwork, and the paintjob and....)
Results of the chrome paint test ...
I think that is the best chrome paint I have ever seen.
It really looks better then the others I've tried.
Still not sure if I'll use it though.:rolleyes:
Now for the rubber test ...
Still a little wet.
I don't know:?
Sure is different!
What do you guys think:down: :up:
:)
I don't like the coils at all. That might just be me. But they do look better chromed.
As for the rubber paint stuff? Hmmm, I say it looks pretty unique and in a good way. Reminds me of when I look in a car and see all those rubber tubes going everywhere.
My final verdict: :up:
Makes it look more like the engine area of a car, which is a good thing imo. And of course, even if you just leave them as is, they will still look good.
-SF
the rubber is awesome looking. got all my votes on that :p
the coils look better, but i agree ... they don't seem to fit so well with the theme.
man. that rubber looks great. seriously :)