Looking good ... I think I would have put the Casters on the side for more of a RACK type setting. But when they are done with it. They can always turn it into a coffee table :D

Printable View
Looking good ... I think I would have put the Casters on the side for more of a RACK type setting. But when they are done with it. They can always turn it into a coffee table :D
nice :)
Small update from the progress today.
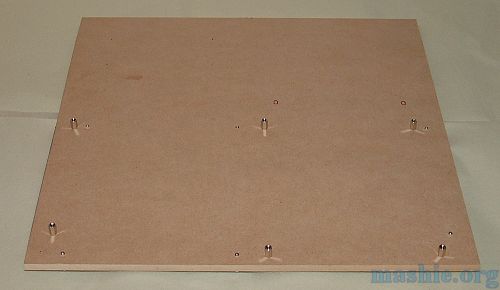
The time has come to work on the trays that will hold two complete systems each. The material is 6mm MDF. One nice little feature with MDF is that it can be threaded using normal metal taps. After drilling a fair number of 2.5mm holes they were quickly threaded to M3 and the motherboard stands were installed.
I have a feeling some of the people defining the ATX standard did think twice since the stands from the opposite sides do stay clear from each other when the motherboards are mounted like this.
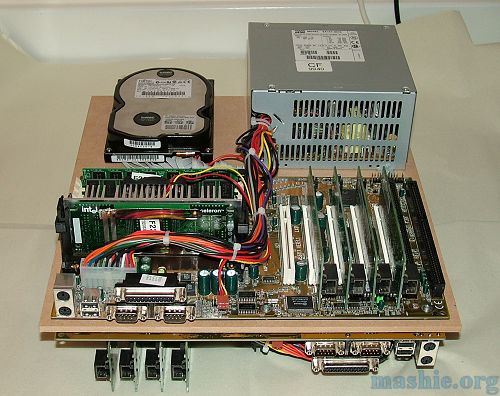
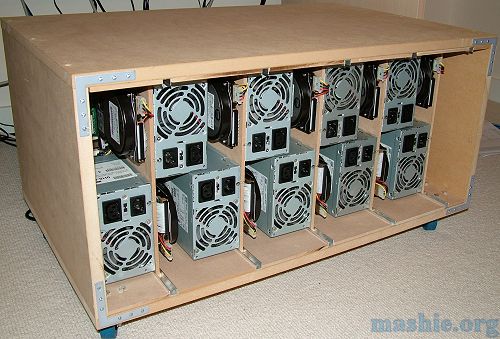
Next to follow was adding a few more holes for the PSUs and HDDs. After a bit of pain I realized how awkward it turned out to be mounting the HDDs and PSUs. The PSU will block the mounting screws for the HDD on the opposite side but then it has to sit on top of it's power lead from the PSU on the same side... To make a long story short, four hands had helped but I got there in the end. Now I just have to make another four of these. :D
Lol, its goin good man...
How is your search for components in Time Machine going btw?
Won't that be 5 more? ( 3 double sided, 2 single sided)
Looking Good BTW.
Nope, it is four with double mobos and one with single mobo plus switch.Quote:
Originally Posted by Xbrid
Actually it is only three left to make since the mobo plus switch is done as well.
Thats HOT mash. Seriously.
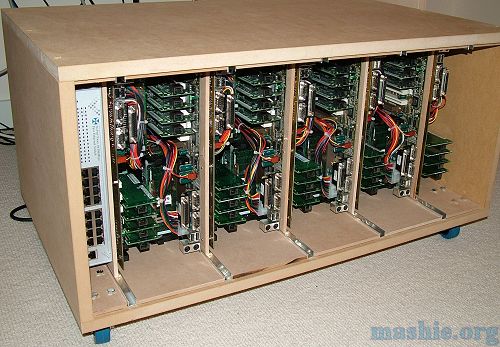
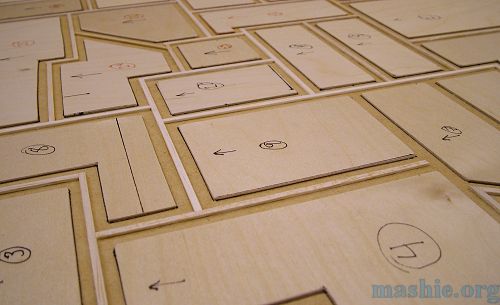
Another day, another update...
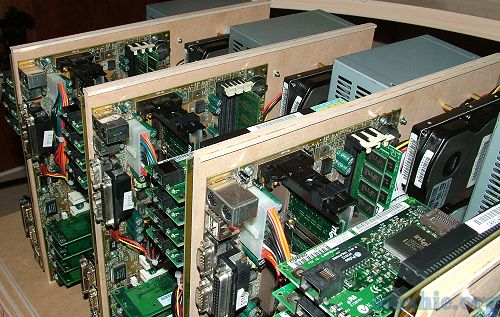
It felt like manufacturing doing unit after unit. At last all are done regarding major assembly. Power button and LEDs are still left to do on these units. They will not be painted and when the outer shell is ready they won't be that easy to see anyway ;)
If you look closely you can see ribs of wood attached near the top edge. They were added to make the 6mm MDF fit perfectly centered inside the 10mm aluminium profile.
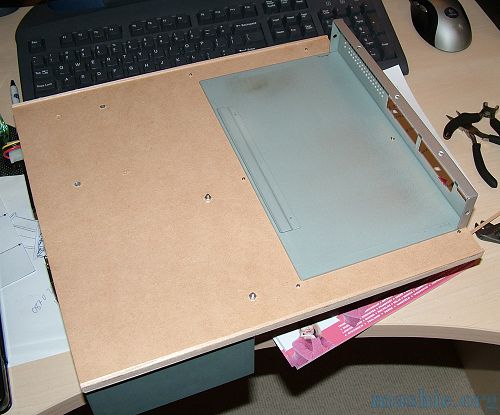
The last tray was slightly different to make since it hold a system as well as a 16 port 10/100 switch. I wasn't too keen to add spacers to make the switch stay clear of the mobo stands so a suitable hole was drilled before gluing it in place. :D
All new switches I get from now on will be gigabit only so this one will be retired together with this project in a far distant future...
I can happily announce that somehow I managed to measure everything correctly so it did fit :D
The spacing is 5mm between CPU and NICs on the next system.
In case the HDDs needs to be reimaged that can be done fairly easily from the rear. It is lucky the PSUs has bypass power as well since this will eliminate the need for loads of messy cables and splitters.
Ok, tiny update.
Yesterday I did fire up all systems for the first time to see if they worked. Well the first thing that happened was that one PSU blow up due to some joker setting it to 110V instead of 220V... Those of you watching the ModCam had the pleasure to see the flash and smoke live. With the PSU replaced I found out that two of the nine systems had duff motherboards. BIOS is dead, after resetting it I get a lovely input device error so unable to configure the BIOS to boot from HDD or floppy to reflash it. :mad: It will have to work with seven systems for now and then later on the mobos will be replaced.
Anyway, time for some more good news.
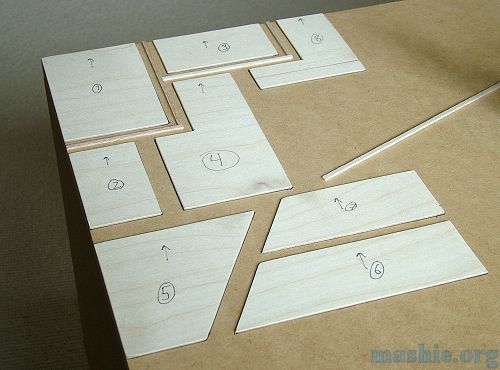
The work has started to give the outer shell a more interesting look compared to bare MDF. The armor plating is done using 2mm plywood and some basla wood.
Slow but steady progress, this will probably take the whole next week to get done...
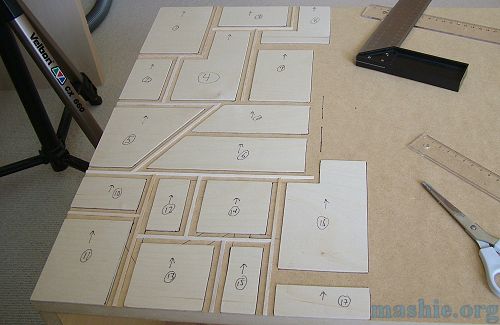
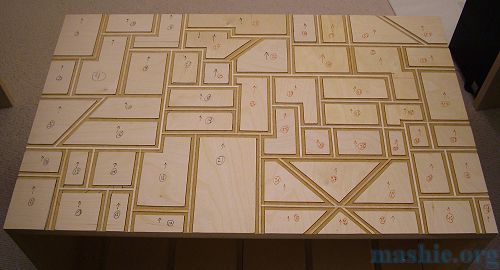
Measure, cut, sand, glue, measure, cut, sand, glue... repeat 54 times and this is the result.
The top has all the wood work done, just going to add some details tomorrow before it is ready to be painted.
The plates are 2mm plywood while the ribs are balsa wood. The biggest advantage of balsa, it is dead easy to cut so a scissor was all that was needed. Then just put it all in place with some cyanoacrylate glue.
I'm still a bit undecided what to do with the sides though. Armor plating is one option, just that it feels a bit waste of time considering they won't be visible at it's final location.