aww damn...i saw you posted and thought you were giving us an update:P
should be ordering my own of this case here in a couple weeks

Printable View
aww damn...i saw you posted and thought you were giving us an update:P
should be ordering my own of this case here in a couple weeks
Wow. That case looks amazing. I should get back and check in more often.
+Rep
I have been able to get some work done today, so update should be up in a few minutes.Quote:
Originally Posted by b4i7
Be good to see what you do with the case - best of luck with it.
Thanks, and thanks for the rep!Quote:
Originally Posted by BigJohnson
Hi guys,
With the luxury of a 4 day weekend I am hoping to get quite abit of work done on the case. Today I worked on some surrounds for the 2 front intake fans.
I will be using AC Ryan UV Orange fans throughout the case, I used them in my last mod and loved them. Great quality, not too loud and having the slit power for the leds and fan was very handy.
So I designed some 'ducting' for them. To focus the airflow onto the motherboard. Having the fans enclosed should also create a nice effect with the orange glow.
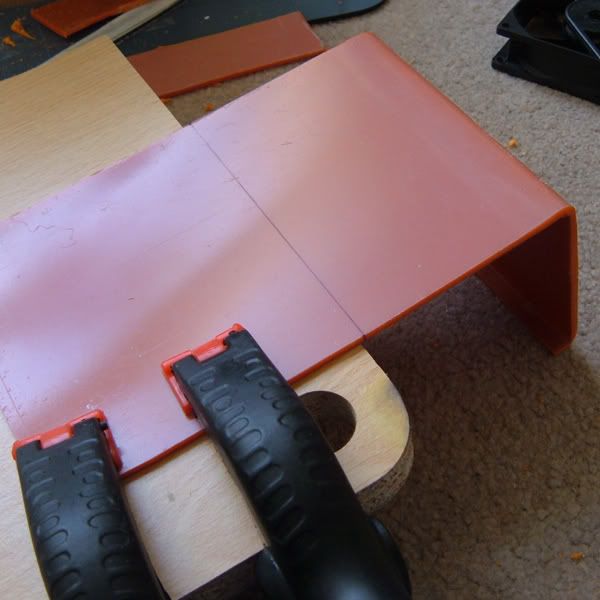
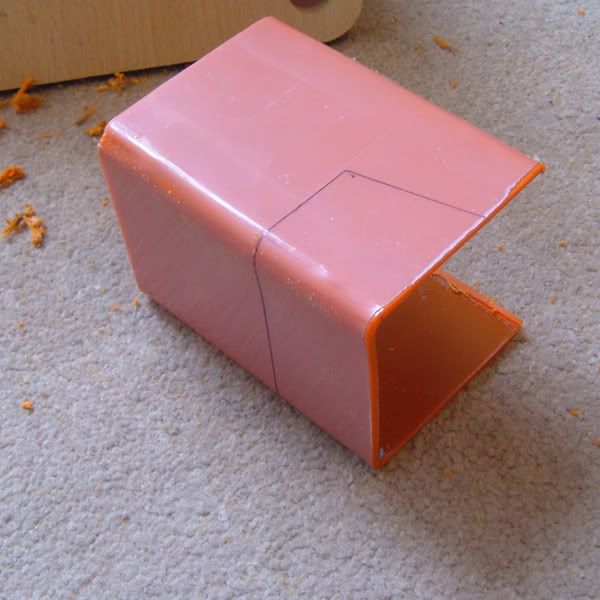
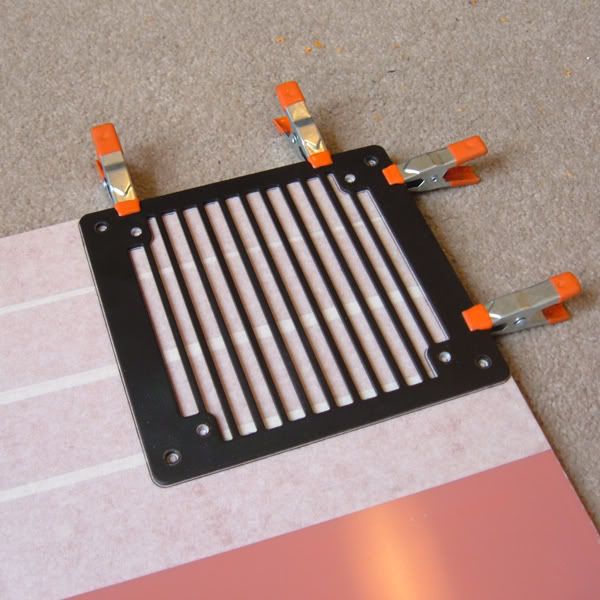
So first of all I cut a sheet of orange acrylic and set about bending it into shape:
I use an old table base and clamps to make the bends, oh and a blow torch:
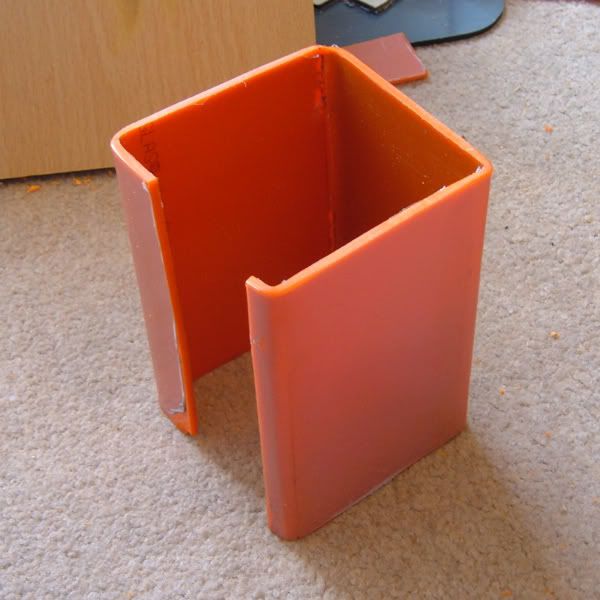
Here is the sheet bent into shape:
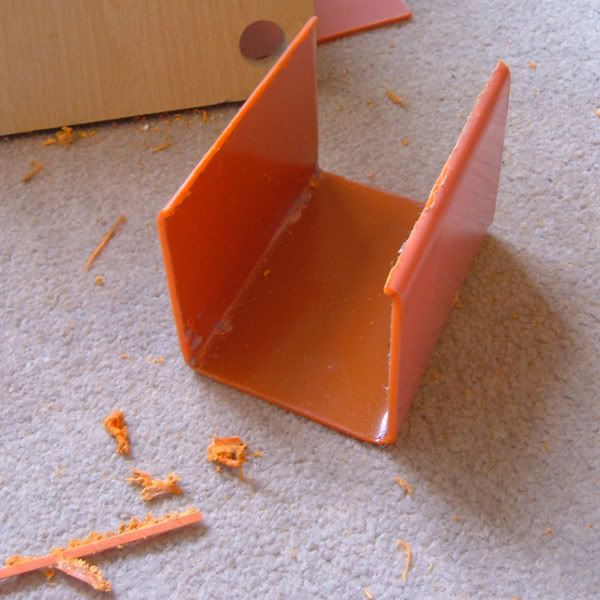
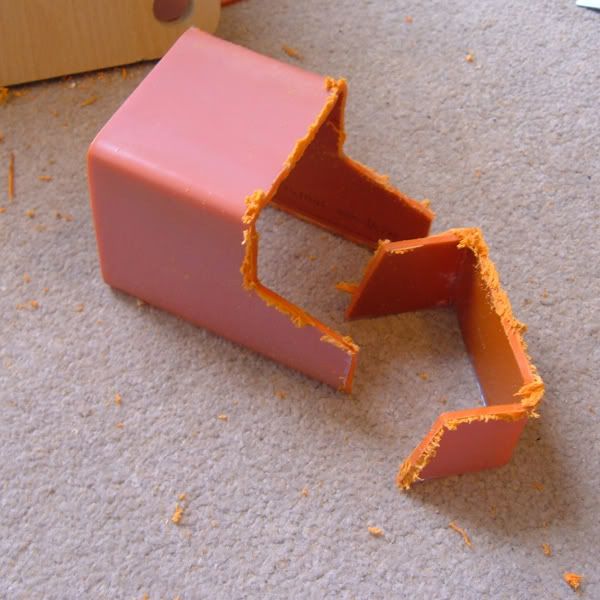
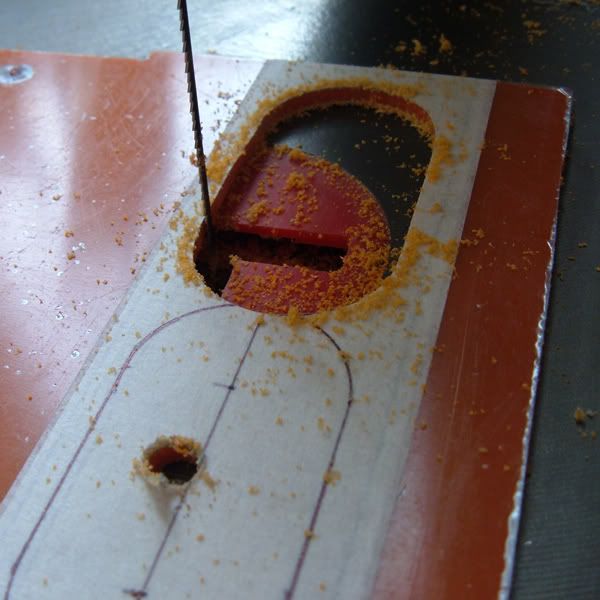
Now to make some cuts. I would ideally have used a scroll saw for these cuts but the piece is 80mm in height and my scroll saw has a max cut depth of 50mm. So out came the dremel, not to much of a problem but the cuts are no where near as clean - nothing a little sanding wont fix.
To make sure the ducting wont be touching the motherboard I made some further cuts:
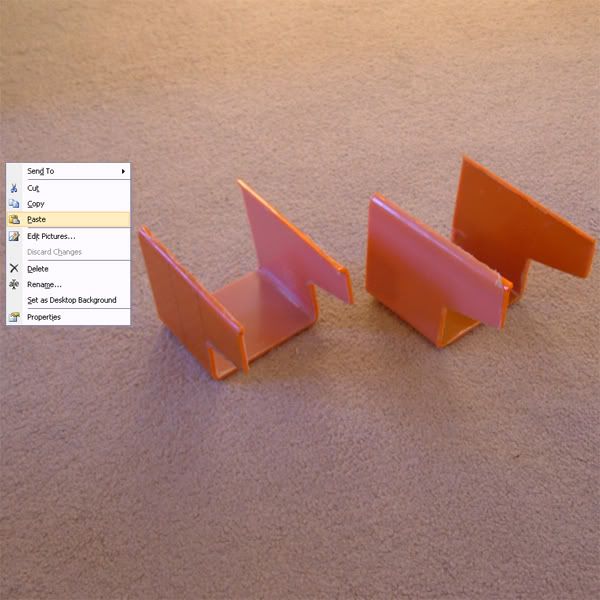
Then copy and pasted ( If only:) ) the finished duct to leave me with 2, one for each fan:
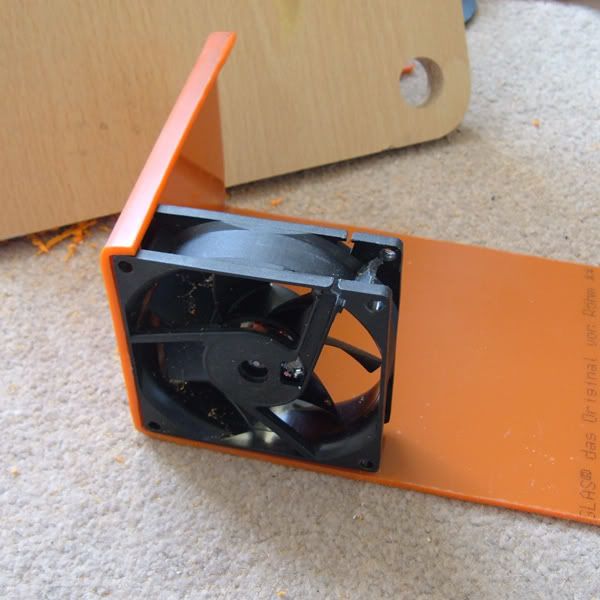
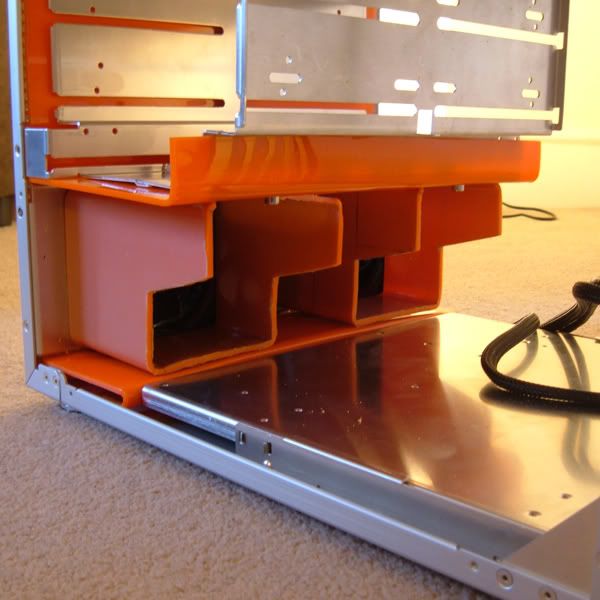
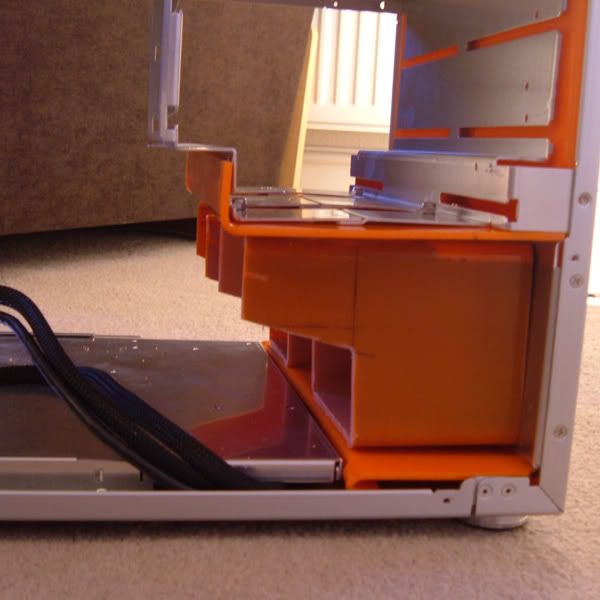
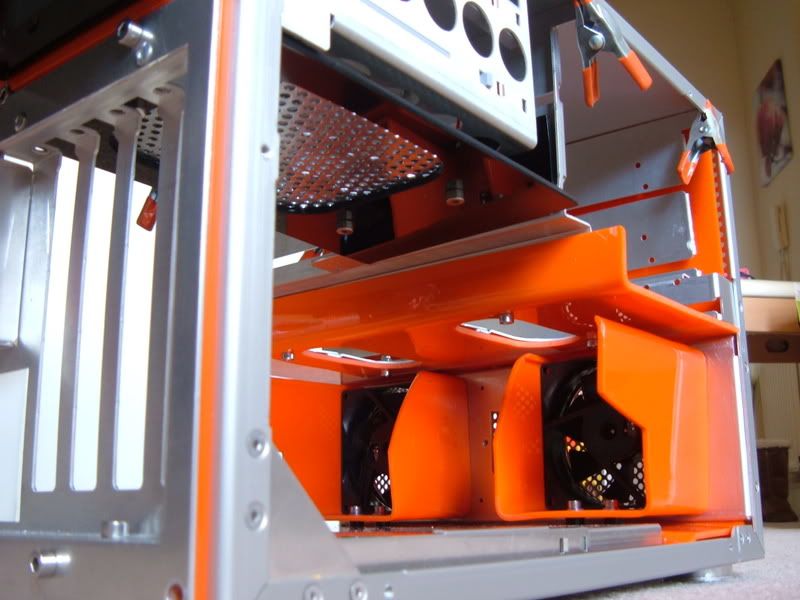
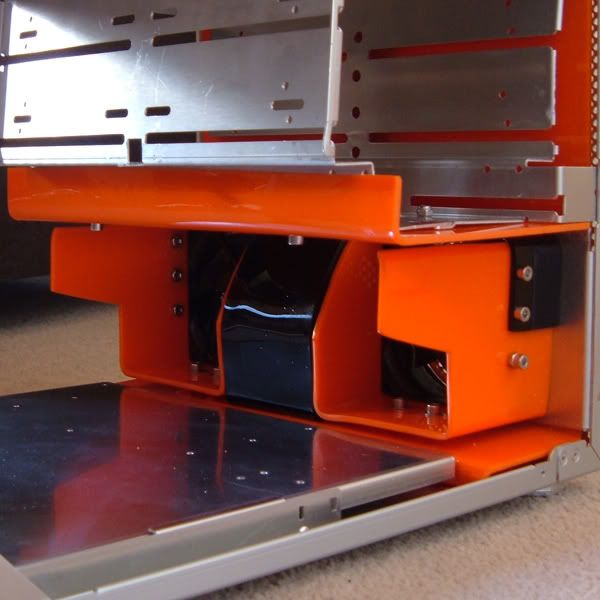
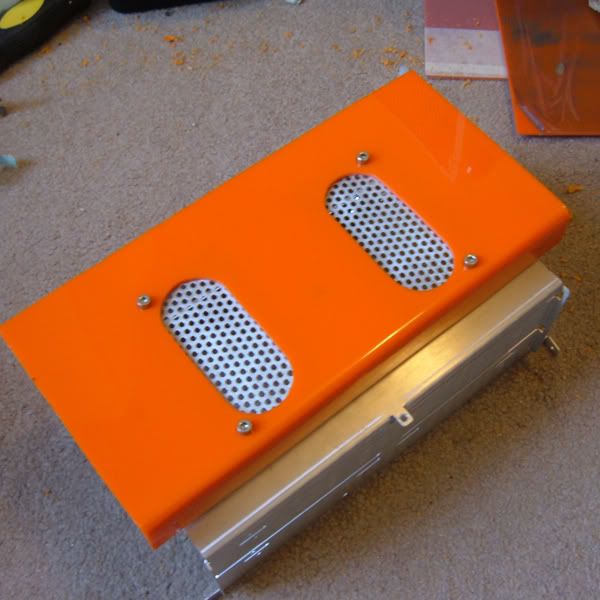
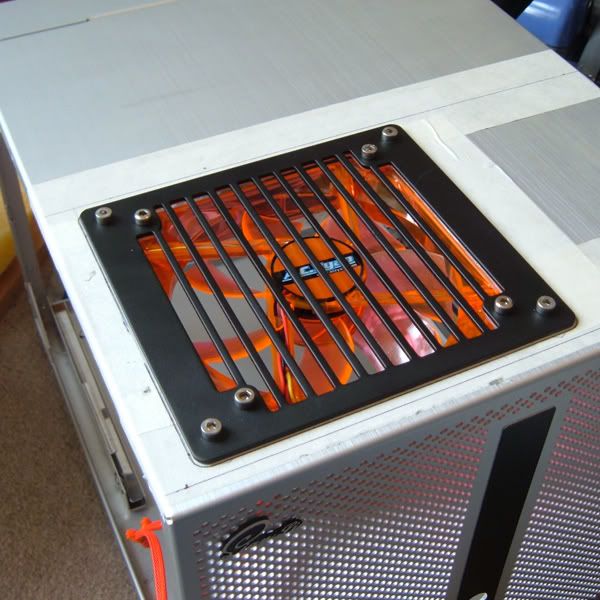
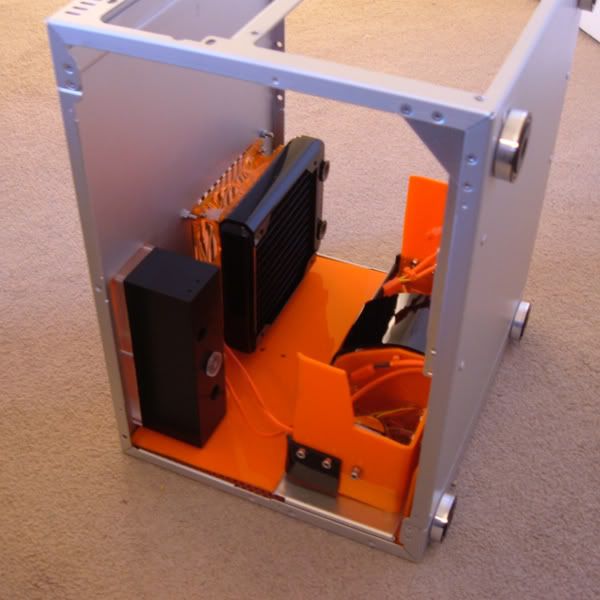
Here they are inside the case, just a test fitting at the moment. I still need to sand all the edges, add some detail with steel mesh and remove the protective covers. But you get the idea:
I have ordered the fans today, so should have them some time next week. 3 x 80mm UV Orange and 1 x 120mm UV Orange.
I have also ordered the 120mm rad, Black Ice GT Stealth.
But the most exciting news is that following a battle with my old employer they have decided to settle out of court and pay me lots of lovely modding money ..... so things have just become interesting for this mod as I have a lot more money to play with now!
Stay tuned, thanks for reading.
Xperiment
those are wicked!
now all i have to do is master the art of copy/paste IRL
You know how much time that would save me if I could just copy and paste while doing everyday tasks? Looking good man.
i once removed a harddrive and realized that it sat perfectly, and my first thought was "ctrl-z" and i just looked at it for 2 sek thinking "why doesnt it go back?"
ctrl- x commands would be so usefull irl!
Looks wicked, even without a copy and paste function you did a damned good job making the second duct.
Ctrl-Y would also be a great function in real life.
Mate fantastic work, you never cease to amaze me with your plexi skill. Copy and paste IRL FTW!!!
Have fun spending the new money (:
Great job on those ducts. Flux is one of my favs at this time on TBCS!
Think I'd try to copy+paste my girlfriend IRL :grouphug - not mine :D
Hi guys,
Quick update on some work I got done today in between and during eating far too much egg shaped chocolate. Chocolate and perspex dust doesn't taste very nice FTW :think:
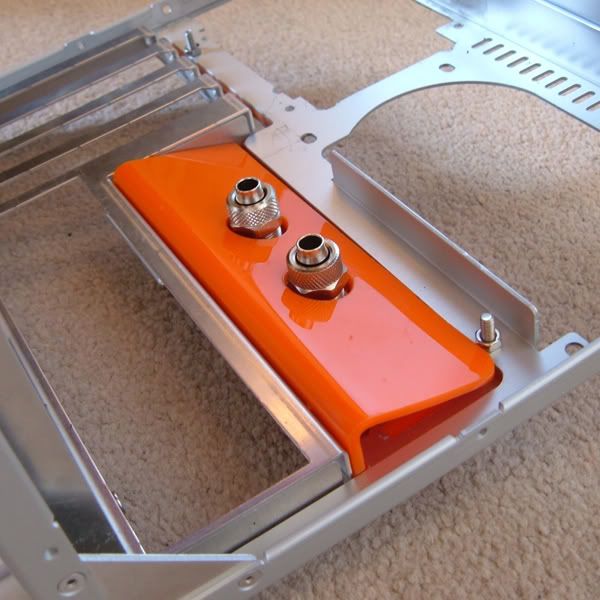
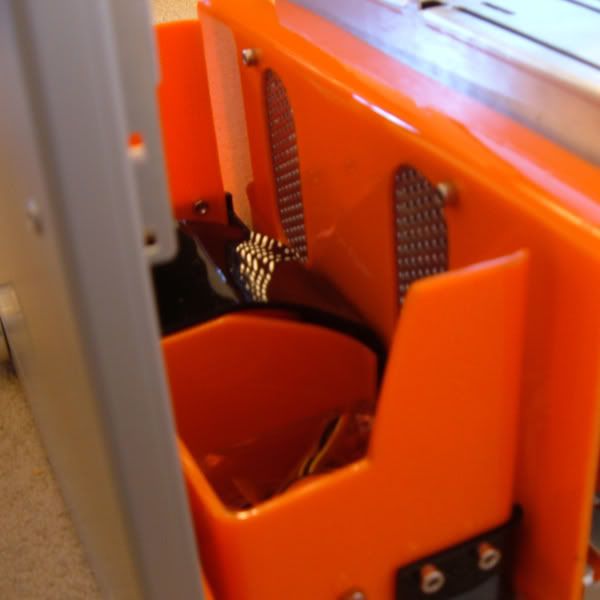
I started by making a cover for the rear of the case where the tubing passes though. You can see in the picture below it was a little untidy to say the least:
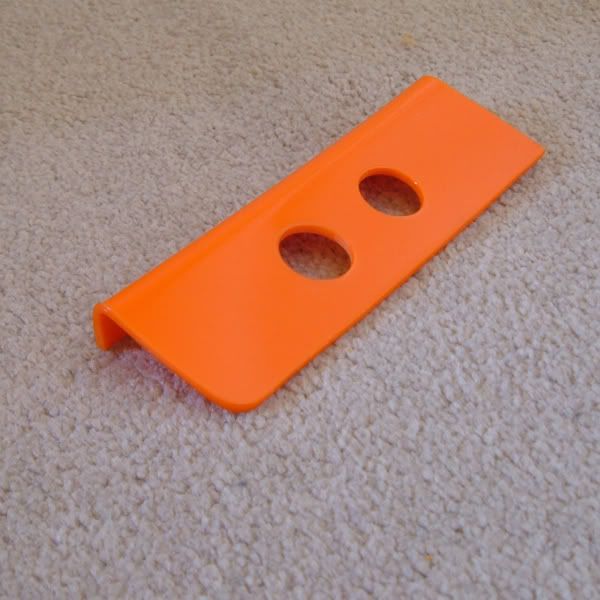
Here is the cover cut and bent:
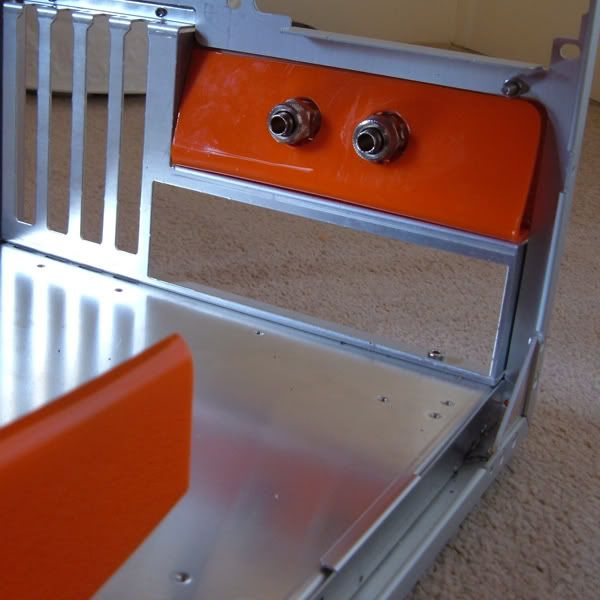
And here it is fitted to the case, much better:
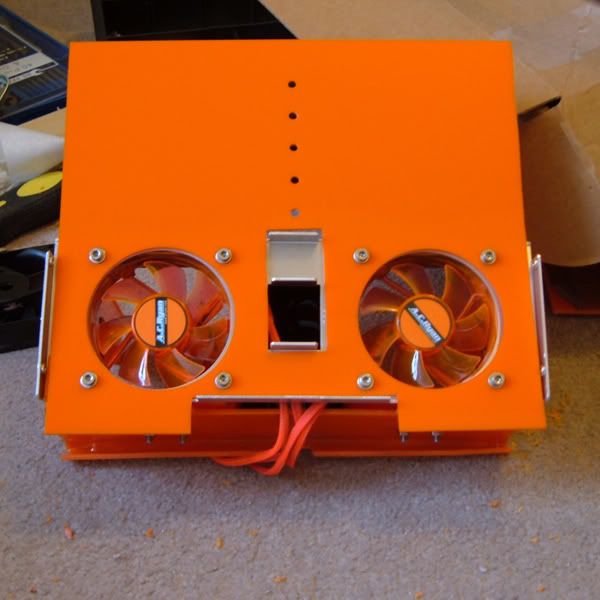
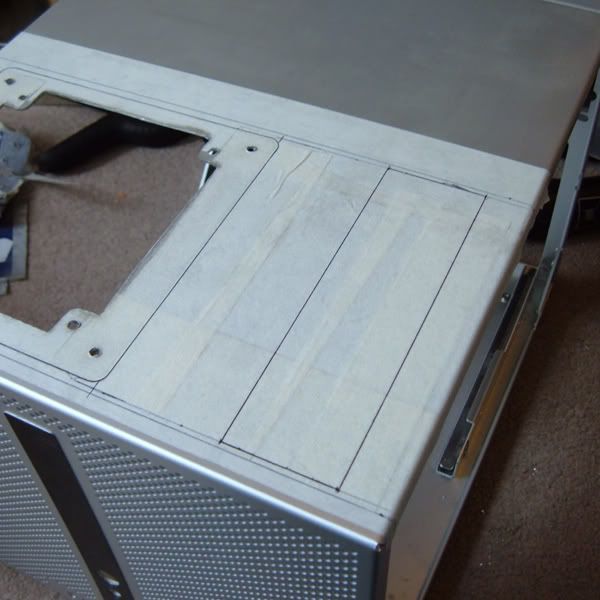
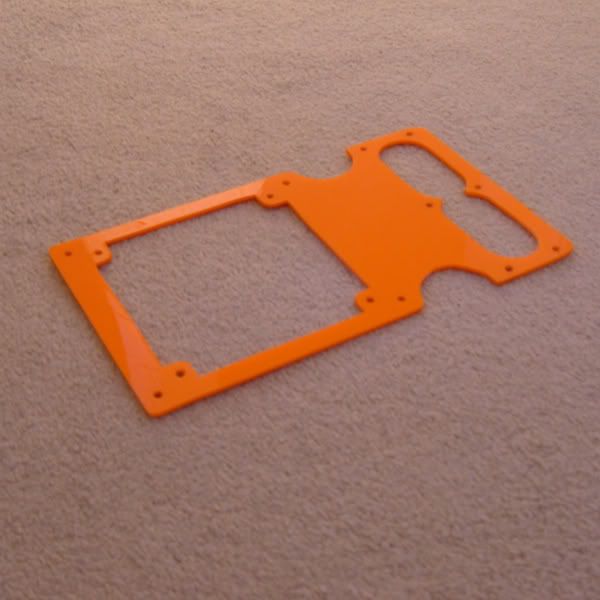
Next I moved onto the ducts in the front of the case. I changed the design of them slightly since my last update. Here is how they looked this morning:
No major change, just trimmed the inner edges down a little.
Also you can just make out 4 bolts with plastic spacers that hold them in place.
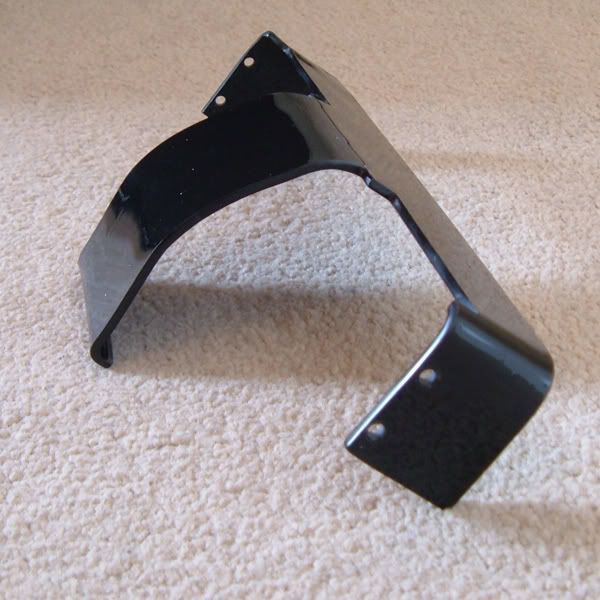
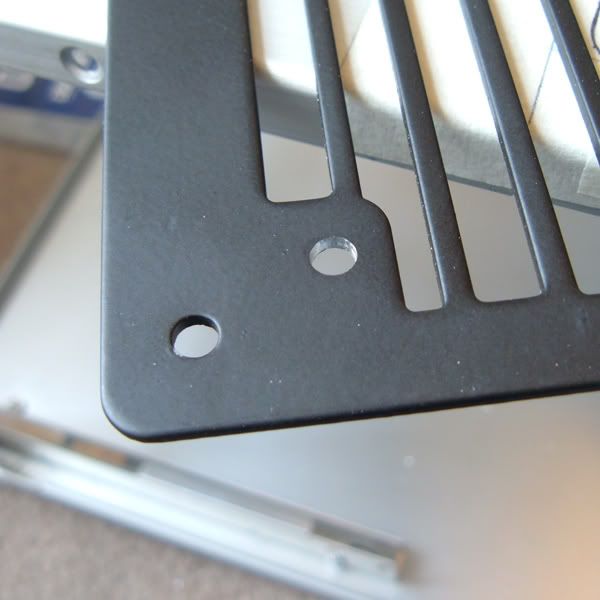
I spent the rest of the day, well around 5 hours cutting, bending and sanding this black piece of acrylic:
But what is it I hear you cry?
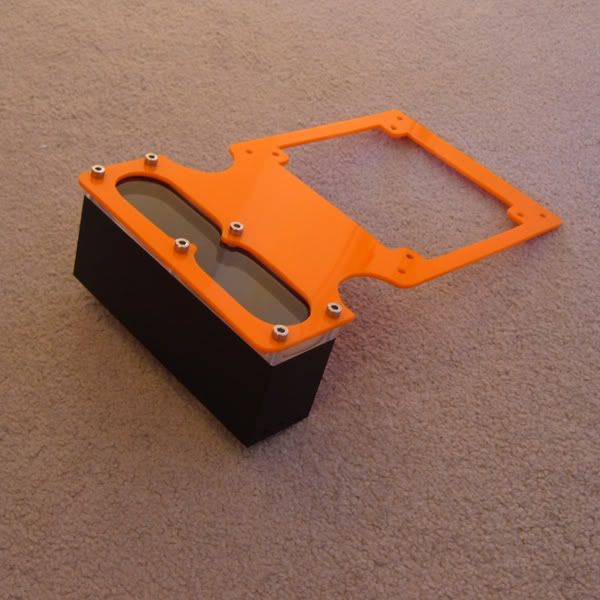
Its a bracket to hold the ducts firmly in place. Although they are held down by the 4 bolts on the bottom they needed 'squeezing' together to keep them pressed up against the fans.
Also I wanted to cover the gap in between them to better hide all the wires that will end up in that area.
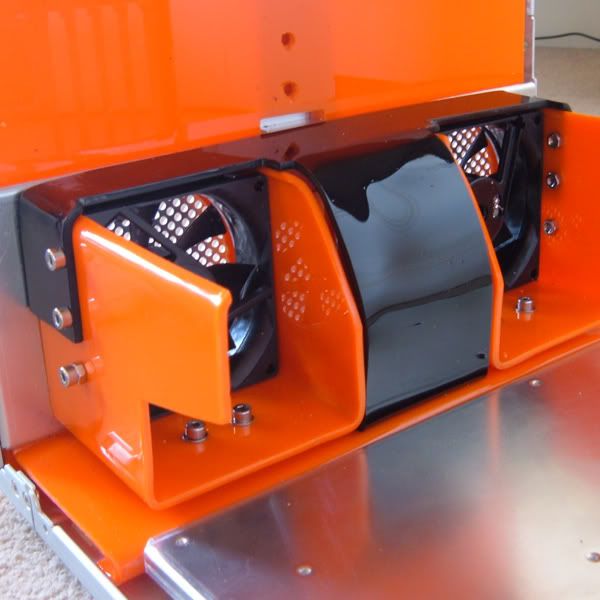
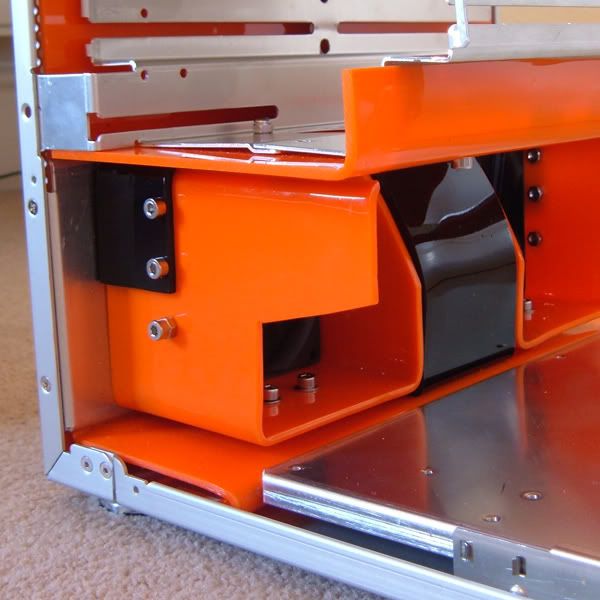
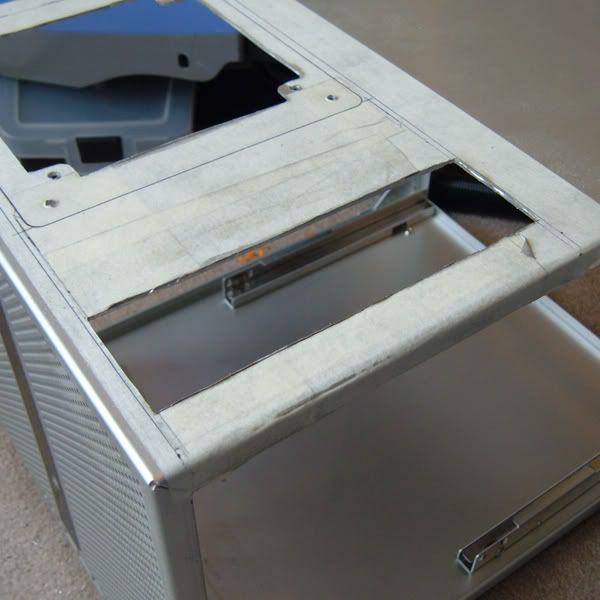
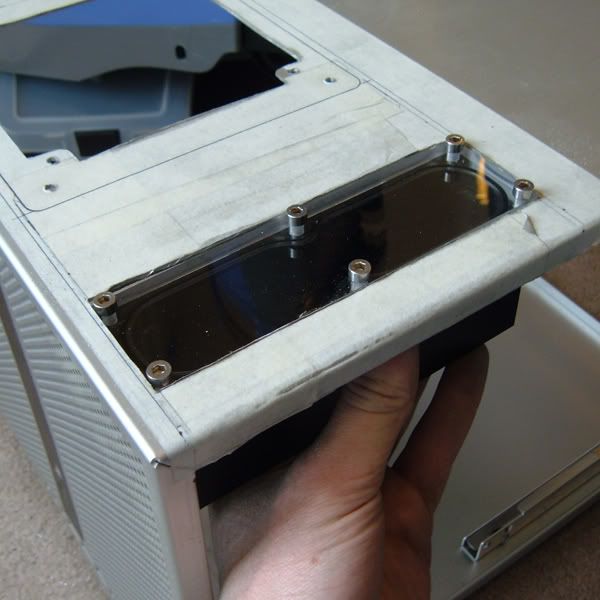
The piece slots down over the ducks and is held in place with 4 bolts like this:
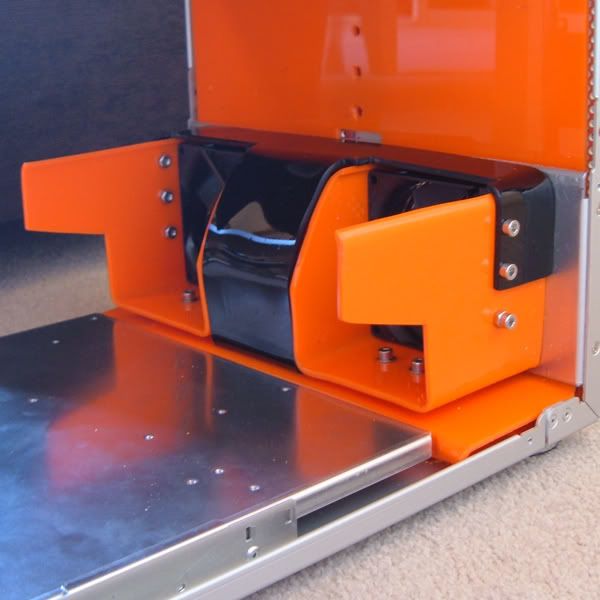
The gap between the ducts is then covered by the curved piece that hangs down:
Here it is with the drive bays mounted above:
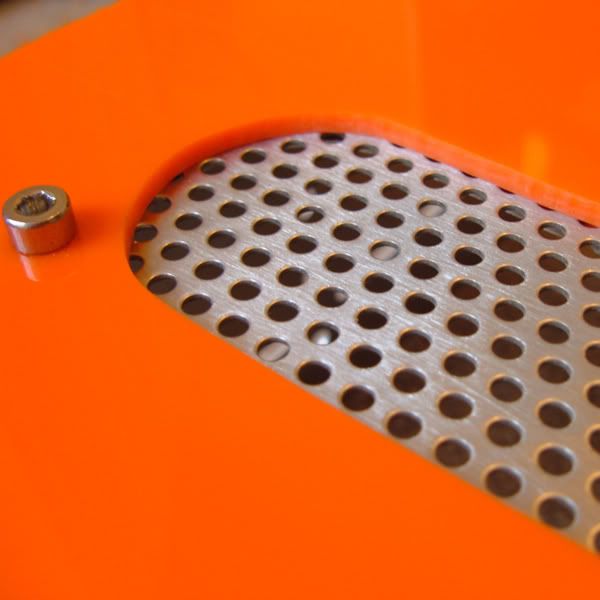
The bolt in each duct that appears to serve no purpose is just there to fill a hole I drilled to start working on some adjustable vents. I am planning on making a siding vent a bit like the ones in car heaters. Only this one will be moved by a motor or a servo.
So I can divert more or less air through the holes above the ducts into the rad that will be above it. Not really necessary but should look quite cool :)
That's it for today, thanks for reading!
Xperiment
wow that is sick. cant wait to see what it looks like completed. keep up the good work.
omg X, that cover is amazing....i absolutely love this mod
omg wtf bbq !!1!! this mods great y was i not informed
You are the master of bending the plexi. Really a great job on this build. I was just checking out some of your other stuff. You really do awesome work.
Quote:
Originally Posted by AMD_TaT3rs
Quote:
Originally Posted by b4i7
What they say! amazing work. Your attention to detail is just... just... wow! keep it up!Quote:
Originally Posted by BigJohnson
(oh yeah, +rep offcourse...)
Oh My God!!, That looks beautiful, great work as always.
Thanks for the kind comments and +reps
Got me all hyped up to mod some more now, wheres that dremel :)
And again..... Fantastic work mate, you really have some inspirational work! While your plexi work is amazing it is actually your water cooling that has my interest at the moment. Having never worked/used water cooling before it will be definatly in my next mod. Thanks for posting your logs, ill keep watching. Once more - GREAT WORK!
Thanks Talon - Hopefully my worklog will be of some help when you dive into watercooling. I remember the first waterloop I built, other peoples worklogs were so useful.
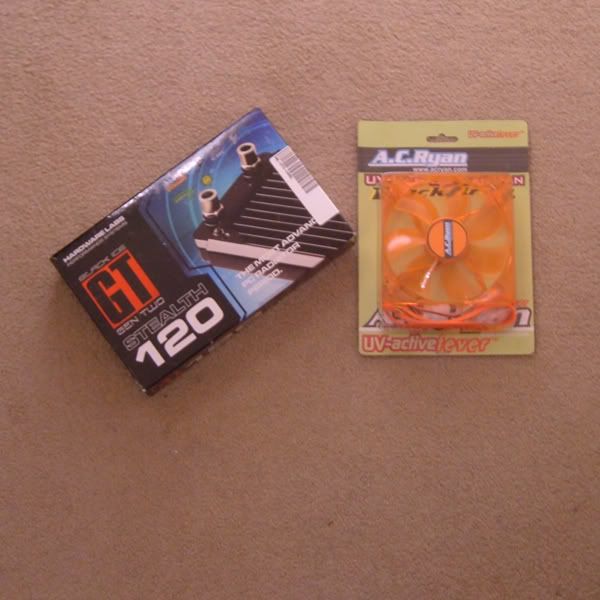
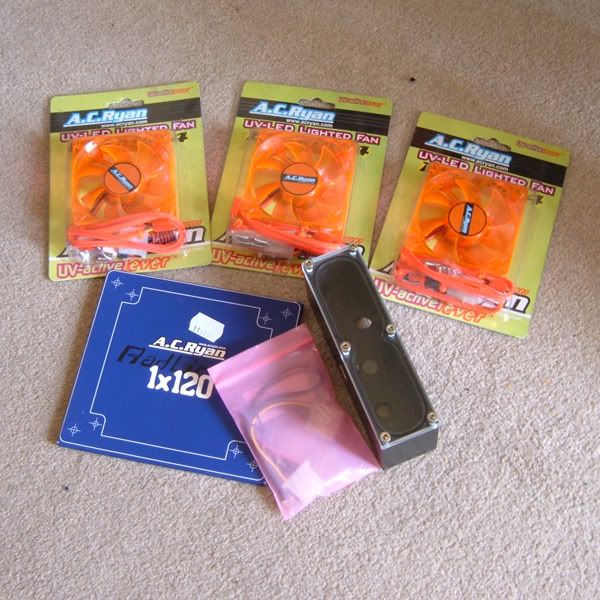
Just thought I would post up a few pictures of some parts I had delivered today.
On the shopping list was:
3 x 80mm AC Ryan UV Orange fans
1 x 120mm AC Ryan UV Orange Fan
1 x Black Ice GT Stealth 120mm Rad
it turns out however that 'in stock' actually means 'out of stock' when it comes to 80mm fans. So to my frustration I am going to have to wait for these :down: Hopefully not too long though.
Anyhow, some pictures:
The rad:
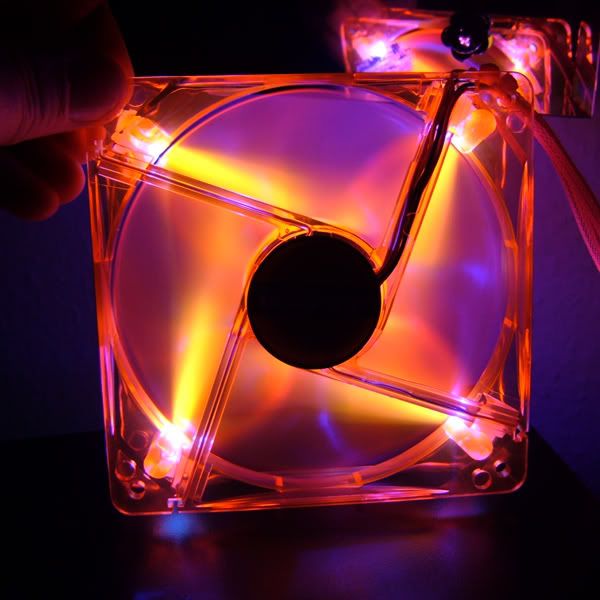
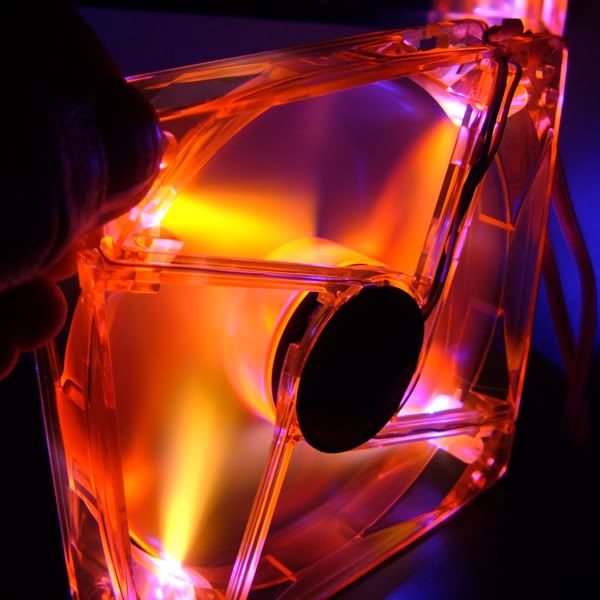
The fan:
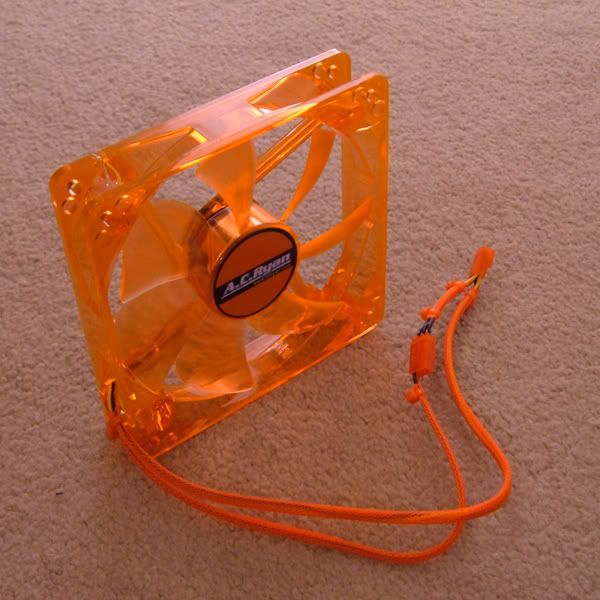
I took a couple of pictures of the fan powered up to show the UV Orange effect. I really love AC Ryan fans, such a nice colour effect and the split power is so so handy. I am really looking forward to getting these in the case:
I am just waiting for the rad grill now and I can get cutting. For those who haven't seen the sketch-ups on the front page of this worklog, the rad and fan will be mounted in the top panel, where the drive cages are.
Should be able to get started on the weekend.
Thanks for reading
Xperiment
Nice fans, but why do you say the split power is handy? Seems like it would just be one more thing to try to hide.
Strange as it may sound, I do quite enjoy hiding wires, yeah that does sound strange.
Its very rare I will have fans running at 12v. I usually have them at 5-7v and find thats more than enough to cool a waterloop.
With the split power I can do this without having to also drop the power to the LEDs so they stay nice and bright.
The perfect balance of noise v's looks IMO
Ah, I get it now. I didn't understand the split power was one for the fan, the other for led. sorry for that but I am still a noob, to what you can find out there as far as parts go.:bowdown:
oh...this project has given me an idea for a grill.....ima have to draw it up for a single 120
Agreed @split power. Those fans look great!
Looking forward to the next update :)
Holy .... well whatever :)
This is so amazing, its gonna be one sweet rig when its up and running, got my self some ideas from this one ;)
Keep it up !!!
Edit: BTW congrats to the frontpage !!!
I really like those fans lol.
This one is going to end up in the featured worklog. Nice work and I like the design.
ive thought the same franklinQuote:
Originally Posted by Franklin
and congrats on front page
Thanks as always for the positive comments and +rep's.
Thanks also for the front page review, really appricate the write up b4i7
Better get an update posted ........ been busy today!
Well its the weekend, that can mean only one thing - Modding!!!
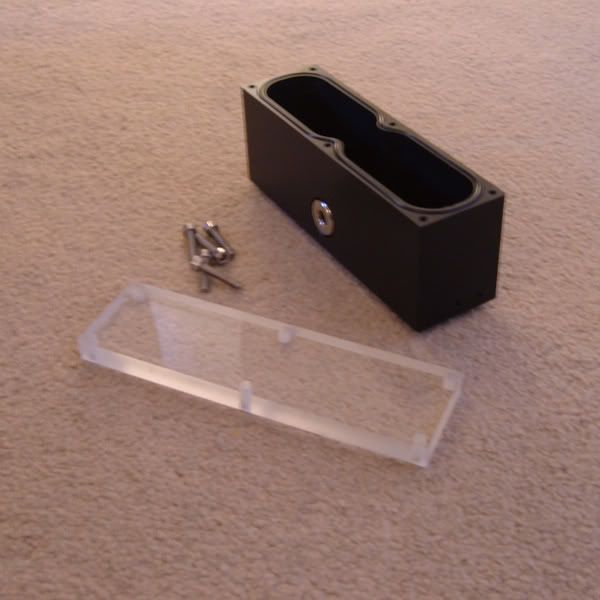
I had some bits in the post just in time for the weekend so was very keen to get working. My 80mm fans turned up, also an AC Ryan rad grill, another sheet of orange acrylic and a drive bay res.
I had a re-think on the top panel of the case and decided to change the res design a little, hence the drive bay res instead of the aqua tube as in the sketch-ups.
First on the to do list today, replace the stock fans with the 80mm AC Ryan Orange ones:
The steel mesh I ordered a while back also turned up, so I cut it into shape:
Gave it a good sanding to give it abit more shine:
And then applied to the drive bay cage:
Next I drilled the fan holes on the rad grill out to 4mm:
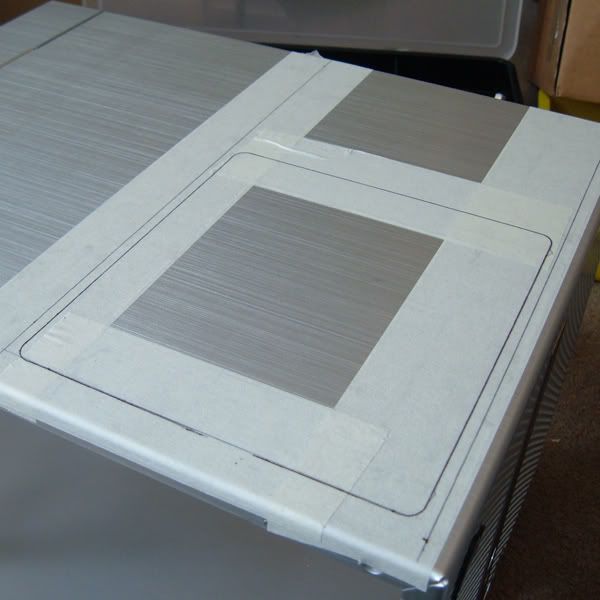
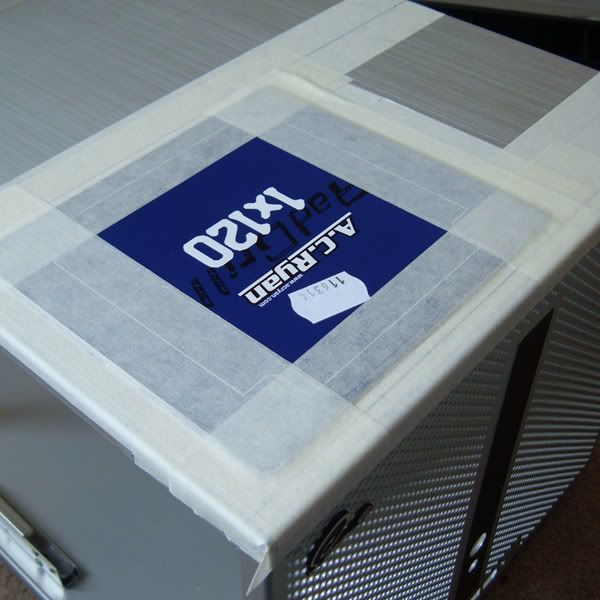
Then started marking out the top panel for cutting:
The template with the grill came in very handy:
Ready to cut:
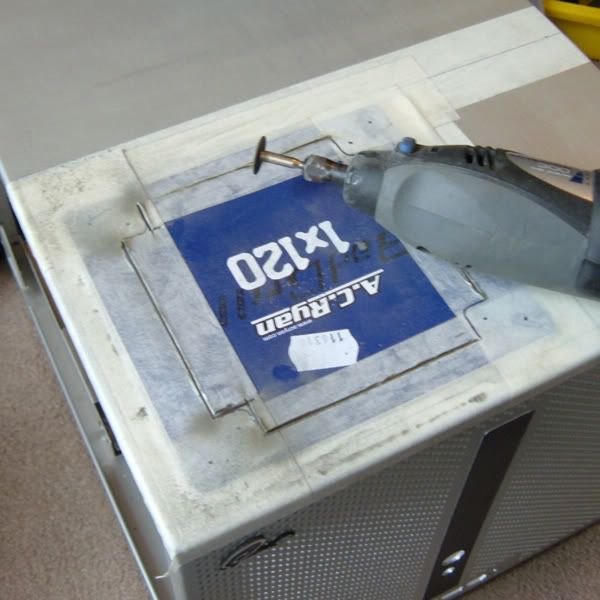
Enter the dremel:
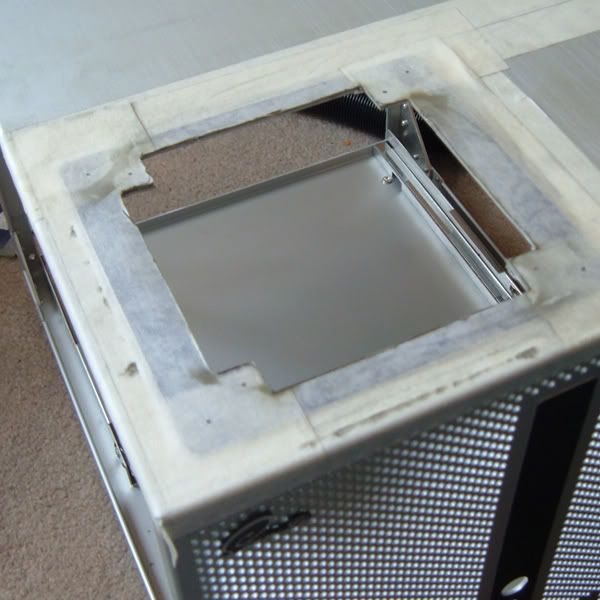
Done:
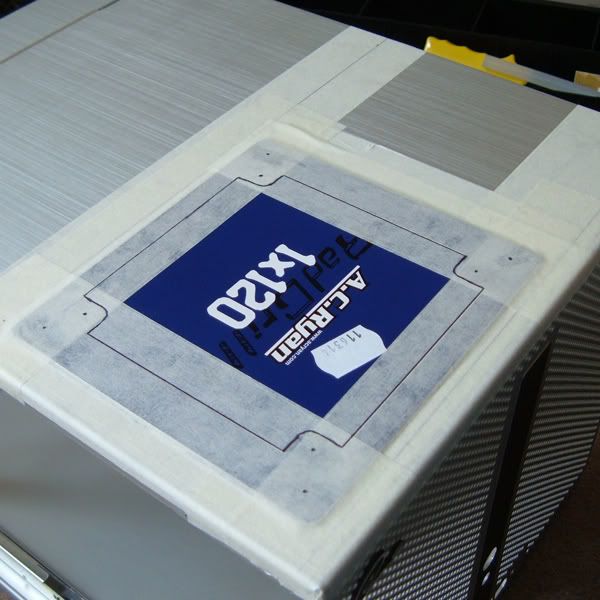
Next to drill the mounting holes. I used a centre punch just to make sure the holes were accurate:
Now for a test fit .... success:
I wanted to do something a little different with the drive bay res, so began marking out the top panel to cut:
Cuts made:
A test fit:
I dint want the res just sticking out the top of the case, so started cutting a surround. It would span both the res and the rad grill with an area in between for mounting a kind of control panel.
Somewhere to mount all the switches and a fill pot:
Cutting for the res:
And a test fit:
Now to put everything together to make sure everything fits before sanding and filling:
Top surround:
Res:
Mounted together, going well so far:
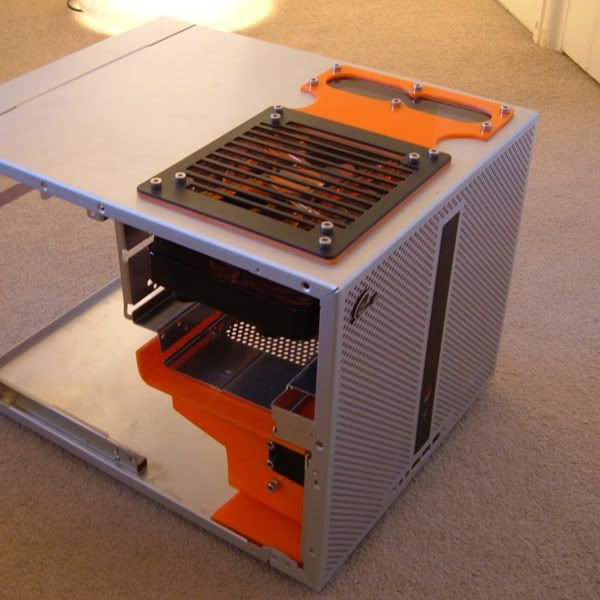
Fitted to the case, with rad grill fitted:
120mm Fan & Res:
Fitted in place:
From the inside:
Drive cage fitted:
Woohoo everything fits:
I really like the top panel this way, I still want to try and run some tubing across the top but will need to re plan it a little.
I will sand and file everything down tonight and then hopefully over the next week or so be able to start putting in all the switches and fill pot between the rad and the res.
Thanks as always for reading.
Xperiment
Dude, this thing looks more amazing everytime I look at it. Great design and incredible work.
awesome... would it work to put the fill port in the res?
This is really coming along beautifully! I am really into your style of work. I'm actually thinking the same thing as Ap1thy... I think that would be a sweet spot for a fill port.
that.... is really friggin cool!
If this baby hits 88, we're going to see some serious ****!
Anyone, anyone?
Wow thats a great update, looking better each and every time i look at it !!!
Your work on the acrylic is just amazing, tell me you're gonna compete with this mod ???
Mate I lOVE your work, I think you have really out done yourself this time, it looks fantastic. +rep
Hi X - fantastic - the gloss black and orange took me back to 1970s dodgems or bumber cars my fave was always the orange and black one - plus the chrome of course.
http://images.google.com/imgres?imgu...%3Den%26sa%3DN
Any chance you might do a plastics bending and Dremel cutting tutorial when you finish this? I keep looking at your photos on that light coloured carpet and thinking - what does he do with the dust! What speed and cut-off wheel do you use on plastic?
Anyway - keep up the good modding. I would love to see a complete plastic creation without the Li An in the middle of it. Bit like a Playstation - Industrial product design that looks like nothing else.
much cheer
John
ps - my spectacles have saved my sight many times from broken dremel cutoff wheels and flying solder - please tell me you're wearing eye protection!