They are like $40AUD each lol, for the cheap ones and you have them lying around ? LOL.

Printable View
They are like $40AUD each lol, for the cheap ones and you have them lying around ? LOL.
lol /\ exactly why i want one :)
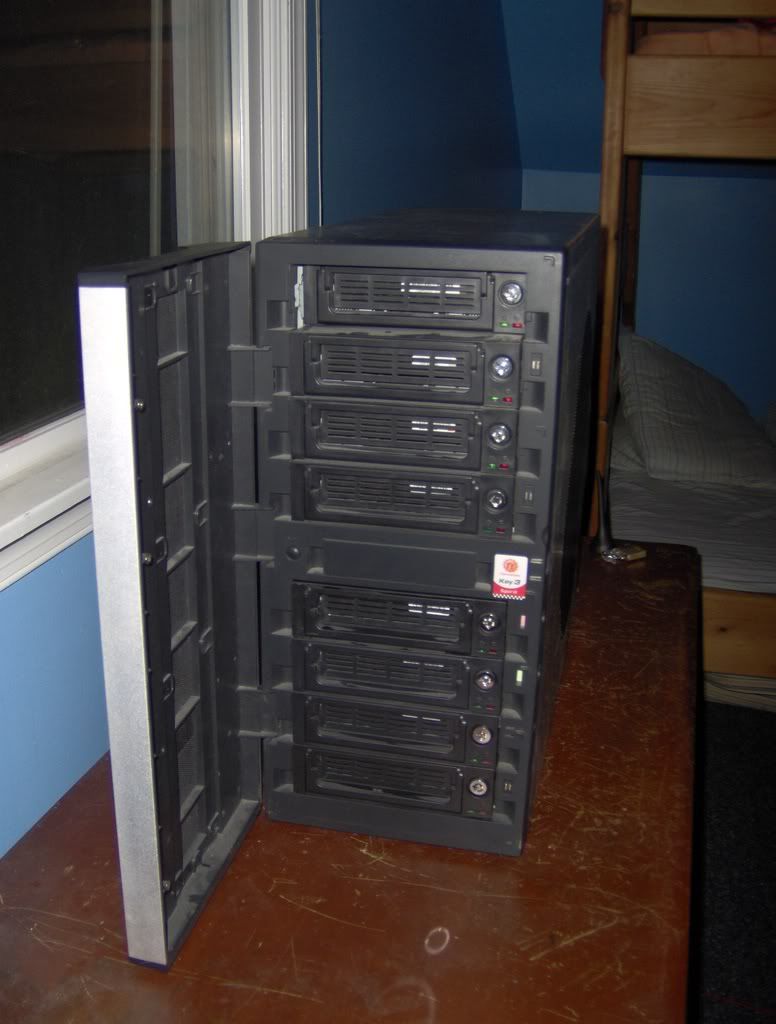
Well, long story (very) short, an old system of mine and had all the storage HDDs mounted in these. The system is no longer in use, and actually has been cannibalized almost in entirety by now, but the case and drive bays are just sitting around gathering dust. I had been planning on rebuilding it with better components, but ever since I discovered multi-drive bays (ie, 5-in-3's, 4-in-3's, 3-in-2's, etc) I doubt I'll ever use 1-in-1's ever again, for that purpose (the system was a fileserver, incase you couldn't guess ;) ).
pic of case with populated front (yeah, I know the top bay is off a bit; this was after its effective lifetime):
re: DonT-FeaR, I might could be persuaded if you've got an interesting idea :D but I feel like the cost of shipping would probably be more than the cost (at least in the US) of buying a new one. (I think they cost me ~$20-25 each, originally)
Could you weigh it? I have a UPS account, so I get a little discount through them if they're cheaper.
I would guess around 8 oz, but the cheapest shipping according to UPS and FedEx's online calculators for that would be ~$70US
Where are you? And $70 for 8 oz can't be right, unless you're having them pick it up.
wow... thats alot... and the postage is ridiculous
If you say that you will schedule a pickup (for UPS, at least), they only give you the outrageous quotes, not the normal ones.
I tried for drop-off and pick-up, which were actually about the same. The problem, I would think, is that it's shipping from Maryland, USA to Gawler, Australia. There seems to be a minimum cost of ~$75 for UPS, and ~$70 for FedEx (1 pound was the same for both).
Try this, too http://postcalc.usps.gov They can pickup the packages for free, too. And could you give me a shipping quote to 48167?Quote:
Originally Posted by x88x
how you know where i live :0 looks around nervously...... lol
:mad::mad::mad::mad:
BLAGREH!!!!
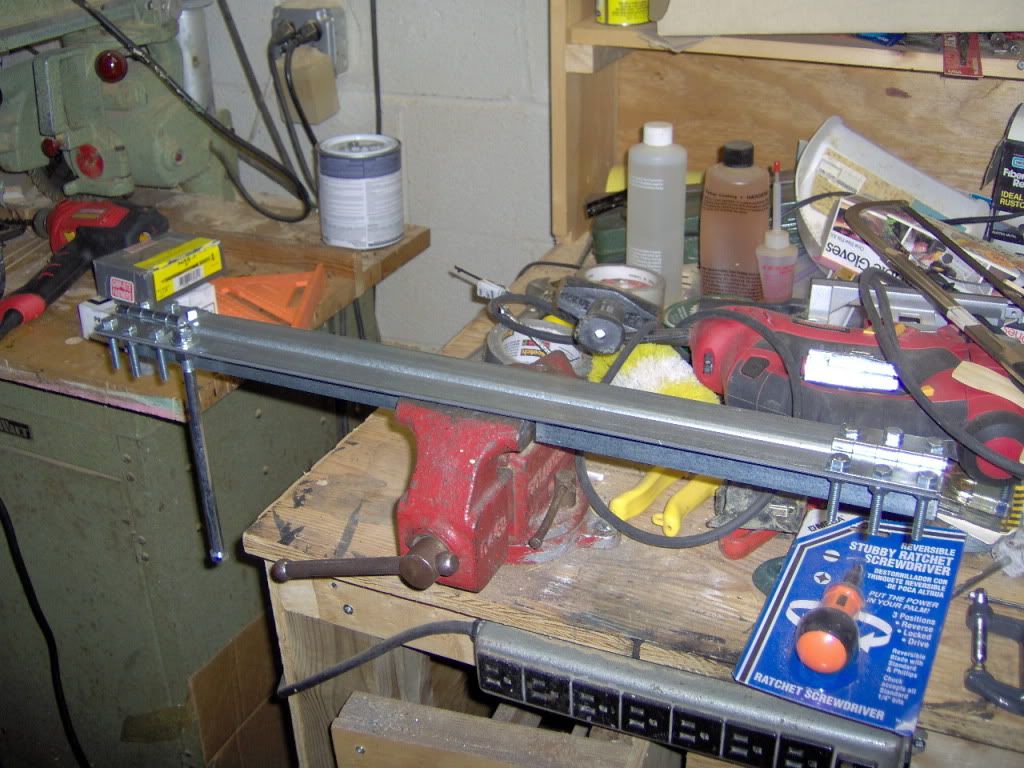
So after two weeks, I finally got time to work on my mod today (or rather, on the metal brake I need to continue my mod) and just ~10 minutes into it, my dremel suddenly dies! GAH! Motor just went kablewi and started smoking... :mad:
Here's hoping Dremel has good customer support...though I really don't want to spend a long time waiting for shipping/repairs/shipping...grrrrr....
Does anyone know of anything currently available along the lines of this little gem? If the motor isn't covered under the warranty (or even possibly if it is) I think I'll want to try and get (or build) something a little tougher, and that seems like it would have been a great solution because ever since I got my flexshaft attachment, it hasn't left my dremel.
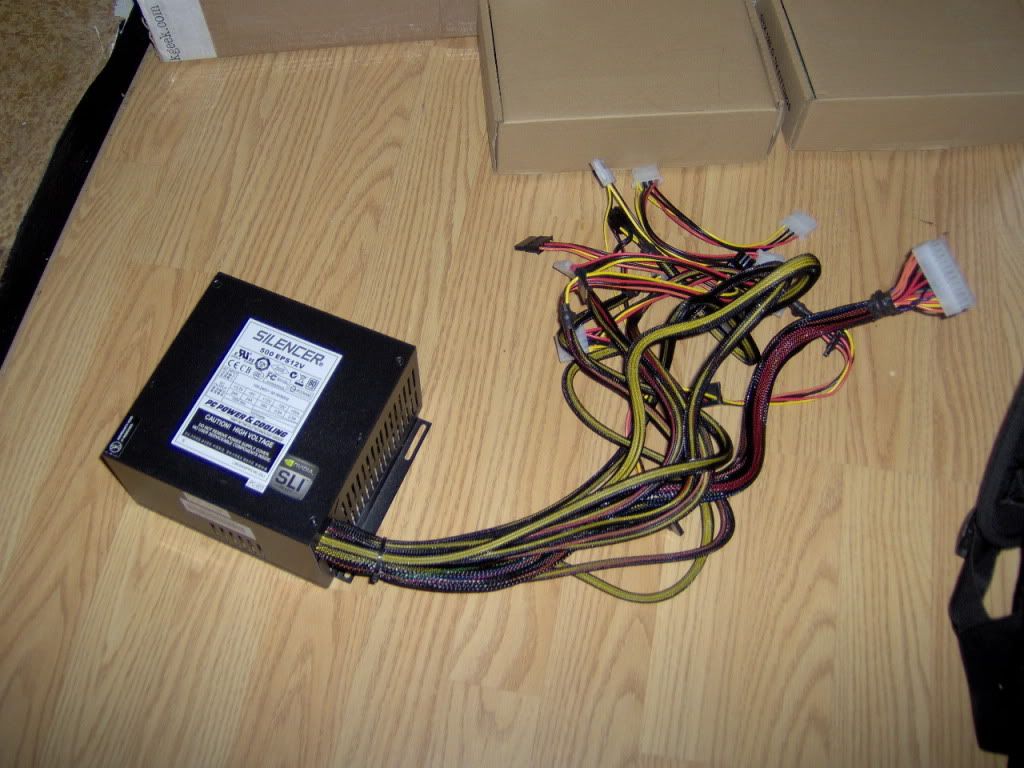
On happier topics, I got the PSU I'll be using for the mod; a PC Power & Cooling Silencer 500:
It was on sale for ~60% off (after rebate) plus I got a free 4GB flash drive :D
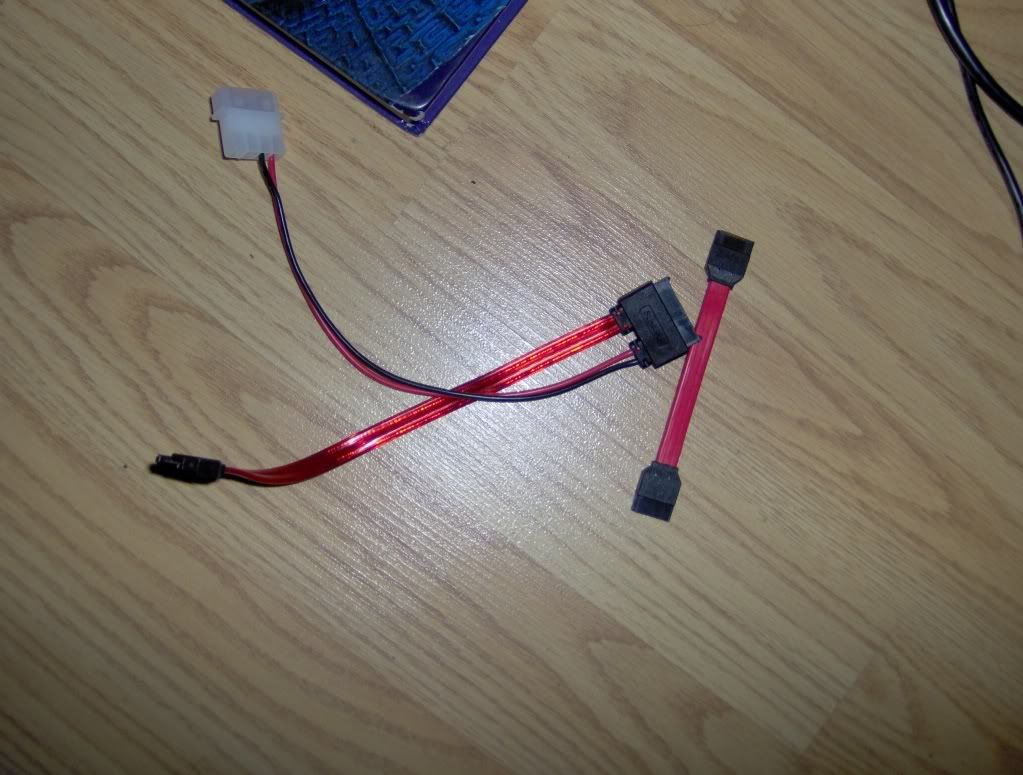
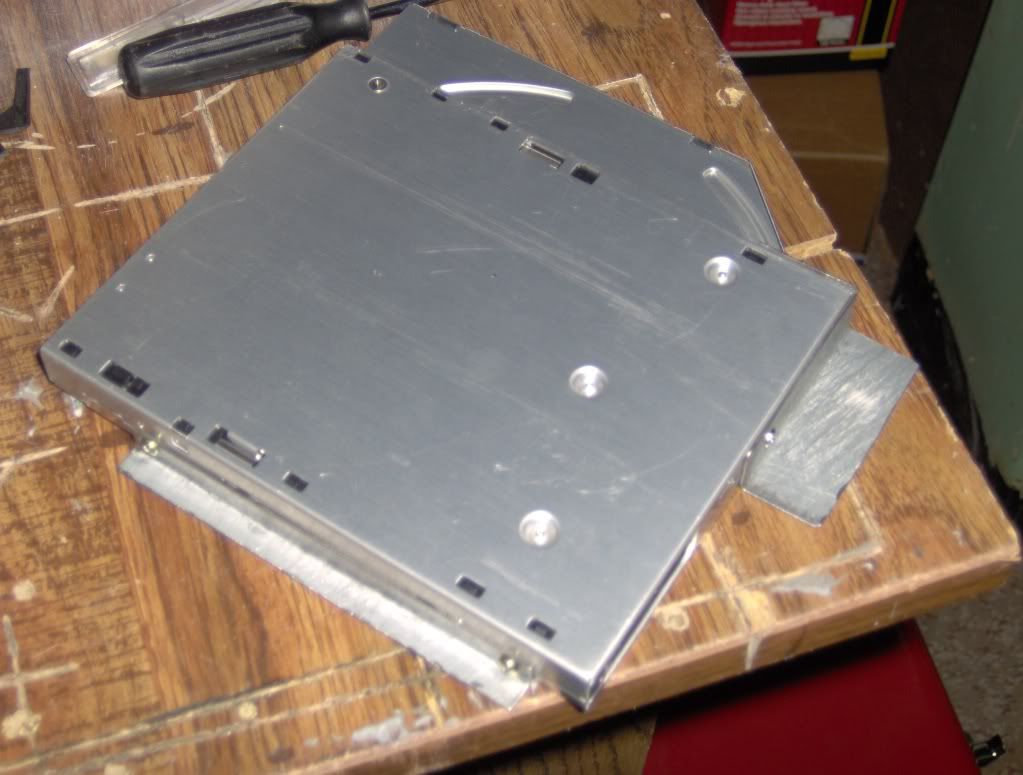
I also learned the hard way that you can apparently get female as well as male adapters for slimline ODDs.... But after ordering the wrong one from Newegg, deciding it wasn't worth the cost of shipping it back, and finding out Newegg doesn't carry male adapters, I finally got what I need from cpustuff.com:
The tiny SATA cable next to it is a 4" cable for the HDD...I had been thinking I might want something even shorter, but after seeing it...no, no, 4" is pretty freakin short.
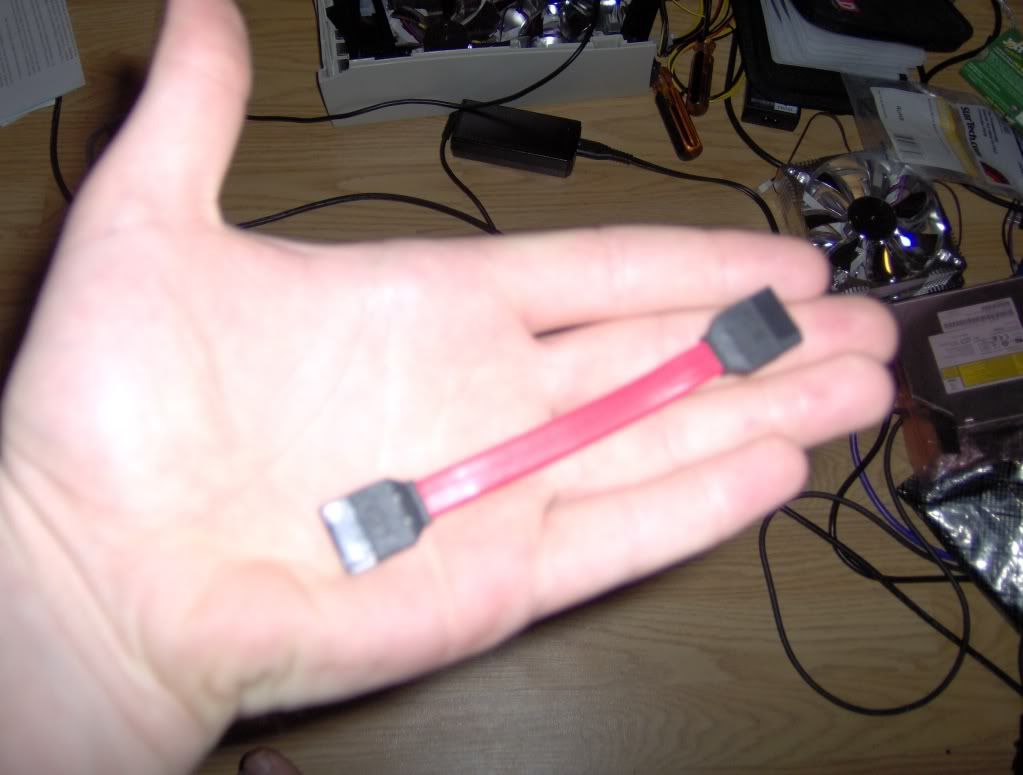
For scale:
Also, this is the metal brake as it currently stands:
I got inspiration for the design from FrooP here, and yeah, I know, I need to flip the hinges over....I was in the process of doing that when the magic smoke left.
re: DonT-FeaR and nevermind1534, I checked the USPS pricing, and that might actually be worth the shipping. PM me and we can work something out.
Well when the variable speed on my Dremel died they fixed it without question .They will fix the motor if it wasn't abuse of poor care that killed it. They recommend you clean the Dremel after every use such as blowing metal shards out of it and generally keep up the maintenance. Most likely a metal shard got stuck in the motor and burnt it out, happened to my older Dremel rip off, cooling blades melted and all.
If you are looking to get that other rotary tool you may be out of luck. That page you linked to says they are out of production and sold out.
Yeah, it seems to have been quite a while since they stopped making it. I'm considering this. Anyone have any experience with that company? I hadn't heard that before about cleaning it after every use, though it certainly makes sense. It would be a bit odd though, if that was the problem, since I've actually never used the thing without the flexshaft attachment, so it always hangs up about 8 feet off the floor.
update:
Well, it looks like Dremel's gonna fix mine for me, but after this, and considering how much metal cutting I've been doing with it recently..and how light a hand I've had to use with it at times... I decided that it just wasn't quite powerful enough for my needs. I finally remembered where I originally saw the kind of tool that I want. The company is called Foredom. Unfortunately, their products are quite expensive, so I got this instead. Hopefully it should get here sometime next week and I can get back to modding. In the mean time....idk, I might start working on my plans for the fileserver I want to build :D
update:
YAY! New not-a-dremel-thingy got here today! I couldn't find any reviews of it online anywhere, so I made one here.
update:
...I am not having good luck with tools these days... The dremel-on-steroids is doing just fine, but I completely forgot to think of the torque that this thing would put out. Long story short, if you get something like this, do NOT use Dremel cut-off wheels. I was able to use the fiberglass reinforced wheels just fine, until the screw broke. Yeah, that's right, I hit a snag in the metal and the screw that holds cutting wheels on the attachment broke. Sheared right in half. So, yeah, I'm gonna have to find some new wheels to use with this thing.
Wow, it's been a while, but I promise; I'm not dead :p
First off, I gotta say, Dremel support is pretty awesome. After getting the shipping info for my 400, I decided to try with my 300 that I have no receipt for. And guess what? They replaced both of them with no questions. Yay for companies that actually have good customer support :D
Back on topic, I finally got some time to work on my mod today, and I finally got the metal brake done.... unfortunately, it bends itself...needs some modifications before it'll really be useful. That aside, I came up with a better idea for the ODD mount. My previous design was basically to have a whole wrap-around thing that the ODD would sit in, but now that I can't bend large sheets, I got this idea:
I've also got the PSU mount modified to fit my new PSU, and I just ordered the rest of the materials for my water cooling setup. The last few weeks I've been really busy, but the night class I'm taking is off for the week and only has one week left, and the college courses I'm taking are over in a couple weeks, so soon I should have more time to work on modding now :D I'll post more as I make more progress.
Glad to see you are making some progress.
I finally settled on a design for the top vents/side (side design affects how the top vents would be). I decided to go with the stock method for securing the side panel, so I couldn't cut the ideal full circles in the top panel, but I think I got enough out that airflow shouldn't be too impeded, especially since it's also flowing through the rads.
holes:
holes with spring thingy that holds the side one:
Now structural stuff is almost done; aesthetic, I'm not sure about yet, so main stuff left is the wiring. I have all the parts I need on order with the possible exception of a right-angle connector or two for the GPU water block (I'm hoping I won't need them), so I'm hoping to have everything with the possible exception of the shell (aesthetics) done by this time next week.
Everything's come in now, so it's all just waiting for me to finish the mod, and then it can all get installed! I'm forcing myself to not install anything in the old case...if I want to use it, I have to finish the mod...at least the structural and electrical portions.
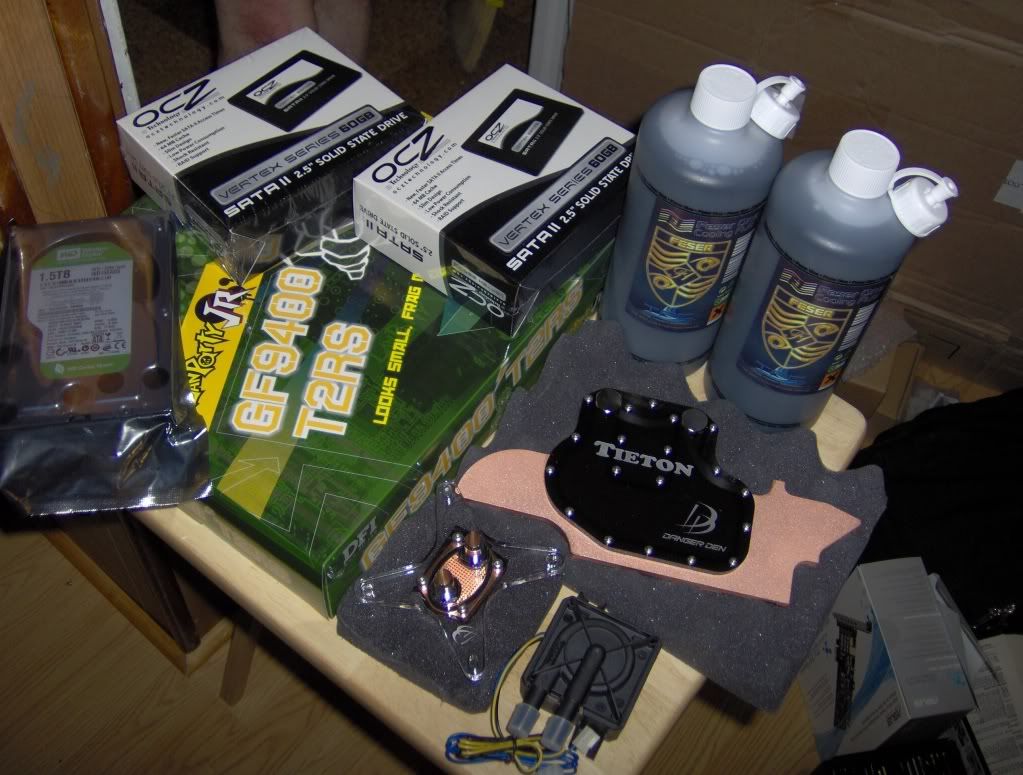
Happy fun pile of awesome!
And, let's see...what exactly is the most awesome little nugget in there (or rather, nuggets)? What have we here...
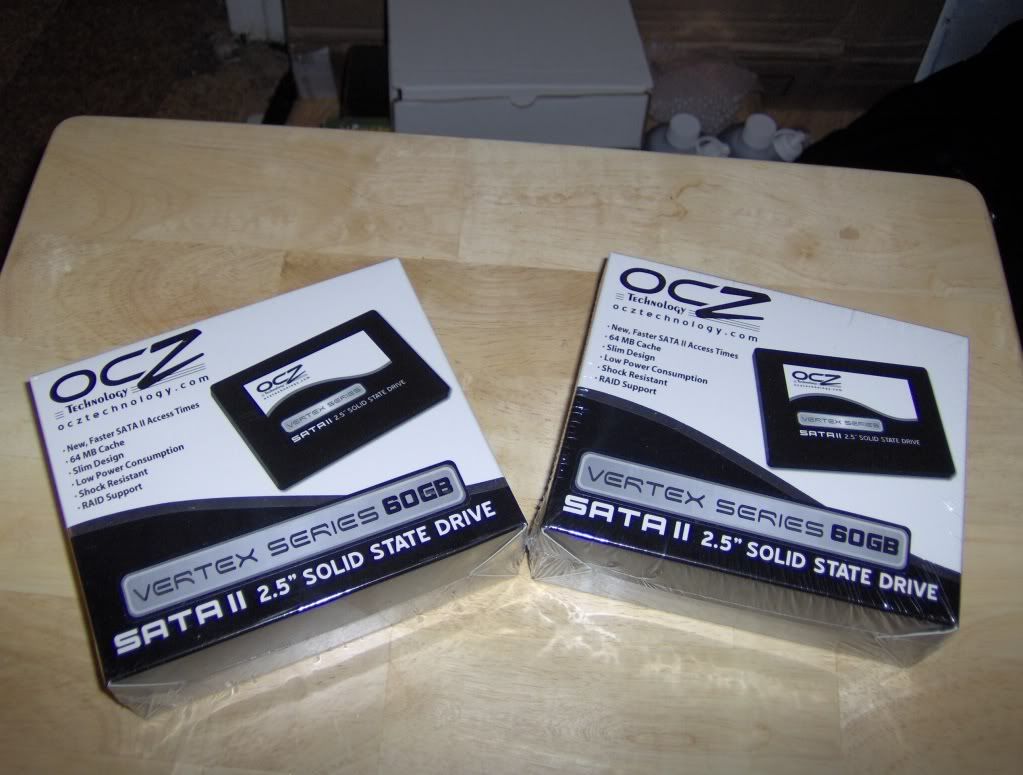
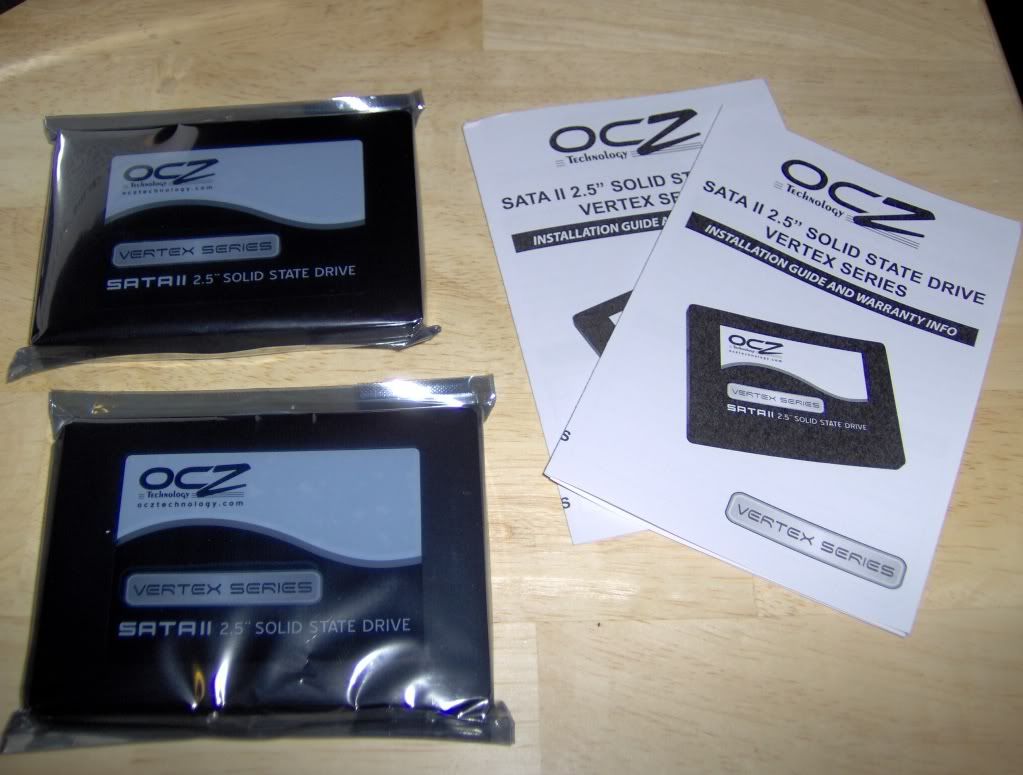
I fought with myself long and hard over this, but in the end, my techno-lust won out over my tax refund, and I decided on these. (So, for those of you who have been following this log for a while...I suppose I lied about not putting SSDs in this build :D )
post-unboxing shot:
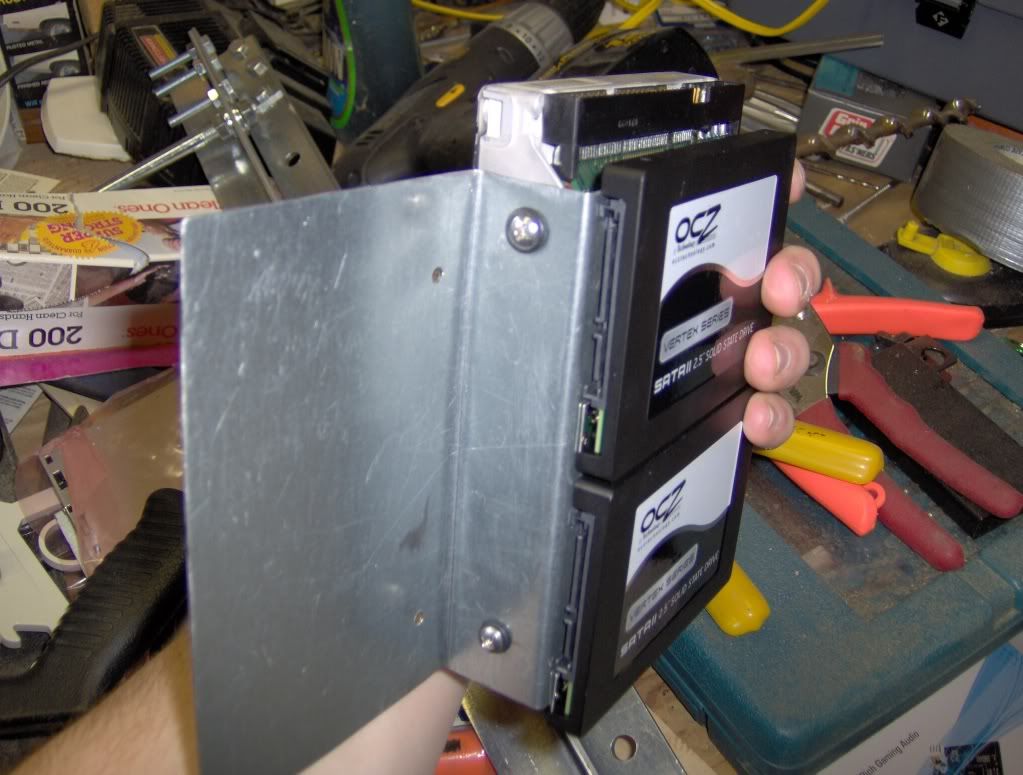
Now I just have to make the HDD mount, paint, and do the wiring....thankfully I don't have much going on tomorrow.
More to come soon.
Nice gear especially the SSDs.
wow.. those ssds would have set you back a bit!
yeah nice idea about not using anything until ur mods done,,
Yeah I wish I got all my tech after I finished my mod. By the time I was finished LEXA all my good gear was nearly second gen tech.
think we all tryid that:DQuote:
Originally Posted by The boy 4rm oz
Yeah, though to be honest it was really more of a "Oh, hey, I suddenly have $1000 that I never calculated into my budget! ...*pst*..*hey budget, look over there*.." And actually, after I do all the upgrades, the only things coming over from my current setup will be my CPU and RAM. And while my CPU is over a year old, it's still a really nice CPU (Q9450).Quote:
Originally Posted by The boy 4rm oz
yeah...a bit more than I care to admit...but I just couldn't justify buying a raptor, and I wanted something faster than a standard HDD for my OS and Apps, so that was the best choice. And, yeah, not letting myself use any of the new stuff till the mod is done is definitely giving me a lot of incentive to finish it soon. (Well, nothing aside from the 1.5TB HDD that is; I hooked it up last night to get stuff off my aging 7200.10 500GB drives....and they were not happy about working that hard...definitely gonna be RMAing those things before I sell them).Quote:
Originally Posted by DonT-FeaR
rofl... yeah i cant justify buying an ssd but i want to ... lol
I can justify buying one but my bank account doesn't lol. I HAVE to save for my trip to New Zealand next year lol.
might cya there jase...
dad wants to go for fishing :P
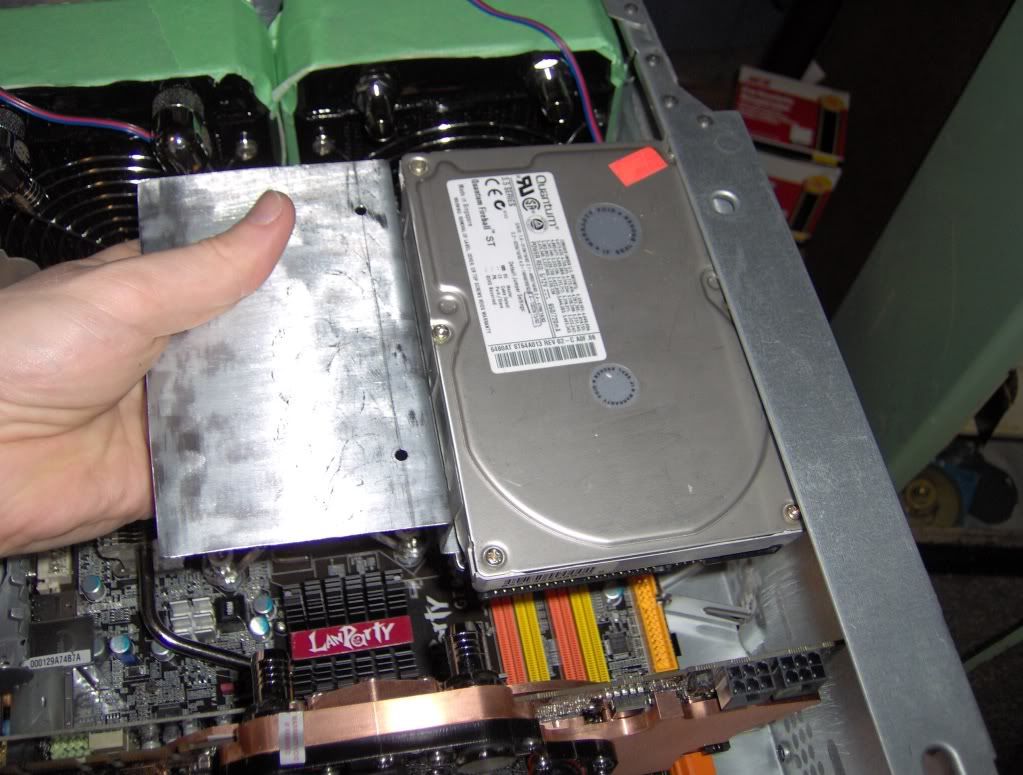
So, yesterday I finally got the HDD mount done:
Fits in like so:
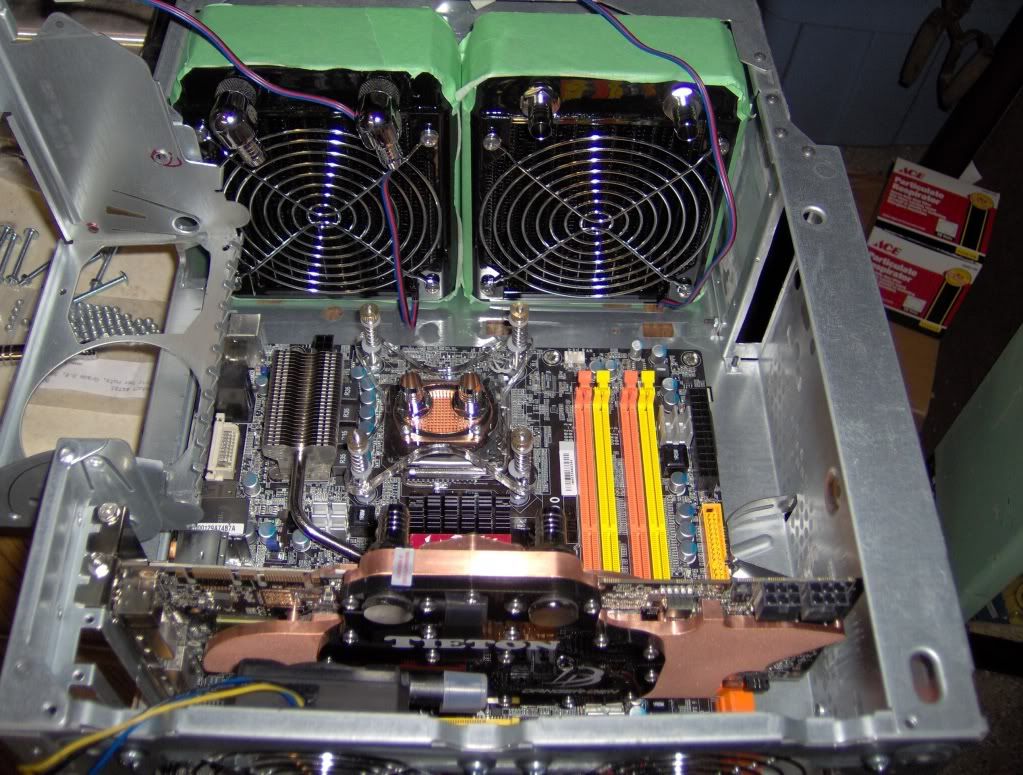
Unfortunately, it looks like I underestimated how much space the watercooling tubing would take up...also fans...also some other stuff...yeah... Anyways, I've rearranged some stuff and it should work now. The biggest change is that I'm ending up having to use a total of 7 right-angle connectors, which I'm sure will wreak havoc on flow, but hopefully it won't be a problem. I also ended up dropping one of the bottom fans, possibly both. One I had to drop because I ran out of space for the pump, but hopefully the other will still fit. I think I'll also leave the fan in the PSU for now, though I switched it around so it's pulling air in to the case instead of blowing out.
New partial layout:
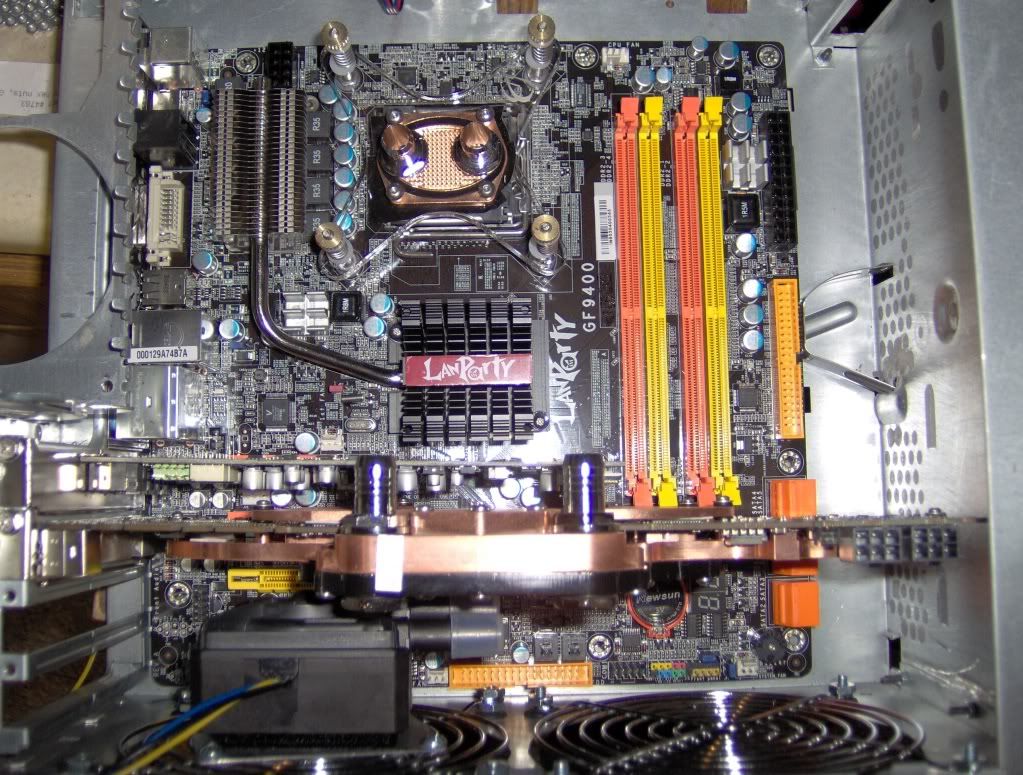
Better shot of the pump and the newly water-blocked GPU:
And I will say this; prepping and blocking a GTX260 is a PAIN. All those little surfaces that have to be cleaned, prepped and gooped...geh. But, once it's all together, it'll be worth it. Still got a lot electrical work to do, but I probably won't get the new right-angle connectors I need to finish the loop till Wednesday, so hopefully I'll get a chance to finish the wiring before then.
The HDD mount looks awesome, nice work. The GTX260 looks great with the block on, would weigh a whole lot less also lol.
like the hdd mount looks good
Heheh, yeah, I thought it would too, but that water-block is almost a solid slab of copper...I think it's actually heavier now than it was with the stock HSF. It does look pretty though :DQuote:
Originally Posted by The boy 4rm oz
Thanks both on the HDD mount. When I was cutting out the sheet to form it out of, I actually forgot about the SSDs, and made it just under five inches tall...a tad too narrow to get mount holes for both SSDs in there. Fortunately, it worked out well because I was able to put them almost flush together and the upper and lower edges stuck out just far enough off the edge that I was able to just throw a washer under each of the screws and it holds it on. I'll try and remember to get a pic of it when I takes it apart for painting.
Ok, yeah, yeah, it's coming up on two weeks....oh well, better to do it right than quick, right? :D
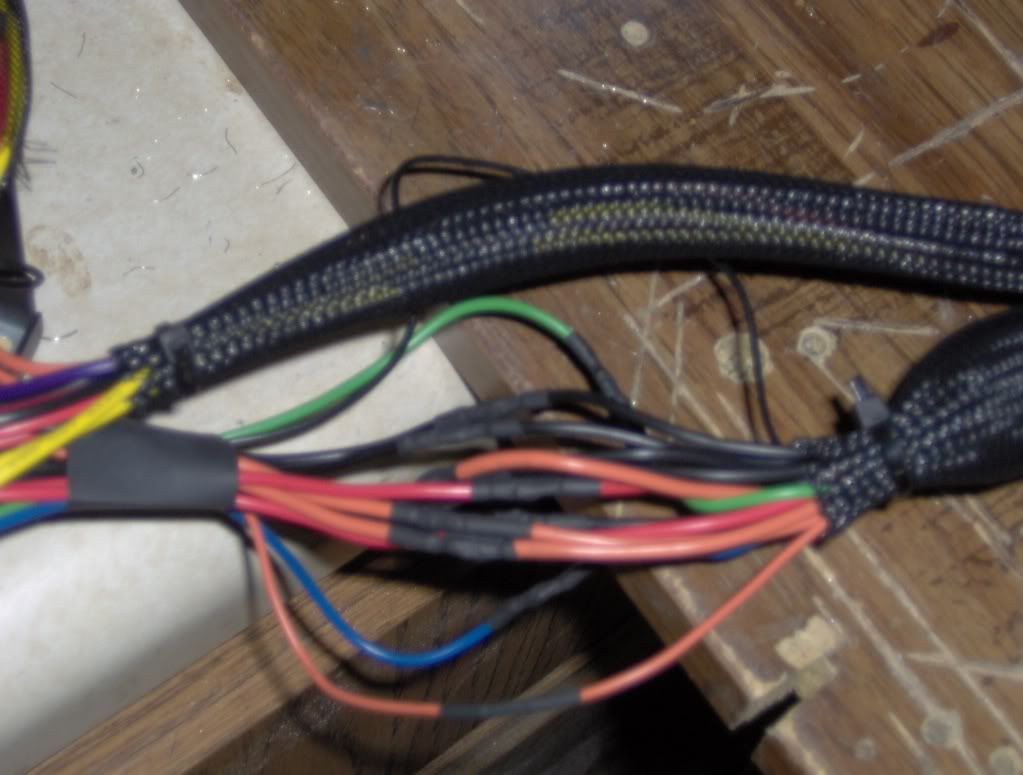
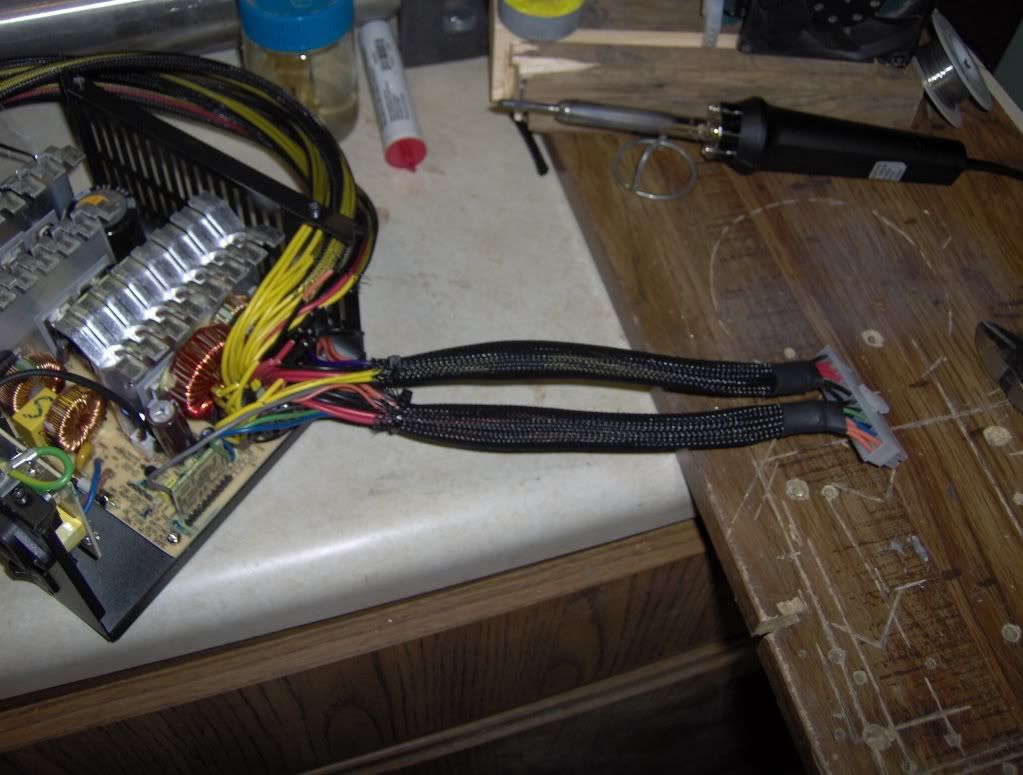
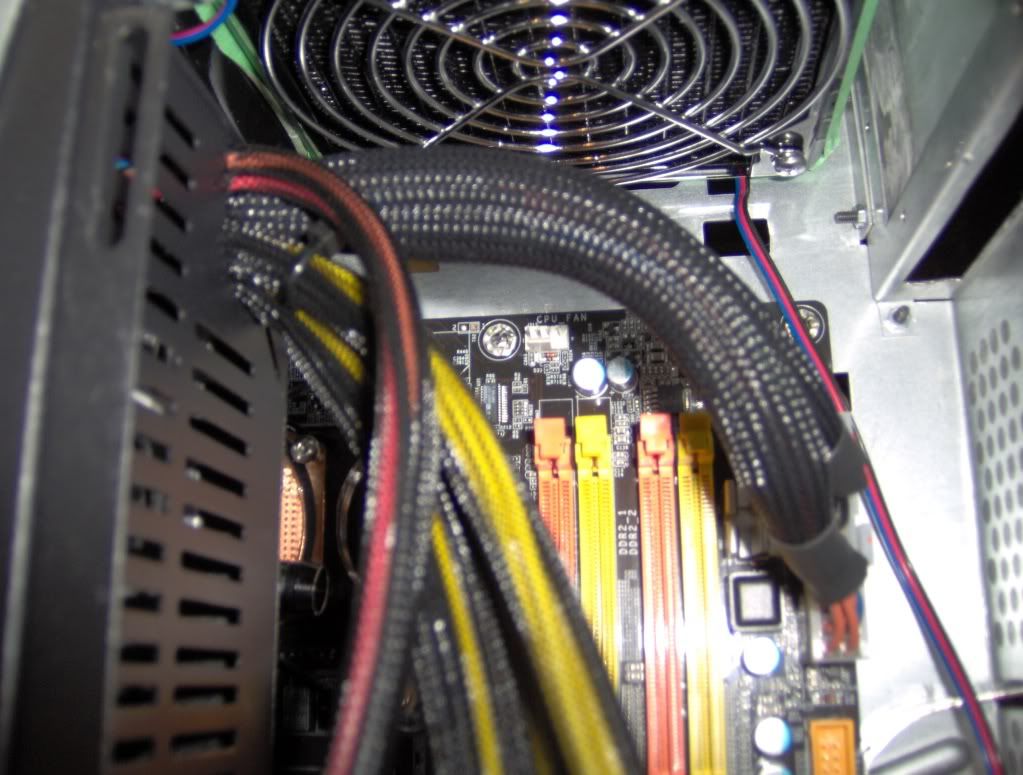
I've been working on the wiring the last few days, so I'm getting closer. I gotta say; I'd never used heatshrink tubing before, but I LOVE IT! It makes insulating connections soooo much easier, and lets me do much smaller, more streamlined connections. Like so:
I decided to route my ATX connector through two sleeves because it gives me more flexibility with routing the cables (ok, so initially it was because all 24 wires wouldn't fit through the sleeving I have, but it worked out well).
ATX connector done:
and in place:
I got one of the PCI-E power lines done today, and started on the second one, but I ran out of the narrow heatshrink tubing *kicks self for not getting more*. So tomorrow I'll head off to Ace and pick up more tubing...stupidly overpriced there, but I'm not gonna wait for delivery, I want to get this thing running this weekend. Once I get the wiring done, I'll finally be able to run the tubing, and I want to run the loop without the majority of the hardware in there for at least 12 hours. If it's not raining tomorrow, I'll be disassembling the whole thing again and throwing a few coats of paint on the frame.
very cool..
im in the process of doing something similar :)
Never seen a duel sleeved 24pin ATX cable before lol, epic. +rep
Bleargth... stuff taking way more time than I thought it would... Oh well, my finals were last week, and I've got a 3-day weekend next weekend, so I'm hoping to have it done by next Monday at the very latest.
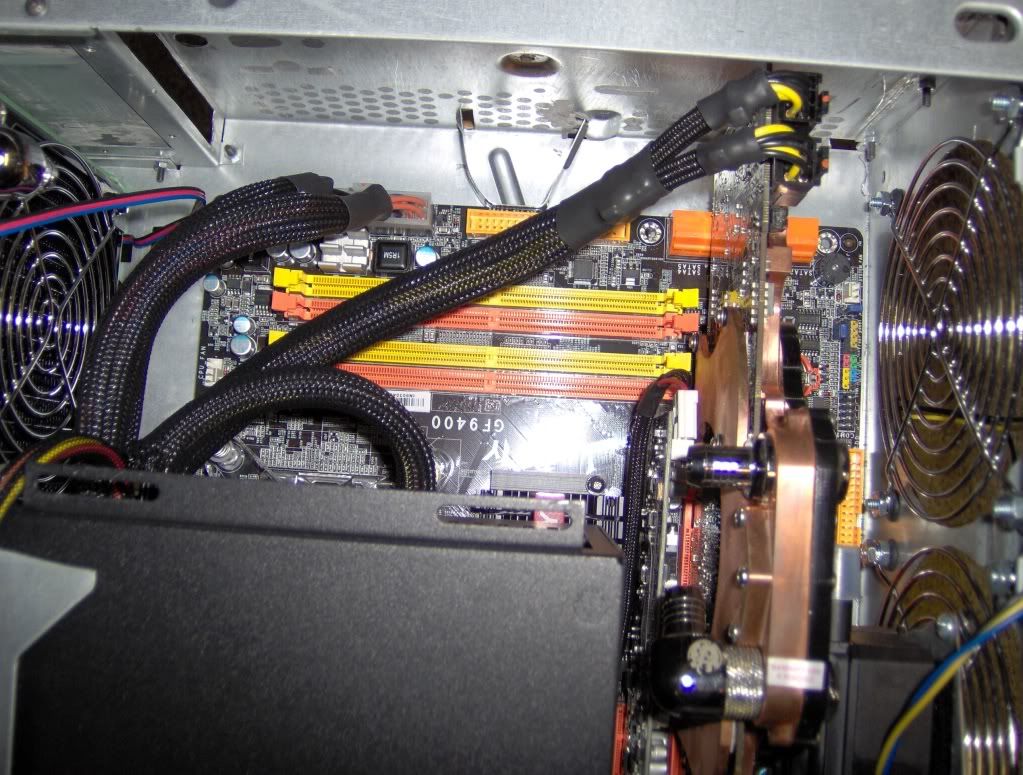
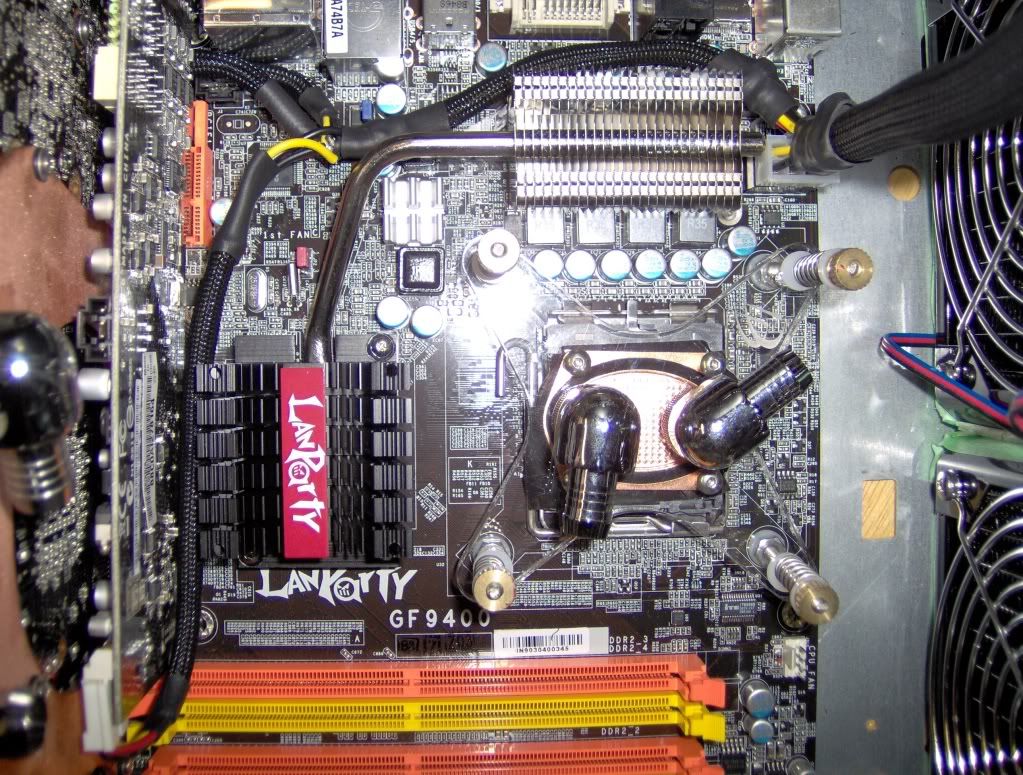
I got more wiring done, I got the PCI-E power set; also a little unique setup:
My new motherboard has some pretty weird power requirements; it needs a separate power connection for each PCI-E x16 slot, and I don't want to have to add any wiring later, and the Xonar needs a separate power connection, so...weird funky wiring it is:
close-up:
I also got the res mount done, though the more I complete of this mod, the more I realize how much of a pain it's going to be to actually assemble...mainly, getting the video card and the water loop in at the same time..
BTW the power on the PCI-e slots is only if you are running SLI, otherwise they arent necessary. The sleeving does look good though.
DFI recommends in the manual that power be provided to each x16 slot that there is a card in, and even if it's not needed, it won't hurt :DQuote:
Originally Posted by The boy 4rm oz
Hmm, that's strange. In my DFI manual it says that the power connector isn't required but it is recommended for SLI use lol. They must have changed their thinking. Are they still using floppy drive power connectors to supply the power? That is a major fail. I would prefer 3pin or Molex myself.
Yup, still using those horrid floppy connectors. I remember my old AGP X800XT AIW had a floppy connector, and after a couple years of use it was getting a lot looser than I was realy comfortable with...though it took a bit of persuasion to get it off each time, a bit like on my Xonar. But on the MBB, the connectors seem to have hit a good balance of secure but not so secure you have to pry them off.
Wow, I had been considering not painting any of the metal (to save time, get the mod done faster, and thus get to use my hardware sooner) because almost none of it is actually going to be visible, but in keeping with my work with the wiring, I decided I would rather do it right than fast, so I picking up some automotive primer today and got to work. ..and I gotta say, it looks niiiiice. Even with just the primer, the paint really transformed the case. No pics yet because it's dark, but when I bring the pieces inside later, I'll get some. I also slimmed down the HDD/SSD mount, enlarged the foot holes to accommodate the new feet I got a couple weeks ago, and I made this..
Any guesses :twisted: (and no, it's not a fill port)
EDIT:
whoops, just realized I never posted a pic of my res mount. here we go:
its a key lock... to either... stop people opening the side pannels... or to power it up