Nice progress. Love your attention to detail. :up:
So does my wife.Quote:
Originally Posted by SXRguyinMA

Printable View
Nice progress. Love your attention to detail. :up:
So does my wife.Quote:
Originally Posted by SXRguyinMA
After two weeks I think it´s once again time for an update. Unfortunately I forgot to make pictures second last week. Reason for this could be that I made only little things at the PC and fill the GRP form with surface. Be that as it will last weekend I made some pics that I´ll show you in this update.
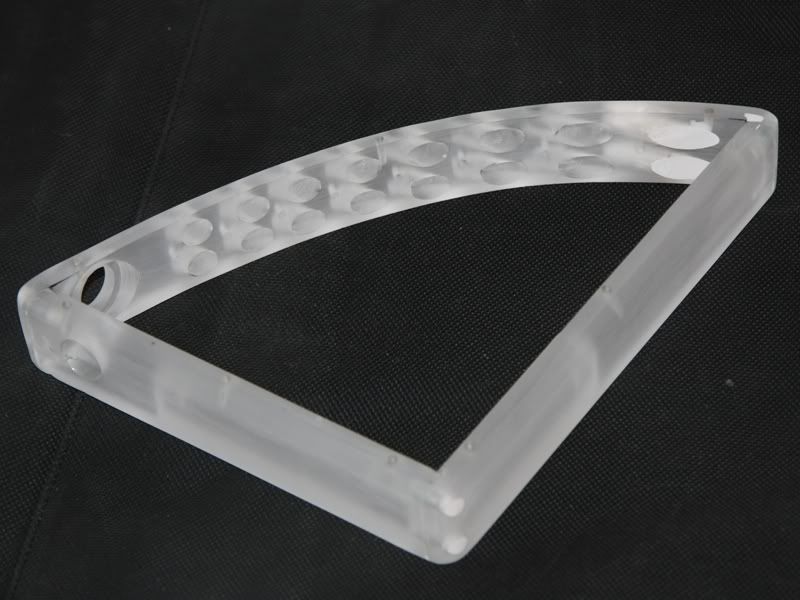
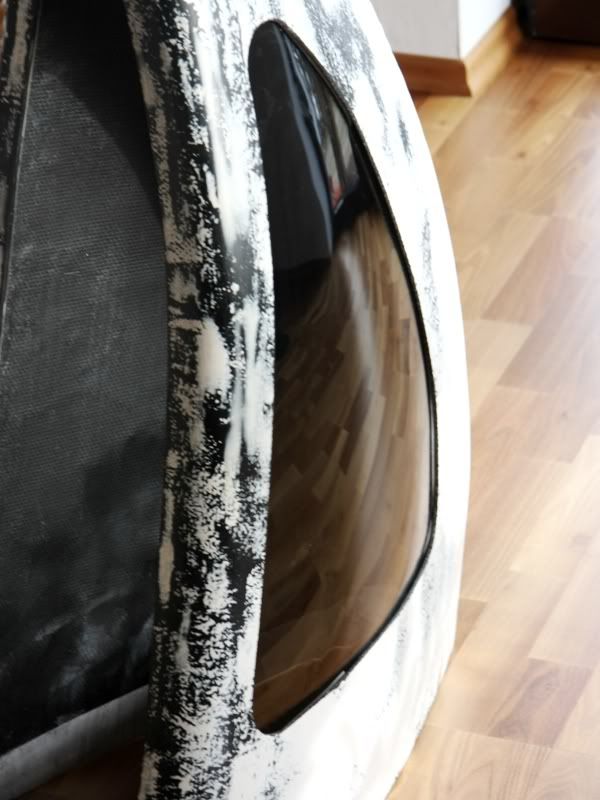
I started with cutting the hole for the window out of the GRP form.
I know the window could be maybe a little bit bigger to look “ideal”. When the window will be bigger I had to make the inner space bigger and the bigger inner space wouldn´t look so good how the space with the smaller window. So I decided to make the hole for the window better a little bit smaller.
With the hole for the window the last big piece from the big GRP form was eliminated.
At this picture you could see the 3 pieces I cut out of the form
Moreover I got a very nice package from Calgary (Canada) with two Freezone Elite radiators , one Freezone radiator, a MTEC Control Center und some tubing.
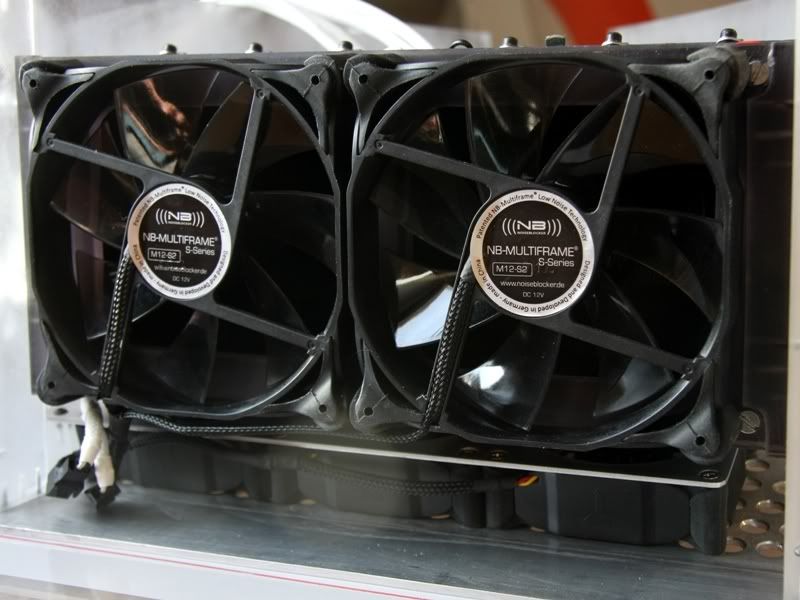
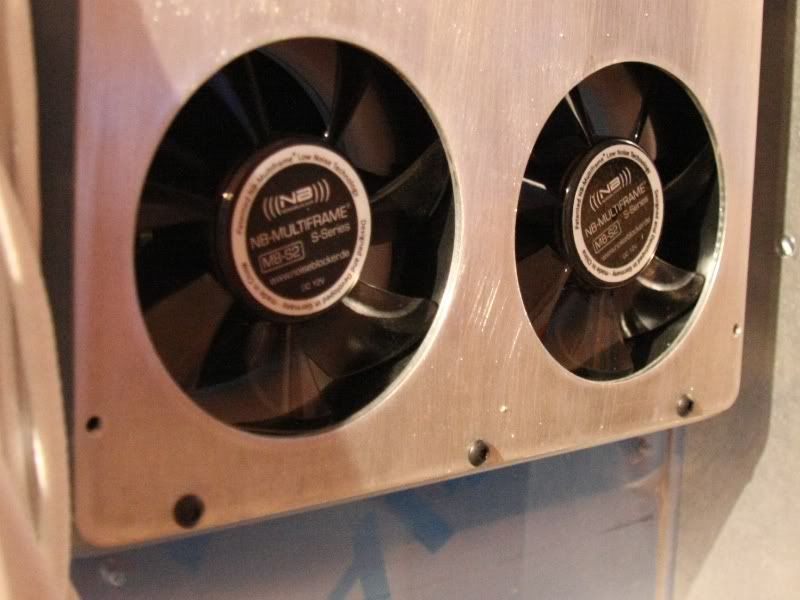
The two Freezone Elite radiators will be installed at the bottom of the sail like my plan was. To get very great cooling results I´ll install two Noiseblocker Multiframe MF12 S2 fans directly behind the radiators.
Later I´ll cut two holes into the Plexiglas, so that the hot air could flow from the radiators to the fans. Moreover I´ll bore three M3 threads in each side edge to could install it how you see at the following picture.
How you could see at the picture I changed my plan for this area a little bit. Namely I´ll install 6 Noisblocker Multiframe MF8 S2 fans instead of only three. These 6 fans will shovel the cold air in the case an directly against the radiators. The hot air from the radiators will be exhaust by the two 120mm fans behind the radiators.
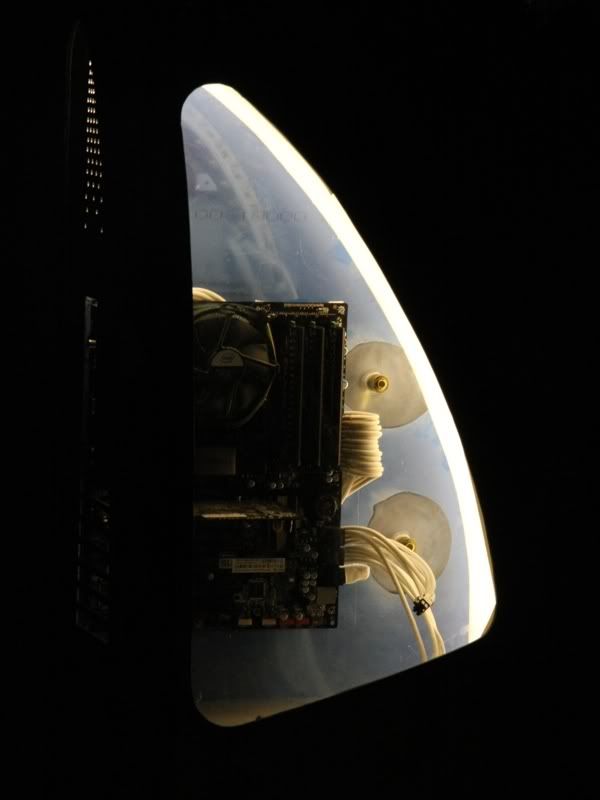
Because at the end I´ll make some “final-pics“ from the inner case (without the GRP form on it) I think it would be really great to see the things that are under the inner bottom plate. For that reason I´ll cut a hole in the bend Plexiglas at the left side. At the following pictures you see the dimensions of the hole.
Besides the bottom area I employed with the GRP form that it fit exactly to the rest of the case and especially to the aluminum plate at the backside. Apparently my preparatory work was nearly exact, because the GRP form fitted relative fast.
How you could see at the cables on the pictures I´ll have a lot of “fun” to sleeve them all.
At the following pictures you see the backside of the case.
The Plexiglas frame between the GRP and the aluminum fitted exactly, but this isn´t such a big problem, because I have to crop only 2cm from the lower side.
Who considered the last pictures a little bit exactly, noticed maybe that under the GRP form is a socket.
The socket is made of MDF an only for test. The final socket will be making of black anodized aluminum. Moreover I think it will look better, when the socket is 8cm high instead of 7cm, or how is your opinion to the socket???
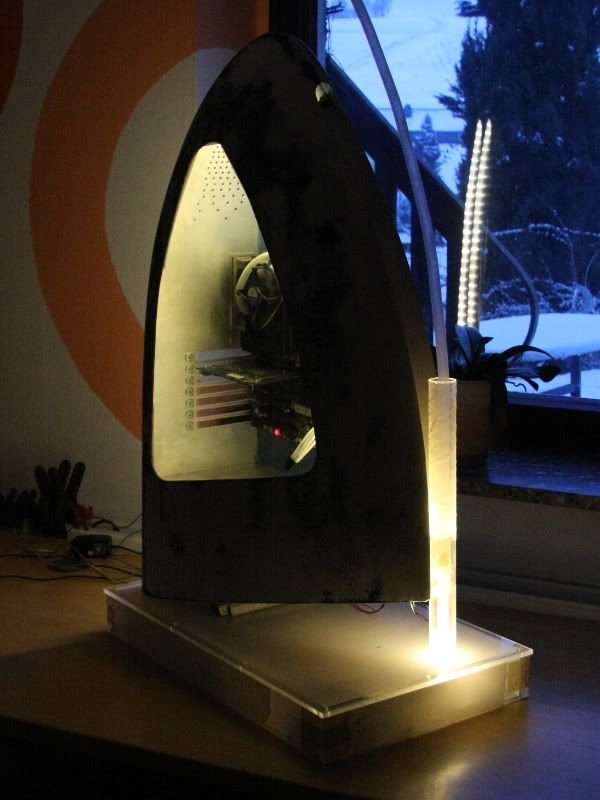
To give you a little decision guidance here is a picture from the front.
Well and now we are at the end of this update, and I be afraid that I´ll couldn´t work a lot at the PC next weekend, because I´ll come home in the night from Saturday to Sunday…:-(:-(:-(
@ SXRguyinMA/ msmrx57: Thanks for the complements. Well the shower I really nice, but it´s still nicer to shower under it…;-)
Edit: Well just this minute I noticed that I´m nominated for the Mod of the Month July. So I would be very happy that all who like my project could vote for me. For this many thanks beforehand and I´ll reciprocate with some more updates the next weeks/months.
nice progress :up:
Nice work so far! Looking forward to seeing those Freezone Elite radiators in action.
BTW... I am moving this thread to the Works in Progress forum.
very nice work as always
Realy love your work !
you got my vote on bit-tech !! :D ;)
Wow! Looking nice and loving the concept! sweet.
Wow those little coolers are really cool!
Looking great bud.
I'll get signed up on bit tech, can't belive I have not already and I'll vote for ya, I like your creations a lot mate, keep it up :).
Doh!, I just signed up there to add my vote, I could not vote, yet at least, its looking close just 2 votes behind che, could be 1 if I can vote in time.
I'll be adding some pics of my creations on there too and my latest work log, maybe, hopefully, luckily and with a bit more effort on the finish I might get a nomination some time :).
One hell of an impressive enclosure. +Rep
Also like the local landscaping in the background.
Will also vote for you on Bit-Tech. Subscribed.
Congratulations! You can see your blurb here
Sorry for interrupting you, but all you need to visit this I think they are similar, aren't they?
P.S. I'm Russian. Excuse me for grammatical mistakes.
They are similiar, yes, however, this sail is curved out while the other is curved in. Also, this sail has more details going into it while the other, which is great, seems to have less with a fabric finish.
Excellent work so far...looking forward to hearing your status update.
that is your opinion. ik think they are both great but indeed very differnt
I think after more than a month it´s time for a further update. Unfortunately I haven´t a lot of time so I hope it isn´t such a big problem for you that I show you only some pictures with only a few words. Well and if you have maybe some questions to the following pictures please ask me and I´ll give you an answer.
I´ll glue this little piece of Plexiglas at the tube in the front to hold the whole sail that it has no chance to overturn and the three LEDs are the power LEDs. For better imagination I made a test piece that you could see at the next picture
#
Well I also started with building the seal for the bottom of the Plexiglas tube in the front.
Under this seal I´ll install 4 high power LEDs to illuminate the water very well.
For this pictures I used only three Superflux LEDs. The part that is under the Plexiglas plate will be later in the black socket.
Moreover I bored the holes for the 2 120mm fans in the backpanel.
Ready with this I made the bottom plate for the internal space.
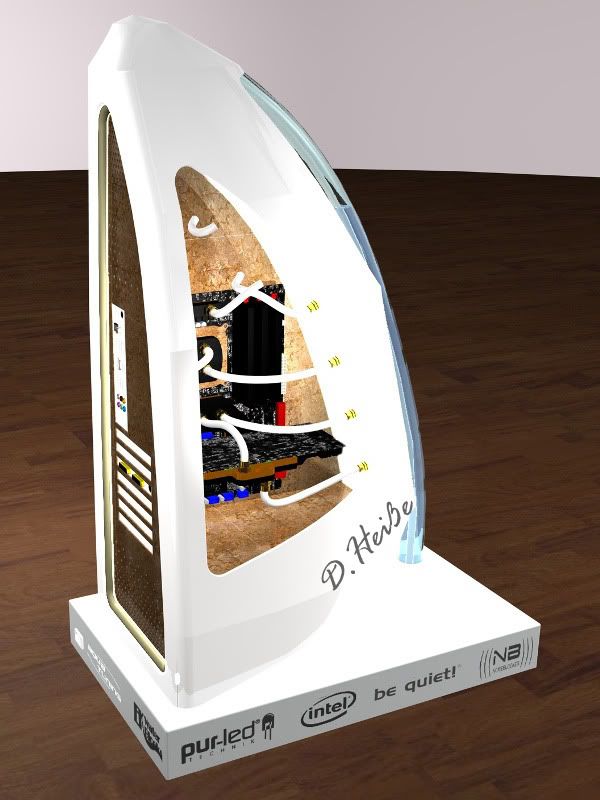
At the end 3 pictures from the whole case.
And now we are at the end of this update. I only have on picture for you.
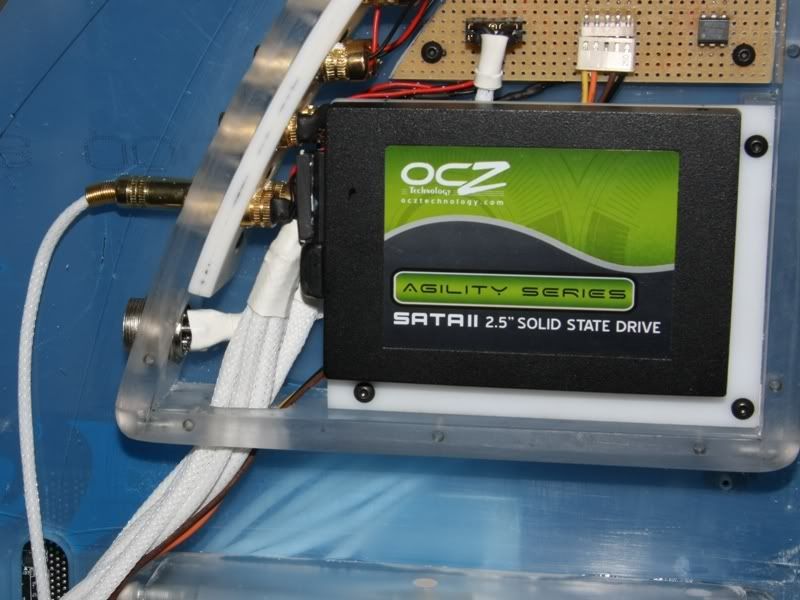
A OCZ Agility series sata 2 2,5 SSD with 30GB that I got warmly from OCZ for this project.
@SXRguyinMA/ Vitz¥^/Eclecticos/River82falcon: Thanks guys for your compliments!!!
@OvRiDe: I´m looking forward to see the FZE in action, too. Thanks you for moving the thread.
@tomcatt: Thank´s for your vote, but unfortunately I had 2 votes too little for the first place ;-)
@Mark_Hardware: Well I think the coolers aren´t so little how you think ;-)
@Waynio: Thanks for your commitment to vote for me! Well you could only vote than you have enough post or something like this I think.
If you have a nomination please tell it me and I´ll vote for you!
@Datech: Ohhhhh thanks to devote my project for the weekly spotlight, it´s a big honor for me!
@Beasonde: I didn´t see this case before and in my opinion my concept and this case are very different.
@Cheron: I second that! Only the basic form of this two cases are similar.
Looks like solid progress to me. I really like how this project is shaping up.
/\ me too :)
Nice perforation mate, so it can be done good with a normal drill :), looks great, to be honest I think some mods get put in to the mod of the month a little too early on bit tech, especially if it is up against a near completed mod, if your case was closer to completion you would have had a much better chance, but yeah missed getting my vote in with being new there :(.
This mod is turning out amazing, I want to make an irregular shaped case rather than just a cube now lol :), look forward to seeing the end product & wicked sponserships :D, ssd's are awesome for an os drive, vista behaves as snappy as xp did now for me.
nice
looks great!
Hello,
after nearly two weeks I think it´s time for a further update. After I made the bottom plate for the interior I could start with cutting out the back plate for the interior.
To connect this plate with the bottom and the rear I filed some feet made of 8mm Plexiglas.
This feet I glued with acryfix at the back plate. After the acryfix was dry I mark the right positions to cut M3 thread in the aluminum.
Ready with this I could start with bending the 3mm white Plexiglas on that I´ll install the LEDs to illuminate the inner space. For this I built at first a form over that I could bend the Plexiglas.
During I built the form I hopped to get a great idea how I could heat up the 90cm long Plexiglas stripe easily, because the stripe was to long for a normal oven. Unfortunately I didn´t get a better idea how to split it into two parts.
Now I had the size how long the circuit stripes for he LED have to be. So I started directly with cutting out of them.
At each of this stripes I soldered on 3 warm white superflux LEDs.
I connected all the stripes, so that I have to solder only one plug and put it into a 9V bush.
After the LEDs for the inner space were soldered very well I could start with the LEDs for the rear. For this I bored at first 80 5mm holes in the frame made of Plexiglas.
Next I grinded off the heads from the LEDs to get a bigger angle of radiation. I also cut the cables that I needed to the right length and removed the isolations of the ends.
Right after I was ready with soldering the LEDs I assembled all provisional to see the light effect and especially to make a photo from it, that you could see it to ;-)
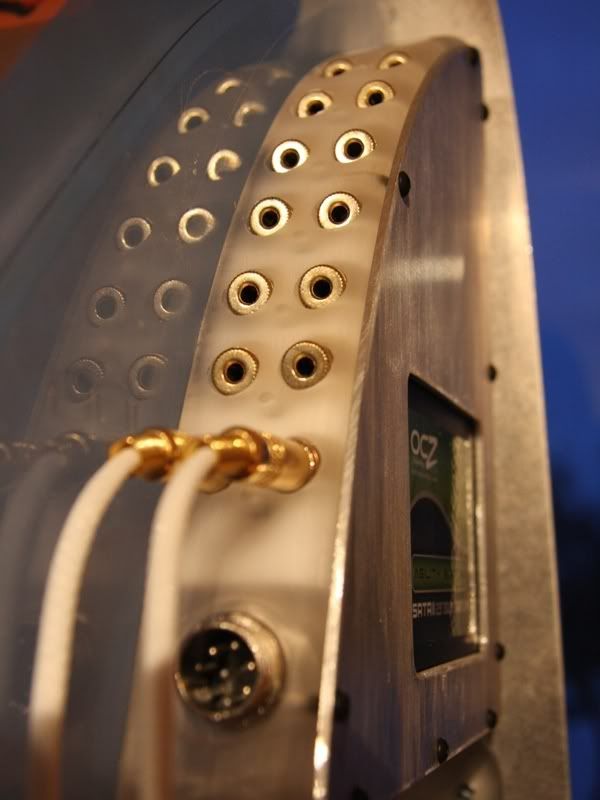
Ready with soldering LEDs it was time again to bore some holes in the rear plate. But at first I had to find the right position of the 150 holes.
For this I made a sketchwith a CAD program. I think it´s a lot of better than a sketch with pencil and ruler, because on the one hand it´s 100% exactly and on the other it´s more easier to rework the sketch a little bit.
And so looks the upper side of the rear after I tortured the 4,5mm borer about 150 times. I think the result looks relative good and nearly like a CNC work ;-).
In contrast to the holes in the lower part of the rear you see in the upper part the holes from inside and outside.
Now I could devote to the Plexiglas stripe that will be installed infront of the LEDs to refract the light of them. For this I start again with building a form to bend the Plexiglas stripe over it.
How you could see is this form a little bit more exactly than the other form. Reason for this ist the fact that you don´t see the stripe on that the LEDs are so it wasn´t necessary to work accurate to a millimeter.
Ready with this I faced to the same problem how I descriped you at the start of this update namely how to heat up a 80cm long Plexiglas stripe. But now I find a solution that you could see the following picture
I don´t know why I hadn´t this idea much more earlier, but better late than never ;-)
Thant he Plexiglas stripe was heat up to 170°C I could start with bending it.
Before I take the Plexiglas out of the oven I filled the bottles with boiling hot water, because cold water would eliminate the heat of the Plexiglas instantly.
After the stripe was bending I cut out the stripe that it fitted exactly between the backside and the GRP form.
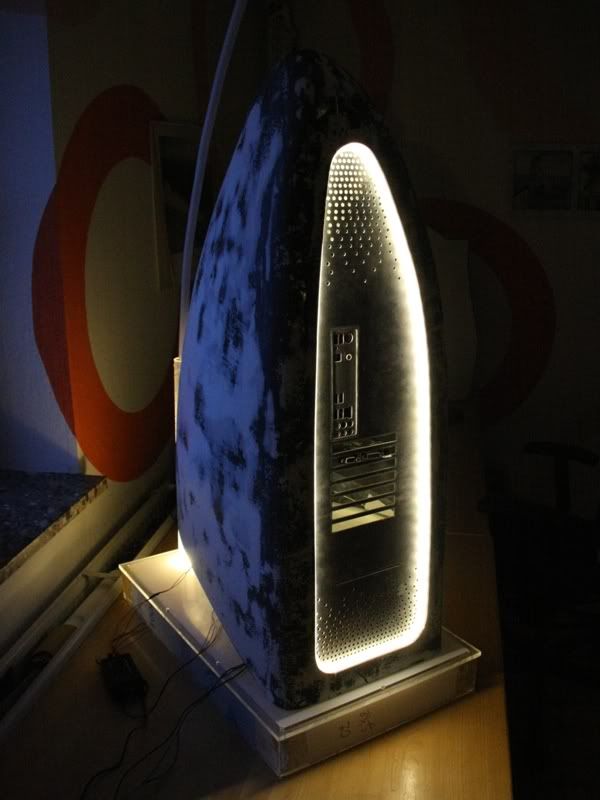
Now I assembled all provisional again to give you a little impression how the case looks with the LED light.
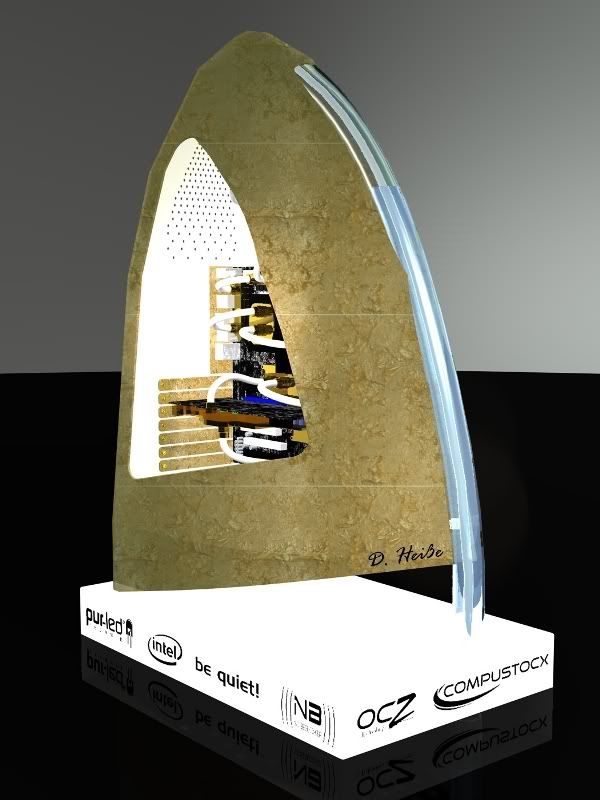
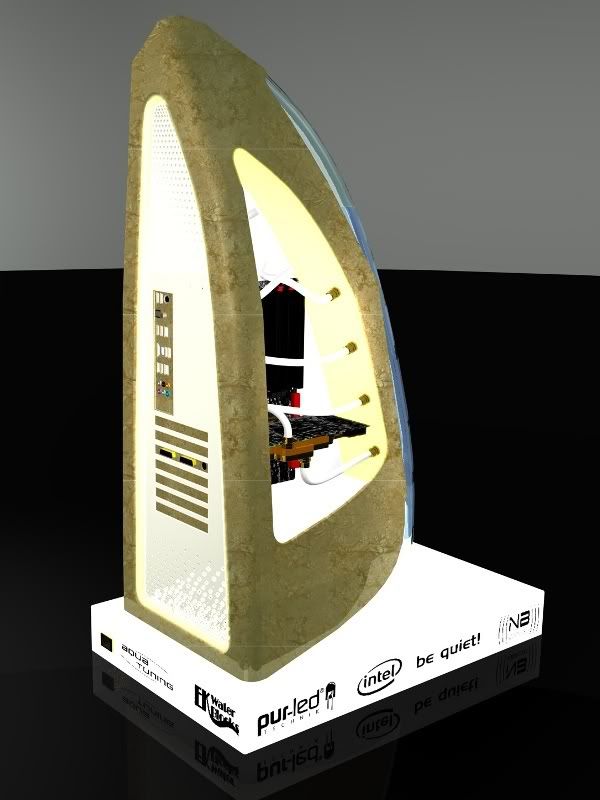
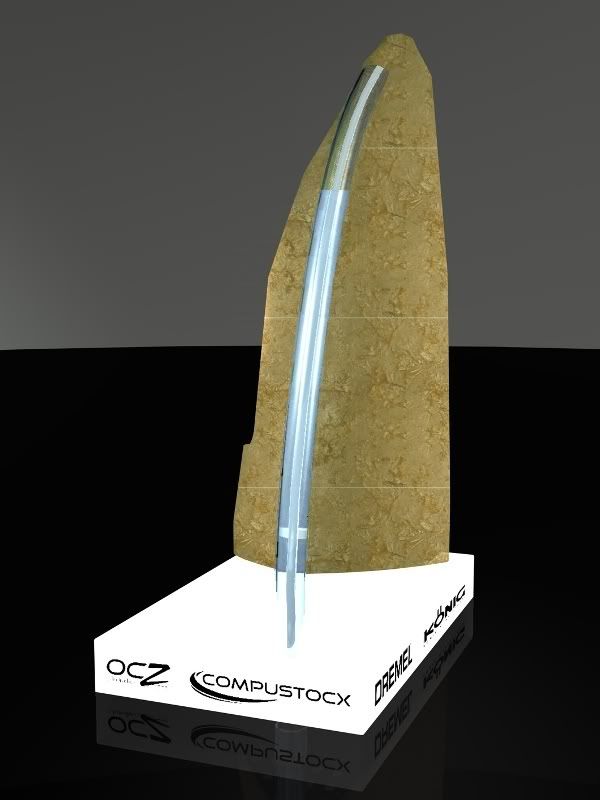
Well and now we are nearly at the end of this update. Nearly means that I have a question to you once again. The question is about the socket, because I´m not really sure how it looks best. To help you a little bit I rendered 3 Versions with Cinema 4D for you.
And now I would be very happy, if you could post your opinion to the socket.
@OvRiDe/dont-FeaR/rithunder916
@ :Waynio: Well I think like you that some mods get put in to the mod of the month a little too early on bit tech. I was a kind of startled than I saw my case nominated for mod of the month. But what´s the point, I think is isn´t really tragic more important is that I finished this mod as soon as possible and a lot of people will like it ;-)
nice work, as always. :up:
that lighting looks amazing :bowdown:
Agreed, great job on the lighting!
Took me a while to give a good response to this.
To your request of opinion - I'm gonna say black for the base, to go with the motherboard and all the black accents inside the case & to break it up from being all white and it should define the angle gap beneath the main case better and all the sponser logo's are very nicely done.
Would it not be possible to have a white base painted black but with the logo areas frosted & masked up with leds behind them so the logos glow too or is that a bit too much work, I think it would look very amazing rather than flat logo's and with you being so good with leds, either way thou it will still look awesome :).
And yes the lighting on this is fantastic, nice warm glow of white rather than overly bright light looks really nice, I want to get good at putting leds together like this for future mods, ccfl's are arkward to deal with, can be much more creative with leds, keep it up mate, awesome so far. :)
After I used the last 3. weeks before my third semester started intensive with modding it´s time for a further update of this project.
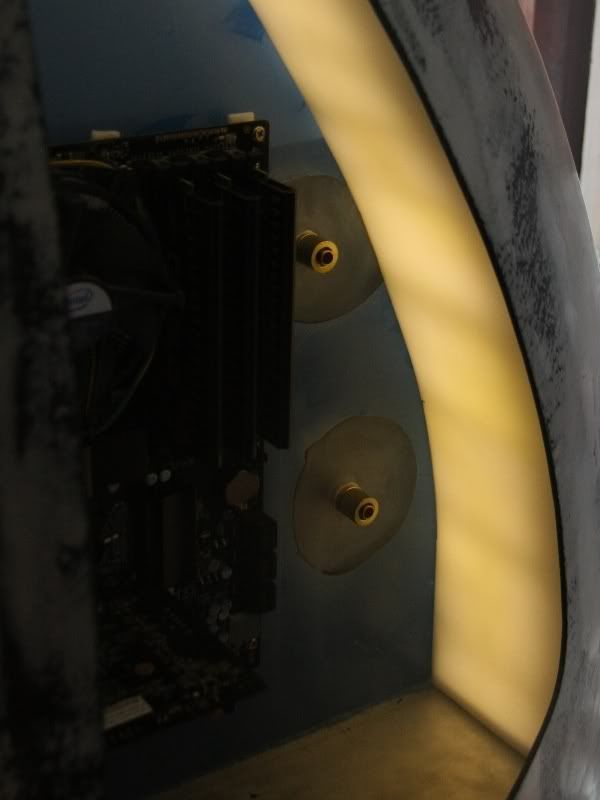
Because the PC should look very tidy under the GRP-bonnet, too it was time again for planning the inner space.
The straight lines at the left side symbolize two water tubes, and the over lines right besides symbolize cables. The cables that come from the upper case will be connected with golden 3,5mm headphone plugs. The cables are for the LEDs and some buttons. The cables that come out of the lower box will be connected with the M-TEC controllcenter, and the cables that come from the long slot left besides that box are from the mainboard.
After the plan was ready I built two models with carton.
Satisfied with this models I consider the material that I´ll use for building that two boxes. At the end I decided to build a frame made of Plexiglas. That frame I´ll glue with Acryfix at the big plate and on that box I´ll screw on an aluminum plate.
In the meantime I received a package from Bielefeld (Germany) with the following volume.
For this I want to say a big thank you to [url=http://www.aquatuning.co.uk/ [/url] for this great support.
After I had controlled that package with a lot of fun I could devote to the I/O blind and the slot blinds. For this I measured all and mark it.
I cut out the holes with a jigsaw and after this I used a file to got a realy accurate result.
Ready with theses holes I came to the bottom plate, namely to the fan holes.
With this printout it was no more problem to mark the more than 200 holes exactly. Next I bored the 8,5mm holes and countersinked it at the end.
With this plate the last big piece for the basic case was ready and I could build the case provisional together. At first I screwed the two side panels made of Plexiglas on the bottom plate.
You see at the picture also the PSU-holder and the mounting for the 3 fans. At the end I´ll glue all these things with the 3mm aluminum bottom. So it´s impossible for the bottom plate to sag. All that you could see at the picture will get a white varnish at the end.
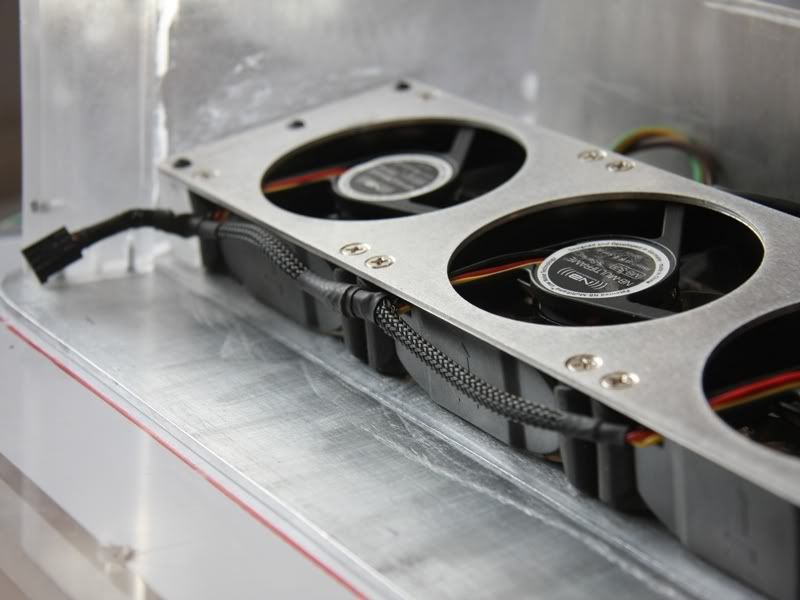
Now I installed the PSU and the 3 80mm fans. Certainly I´ll use other screws for the PSU that look a bit more decent.
After this the CoolIT radiators and the two 120mm Noisblocker fans came to their position over the three 80mm fans.
I decided to cut a big hole in one of the two side panels at the bottom area. So it´s possible to see the hardware that´s in it, in case the GRP-bonnet isn´t over it.
Next I screwed on the intermediate floor at the two side panels.
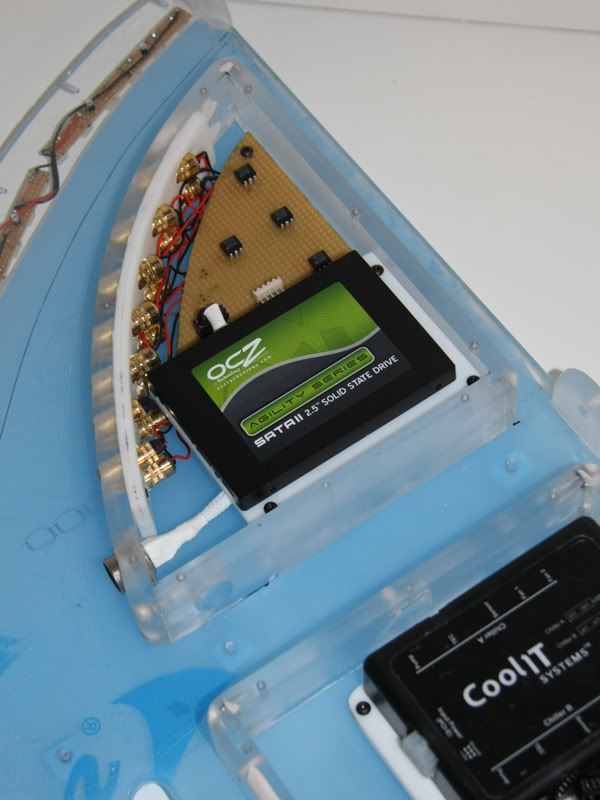
At this picture you see the mountering for the slot-in drive. The box is a bit higher than the slimline drive because under and over the drive I´ll apply 3mm cellular rubber. Moreover the slot will be illuminated with 8 LEDs that I glue in the stripe made of Plexiglas.
The 8 LEDs will be connected with the status LED from the disk drive with help of an opto-coupler. So the slot won´t glow always but replaces the normal status LED from the disk drive.
Let´s come to the pictures of the back panel that I mentioned at the beginning of this update.
How watch the picture more exact noticed that the upper box is absent and that in the lower bix are two bigger holes. The absent box is nearly ready and I have only to glue it. The holes are a kind of fan holes for the inner space.
I hope you understand my plan after watching that picture. The two 80mm fans will blow against the mainboard. Because the mainboard has a distance to the back panel of 15mm the air will stream under the mainboard in the inner space and than through the 150 4,5mm holes in the upper part of the back side out of the case.
Certainly the box with the M-TEC controll center won´t be open but a aluminum plate come over it.
I´ll overdraw this plate with leaf guiding and in addition I´ll use black M3 screws. The rest of the back panel will be white at the end
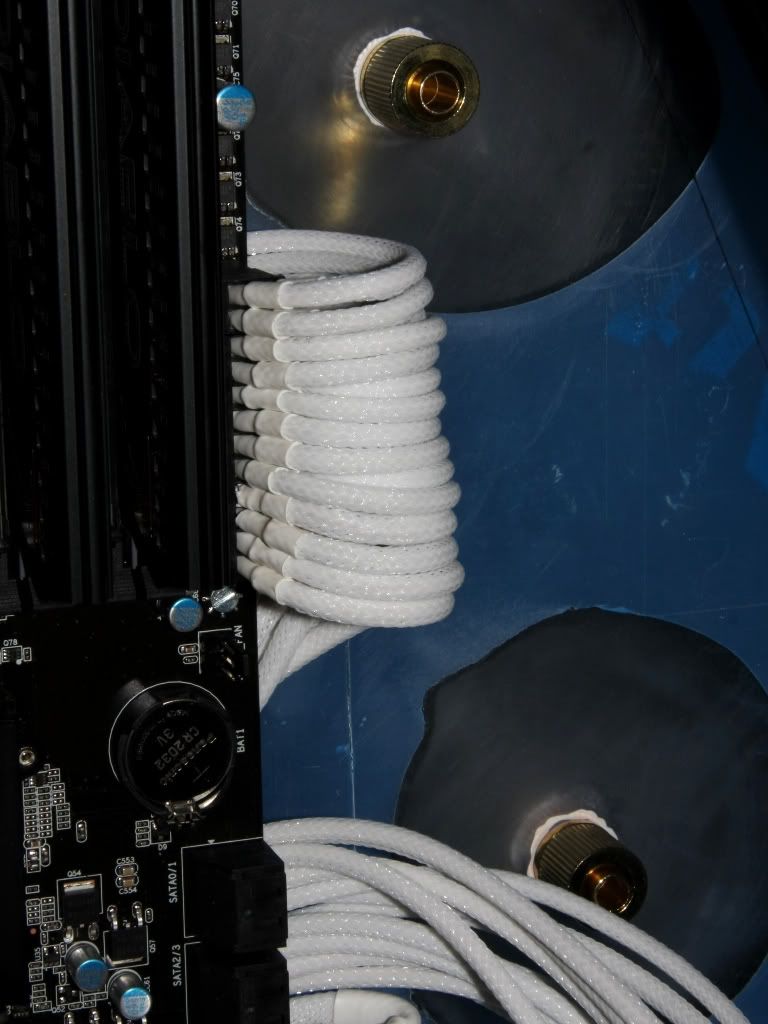
All the cables will be sleeved white and with the aid of a mounting forced to lie exactly vertical.
Now we come from the back side to the front side.
The white pieces made of Plexiglas are only for the moment and will bail at the end.
So and now it´s time for the solution how I´ll make the mounting for the slot blinds.
How you could see at this picture is it impossible for me to use standard blinds and so I have to make all for myself. But I hope that isn´t such a big problem. The blinds will be screwed on with M3 screws at the mountings that you could see at the picture
At the following pictures you could see how the holes case looks like.
And now we are nearly at the end of this update, but only nearly. Like in almost every update I´ll finish this update with hardware news as related to the graphic card. Namely the company mushkin will support me with a HD5850.
@ Mark_Hardware/ SXRguyinMA/ Datech: Thank you for your compliments!!!
@Waynio: Thanks for your opinion, but I´m unfortunately a bit undecided how I´ll make the socket. Because I think the black is a very hard contrast to the white sail I think maybe a dark grey socket is maybe better than a true black socket. The other thing is I had to find a company that anodizes me the socket in dark gray. To find a company for black is no problem but dark gray I´ll see.
The idea with the glowing logos is great, but I think if I´ll make it the socket would be to bothersome and steals maybe the sail the show.
looking more and more beautiful every day!
looking great, and congrats on the sponsorship!
Excellent work mate :up::):up:.
I'm liking the hand made back io panel, something I want to pull off myself on my next mod, coming along perfect 8) :bowdown:.
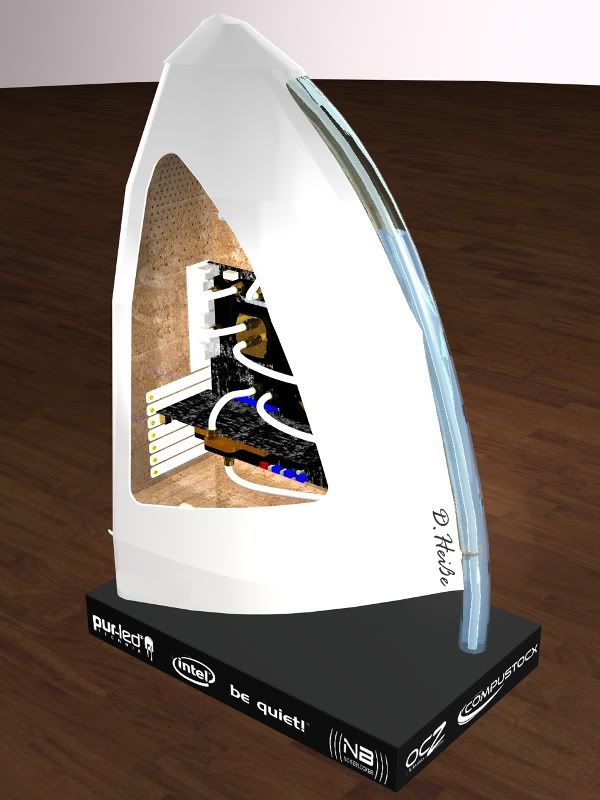
Compared with the other update this update is really short and contains only renderings.
By way of comparison the old rendering.
Well and now I would be very happy if you could post your opinion to the suggestions/ options.
personally i like the gold with the white base but if this were my project id try to make the sponsors names in a bolder text so as to break up the white a bit more, and maybe some kind of graphic on the top of the base(nothing overpowering maybe some simple pinstripping) cause theres alot of white on there and i dont know it looks just to plain
i second this.Quote:
Originally Posted by raistnox
i admit i haven't read the whole log, so i don't know your whole plan. But a 24k gold leaf case would be kick a%$. maybe a gold case with a black base?
Top notch building at any rate. looks like it should sit in a fine art gallery.
i also liked the large horizontal signature along the side, over the others.
(thats a hell of alot of drilling btw)
:bowdown:
need I say more??
+rep
Hello, unfortunately I had no time or no passion in the past. This is the reason of the long break between this and the last update. I hope you could forgive me ;-)
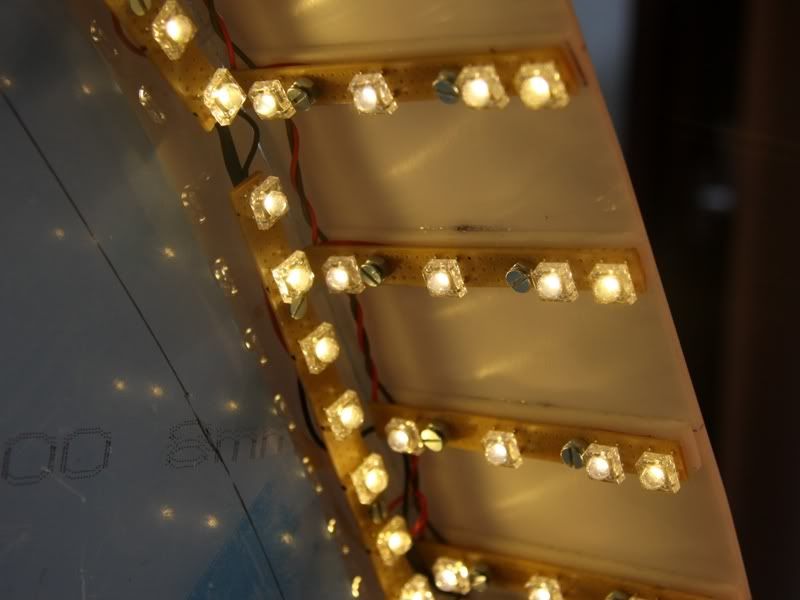
Now lets start with the illumination of the inner space. This was actually complete, but only actually. Because I wasn´t really satisfied with the smoothness of the light. I know at the pictures I show you I looked very smooth, but in reality it wasn´t the same case. At the following picture that I made with a shorter exposure time you see the real disaster.
To get a 100% smooth light panel I thought it´s enough to take more LEDs. So I desoldered all the 60 LEDs and solder all new with 120 LEDs.
The result was indeed brighter but still not to 100% smooth.
Because I had no passion to unsolder again all the LEDs and take still more LEDs I had to take trick 17 that means head away.
And now I was satisfied with the light panel, because now it´s a really smooth light without any inequality.
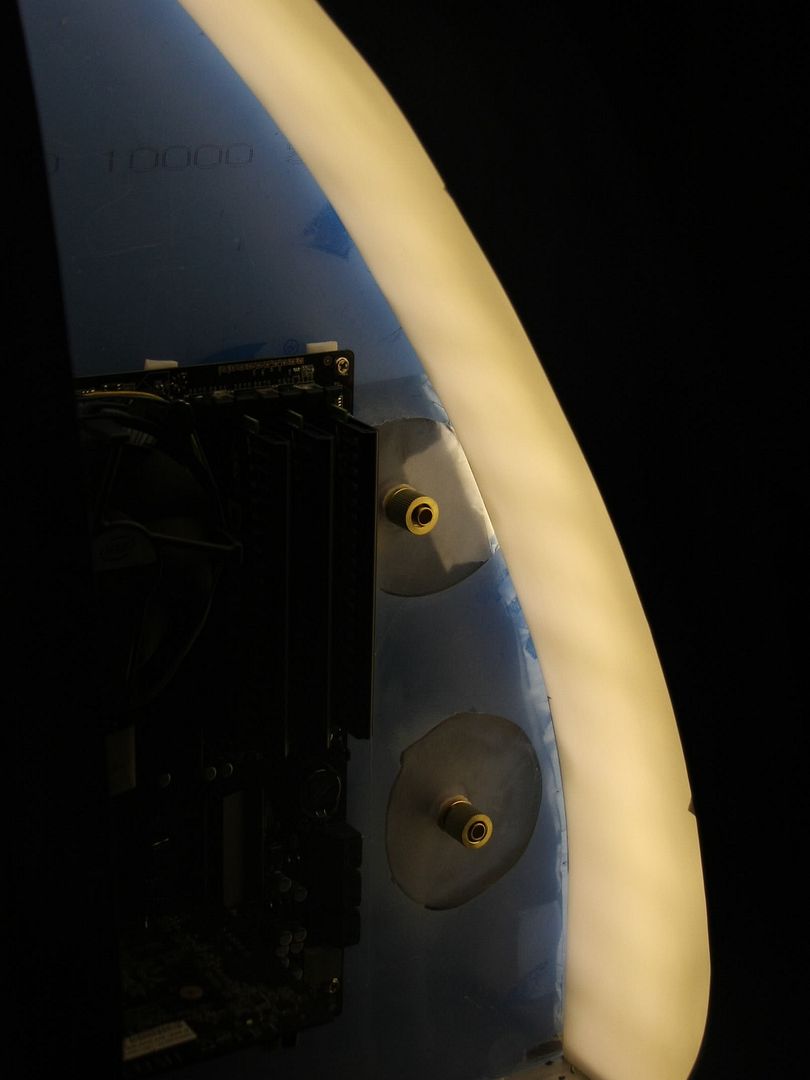
Ready with the illumination of the inner space I could start with a kind of connecting central for the PC. At first I build a frame made of Plexiglas.
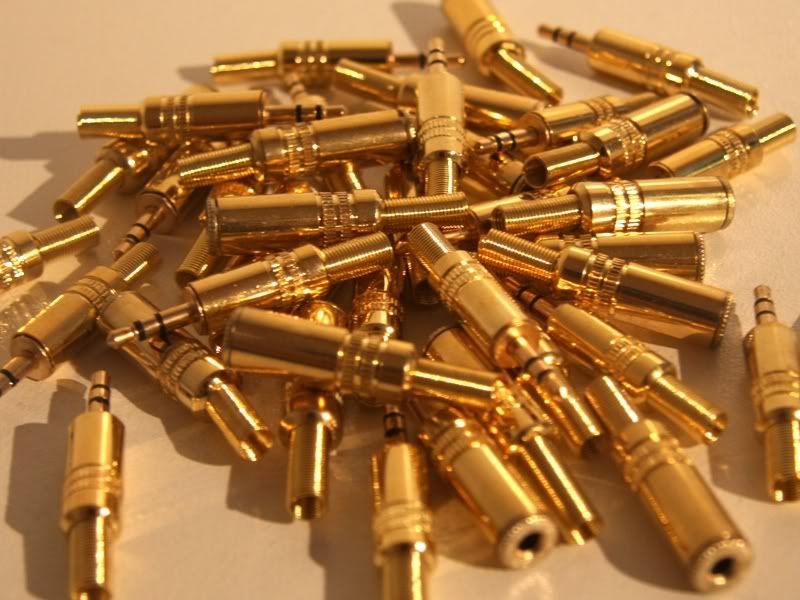
In the meantime I got the 3,5mm connectores.
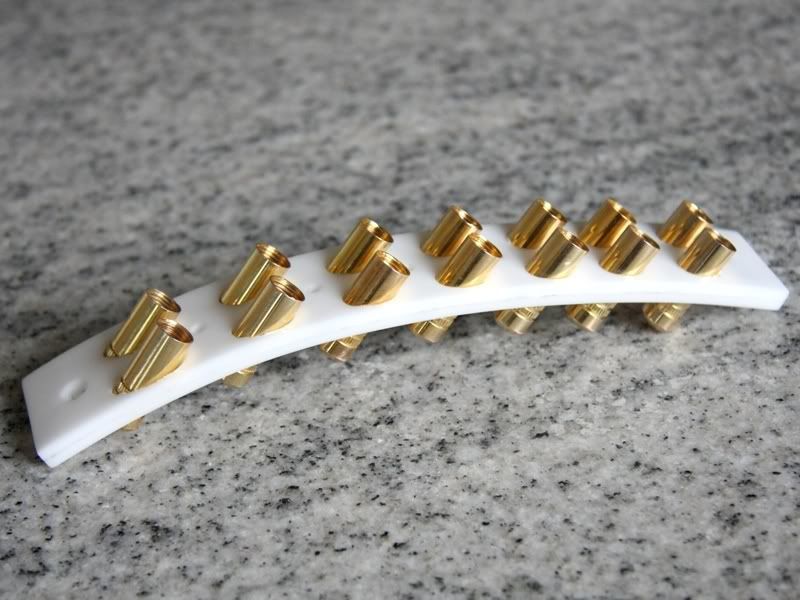
I glued the sockets in a white bend piece made of Plexiglas.
Ready with this I could start with soldering. For this I made at first a kind of solder plan that showed me that I have exactly to solder. Because of this I haven´t to solder on cable 5 times and I also know 2 months later what I soldered together.
With this plan in front of my face I was able to solder all these sockets with the opto-coupler and the bushes at the perfboard.
I know I looks like a real cable tangle but with my smart soldering plan it is actually quite clear.
Now I could glue the frame made of plexiglas at his final position. After this I bored some threads for the perfboard and the SSD.
Certainly the box get a bezel made of aluminum. A picture with it you´ll see in the next update I hope.
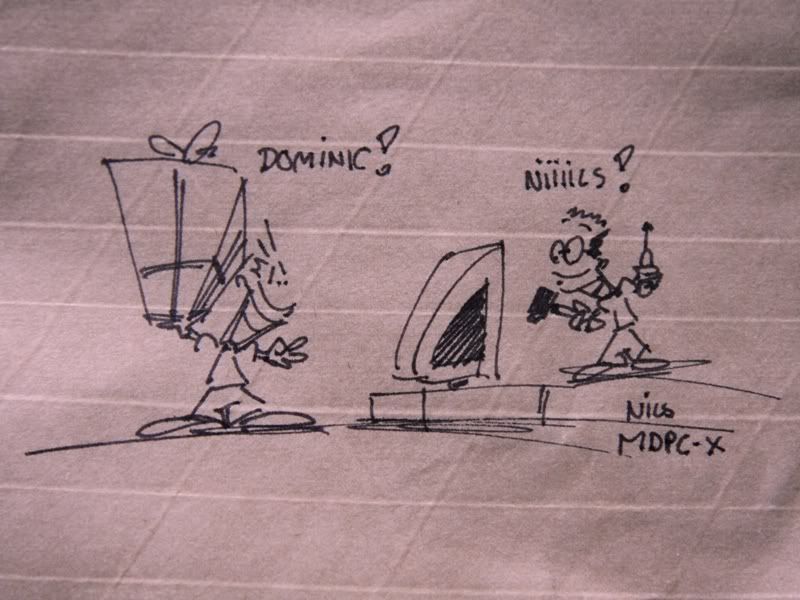
Well in the meantime I got a package that had at his back a little but really nice sketch.
Naturally was the content not less nice like the sketch.
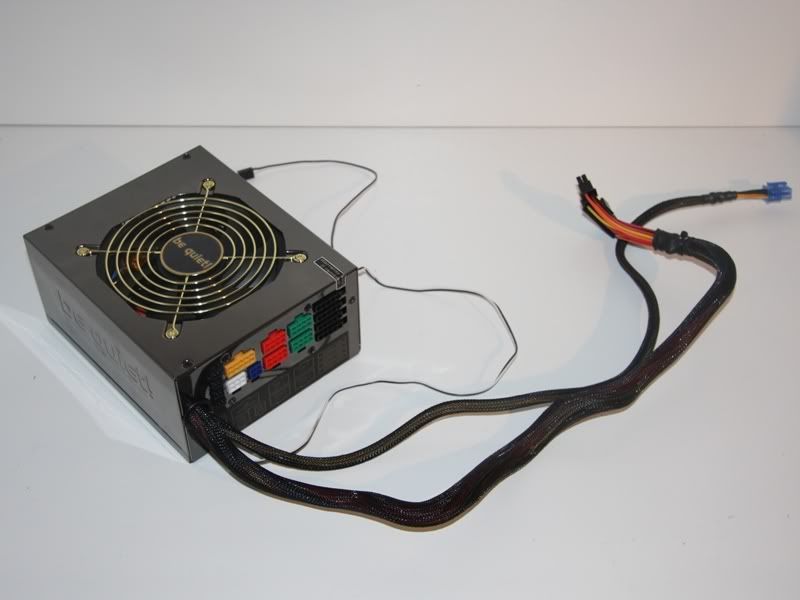
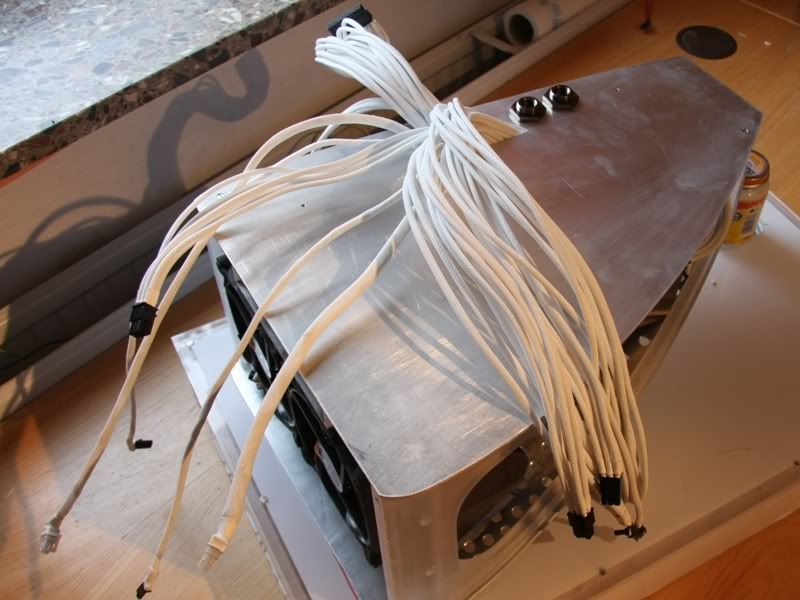
With this delivery the last hours of the great be quiet! supply were counted. Natural I made a last picture of it before the aesthetic operation started.
And after maybe 20h 25h hours the power supply looked so.
For the friends of macro pictures another picture.
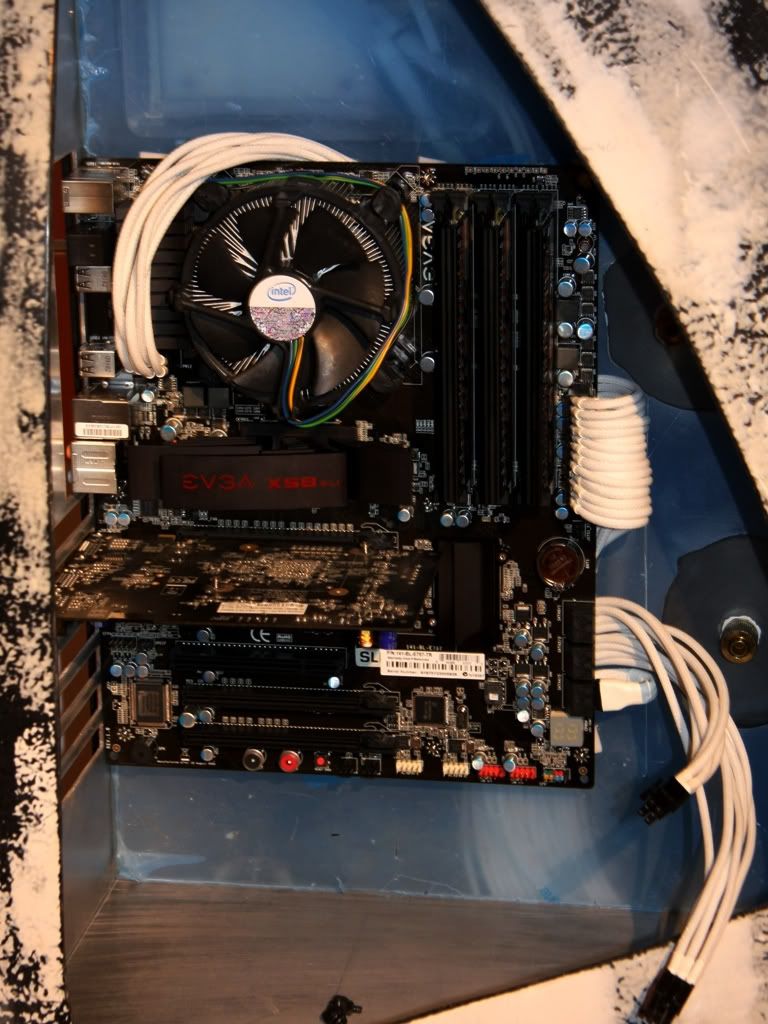
After I was ready with sleeving I build in the supply to see how I looked in the case. Unfortunately my pleasure didn´t rise up but rise down.
The reason of this disappointment was a 2 week break because I had no passion to make anything for this project.
At least a picture that shows my second try to bend a plate made of plexiglas in the form of the window for this project.
Well and now we are at the end of this update, but I hope you haven´t to wait only two or three weeks for the next update, and not two months ;-)
P.S.: Oh I had nearly forgotten to say you that I came to a decision as related to the socket and the sail. And so I´ll make the socket white and the sail gold. I hope the fans of white sail and black socket won´t be really disappointed and I try my best to convince you that a gold sail look better than a white sail at the end ;-)
@raistnox: The idea with the pinstripping is not bad, but I think the socket should be only a socket. That means that with a great pinstripping the socket attract the attention to much. But maybe I don´t like the complete white socket at the end and then I´ll remember to your idea.
@Twigsoffury: Thanks and I also hope that a 24k gold leaf case would be kick a%$...;-)
looks awesome!
:eek: no words........ :up:
I love the white flexing :D
Great job, can't wait to see updates
glad i could help out, i do agree that sometimes pinstripping can be overpowering and detract from the main focal points and certainly with something like this where you just want to break up the white a bit you dont want that, any way good job thus far you are indeed a skilled craftsman and i cant wait to see the conclusion
I'm lost for words, again :D.
I can't even imagine how bad a$$ this is going to end up looking like, merry christmas. :santa::up:
Christmas-Update
About questions, suggestions and criticism I´ll be very happy. I wish you a merry merry Christmas and a very great start in our next decade!!!
Beautiful work on this mod. I love what you've done to this point. Keep it up!
:) Really coming together now, can't wait to see the finnished piece congrats, it is such a nice fuzzy feeling getting a scratch build to a point where you can actually use it, even though there is still some more to do but being able to sit back and say I made that is nice, I know when I got to the stage where I could put my pc gear inside my latest I had a big grin all day and almost did a singing in the rain do hehe :) merry christmas & all the best to all at TBCS.
I'm off to stuff my hdd with cheap quality games courtesy of steam :banana:.