-
Re: Planning Project: OSIDIAS (SFF taken to the extreme)
Quote:
Originally Posted by
Mach

I'm intrigued by your ideas and would like to subscribe to your newsletter:think:
I love the idea. It'll effectively be all the systems that anyone needs in one SFF package; crazy performance, storage, mobility, and control. Any thoughts about interfacing it with your house for home entertainment served off of the base unit? Watching for the magic to begin :)
Lol, I think my wife would kill me if I took the time to write a newsletter...
I've got lots of thoughts about this being an entertainment hub. In fact, that's part of the functionality the UMPC will bring in to the mix. Since it is wireless, I can control the PC from anywhere. All I would need is simple PC wherever my TV is located, and stream to it.
-
Re: Planning Project: OSIDIAS (SFF taken to the extreme)
EDIT:
Sorry, my browser got confused and sent the same thing again.
-
Re: Planning Project: OSIDIAS (SFF taken to the extreme)
No worries... I thought I was having deja vu for a moment there...
-
Re: Planning Project: OSIDIAS (SFF taken to the extreme)
Well, I can understand your issues after being unable to OC...
I'm burning up my rig trying some of what I'm trying (Sketchup+multiboxing) so I'm going with this setup to try to finally build myself a true monster.
You, however, seriously have my interest piqued. So are you discarding your original touchpanel for that?
-
Re: Planning Project: OSIDIAS (SFF taken to the extreme)
Yes, I've convinced myself that a little OC is good enough... I'm running at 4Ghz on my i7 :D Anymore really isn't needed for what I do. If anything I need more memory yet...
Yes, the original touchscreen will be replaced by the UMPC in the same location. The Viliv happens to be the perfect fit. I'll find another mod to work the original touchscreen in to.
-
Re: Planning Project: OSIDIAS (SFF taken to the extreme)
I really need to make an update here! The Viliv has arrived, and I'll be doing a video review of it shortly. In the meantime, I've been playing with other ideas. You see, with the addition of the UMPC for system monitoring, I needed a reliable way to relay information to it. I have been toying with bluetooth, but have a 2 device limit on networking them. So, wi-fi was the next obvious choice. That brought it's own set of issues. The pico must always be on and networked, the main system may not always be, and the Viliv must also always be networked. I also want to ensure the Viliv and pico always have internet access. Not that big of a deal, right? Well, Samurize needs static IP's for relaying information, and while that is great for home use, what about when I go to a LAN? The IP's are subject to change, and that would throw everything off.
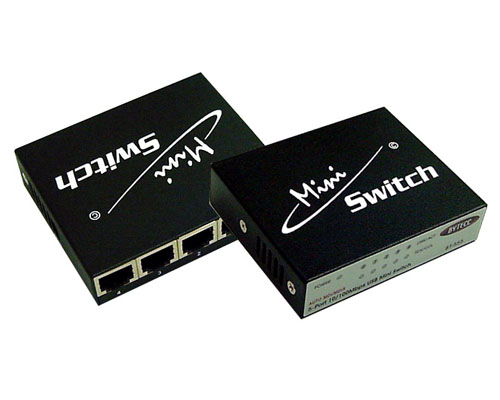
So, what's the fix? How do I get static IP's? The easiest way is to use an access point, in this case, a wireless one. Everything is wireless capable anyway, so I can assign each adapter it's own IP, and they won't change regardless of where the system goes. That's where this comes in to play... It's the smallest AP available.
Okay, with that out of the way, I have 3 devices inside of OSIDIAS that need ethernet connections. The main system, the pico, and the access point. That leaves the need for a switch. This unit from Bytecc is the absolute smallest I could find. Everything must be internal!
Believe it or not, I've found room for both of those components inside the case without inhibiting airflow... When I get a chance I'll get some updated pics posted. Stay tuned!
-
Re: Planning Project: OSIDIAS (SFF taken to the extreme)
I had a little time over the weekend, so I thought I'd make something special for everyone that has been following this project. This is a video walkthrough of OSIDIAS. It explains how some of the components fit together, and I cover some of the design basics. Although I've left out a few details, I think you'll understand the project a little better. Enjoy!
http://www.vimeo.com/8832516
-
Re: Planning Project: OSIDIAS (SFF taken to the extreme)
Well, disturbed13 at bit-tech managed to pry an upcoming sponsor out of me...
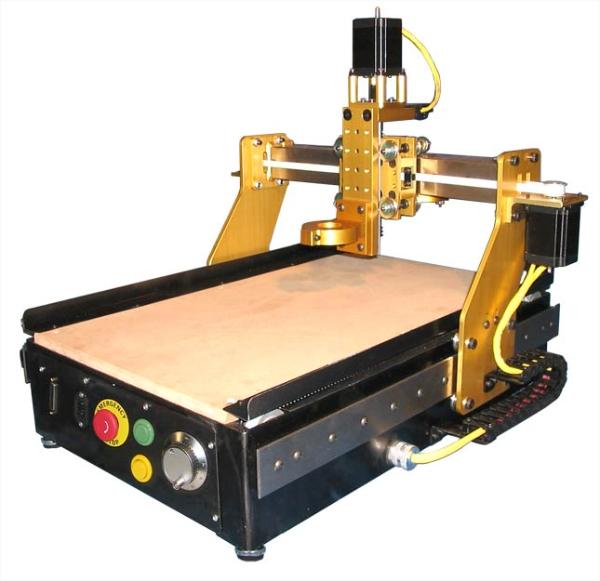
So, since the surprise is out there, I might as well make the official announcement. I've been speaking with Ron Rogers of Romaxx CNC, and he's been generous enough to sponsor a HS-1 machine ready to run. I'll be using the machine on this project, as well as any future projects where applicable.
The HS-1 is a very solid tabletop CNC, and will be able to handle most any job I throw at it. I wanted to work with Romaxx for several different reasons. The first of which is the standards by which their machines are built. There's no doubt they are solid. The second is the support Romaxx offers after the sale. They stand by their machines, and are quick to take care of any issues should they arrive. Lastly, there is a pretty good community of users on the Romaxx forums that are willing to help and share their experience. All of these things added up to make it an easy decision for me.
I'll keep everyone updated on the machine's arrival, and I'll certainly post pics as soon as I can!
-
Re: Planning Project: OSIDIAS (SFF taken to the extreme)
Wow.. I can't wait to see that baby in action!
I know all the planning is going to pay off in the end, but I want to see if now! :D
-
Re: Planning Project: OSIDIAS (SFF taken to the extreme)
Damn thats nice. Congrats man!!!
-
Re: Planning Project: OSIDIAS (SFF taken to the extreme)
Quote:
Originally Posted by
OvRiDe
Wow.. I can't wait to see that baby in action!
I know all the planning is going to pay off in the end, but I want to see if now! :D
Yeah, me either. I haven't worked with CNC since I was in high school, and that's been quite a while ago. This thing is going to open up quite a few new possibilities for me.
The sad part is, I'm still making small revisions, but could technically start tomorrow if I wanted. I just need to finish a current project first!
Quote:
Originally Posted by
Oneslowz28
Damn thats nice. Congrats man!!!
Thanks man!
-
Re: Planning Project: OSIDIAS (SFF taken to the extreme)
Are you guys ready for this?
Well, it's finally arrived! Thanks to Ron Rogers of Romaxx for making this possible. What you are about to see is the unboxing of a shiny new HS-1 CNC router.
This machine is considered a tabletop CNC, and as such, doesn't take up a lot of space. Since I work primarily in small form factor, this will fit 99% of every need I have. Even though it's a compact design, this thing arrived to me in a 125 pound box. 105 pounds of that is the machine itself. If weight is any indicator of strength, then this thing is a beast.
So, shall we look at a few pics of this thing?
The box...
Let's crack this thing open. It's definitely well packed, and bolted through the bottom of the crate.
That's it for now, but I'll follow up once the machine is setup in the shop. Until then!
-
Re: Planning Project: OSIDIAS (SFF taken to the extreme)
Mmmmm, preeetty. :D Can't wait to see it in action.
Also, I love the giant emergency shutoff switch. :P
-
Re: Planning Project: OSIDIAS (SFF taken to the extreme)
Quote:
Originally Posted by
x88x
Mmmmm, preeetty. :D Can't wait to see it in action.
Also, I love the giant emergency shutoff switch. :P
Thanks man! I'm still waiting on the end mills to arrive, and I've got to get the software sorted out. I'm hoping for cuts in a week or so!
-
Re: Planning Project: OSIDIAS (SFF taken to the extreme)
While I know everyone is anxiously waiting to see the CNC running, I needed to take care of a few small details first. One of those details involved a custom misting solution for cutting aluminum. Why mist? Well, for the work I have to do it can be just as effective as flood, yet it's so much easier. I should say it's easier, only if you can find a workable and convenient way to implement it.
I have been doing some research into CNC misting techniques, and most of the options are geared towards commercial applications, and are quite expensive. I wasn't really willing to spend $300 on something I was convinced I could do myself. Since I'm a modder, it only made sense to mod a homebrew solution. Many hours were spent Googling anything that misted, before I came across the mention of using an airbrush as an option. I tried to find where someone had actually followed through using this method, and came up with nothing. So, I figured I might as well be the first. Even if I'm not, I'm hoping my methods and documentation will make it easier for others to find and implement themselves.
Now, before any fabrication could begin, I needed an airbrush and dedicated on-demand compressor. Amazon came through with this nicely outfitted kit.
Okay, well, now that I've got the airbrush, I need to find a way to get it mounted to the Romaxx machine. Since the mister needs to follow the mill bits as they cut through the material, it was obvious that it needed to be attached to some location near the spindle. It just so happens that there were some unused spindle mounting locations that would be perfect. So, I just needed to come up with a workable bracket of some kind. Not only did the bracket have to hold the airbrush securely, but it couldn't interfere with any machine operation whatsoever. I needed full X, Y, and Z operation with no limits or restrictions. I broke out the cardboard and started experimenting. This got me in the ballpark...
Since I was satisfied I had a workable idea, I committed it to metal...
I love bending things, so the newly cut bracket received some attention.
With the cutting of a few well placed slots, and the help of some rubber o-rings, the brush and it's coolant reservoir were attached to the bracket. I used a simple mounting method for two reasons. Ease of maintenance, the ability to have flexible mount points should some unforeseen interference occur.
So, let's get this bracket mounted! You can see how cleanly it sits in it's location. It's also easily adjustable for height.
There is plenty of room for travel with no interference.
Now finally, here are a few pics of the machine as assembled and ready to run.
All that I've got left to do is make sure I'm set for live streaming, and I'm ready to cut. If I can find a good material hold down solution, I'll give it a go tonight. (Yes, I'll likely be getting the aluminum top w/ mounting holes soon.)
-
Re: Planning Project: OSIDIAS (SFF taken to the extreme)
Nice job; it almost looks OEM. ;) I can't wait to see it in action.
-
Re: Planning Project: OSIDIAS (SFF taken to the extreme)
Wow, this thing looks like a lot of fun. Only question I have, and maybe I missed this in the pictures, is how will the airbrush trigger? Will it be always on, or setup so that it triggers when cutting? Love the bracket and can't wait to see what this will churn out!
-
Re: Planning Project: OSIDIAS (SFF taken to the extreme)
Quote:
Originally Posted by
x88x
Nice job; it almost looks OEM. ;) I can't wait to see it in action.
Thanks mate! I just happened to have some gold anodized aluminum on hand. :D
Quote:
Originally Posted by
TheMainMan
Wow, this thing looks like a lot of fun. Only question I have, and maybe I missed this in the pictures, is how will the airbrush trigger? Will it be always on, or setup so that it triggers when cutting? Love the bracket and can't wait to see what this will churn out!
Thank you. The airbrush will be triggered on constantly. Since the pump is activated on demand, there is no need to trigger it separately. The pump will be turned on and off via the Mach3 software.
-
Re: Planning Project: OSIDIAS (SFF taken to the extreme)
Not knowing alot about CNC, is the sprayer for cooling lube (like the pink fluid the huge machines use?) while cutting metal?
-
Re: Planning Project: OSIDIAS (SFF taken to the extreme)
Quote:
Originally Posted by
diluzio91
Not knowing alot about CNC, is the sprayer for cooling lube (like the pink fluid the huge machines use?) while cutting metal?
It most machines that would be correct. However, I'll be using denatured alcohol in mine. It has great lubricating properties when cutting aluminum and evaporates quickly. It should be relatively mess free. :D
-
Re: Planning Project: OSIDIAS (SFF taken to the extreme)
Hey guys, I did a live streaming test tonight on a dry run. I was having mic issues that have since been fixed. I was also experimenting with a dual webcam setup just to test it's feasibility. I'm not sure what I'll do with a second cam, but as you see, it's certainly possible to use one.
http://www.livestream.com/losiastech...2-6283ae9d8f69
(If you happen to get an irritating overlay on the bottom of the video, just pause and start again, and it should go away.)
-
Re: Planning Project: OSIDIAS (SFF taken to the extreme)
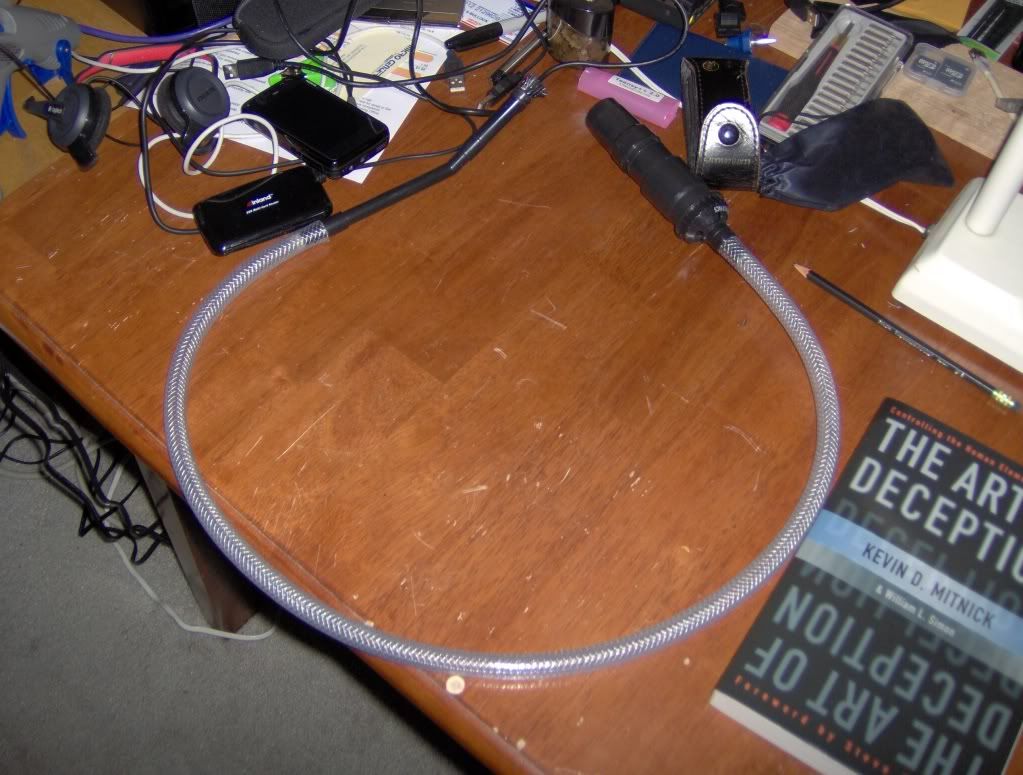
Okay guys, since I have a habit of never being satisfied... I made a few changes to my CNC router. After my dry run with the picture in picture webcams, I started thinking about how cool it would be to add one of the cameras near the spindle itself. I thought it could capture the mill bit working as I machined. Well, in order to make this happen, I went ahead and got a $10 camera from newegg, and set out to find it a home.
I knew I had to get it as close to the spindle as possible, yet there could be no interference in the machine operation or safety. This was a must. The machine comes first, and these little extras second. So, as I was poking around with the cam, one thing became clear. My new mister bracket wasn't going to cooperate. I could either ditch the idea of a camera, or redesign the bracket. Well, I chose to make a new bracket. It is greatly simplified over the other one, but required the flexible metal shaft from a donor lighter. This shaft was the key to making everything work, as only this, a piece aluminum angle were going to be used in the new design. After a short while, the new bracket was in place, and I could move on the mounting the camera. This was even easier. I just needed a small aluminum triangle and a rubber washer... I removed the camera's original mount, and attached the aluminum. I then bolted the bracket to a free hole behind the spindle, and I was in business. So, shall we get on to a few pics?
Here you can see an overall pic of the machine. The new mister bracket, and the webcam behind the spindle are visible.
A little closer...
A few more closeups...
As you can see, there are no clearance issues of any kind. The machine is still just as easy to maintain, and I don't foresee any issues. Now all I need to do is get something cut!
-
Re: Planning Project: OSIDIAS (SFF taken to the extreme)
Aw, it's a shame about that old bracket...it was so pretty. :P
Pretty sweet idea with the camera though; I can't wait to see it in action. Hopefully the shards won't get blasted all over the lens...
-
Re: Planning Project: OSIDIAS (SFF taken to the extreme)
It was pretty wasn't it? Lol, I had to change it though, and the new one will work just as well.
I'm going to make little clear plastic loops to put over the camera lens. I can just swap them and throw away as needed. If it doesn't work as well as i had hoped, I'm only out about $15 for the camera.
-
Re: Planning Project: OSIDIAS (SFF taken to the extreme)
Awww man, you are so going to make want a CNC router, aren't you? Looking good Craig!
-
Re: Planning Project: OSIDIAS (SFF taken to the extreme)
You know you want one! No, I take that back... you need one! You can justify it, right, right?? :D
-
Re: Planning Project: OSIDIAS (SFF taken to the extreme)
Oh I WANT/need one, simply can't jutify it right now. So many things it would get used for around here.
-
Re: Planning Project: OSIDIAS (SFF taken to the extreme)
Oh believe me, I've come up with a whole list of things I think I need to make...
-
Re: Planning Project: OSIDIAS (SFF taken to the extreme)
I managed to make a few cuts today guys. I was having a z-axis plunge problem which you will see in the first video in particular. (I've got videos 2 and 4 linked below). Apparently it's an occasional problem with Mach 3. I did manage to get it sorted though, and got all my cutting done. Take a look!
http://www.livestream.com/losiastech...9-a1e822fd22be
http://www.livestream.com/losiastech...4-c4d584e05332
-
Re: Planning Project: OSIDIAS (SFF taken to the extreme)
Quote:
Originally Posted by
craigbru
I was having a z-axis plunge problem
So is that what the kids are calling it these days... :P
Seriously though, pretty sweet. Glad to hear you got that worked out. Now you just need to make a mount for your vacuum hose. :D
-
Re: Planning Project: OSIDIAS (SFF taken to the extreme)
Thanks man. I'll get a hose mount figured out soon. Cuts that don't take long aren't so bad for holding the shop vac, but I don't want to follow the mill around for some of the bigger jobs. :)
-
Re: Planning Project: OSIDIAS (SFF taken to the extreme)
I couldn't find it on their website, but a while back I got an adapter kit from Harbor Freight that hooks to a normal vacuum. Making/finding something similar might be useful so you don't have to route that big tube everywhere.
-
Re: Planning Project: OSIDIAS (SFF taken to the extreme)
Now that's pretty interesting. Thanks for the pic. I'm not sure what I'm going to do yet, but I do know I'm not going to do a huge foot assembly like you see on a lot of machines.
-
Re: Planning Project: OSIDIAS (SFF taken to the extreme)
WE WANT SOME ACTION SHOTS!!! lol..
-
Re: Planning Project: OSIDIAS (SFF taken to the extreme)
Lol, I do have two videos linked a few posts up. Granted the quality is lower than I would like, but at least you can see the machine moving. :D
-
Re: Planning Project: OSIDIAS (SFF taken to the extreme)
I came home from work today to find a nice sized box on my front porch. Inside was one of the last items I needed for setting up my Romaxx CNC machine. It was a VT6040 vacuum table that I had purchased from ebay seller dcad100. It measures 24.0”x16.5” x 0.8125", and was the perfect size for my machine. The vacuum table will allow me to hold parts in place without clamping. Should I need to clamp things anyway, there are M6 holes on the table that should easily allow this.
So, should we take a look at the table? Here it is as it arrived to me.
Opening the box revealed a very well packed table.
The table also came with a the necessary tubing for hooking up to a 2" vacuum line.
Also included was a solid rubber mat for blocking off unused holes during vacuuming, and a holed rubber mat that sits below parts that are being cut. The holed mat not only allows transfer of suction, but will help keep the end mill just above the aluminum table surface. These should be easily replaceable should the need arise.
The table looks to be of pretty good quality, and is well constructed.
Now finally, here is the table sitting on the machine. As you can see, it's the perfect size. All that's left is to get the vacuum lines hooked up, and it's ready for use. More coming soon!
-
Re: Planning Project: OSIDIAS (SFF taken to the extreme)
Interesting. I wouldn't think that the pull from a normal shop vac would be strong enough to hold something down again the force of a router.
-
Re: Planning Project: OSIDIAS (SFF taken to the extreme)
Well, even though it might be enough, I won't be finding out. I've got a nice vacuum motor I'll be hooking up in the next few days.
-
Re: Planning Project: OSIDIAS (SFF taken to the extreme)
I had a little more time tonight, and was able to get the vacuum assembly finished. As of now, the vacuum table is completely ready to use. I am pretty happy with the way that things turned out. It's compact, easy to maintain, and fairly cost effective. Of course, none of that matters if the table doesn't perform as expected. Well, I'm happy to report that it performs even better than I had hoped. I know everyone is anxious to see how it turned out, so let me walk you through the rest of the setup process...
There are really only 3 major components needed in a vacuum table setup. The first is obviously the table itself which I covered in the last update. The second is the source of the vacuum itself. For this, I went to industrial parts supplier Grainger, and picked up a vacuum pump. I selected a two stage tangential unit capable of 97 CFM and 81.8 Hg vacuum. There were more powerful units available, but this one was an outstanding deal, and worth taking a chance. So, let's take a look at the pump...
Now, I should mention that although this is a vacuum pump, it's also a blower by it's inherent design. Unfortunately the only fitting for attaching a hose is on the blower end. That meant I had to get a little creative and epoxy a fitting over the vacuum hole. It was a simple fix, but just one more step I had to take before I could move forward.
Okay, now we've got two of the three major components out of the way. The third? Well, that should be easy. We've got to have tubing connecting the table and the vacuum pump. This shop vac hose kit offered the perfect solution.
As you can see the shop vac hose was a perfect match for the tubing adapter and splitter that came with the table.
Now all that was left was to route the tubing and hoses, mount the pump, and connect everything together. As you can see, the whole assembly is pretty clean and simple.
At this point I was pretty anxious to kick it on and do some testing. I'll try and get some video of that up in the next day or two, but as I mentioned above, I was very happy with the results. I could lay a block of wood in the center of the table, and with the pump running, it was surprisingly hard to move laterally. Keep in mind that this was without blocking off any of the other holes in the table. Doing so would increase the vacuum significantly. I'm pretty confident that as long as my feed speeds are appropriate, and my end mills are sharp, nothing is going to move while vacuum is applied. The only way to know for sure is to actually cut something, and I'll be doing that very soon!
-
Re: Planning Project: OSIDIAS (SFF taken to the extreme)
Very nice. I can't wait to see it in action.