hey congrats man!

Printable View
hey congrats man!
Aaaaaaand here we go again with the latest installment in this project...
I'm sure you all remember this - I made enough of a fuss about it....
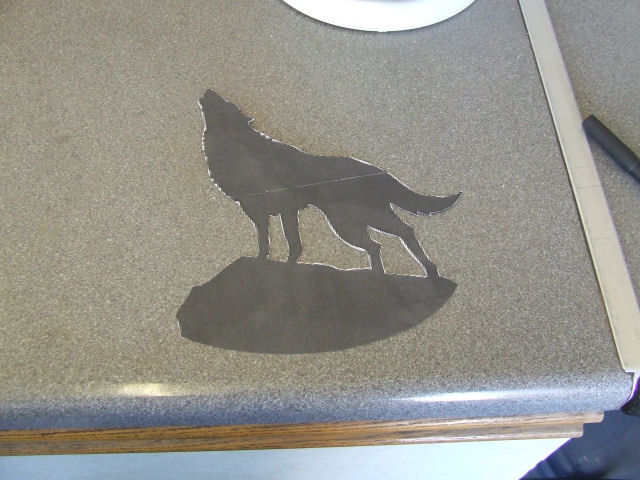
Well that bulge just behind the wolf was originally meant to be a tree, but no matter how much I've looked, I can't find a sensible image that I can 1) make work - not TOO intricate and 2) won't look like a cartoon christmas tree - so I decided to get rid of it altogether.
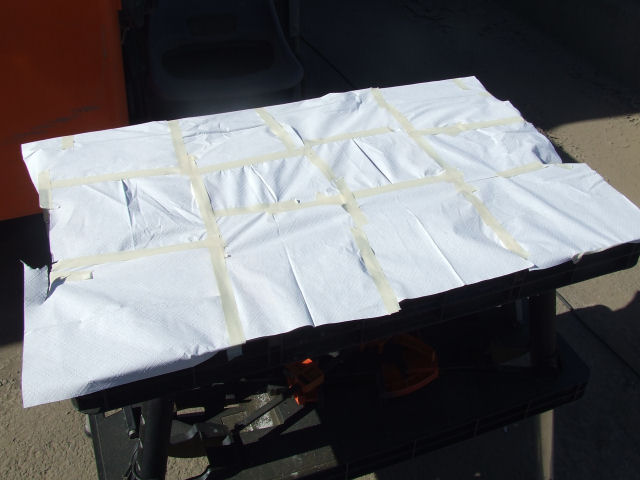
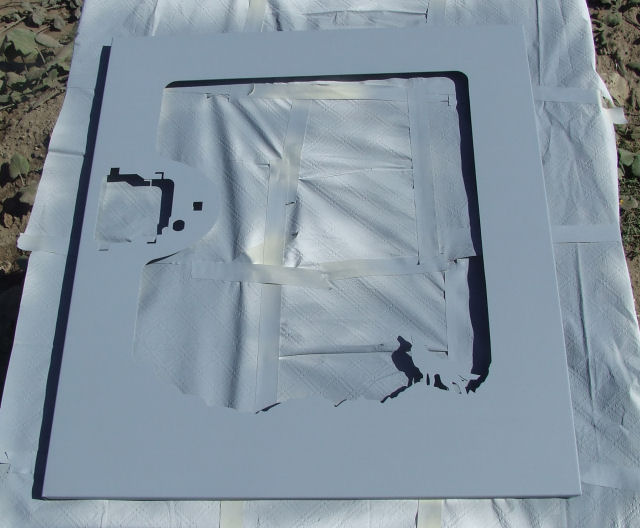
I've also noticed that the metal is starting to discolour since I stripped it down, so I thought a coat of primer, even if it's going to be replaced at some point with better primer, might seal it and stop that problem. I wasn't planning on painting at work so I didn't bring in my masking paper, so had to make a big patchwork out of kitchen towels lol
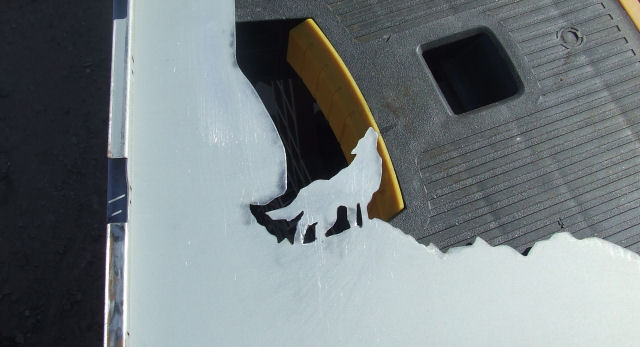
And the wolf panel with the tree bulge removed, the edge filed and sanded to the same standard as the rest of the edges...
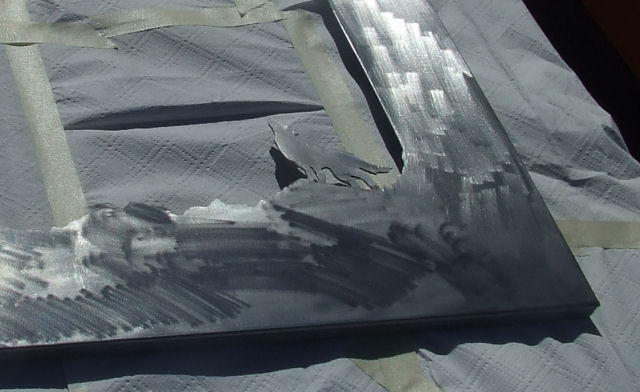
And a light coat of grey aerosol primer
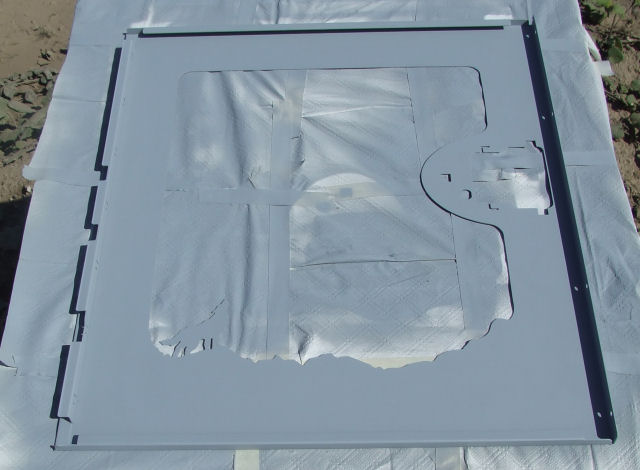
And then a heavier second coat - this aerosol primer does have one BIG advantage - it's touch dry within seconds of hitting the metal and overpaintable inside 2 minutes (well it was today - out in the direct sunlight with a nice gentle breeze going)
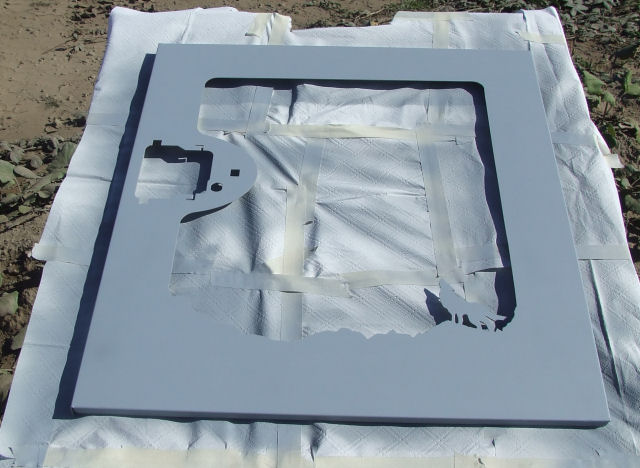
And a quick light coat on the reverse too
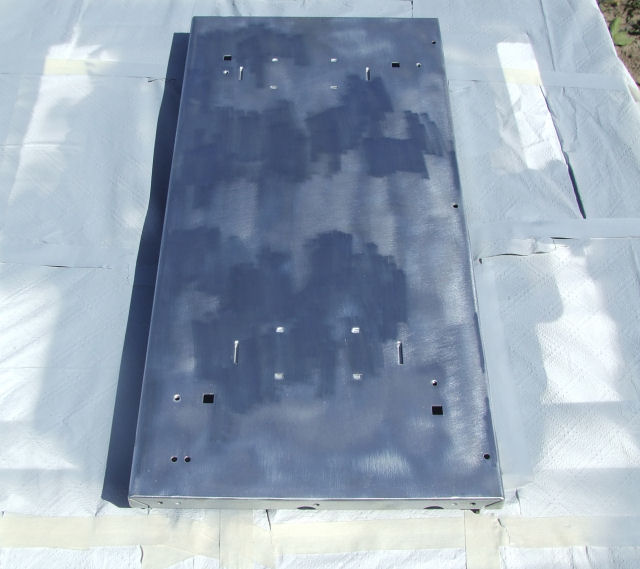
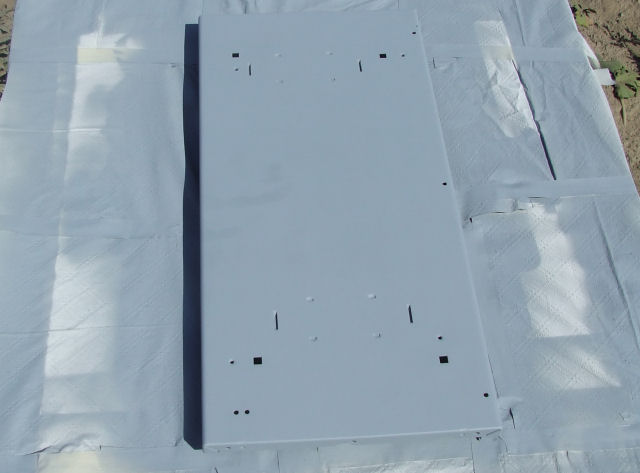
Bottom panel gets the same treatment - from this...
To this...
Then the top panel - which wasn't actually ready for paint - need to finish that top blowhole first. Thought I'd try a different method I've seen used to make this blowhole. Started drilling holes as near to the marked edge as I dared...
Then the dremel-clone to take out the centre...
And then a LOT of filing and a little sanding...
My advice - DON'T do it this way unless you have NO other option. It took longer, was more hassle, and left a lot more filing and finishing afterwards - I'm sticking with holesaw when I have access to one or the dremel/file method.
Another problem with the drilling method (although it's arguable that it was a problem with MY control) is twice the drill dropped in before I thought it would and damaged the panel - only really deep scratches, not big dents but still enough for me to want to put them right... Because the filler I had with me takes a while to dry, I primed it up first, then dotted in the two damaged areas..
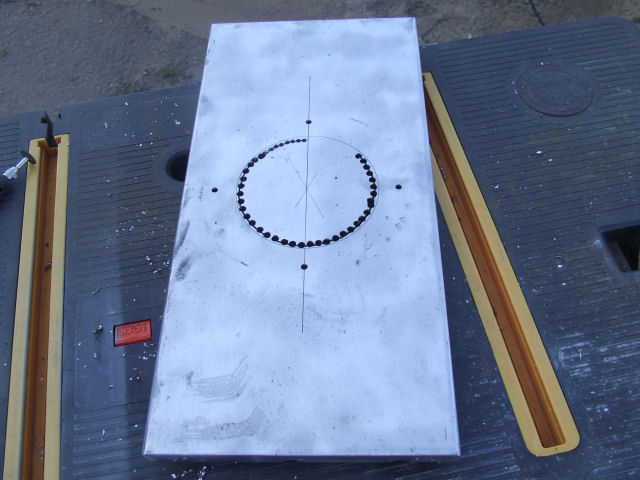
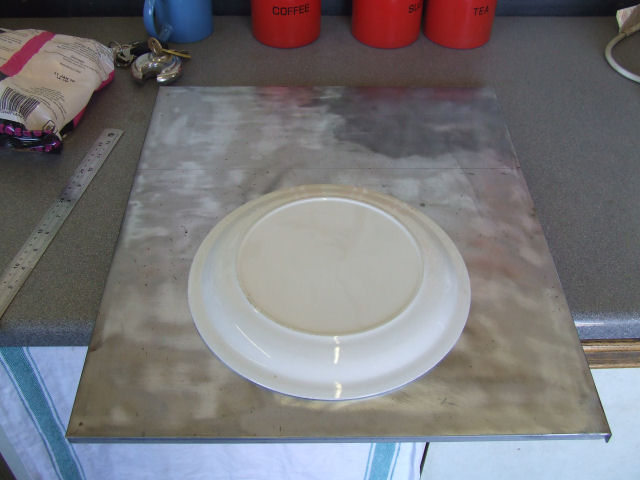
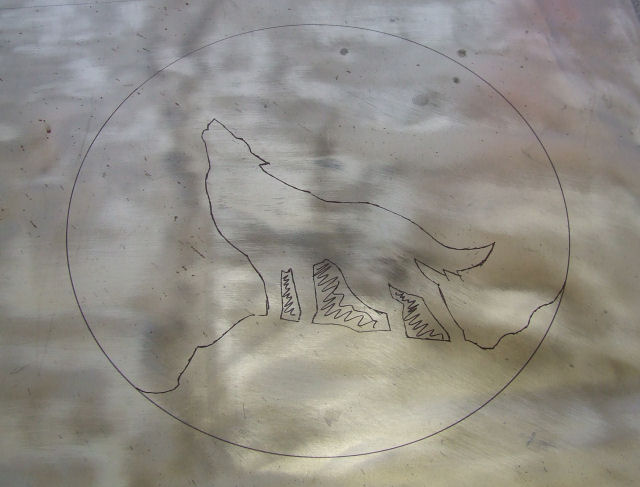
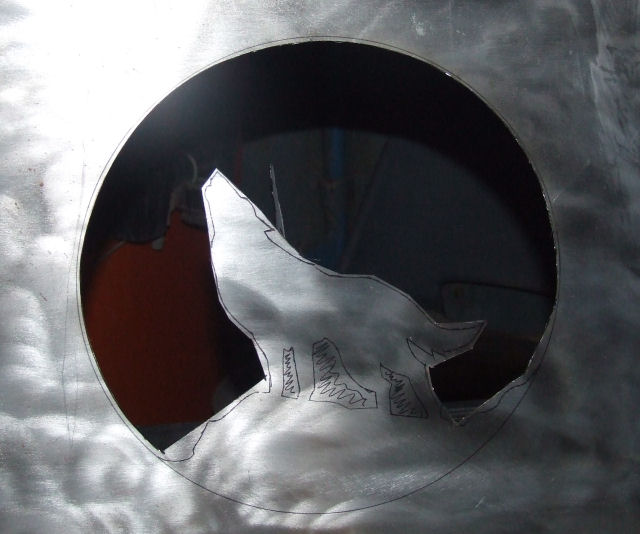
And now for the final big cut. I've been 50/50 on putting something in the opposite side panel to the big window - finally decided to go for it and after looking at dozens of different wolves and outlines, decided "Hell, I really like the wolf I already have, I'll just make it bigger!" Going to back it with perspex, probably illuminated but not see-thru at all - that'll still leave me space between the perspex and the mobo tray to hide some cabling...
Cut out a template I printed off this morning before I left for work...
And used a dinner plate to make a nice even circle - centred exactly between the two edges, and exactly between the bottom of the case and the point where the motherboard tray stops inside the case
Traced the plate and the wolf and came up with this...
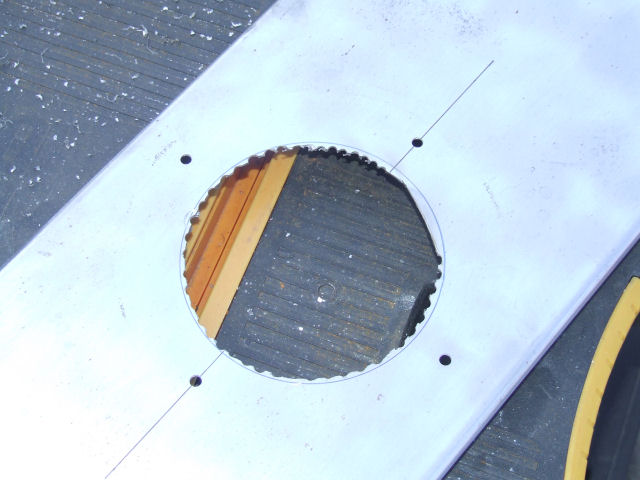
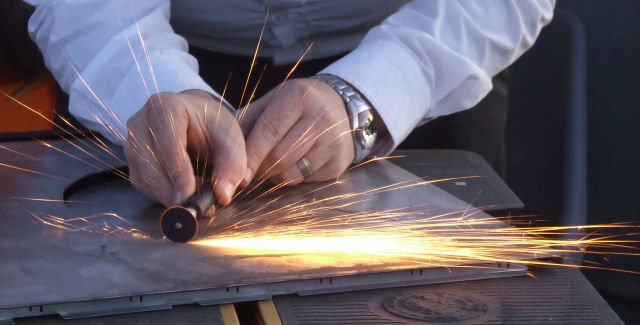
An hour or so of this...
Sparkly!!! lol
Anyway - here's the panel with the first cut made - the initial rough cut...
At this point, I looked up and saw this...
And realised that it was time to call it a day.. until tomorrow - the weather forecast is looking good - but I think I might be out of primer - will check at home. I have load of "proper" primer but that means carrying a hell of a lot of extra gear - primer, activator, thinners, mixing cup, mixing stick, waste tin etc and that's a little too much hassle for work - plus it's real dusty here at work and while the aerosol primer dries fast enough for the dust not to be an issue, the high quality primer doesn't.
There'll be more tomorrow, I'm sure...
looking awesome~!
sweet work man, looking great! love the action shot of the dremel!
damn man a bit overdressed for modding, arent you? Half the time I work in my underwear- I mean shorts.
I do most of my modding when I'm at work - I work security on the weekends - there's kinda a uniform requirement :p
Very nice work!
I was thinking the same thing when I saw that picture. It made me think.. He's the gentlemen modder. :DQuote:
Originally Posted by Mark_Hardware
One day I'll get my tie caught in the dremel and you'll be calling me the ghost of modding past :D
I tend to wear trousers at a minimum, and usually a T-shirt. Hot sparks are fine on my arms/hands, but not on my stomach/thighs/junk.Quote:
Originally Posted by Mark_Hardware
Anyway, great Dremel shot. Gotta love those, especially with your work uniform.
That opposite side window is spot on. Can't wait to see it filed out and lit from behind.
Filed out I can do, illuminated from behind - that'll be a while yet - waiting for the plexi, for one thing, and I want the case fully painted before the windows go in to make the painting easier - I'm planning on permanently attaching the plexi with some kind of glue/bond so there are no visible fixings so it'll be one of the last things done...
Anyway.....
And it's sunday and time for a little more....
I have to admit, the day didn't start off too well. I drove to work through 3 REALLY short light rain showers despite the weather forecast calling for cloud with sunny intervals but no rain. Got to work and this is what I was met by...
Not the most promising of outlooks huh? Well it rained again two or three times during the day but never much - just enough to make me pack up all the power tools etc and put them away for half an hour or so. Unfortunately, it didn't rain enough to put a decent layer of moisture down, so when I wasn't hiding from the rain, I was being choked by dust clouds because of the wind - between the dust (no painting) and rain (no anything!) I didn't get a huge amount done - but I wasn't going to be totally beaten so I DID get some bits pushed on....
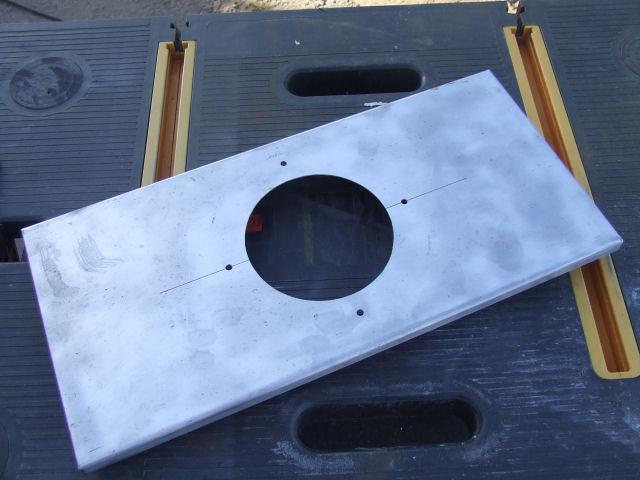
Took the new side window from this...
To this...
And as that means pretty much all of the sheet metal is now physically done, and ready for paint, I figured I should probably do something with the frame it'll all hang on...
I can't figure any practical way to get a 120mm fan in the back, much as I want to. The entire case is only 200mm wide, so I'm going to put a pair of 92mm fans in the rear - it's still an improvement on the pair of 80mm fans the case was designed for. I started by cutting out the stock fan covers/grilles because they actually stand out from the case and made measuring up difficult because I couldn't get a ruler on a flat surface to make sure of things...
After measuring up, two 92's will fit but the existing holes are in just the wrong places so I'll struggle to get them fitted securely. The only solution I could come up with is to cut out the whole piece of metal and replace it with a new one. So cut the hole out...
And a quick test fit with the aluminium frame I use when working with 92mm fans...
Tight but it'll work (just)...
I turned the case over and started measuring up for the front fans. Again, 2x120mm is going to be so tight and kill so much of the case's practical structure I'm rethinking it. Current thoughts are either 2x92mm or 1x120 and 1x92. Probably the latter - I want as much airflow as I can get, after all.
Just for kicks, thought I'd put the whole thing back together - just to see how much it's changed since this...
And here we go...
It looks terrible with the old black, primer and plastic visible, most of the panels primed and one still bare metal - but it's DEFINITELY getting there....
It may be as long as 2 weeks before the next update - my shifts have changed and I'm working all nights next week - nightshift and modding don't go well together unfortunately. I'll probably get some stuff done at home in between but 2 weeks is a possibility :(
This case really is looking awesome man! Take some rep.
ty ty - with a little luck I'll get some time at home this week to do a few bits - I'm working nights on Monday, Thursday, Friday, Saturday and Sunday this coming week so other than Tuesday afternoon and most of wednesday, the whole week is gone before it even starts!!!
love it
Yup working nights is a drag. Wondering though if you have power for your tools couldn't you take a work light along? Love the way this is going. Really like that your doing something with the side behind the mobo tray. :up: Looking forward to the next update.
I have two worklights - a 150w and a 500w and to be honest, they don't really provide good enough light, especially as I'm paying so much attention to details on this project - I admit I'm probably going a little TOO far but I don't care lol - I'm in no hurry to finish it, so I might as well take my time and get things exactly the way I want them...
So, I want your opinions people....
I've just realised my original plan for the location of the moon on the main window is just not going to work, mainly because the PSU and reinforcer bar are going to seriously get in the way of the light I plan to use to illuminate it - the idea is to try to "aim" a white led (or 2 or 3 or whatever it takes) at the back of the moon and get it to glow...
Originally planned location...
Central...
Wolf's eyeline (this may have to move a little to the left depending on how far the 3 1/2 inch drive bays stick out)
Low on the hills
What do you guys think - the main thing in my head is that there be little or nothing directly behind it so i can get it lit from behind clearly....
The moon may look a little funky because it's a negative greyscale image of the moon lol - just realised I'd used the actual image I'm sending to the engraver (I FOUND ONE - YAY!!!) to put the moons on the images here - they were already uploaded and I didn't really see the point remaking all the images for the sake of lunar accuracy :p
I think lined up with the rounded section for the handle and staight line from the snout. just my opinion. As far as paying too much attention to detail, unless you get so obsessed it keeps you from ever finishing it no such thing. :devcool: Its the attention to detail that lets you get it just the way you want it to be.:up:
Well I'd like to think it hasn't gotten in the way of some pretty serious progress so far... The only thing I'm really worried about is all the sheet metal is now done - I have all the perspex ready to cut - got the engraver lined up - know how i'm doing the drive bays and cooling - and I still have NO FRIGGIN CLUE what the hell I'm going to do with that damned front panel!!!
Oh yeah, and I'm still only about 65% sure of the colour the whole thing is going to be - found a real nice dark anthracite grey metallic from an Alfa Romeo the other day at the bodyshop....
So anyway.... I got presents today....
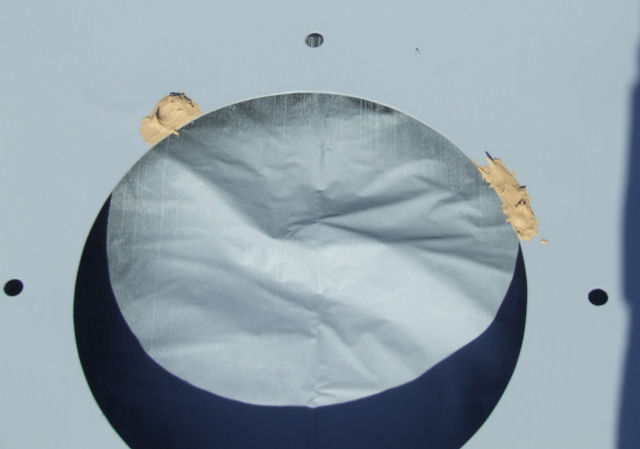
There we have, on the bottom of the pile, the 500x500x5mm sheet of light tint for the main feature window. There's a fair offcut on that so that might end up in the front panel.... Then top left is the A3 size 3mm tinted for the smaller window on the opposite side - and there'll be enough left from that to make the window for K-9 as it's just a little one. In the top right we have the red tint A4 x 3mm which I'm going to slice up carefully to make the eyepiece for K-9. Bottom left is a A4 x 3mm light tint - main window on Liquid Yellow - the upcoming Xbox 360 mod (figured I may as well save on postage and get the perspex now, which also explains the clear A4 x 2mm which I'm going to use to TRY to put a window in the DVD drive in the Xbox and the HD in the Xbox...
And finally.... location 5 for the moon, as per suggestions here and at other forums...
I kinda like this one myself, except it's bang in the middle of the window - not sure why that's an issue - but it is lol...
man this is wicked!
The original location was the best, but I have to admit the spot you decided on in the end works well. I wouldn't worry about it being in the wolf's "eyeline," as when I wolf is in that postition doing that infamous howl, their eyes are typically closed anyway.
Good work for sure man
The silhouette effect with the wolf is awesome mate, and wow, being able to do your mod while working how awesome is that :D, look forward to seeing this get completed, subscribed & +rep :).
absolutely love your work man + rep and subbed
TY again all for comments - don't worry - this isn't dead - just had a stupid couple weeks at work - hoping to get some paint (internal black and external primer) on tomorrow and this weekend make a start on the dreaded front panel which I'm slowly getting ideas about...
My work shift location and times changed last weekend, just for the one weekend so I didn't get my usual stack of stuff done unfortunately. I tried taking parts in to work to paint (I couldn't do the cutting etc as it was a clean site so I couldn't make a mess). The problem was, every time I tried to paint anything, the temperature dropped like a stone and everything got covered in condensation. Water + fresh/wet paint = fubar.
I got as far as masking up and priming the top and bottom case panels...
Which went wonderfully well - then I put on the black...
I also primed and painted the metal part of the iCage but you can see from this pic that the black really didn't take because of the temperature/moisture and it was a real pain in the ass to try to get paint on the insides too...
Which is about when I gave up trying to paint at all, and accepted that a little more disassembly was going to be called for. So this is what you get when you remove the rivets from an iCage...
And you can really see there what I meant about not being able to get the paint on the inside parts despite trying to aim through the holes in the iCage. While I had the drill out, I also decided to strip down the case chassis as I figured that'd be just as much of a pain to paint in one piece...
And that's what you get when you REALLY take a case apart - little bit more than thumbscrew removal there eh?
I managed to pick up a load of mesh from various sources recently - this is the piece that has my creative juices flowing...
Most speakers have a fabric mesh on the front, but this speaker actually has a metal one - wish I could have found the other half of the pair but I could only find one. This should give you a better idea of how fine that mesh actually is - enter car-keys...
And that, is the grand total of everything I managed to get done in five 12 hour shifts - impressive huh?
Anyway - the weather has been nice the last couple of days so I thought I'd give the painting another shot. Here's my impromptu painting booth - the garden shed with everything pulled out and left lying around in the garden...
First thing I had to do is rub down the moisture damaged paint on the inside of the side panels - especially as I had to try to repair some damage caused when the panels clashed together during transit - so we have our panels with some really heavy sanding...
Then I applied a coat of the gloss black...
And a second coat...
Which is when it became clear the damage wasn't totally hidden - I then sanded again - every time you do that, the damage becomes less as the paint gradually fills the indentation - it's not ideal or perfect but this is the INSIDE of the panel which you'll never really see so while good enough isn't usually good enough for me, this time it is - you'd have to know where it is to see it at all and then hold it at just the right angle to make it catch the light.
Between a worklight and a halogen heater, combined with the semi-enclosed nature of the shed, I didn't have the same condensation worries I had at work, so I worked into the night - till about 1.30am to be precise. I'm not that bad a workaholic - I had to be up till 2am to pick the wife up from work.
And the panels ended up looking like this after the final coat of black...
Before painting, you have to clean things thoroughly, and just as important, dry them properly - here's my quick n easy drying station lol
Yup - the floor - least nothing will fall off of it :p
I also got a good coat of primer onto most of the loose parts - they're going to have to be turned and flipped and re-primed to get it all perfect but that's not going to be a problem with the shed and heater available.
... and that's about as far as I got, which isn't bad really - definitely making progress.
At work now, and as the weather is looking a little like this...
I'm hoping I'll get a lot more done this weekend so there may well be another update tonight - stay tuned....
EDIT: Ok, so I should have been modding and I started playing with a graphic - I spotted a thread about custom headers for Project Logs - so I spent about 2 hours and made myself one.... Tadaaaaa
Not too shabby huh? :D
Looking good. Nice header as welll.
Looking nice. I love the header. One thing I would caution you about painting the case while it's taken apart; make sure you go lite on any contact areas. I made that mistake, and ended up having to sand down a lot of paint layers in certain areas, and I still got a fair amount of chipping when I got it all back together.
Yeah, thanks. As it happens, I'm being careful with that anyway. Last case I painted, I couldnt get the buttons or LEDs back into the front panel - that made me acutely aware of how thick paint can get if you aren't careful!Quote:
Originally Posted by x88x
i ran into the same problem when reassembling my mouse not to long ago as well funny how paint can get so thick and how tight the tolerances are on some of these things
This part of the painting isn't really a problem. The aerosol paint I'm using for the priming and the interior black goes on in very thin layers. The real problem, or potential for problems will come when I come to put the metallic colour on the outer panels. Even then, the colour isn't the problem - I plan to use a high-quality automotive clearcoat to get a really deep shine and it's the lacquer which can get seriously thick, seriously quickly, especially as I have a habit of managing to screw it up a couple of times before I get it right so I usually end up with 4 or 5 coats... Where possible I plan to sand the edges back a little to make a little more room for clearance so hopefully, it won't be too much of an issue
Very cool project! Looks real cool. I had an idea for the moon issue, not sure how well it will work but maybe you could somehow add stars to give it more of a night sky feel.
why not edge light the plexi to get the moon to shine then you can put it where ever you want and you could also add stars if you so choose
the moon will be lit - current plans are to have an LED or two aimed at it but I'll try different combinations if I don't get the effect I want.
Wow some very nice prgress, very nice work man everything looks great :up:
Nice work man,
I really like your cuts, there really nice and good.
I have no clue how many disks I went thru on those cuts - I tend to stick to non-reinforced disks because I think they give more control and a cleaner cut. This is an old case and the metal is anything but thin - if I had to put a number on it, I'd guess I'm easily in the 50-75 disks used range!!!
Ty for comments guys
Aahhh, non-reinforced discs! The horrors! I used a lot of the non-reinforced discs on my case (also old, thick steel...also a Dell, come to think of it), and after running through about 30, and having to change discs about every minute or so, I gave up and went back to reinforced.
Also a dell? Are you insinuating that there's anything dell related in this build? There's nothing dell in this HOUSE!!!!!!!!!!!!!! As soon as I get my hands on a dell, I make a point of turning it around asap - of the last 3, I gave 2 away as full systems and traded the 3rd for some paintwork for my car!!
Dell is not welcome here!!!!! :P
/Looks back at first page...
oops, sorry, I was thinking of another mod...no clue which one now, come to think of it...
Dell is a four-letter word in my world - and I don't mean the number of letters in Dell lol
Hahaha, fair enough. I just happen to like some of their old cases...or I did before I did extensive work on one....I don't think I'll be doing that again...custom construction or newer standardized construction techniques for me now thanks.