I wonder if it's like my UV red ACRyan heatshrink; pinkish under normal light, but a vibrant red under UV.Quote:
Originally Posted by StormRider

Printable View
I wonder if it's like my UV red ACRyan heatshrink; pinkish under normal light, but a vibrant red under UV.Quote:
Originally Posted by StormRider
ok so I just got an email from PPCs saying they're sold out of the NZXT red 24-pin extensions and don't know when they'll have them back. That's ok though, because my PSU and MB are actually 20-pin. so I emailed them back and said delete it and give me 25' of 1/8" red cable sleeving and a black 20+4-pin mobo connector instead. I'll do it myself!! lol I am getting the other extension sleeved at least :D
And the other 8-pin extension I don't need. I'm taking 4 of the wires for a 4-pin mobo extension and using the other 4 for the molex extension for the HDD
Ok well plans have changed, no more red NZXT extensions. Instead I'll sleeve them individually myself, doing alternating black adn red. that should fit in with the insides (and the black/red plaid fabric) better :D
should be sweet. This project is looking good! I need to start working on my xbox again... lol
well I went home for lunch and in my mailbox was a box from PPCs :D
Inside there was 25ft of red 1/8" sleeving, a bunch of black male and female molex connectors with pins, a black 20+4 connector, and a black 4p mobo connector.
I was going to do some sleeving tonight, but I've got a neat cable management idea, so I'm going to toss some ideas around tonight and see what I can come up with!
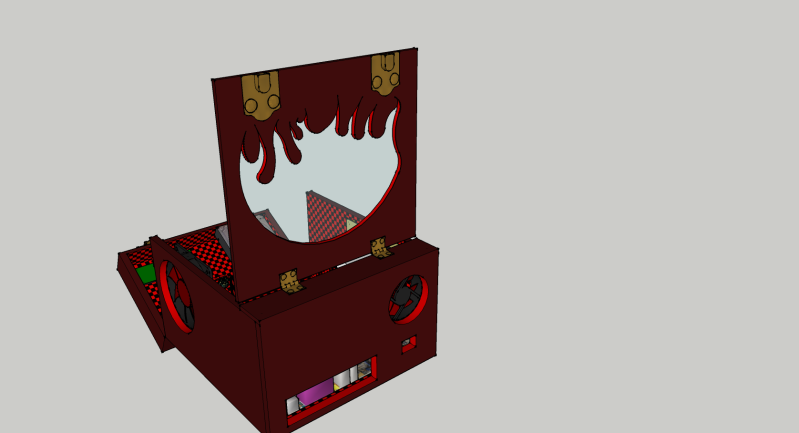
alright so I was just messing around with layout, etc. The cover I was going to make for the PSU isn't going to happen. The passive cooler I've got on my video card will cover the whole thing and you won't be able to see it. I'm going to do something simple, maybe just a flame-shaped cover out of 1/4" red plexi I've got laying around. I may use the LED flasher to light up some etched flames on the top window instead, we'll see how it all works out though.
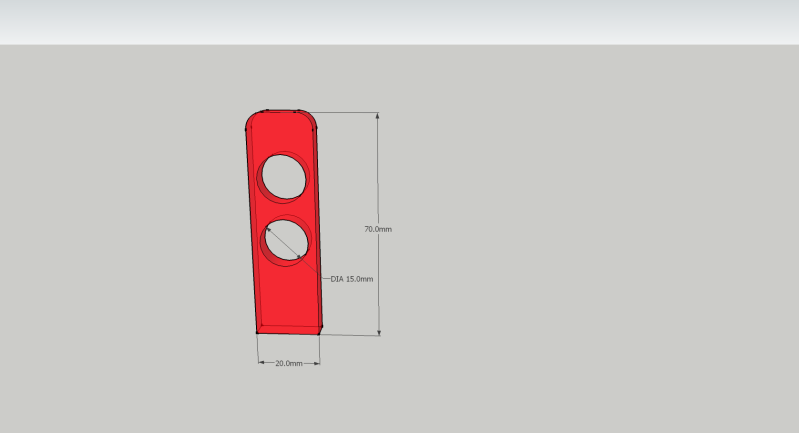
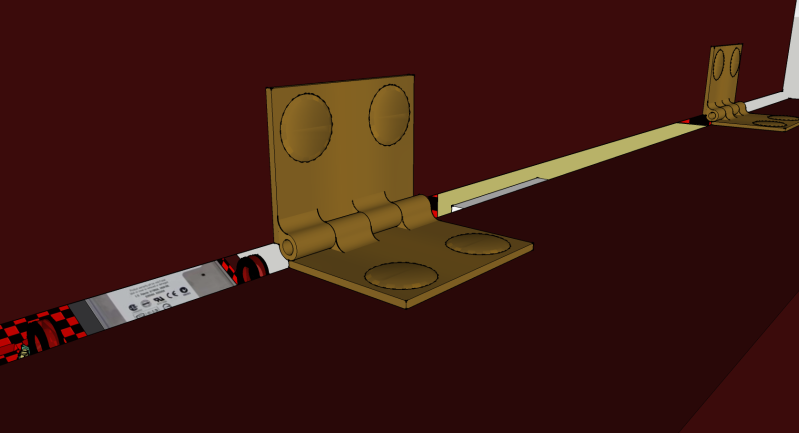
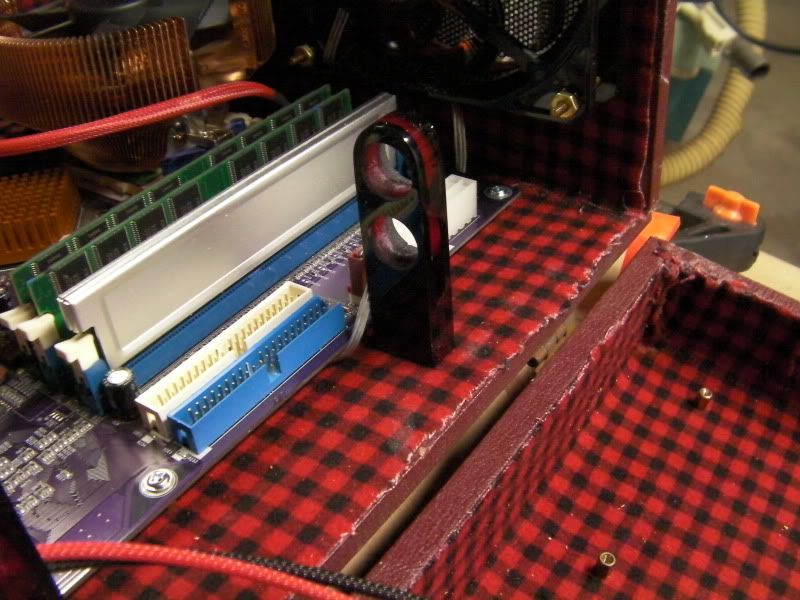
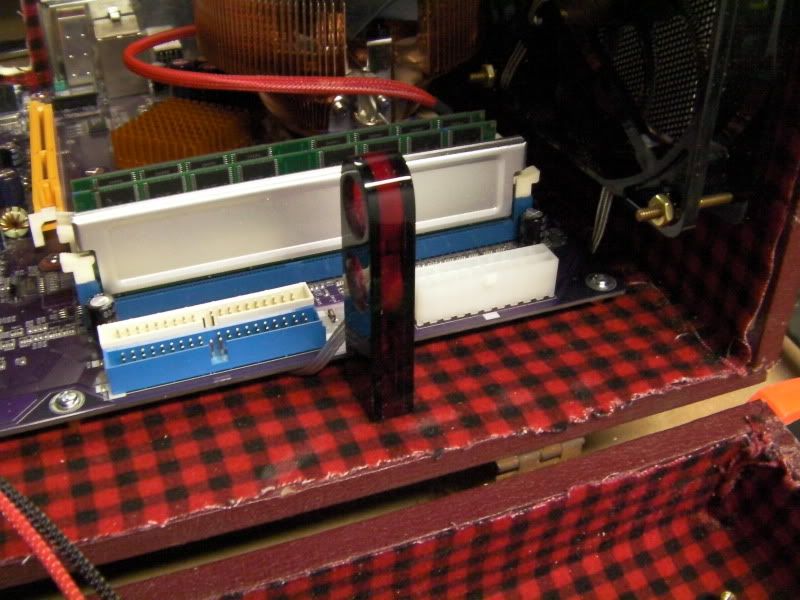
For the cable management idea decided to make a couple cable guides out of red plexi to make things neat inside. This will require lengthening the 4-pin mobo wiring as well as the 20-pin wiring.
Details to come :D
alright, the plan is to make 2 of these to hold the 4-pin and 20-pin mobo cables, and I'll probably design and make more as needed once I start laying out the cables. I'm debating whether or not to put some LEDs in the bases to light them up, basically making the edges glow. We'll see
yay for glowing edges! :)
:DQuote:
Originally Posted by billygoat333
I think I'm going to have to skip the glowing edges. I was trying to work out a way to get the wiring to the supports neatly, and integrate the LEDs neatly, and I don't think it's going to work too well. I'm still going to play around with some ideas though. Hopefully I can get the pieces water-jet cut so they're all neat and matching :D
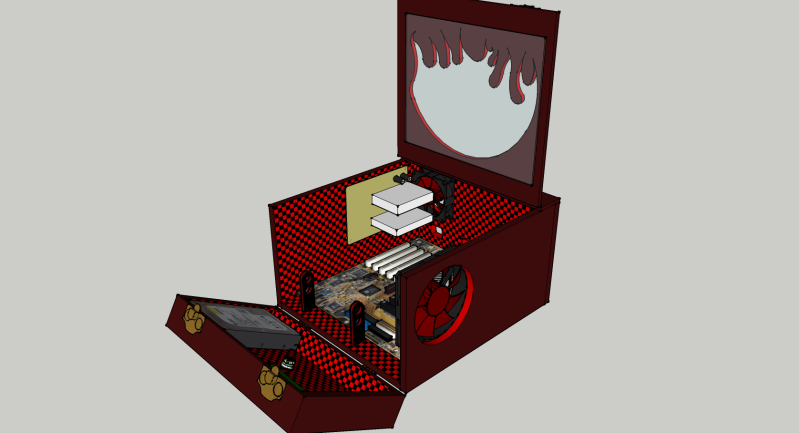
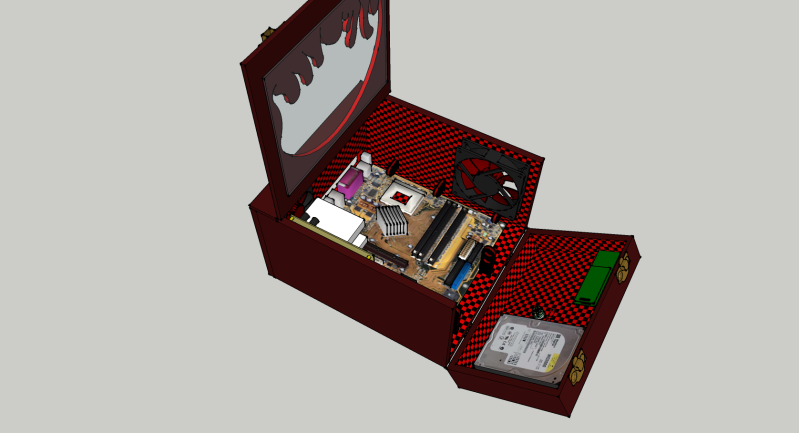
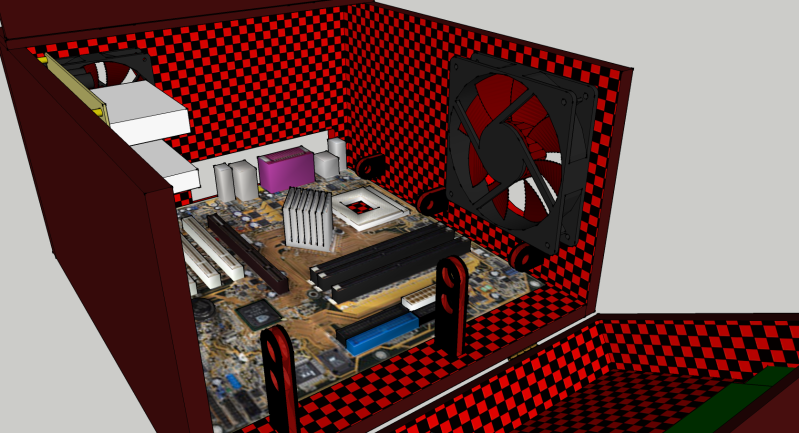
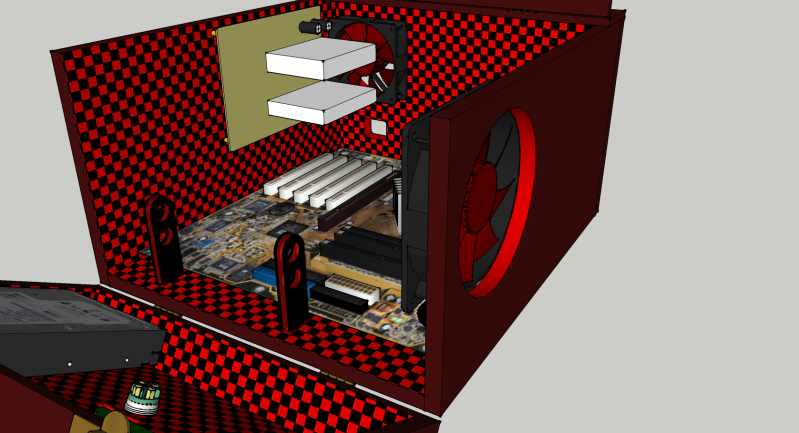
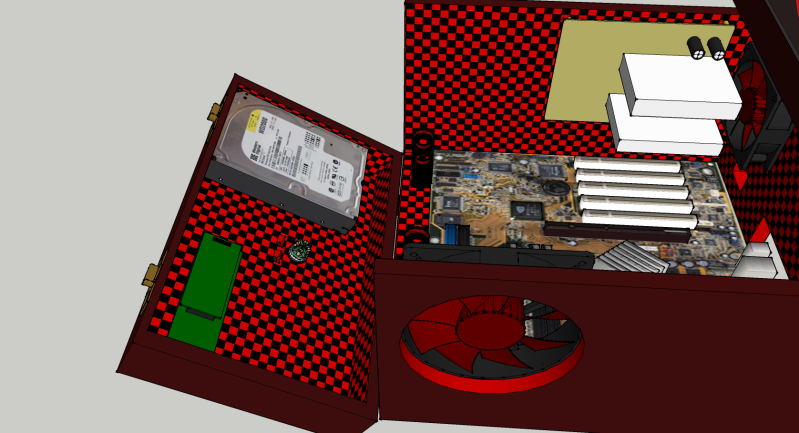
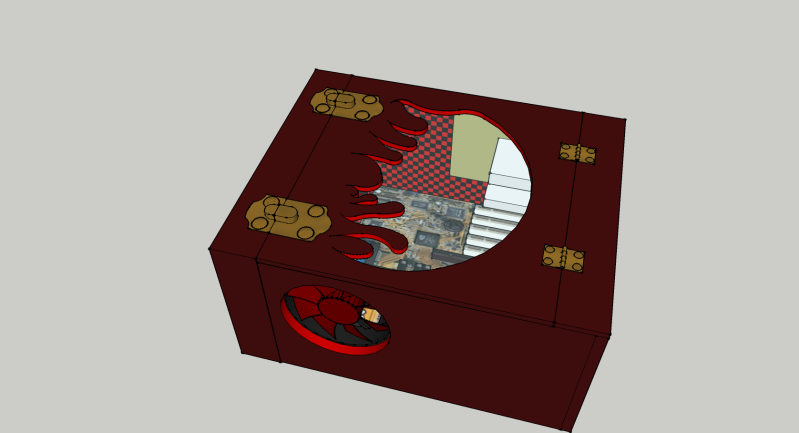
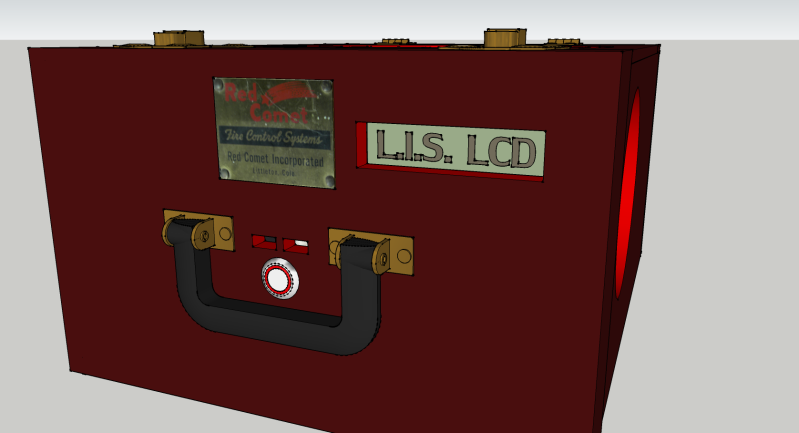
ok so after several hours playing with sketchup I made it :D
I've decided to sandwich the red plexi with some 2mm black for the cable guides. let me know what you guys think! the only things missing are my Stealth S120 AGP with the AC Acelero S1 passive cooler and the Zalman copper CPU heatsink
you sir, are a sketchup master.
Looks great!
Are you kidding me with this Sketchup!?? I can barely make a square box turn out how I want it to .:twisted:
Looking sweeter all the time. Keep it up.:up:
not even close, but I'm learning everytime I use it!Quote:
Originally Posted by billygoat333
Thanks!!Quote:
Originally Posted by x88x
Thanks!! :DQuote:
Originally Posted by BS Mods
Update time!
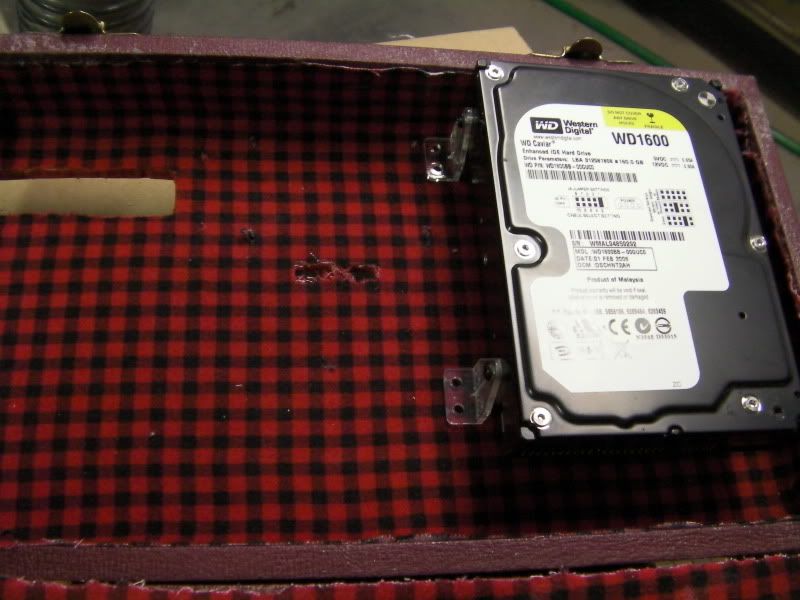
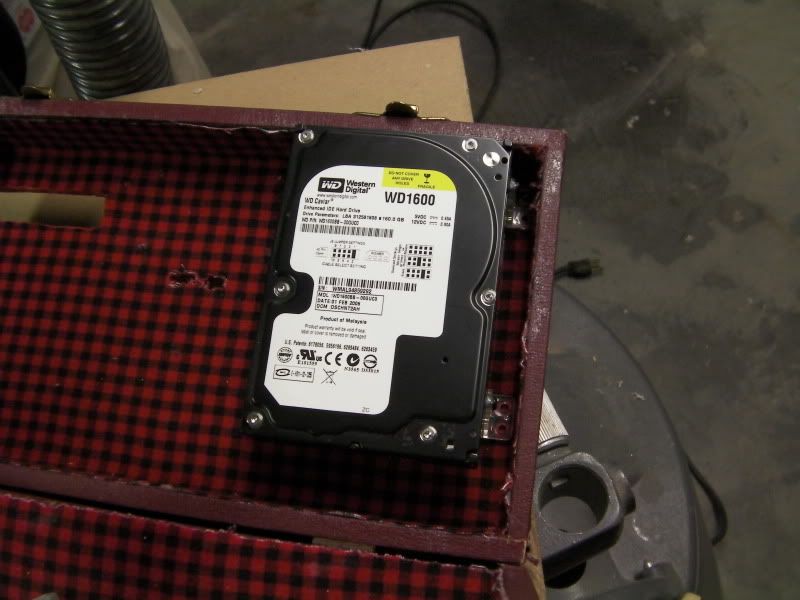
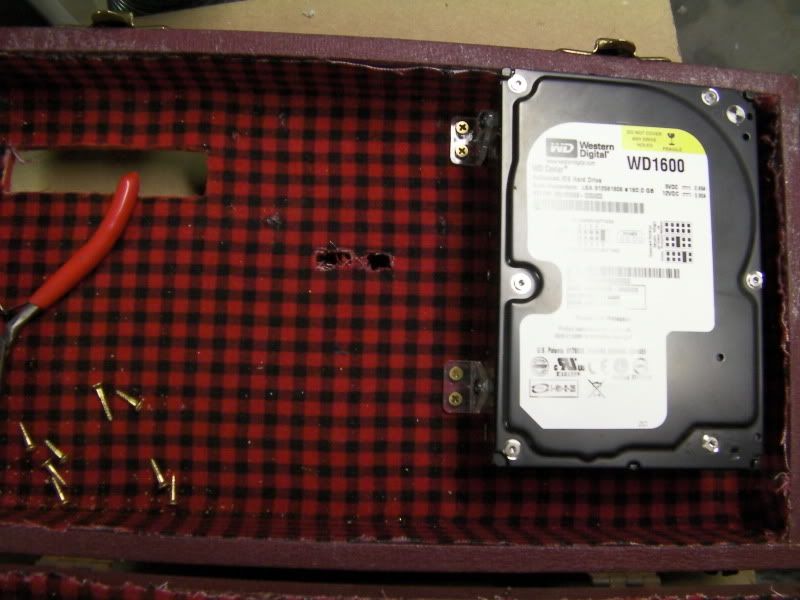
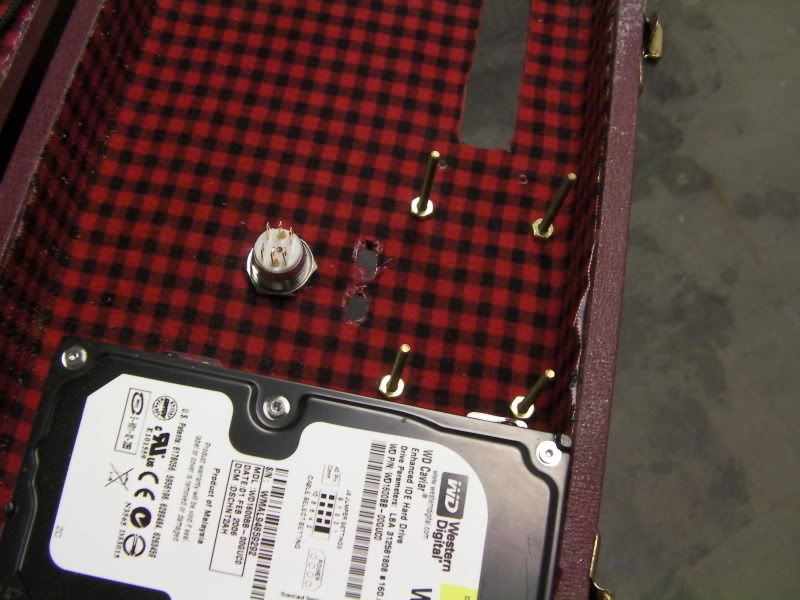
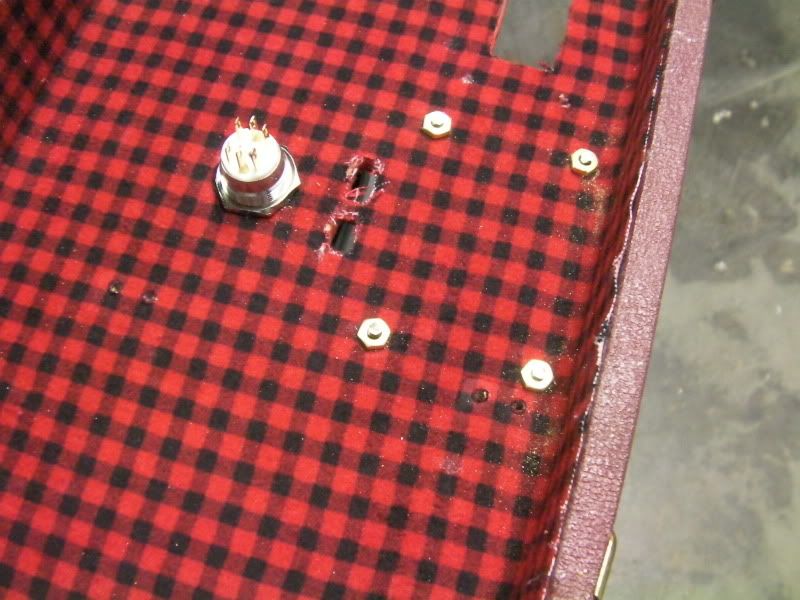
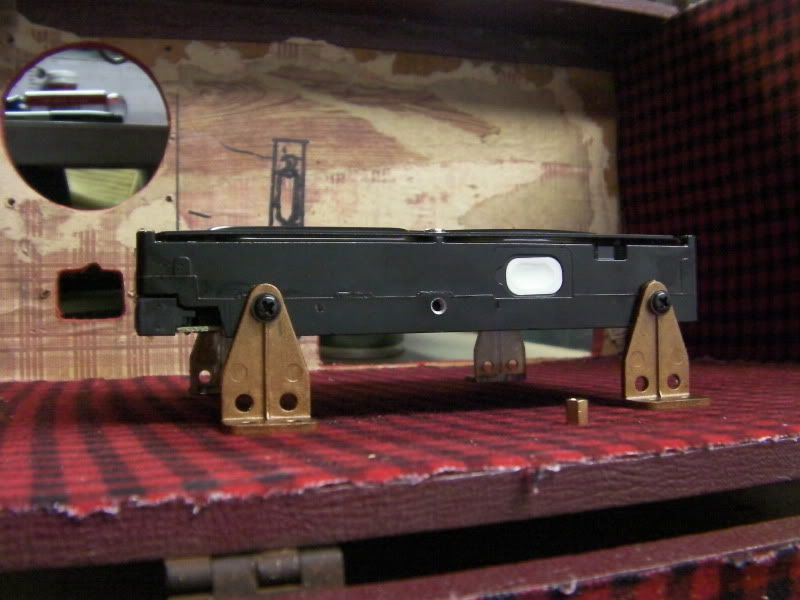
Alright, first thing I did was go about mounting the hard drive. I used the same mounts that I used in Rockin Case, but this time I cut off the nubs and drilled holes for the screws, so the mounting hoes wouldn't be underneath the HDD as they are in Rockin Case. I mounted them to the HDD and set it to mark the mounting holes for the case.
Then I drilled pilot holes and mounted the HDD with 8 short brass wood screws.
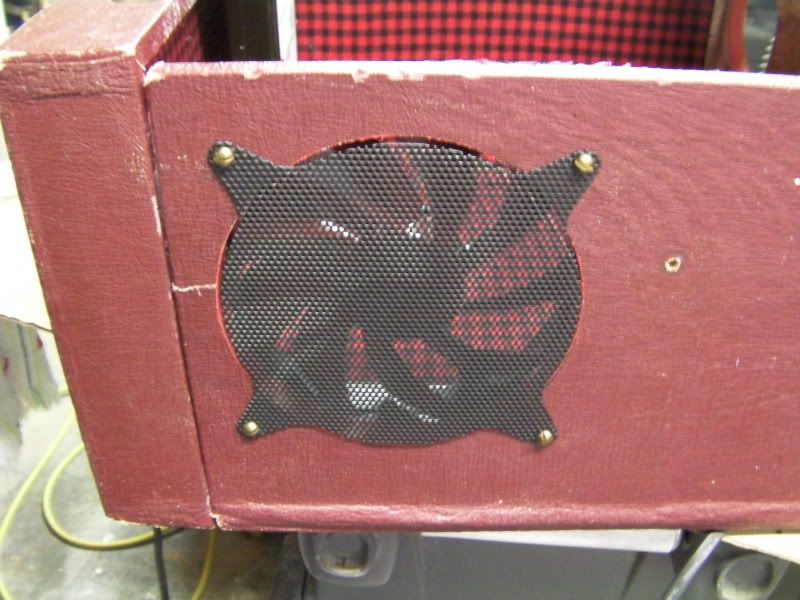
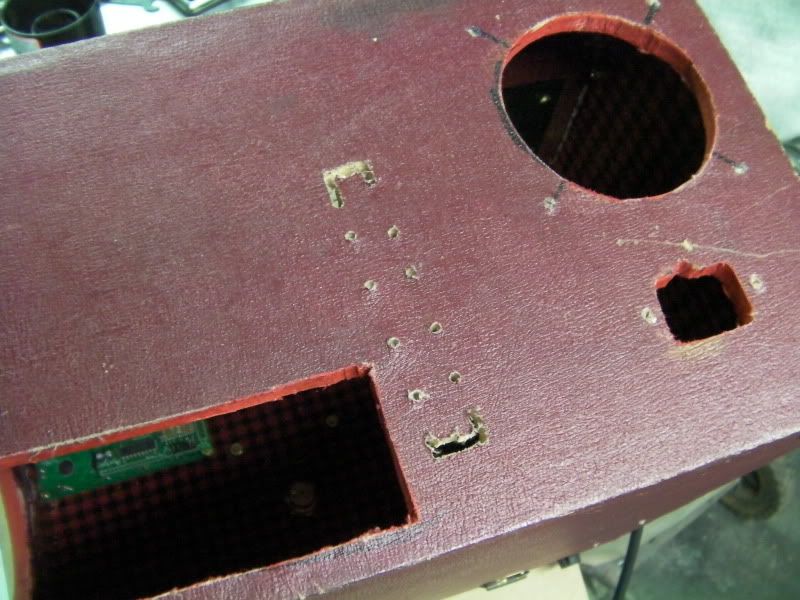
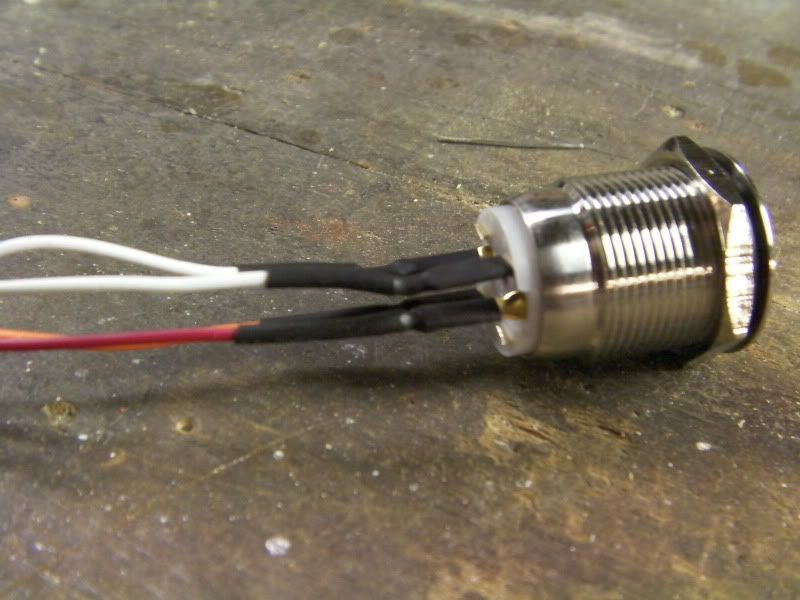
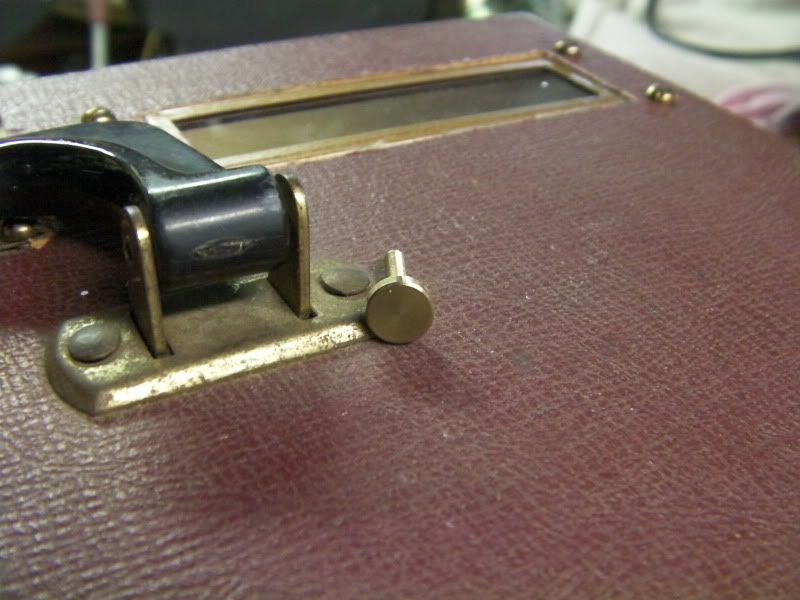
Then I drilled the hole for the Bulgin switch and mounted it.
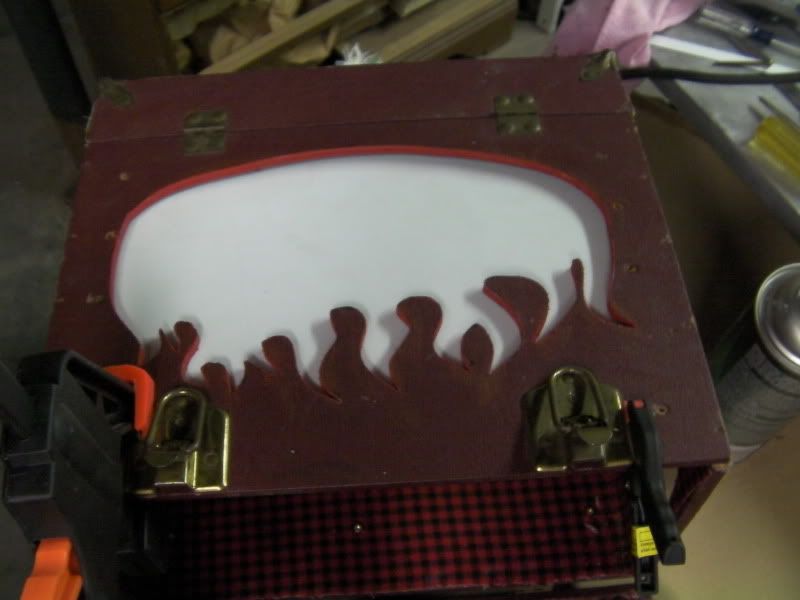
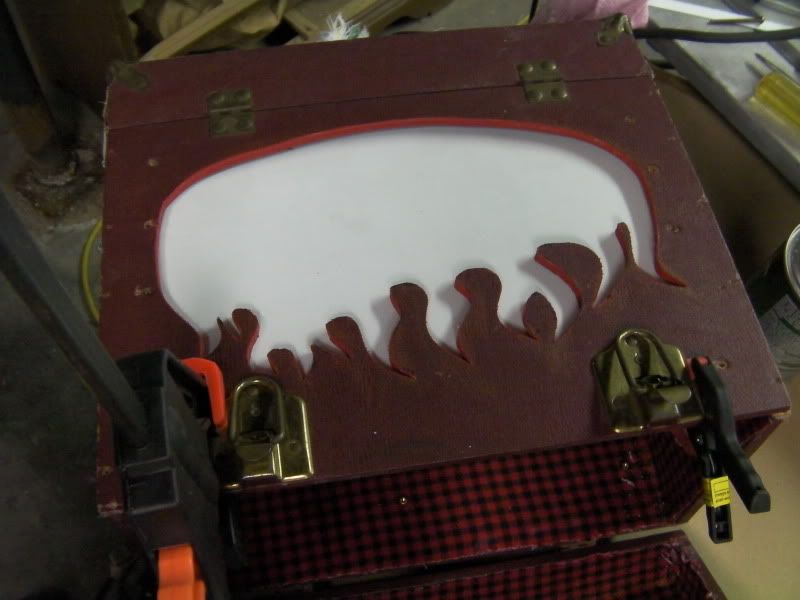
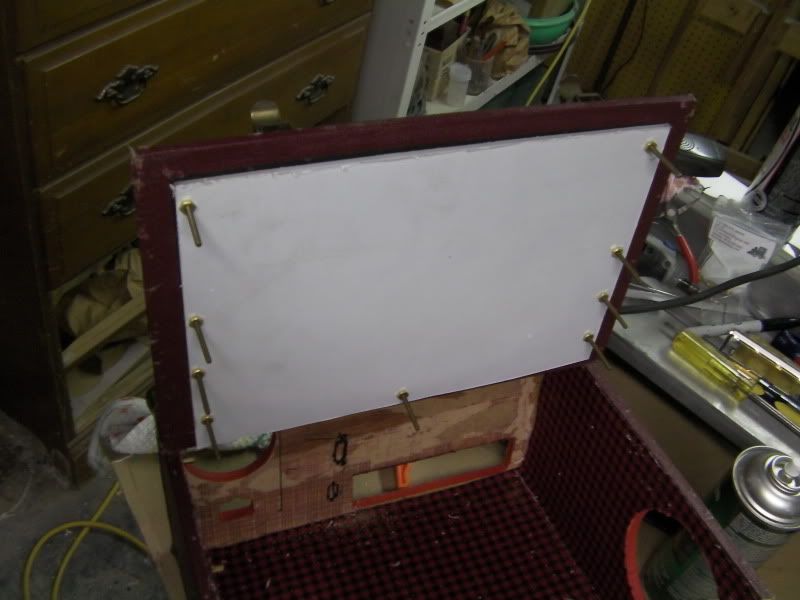
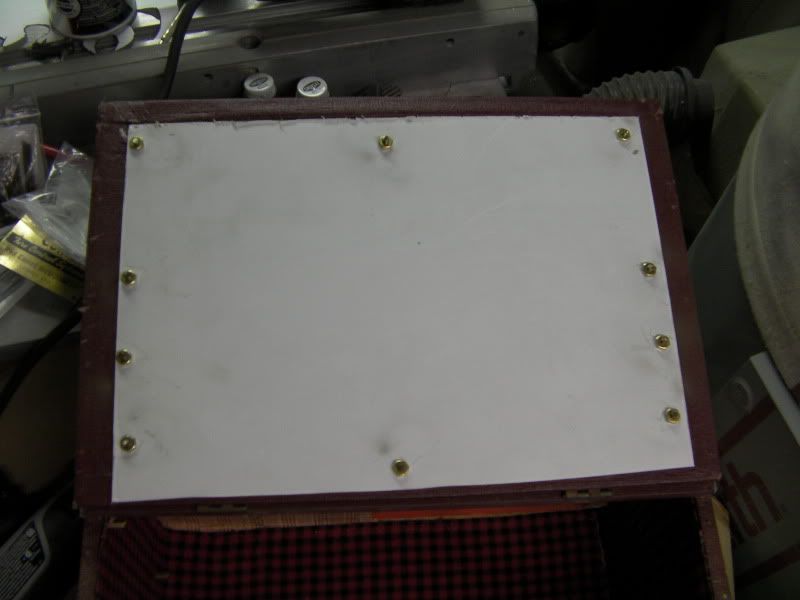
Then I clamped the window to the top panel, and drilled through the 8 holes that were already in the case to mount it. I ended up adding 2 more, one at top and one at bottom to keep the panel flush.
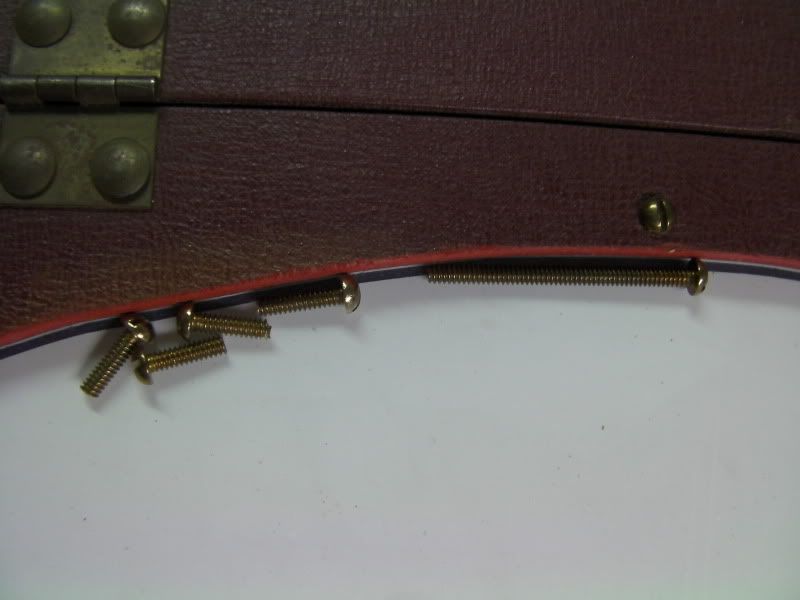
I picked up a pack of 6-32 x 1 3/4" brass screws, and a pack of 6-32 thin brass nuts. They fit the build perfectly :D
But they're a bit too long, so I trimmed them :D
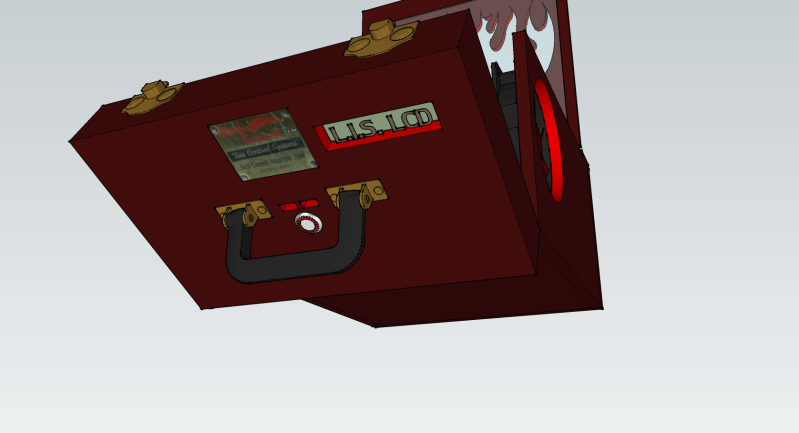
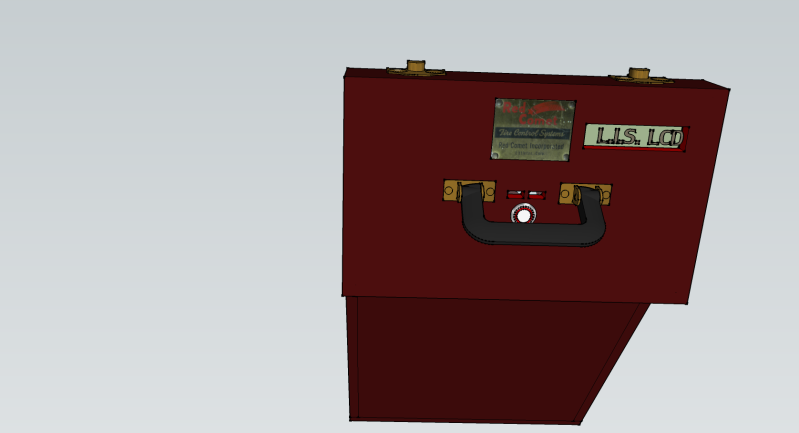
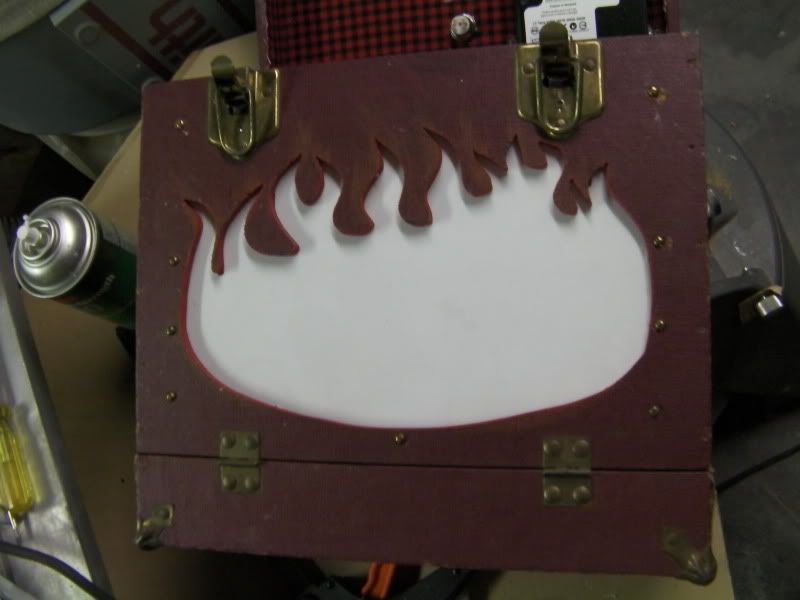
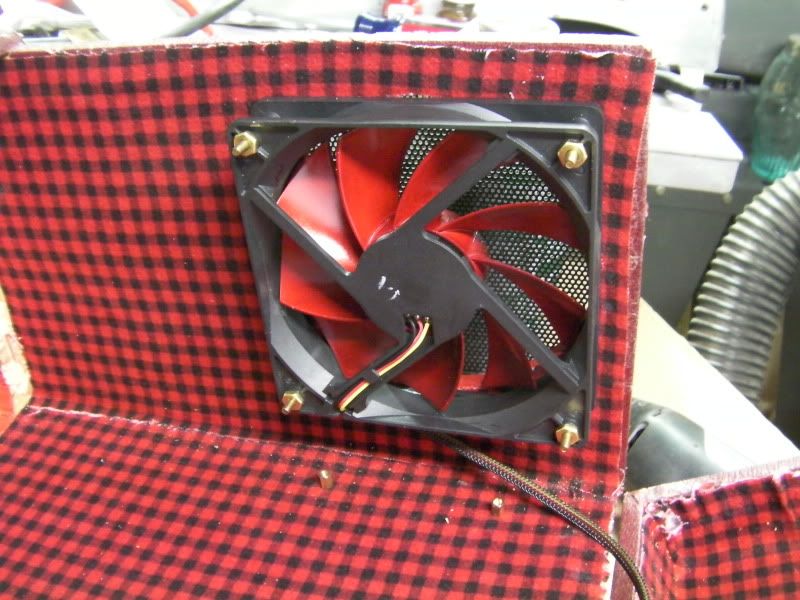
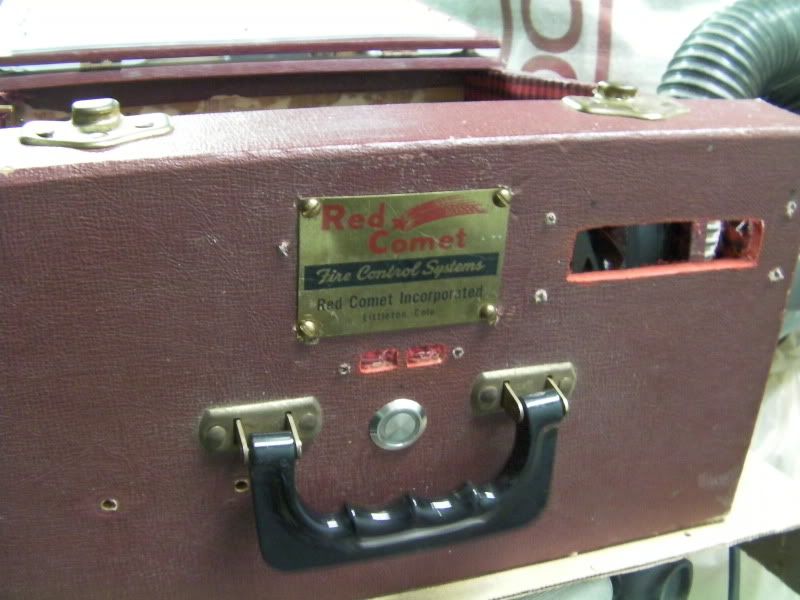
I used the same screws and nuts to mount the side intake fan and grill, and also the front name plate.
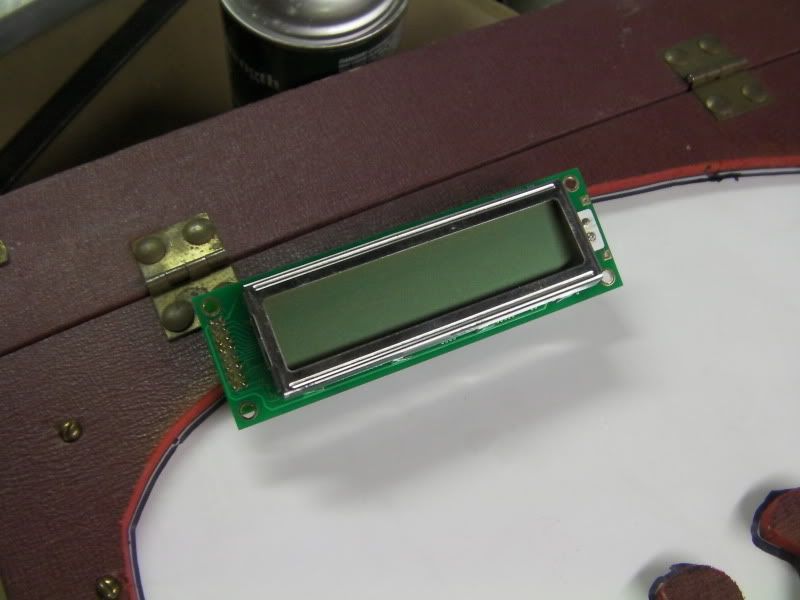
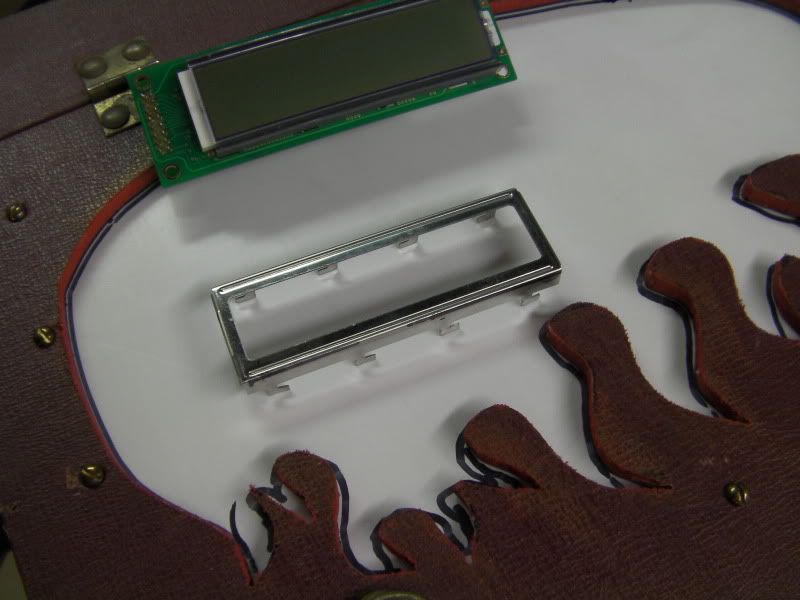
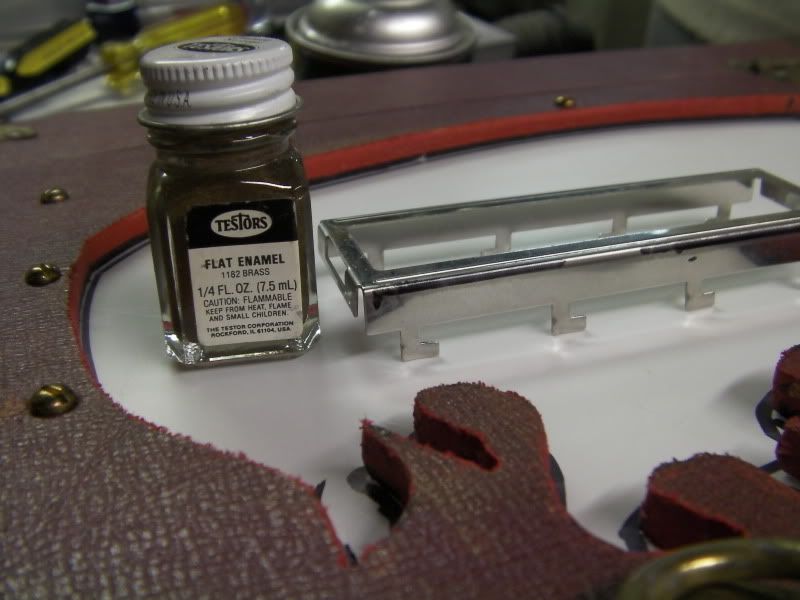
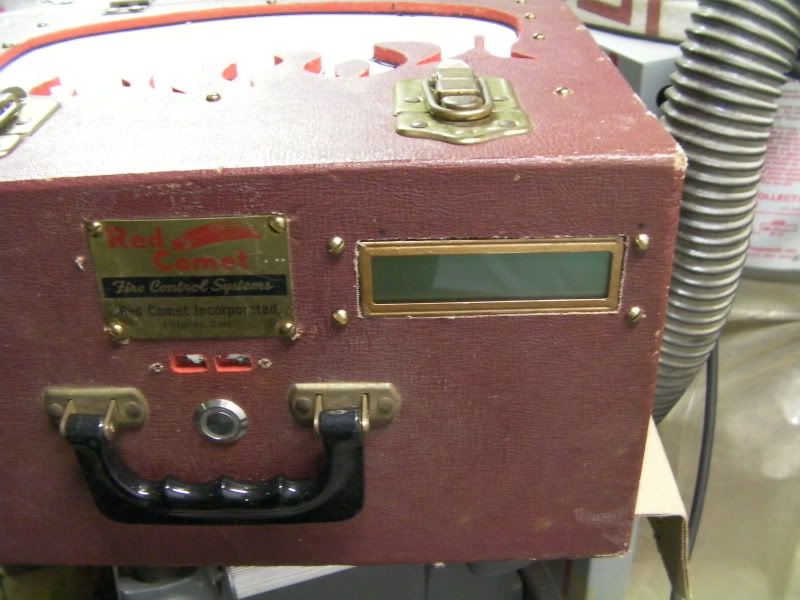
Now the more I looked at the LCD panel, the more I noticed the chrome bezel didn't fit at all. So I took it apart and painted it with brass model paint.
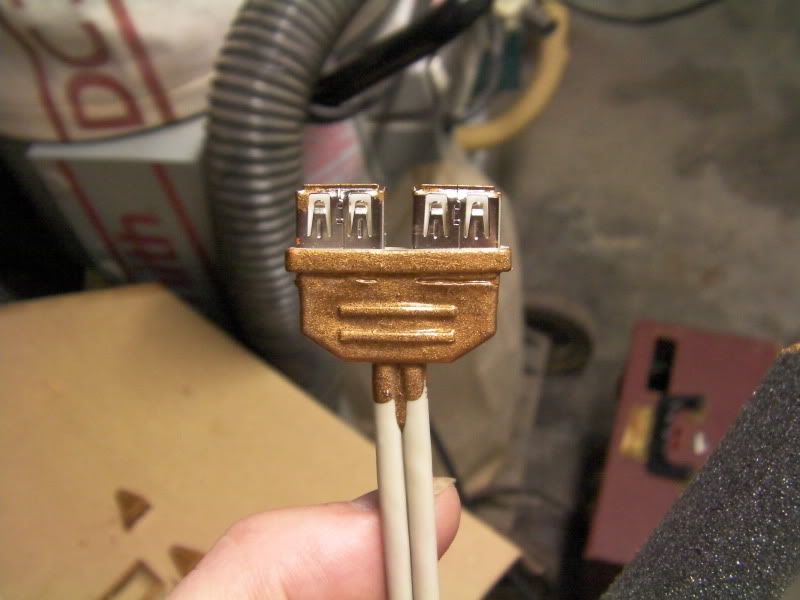
I also painted the HDD mounts and the front panel USB connector as well. Don't worry, that ugly beige cable will be sleeved :D
Ahh, much better
I shortened the screws as needed, then mounted the LCD to the front panel.
That's it for now! Tomorrow night I should have another update!
Here's what's left to do:
- Mount PSU and related components to case
- Create some sort of cover for the PSU (for aesthetics mostly)
- Install Motherboard
- Cut out slot for VGA card connections
- Re-sleeve and extend PSU wiring and replace connectors
- Devise wiring loom for PWR/Reset buttons and PWR/HDD LEDs
- Design and create wiring loom(s) for interior LED lighting
- Get acrylic parts back from HydroCutter for cable management :D
Great choice on those screws, they really do fit it nicely. The painted LCD trim is also a definite improvement. :up:
Coming together nicely. Good choice on the brass. It fits that time period much better.
Thanks guys! just a minor update, I picked up a 120mm Cooler Master red LED fan at MC that will replace the NZXT one that I painted :D
So Tesdady PM I should be getting some stuff back from Hydro Cutter :D :devious:
The stuff he's cutting for me is all that's holding this whole thing up right now! Once I get these parts I should be set to get this puppy finished!
I also hope to be picking up a copy of windows 7 Home for this, and hopefully integrating my RFID reader into this case, as it will be in my garage for my side business, and this will prevent unauthorized use :D
Update!
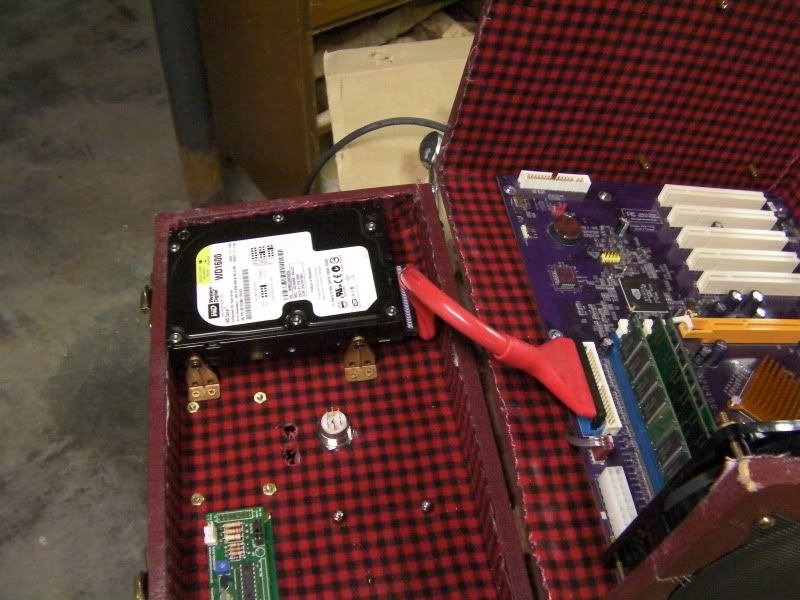
Got the painted HDD mounts mounted back to the HDD:
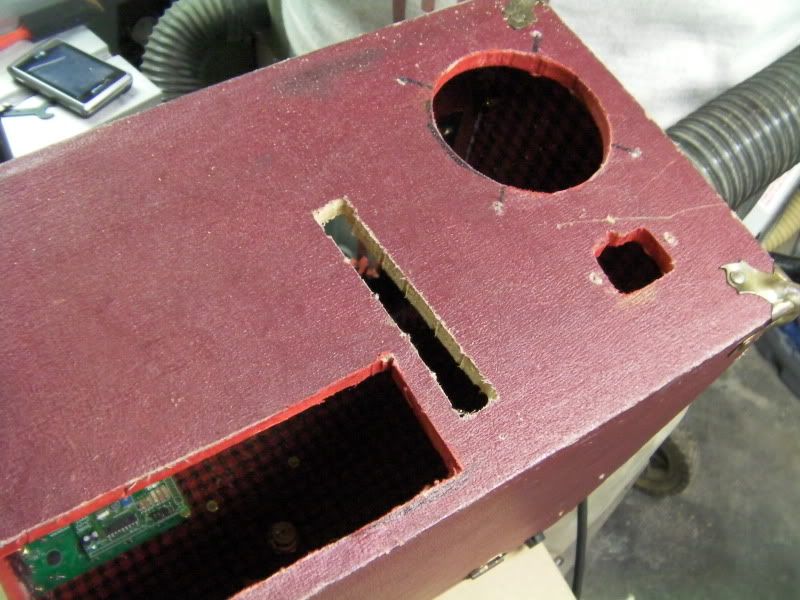
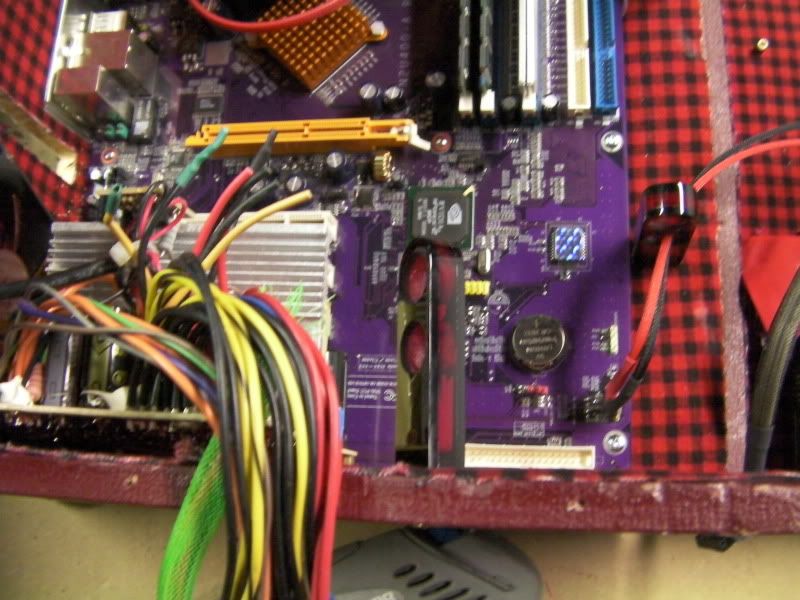
Got the slot cut out for the video card ports:
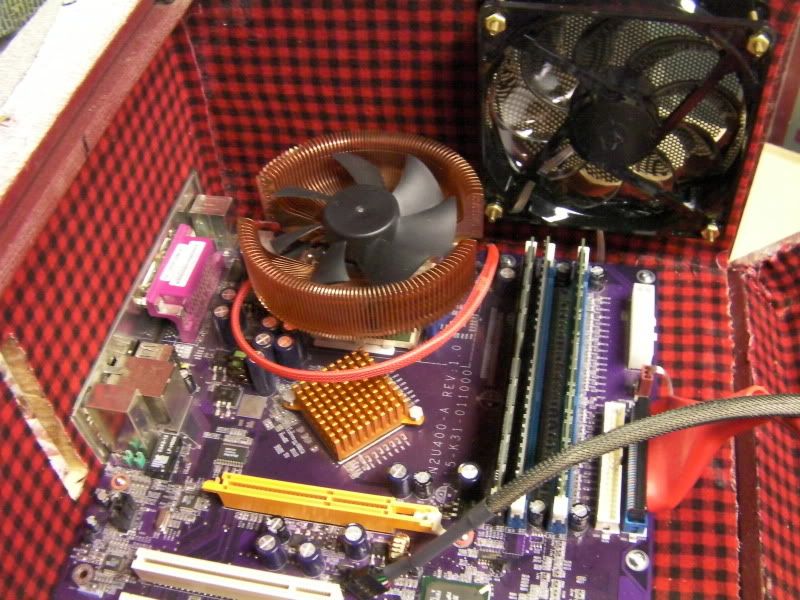
And mobo set in to check alignment:
It's angled because the heatpipes on the cooler hit a few caps on the board and it angles the card ever so slightly. It's worked like this for quite some time now, so I'm not worried :D
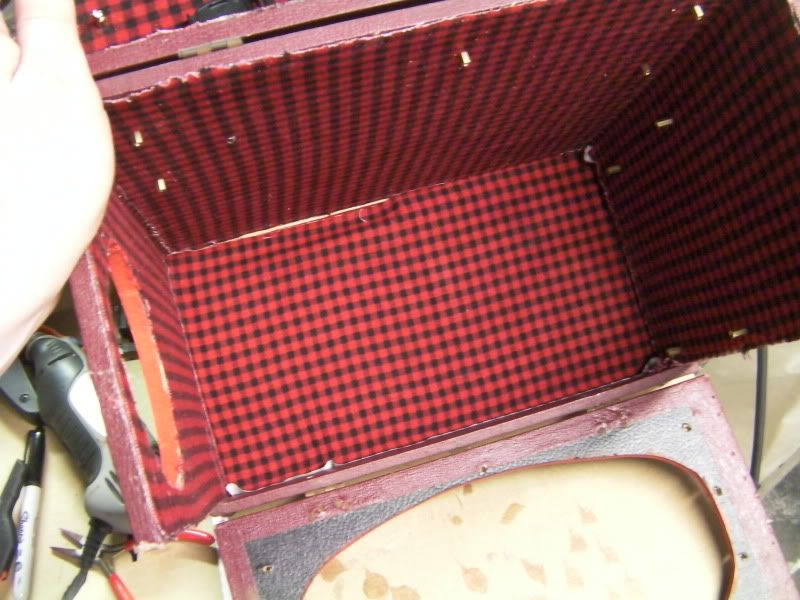
Next up I cut and glued the final piece of fabric for the back of the case:
And after a trimming with a nice sharp razor blade:
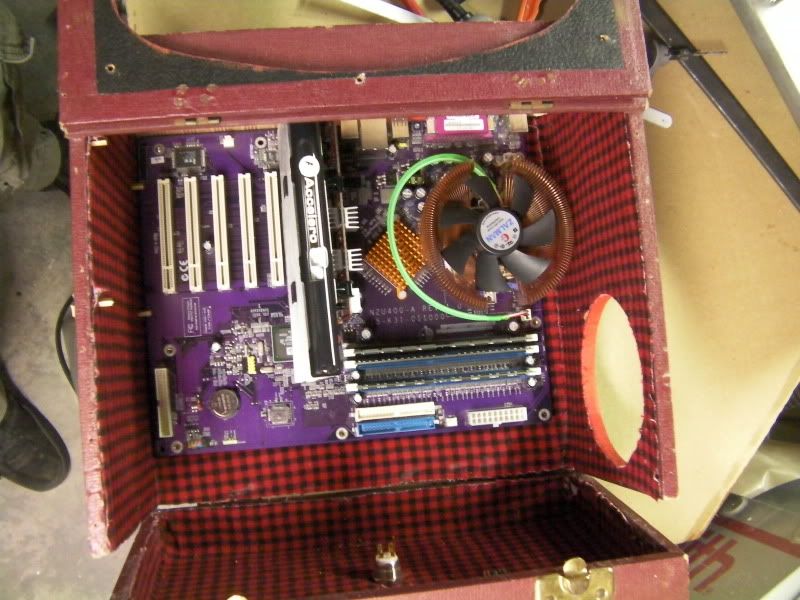
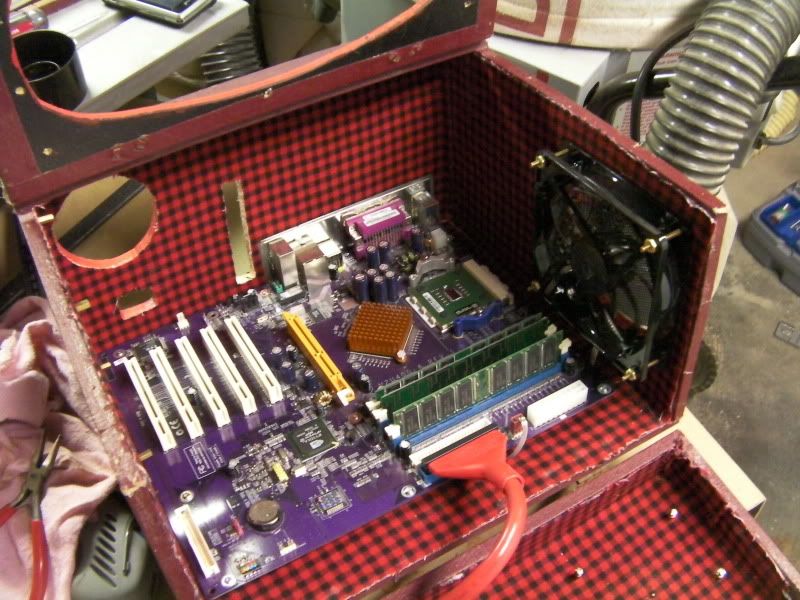
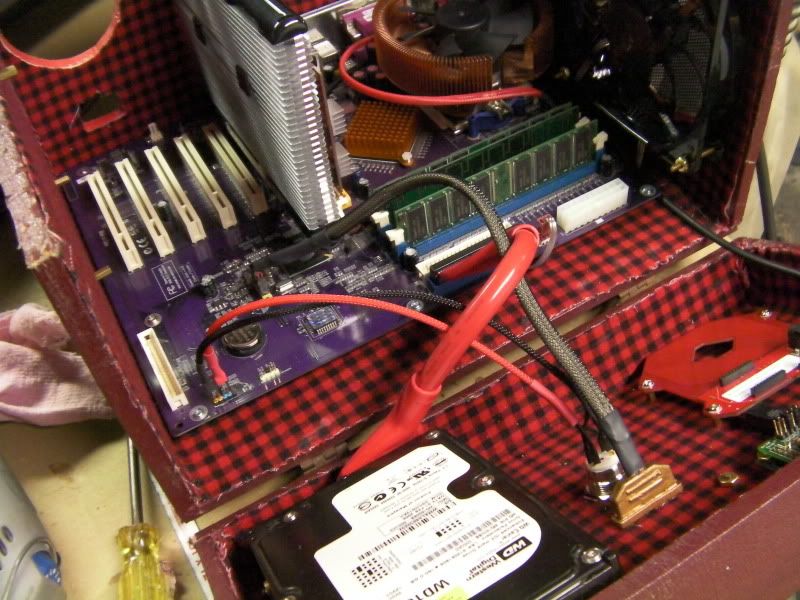
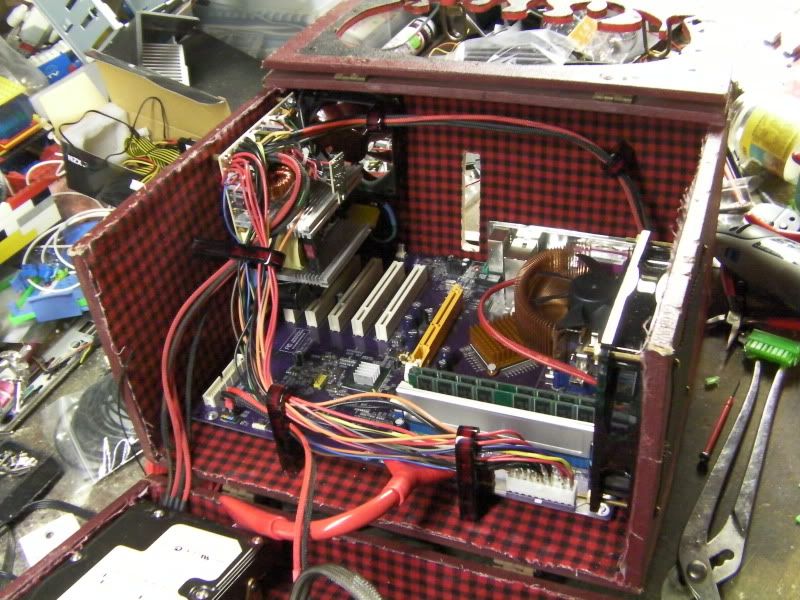
Mobo finally mounted in place, along with HDD, new CM red LED fan, and red IDE cable:
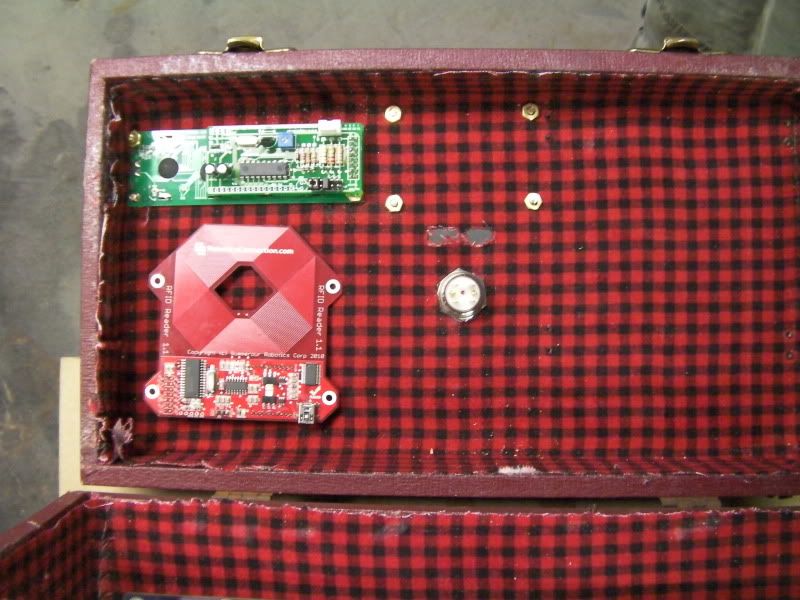
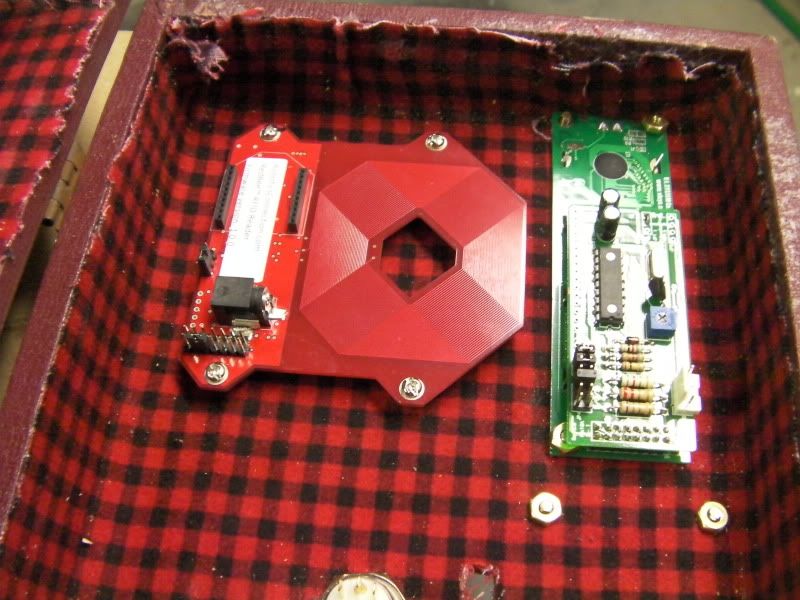
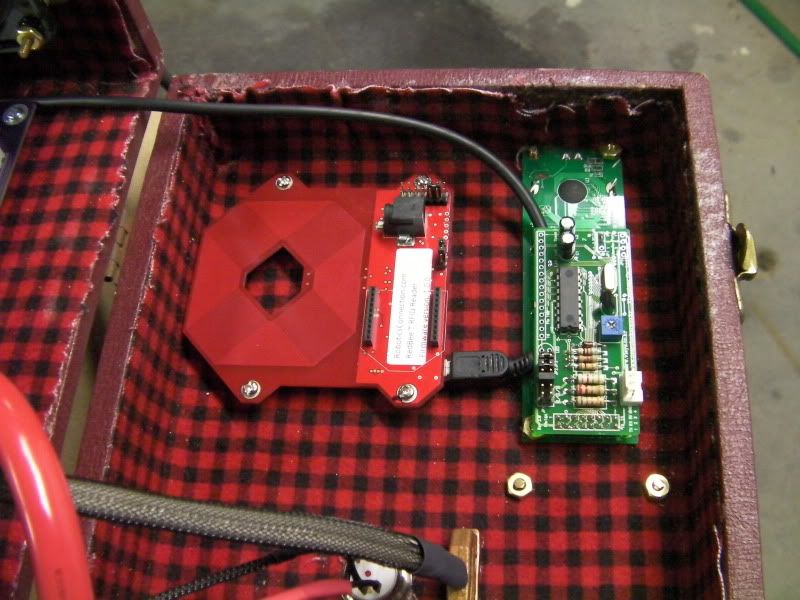
I also got the RFID reader mounted in it's spot :D
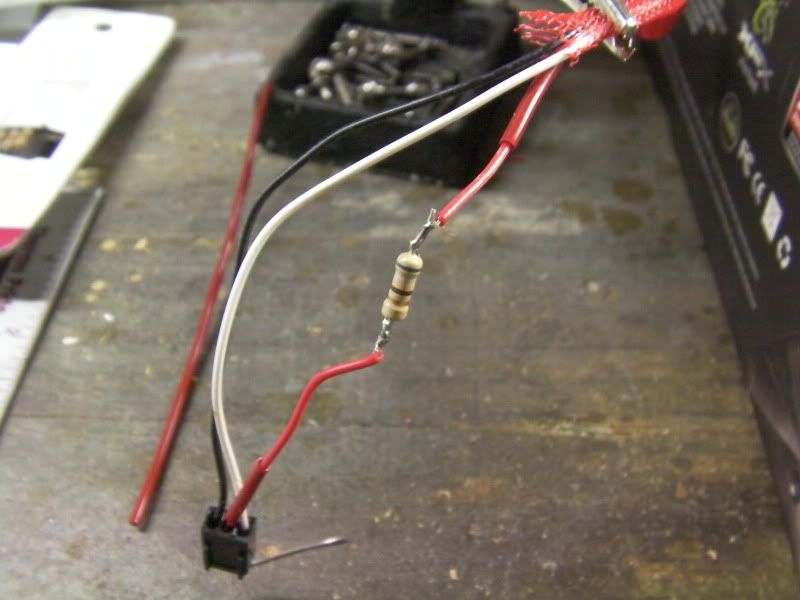
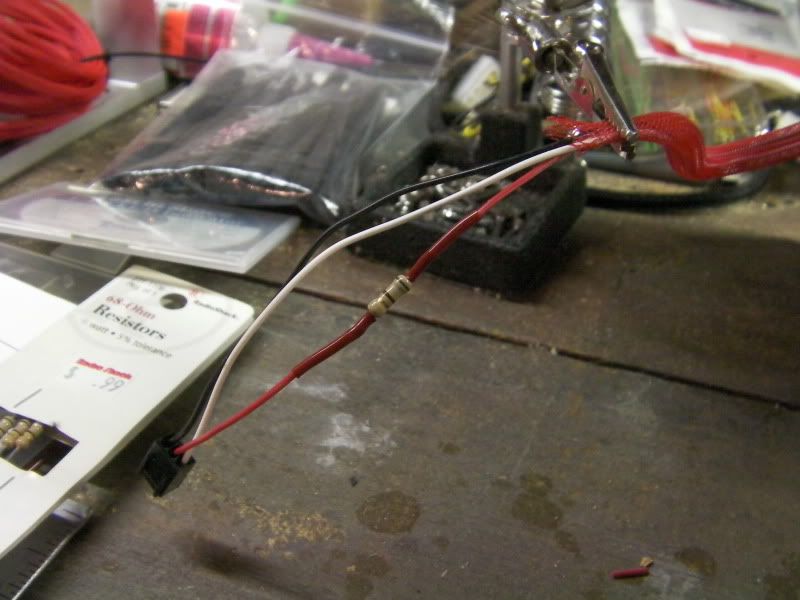
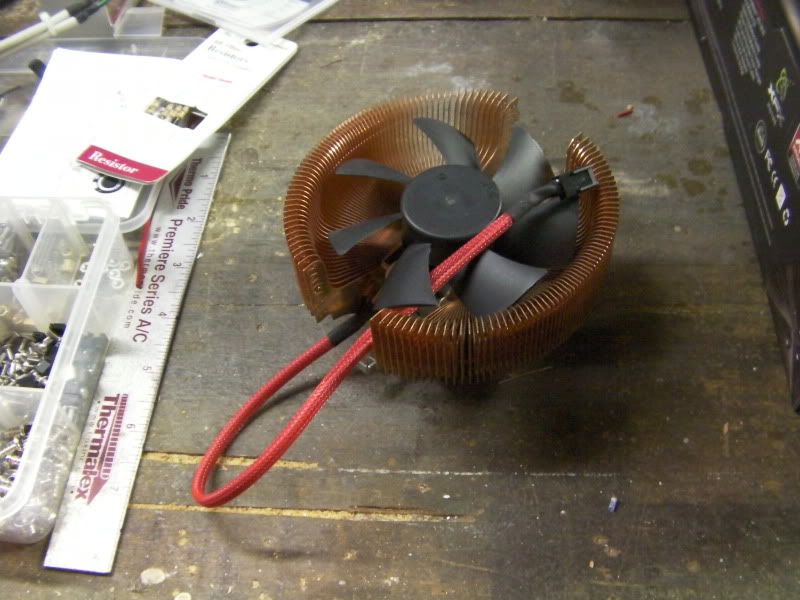
I pulled the CPU cooler off to swap the neon UV green sleeving for some red, and I'm also going to put a 68-Ohm 1/2-watt resistor in the power line to slow the fan down. It's loud at full blast, and this mobo doesn't have any kind of fan control, and I don't want to hook up the fan control that came with it, because that's just more wires to deal with and try to hide, and I never have a reason to have the fan above minimum speed anyways.
Update time!
I soldered in the 68-ohm 1/2-watt resistor to slow the CPU fan, then sleeved the wiring:
And reinstalled onto the mobo:
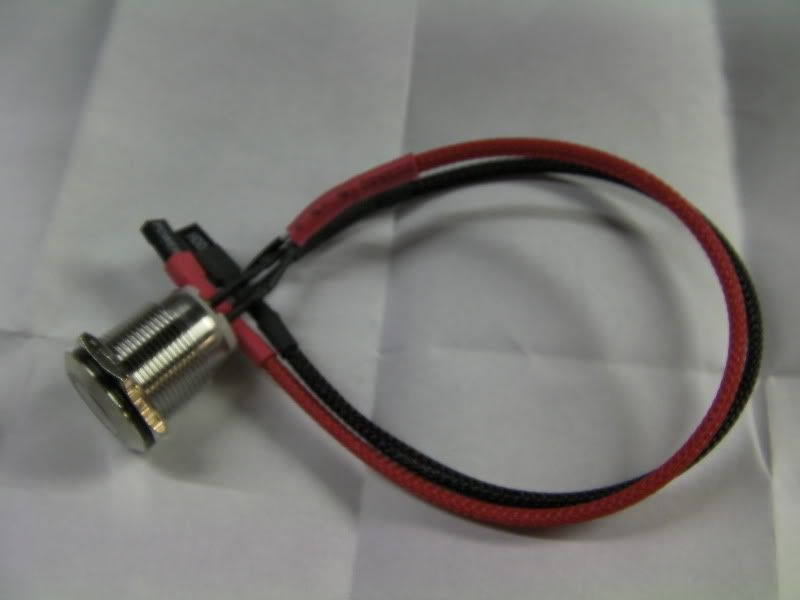
Next I wired up and sleeved the Bulgin switch:
And temporarily installed:
I also had to flip the RFID reader 180º so the USB cable would fit in:
That's it for tonight!
yay for updates!!
Looking good. :up: Cable management is really nice.
:banana:Quote:
Originally Posted by billygoat333
thanks :DQuote:
Originally Posted by msmrx57
Just wait till I get a call from Hydro-Cutter, and start extending and uni-sleeving my PSU cables in the red and black :devious: This is why I put "temporary" in for the wiring for the bulgin switch :D
Once you see what I had cut, all the pieces will fit :smoker:
Looks great!
Smallish update! :D
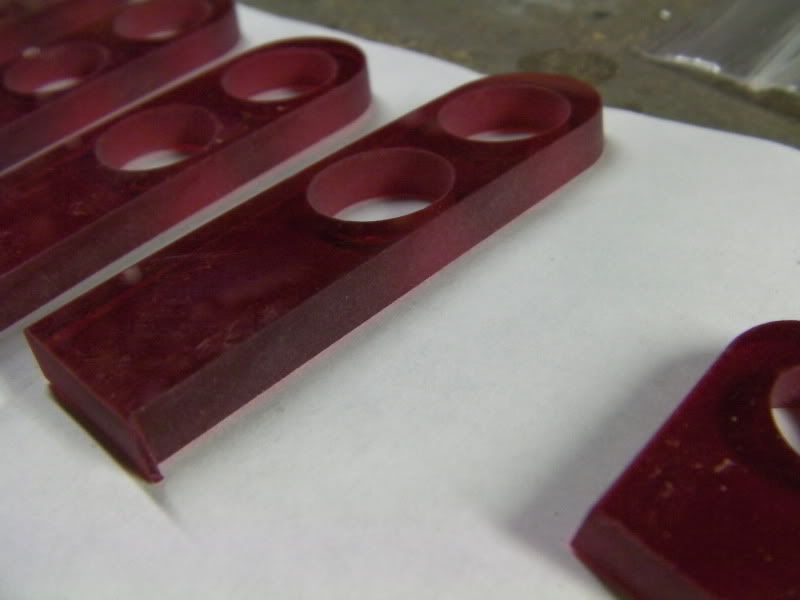
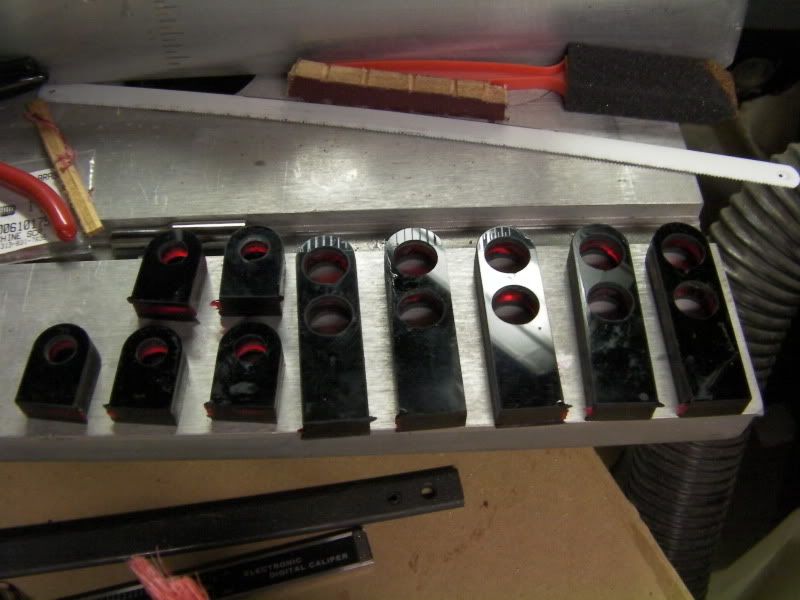
Got the parts back from Hydro-Cutter today! :banana:
I glued them together in a black-red-black sandwich:
That's it for tonight, the solvent needs to set. The next step is to sand and polish them, then figure out where/how I'm going to mount them, then start extending and sleeving wires!!
Looks great. Are those little tabs on purpose?
They are on purpose, but not needed. When he makes the CAD files for the machine to cut he leaves those tabs so the parts being cut stay attached to the main sheet and don't fall into the murky abyss that is the water tank lol. He actually cut me a few more because a few popped off and sunk
Ah, ok, that makes sense.
Those are cool looking. I need to make friends with somebody who owns that kind of machine!
You can never go wrong with black and red.:)
he's convenient...he's 5 mins from my house :D
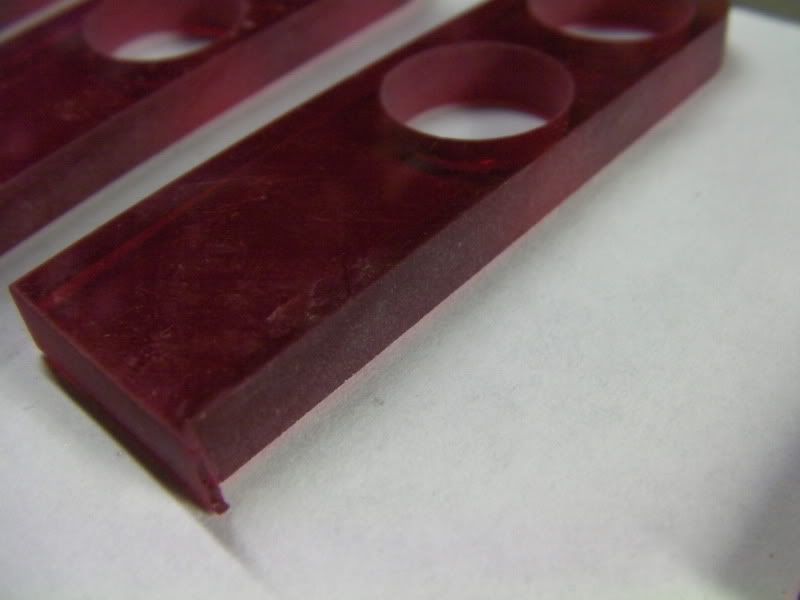
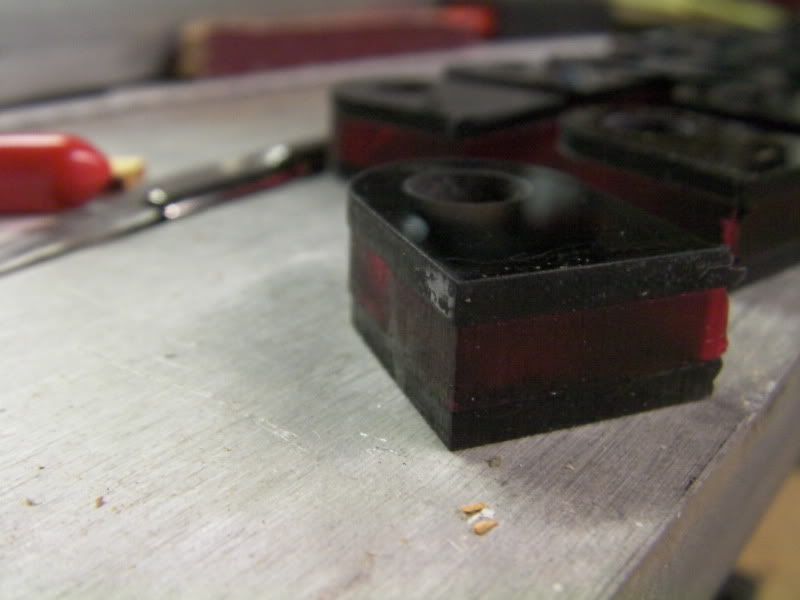
I'm experimenting with different finishes on them, from polishing to frosting, etc. We'll see how they turn out then I'll go from there
Alright it's been a busy couple weeks but I did manage to squeeze in some modding time!
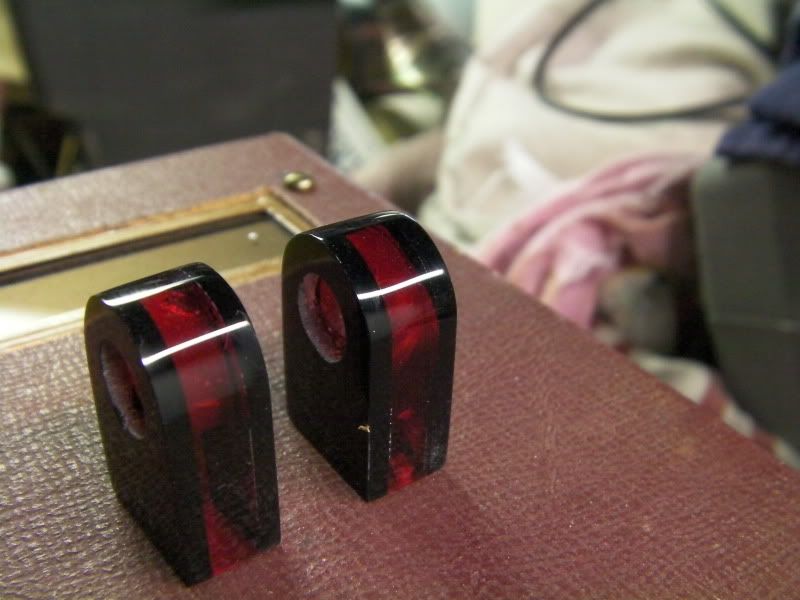
I tried different finishes on the cable guides, and I ended up just sanding and polishing them. Nothing else I did gave a uniform look like I was after.
Small ones polished:
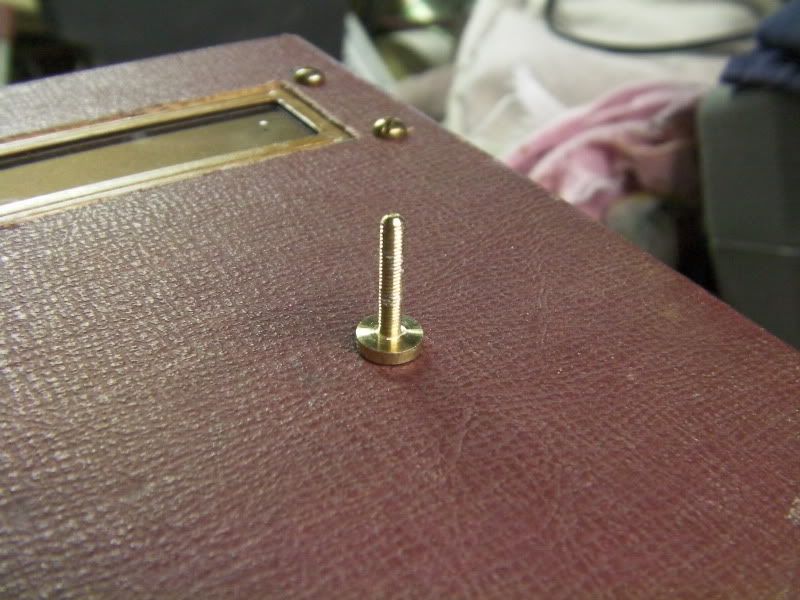
Now I had these screws leftover from taking apart the LCD panel:
And decided to use them to secure the cable guides to the case.
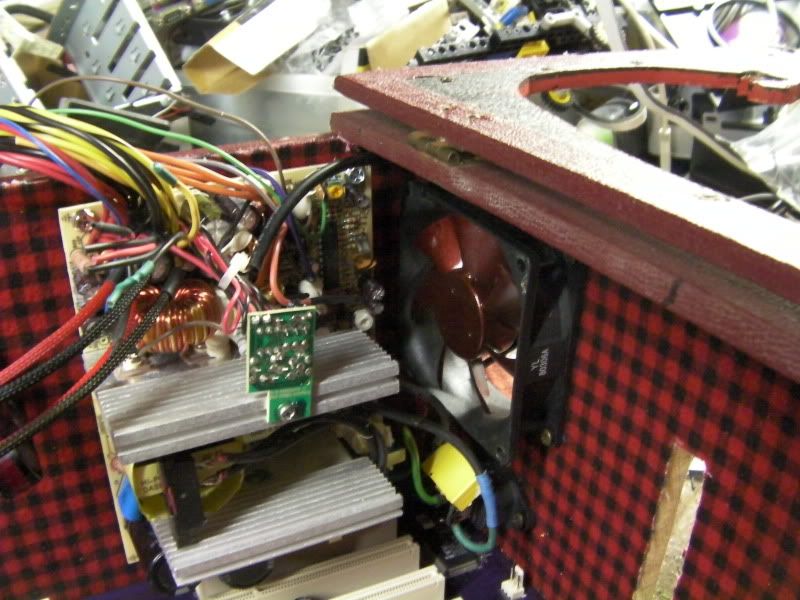
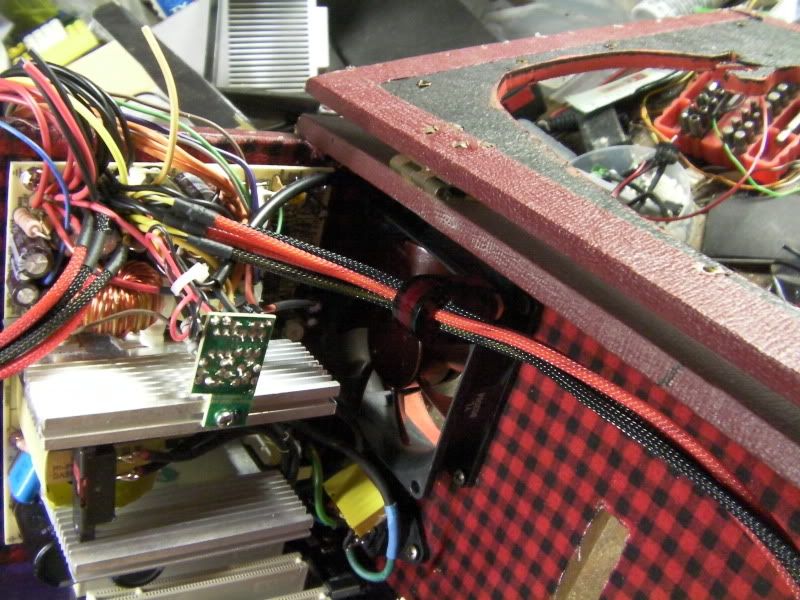
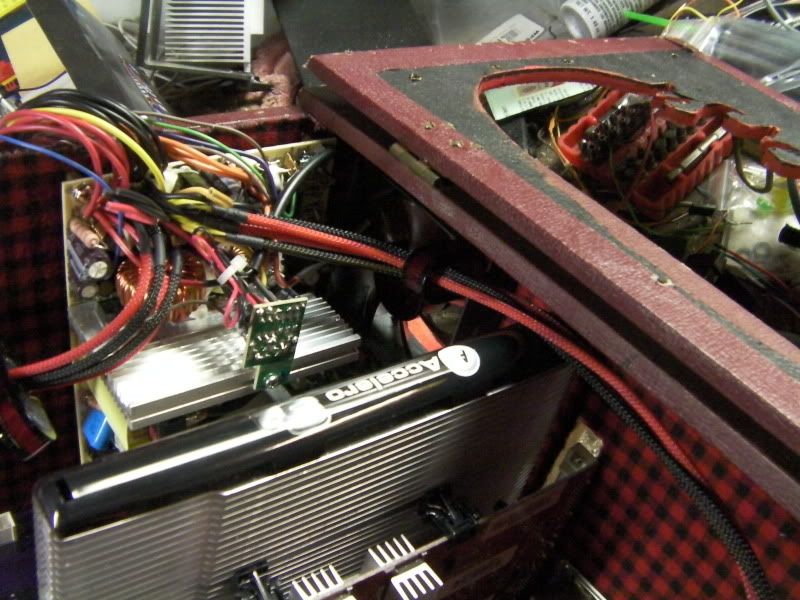
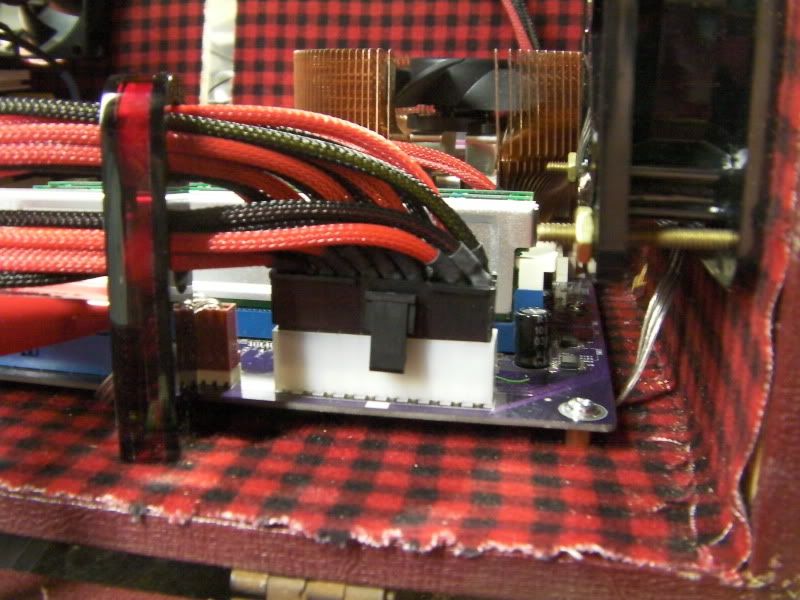
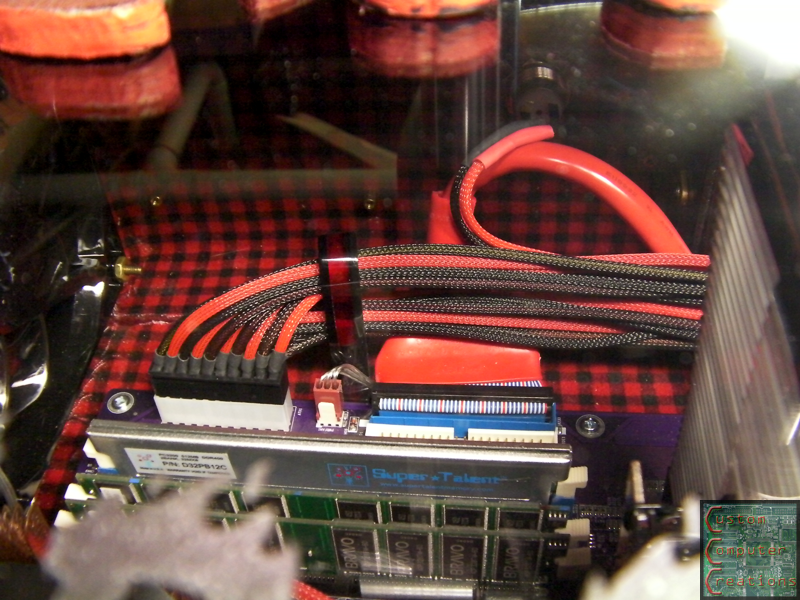
I mounted the PSU, PSU fan and plug:
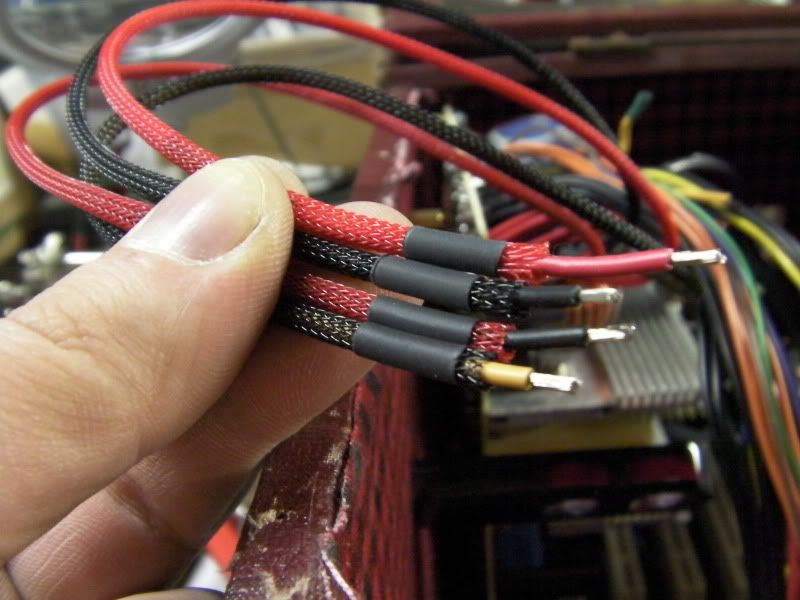
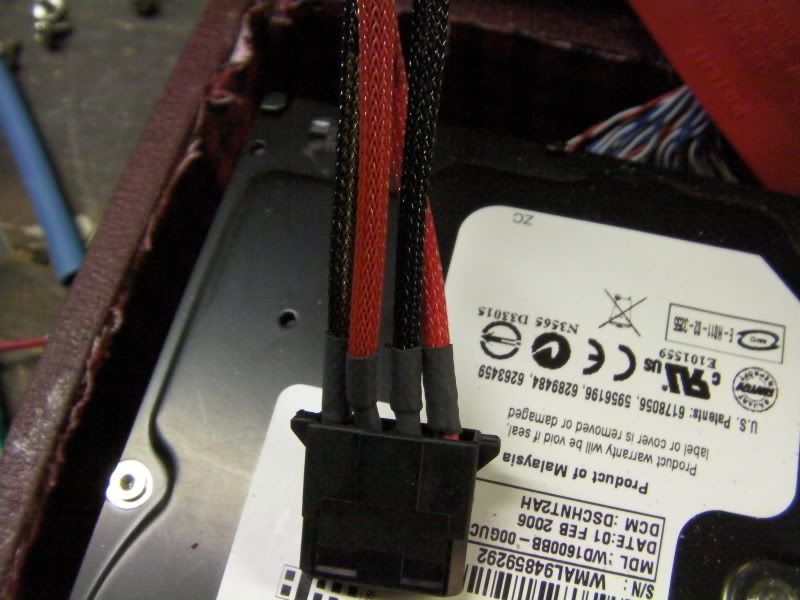
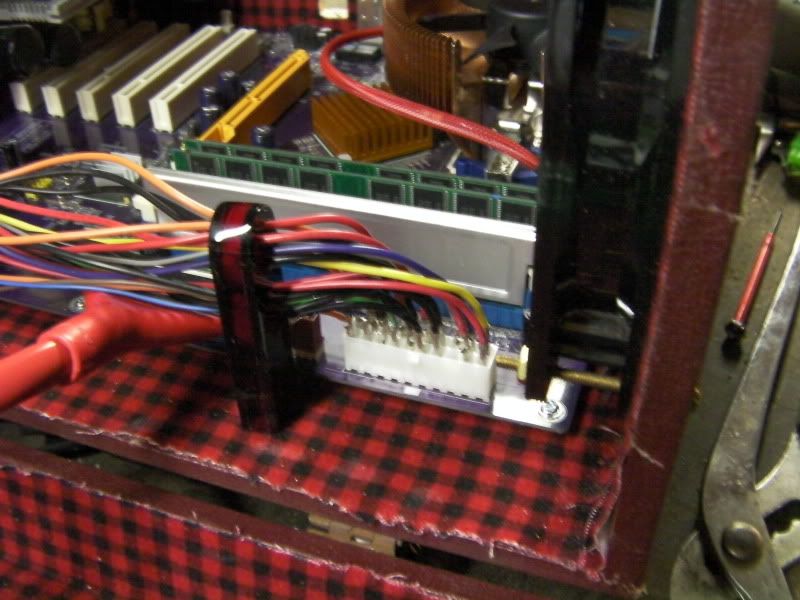
Next up I uni-sleeved the 4-pin molex for the HDD:
And ran the wires through the guide and put on the connector:
And lastly I unisleeved the 4-pin mobo connector:
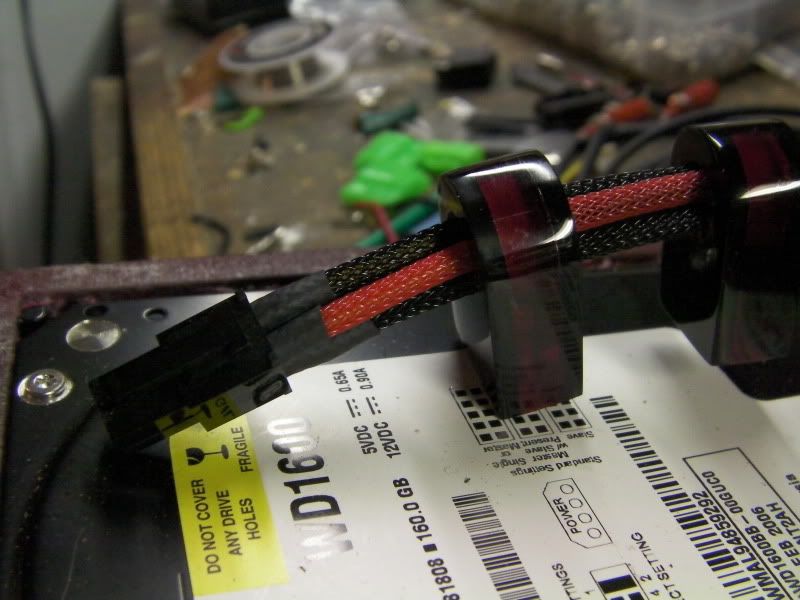
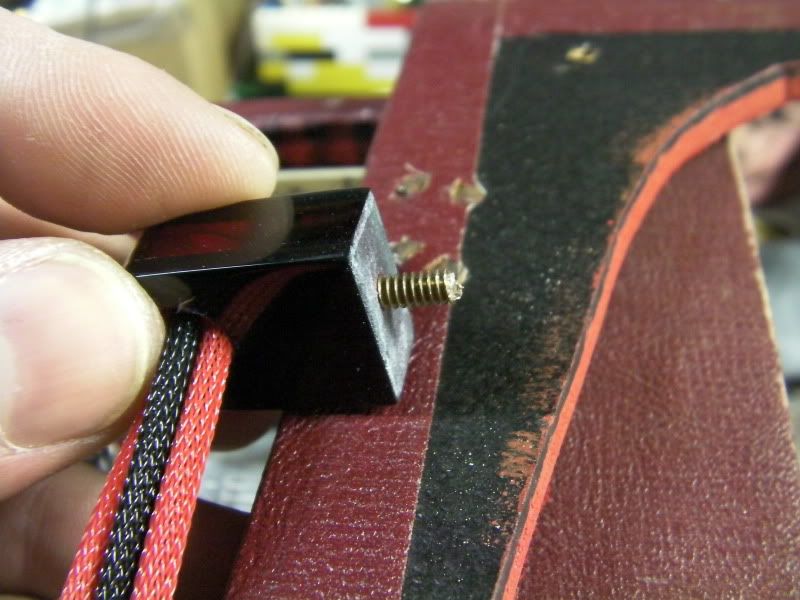
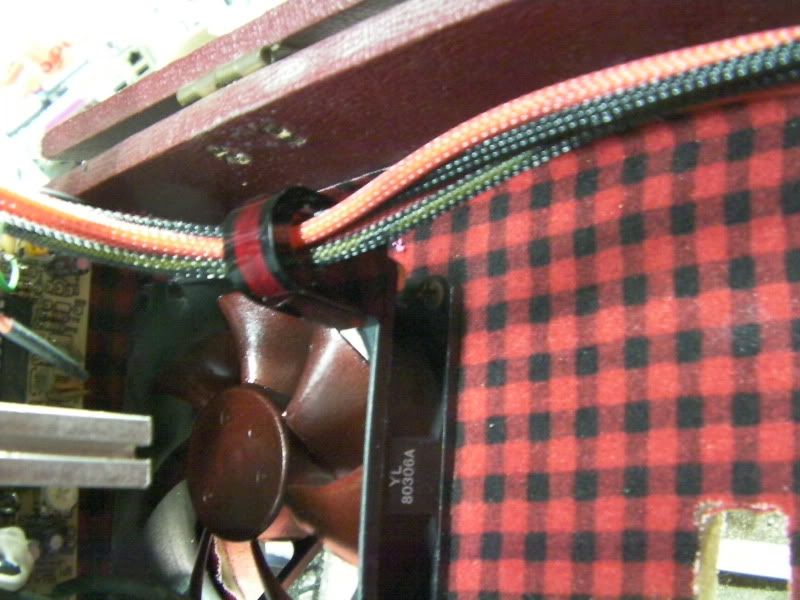
I used a piece of brass bolt that I had cut when shortening them for the window, threaded it into one of the cable guides then cut it even shorter.
I then put the stud through one of the empty holes in the fan and secured it with a nut:
And here is how it will be run. I just need to mount the second cable guide and that piece of wire will be done:
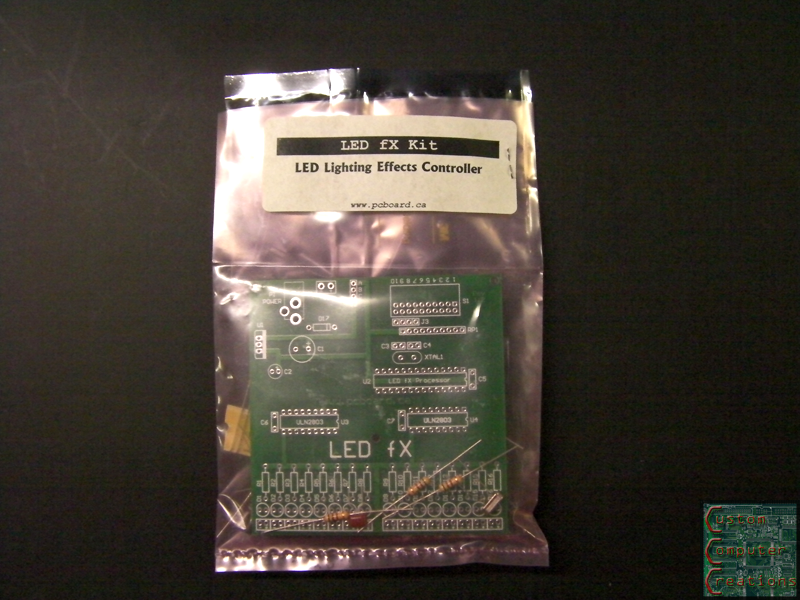
All I've really got left to do is uni-sleeve the 20-pin power connector and run it through the guides, mount the window, and once my LED FX kit shows up from John at PCBoard.ca, I can devise my lighting scheme!
One of the final steps will be to get a copy of Win7 Home for this puppy to run!
Lookin good. Good job sleeving too.
Looks great. I don't always like cable guides, but these look really good. Well done. :up:
Quote:
Originally Posted by BS Mods
Thanks guys! :DQuote:
Originally Posted by x88x
Update time!
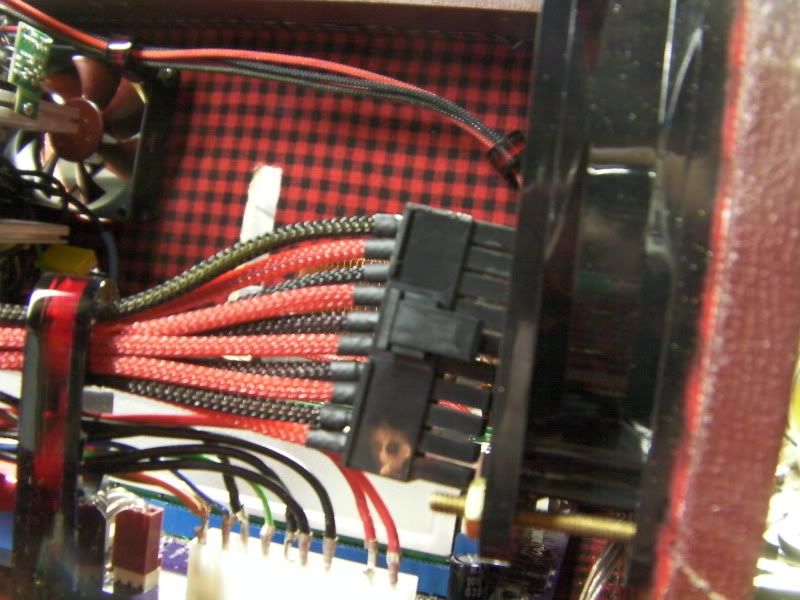
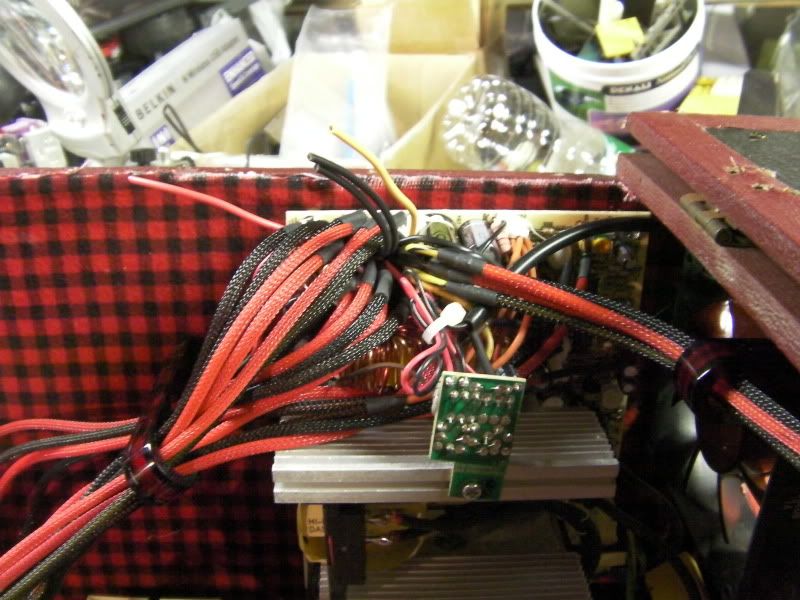
I popped the pins out of the green ATX 20-pin connector, and routed them and plugged them into their final locations, and I'm SO happy I didn't have to extend any of them!
The first row sleeved:
And finished!
I may put some zip ties on them just to tidy them up a bit, but we'll see. The 4 wires you see that are still unsleeved I left for the lighting system. Once i get it mounted and wired, those will be sleeved as well.
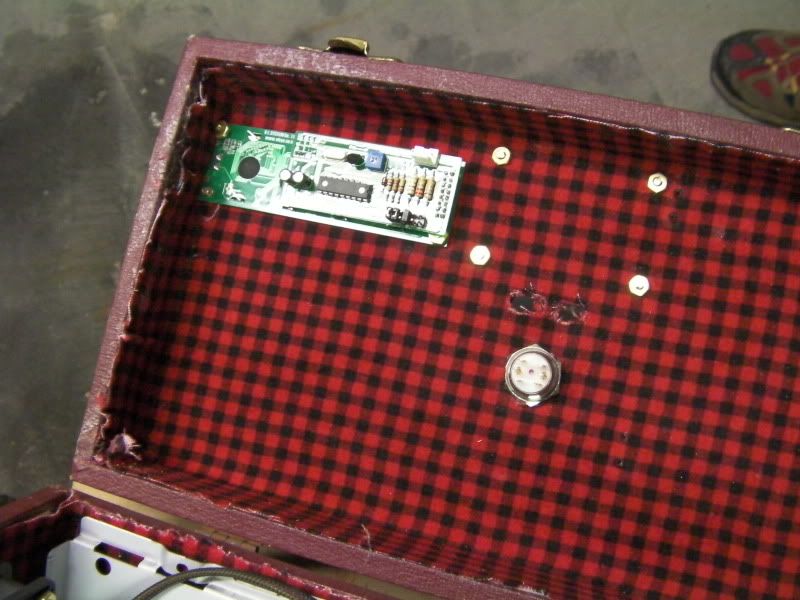
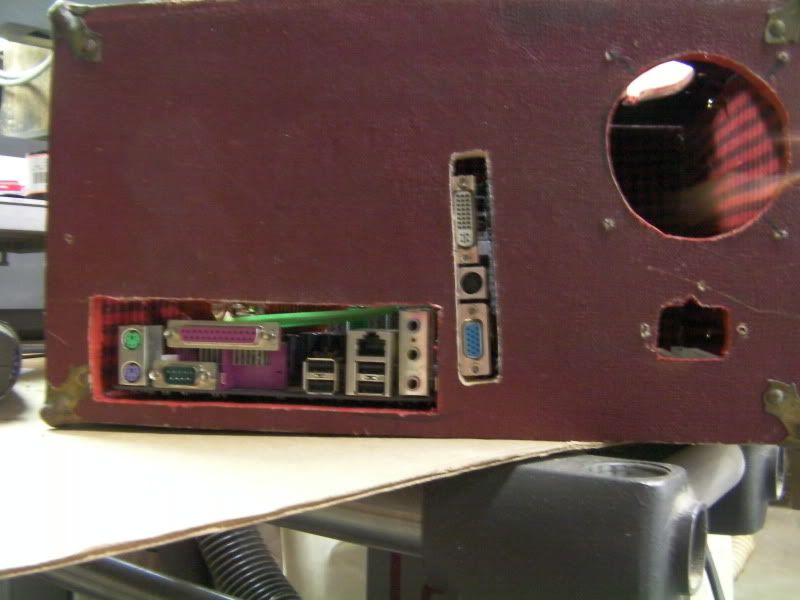
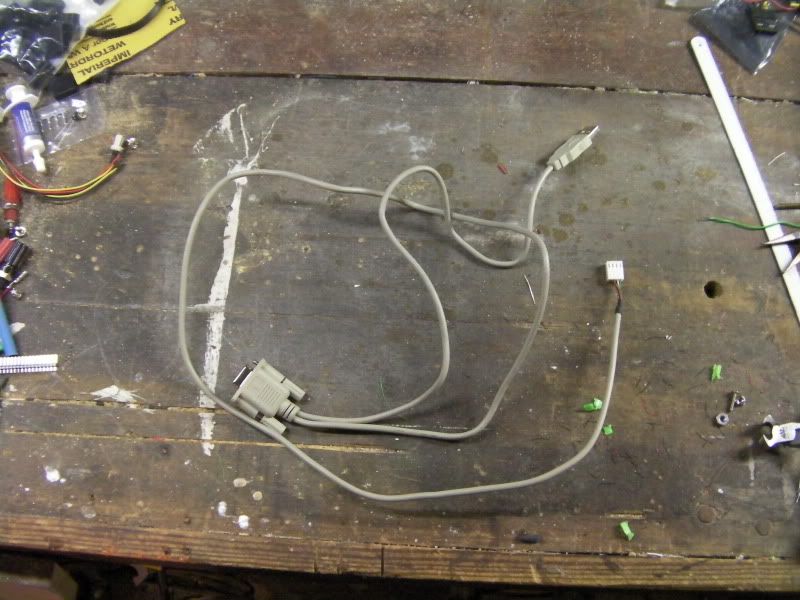
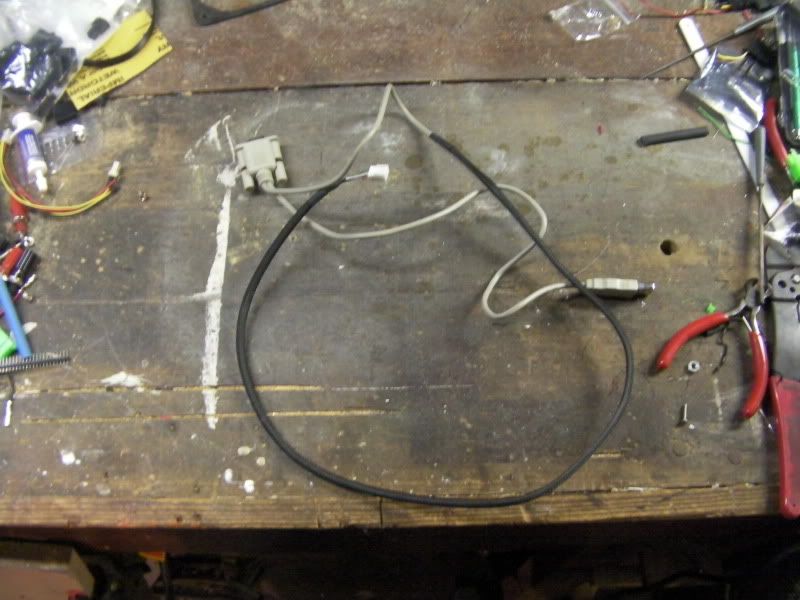
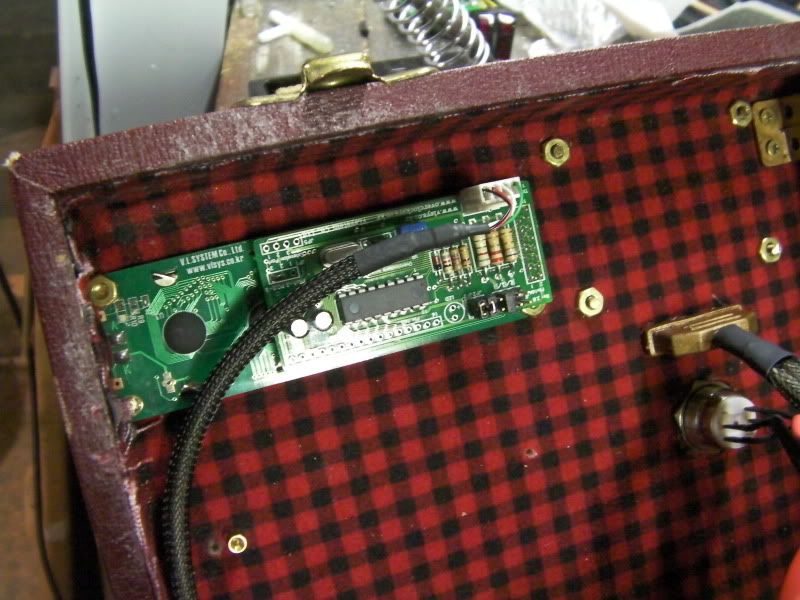
I also sleeved the cable for the LCD screen. This will run under the motherboard and out the back, and plug into a USB port (for power) and the serial port (for data) in the back.
Before:
After:
Installed:
That's it for now!
looking good sir!
Alright minor update!
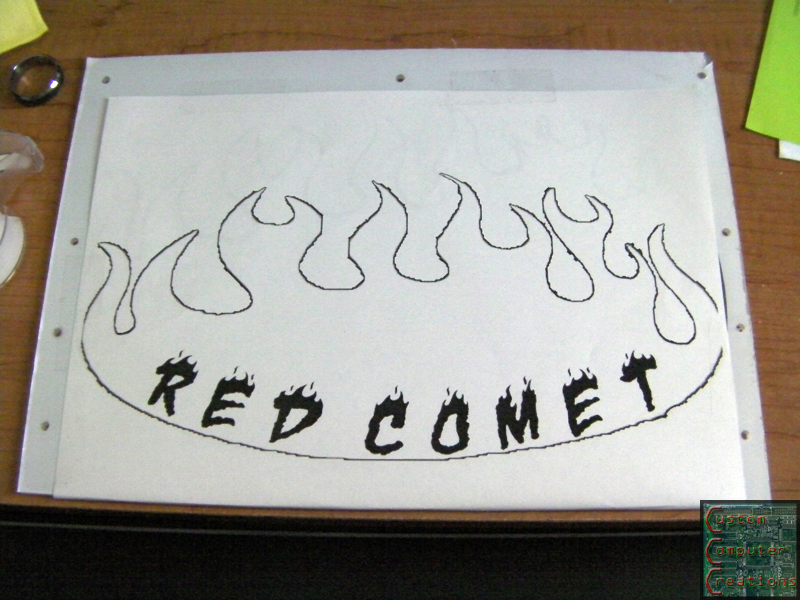
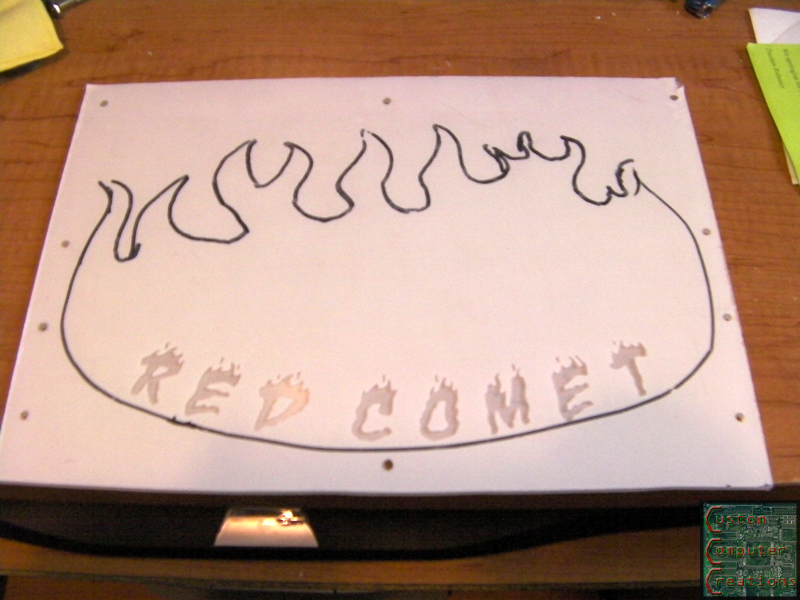
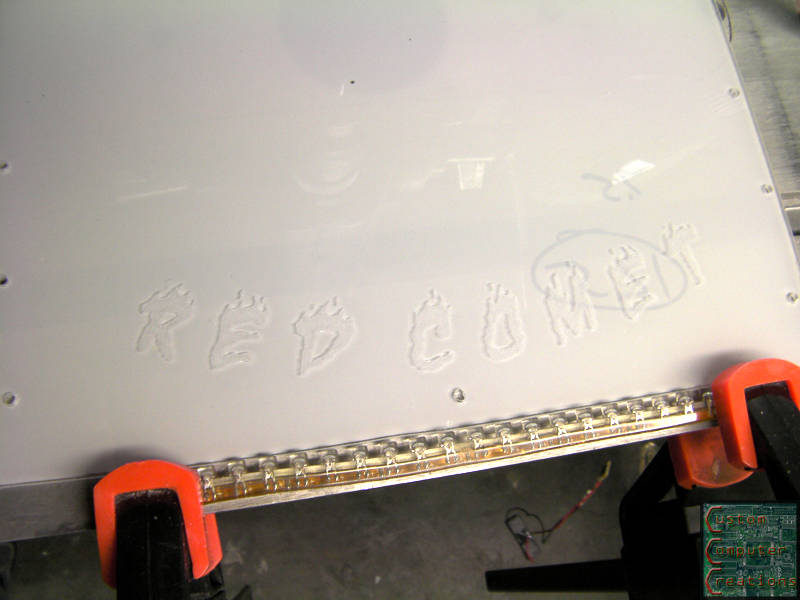
I made up some lettering in photoshop, then printed it out and taped it in place on the plexi panel.
Then I (painstakingly) cut it out by hand with a razor blade, then peeled off the paper to get this:
Then I peeled out the letter pieces and got this:
I will etch this with either my Dremel (less likely) or my handheld bead blaster I got from harbor freight (more likely). I also got word that the LED FX kit is finally in stock and on it's way to me :D
Once the window is done, all that will be left is to be wire up the LEDs and it'll be done! Also, I'm not going to have the RFID reader in this only because I'm not going to be installing Windows 7 on this machine like I originally wanted to, and the RFID reader ONLY works with Windows 7. I'm trying to figure out how to hook it into Arctic Cat though :D
Update time. :D
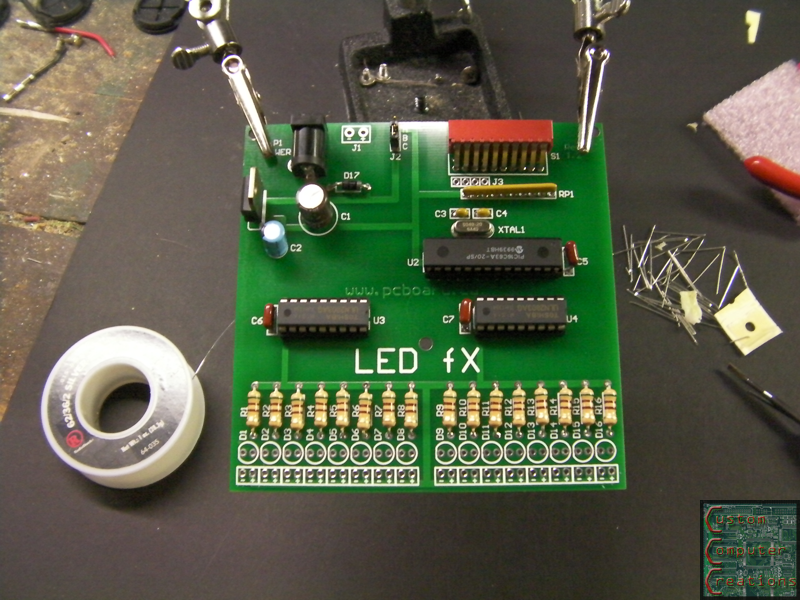
I got the LED FX kit in from John over at PCBoard.ca!
And assembled:
I can safely run 4 LEDs from each of the 16 outputs on this puppy, so I've got some options :D
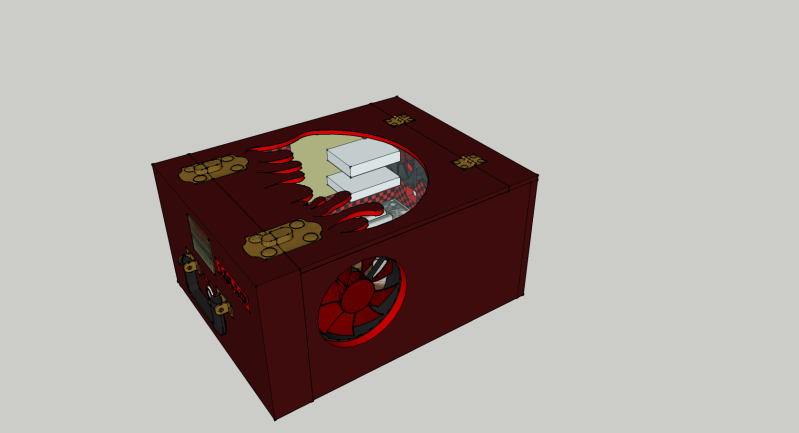
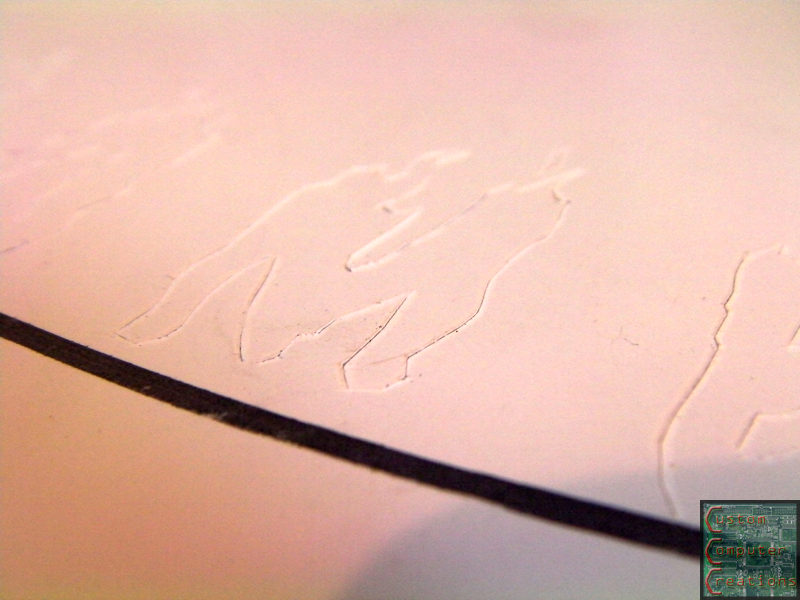
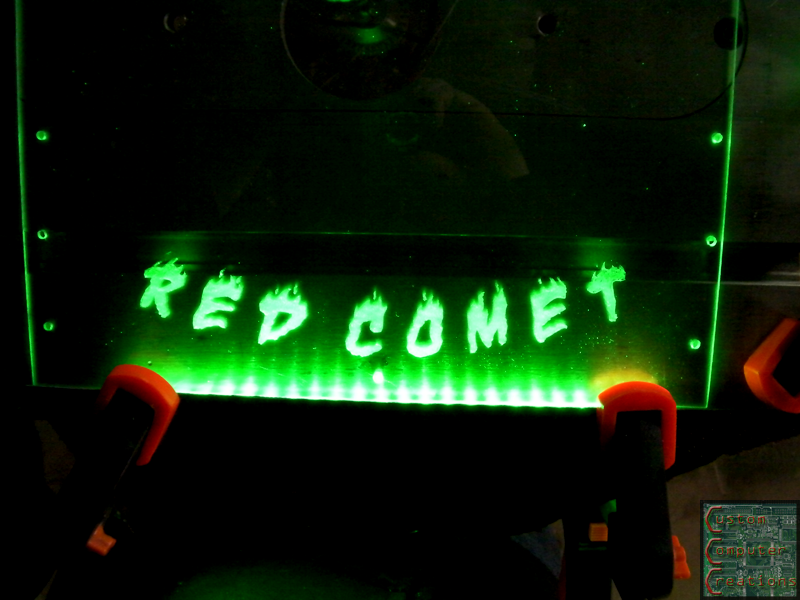
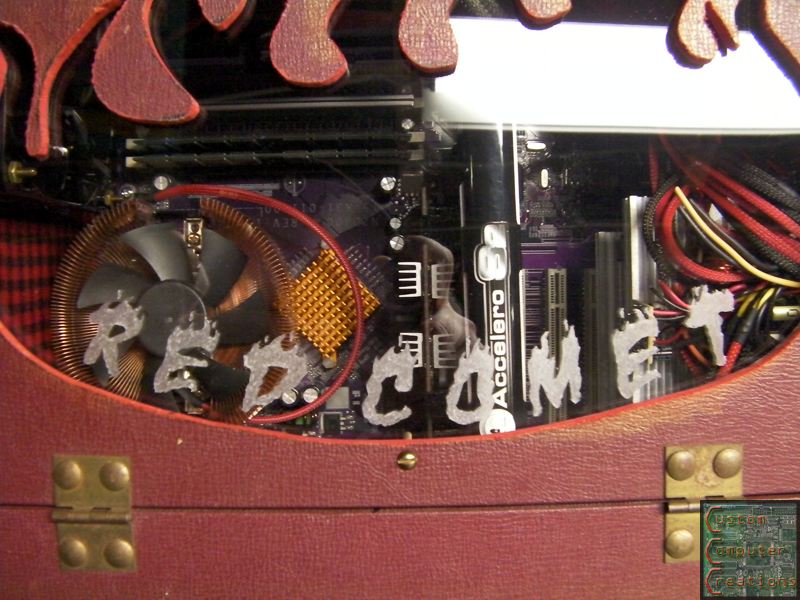
I spent an hour or so with the dremel and the VERY small ball-shaped engraving bit.
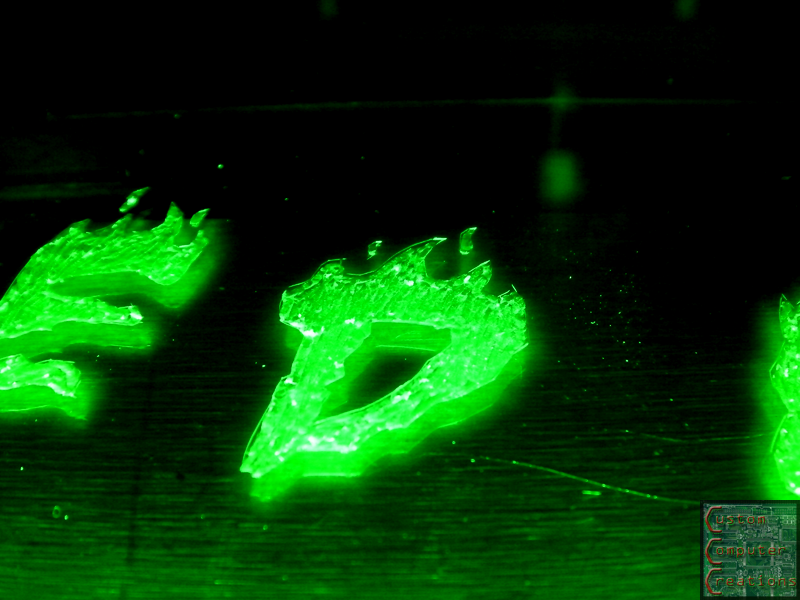
And the result. Not bad for my first time eh? The green is only for effect. It actually worked better to edge-light it like this and etch it, that way you can see your progress much easier.
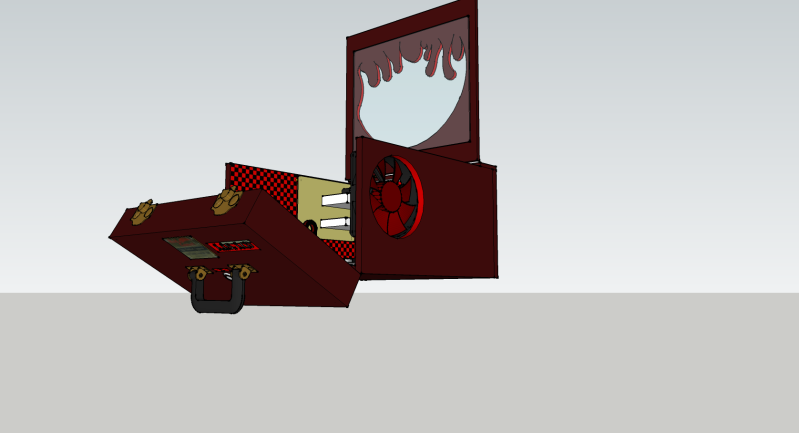
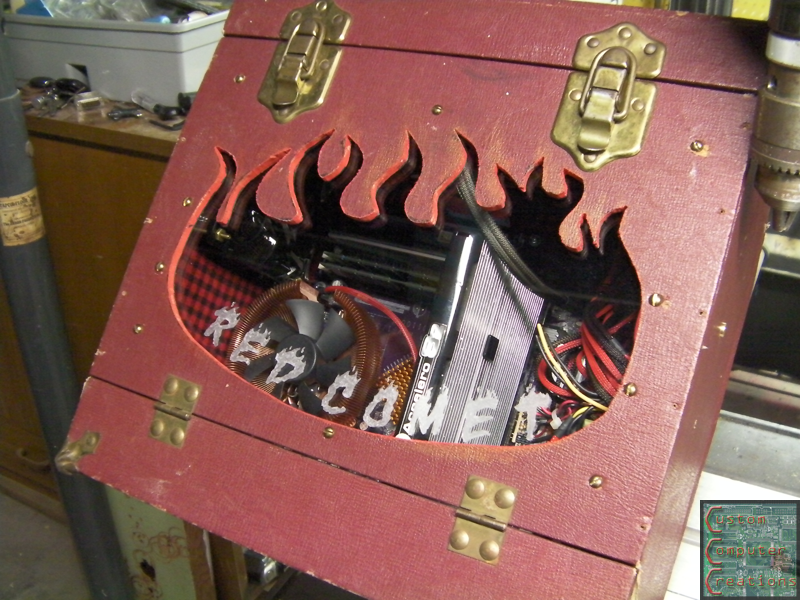
And I got the window mounted.
And a neat shot of the inside through the window :D
All that's left to do now is mount the LED FX board and wire up the LEDs! :banana:
Ooh.. now that I can see this on a monitor, it looks 10x better! I really like that close up of the lettering. The different depths really sets if off.