Those are turning out AWESOME!!! Don't know what else to say. You keep building we'll keep complimenting. :up:

Printable View
Those are turning out AWESOME!!! Don't know what else to say. You keep building we'll keep complimenting. :up:
wow... love the plastic mold work! very cool! I am loving this project and will watch it to the end!
Thanks for the comments! Here's more:
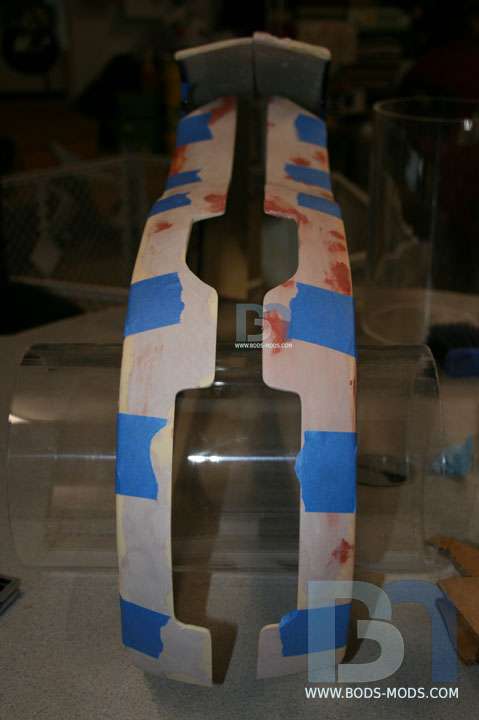
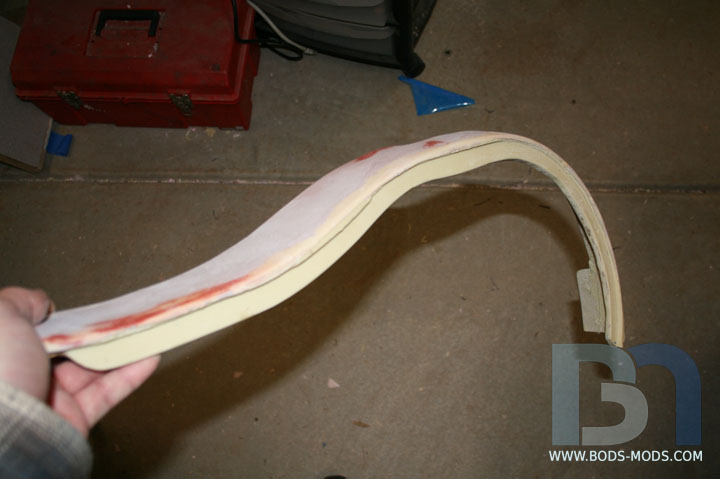
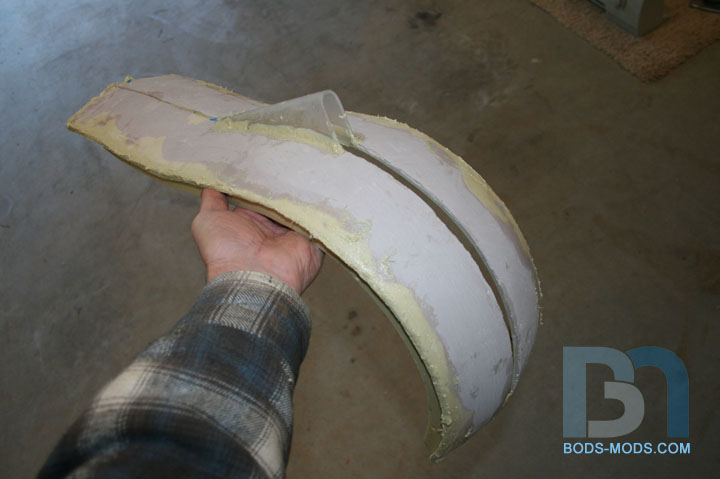
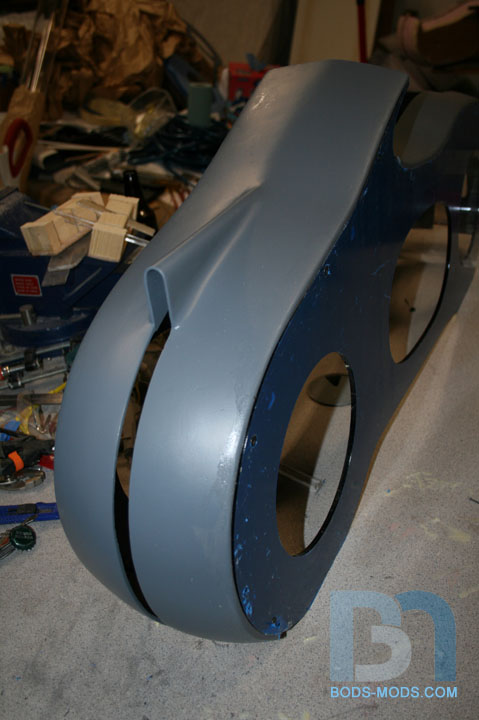
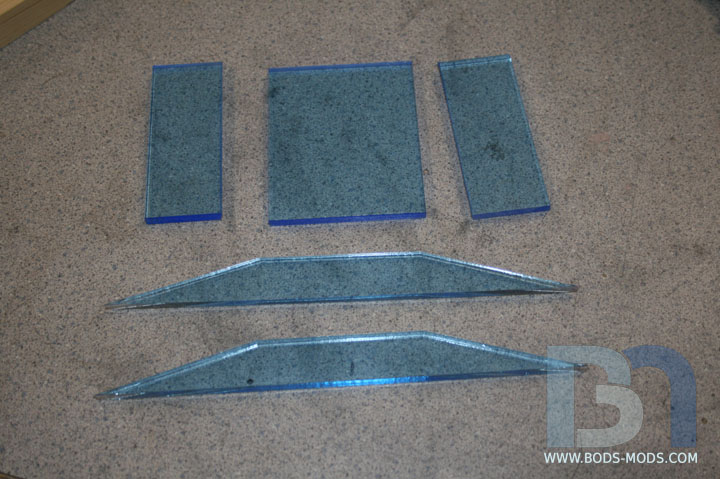
Started working on the rear fairlings. I measured and cut them just as I did the front ones, except it's just a straight cut on these, no patterns.
Cleaned up the cuts and set them on the bike for a test fit.
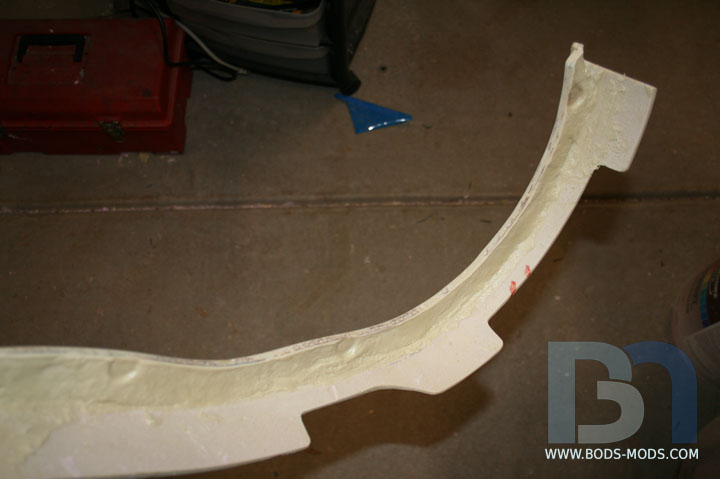
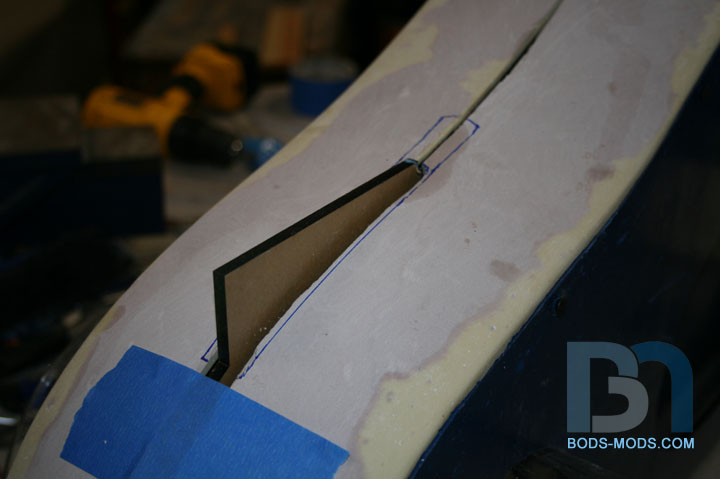
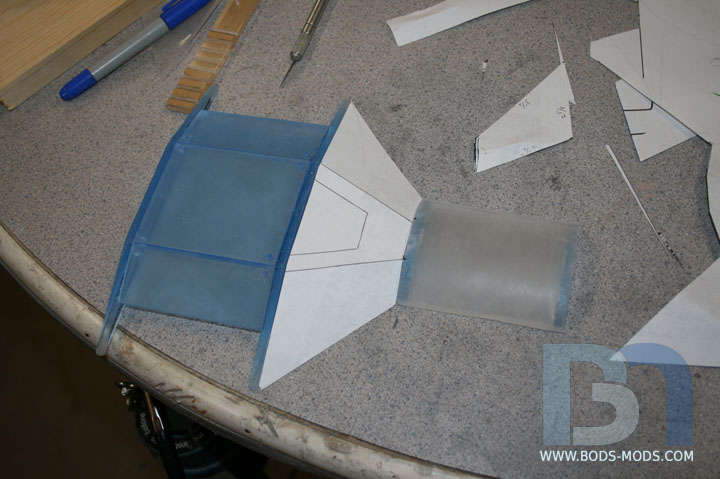
I didn't really fancy sanding and filling tonight, so I'll tackle that probably this weekend. What I really wanted to do was make the tail part that will cover the tip of the edge where the light wall comes out of the bike. This cover will be molded into the rear fairing, and as such, both halves will then become one part.
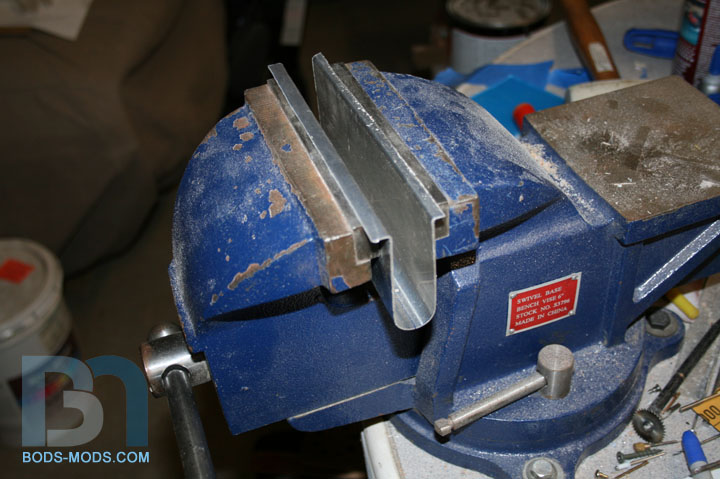
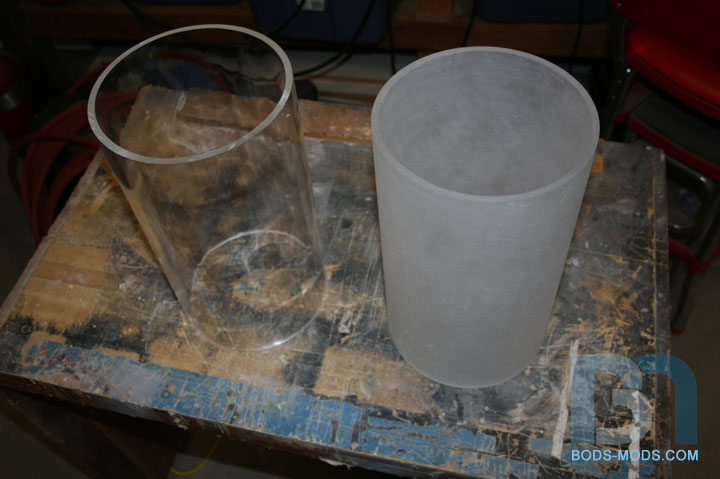
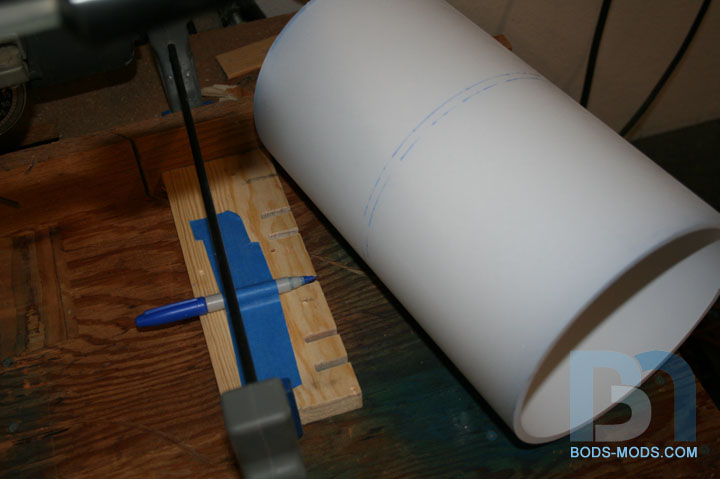
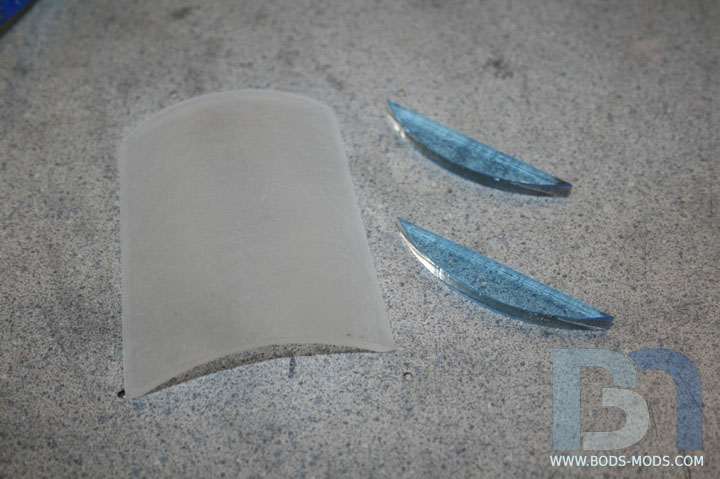
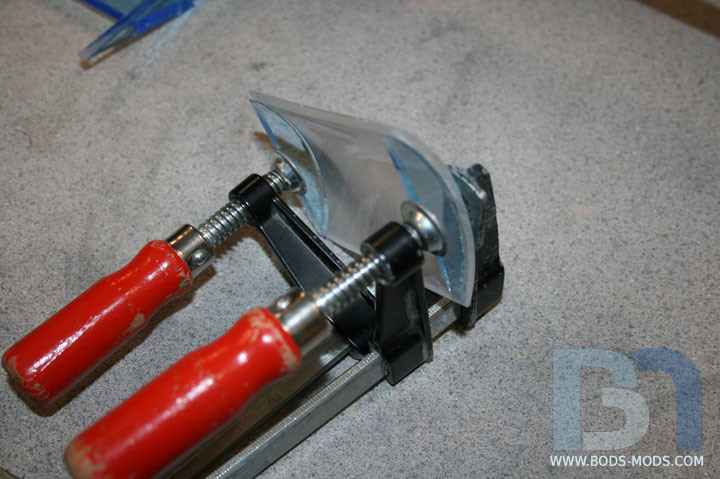
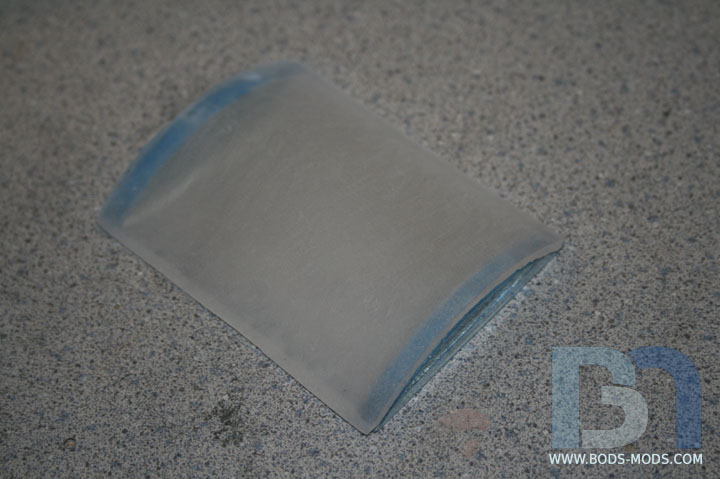
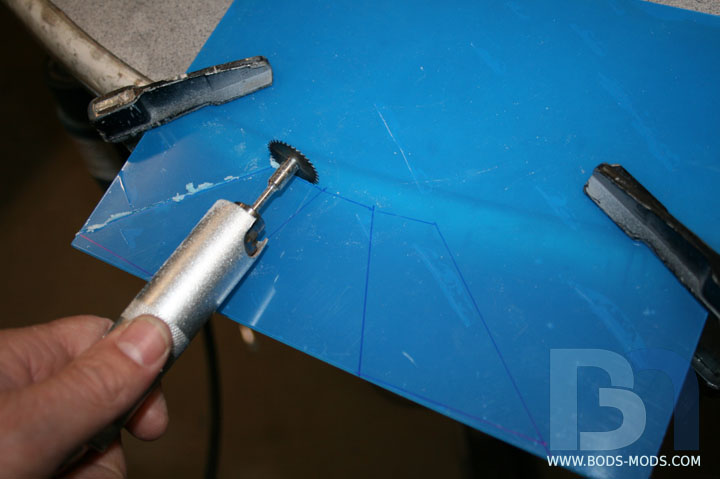
To make this piece, I will be bending a small piece of 1/8" acrylic into a U shape. So the first thing I had to do was make a metal pocket for the acrylic to fold into. I found a 3/4" dia. pipe and bent some sheet metal around it, then flared the ends so it sat in the vice like so.
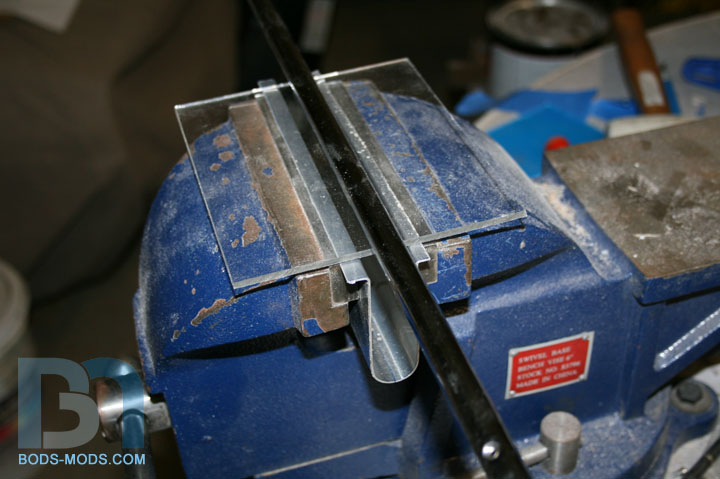
Then I cut my piece of acrylic down to size and found another smaller 1/2" pipe to push it into the pocket when heated up.
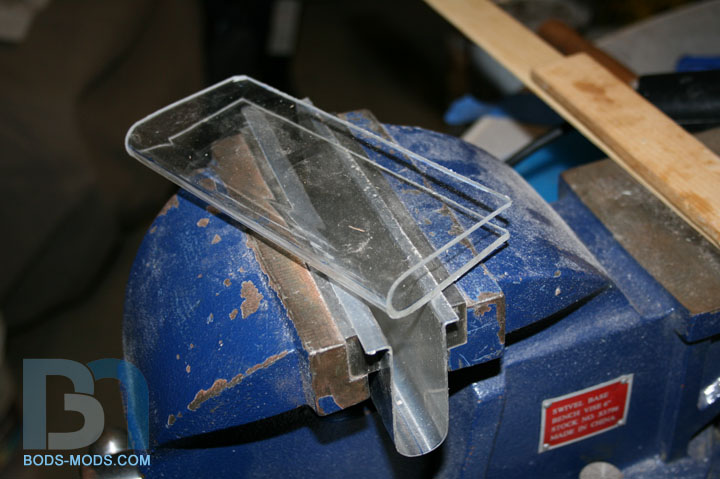
I first heated up the pipe with a torch, then heated the acrylic with my heat gun until I could push it down into the pocket with the pipe. I immediately stuck some wood scraps in there to keep the sides straight while it cooled.
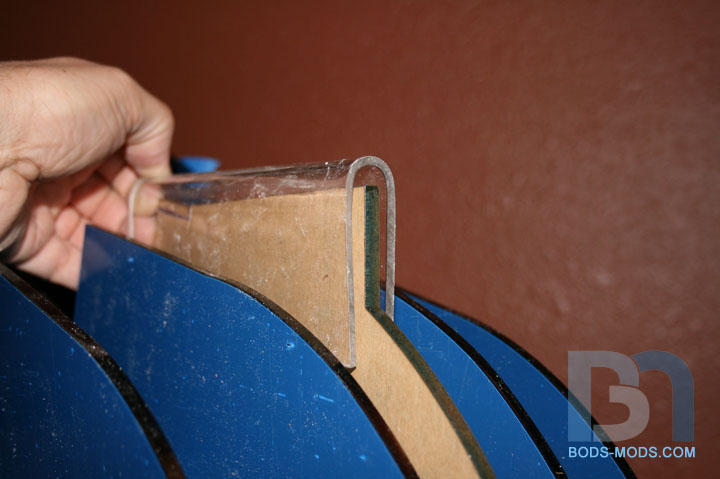
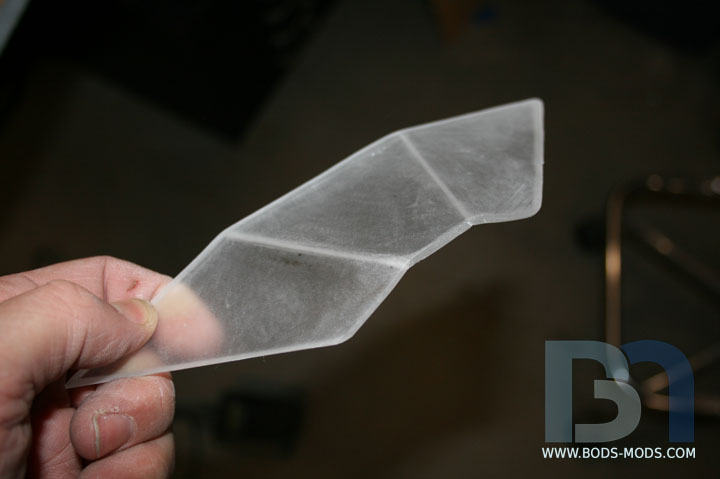
After a few minutes here is the result... a perfect U shape!
Here is where it will go on the bike. I will round the top of that center rib, and paint the sides and top edge black, leaving the trailing edge for the glowy light to show through. Should look pretty slick!
This concludes the Mid-week Modding "Bodcast". Thanks for tuning in!
"bodcast" haha lol clever.
Nice work bro really nice
looking good!
Thanks guys!
Time for another Midweek Bodcast!
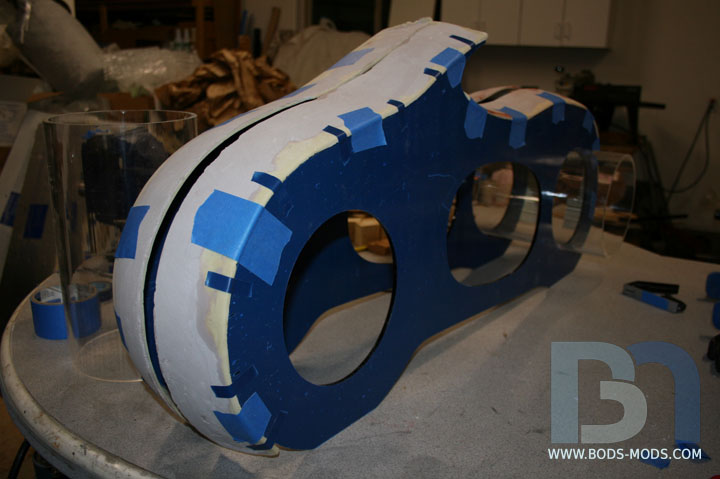
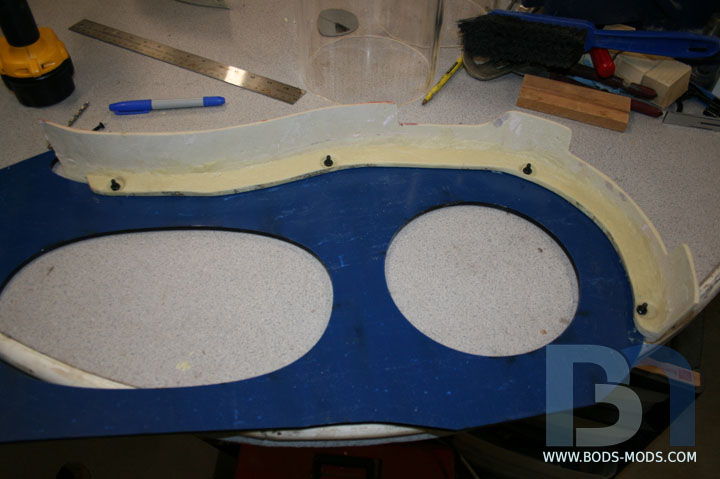
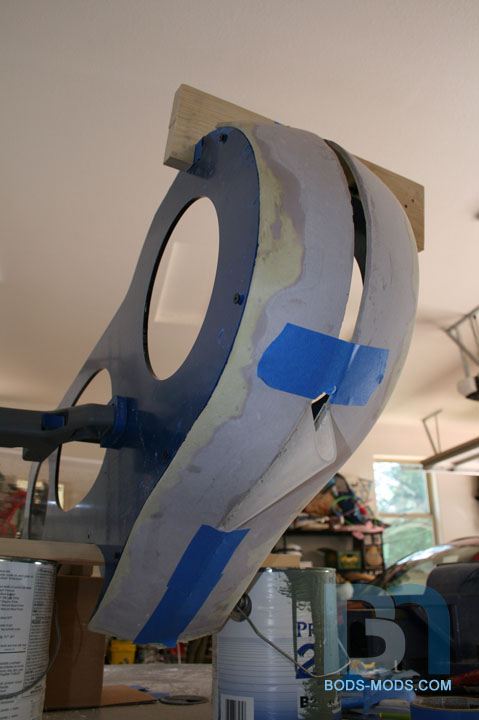
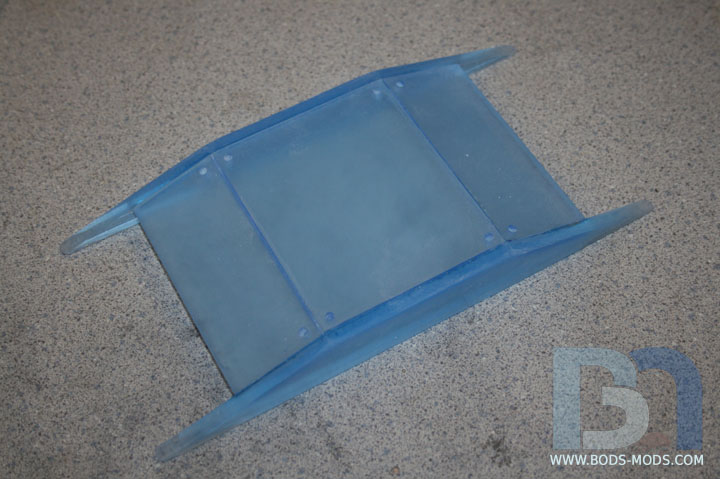
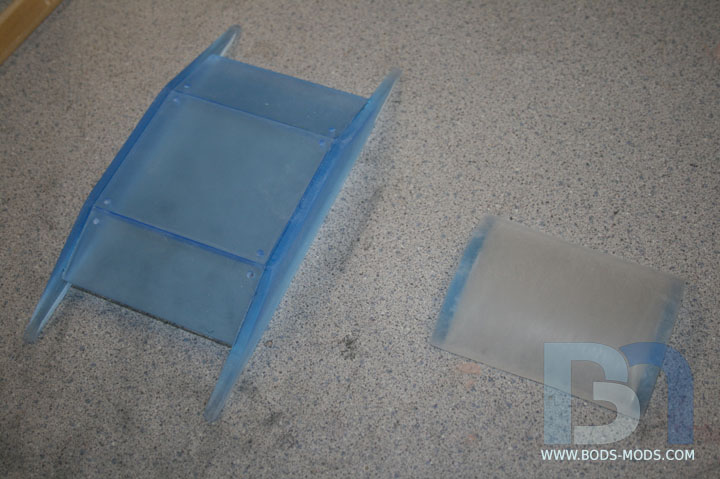
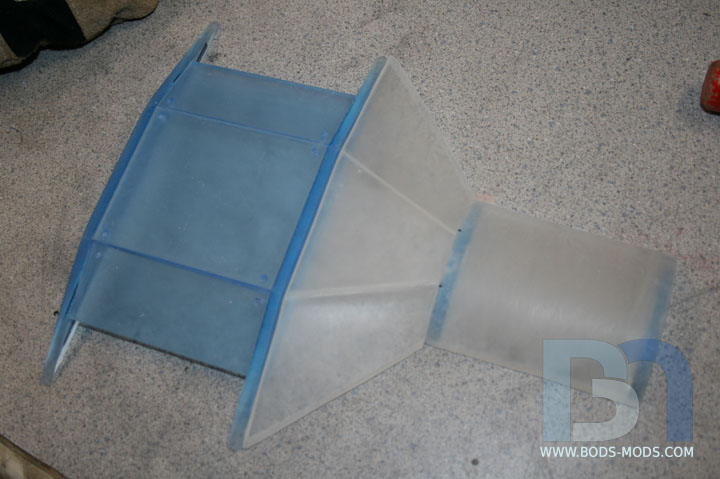
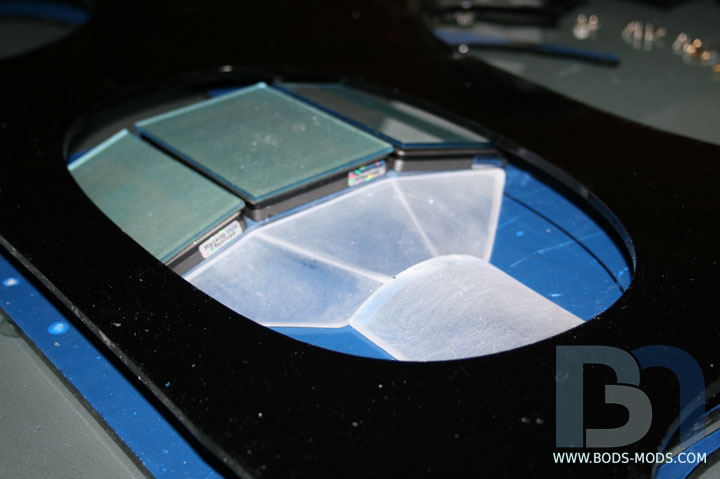
Nearing the end of the fairing fabrication. As I mentioned before, I was able to add much more strength to the pieces via a mounting edge on the under side. I was going to use acrylic, but was worried the adhesive wouldn't stick to the formed plastic. I knew that plasti-paste does stick to itself quite nicely, so I decided to make the mounting rails simply by throwing more paste at it!
So first thing was to tape the fairings onto the ribs, making sure they were placed correctly.
Also checking for symmetry.
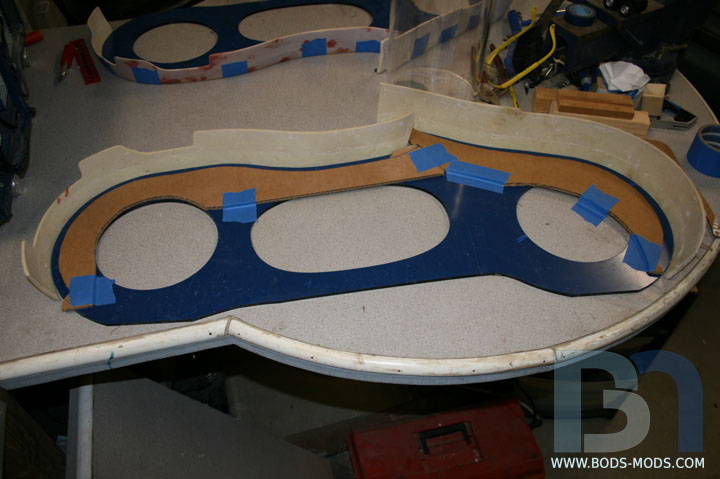
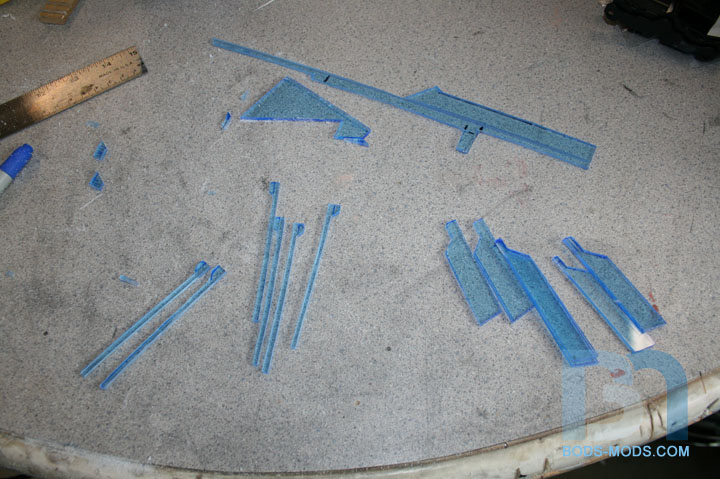
Then I cut some cardboard pieces and taped them to the inside, to enclose the area where the plasti-paste will go.
Added the goop...
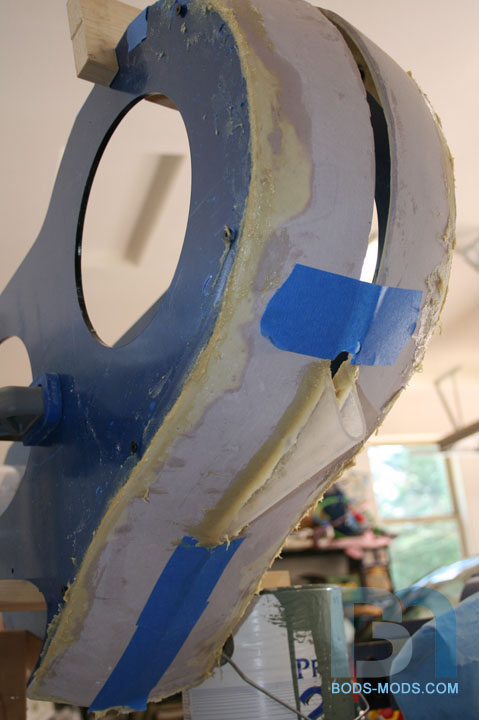
A couple hours later, I could pull the fairings off with ease, thanks to the plastic coating on the acrylic. I had also taped the acrylic edges with electrical tape, so the plasti-paste wouldn't stick there either.
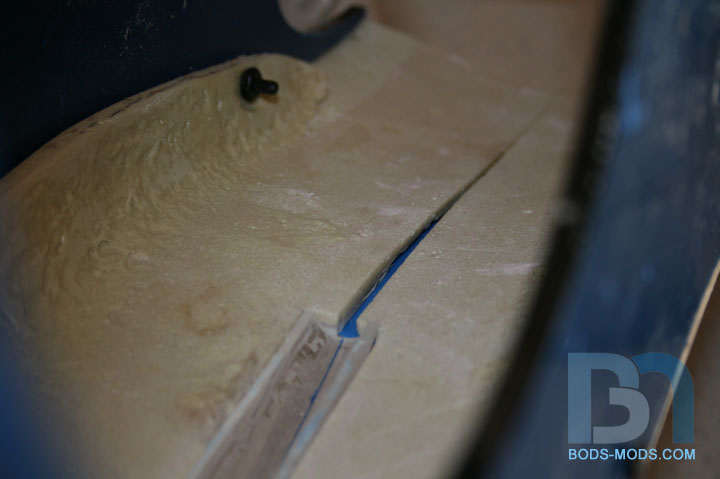
Removed the cardboard with a utility knife, and smoothed out the edges.
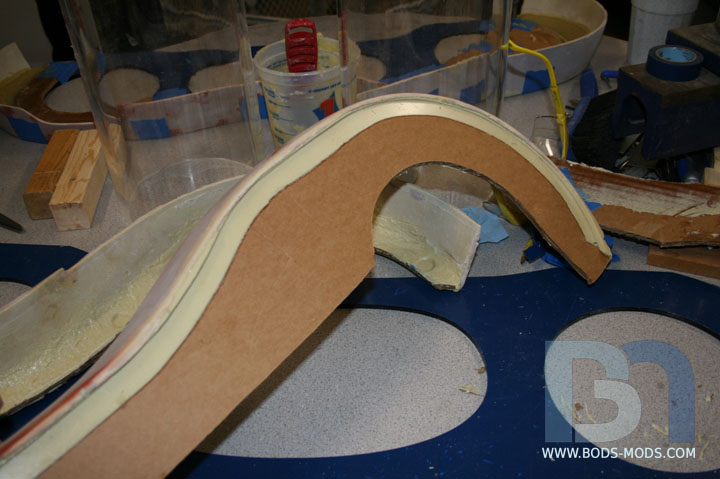
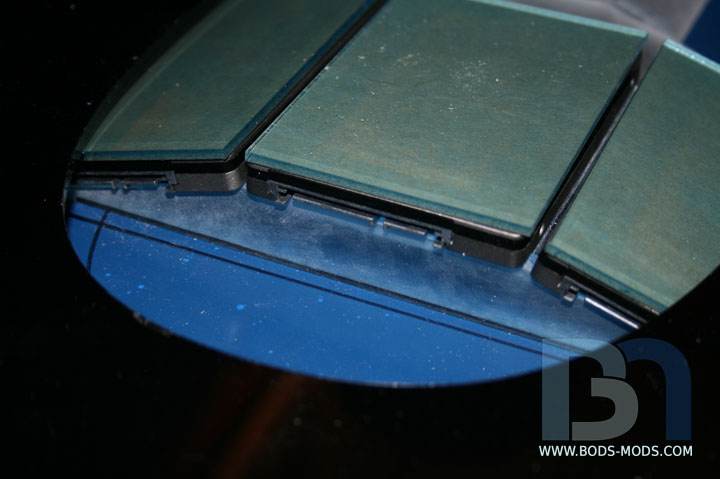
A closeup of the edge shows that the plasti-paste actually filled in the gaps between the fairing and the rib, resulting in a much better fit (once cleaned up and smoothed of course).
A shot from the underside. The rail and fairing are now one!
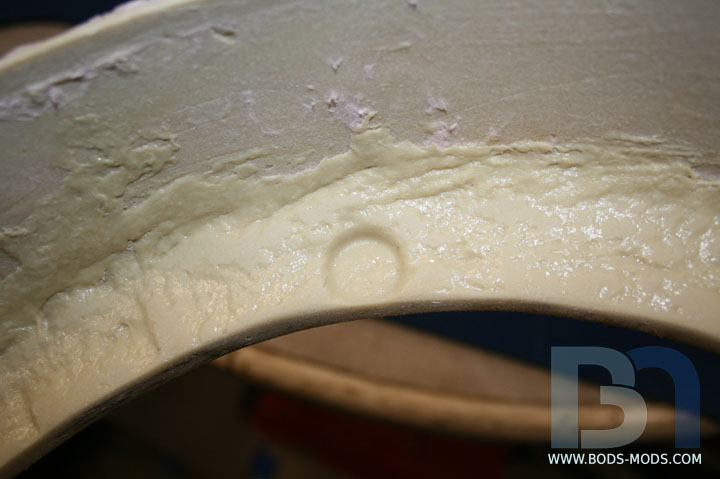
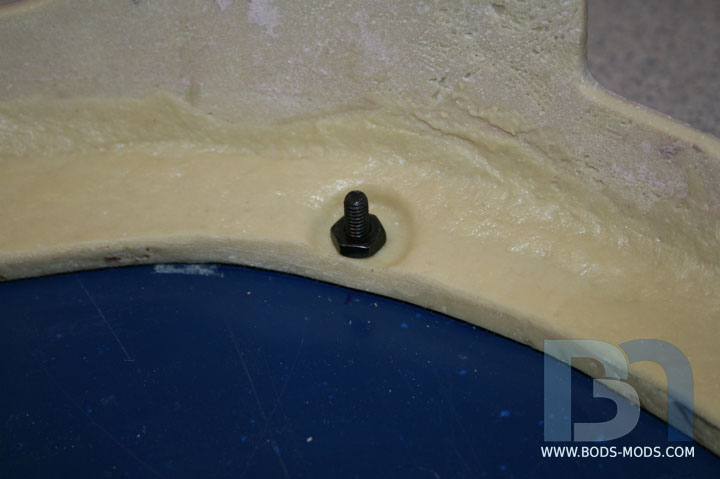
As the plasti-paste was setting up, I took the liberty of adding depressions where the mounting screws will go.
Got one piece mounted, using 8-32 socket head screws.
A closeup of one of the mounting points.
And that about wraps up this edition of the Midweek Bodcast. Next on the weekend installment, I should have the rest of the fairings mounted, and the two rear fairings fused together along with the U-shaped piece I made earlier. Thanks for watching!
So, which kid is this going to?
Or is it a personal rig?
Have to say I really love this and it is something that I am enjoying watching, especially with the delay with some of my parts, keep up the excellent work...
Nice work. I like how you were able to just blend the two parts together. :D:up:
This will be going to my inner child lol. But it's starting to make my son jealous. :lick:Quote:
Originally Posted by AmEv
Thanks Richie!Quote:
Originally Posted by Richie123
Thanks x88x, yeah that's another benefit of the plasti-paste. You can just keep adding to it!Quote:
Originally Posted by x88x
Damn Bod! BSG was awesome, and this one is shaping quite nicely too.
Am I surprised at the quality of the craftsmanship? no
Am I aroused? oh yeahhh
Fabulous work as always bro!
Thanks, I'm having a lot of fun building this one!Quote:
Originally Posted by SgtM
haha thanks John. Maybe I should rename this project....Quote:
Originally Posted by jdbnsn
:D
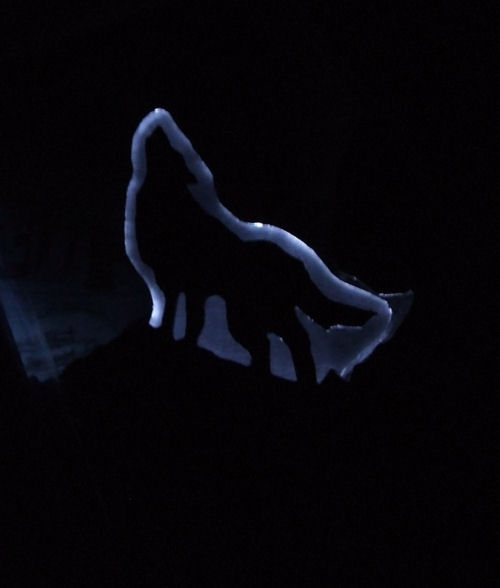
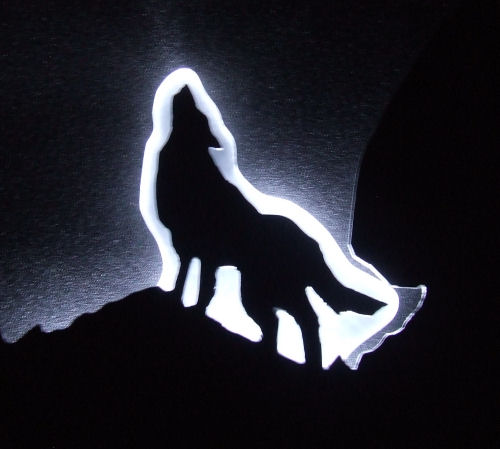
A word of warning here man, when I painted the back of the perspex Wolf black in Lobo, the paint absorbed almost all of the light from the 3 LEDs I had fitted at the time. I managed to get some scrap mirror film (the kind they use on car windows) and that totally solved the problem as it reflected the light much better.Quote:
Originally Posted by Boddaker
Having said that, I was looking to get a glow when looking at the perspex face on - the light may well still come out of the edges really well. Might be worth 10 minutes of your time for a quick experiment with some scrap painted plexi before you go painting that moulded piece......
With black paint....
With reflective surface....
Wow that's quite a difference there. I will heed your warning and try using some white primer under the black paint and see how that looks. Thanks man!
Least I can do. The worst of it is, the first pic actually looks a LOT better in the photo than it did to the naked eye - it was way darker - only the longish exposure with the camera got it to look that light...
You made me laugh. +r
Wish I had old photo of first ever etch it was on clear acrylic too... I got that to glow up by drilling little holes in side of acrylic and putting small white leds in holes and sealing the edge. You could do something similar on the back acrylic piece. When I am back home tonight or in the morning ill PhotoShop what I mean onto a pic of acrylic to give u a better idea of what mean
Ok maybs I should have not tried to explain that via phone lol,
Basically this is what I mean,
Uploaded with ImageShack.us
First I should point out that this is meant to be done on the inner side of this piece, not the outsiding face.
I am just suggesting this, you could also test this if you wanted to know the desired effect on a small bent scrap bit of acrylic, drill some holes and use a bit of place electrical type to try it out for your self.
drill out the LED holes (you dont want one at the top as it will become focal) in the edge of the acrylic, then once you have your LEDs in place, also seal up the back of the LED's. (For the LED's. I used little blobs of black silicone sealent and rubbed it down around the LED once they were in place) This stops the light from escaping out of the back, I would advise white LED's for this.
Then you need to seal in the edges along that edge and around the whole piece,(the only edge you wont seal in is the outer facing one). Use electrical tape if your trying it out on test piece.
Then you want a row of blue LED (lian li blue led light strip could probably fit the bill) so that they are pointing outwards.. The white LED's that you drilled in and thanks to the acrylic will give a prism type effect once the sides are sealed. then the blue LED lights will come through the inside of the piece, this will also give that blue white glow.
The reason for the white LED's though mainly is to stop the inner lighting from escaping though the acrylic, and leaving the outer facing edge not sealed will give it a glow.. if you do try it you could get some extra bright blue LED's for the acrylick and white on the inner edge (hense using electrical tape to test so you can decide which effect you like best.
Thanks Richie for all the led help! I'll definitely be testing out my lighting options, especially since the lighting is so integral to the TRON theme.
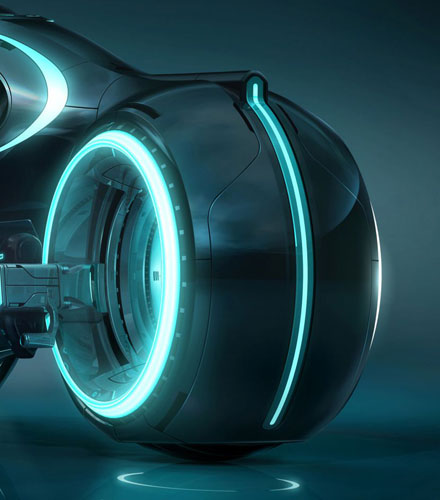
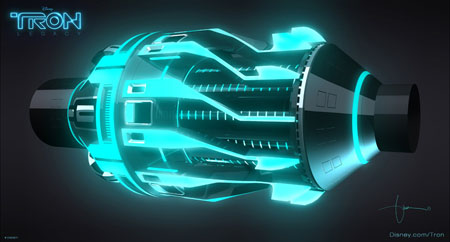
To clarify, I will not be lighitng the U shape as you have shown in your illustration. I'll be lighting the center rib piece that U shape goes around. See this reference pic from the lightcycle:
I had the center rib cut from transparent blue acrylic, so it will already have a blue tint to it. I'll try some different colors, but it should yield a good bluish glow using some white, or even uv leds.
Your suggestions still have merit though, regardless of which piece I'll be illuminating, so I appreciate the advice. :D
Bodcast: Weekend Edition! :D
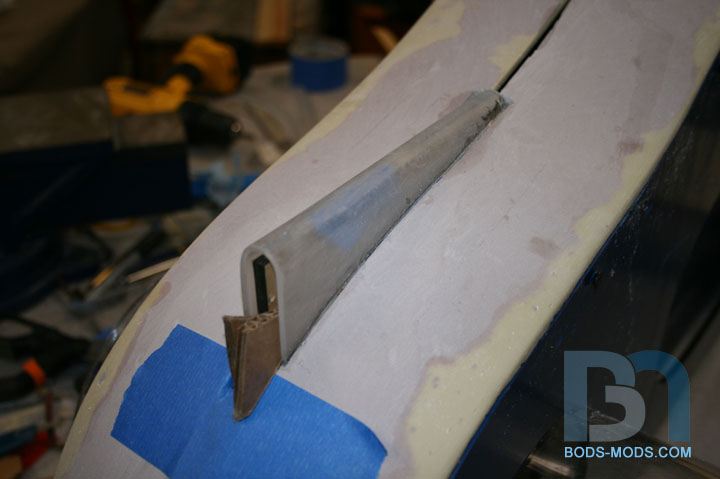
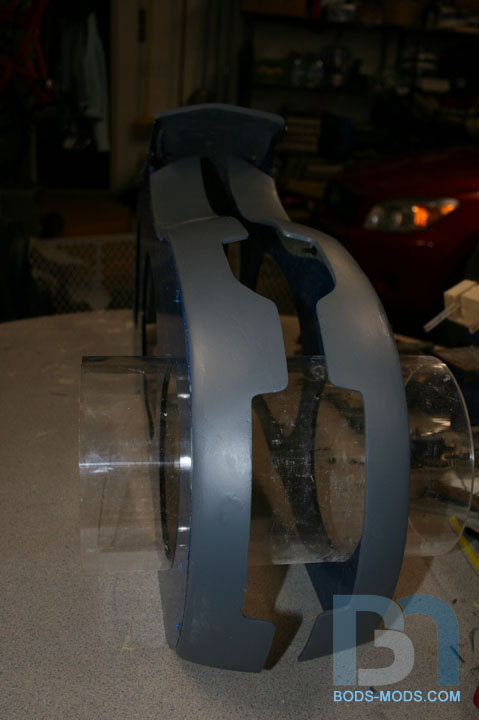
Trying to finish up the fairings this weekend, and I think I got pretty far today. I started with getting the U shaped piece integrated into the rear fairings.
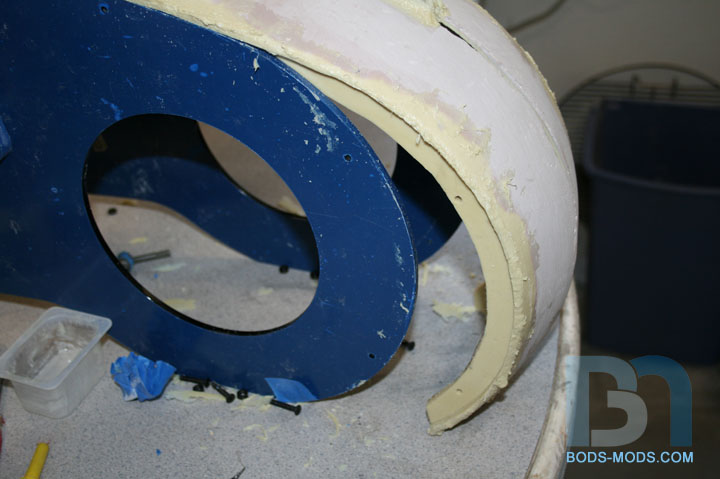
Now that the fairings are securely bolted in place, I can mark where the U shape will go and notch out the fairings.
Cut away some material so the U shape fits in there. Here I've marked where the fairings meet up so I can cut away the extra thats hanging down below. I taped a 1/8" drill bit to the top of the center rib to get the correct spacing between it and the U shape.
Since the mark was above the fairings, I cut about 1/4" below that to allow for the thickness of the fairings.
After cutting, I roughed up the U shape and glued it in place, positioning it with some cardboard spacers.
Once that was glued, I had to turn the entire thing upside down so I could apply more plasti-paste to the underside of the fairings to join them together and strengthen areas like the U shape. I notched a piece of scrap wood to help keep everything aligned correctly.
I taped the seams at the top to give the paste some backing while it sets up.
Here's the seam from the underside.
A shot after applying more goop.
And the same underside shot of the seam with the goop.
I joined the fairings together at the bottom as well (The bike is still upside down).
Once everything set up, I could remove it from the bike as one piece.
Ta-daah!
The piece is really starting to take on some weight now, and it's pretty solid.
Looking back, I probably could have molded the rear fairing as one piece, and just cut the center slot and add the U shape, which would have made it more uniform. But I didn't really know the exact width when I started, and it was easier to add the mounting rails this way. I think it came out pretty well. I probably have one more bondo/sanding session before I can throw some primer at it. Hopefully I can take care of that today.
Amazing mod. Will be watching this one.
I actually found that out by accident many moons ago after a fan light caught the edge of a sheet and I noticed how much the edges lit up but not the actual acrylic,Quote:
Originally Posted by Boddaker
Keep up the good work I love tron tbh and saw the first in cinema when I was really young.
Just wondered though how you plan to do the circle light on the wheel I am sure I have seen something that will fit the bill or not ill have a quick look during office hours this week, just dont tell the boss :)
P.S I fully expect a mini ITX HTPC in a tron disk to go with this when your finsihed.
My plan is to insert led's into each tube around the center, so that the ends will glow (will paint both insides and outsides), then glue frosted blue transparent rings on the ends. Hopefully the light will illuminate the whole ring.Quote:
Originally Posted by Richie123
Well I actually did get some primer on the fairings on Sunday, but I ran out. :(
So I picked some more up yesterday, but then didn't get home til after dark. :facepalm:
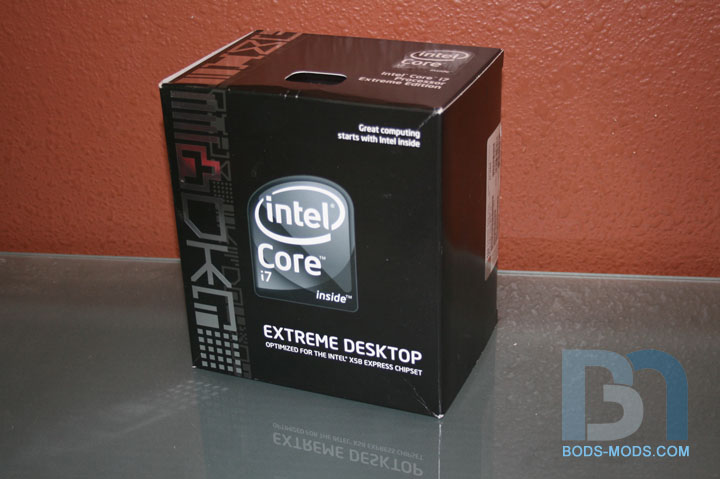
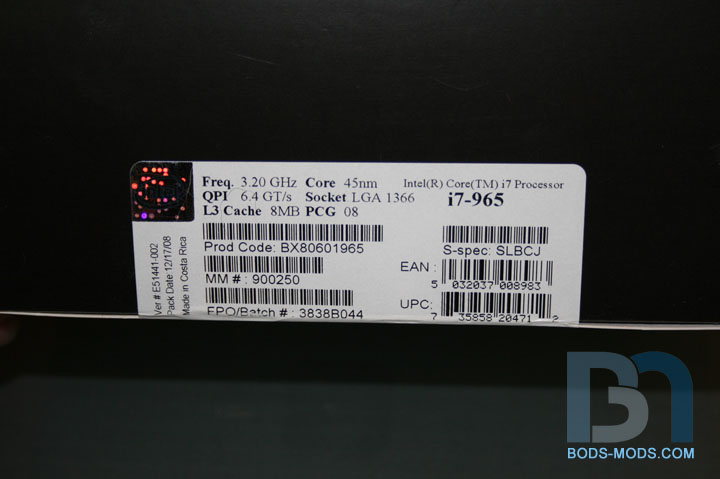
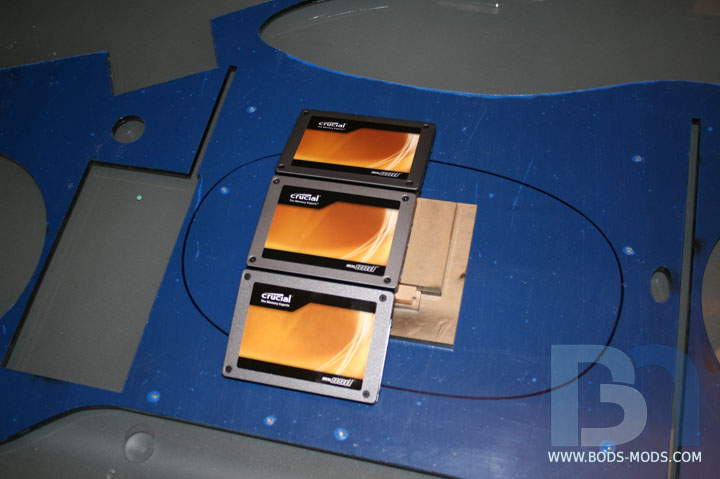
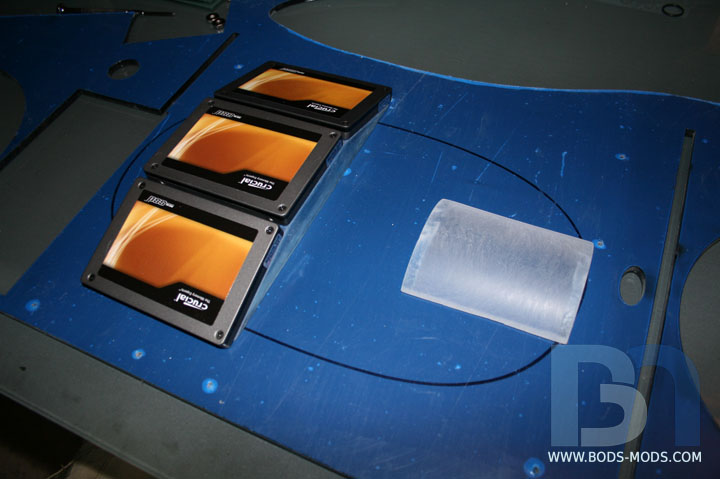
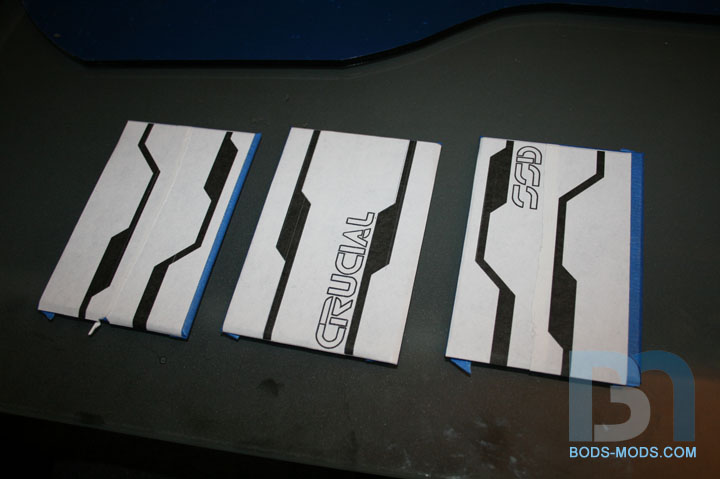
Hopefully I can get home today in time to do some painting while it's still light outside. In the mean time, here's a few more pics of the parts that will go into TRON:
Crucial SSD's and triple channel Smart Tracer memory kit, and EK waterblocks for the motherboard, CPU, and vid cards.
i7 965 processor.
Cheers!
he he all them bits almost look like they were boxed by the same company
Well, I had hoped to have more to show this weekend, but my modding plans were thwarted by other things. :( I do, however, have pics of the fairings primed. They look ok-ish, but still need some minor touch-ups before I can lay down the gloss black paint. Once the piece is one solid color, the imperfections really stand out. And black paint is the most unforgiving of colors so I have to work the fairings a bit more.
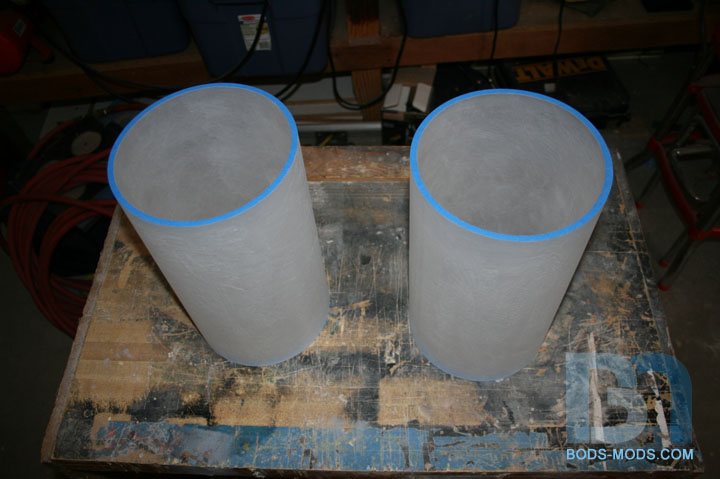
I also got started on prepping the tubes for paint. The ends will be lit via led strips mounted around their centers. So all surfaces will be covered with the exceptions of the ends. First task was scuffing them up inside and out. Got one tube done...
And both scuffed, with the ends taped off.
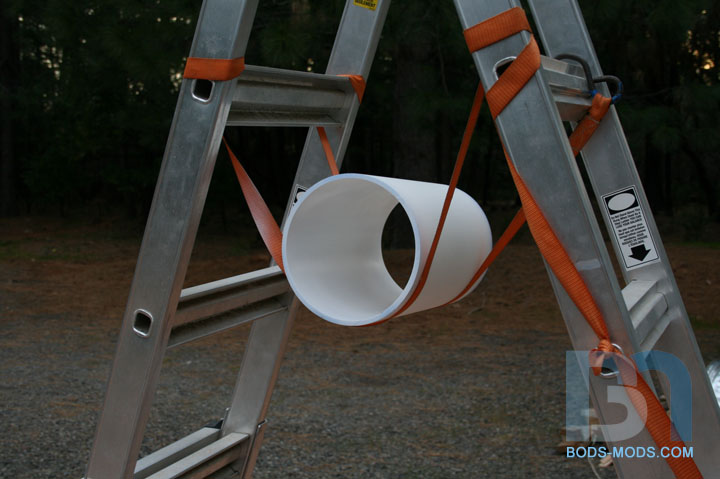
Painting the inside with white primer. A makeshift sling was created to suspend the tube.
For the outside, more thought was put in to the masking, since some of the ribs will eventually be permanently glued to the tubes. I first had to mark the areas to be masked, so I devised a way to mark the tube by rolling it around while keeping it square to a 90 degree surface (Charles Richter would be proud lol).
Once marked, I could take 1/4" strips of tape and mask those areas.
That's all I got so far. I don't have the led strips yet, so I can't finish the masking. I'm waiting for one more package from Moddersmart that will have the led's, fans, fittings, sleeving, and custom rad (wait til you see this thing!). Thanks for reading!
Received the 5-disc Tron a couple days ago.
Both are amazing.
And so is your mod!
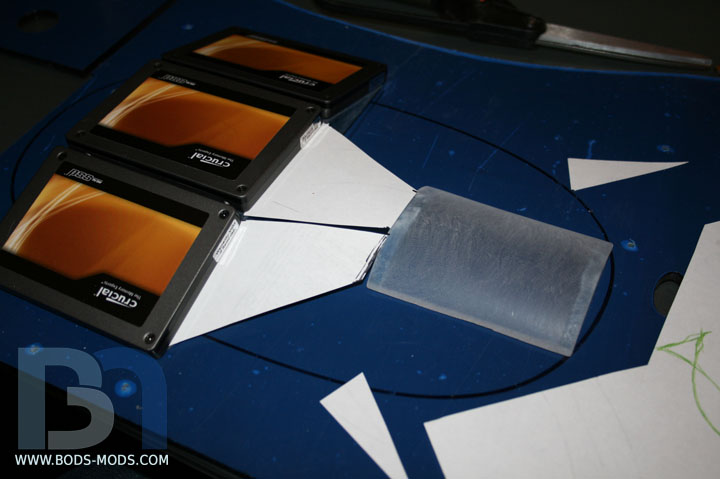
Due to the weather, I haven't been able to continue painting the tubes (damn rain!) So in the mean time, I thought I'd show you what I have planned for the SSD's. They will be mounted on the opposite side of the motherboard tray, disguised as the lightcycle engine.
I'll be making a loose interpretation of the real engine, which looks like this:
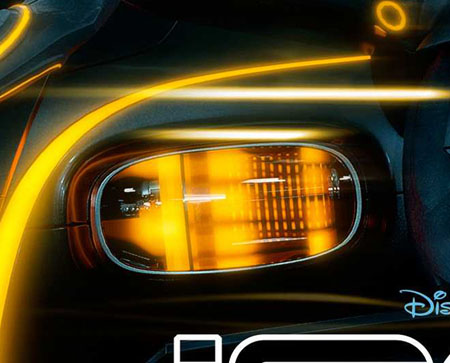
A view of the engine through the window:
I don't have much space between the motherboard tray and the window, so the mounting will be relatively flat, but with a hint of depth. I marked out the window placement, and arranged the drives in that area.
Here are the pieces designed and cut.
And glued together with mounting holes drilled.
Here are the pieces for the tailshaft portion of the engine. I cut a piece of 4" tube for the curved part.
Clamped and glued.
Done.
Both pieces together.
Both pieces in place on the tray with drives mounted.
Now I can make some paper templates for the three pieces that will connect the two. That will be tonight's task.
I think the best complement I can give you with this build is......
When its finished can you pm your address so I can catch a plane and steal it :P
I still love my Level 10 BMW mod, but this would look so call sitting on the otherside of the desk as well :banana::banana:
Again your attention to detail is AMAZING!!!!! What else is there to say? :bowdown:
Haha, nice! Should make for a nice illusion of the engine.
Thanks guys!
Ok, I got the connector piece done last night. :)
First I started making paper templates to get the complex shapes in between the two pieces, but doing individual pieces didn't work out too well. I just couldn't get the angles right.
So I tried making one solid piece. This seemed to work better.
Having transferred the shape to the acrylic sheet, I started cutting it out.
Then I added the bends.
After some trimming and rebending, I think I got it to the shape I wanted.
It fits pretty well in between the two pieces.
Some mockup shots of all three engine pieces in place, with drives mounted and the covers on.
As you can pretty well guess, this will all be lit up in the typical TRON fashion. Next I'll be adding some detail pieces and doing some masking to the covers to get them ready for paint.
Moe work done on the SSD Engine...
Cut some detail pieces out of scrap acrylic.
Filed & sanded.
Gluing them onto the base pieces.
Almost done...
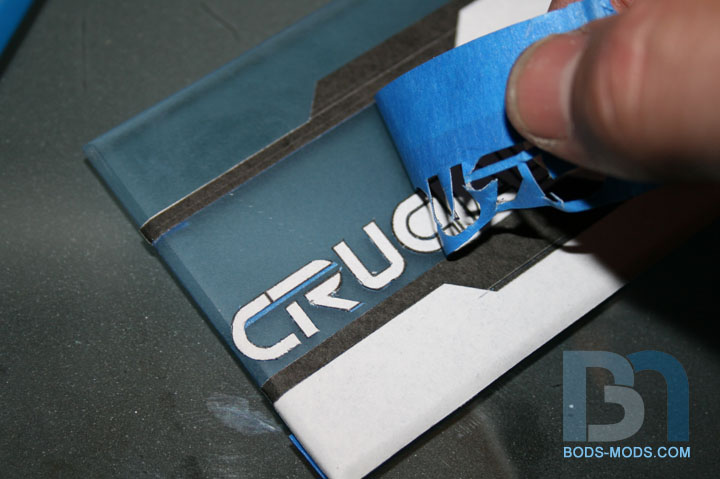
Here I made the masking templates for the drive covers using Adobe Illustrator. I downloaded the TRON font for the text.
I taped off the covers, cut out the templates and used spray adhesive to stick them onto the tape.
Then came the arduous task of cutting the masked areas and text.
The drive covers are now ready for paint. I mocked them up again so you can see how the paint graphics line up with the detail pieces on the other parts.
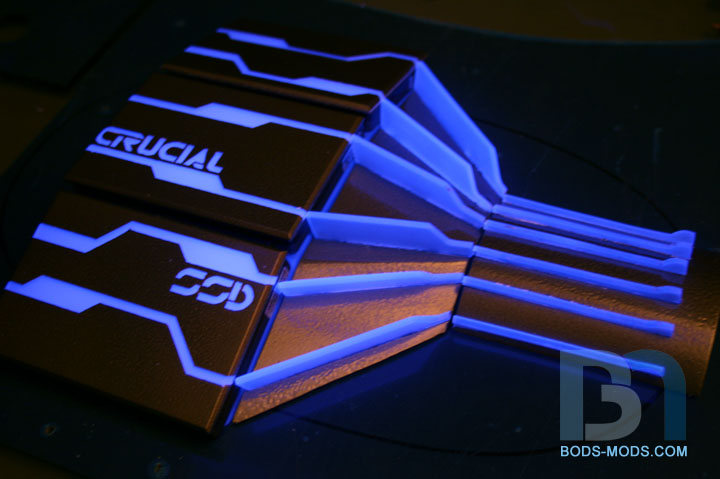
The finished engine will actually be a reverse of what you see here, with the engine being a metallic dark gray and the masked areas glowing blue.
And work continues... :)
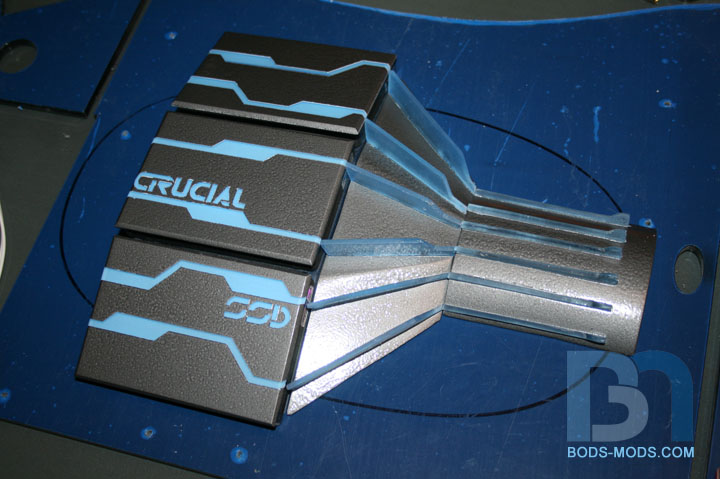
So I think I got the SSD Engine just about finished up this weekend. Got the parts masked off and painted today once the sun finally came out.
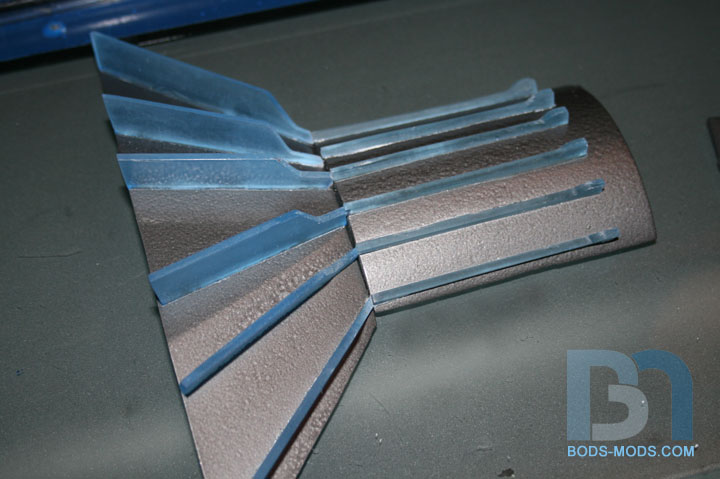
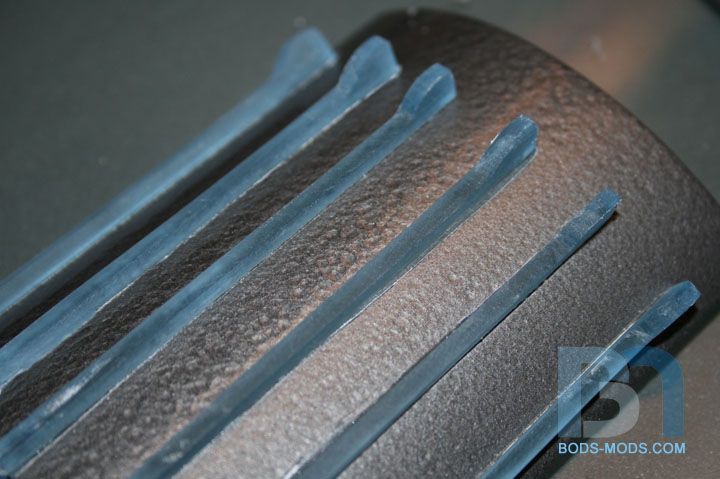
I went with a dark gray hammered finish for the main parts of the engine, to add more of a texture to it and set it apart from the blue fins.
A closeup shot of the textured finish.
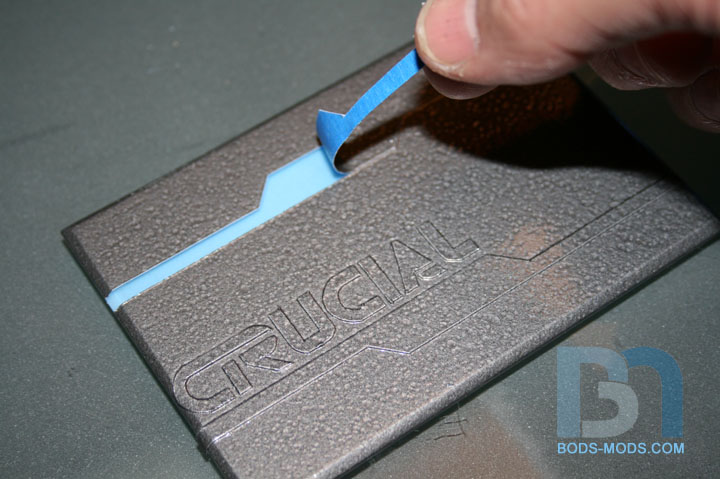
Demaskifying the drive covers to reveal the diffused blue acrylic. I primed the underside as well so you wouldn't be able to see through them.
All the pieces back together for a final mockup, and...........
.........the money shot!
I actually managed to get some paint on the tubes as well, so maybe I can finally get the basic frame assembled this week. Then it will all start coming together quickly after that.
Cheers, and happy Easter! :)
OMG that is so Fracking cool (oops wait thats BSG)..:banana:
Best looking ssd mount I ever seen 8):up: +rep :D.
Gonna get any EL panels/wires?????
Pure awesome, dude. :D:up: