-
Re: ASPHIAX - VENATOR Class Republic Star Destroyer
Requirements :
1 x 50mm acrylic tube
2 x 50mm acrylic disks
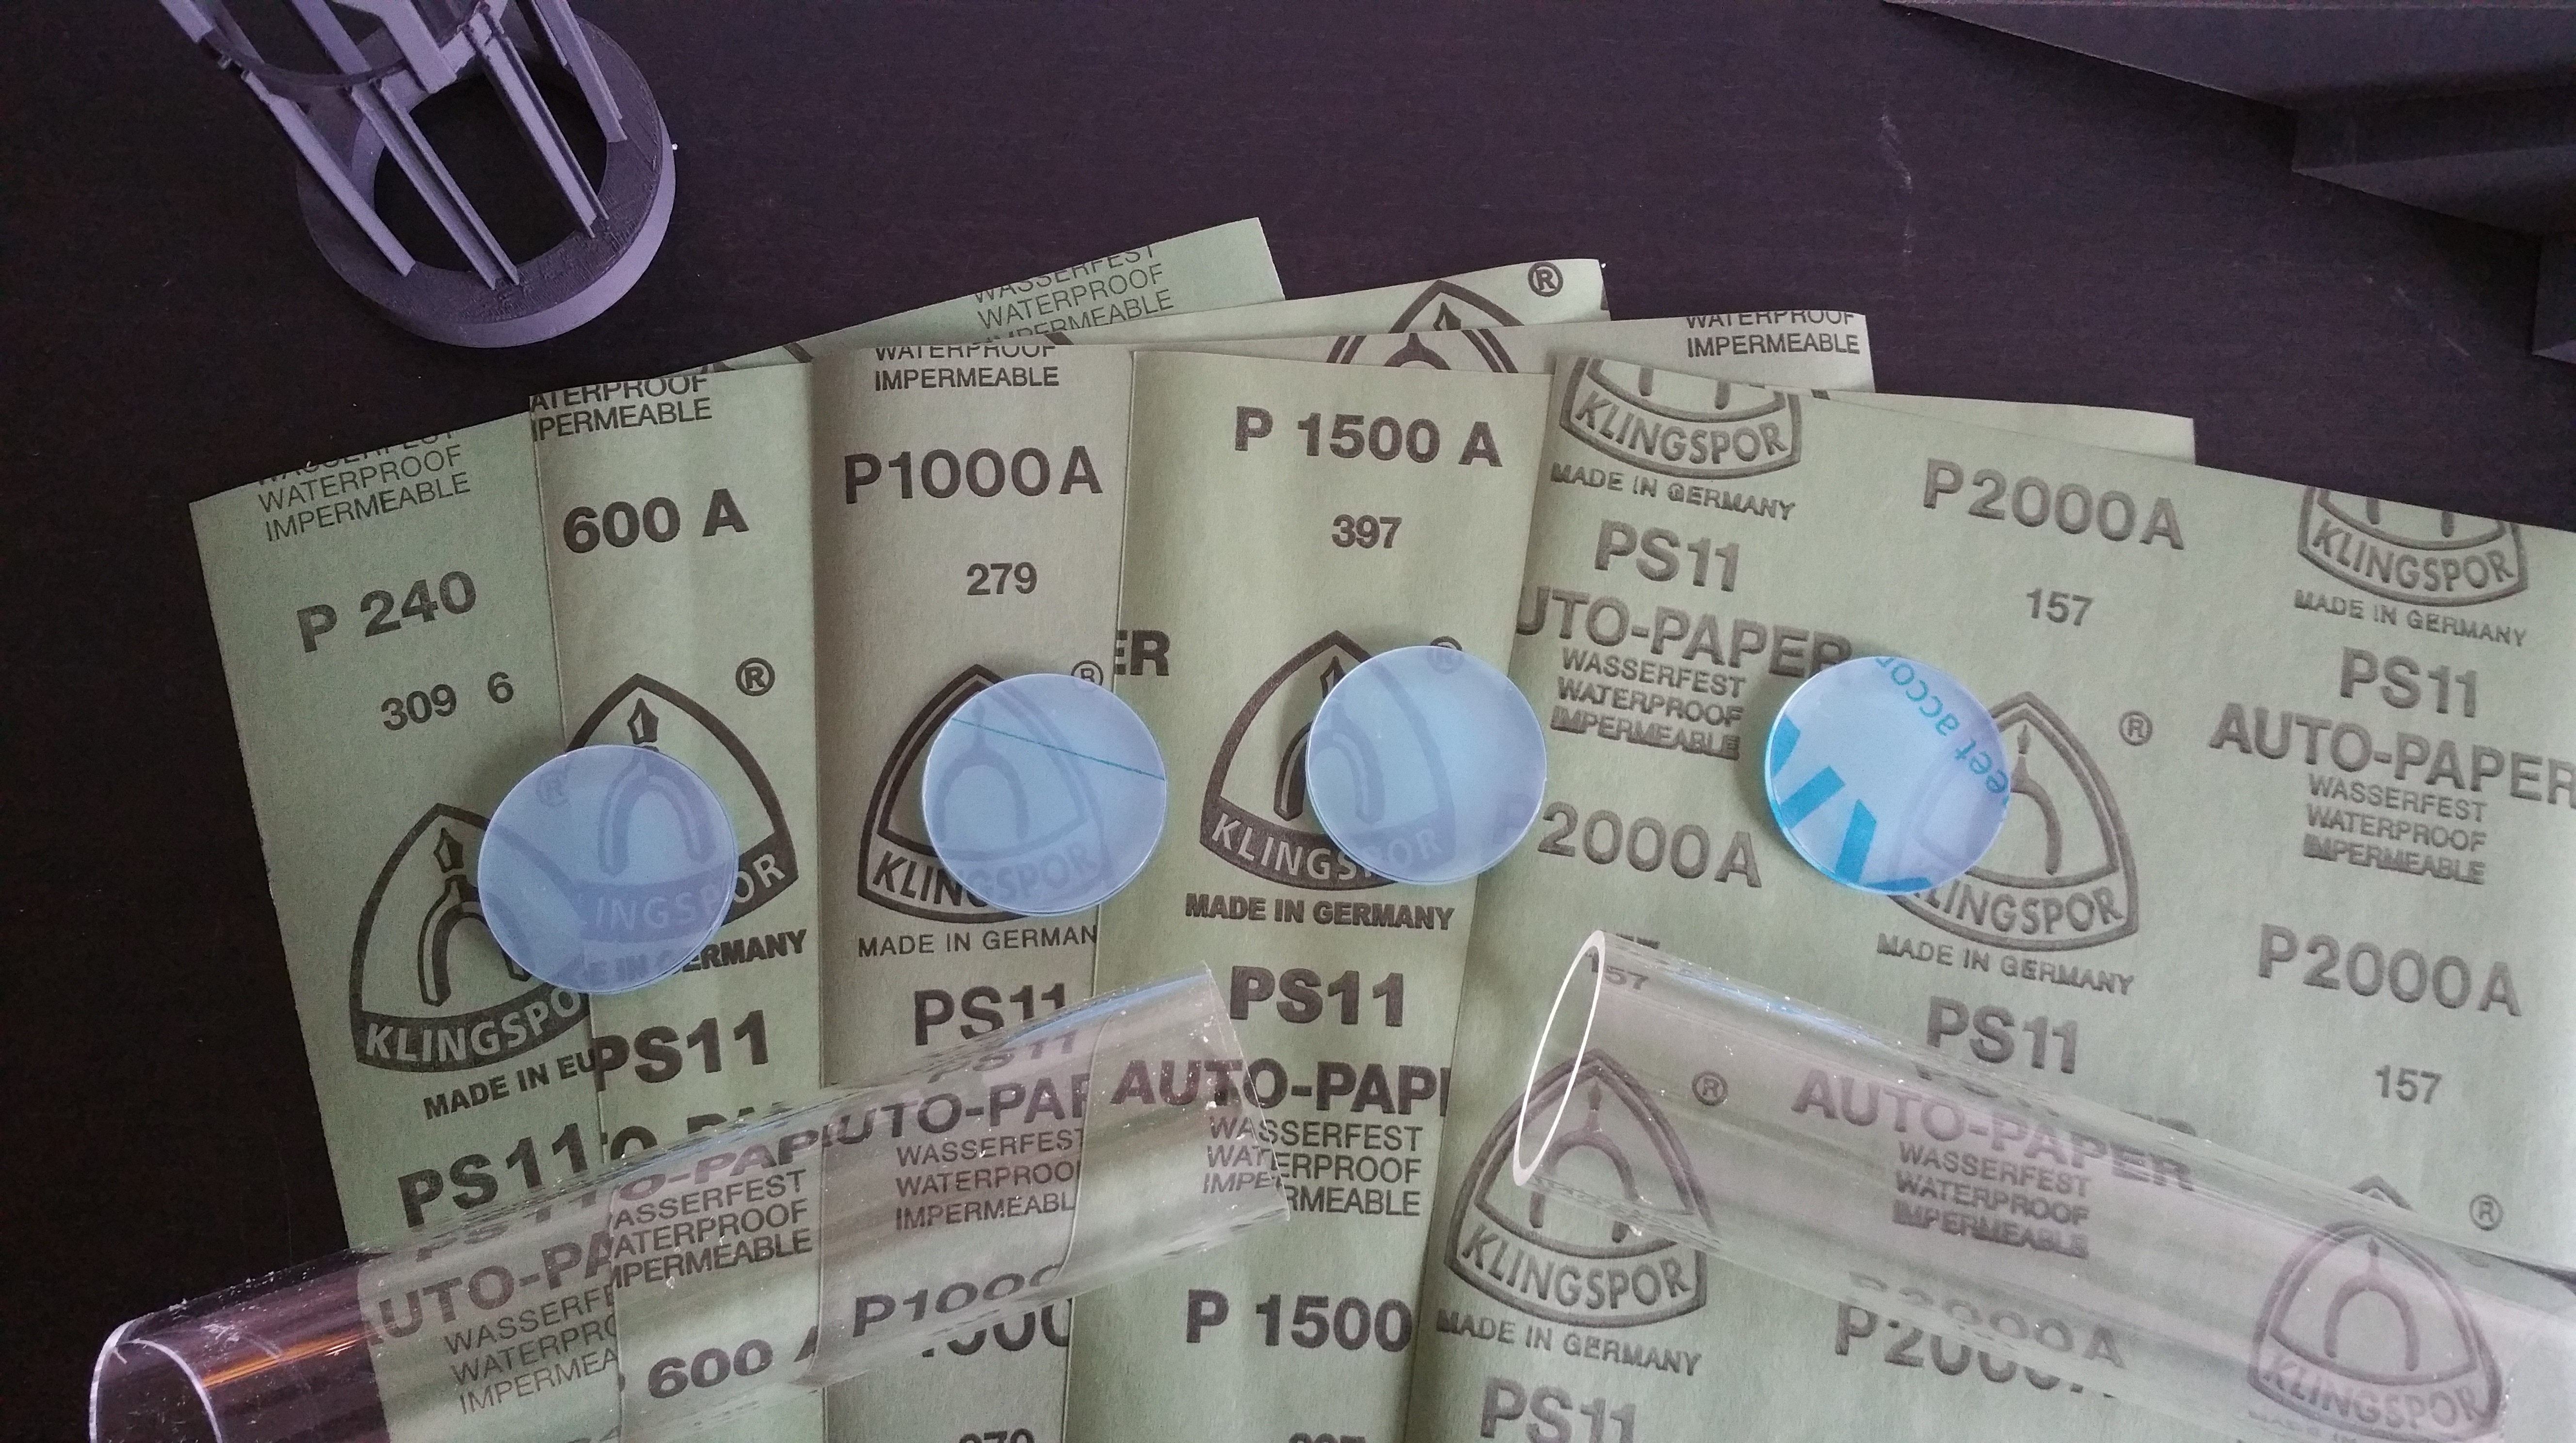
Sandpaper (wet/dry) ranging from 240 to 2000 in 5 steps
Cup of water
non abrasive cloth
silver polish
old molex cable
ACRYLIC glue that is water thin
Hypodermic needle
29/64 inch drill
Tap G1/4
Powered Drillmachine (or stationary drill)
Some old fittings and tube
Ok so instead of just showing I made my own reservoir, i want to show you how to make one yourself as it is pretty easy.
You just need to have the right tools and glue!
So I ordered 2 pieces of 50/3 mm tube and 4 pieces of 3mm acrylic cut into circles of 50 mm
Got some wet/dry sandpaper ranging from 240 to 2000 grit and start put your sandpaper on a completely flat surface
Above you can see how much you need to sand. The slightly coloured pieces are deeper and made by the sawteeth of the factory.
Just sand with the 240 grit until they have disappeared. Make sure you keep the tube completely level with the sandpaper and use a circular move.
No need to apply big pressure, if you notice that the tube is hopping over the sandpaper, use less force and smaller circles.
When you dont see anymore sawteeth marks, take the 600 grit and repeat the procedure ( i do at least 3 x 20 circles per side)
When thats done, time to break out the water. From 1000 I always use water, just works better
Stick the tube into the cup and pull the tube out leaving the drops on the tube and place it on the sandpaper.
That is enough water to sand it with.
After 20 circles, dip it again in the cup and repeat at least 3 x per side of the tube.
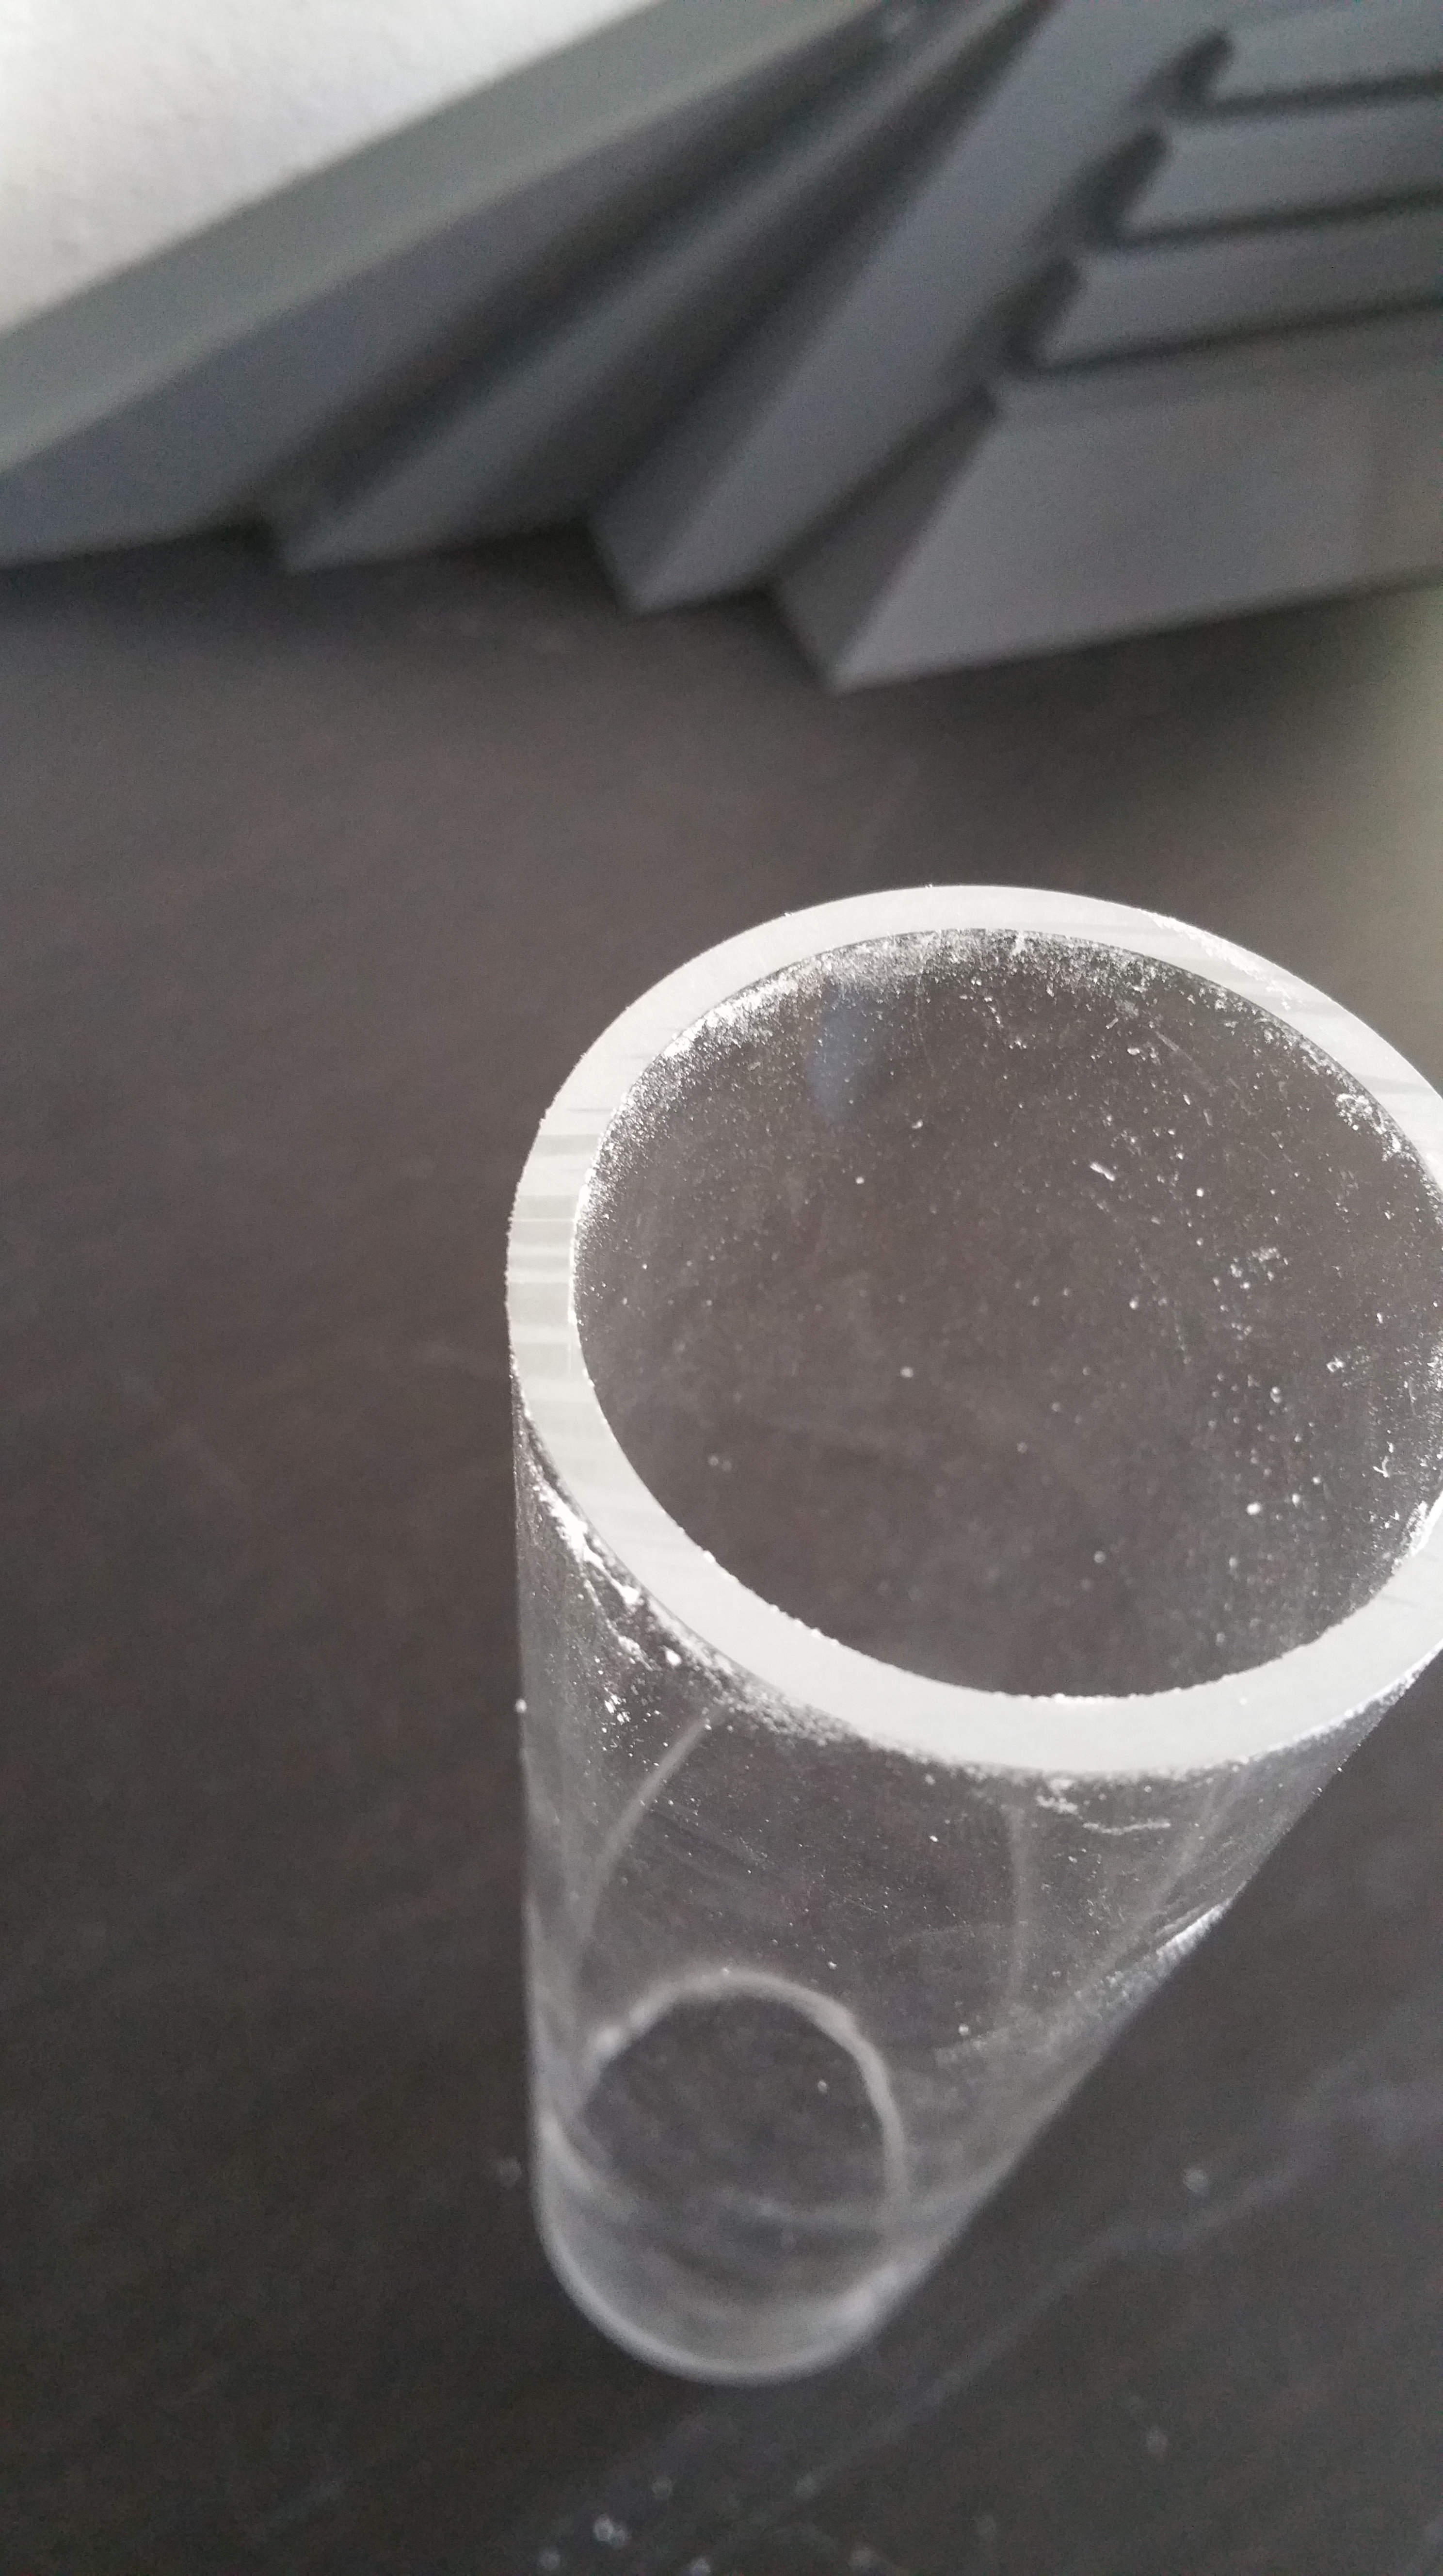
Continue with the 1500 and 2000 grit.
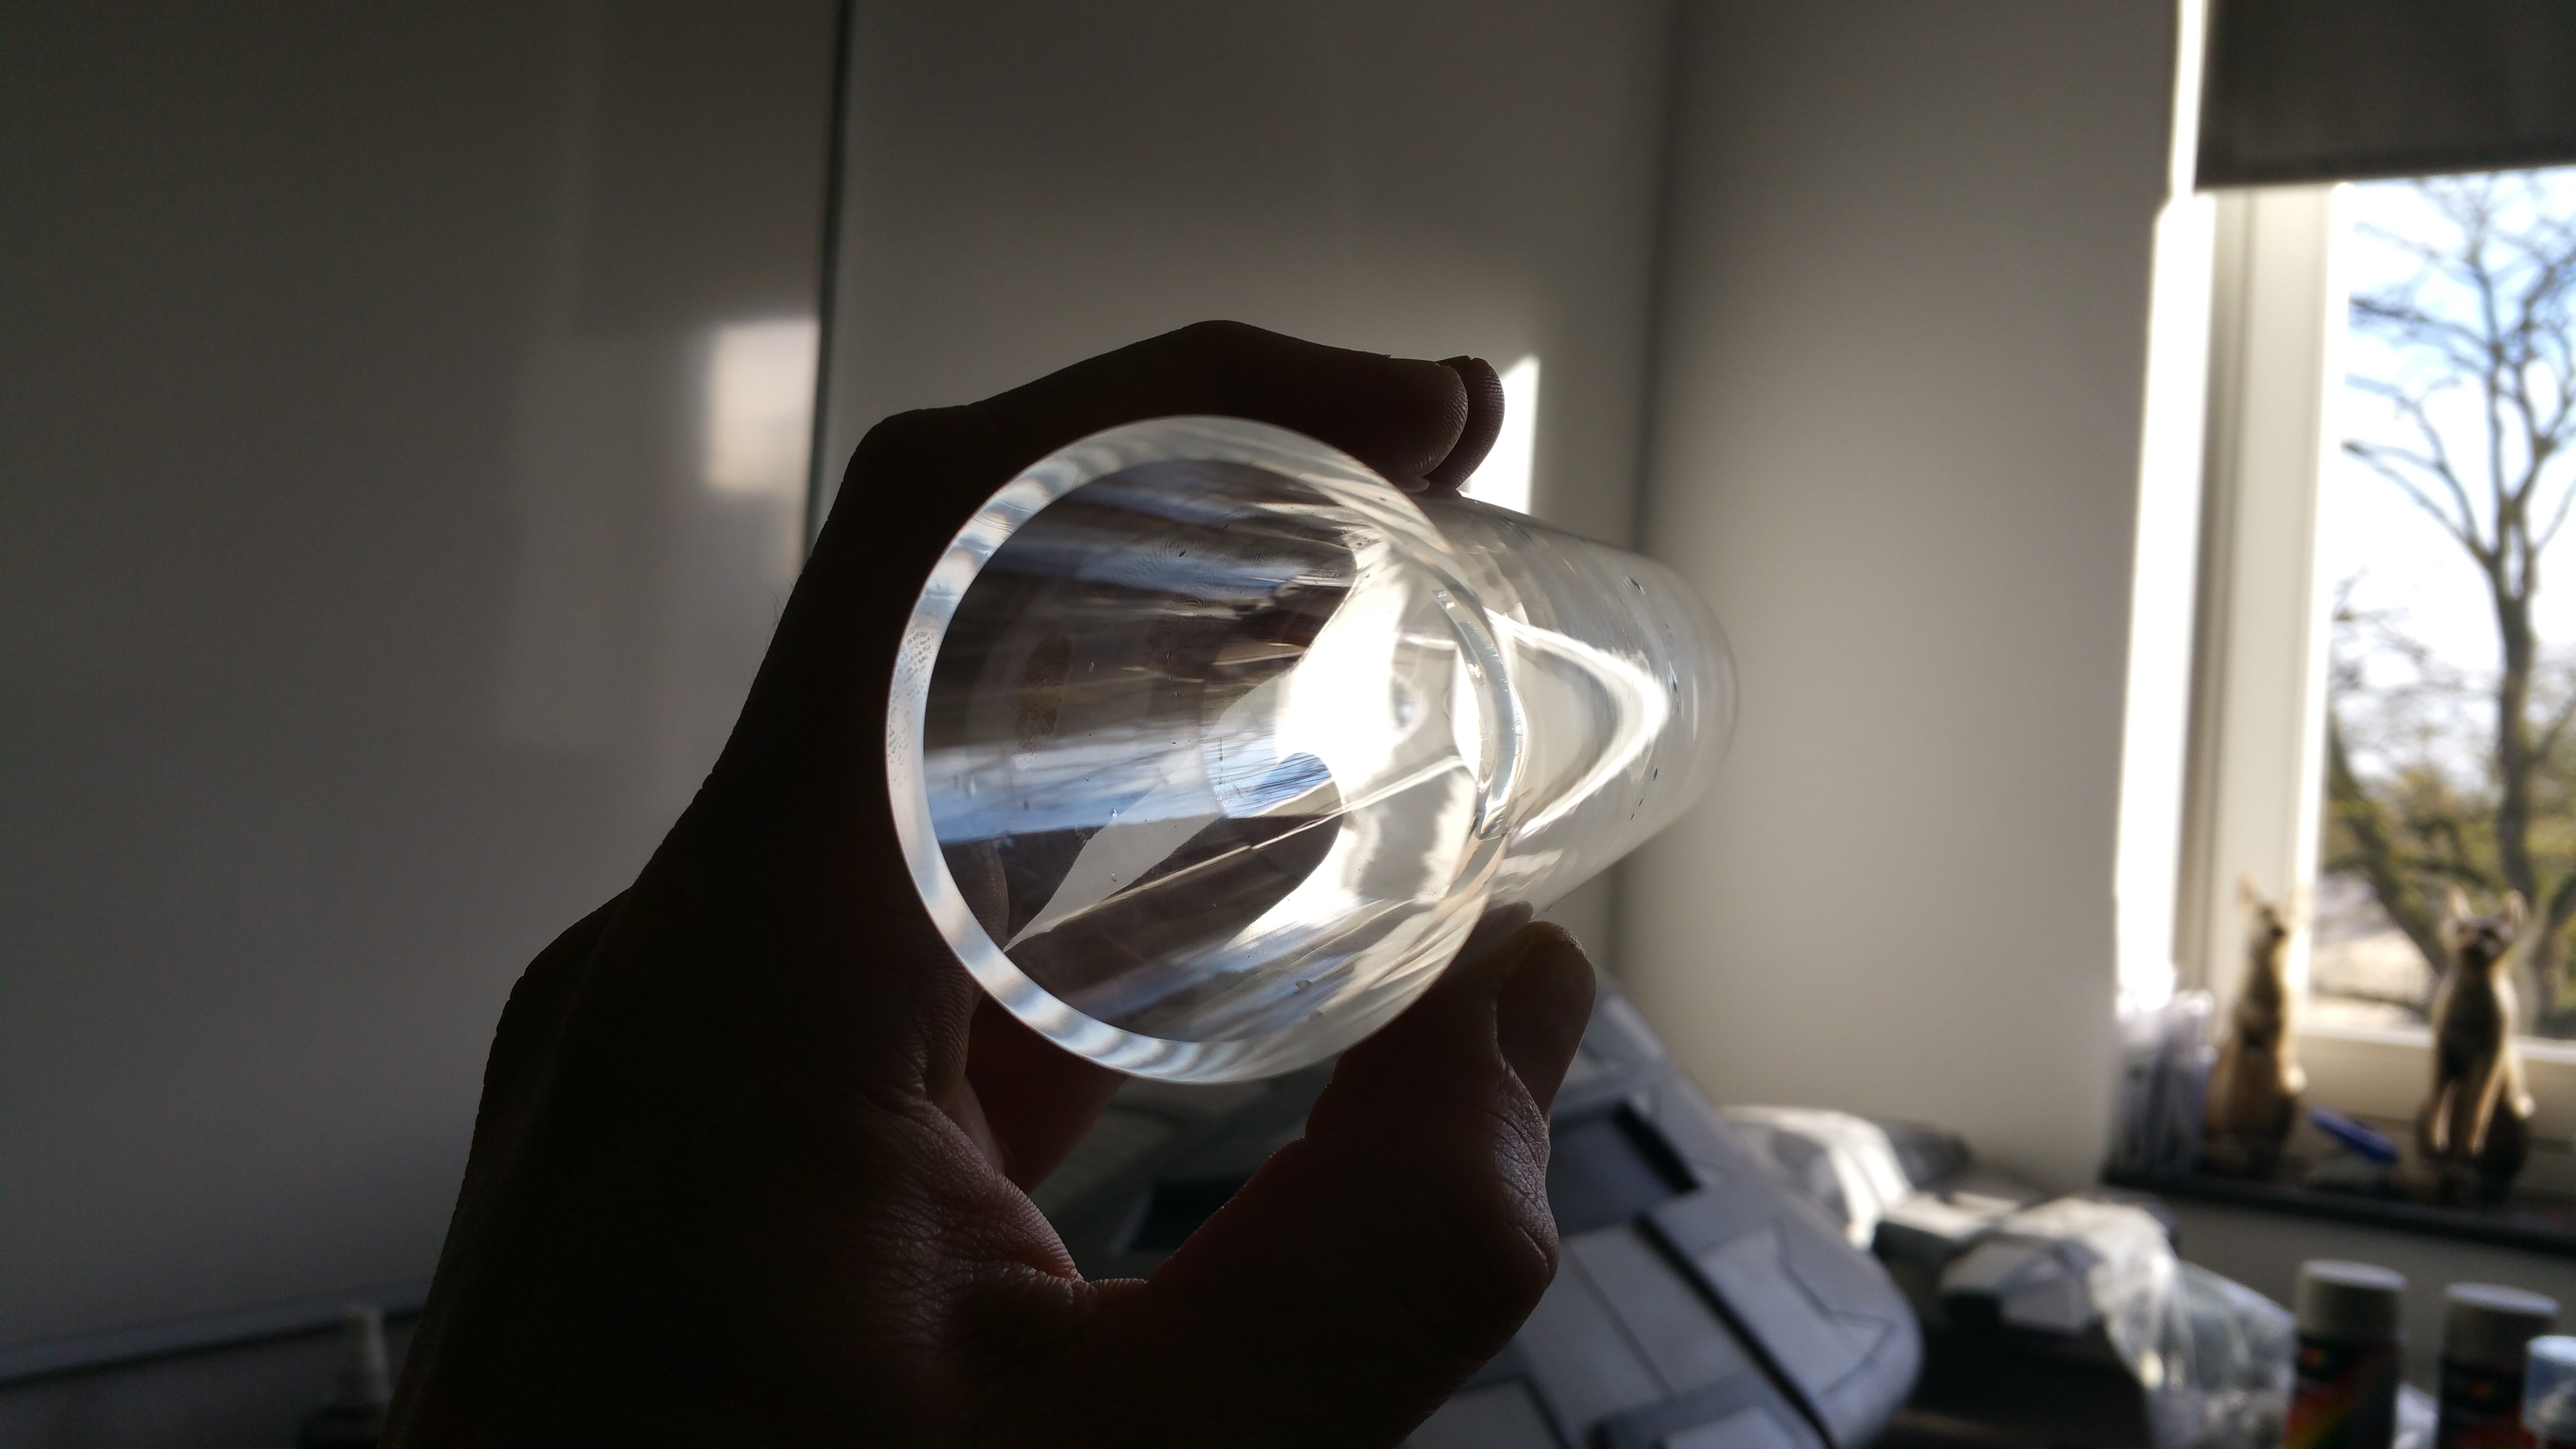
After finishing with the 2000 grit, it should look like this. You can start making out the reflections of the tube itself inside the acrylic.
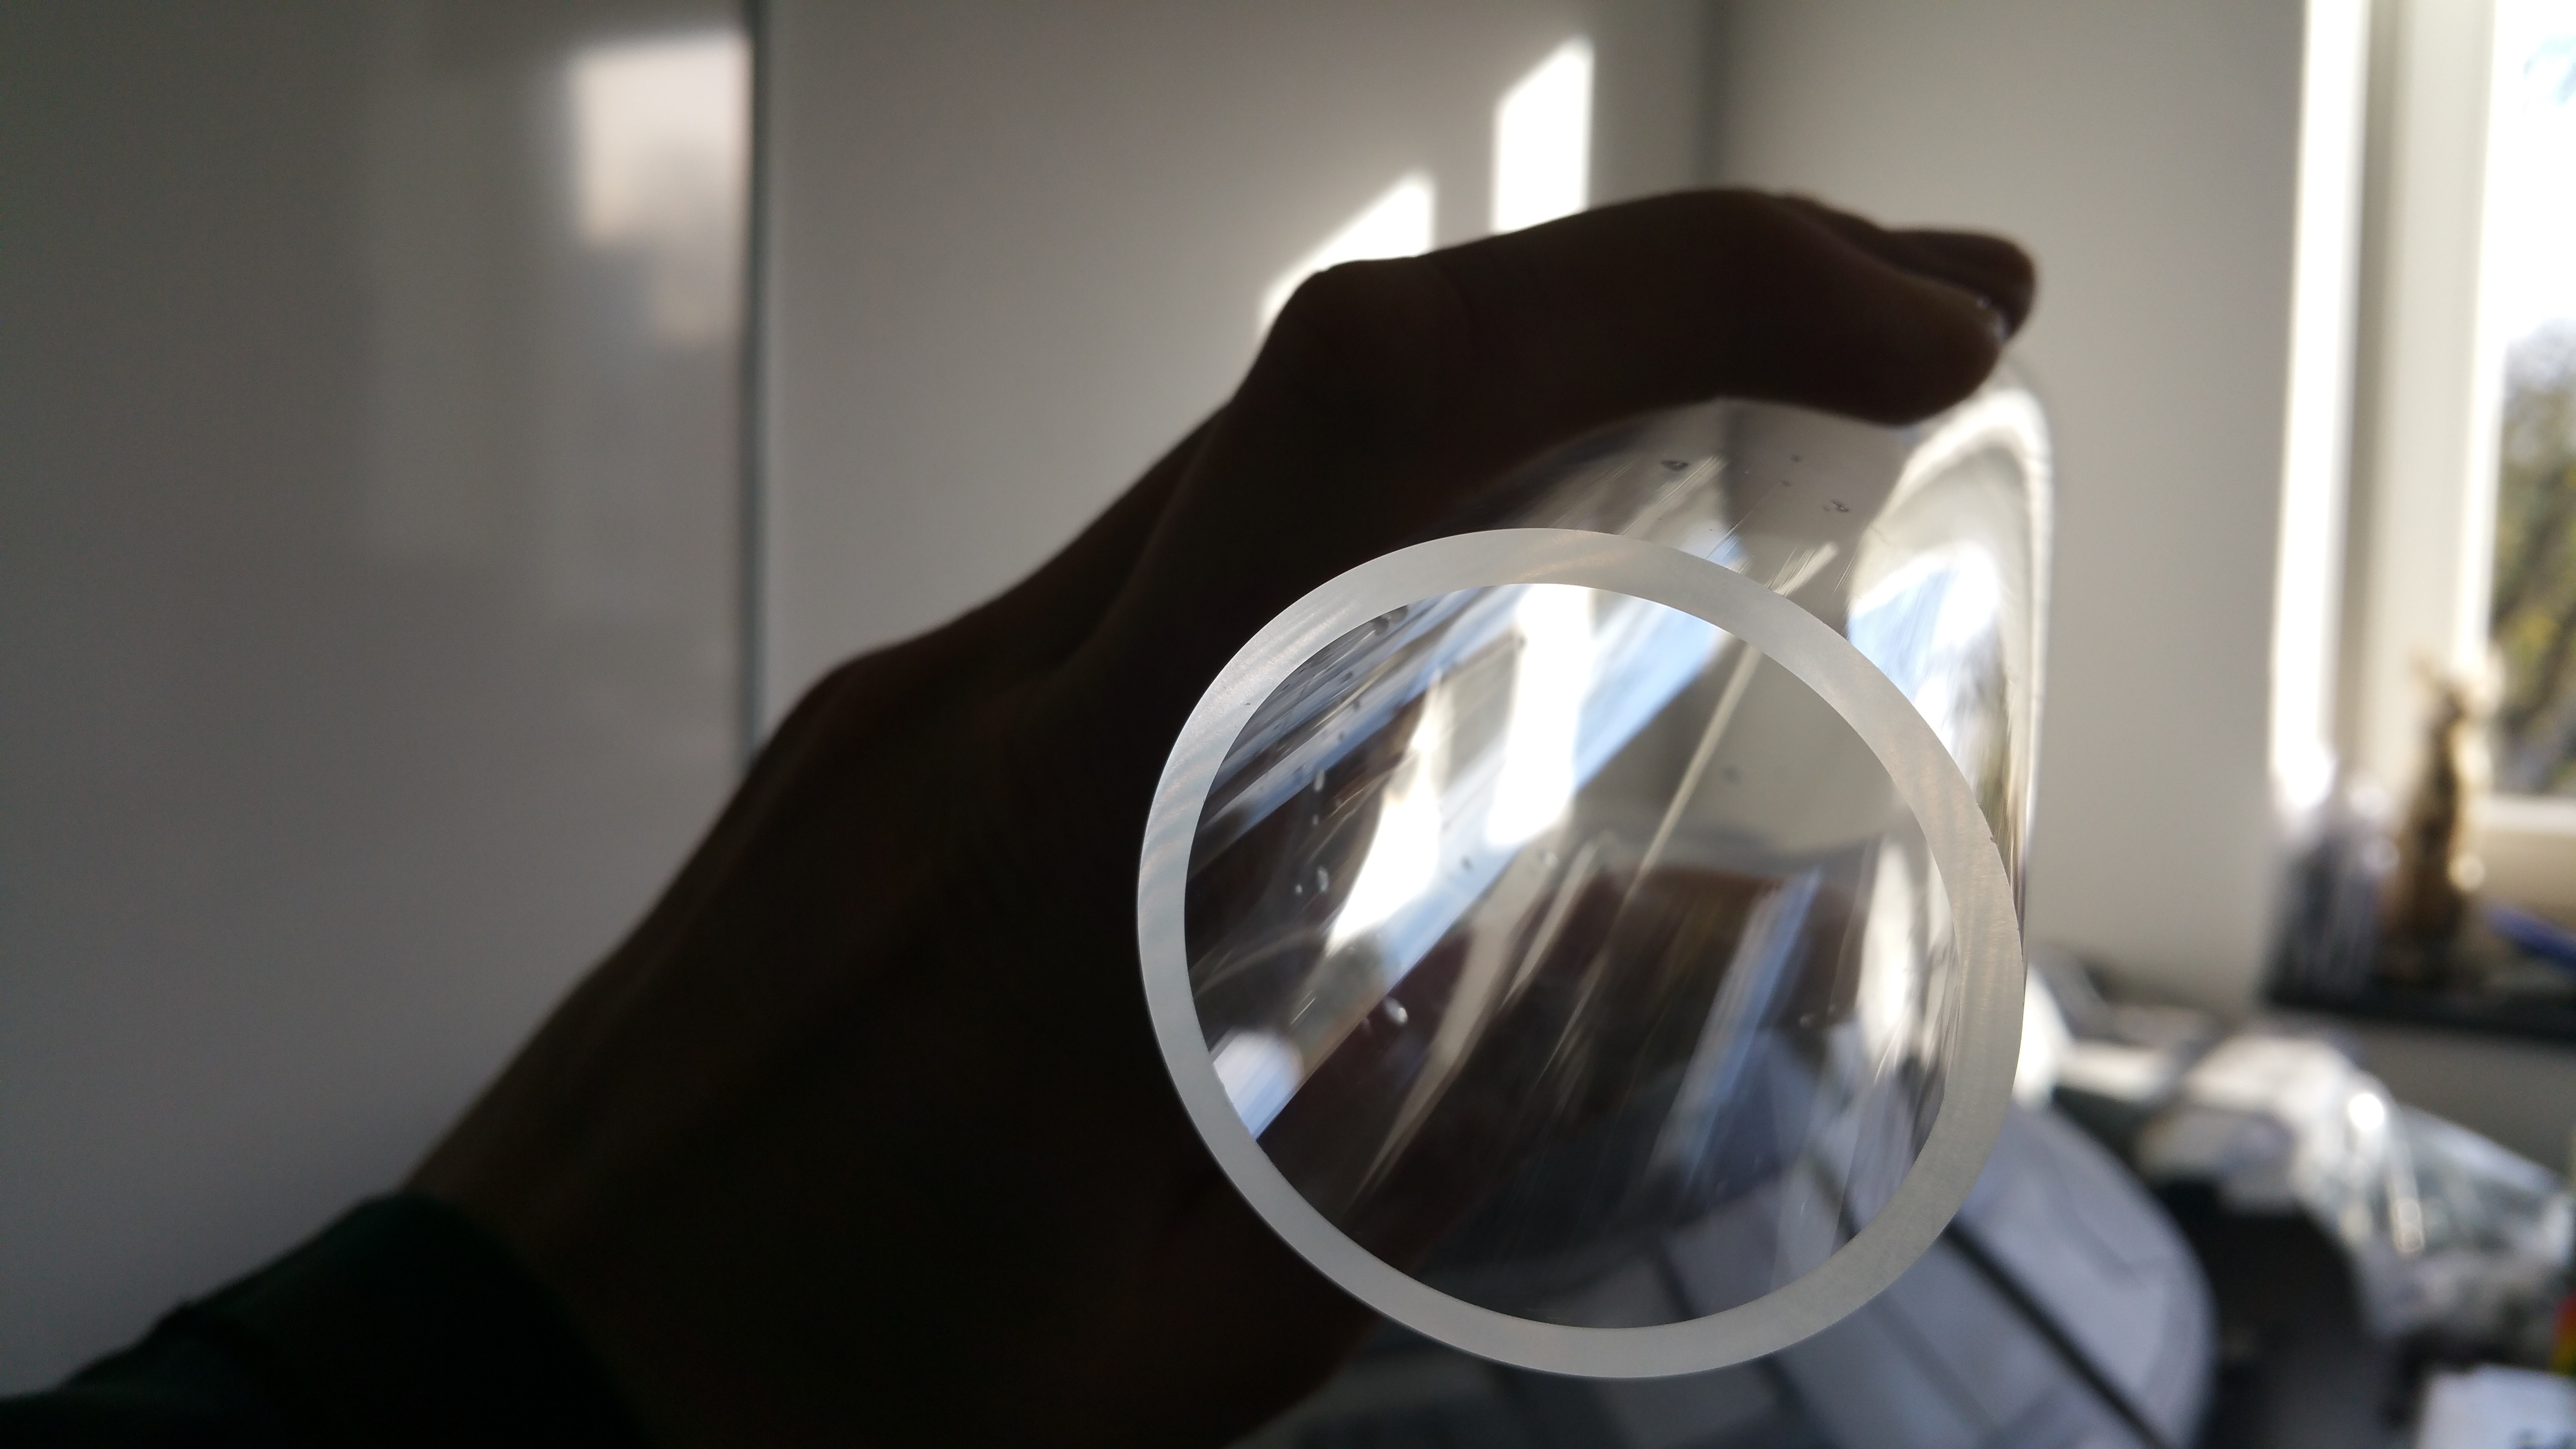
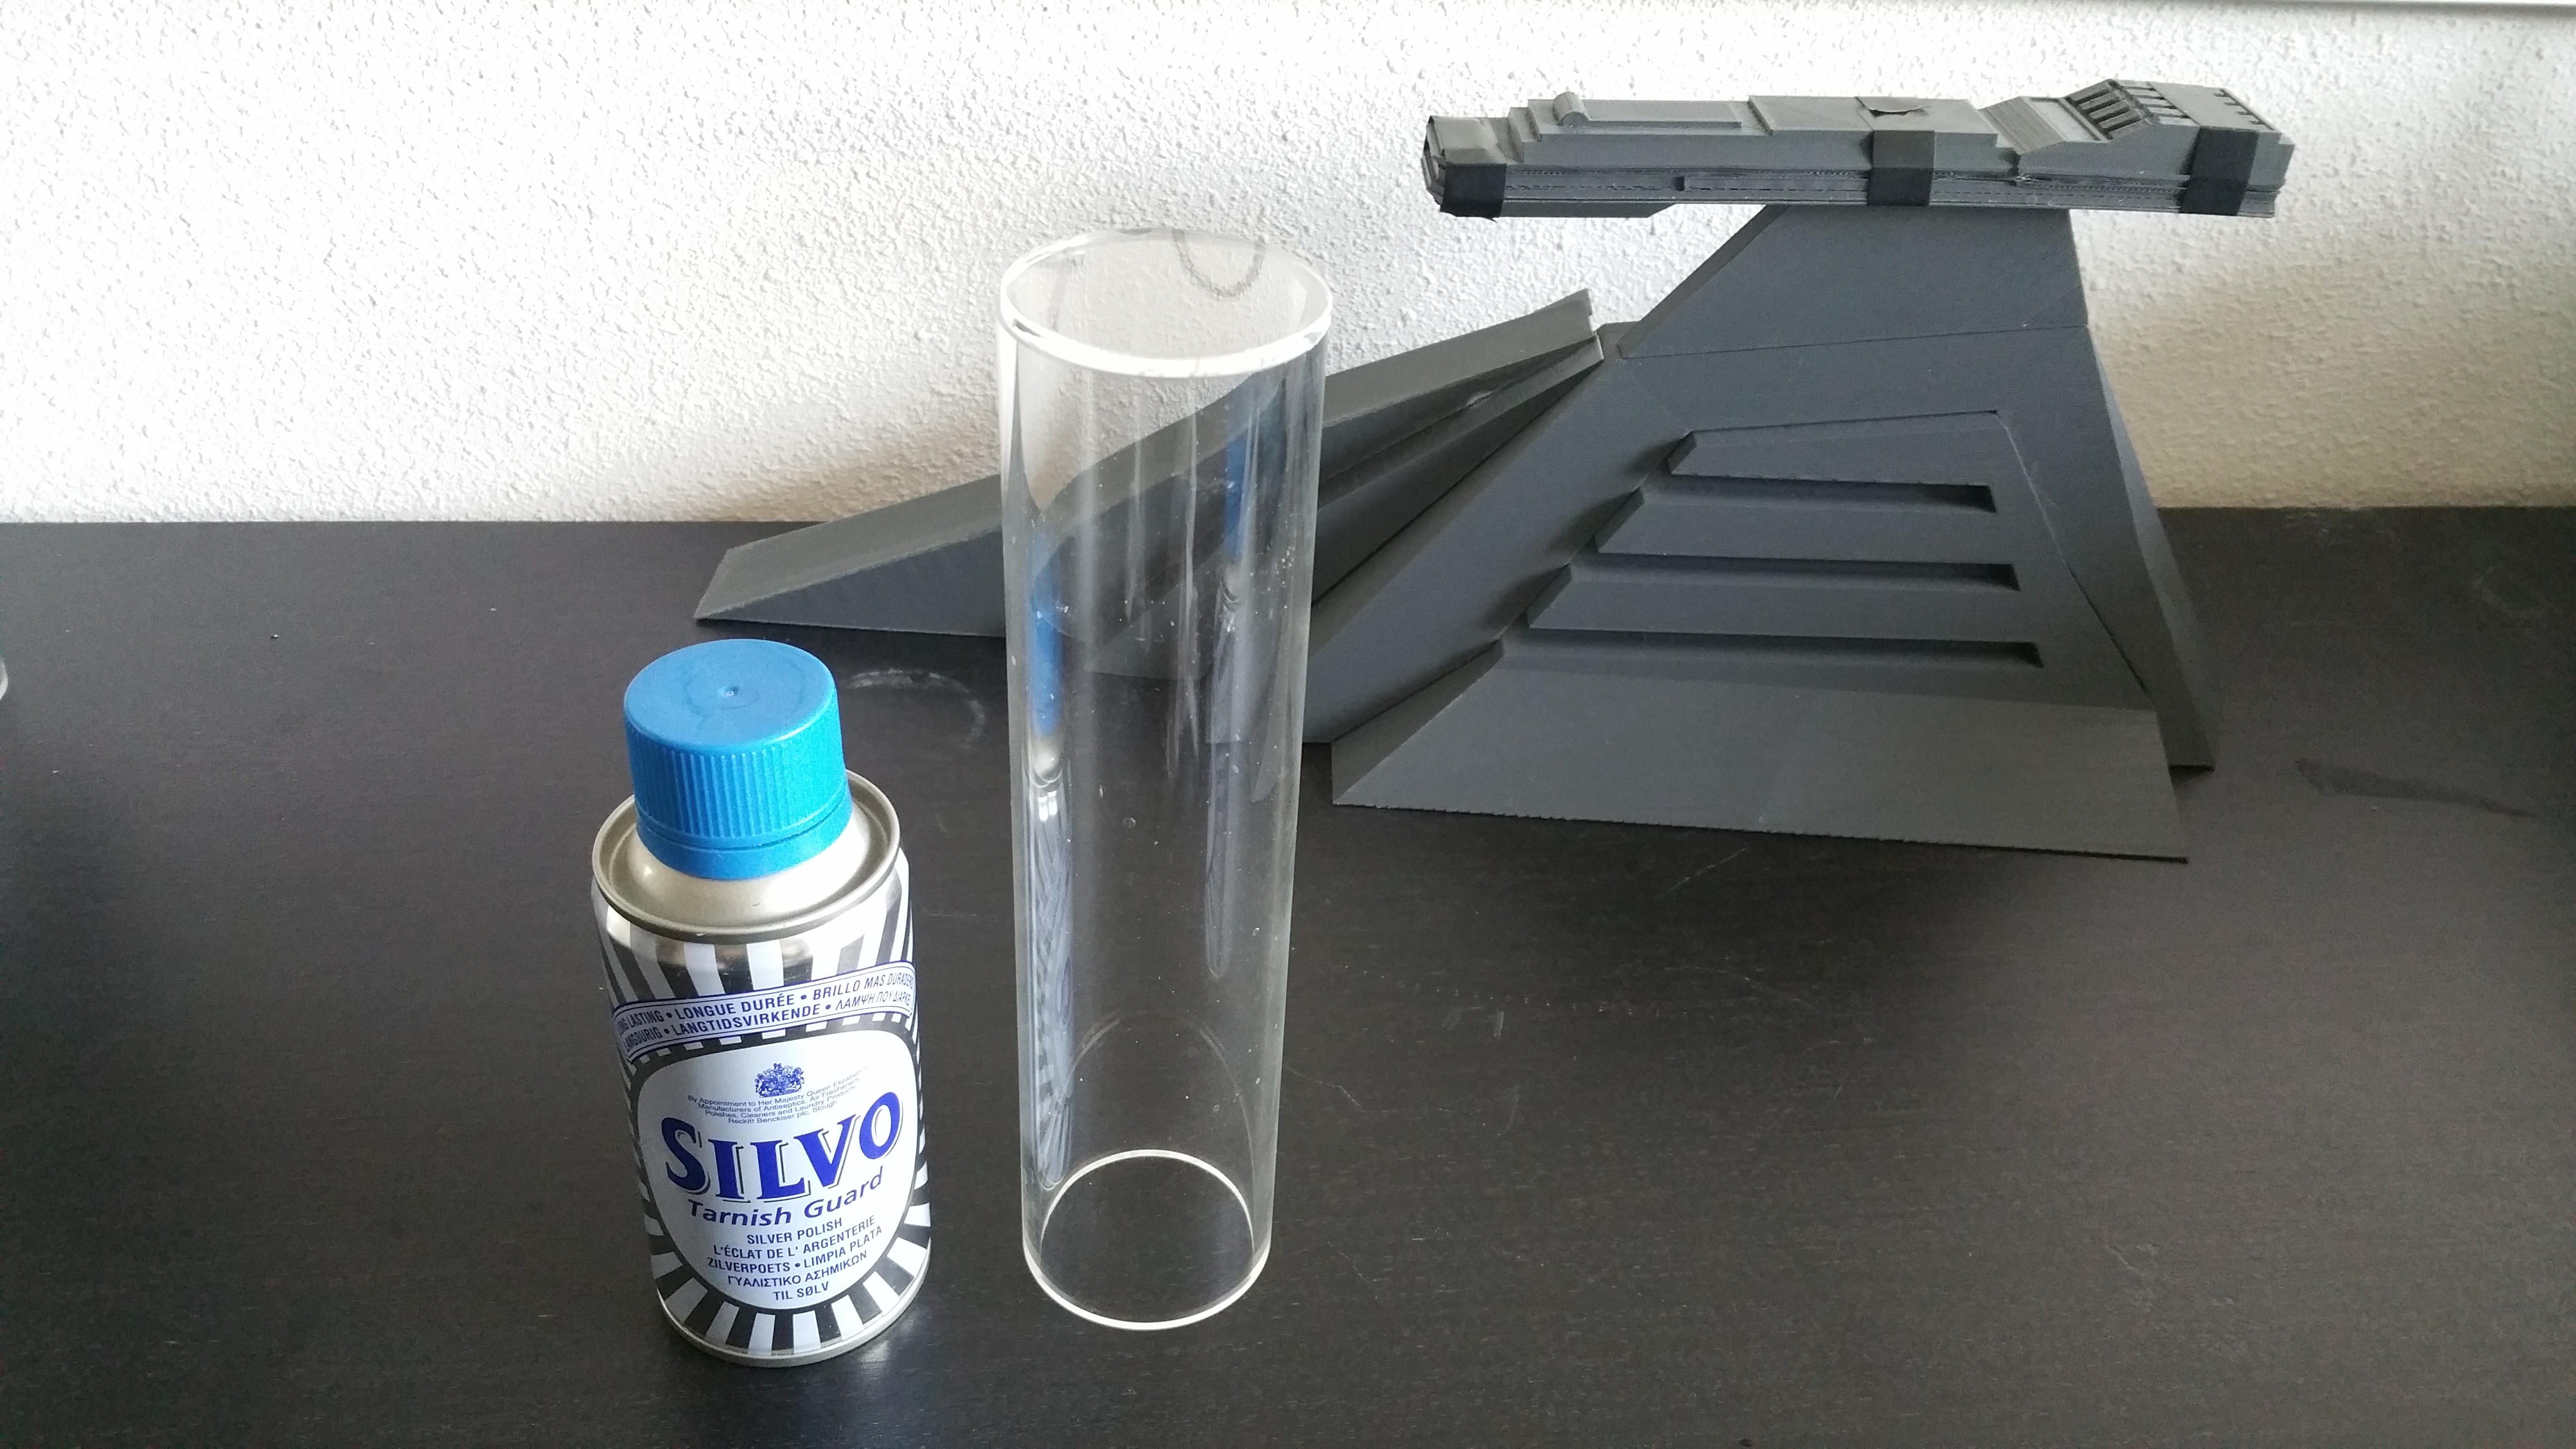
Then the final step to make it perfectly smooth. Everybody has their own preferred brand but I always use this silver polish as it has no special chemicals added.
Those would possibly ruin the acrylic. You just have to try some on a old piece of acrylic and leave at least 24 hours to see if it degrades or stains the piece.
After the polish you should see a lot of internal reflections in the tube wall.
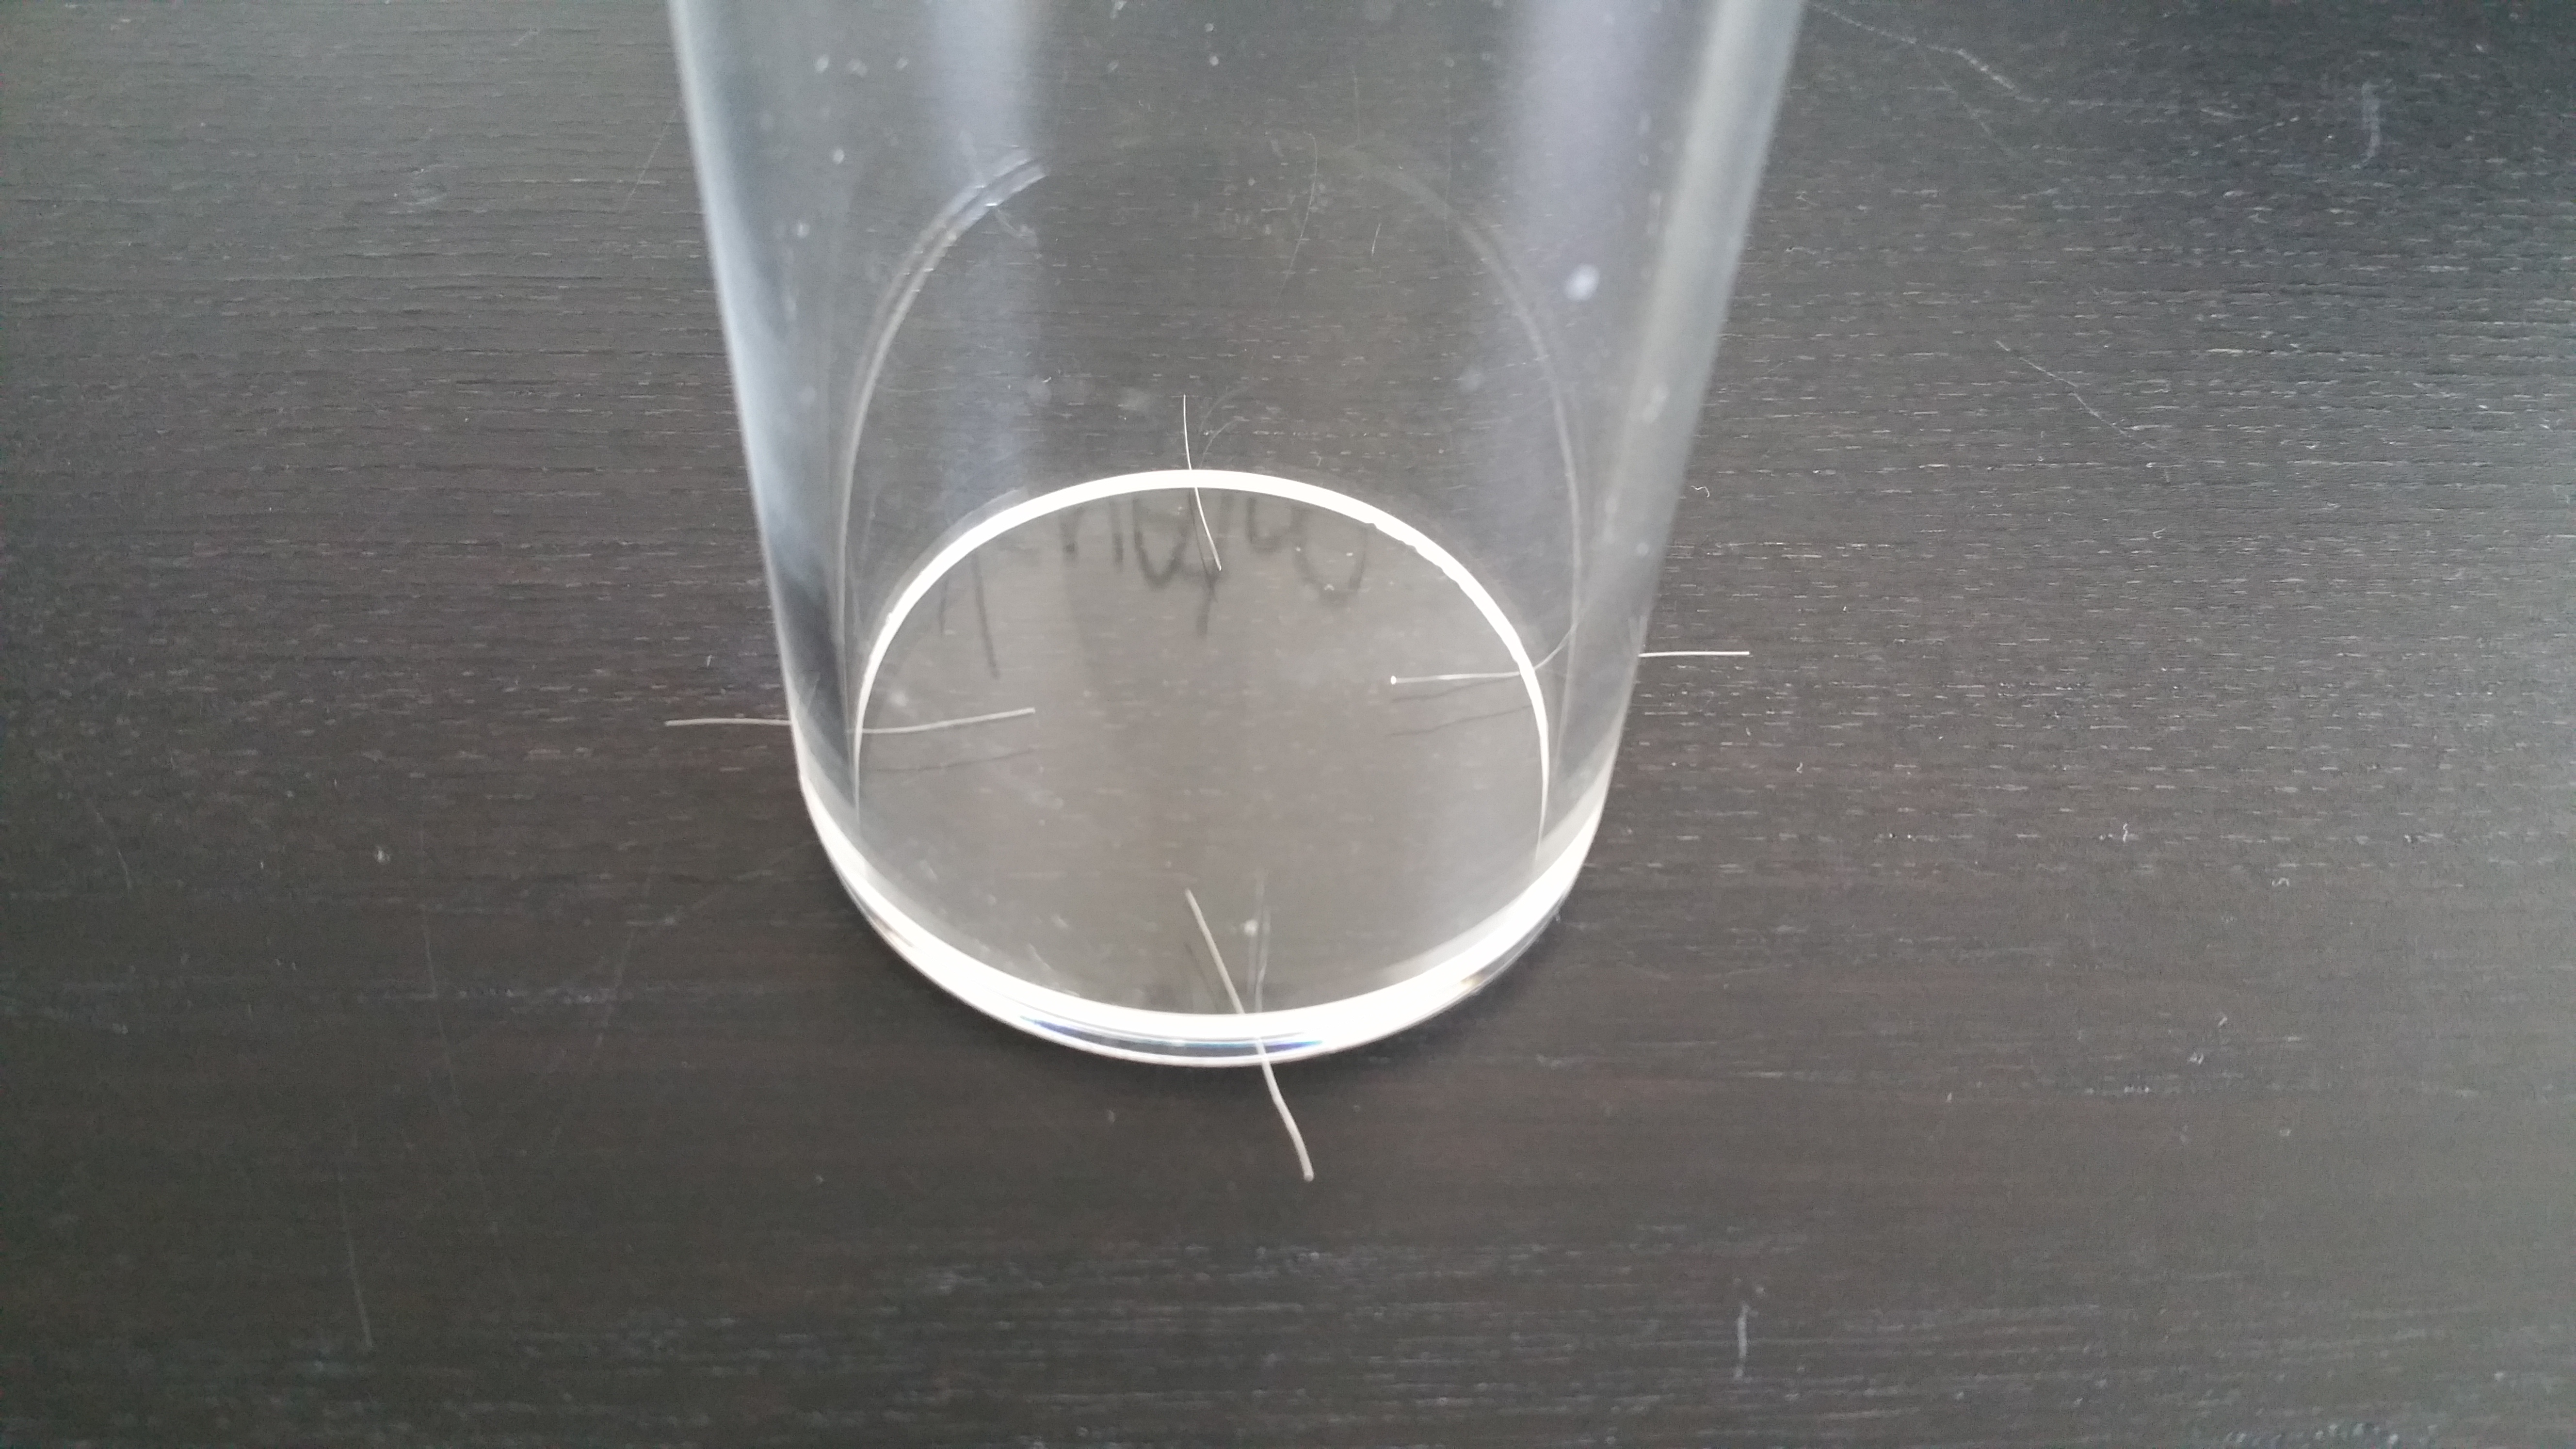
Next step, find yourself an old molex cable. You must have some lying around ;-)
Strip the cable and place 4 of the small strands between the tube and the disk.
This creates a very small cavity into which the acrylic glue will be "sucked"
This is called the capillairy action and is very usefull.
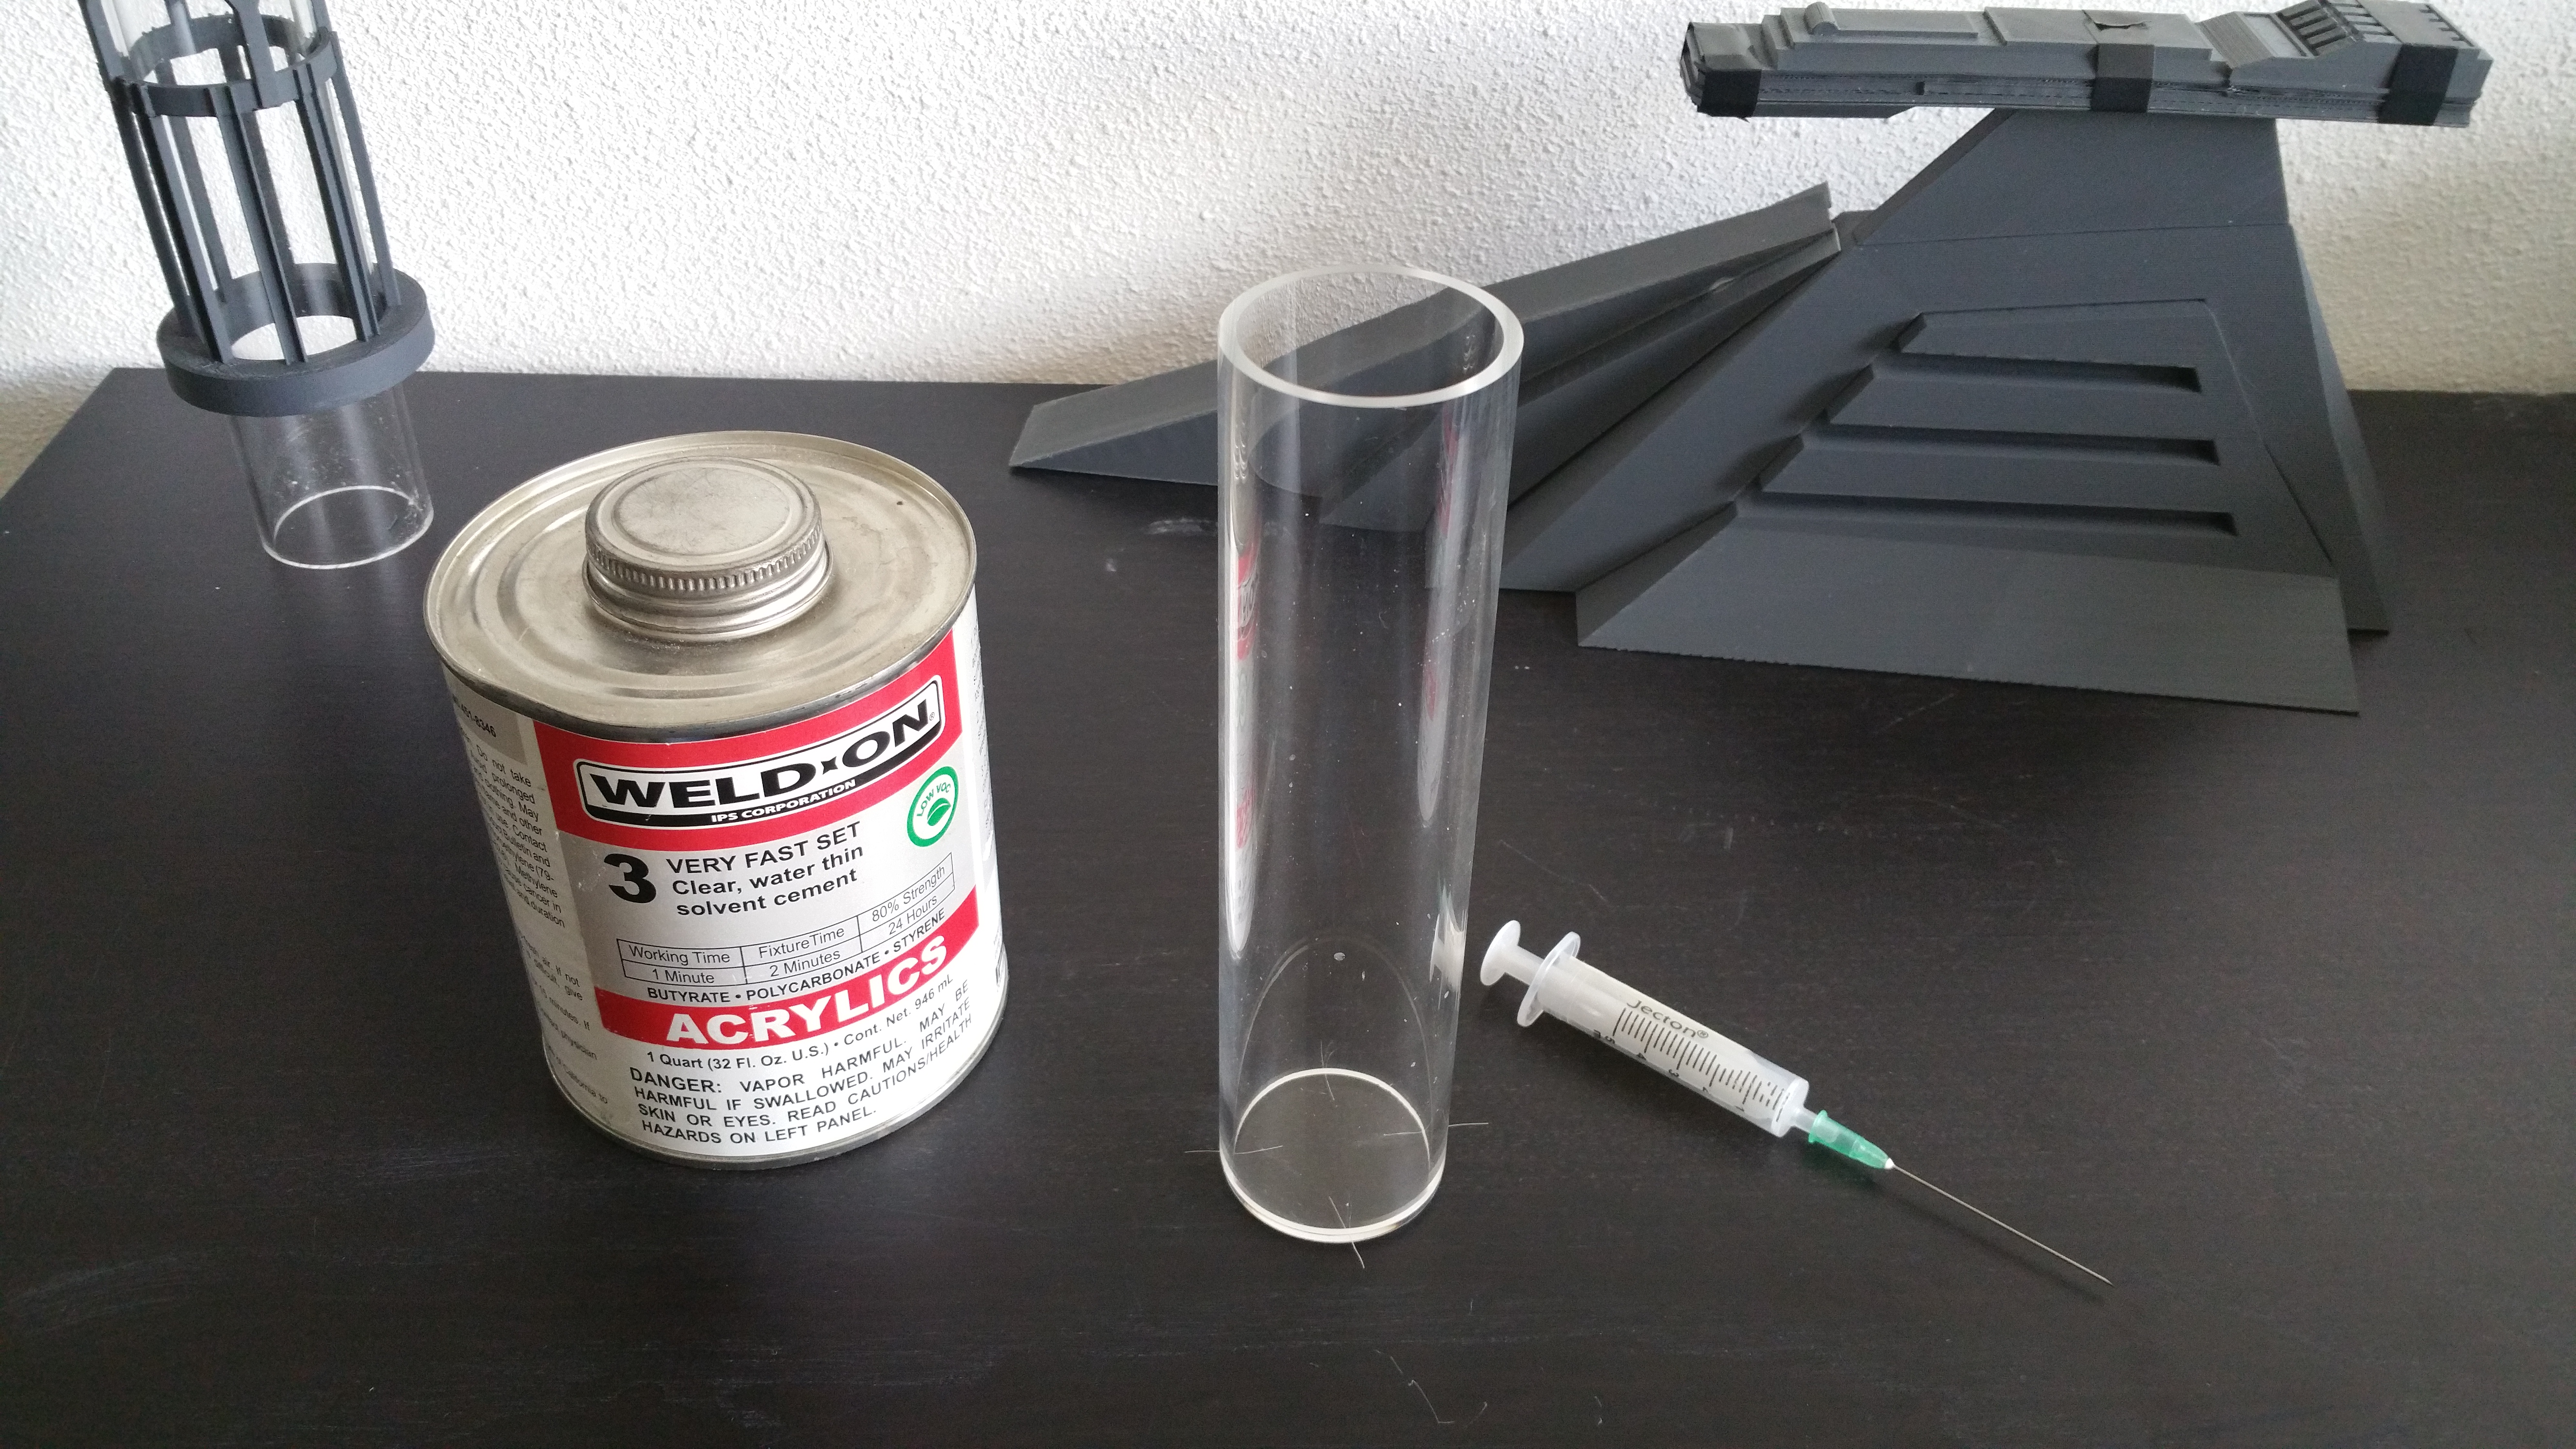
I was lucky to have found the last weld-on 3 in europe. They are not sold anymore due to a specific chemical thats used.
Appereantly you can make a bomb with it. But thats next on the MCGyver show ...
This can will probably be enough for my grandkids to build reservoirs with.
Take the syringe and suck a tiny amount out of the can. Then find the cavity between the tube and disk and VERY, VERY slowly push the glue out while following the cavity along the disk.
When you come to a strand, pull it out and continue. WATCH OUT : you will only have about 20 seconds to replace the tube if you knock it over or move it.
You will see the glue being sucked into the cavity and spread out.
DO NOT push on the tube, just let gravity work its magic.
(PUSHING will create a crackled appereance and potentially ruin the weld)
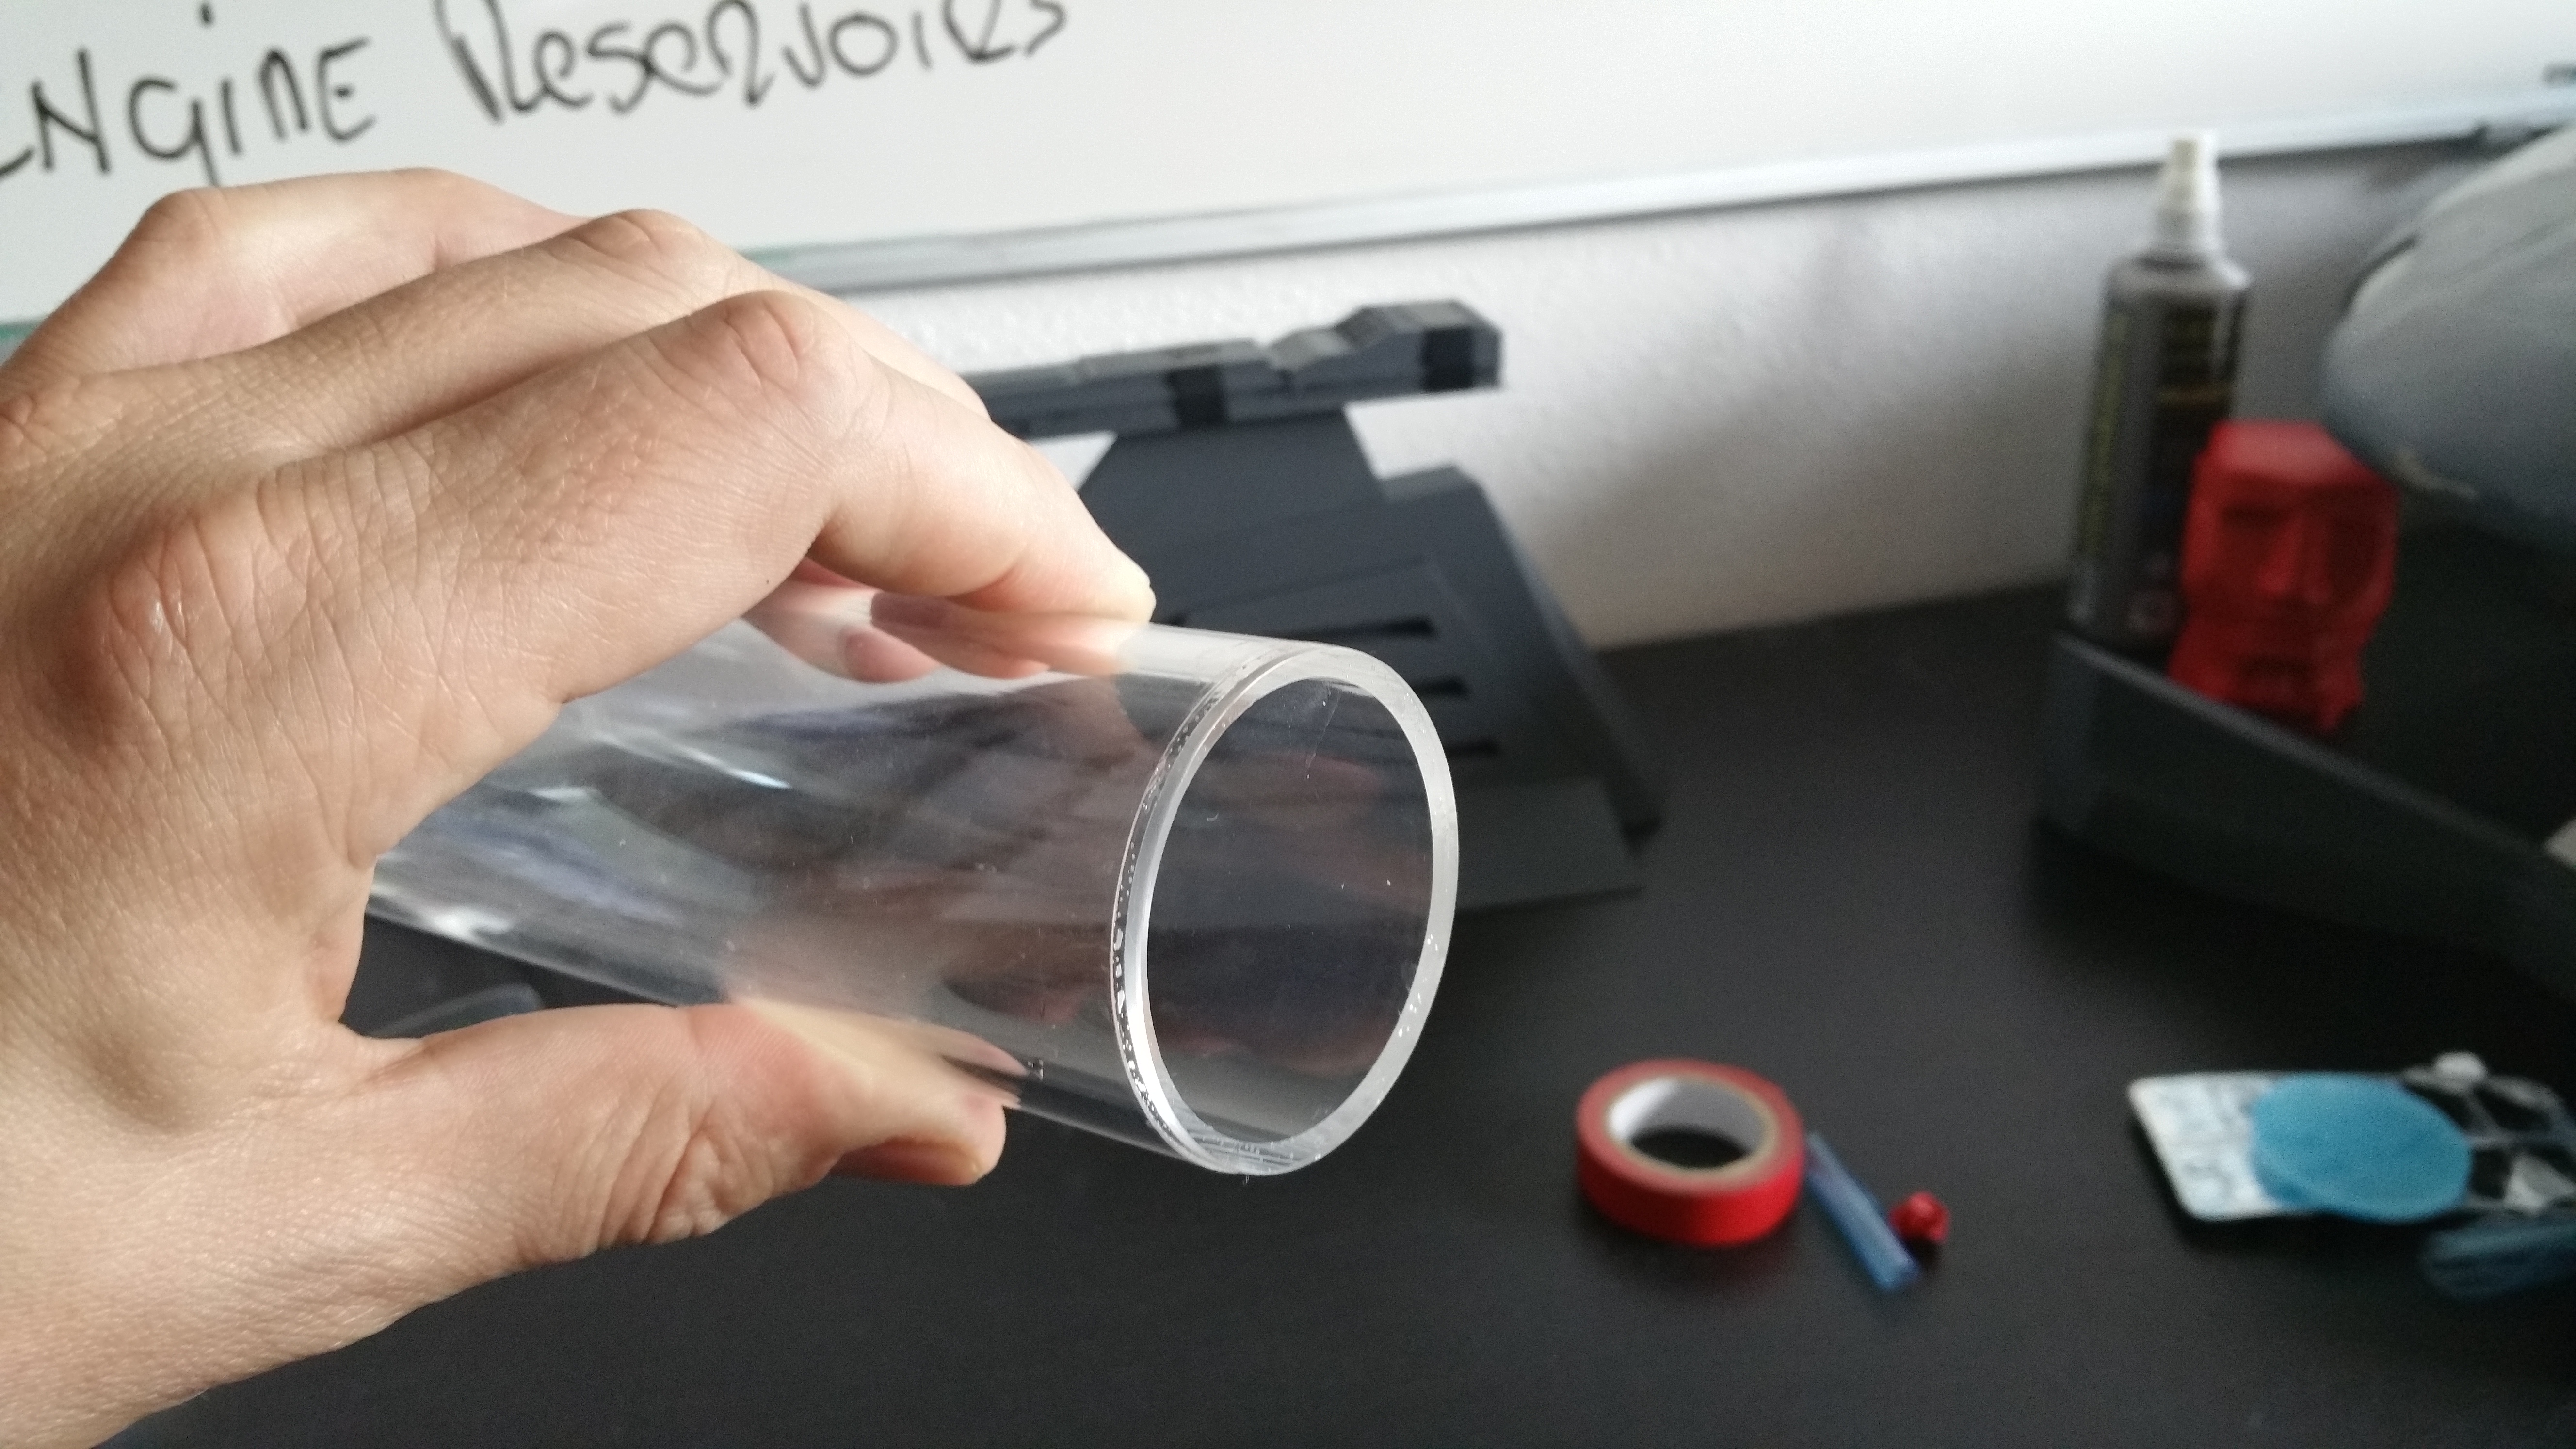
If you squirt out to much of the glue please do not be tempted to whipe it off as I intentionally did here.
The glue is so powerfull it will stain the acrylic. Just let it dry and use the previous method of sanding and polishing to clean it up.
As you can see here. Mind you, it will never become as transparant as it was so better safe then sorry!
Next up, drilling and tapping the G1/4 port.
I had a very hard time finding the correct drill as its a non standard size here in the netherlands.
Luckely I found the correct drill and tap over at the E22 store!
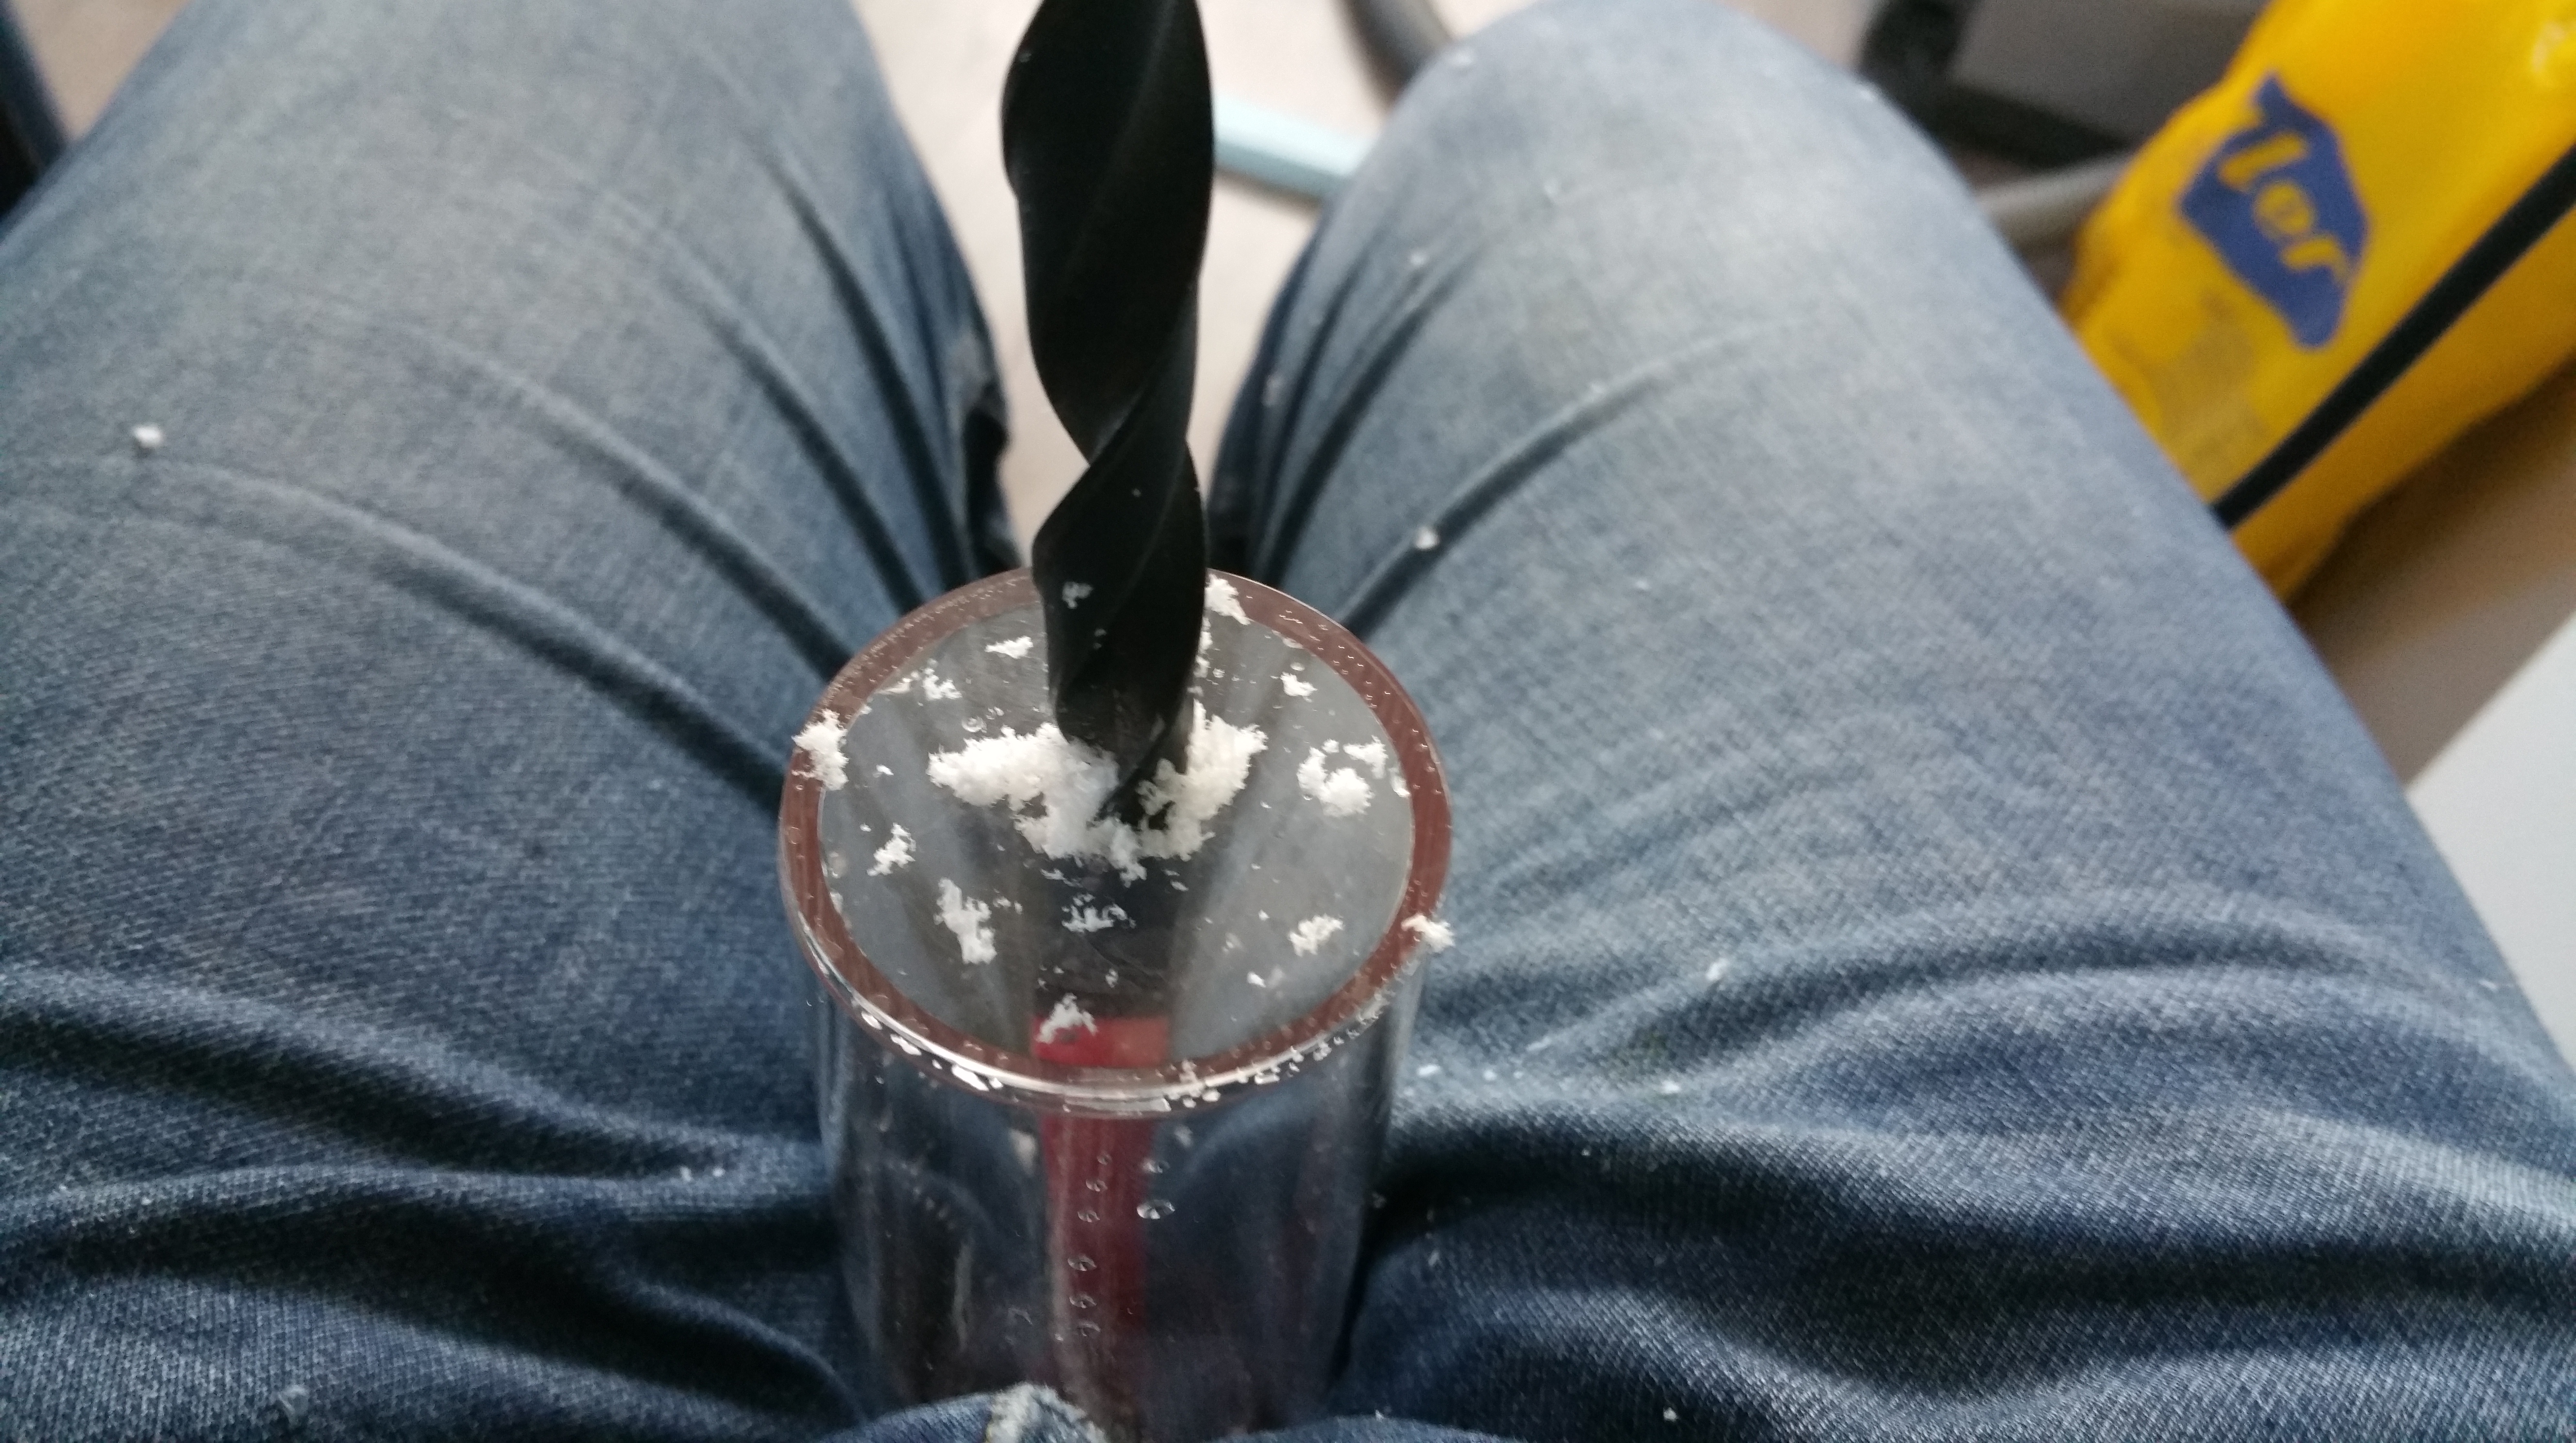
The human body and mind is perfectly capable of drilling perfectly straight but you can probably better do THIS .. with a vice or stationary drill.
The flakes you want is about the size above. Go very very slow, spinning to fast will melt the acrylic and ruin the reservoir.
Let gravity again do its work and blow away the flakes regularly from tube and vise.
WATCH OUT : The drill will lockup at some point , usually when almost through the acrylic. Be ready for it and immediately stop drilling.
Spin up the drill and gently push it down. The speed of the drill will remove the lockup part and you are cutting acrylic again!
Now onto tapping.
Again better to do this with a vice but you can do it by hand. Just takes some practise.
Drive the tap to about halfway , dont stop to soon, the fittings will like that ;-)
And two last tips ..
How to get those darned flakes out of the tube...
Do you know what the fastest way is to empty a bottle?
Fill the bottle with liquid and spin it so the liquid makes a vortex towards the cap. Air replacing the liquid inside will have a unobstructed way in while the water can get out.
Dont believe me, try it with a coke bottle!
Also, due to the vortex the flakes (lighter then water) will spin down in the center of the vortex and flush out in one go .. guaranteed!
And the last one : Simple Leaktest
Add the fittings and tube and for a leak test, keep one end of the tube closed off with a finger and blow on the tube on the other end.
Put the entire reservoir under water (use a bucket or a bath) and if you see bubbles, you got a LEAK!
(see if you can add some additional glue, if not start again unfortunately!)
And there you have it, your own tube reservoir.
Thanks for watching and if you like this DIY (or have some improvements or comments) leave me a comment.
Starting to think I am talking to myself here lol
Untill next time!
Mod-on
-
Re: ASPHIAX - VENATOR Class Republic Star Destroyer
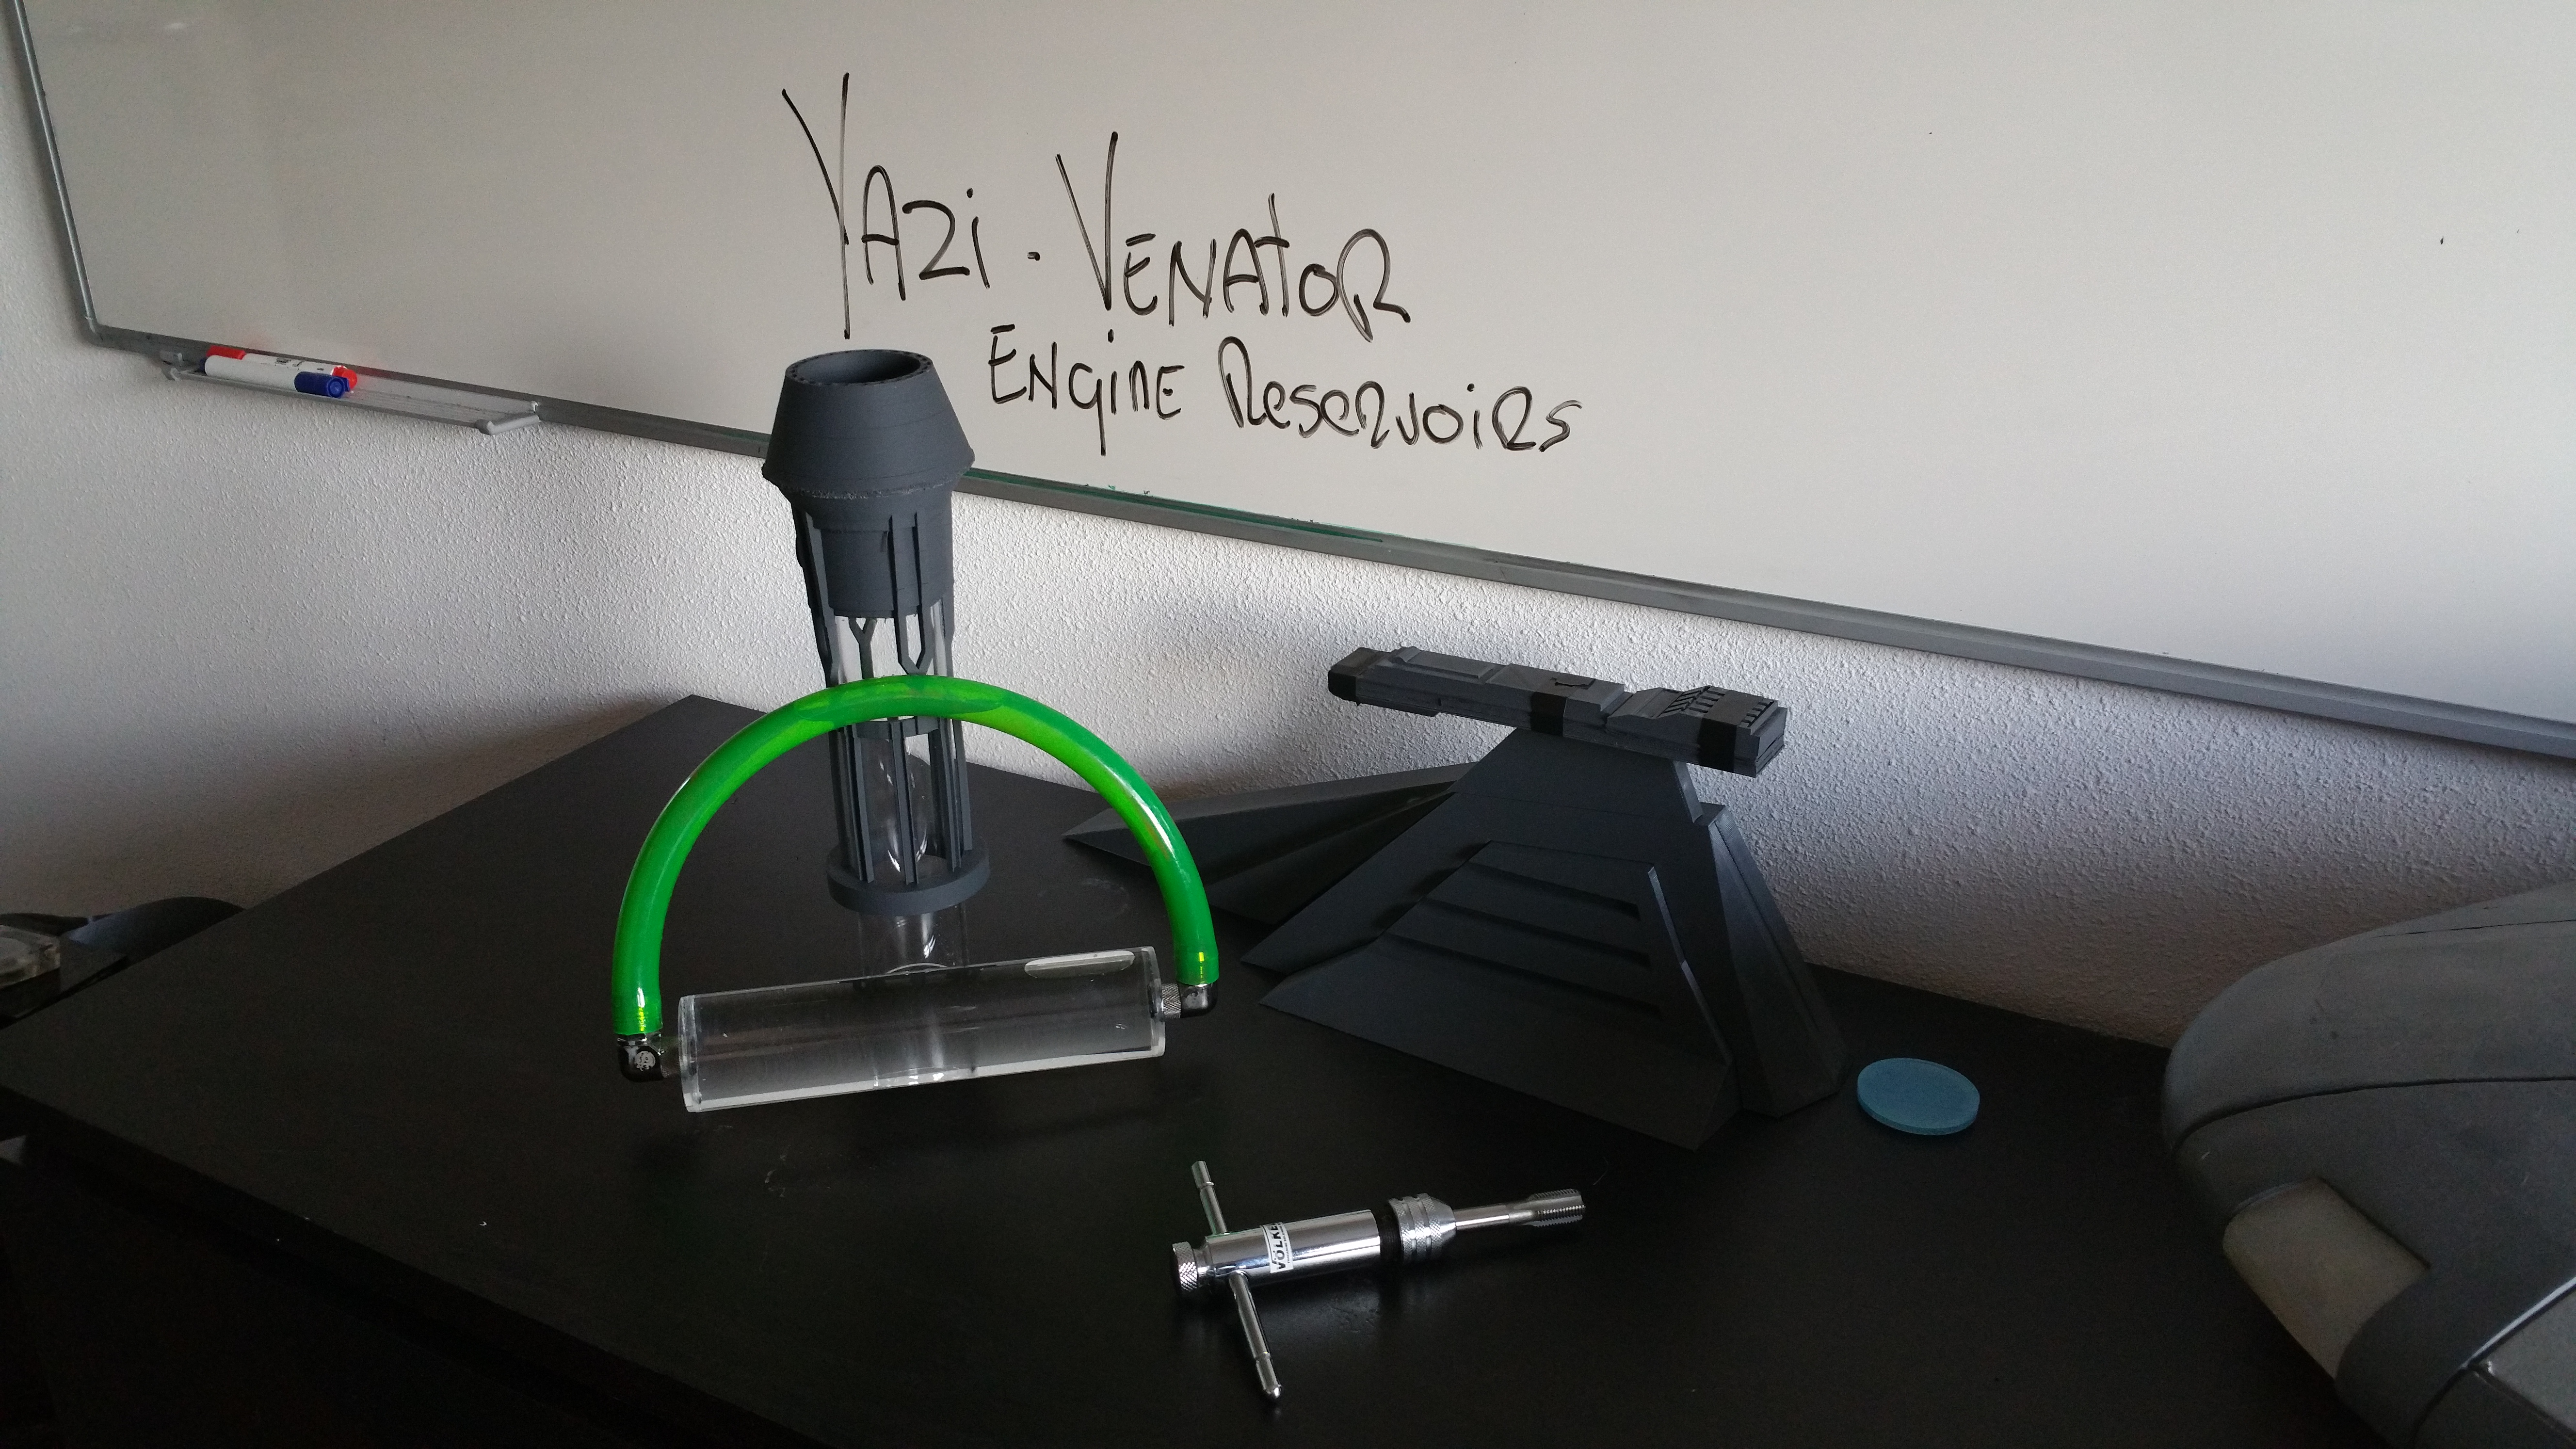
Did a quick test fitting of the reservoir. The resholder is very solid and has a good overall feel.
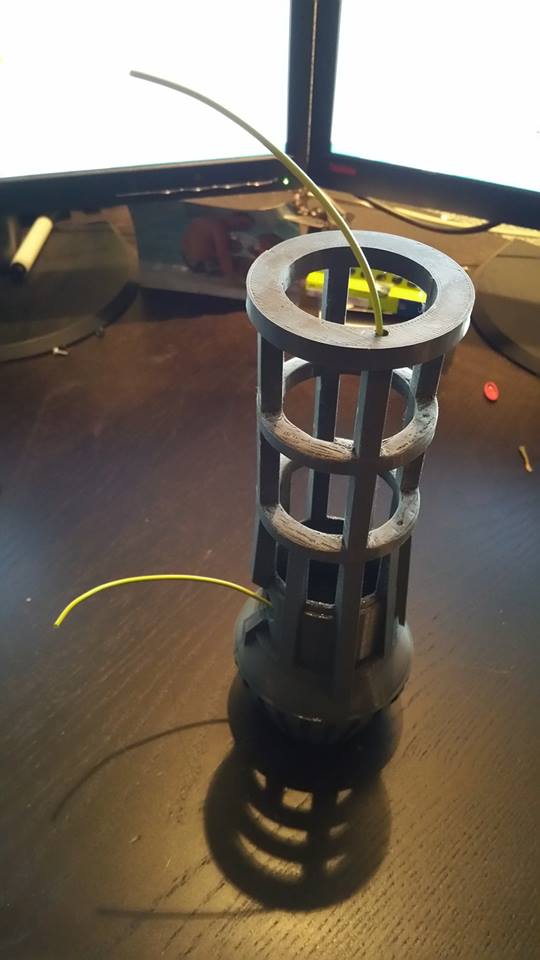
The benefit of designing with 3D is that just before the final version was ready to print I thought it might be handy to have a inbuilt LED wiring channel in one of the legs.
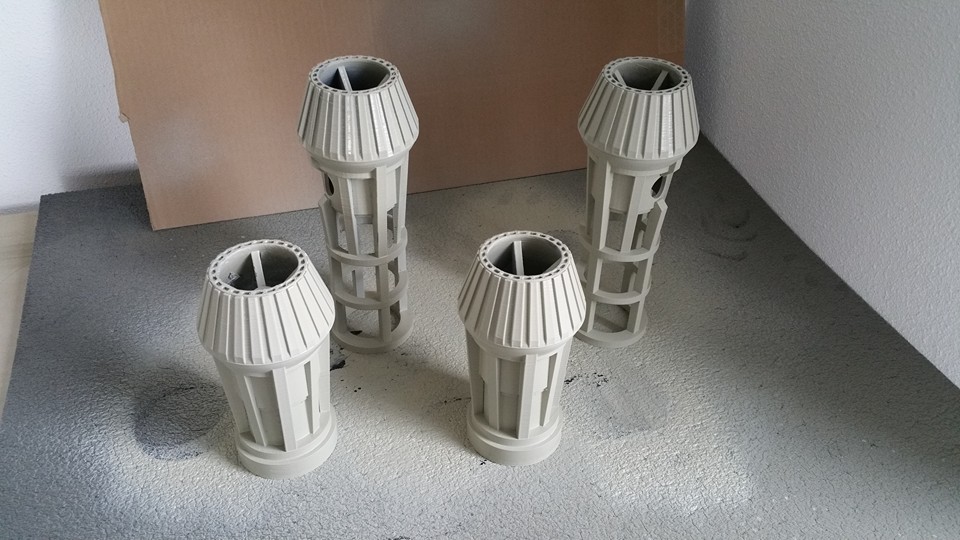
They are multiplying ...
And after so additional love and care they are now ready for airbrush and lighting !
Untill the next update !
-
Re: ASPHIAX - VENATOR Class Republic Star Destroyer
Looking good! What was the print time on those?
-
Re: ASPHIAX - VENATOR Class Republic Star Destroyer
The big ones about 20 hours, the small ones about 16.
That was with 0.20mm layers. I can go to 0.1mm layers. You can almost not see the printlines anymore then but it doubles the print time so was a trade off this.
-
Re: ASPHIAX - VENATOR Class Republic Star Destroyer
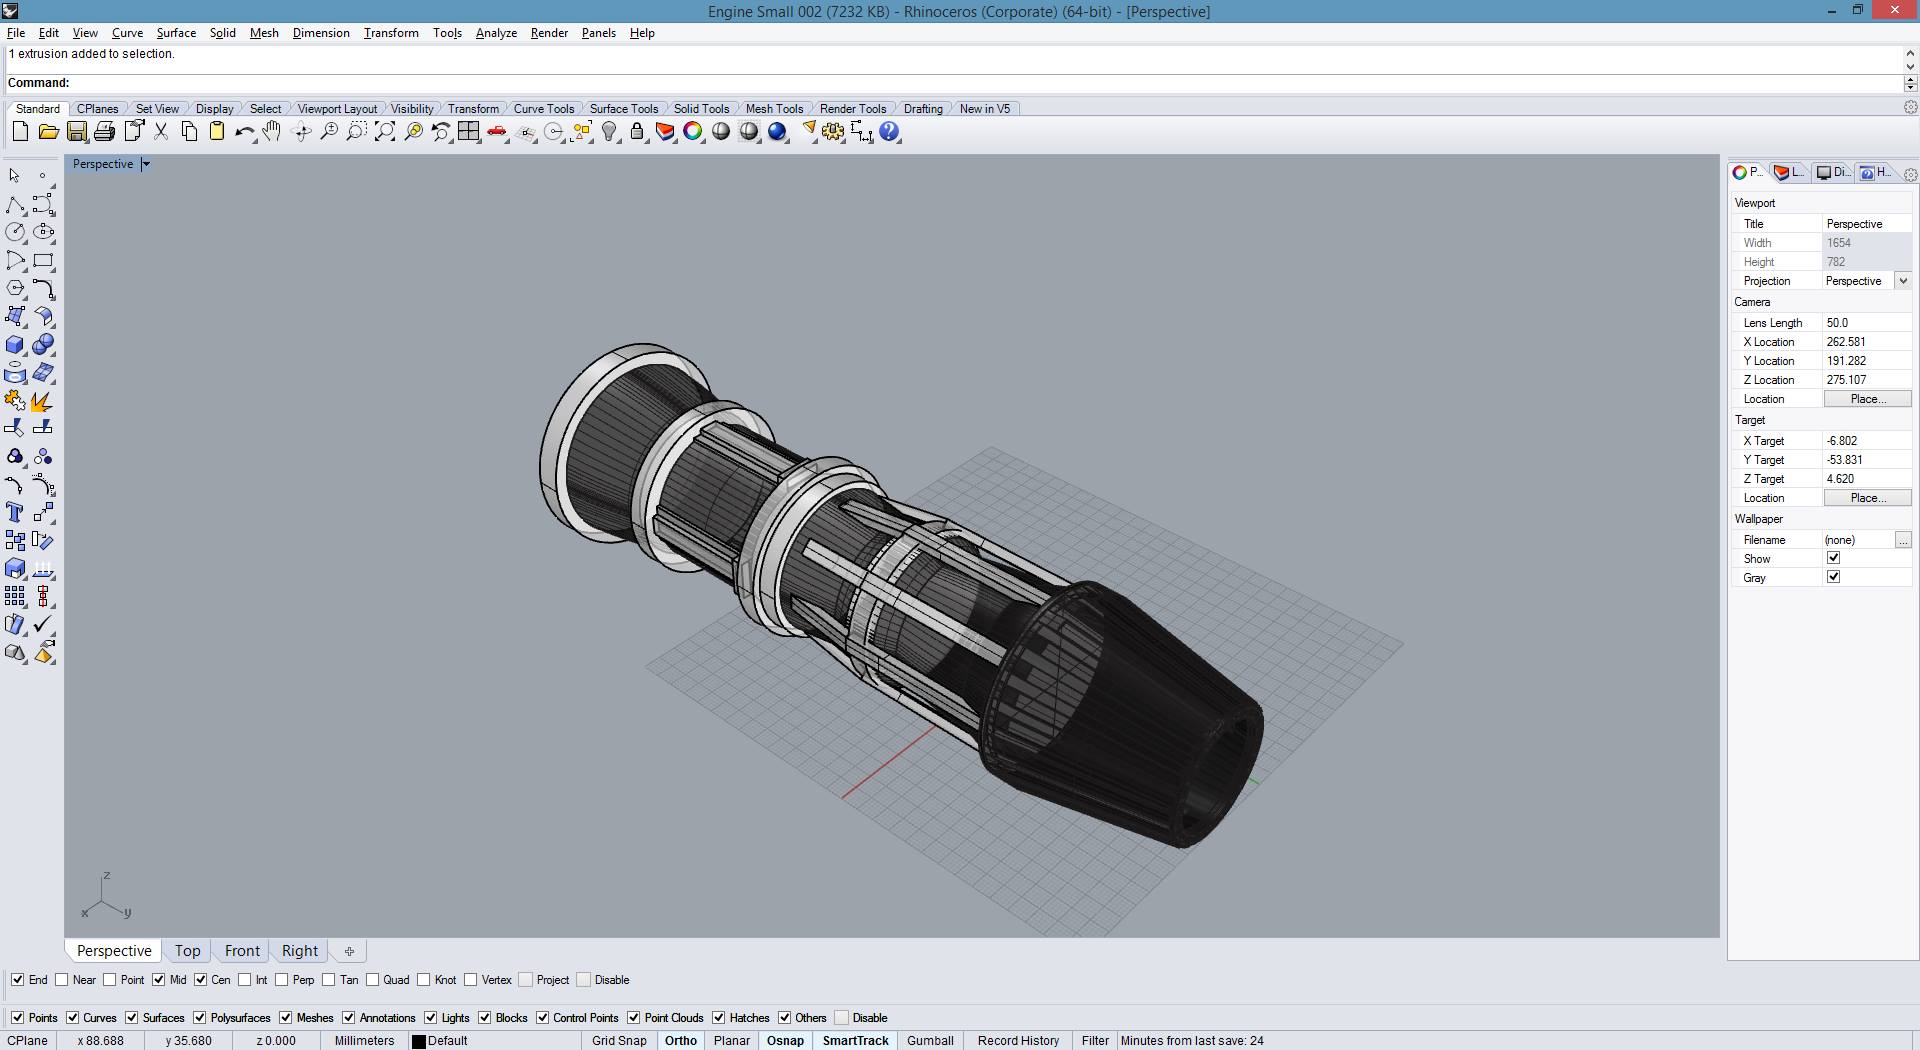
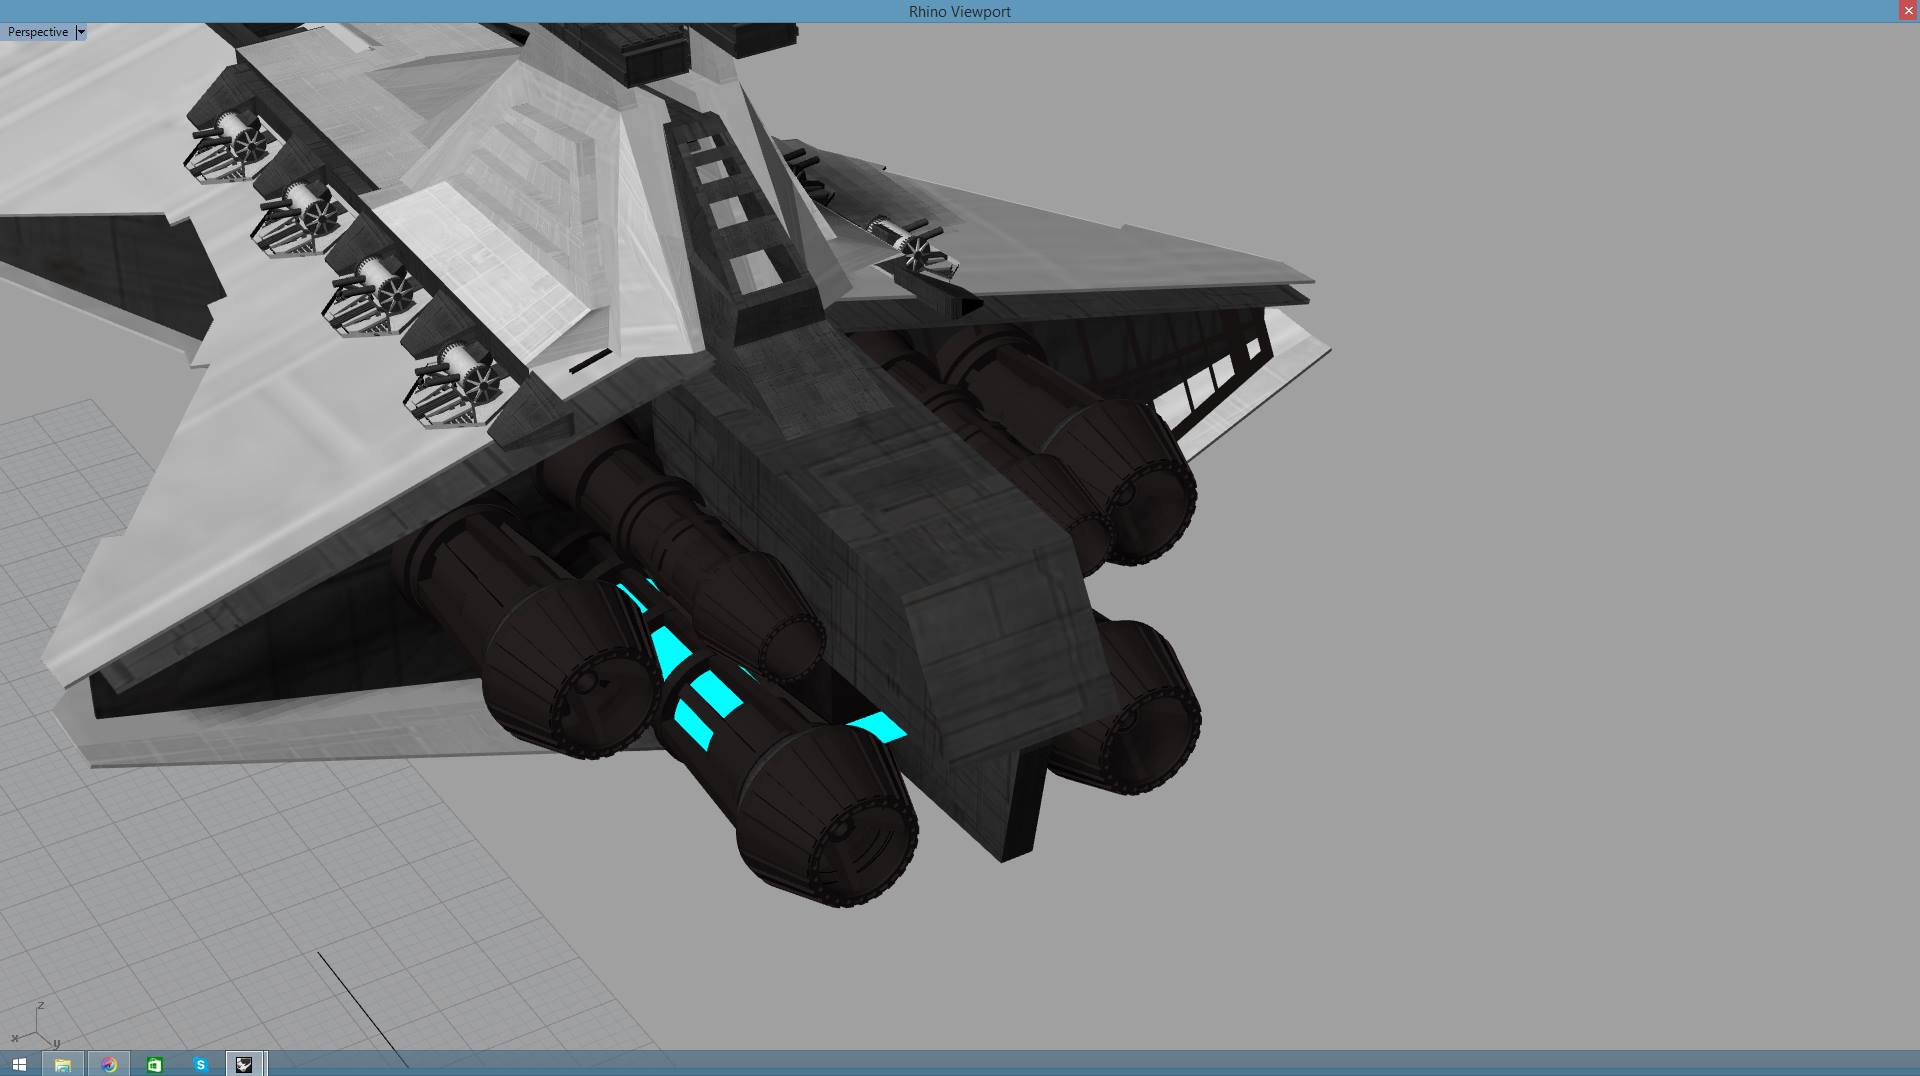
And finally the 3rd engine designed and printed !
The force is strong in your family ..
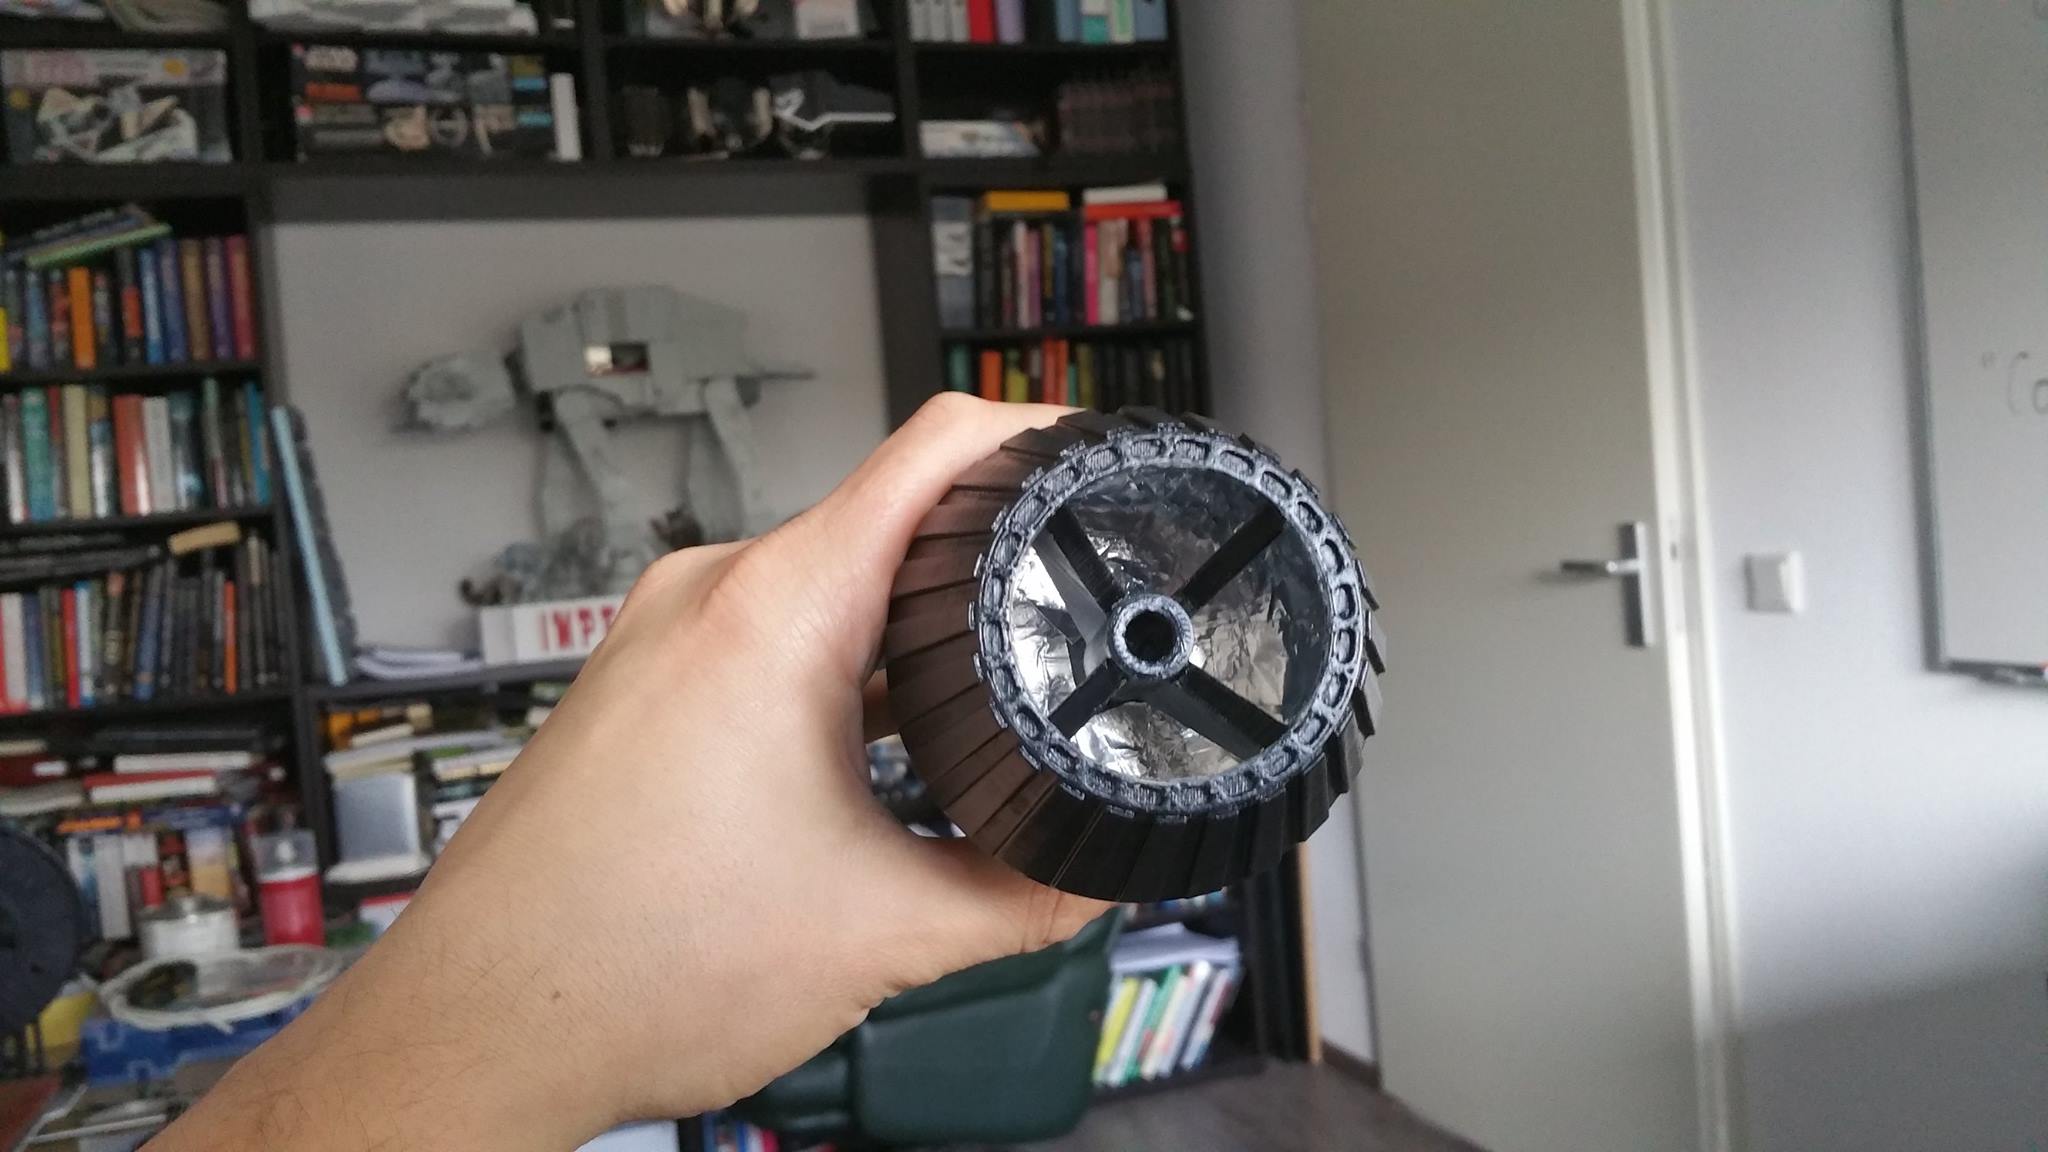
Also started on the lightplan for the YAZI by covering the internals of the engines with aluminum tape*
You know you are getting good progress when you start designing the hardware / internal structures of your build ..
-
Re: ASPHIAX - VENATOR Class Republic Star Destroyer
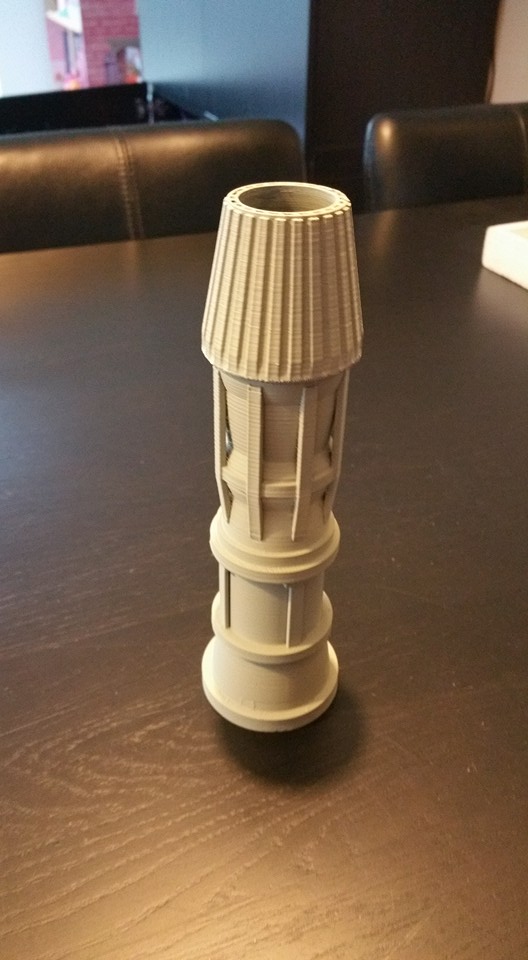
And to show what can go wrong if you design to fast and dont take enough time to properly analyse the part you have created in 3D.
Printing supersmooth, almost looks like a mirror with no feelable bumps or lines ...
Oh **** .. the 3D design is missing a single surface somewhere deep in the design ..
After some fidling and testing in the printsoftware it turned out ok ...
Why not use the misprint for a glue ....
Laters !
-
Re: ASPHIAX - VENATOR Class Republic Star Destroyer
Wow, you've really upped your game with this build! Thanks for showing us the process of the 3D printed parts, I'm finding it really neat to see how the pieces look and then how they fit into the design.
-
Re: ASPHIAX - VENATOR Class Republic Star Destroyer
Quote:
Originally Posted by
TheMainMan

Wow, you've really upped your game with this build! Thanks for showing us the process of the 3D printed parts, I'm finding it really neat to see how the pieces look and then how they fit into the design.
Thanks man! I have got to say that with this printer the creative energy flows freely.
I was planning on doing a timelapse from creating the 3D design to printing it to airbrushing it with some nice music behind it.
-
Re: ASPHIAX - VENATOR Class Republic Star Destroyer
-
Re: ASPHIAX - VENATOR Class Republic Star Destroyer
-
Re: ASPHIAX - VENATOR Class Republic Star Destroyer
"YAZI" - Venator Class Star Destroyer Greebles and Lighting update
So here we are with a new update. Time flies and I knew I had to get going on these two parts very soon.
The reason why the Star Wars ships (and others) look so "real" is because of the scale and the use of Greebles.
Greebles are the little structures and depth variations and shapes you see on the outside of the models.
That gives it the sense of scale and tricks the mind into saying, hey that looks like a hangar, but wait see how small it is compared to the whole ship.
Damn that ship must be HUGE !!
So I started greebling with the help of a friend of mine Mortum. He helped create all the little ingle structure types that I could combine to form larger structures.
Normally you would do this with parts of styrene from scalemodels and this is called kitbashing. I did it digitally lol.
Once I had the size I wanted, I overlayed it onto the model of the YAZI
And there we have the base structure of the armour panelling.
Then came the hard part. Creating shapes that resemble something that you can (probably) find on a starship.
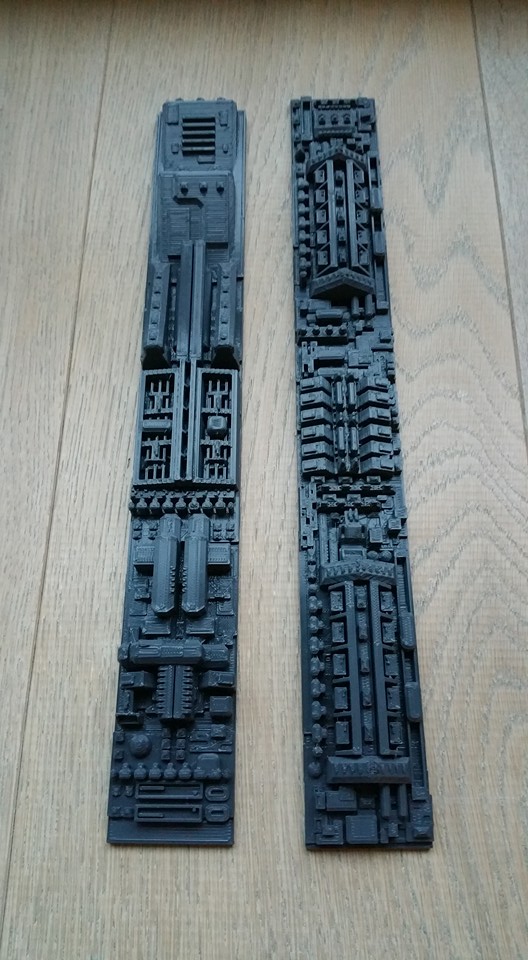
This 20 cm piece is the result of 8 hours scaling, cutting, removing, adding, rotating parts and pieces into new shapes.
Here is the end result. I love my 3D printer. Didnt expect it to come out this crisp.
Here you can also see what I mean with "It has to mean something"
This is the mechanism for the 2 Heavy and 3 medial proton torpedo launchers.
From right to left :
You have to have some type of generation apparatus (far right) , then the protons beams have to be aligned and injected into a collection chamber (middle)
Then you need to condense and accelerate the beams into torpedo shape for firing by the launchers on the far left.
So onto the next challenge, how to light the ship properly.
First attempts obviously failed.
Tried cutting into the printed PLA with a dremel but the end result was far from what I wanted.
If only I had some channels into which I can put the fibers for the light.
Oh wait ... Lets print that into the design...
In my opinion properly lighting is lighting which you can see when the light is off.
Offcourse you need some light point to accentuate certain parts but ..
Getting the holes into the PLA was proving a REAL challenge ..
Tried: dremel drill, Dremel with cnc mill, thin tipped solder iron, glowing wire, handdrill all didnt give the quality or speed needed to finish the project on time
PLA is different stuff compared to polystyrene thats for sure!
The answer : Good oldfashioned brute force. Use a very thin (just wider then your fiber) screwdriver and make sure you print the object the right way.
You have to just break through into the cavity of the internal structure and ou on the other side!
Only took about 3 days of testing methods to figure that one out. lol
But hey, its all fun and games right ...
You almost couldnt see the holes in the one of the previous pictures ..
Also had to change from 0.75mm to 1.5mm fiber cable as the 0.75 was way to small for this scale.
And i didnt have a 1mm screwdriver ;-)
I love that not only you can create beautifull things with the printer, but also practical things.
Here is a fiber to led coupling. with just enough room for the led (0.2mm space left) and room for 20 fibers that will be guided by the tapered internal structure of the coupling
to the exact degrees of the led beam (60 degrees in this case) The result optimal light usage and less power needed!
Well that was it for this one.
Welding the main body tonight so pretty stoked for the next update !
Let me hear your thoughts !
-
Re: ASPHIAX - VENATOR Class Republic Star Destroyer
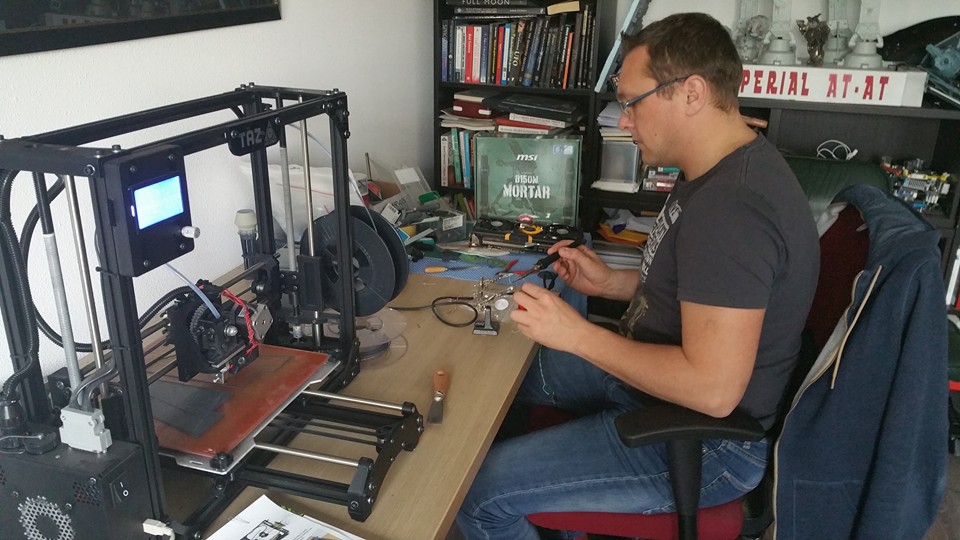
Finally it was time to do the work for the aluminum body!
And who better to check your work then one of the best aluminum builders, Pascal de Greef.
After driving to his house (20 minutes) I had the honour to sit and play around with his Next Level desk. What a piece of engineering. The lifts in the legs raised the whole desk up to my chin and all the way down to my knees. Build quality over 9000000!!!!
Almost reluctant we left his desk and house to start work on the body.
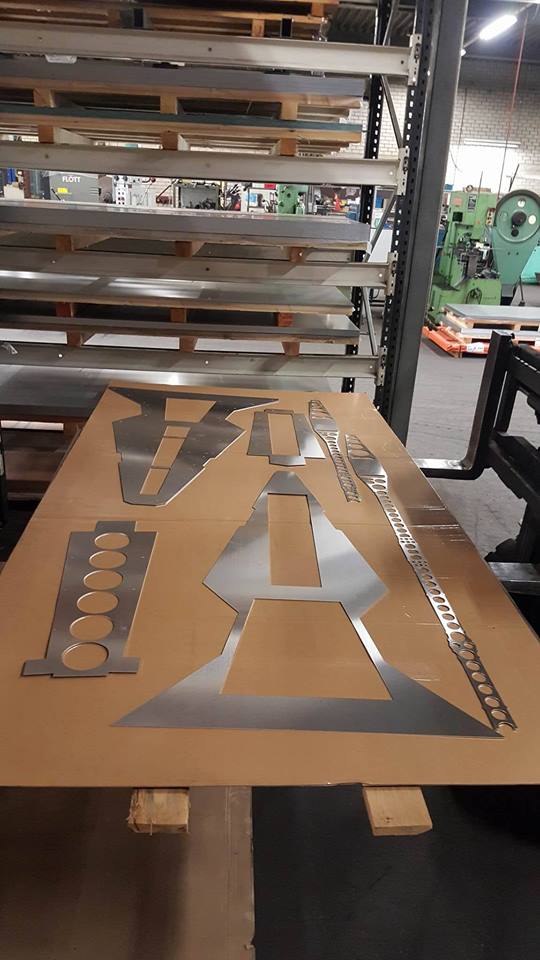
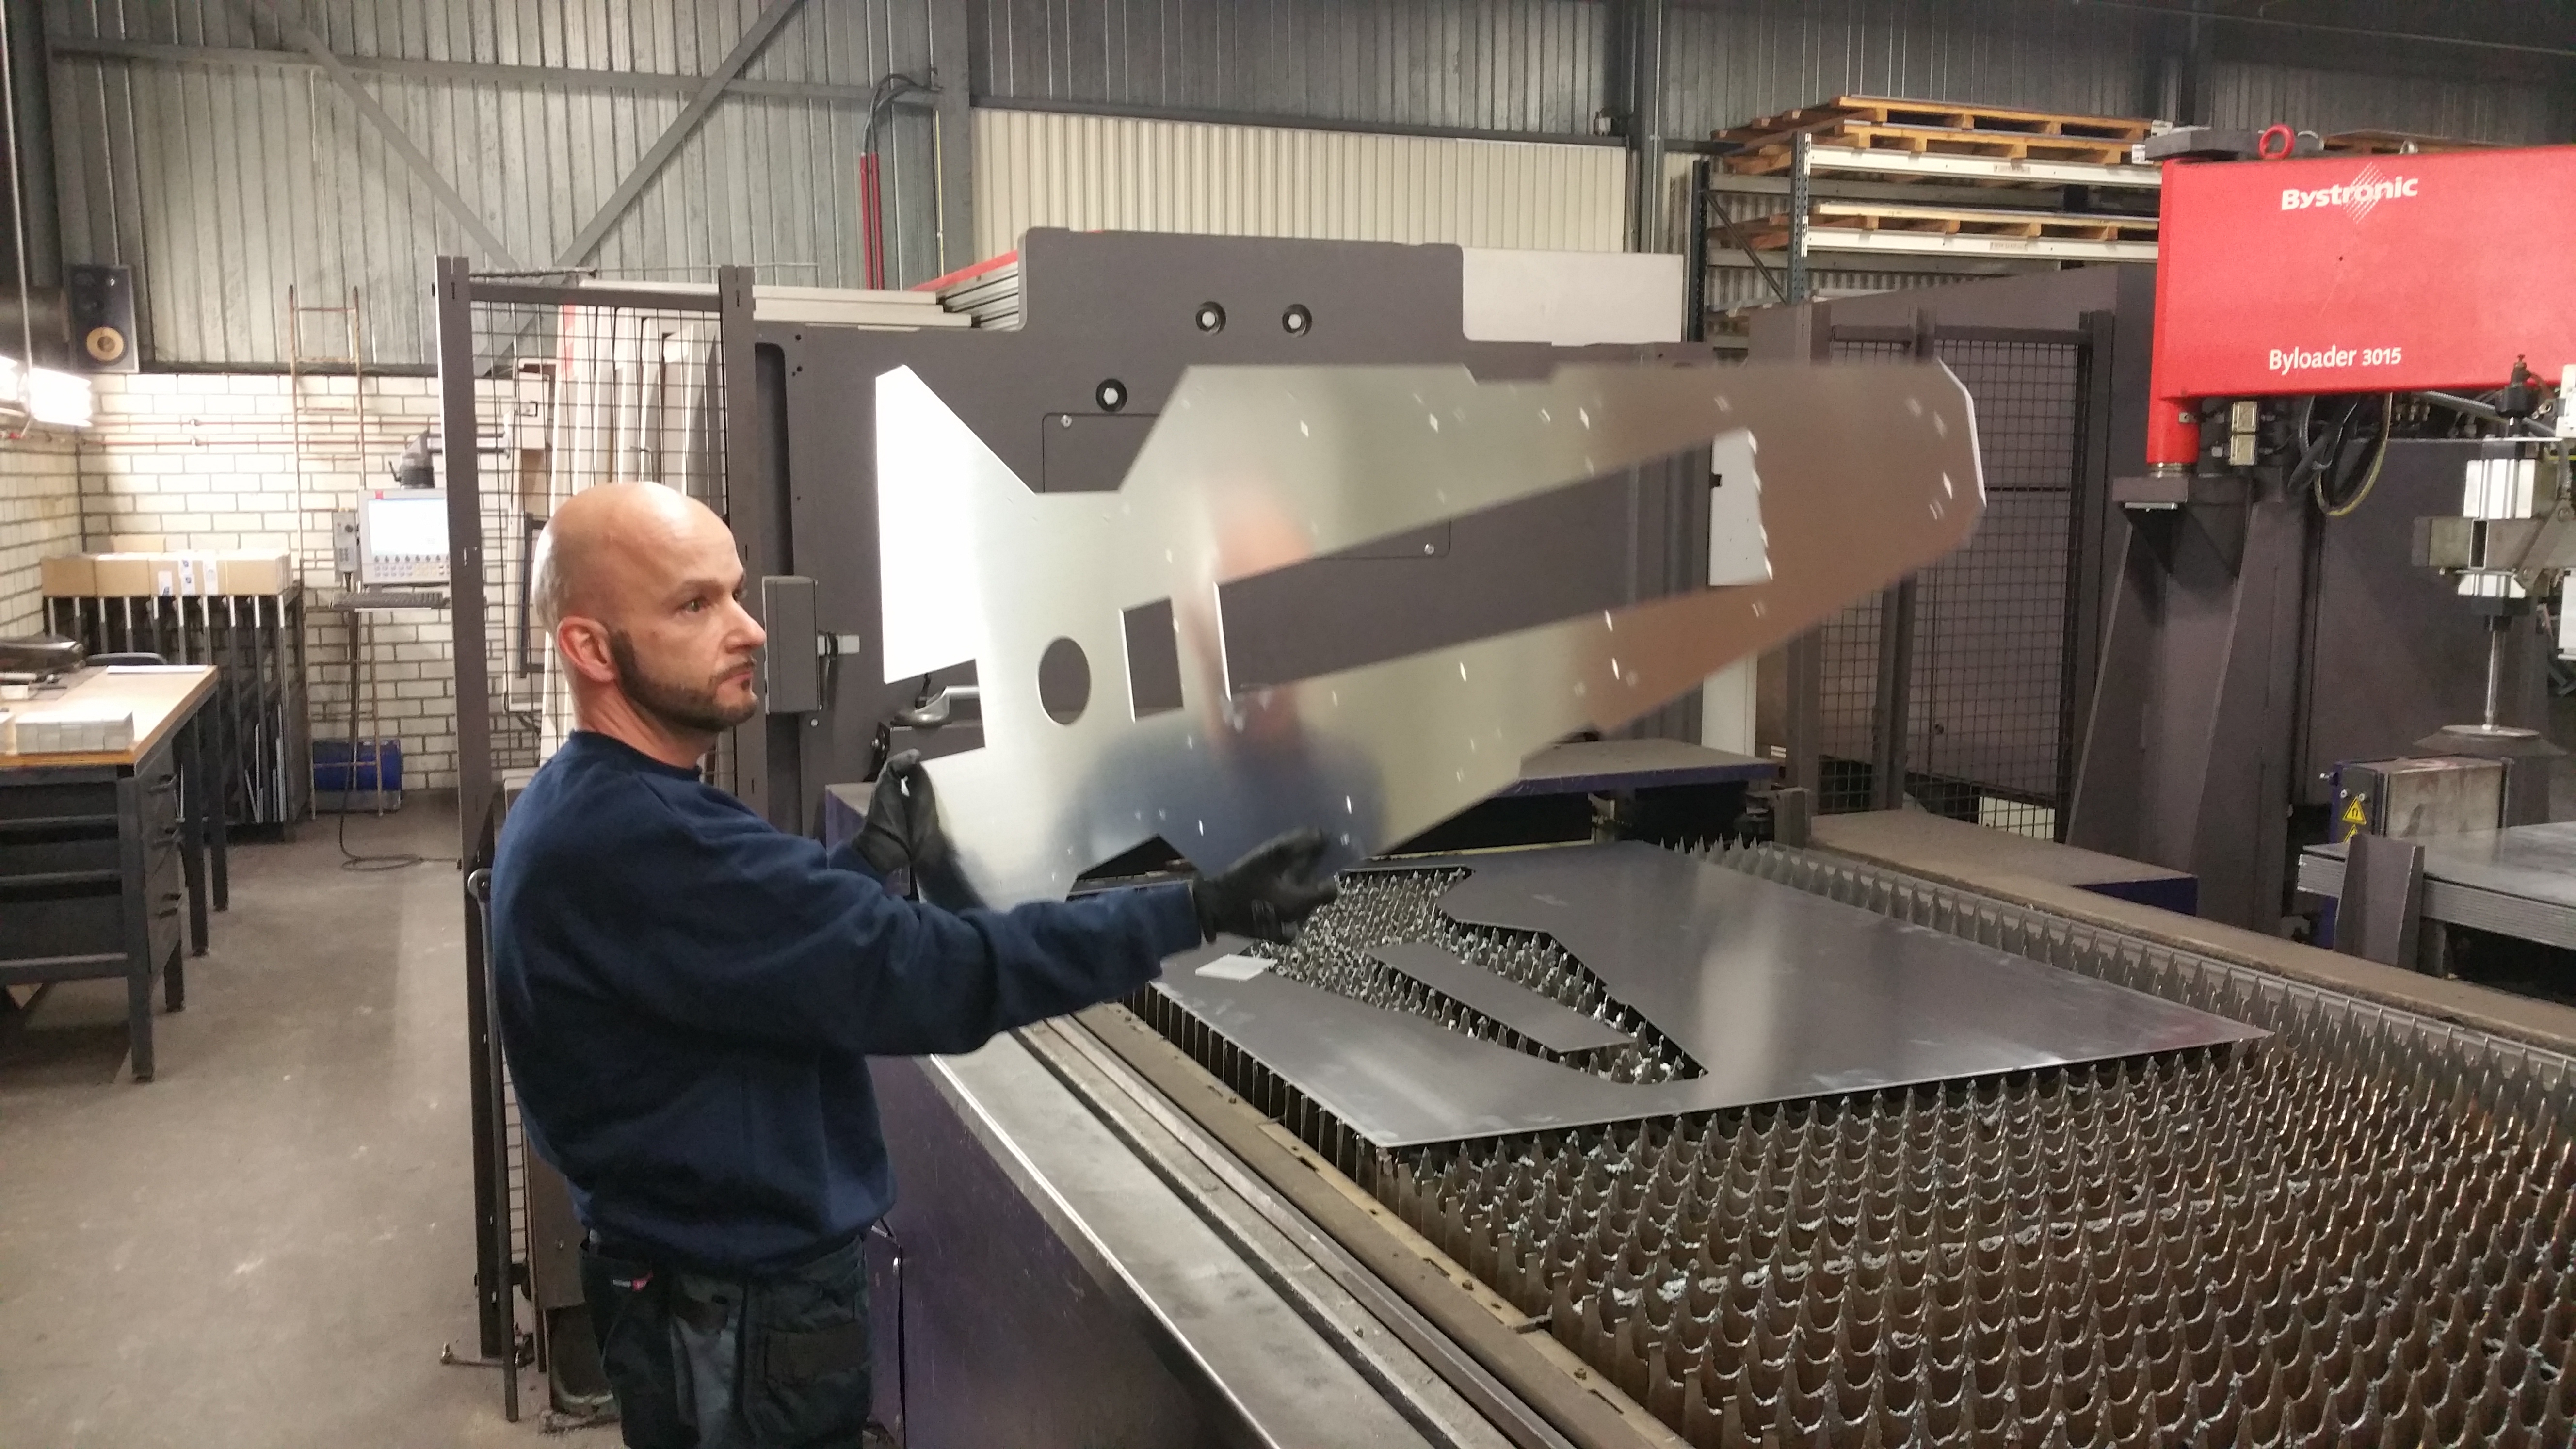
We had to cut just one last plate, the bottom hull ...
This is the beast. 20mm steel is nothing for this Nitrogen 6Kw flastbedlaser
The main man himself : Pascal De Greef!
Then we had to do some bending
I designed the hull parts with a Male/Female connector method. Easy aligning of the parts and you also have a got place to put the welds.
Folding the sides with the large amount of holes cut out proved to be a challenge as we had to do that by hand. Learning so much about this design. Got at least 15 points of improvements for the next one (wait whut ??? That comes later ;-) )
Finally all the correct pieces in place. And you can see we had to change welding method from MIG to TIG as it was putting to much heat into the aluminum and the test pieces deformed pretty easily.
Full 3 mm aluminum next time!
To cover up all the unattractive parts I also designed a midplate which will have a black and white vinyl decoration.
https://scontent-ams2-1.xx.fbcdn.net...fe&oe=56EE8182
I truly felt like Anakin building his podracer in part 1.
https://scontent-ams2-1.xx.fbcdn.net...23&oe=56E13A0C
I dropped off Pascal at 3.30 am and got home at 4 am.
Thanks Pascal, your work and help really meant a lot to me. You are truly a gifted person!
The kids woke me up at 6 to find all the parts in the living room.
The fan/radiator cage I had to design to make sure there was proper airflow!
And there we have the whole YAZI built up for a test fitting.
So happy to be at this stage already but SO much more work to do in just a few weeks now.
Also all the parts of the system are starting to show up !
First the beautifull B150M Mortar by MSI and the 1200 toughpower grand by thermaltake!
Then the well designed AVEXIR 2400 Blitz DDR4 16GB RAM kit.
Cant wait to light these babies up!
Then a beautifull black and white mouse and keyboard by Ttesports.
And Finally a whole assortement of thermaltake fittings, Pacifice W1 CPU cooller, P1 Pump with silent kit, Tubler Petg tubing and whatnot...
I feel blessed to have such a group of great sponsors that believe in my ability and have enabled me to build this dream of mine! Hats off to you!
Now to start printing the Venator "Skin"
Laters!
:dremel:
-
Re: ASPHIAX - VENATOR Class Republic Star Destroyer
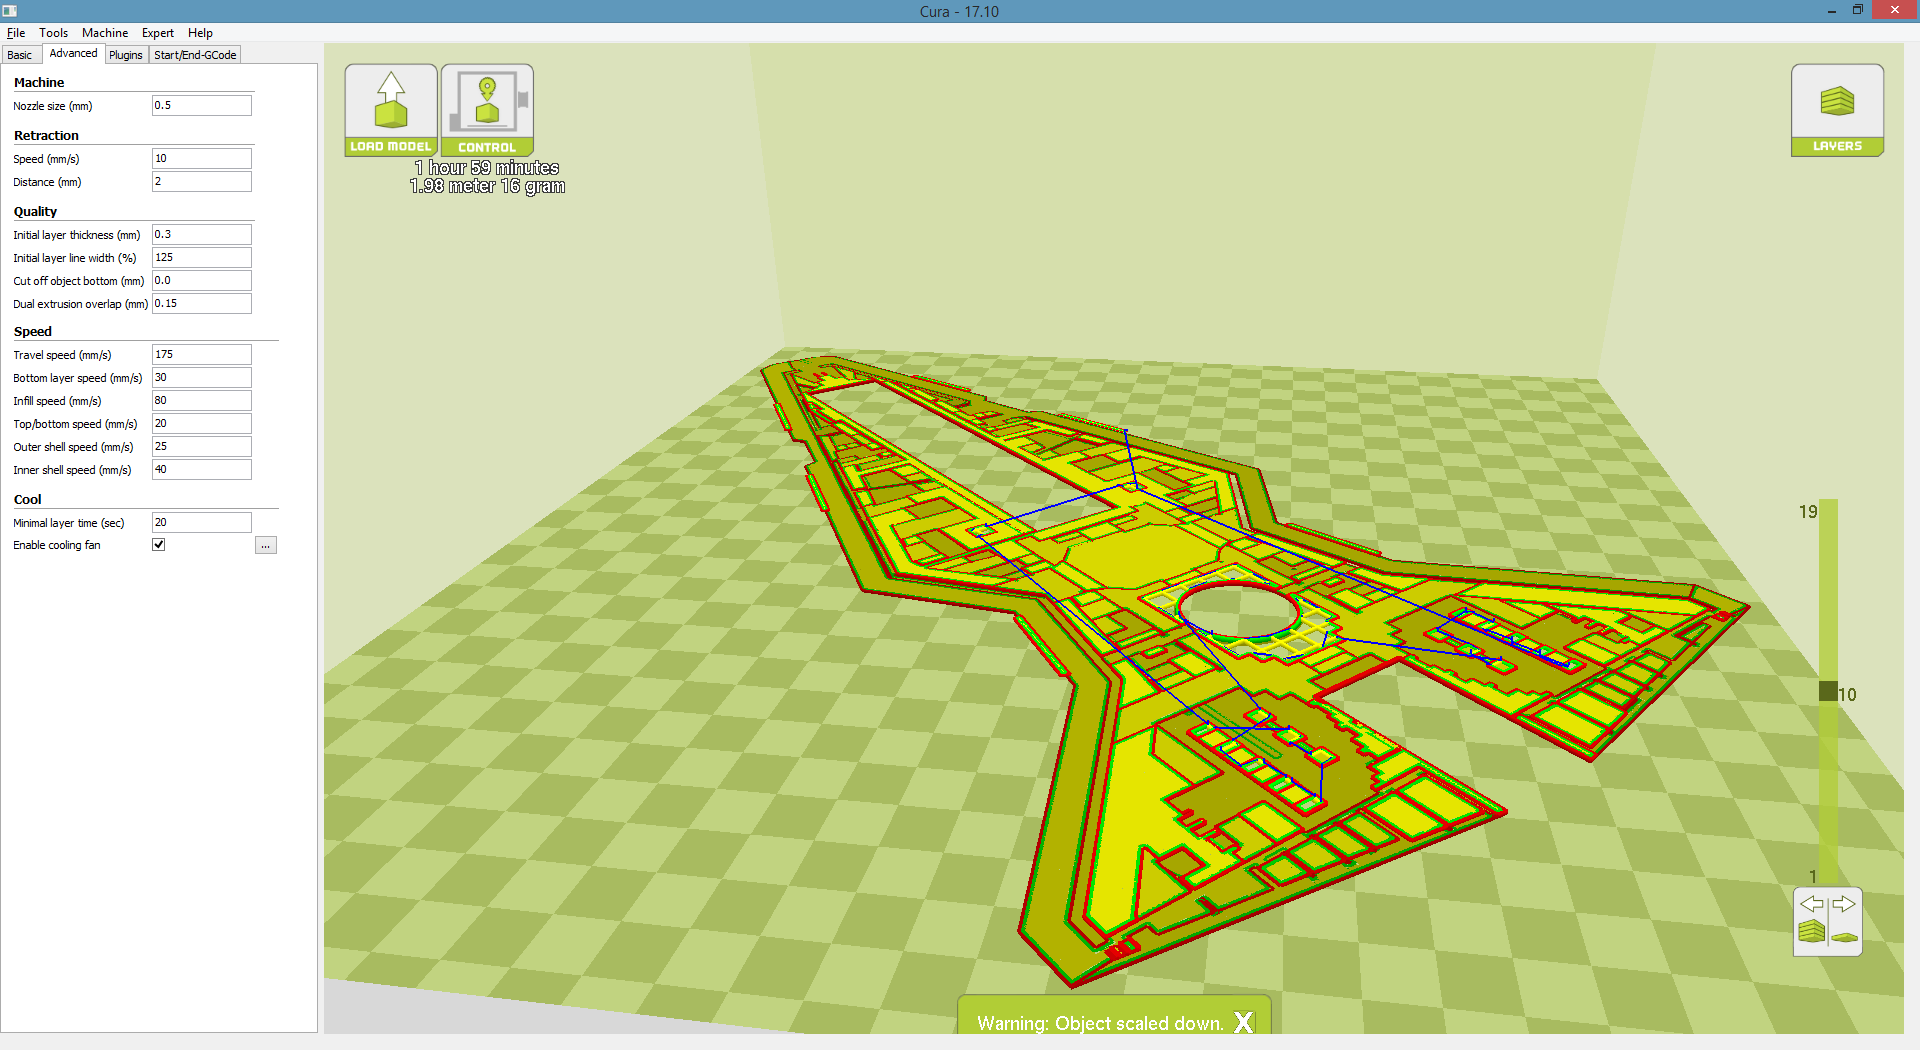
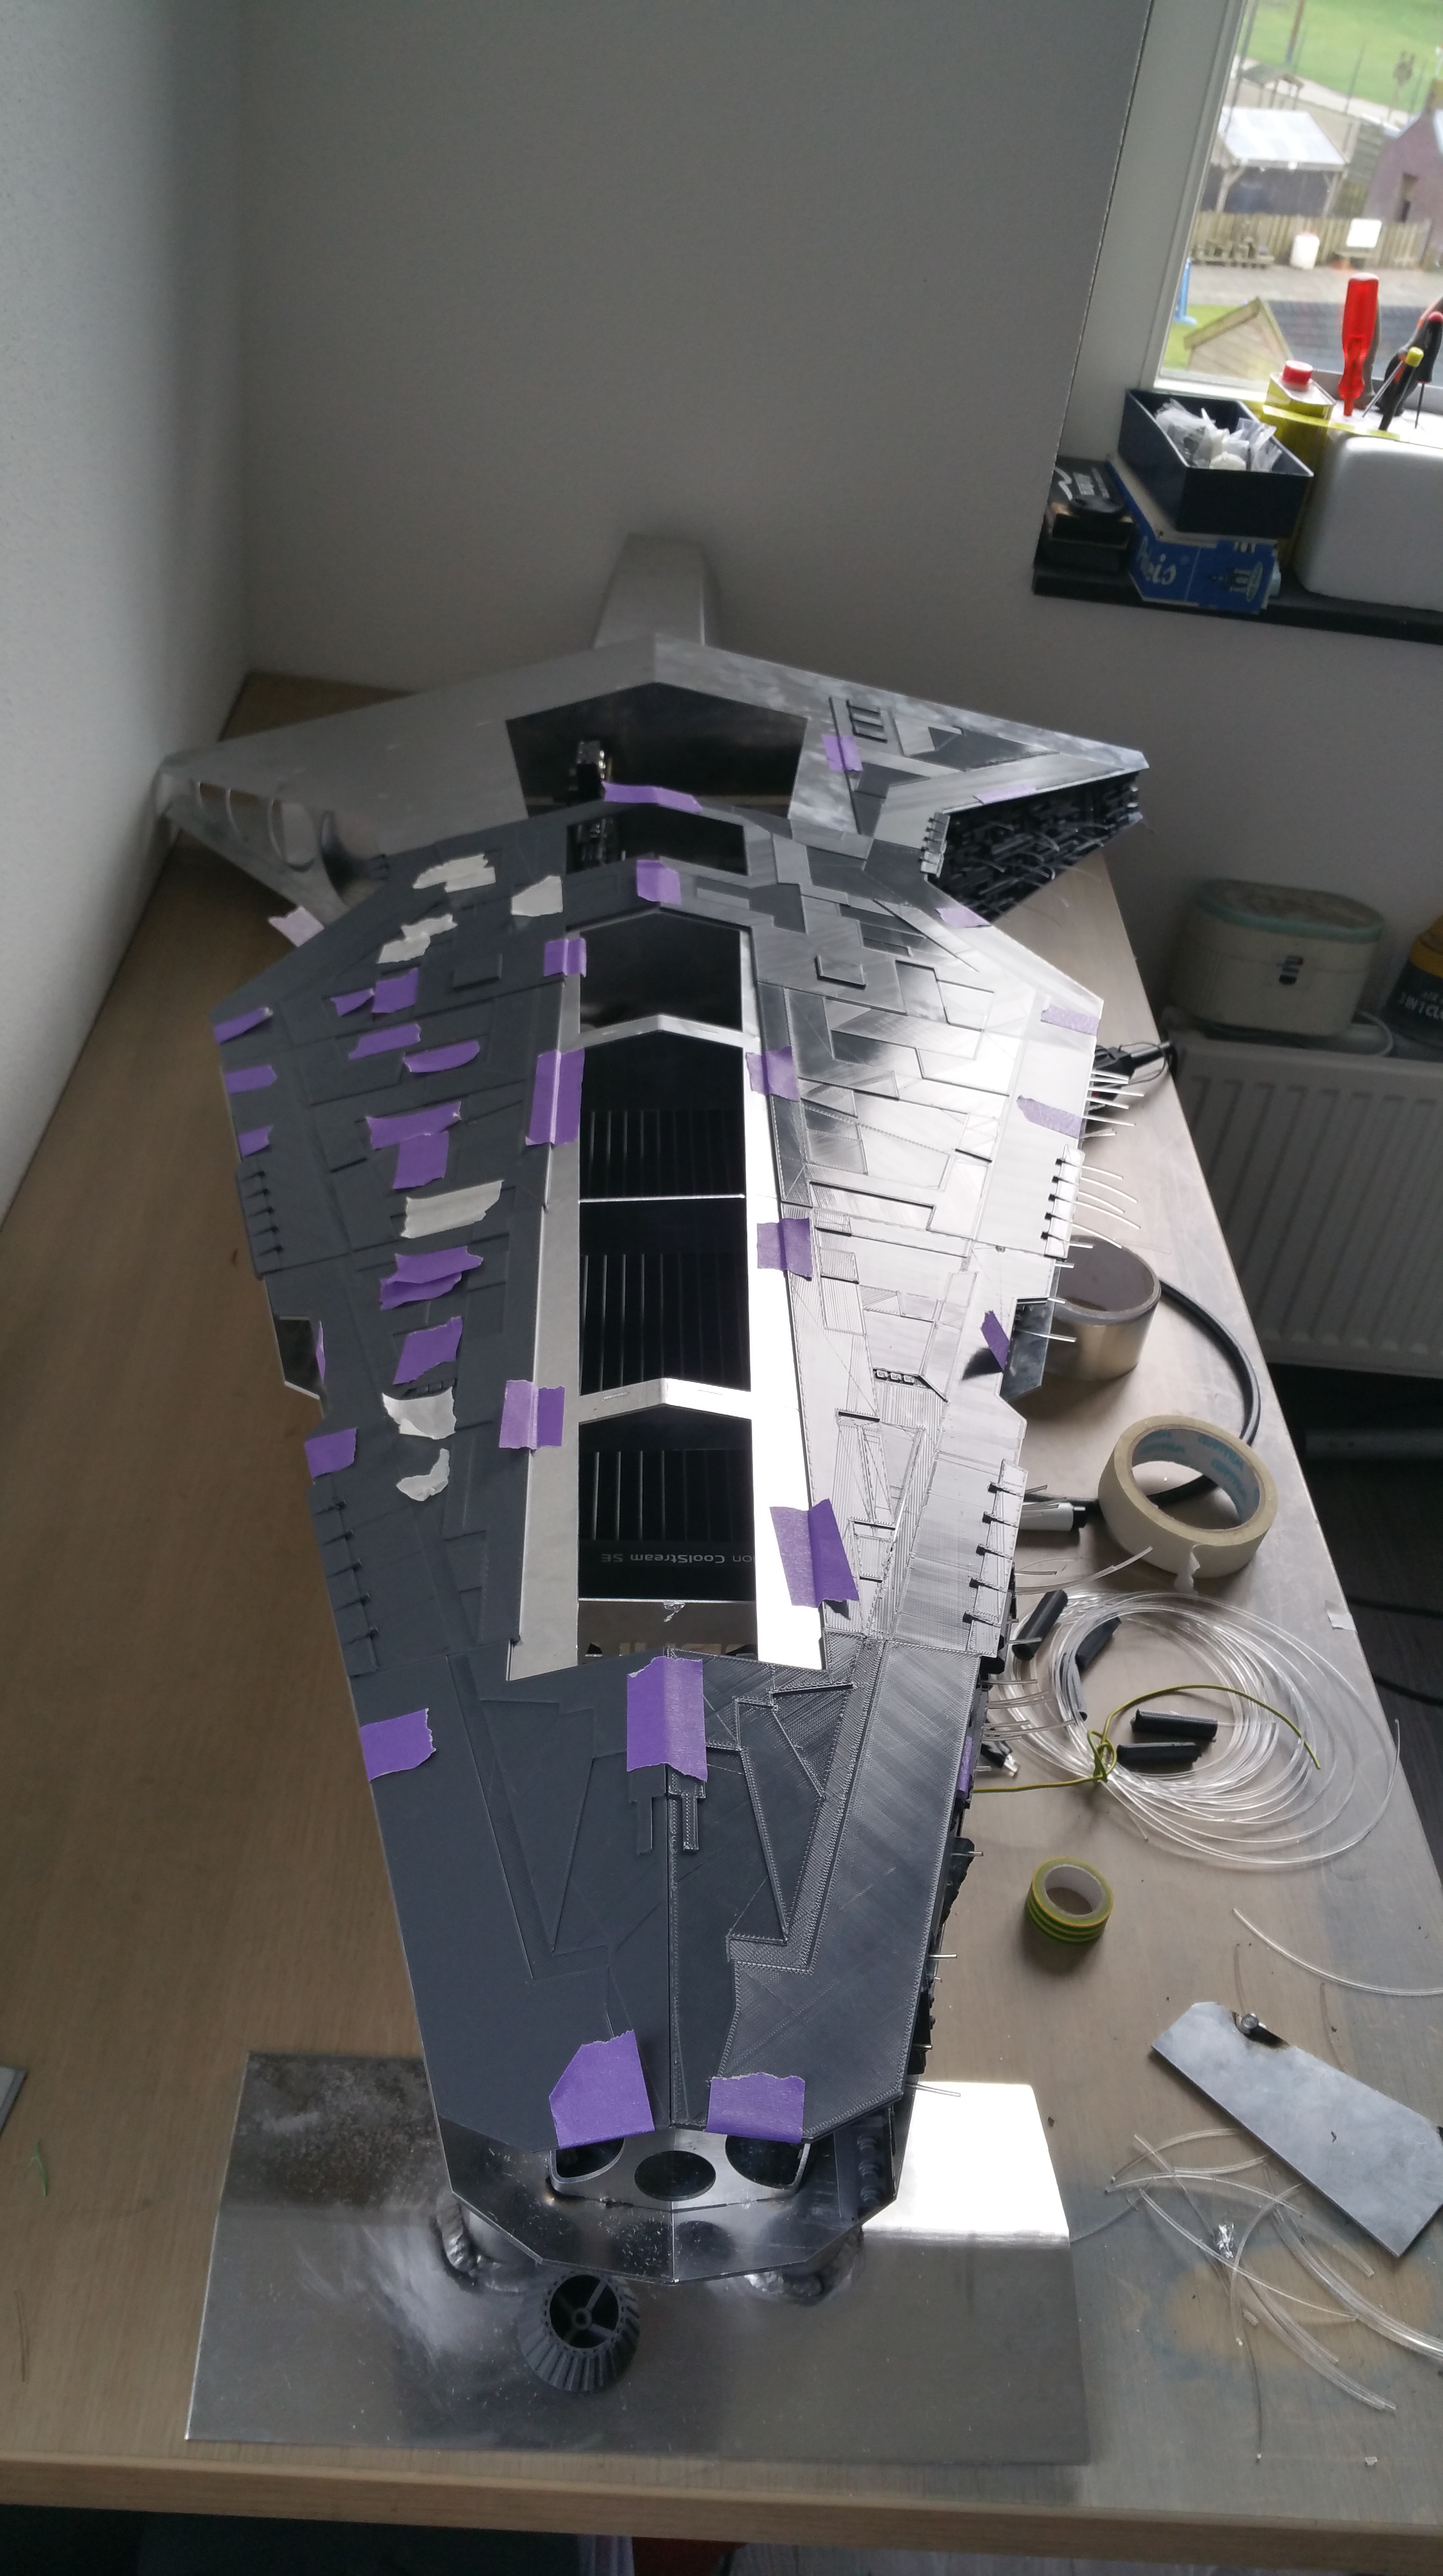
Now on the printer ..
A miniature (20% of original) exterior hull
-
Re: ASPHIAX - VENATOR Class Republic Star Destroyer
Umm .. words seem to fail me at the moment.....
-
Re: ASPHIAX - VENATOR Class Republic Star Destroyer
Quote:
Originally Posted by
OvRiDe
Umm .. words seem to fail me at the moment.....
That bad huh?
I came to this forum when I came across Paul Capello's work online.
His vision and craftmanship is what I always admired.
He always told the whole story with his mods. Such an inspiration.
I didnt know you could do this with computers. Hooked ever since..
-
Re: ASPHIAX - VENATOR Class Republic Star Destroyer
Man I just saw a photo of this that was shared on Facebook! This is one of those mods that goes down in the history books with the likes of Paul Capello, Tribal Overkill, Boddaker, and Dyfiant! Nice work with the Taz as well. I have a couple of Lulzbot printers, and have been a loyal fan of their from the beginning. Keep up the good work, and I can't wait to see this finished.
-
Re: ASPHIAX - VENATOR Class Republic Star Destroyer
Quote:
Originally Posted by
Oneslowz28
Man I just saw a photo of this that was shared on Facebook! This is one of those mods that goes down in the history books with the likes of Paul Capello, Tribal Overkill, Boddaker, and Dyfiant! Nice work with the Taz as well. I have a couple of Lulzbot printers, and have been a loyal fan of their from the beginning. Keep up the good work, and I can't wait to see this finished.
Thank you! Those guys are my all time favorites. They pushed the boundries of PC architecture so far.
I am honoured you would consider me in the same ballpark as them lol.
Just another couple of weeks remaining so time is running short .. As usual ..
-
Re: ASPHIAX - VENATOR Class Republic Star Destroyer
Funny little print, just scaled the top layer a bit too much!
You know what the fun part about 3D printing is?
There's always something sweet waiting for you when you wake up.
Result of the 2nd greeble sessie !
-
Re: ASPHIAX - VENATOR Class Republic Star Destroyer
Final result of the second greeble session, session 3 is already in its 16th hour of printing .. Only a few more !
Greeble session no 003
Whats next ???
-
Re: ASPHIAX - VENATOR Class Republic Star Destroyer
I was so stressed for this print. At 3/4 into the print (16 hours) i started to notice the amount of filament on the spool was growing thin .
With the filament already in the guiding tube of the printer, it was finished at 20 hours with about 70cm of filament left ... Pfew ...
This will be the last picture update for a little while.
Need to slow down a bit and enjoy the music more.
-
Re: ASPHIAX - VENATOR Class Republic Star Destroyer
In the meantime ...
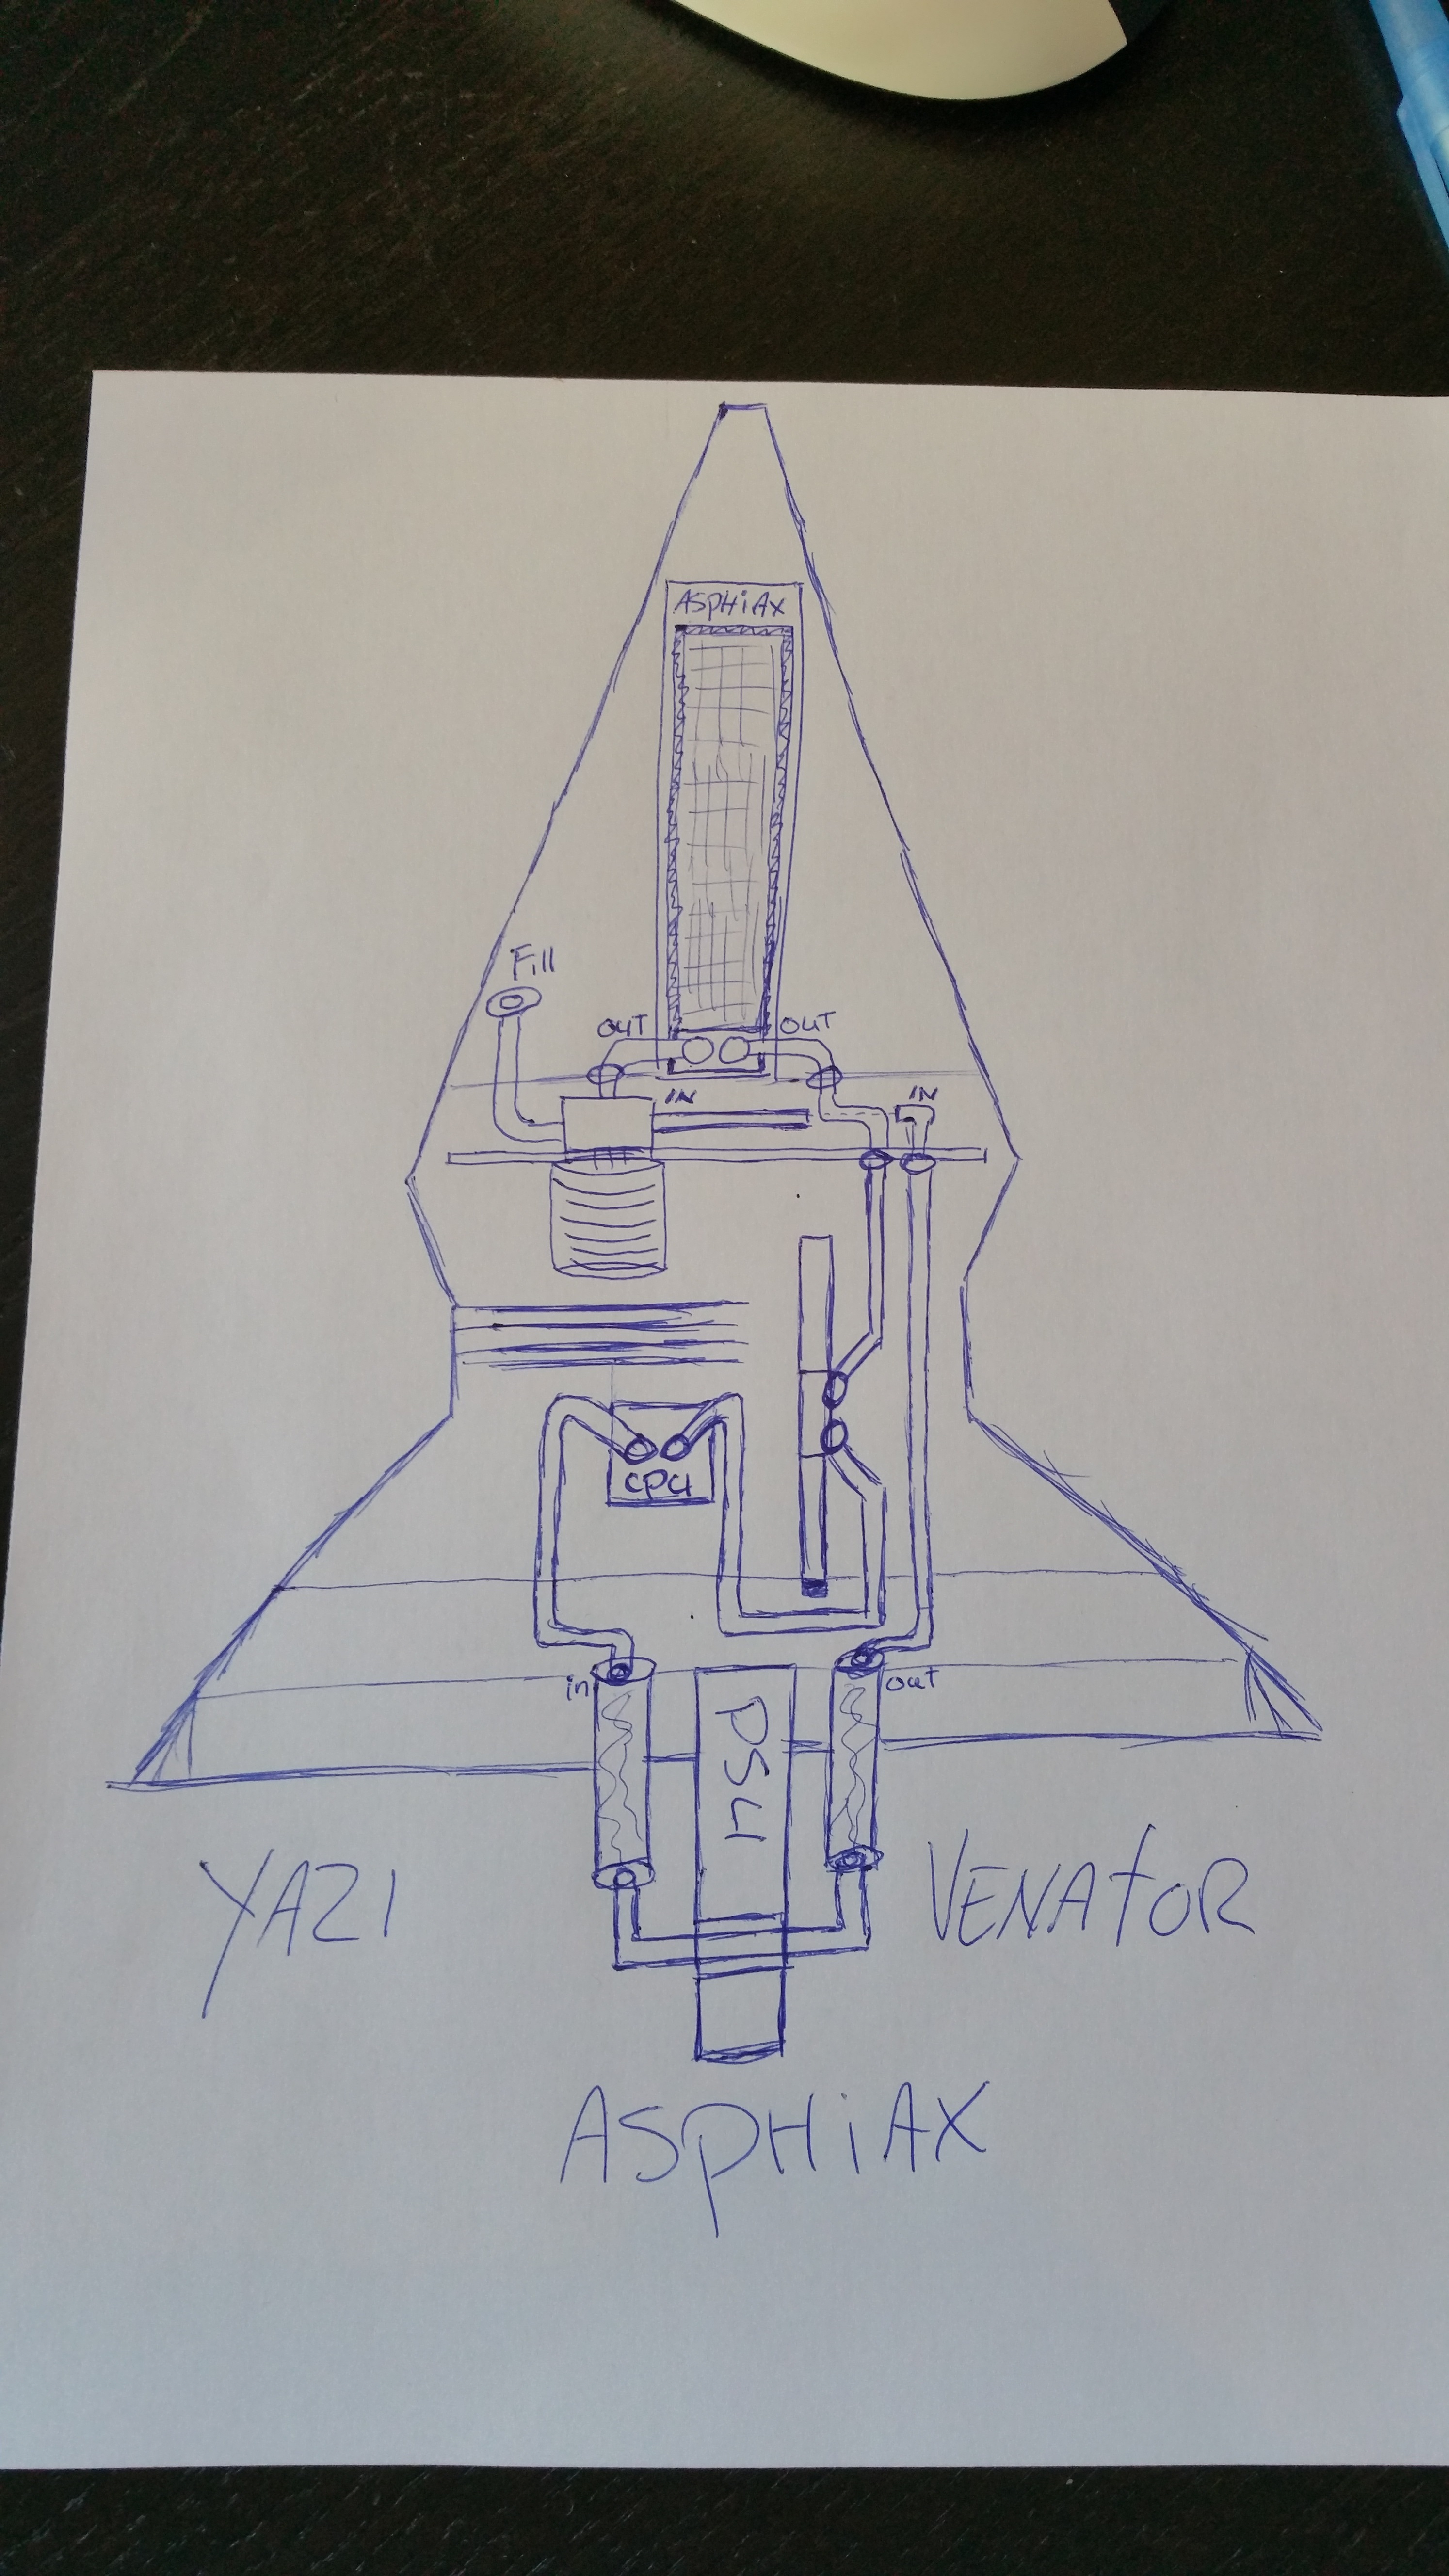
The final loop has been found!
Inside the case I will be mounting several 3d printed PETG coolant tube guiders and supports, VGA and I/O space and some decoration.
You know when you have spent to much time in 3D when you start sketching it only also.
Only 300 left to solder Sander ... Pfew ...
-
Re: ASPHIAX - VENATOR Class Republic Star Destroyer
First light ...
Lightning !
-
Re: ASPHIAX - VENATOR Class Republic Star Destroyer
-
Re: ASPHIAX - VENATOR Class Republic Star Destroyer
Looking fantastic. I was thinking about the lighting. It looks great. My thoughts are if you split up your fiber groups so they are more evenly dispersed along the sides, you could use an arduino to randomly turn or fade led's off and on. Might give it a more dynamic look. Technically you could do it with just blinking leds, but then it would probably look more like the side of the WOPR. With an Arduino you could have long intervals and fades that would be quite as jarring. Just an idea, either way its going to look amazing for the progress pics.
-
Re: ASPHIAX - VENATOR Class Republic Star Destroyer
Good suggestion man!
I can hook up a pretty good daisy chanied TLC5940 circuit that has 4k fades per channel. 16 channels per TLC so I would need at least 3 . Easily done, I think I already have a circuit like that layinga round somewhere actually.
4k fades per minute or so. With some important pieces lit all the time.
-
Re: ASPHIAX - VENATOR Class Republic Star Destroyer
Its looking grate ASPHIAX. I'm hanging to get a 3D printer. :D
-
Re: ASPHIAX - VENATOR Class Republic Star Destroyer
Quote:
Originally Posted by
Zenator
Its looking grate ASPHIAX. I'm hanging to get a 3D printer. :D
Thanks man! Yeah a good printer can do so much these days.
-
Re: ASPHIAX - VENATOR Class Republic Star Destroyer
This gets better every time I see it. The finished quality of this is going to be incredible.
-
Re: ASPHIAX - VENATOR Class Republic Star Destroyer
Quote:
Originally Posted by
d_stilgar
This gets better every time I see it. The finished quality of this is going to be incredible.
Thanks man!
-
Re: ASPHIAX - VENATOR Class Republic Star Destroyer
"YAZI" - Venator Class Star Destroyer The BIG finale part 1
Ok so here is the big finale (wel part 1 of it at least)
Due to the fact that MSI asked if they could showcase the YAZI at the International CES 2016 in Las Vegas the whole time table changed.
I am very strict op planning, its the only way to get stuff done fast, but this was ridiculous. The call came in about a week before the cutting of the aluminum, hence the reason why Pascal and I worked untill 3 am to get it sorted.
I proved not to be the last day I was up untill late !
Here we go:
Started with the always nice smelling epoxy work on the tower
Then it was off to the dirty room for paint, got a nice anthracit paint. The pictures dont do it justice, its darker and less brown.
Quick test fitting
And finally the last of the about 300 holes!
With the holes done, it was time for the greeble basecoat.
The detail just popps out with this coat.
And a quick test fitting, sure looks good in aluminum
But thats not the plan. So gave it a healthy coat
And then a good black matte paintjob
With the black coat on I could finally start to epoxy the greebles onto the side hull
Meanwhile : That was the first box of 8 kg PLA, onto the next one!
Decision time, should i paint the greebles also in the anthracit coat?
So happy with the anthracit, it really has excellent licht action properties
I love doing test sessions lol
Houston we have a problem! That was the last of the 50 meters of fiberoptic cabling ...
Waiting for the fiber, I put myself to the next design challenge the motherboard tray and I/O backwall.
I just love waking up to fresh new custom parts
Ahh the joys of fiberoptic cabling. It wants to go in any way but the way you want it ..
But ... the force is strong ...
Poor mans glue clamp, well actually you can buy a lot of clamps for this grand 1200 watt powerhouse by Thermaltake!
Also installed the rest of the lighting for the tower.
Someone asked my what happened to my old build the USS EURISKO.
Well its standing next to my work pc acting as a side table lol
This looks just too cool not to share
Working 12 to 16 hours a day takes it toll ..
Installed the fans back into their housing. These are the original fans for the build 2 years ago. Try finding a decent 92mm fan these days ...
I discovered a neat trick while glueing the 3D printed PLA. You can cut into just one or 2 of the layers and bend it precisely
Me working the very last of the fibers, will be glad when this part is over ..
The hull needed a little old fashioned styrene love
I wish I still had my workshop, space runs out quick with my builds!
Me working the epoxy ..
Darth practising his one-liners ..
And there you have it, the result of the small ModMarathon ...
Post Project Carnage ..
And that was it for part 1 , stay tuned for part 2 and 3!
Have a good one!
-
Re: ASPHIAX - VENATOR Class Republic Star Destroyer
So here is part II
I managed to get the hull painted two hours before the scheduled pickup for the CES.
Quick dry before the next layer. The weather was helping a lot!
Got something very special planned for the radgrills.
3D printed red HDGlass radgrills!
The front in this picture is missing due to change in plans at the last minute.
Love this picture, she looks so dark and grimey here !
I could not build the loop due to possible issues at customs.
This must be one of my favorite views. Will look sweet with the loop installed.
And finally with the lights on !!
Had to dismantle all the hardware inside so again no issues at customs.
Made sure that it was very well strapped down and covered up ..
Bye bye baby!
And there you have it. From cradle to grave a complete log of how I built this first version!
Hope you enjoyed watching as much as I enjoyed building her!
On to the next one!
Regards
Sander aka ASPHIAX
-
Re: ASPHIAX - VENATOR Class Republic Star Destroyer
While I was so busy with getting stuff done on the YAZI some pictures were made by Mortum
AWESOME Greeble shot!
Nice shot of the Aluminum Alloy / RVS stand ..
Its easy to forget how big she is lol ..