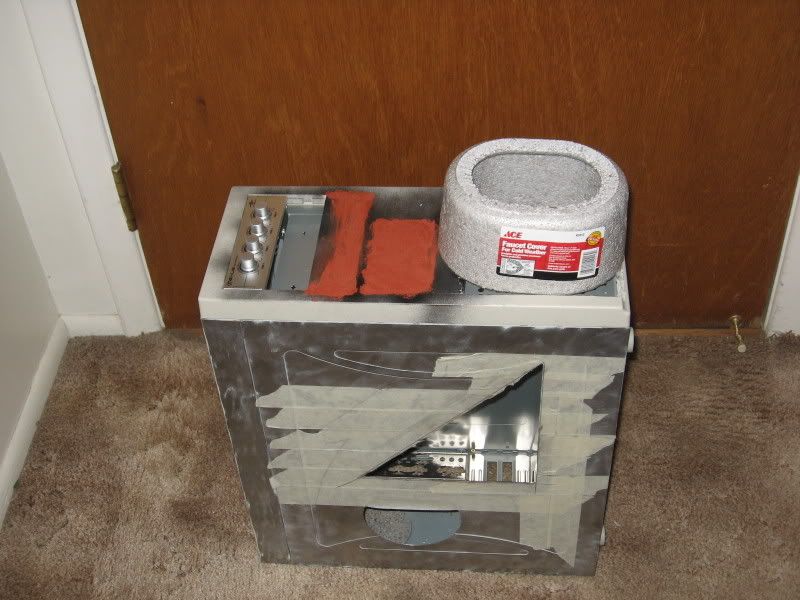
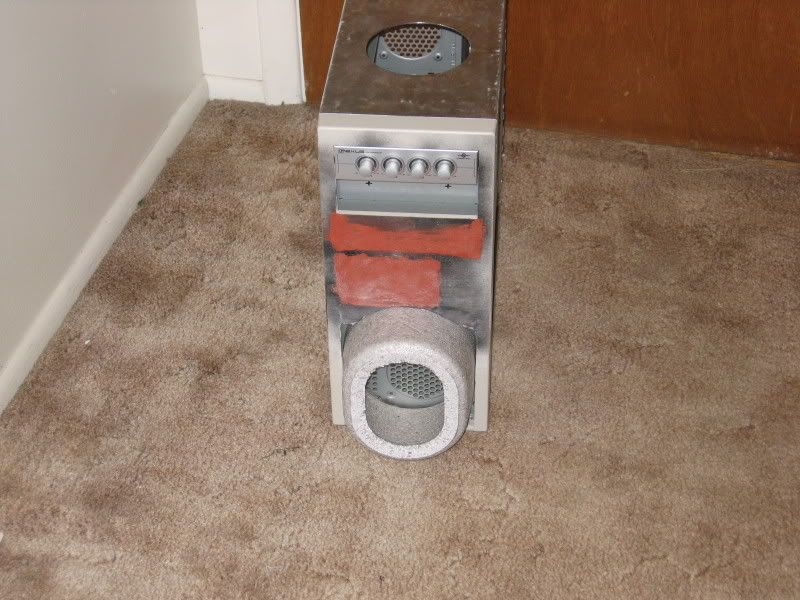
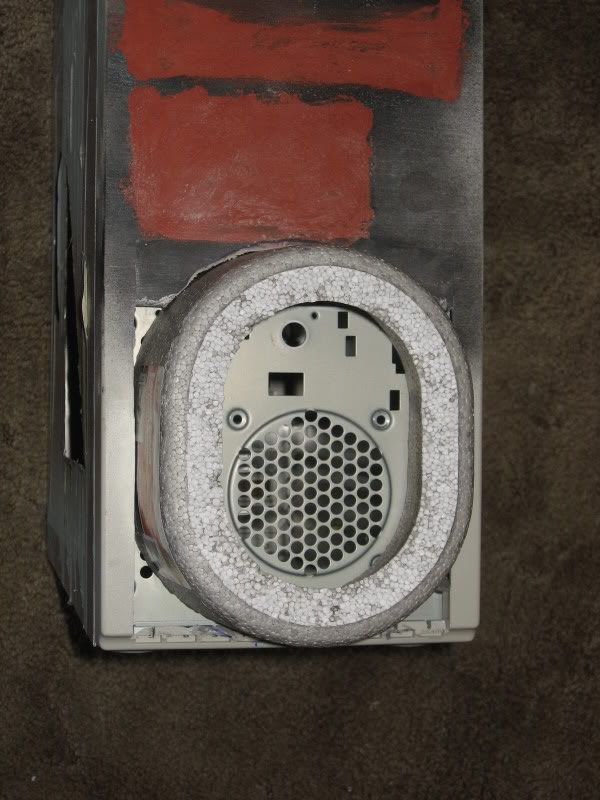
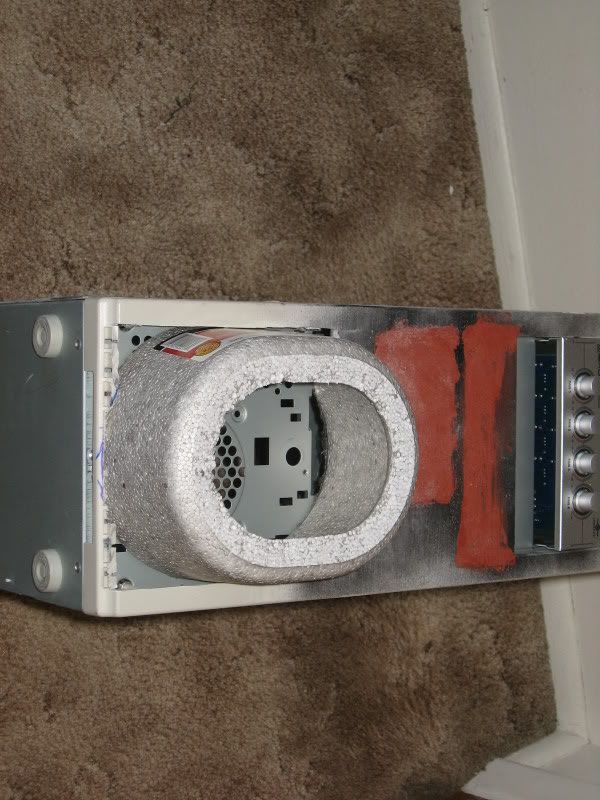
Currently curing. I'm gonna let it sit for about an hour. Gives me enough time to tear apart the skeleton so I can chop away on it as well.

Printable View
Currently curing. I'm gonna let it sit for about an hour. Gives me enough time to tear apart the skeleton so I can chop away on it as well.
:mad:
It's raining outside. Hopefully it's just a quick shower.
Sanded, ready for layer two. I'll cover up the whole damn thing this go around so I can change it from a chunk of PVC stuck in a front panel to something that looks halfway cool.
Turns out all that was holding the mobo in was 1 tiny screw. So it's now gutted, and ready for:
More dremel action. And no, I haven't upgraded yet like I want to. Food and gas are a bit more important than my modding tools.
That poor poor battery.
I'm getting the feeling that's all for today.
So the lil storm passed and I got back outside before sundown. Got some shaping done as well, but I still have lots left it seems. Might see what happens with the dremel tomorrow for part of it.
Probably won't be any picture updates till Sunday or Monday. The better half is stealing the camera so her mom can take some pictures of her getting her wedding dress fitted. May 27th can't get here fast enough.
Slowly coming together. Lots of shaping to do. And I'm gonna strip all the bondo off the raised panel above the hole, cut out the old on/off switch area and rebondo.
Sorry for the lack of updates, but real life took over. Hopefully I'll get some work done on this sometime this week. Also, I might upload a tutorial on a different part of this mod that hasn't been posted yet--once I get the work done (in MSPaint no less! :eek:), I'll post it.
wow, ive been off these forums for like 2 weeks, (my runescape addiction came back, the horror!!) anyways, your fan mount is quite the ingenious one, ive always wanted to experiment with PVC tubing ,and this is quite helpful to me.
It's a very time consuming process, and time is something that I have little of at the moment.Quote:
Originally Posted by intergalacticman
Glad you like the work, but I can't claim credit for it. Search around for some of defyant's worklogs--you'll be getting ideas left and right, I promise.
Since I have hated this case since day 1, and since I now have access to other cases, this project, in it's current state, is going to get scrapped and restarted from scratch.
Two things that are going to stay the same in Mach 2:
*The paintjob
*The blowhole
Some things will be added, others will be changed completely.
The components from 'Blue' (main machine) are going to reside in Frankenstripe Mach 2 as well. The PIII mobo from Mach 1 will temporarily reside in the filing cabinet mod, which might or might not become a freestanding system of its own.
The window placement and the window itself will be moved to a more logical place. I think you guys will approve of what I've got in store for that. It is going to be quite original, as I don't think anyone else has ever thought of putting one of these babies into the side of a case. Since I'm not ready to let the cat out of the bag just yet, I will leave you all with an ambiguous clue:
Everything will be much clearer in a couple of weeks, the detail of which might astound you!
New direction?
Don't ya just hate it when that happens?
But kudos for the Defyant Blow hole.
I love that guys stuff.
This mod took on a life of it's own a long time ago.
Actually, I love it when that happens.
lookin good
Alright, time for some new stuff.
1st off, the new idea for the window:
A magnifying glass that I acquired through a bit of dumpster diving a couple years back. I had originally intended on using this for fly-tying (another hobby of mine!), but just never got around to modding it on an arm. So now it's gonna go into Mach 2. Here's a closeup of my newest Ebay purchase:
That's the CPU on a HP Pavillion that I picked up for $40 bucks. The guy said it didn't work. Gee, wonder why? If the chip is fried, oh well. I'll get a cheap P4 and drop it in there, and do a bit of cable management, but that's gonna be down the line. Probably should plan on getting a HSF for it too.
So there it is, my minor update. I'm planning on heading over to Harry's computer pile and seeing if I can find a decent case for Mach 2 on Thursday, and probably start modding later that day.
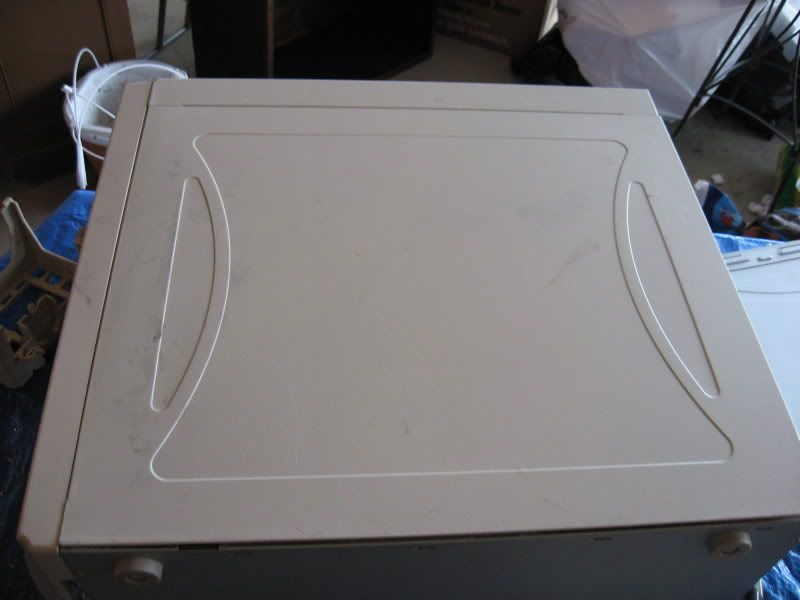
Here begins Mach 2. Got myself a real case, not nearly as much of that flimsy plastic stuff for me!
Beginnings of dismantling:
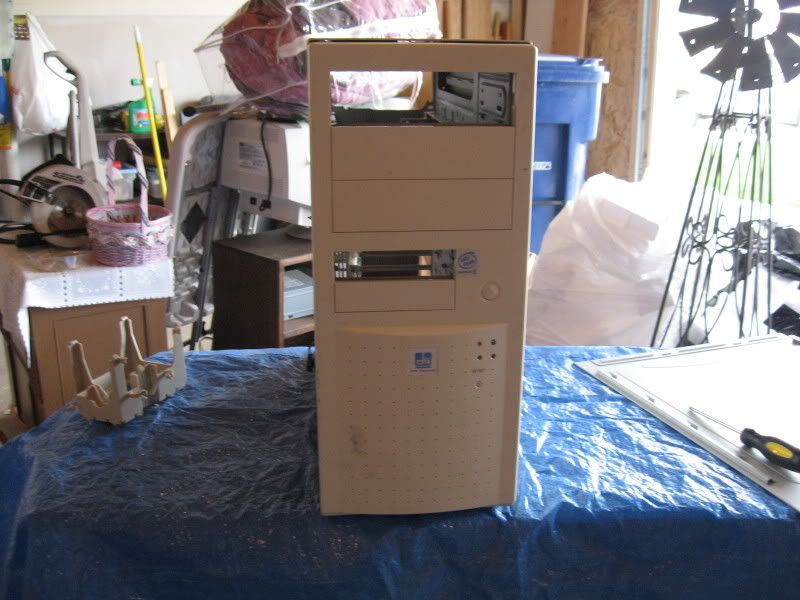
Quick shot of the front panel:
Front panel got chopped up. I've got something in store here. Don't know what exactly, but like I stated previously, this mod took on a life of it's own a long time ago.
View of the inside:
I don't think I had my screw tight enough in the cutter. Snapped it right off. Oopsy.
I just spent the last couple of hours sanding. Pretty much down to bare metal:
Tomorrow, I shall clean everything down and prime the top and back panel. The side panel needs a hole. But in order to get that, I need to make some measurements first. Which means Blue is going to get opened up. Oh, the agony!
ive had that happen to me before...broken screw in the cutter....
lookin good!
A little more progess, this is starting to come together nicely, if I do say so myself. Now I'm just hoping I don't royally screw up the defyant-inspired blowhole that's next.
Anyways, on with the pics!
Just in case you forgot what is going to go into the side as a window:
So I chopped it up a bit, and sanded a bit. Looks like it was never part of a folding unit!
Did some more sanding--there were a few areas that I needed to go over again. I'm to the point now, however, where I can rub everything down with some mineral oil (my project for the next couple days)
So, onto placement:
Looks like a good spot. Out comes the masking tape and a permanent marker:
As you can see, it's been mocked up, marked up, lined up and drilled down. 30 seconds later:
And now for a couple of the backside:
And every mod needs a mascot! I do believe that's where I went wrong the first time. So here's my mascot, my in-law's cocker spaniel:
More next Friday, as I got to work the next 6 days.
Nice mod, keep up the work.
I got a cocker too :)
lol. . a Mascot. I got a Chihuahua.
Great Idea. . With the Magnifying glass.
That guy is going to become a fan guard. I'm going to have to find some stock somewhere and get some practicing done.
Here's what I've got planned for Friday:
The two elliptical areas are going to get bondo'd. The two triangle shaped areas represent the two smallish windows that I'm going to cut into the panel.
Also, the more I think about it, the blowhole isn't going to be done on this mod. Two reasons--#1, I need more practice with shaping bondo, and #2, it really doesn't fit into the theme as well as I thought it would. I still have the old front panel from Mach I of this mod, so I will woodshed on that until I am satisfied with the results. Hell, if it's good enough, I might even post some pictures!
Having said that, I am planning on covering the gaping hole in the front panel with either modder's mesh or something similar. I'm still planning on a 120 mm fan in the bottom of the case, so I'll probably get that cut this weekend as well.
After that's all said and done, it will be time to move onto the next part. I'm also planning on getting some acrylic rods from Estreet Plastics, cutting into the front panel like this:
(not to scale, and I added a view of the mesh as well).
And installing rods on each of the long sides of the front panel. And yes, those rods are gonna light up. I'm planning on getting a handful of red LEDs from LSDiode as well.
After that phase is complete I will move onto painting.
So I've got some goodies heading my way courtesy of Crimson Sky's eBay offerings, including a fan controller that is going to go into this mod. After a quick PM regarding the dimensions, I'm going to add a 120 mm fan on the top of the case and build a 'false top' out of wood for the frame and styrene for the body, with modder's mesh (or similar) on the front and back for air flow, kinda like this:
I'm currently planning on ~ 3 3/16 inches high so I can add one or two 80mm fans for added air movement.
A bit more of an update. I got the rough shape of the window cut out and the 120 mm fan hole in the top of the case cut as well. Tomorrow (hopefully) I'll be working in Dad's shop for a little bit, so I'll have access to all sorts of goodies. Anywho, here's some more pics:
All taped up. Wasn't quite sure how far I was going to be going with the cutting, so I played it a bit safe.
Opted for one big triangular window instead of the two small ones.
Three guide holes and a few minutes with my jigsaw and I've got a very rough shape.
Uh...jigsaw decided to take my masking tape off in the process. Not that big of a deal.
Busted out the dremel and got a helluva lot closer to my finished product.
While I was letting the dremel cool down, I marked out another hole
Viola!
So that's it for today progress wise. Next week I'll be getting my grab bag in the mail, so I'll see what can be used other than the fan controller--I've got plans for some of that loom that's in there.
Comments and criticism always welcome!
clean cuts :]
Thanks! I'm hopefully going to be getting some more filing done on the triangle window sometime in the next couple days.Quote:
Originally Posted by peoplefire
Very nice Cuts DrumThumper. I'll be watching this mod :D
+rep
Front panel mockup time!
3/8" wooden dowel, when I get my rods from estreet and the LEDs from LSDiodes, I'll install them--just wanted to see if this was gonna work.
And now for the piece de resistance:
While cruising around Michael's Crafts store, I had a brilliant idea in regards to the mesh, one which is going to work perfectly: Plastic Canvas. Same stuff little old ladies use to make kleenex box covers. As you can see, I took a permanent marker to this for the mockup. I'll be throwing down a few coats of black paint on it for the final product.
That's all for this evening--I'm gonna trace out Hammer Guy and get him scanned sometime tomorrow. Then two things are going to need to happen: Figure out what size to make the fanguard and figure out where the hell to put him.
Thanks for looking!
Another little update--Bondo round two.
I've no need for the 3 1/2" drive bays, so:
Traced it out
Dremeled it out
Hot glued it in
Bondo'd!
Current state. I'm going to go get some spray putty some time this week, sand it a bit more, and touch it up. Also thinking about a different switch location--maybe on the one 5 1/4" drive bay that's not going to be used. I'll play around with some ideas--I'll take a bay cover to work with me.
Edit--just ordered the acrylic rods and 10 LEDs. Combined with all the goodies that Crimson Sky is sending my way, I can't wait!
I little bit of spot putty, some elbow grease and I will move on to the side panels.
I realize that the bottom of my bondo area looks a bit ragged. I plan on using a combination of hot glue and bondo to attach the rest of the front grill, and even more sanding. But first I gotta fabricate that. I know what I want, just need to get the stock to knock it out. Figuring that part will take me a day.
And on another note, my LED's and acrylic will be here soon. Hoping for today, But I'm betting that they'll show up tomorrow.
Update time! I got some toys in the mail over the last few days! First up, from the grab bag from Crimson Sky:
Fan controller that I quickly disassembled.
This is gonna get repainted. After I'm done with it, it's hopefully going to look like a front panel for a guitar amp--gonna relabel the four fans Gain, Volume, Presence and Resonance, a la the 5150 amp.
And then today I got my acrylic tubes and 11 LEDs from estreet plastics and LSDiodes, respectively:
This had to go on my parts box.
And finally, I've been kicking around some ideas for the back panel. I think I finally came up with a winner--another window like so:
This one's gonna get a frosted plexi window with the VH swirl logo right in the middle, and even more LEDs!
So, my to do list is as follows for this weekend:
Right side window cut.
Make a jig to bend the acrylic.
Finish left side triangle.
Find some mesh--dunno if the plastic canvas is gonna hold up or not--it's good for mock up work though.
Look around for something to kitbash for the front panel that I've been bondoing. I know what I want, it's just a matter of finding it.
A real update will be posted Friday. Saturday's my birthday, so don't expect all that much--I think we might be going jet-skiing on the Missouri. Or maybe just fishing on the Missouri. Either way, I'll be soaking up some sun!
Edit--here's a very rough sketch of what's going to be etched in the right hand window:
Needs quite a bit of touchup done to it--this is just the first draft of it.
Damn, I haven't had time to do **** with this, so I shall ask the collective (a la TGS) the following:
Flush blow hole or no?
I've been playing around in sketchup, and am starting to get the hang of it--here's a wireframe pseudo side view of my propose front panel:
And here's a shaded with textures version, different angle:
Should I go this route or do something along the lines of this:
And just modder's mesh the cut out area?
I, myself, am leaning towards the flush blow hole (again).
mesh!!! mesh!!! mesh!!!
hole!!! hole!!!! hole!!! :D no really mesh is so... standard :D make a monster hole or a gfk one organic shapes^^
Having decided that I only need one optical drive, along with the fan controller, I got a bit crazy with the bondo.
I'll commence sanding tonight when I get home from work.
And as you can see, I'll be doing a little bit of touchup on the other areas.
Next up, the bottom of the front panel!
Do a mesh-hole. It looks good (pictures forthcoming).
EDIT:
Mesh-hole, taken from my worklog:
warning, huge picture
Best of Both Worlds (shameless Van Hagar plug lol). I like it.
But, I think I might have found something definitely different, and it might work.
A Styrofoam outdoor faucet cover. Dirt cheap (less than 5 bucks) at Home Depot.
Sadly, I didn't get a chance to get some dimensions off of it. But from looking at it the other day, I'm pretty sure the larger end will fit flush in the gaping hole that I made.
Cut it down a bit, either bondo or fiberglass it, and move on.
I'm gonna go pick one up tomorrow and see if it looks as good in real life as it does in my head.
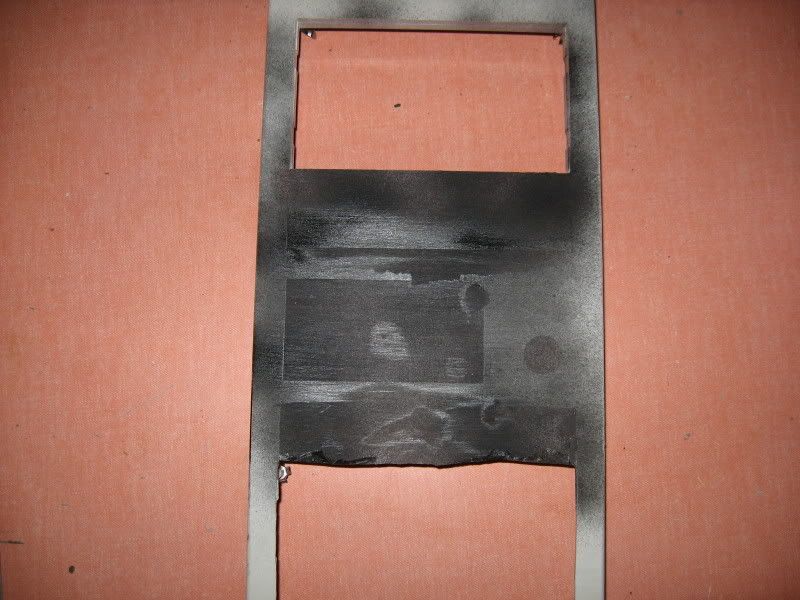
Sanded and what was originally supposed to be just a dusting of paint to see what the hell is going on. As you can see, it didn't turn out quite that way.
Oh well, this is actually much better. gives me some ideas as to where I still need to work.
More coming tomorrow!
So, I snagged one of these for $3.49:
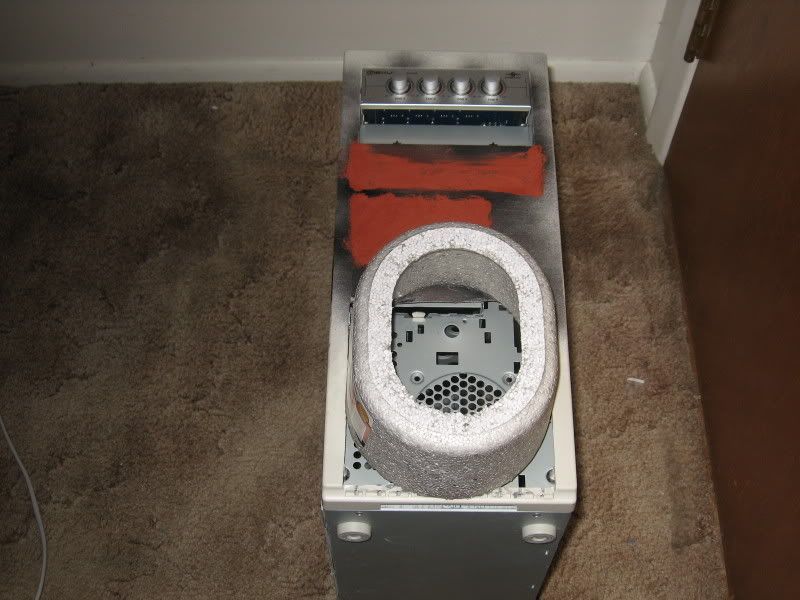
I chopped the top off and mocked it up sitting on the front panel. Looks like I'm gonna be removing some bondo tomorrow.
I definitely like how it looks--almost like a porthole on a speaker.
BUT--here is the dilemma--from what little research I've done, it sounds like this is gonna be a bitch to get to cooperate. Fiberglass resin eats through this stuff faster than a bulimic at an all-you-can-eat buffet. I haven't tried bondo yet (I still have the top section I cut out for trial and error), but I'm not keeping my hopes up.
looks great man...keep it up!
Great news to start with: Bondo will adhere to sytrofoam:
So, having solved that dilemma, I went ahead and did some more chopping on the front panel and got the soon to be blowhole flush with the chasis:
So now I am going to chop up another cheap plastic cd case that I got from work and begin filling in the four holes. Tomorrow I do believe I will be bondoing.
Well, back to the drawing board. I just attempted to bondo the styrofoam. Wouldn't take. Also, the bondo itself was getting warm--most likely a chemical reaction between the 'foam and the hardener (or possibly the putty for that matter).
I'd show some pics, but the camera is dead at the moment.
Bondo is meant to get hot. It does that as it hardens. It's quite normal.
you can spray the foam with primer then use the bondo