The Dome is just about done. They're are still a couple things left, but the majority of the painting has been accomplished. These are my favorite pics so far.

Printable View
The Dome is just about done. They're are still a couple things left, but the majority of the painting has been accomplished. These are my favorite pics so far.
I've set the Vapochill in. It's upside down because this is the bottom and that's right.
The bottom that originally came on the barrel has been modified to fit.
Next I needed to cut the hole for the Vapochill's exhaust. I used this blade tool of mine. I love this thing. The day I snap this is what I'm using to kill with!
Here's the hole. Bad angle, so it doesn't look great.
Since R2 is round and the vapochill is squared I'll be using some mesh to tidy up this hole.
Then I painted it white to match the case.
If you do a lot of modding and have a lot of tools, I recommend getting one these extesion cords with a junction box. It really helps.
Here's my PSU. It will be going on top with the mobo.
I cut holes in the sheet metal near the Vapochill so the fans can connect to the PSU.
I added the mesh to R2.
Then I fixed the pinstriping problems.
Next up, is to solve how I'm keeping the bottom on with nearly 40 pounds of weight on it. I've decided to use latches.
They had to be painted black to match the trim.
And so did the screws that held them on.
Here they are together. The silver parts will be painted white to match R2.
And here's where they'll mount.
The rest I'll mess with tonight.
Why the hell would I take a 100 pound computer to a LAN party??
I went to Lowe's and bought some PVC to make R2's projector.
First I painted them with a white primer.
.
Then the color they're supposed to be, silver.
While that is drying I moved on to the latches for R2's under belly.
I drilled on the piece for the trim.
And then the latch. I'll test it later.
My slot loaders arrived. I still have to test them.
I've been working on R2's other eyeball, the one inside his projector. I want to use this area as R2's Hard drive LED. I spent a whopping quarter in a prize machine and got one of those plastic balls.
Separated, I got out my LED
Drilled a hole in the bottom.
Inserted LED and glued.
View from the top.
From bottom. Inserted ball in the bottom of R2's eye.
Next I'm going to drill a hole in R2's dome and feed the wiring through. Then I'll glue the eye to the dome, covering the hole.
The glue for the projector LED dried. Real men drink Beck's or Heinekin, not Piss-weiser.
I plugged it into the power LED posts on my Craftstick Airplane PC and it works! I knew there's a reason I kept that Mod around.
Next, I prepped for mounting R2's projector. I use a hole punch and hammer to mark the spot and give me a nice little divit for the drill bit to sit in.
I drilled two holes. One for the projector bulb (right) and the other for the little red circle under R2's eye (left). The red circle will be for R2's HD light.
Here's the working Red LED I'm using.
R2D2 STANDS!!
It works perfectly. The latches are all holding very well and there is no sign of bending or gapping. And I've attached the hydraulic hoses to his legs.
For now I'm keeping the latches locked by using these lanyard thingies. They are temporary, till I find something better. Ideas?
Here's the view from above, showing the huge heasink hose for the proc and an assortment of wires.
The power for the Vapochill connects directly to the PSU and the cord for the wall plugs into the back of it.
For the record, I spent $600 and what do I get? A photocopied ditto of the instructions! WTF?? I'll have to go on-line for the detailed instructions in plain-jane english and color.
And lastly the Vapochill kit. On the right is the Chill Controll PCB. Next to it is the heater (WTF is the heater for?). Above that is the foam shroud for the socket and an assortment of thermal pastes/gels/wires.
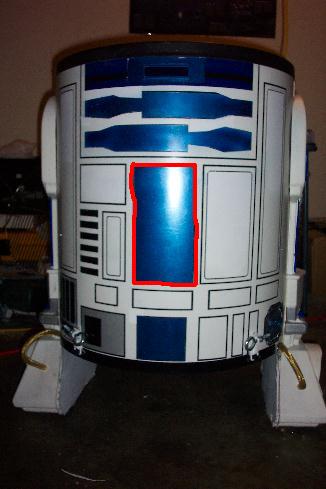
Besides, the pin striping the head is done.
Here's my Matrix Orbital. I want to use it with R2, but have have yet to figure out where.
The PSU has been added.
I cut some more mesh for it. Then painted.
From the inside.
After I added the mesh.
And then I fixed the pin striping around it.
Next on the agenda is cooling for the upper section. I want to put intake fans on the legs. This is a real inconspicuous place to put fans.
Hole saws are essential to modding.
After adding one intake fan to each leg. I made an exhaust fan for the back. It will have a blue LED.
Before.
The grill has to match!
Attention to details. The screws to match too.
And on the case!
More has been worked on yet I didn't actually complete anything.
I set up the Chill control unit. It was pretty easy ecept one part where it said pin 1 was red, when in fact both wires were black???
As you can see, it's mounted near the PSU.
Then I worked on the other halo projector. The sites that I've seen have R2 with another projector on the back of his head, so I added it. This one will not have an LED.
Next I worked on my Matrix Orbital LCD. It's gonna go here:
First a taped the whole thing.
Then cut away everything around the screen.
Next I added plastic and tape to prevent damage to the underside components.
The finish had to be roughened for painting.
I used a grey primer.
Then the Metallic blue. A few more coats of blue and clear before I mount it.
I finished wiring up the dome. The little square thing was originally a lighted foot for AF1.
No work on R2 tonight, I need a break.
O.K. I lied.
I wanted to work on the LCD a little. I finished with the clear coats.
And set it into R2. I left a little space all around, because I will be adding EL Wire around the edge.
The LCD isn't going to bend to the shape. And it'll look stupid otherwise. So I think that I'm gonna have to use this hole for my DVD drive. I have extra plastic lying around that I can use to stealth the bay. I'll look at at more tonight to see what I can think of.
You can get matrix Orbital LCD with out the Alum. and you can order different color/style Alum covers. So Id have to guess (not having one to look @ or play with....yet!) that they should come apart with out too much headache.
For added effect, pick up some cheap "Sun catcher" type transparent blue paint. Then paint the Lexan with it (It should help it blend in abit more).....Of course test it on some scrap first, Don't want to spend the time bending the Lexan to screw up in the 11th hour with untested paint!
Looks Good, Keep the pics coming!
Crazybillybob
I removed the frame from the LCD.
So you can get an idea about how thick it is:
I cut out a new shroud that was bendable like R2's body.
Then I painted the LCD frame. The screen is covered with masking tape.
And the shroud has been painted with a white plastic primer. When it dries I will paint it blue and mount the whole thing inside.
I may have more pics tonight.
I thought I'd show you a newer pic.
I cut the hole on the opposite side for the floppy. Then I shined a flashlight through.
Next, I cut the hole out of the front.
Fixed the pin stiping.
And here it is from the inside. As you can see, I'll be avoiding the use of drive bays to keep the clutter to a minimum.
I was going through some of my supplies when I found a box of handles!
Also, here's the power switch I want to use. Any idea on where I should mount it?
I plugged my lower two intake, upper two intake fans, and floppy drive into the PSU and tidy up the wires.
And I finished mounting the floppy drive.
One of the builders from the R2builders club used similar switches on his droid. Here's where he placed them
I removed the frame from the LCD.
So you can get an idea about how thick it is:
I cut out a new shroud that was bendable like R2's body.
Then I painted the LCD frame. The screen is covered with masking tape.
And the shroud has been painted with a white plastic primer. When it dries I will paint it blue and mount the whole thing inside.
I may have more pics tonight.
I think I want to add a Window to R2. I'm thinking right about here:
Maybe only half of the total square so the mobo could be seen. I will be using blue lights within R2 so that will at least go with the theme. I could also, put a Blue LED intake fan on the window.
What do you think?
I'VE FINALLY PIN STRIPED THE DOME!!
I never knew, THANKS!
I've been testing the LED's. The HD LED is pretty hard to see. I think it may be the thickness or darkness of the plastic lens.
Here's one with the blue Pwr light and a very hard to see HD light that's red.
Here's R2 hooked up to my craftstick plane's mobo. Despite how unliked the mod was, it has proven to be useful enough to keep.
Lastly, here is another lens I have. I'm gonna try this one next. Originally, I didn't because I thought it looked too orange.
I got to using a better lens. The one I had previously suggested is bigger than the original and clearer.
But unfortunately, it was really scratched up.
I had another great idea when I thought that I could use the one from my elbow flashlight (you military guys know about these). They come with several lenses and since I have two of these flashlights, I'll have enough red ones.
As you can see, this one is much more clear.
I've attached it to the dome with glue. I have pieces of tape to hold it on till the glue dries.
Later I'll test to see if the LED appears brighter. :D
First off, I just want everyone to know that I am not happy with the floppy drive. I like the way it looks and all from the outside, but from within it is not very stable. I will be using the square on R2, where the floppy drive resides to hold my power, reset, and fan boost switches. So....
My wife's Aunt gave me this old tower she had in her garage with an old system, minus the HD. The motherboard is oddly small. Is this Baby ATX?
The processor fan was not working, so I laid this 80mm fan on top of it to keep it cool.
I was thinking of using part of the front panel to define the drives on R2, but changed my mind. And it wasn't the dust that it changed it.
One thing Air Force One had that I wanted R2 to also have is the ability speed up the intake fans at the push of a button. So when I scrapped AF1, I took the switch out. The fan is actually spinning in this pic.
When I pushed the button my test fan speeds up and the lights turn on. Remember the intake fans on R2 do no have lights.
I'll be using a 3.5 inch bay to hold the floppy in place for stability and use this section to create R2's Power/Reset/Fan boost panel. This panel will not be visible from the outside. The floppy drive hole will stay the same; only the switches will be added to R2's "look".
I still have some sheet metal left from when I made the heat shield inside R2.
After I set the floppy on the bottom of the cage I began to mold the metal to the floppy's placement.
As you can see I bent the metal to match R'2 shape.
Then I drilled the hole for the Power Button. I will do the reset and fan boost in a bit.
I worked on and completed the front panel for R2. I gutted a USB 3.5 inch drive.
Then pulled my floppy drive out of place.
I traced the ports on to the piece of metal I had cut earlier.
Here are the holes I'll have to cut.
And after it's been cut out.
Check you work before you make it final.
And presto! To the left top is the rest and under it is the fan speed button.
My speakers arrived yesterday.
Today I worked on installing the speakers in R'2 feet.
This is how it looked inside. That's all the expanding foam I used earlier. In the pic you can see the support rod I used too.
After pulling some of the foam out I fed the wire through.
And pulled it out the other side.
The mostly completed look. I will be using more of the mesh from earlier to disguise the hole.
Then I started cleaning up the pin striping. BEFORE.
And AFTER. Go figure I ran out of pin striping. I'll have to go buy pack 19 tomorrow.
I wasn't happy with the front projector. It just wasn't to the same scale as the dome, so I got a bigger one.
My front panel is officially completed. I used a bit more of the pin striping to define the USB ports. You can still see where I need more touch ups.
And I painted the mesh that will cover the speakers in the feet.
I removed the LED from the projector and the red lens on R2's dome. Instead of using them for HD and pwr lights, I'll be replacing them both with LED's running on a molex. The pwr button on R2 has it's own built-in power light. When I had AF1, it had 4 lighted feet, each with their own LED all strung together. The LED's were running from a switch that had since become stuck in the down position and prohibiting the lights from turning on.
I removed the switch and did a little soldering to get them on the same strand.
The next problem was getting the LED for the little red lens under his eye to stay in place.
I used a Milk gallon lid for the shroud.
First I punched a hole into it.
Fed the LED through.
And glued it on.
The new larger projector has been painted and is now dry.
I reinserted the LED for that too.
Here's some current pics of R2.
My 1 year old daughter loves R2 too.
Today I worked on the temp LCD for the Processor.
Here's it's new home.
Here's the temp in my basement.
Here's how not to install it upside down kiddies.
I cut out the area. What you can see is the front of the Vapochill.
And installed.
I forgot this...
I retested the LED's for R2's head.
Here's a zoom in of the smaller one.
And I've prepped to have the mobo mounted. I'm just waiting for one more thing to arrive. Another Gig of RAM! It'll be 2GB total.
My new temp LCD has a female molex and all the molex ends from the PSU are female too. I needed to have a adapter that has two male molex connectors. I did not have one in stock so I made one. Using a female to male adapter, I added another male molex to it by soldering.
Next up is a question I'd like to ask of everyone. I have a clear drive bay cover that I'd like to add to R2 to act as a window, but not deflect from the "look" of R2. I painted it blue to match the exterior.
As you can see it's still see thru.
The question is where to put it if at all?
Instead of the blue window, I still need to install my DVD drive. I could put it in one of the blue spots above with the face painted to match.
Also, my 2nd gig of memory arrived!
Some have asked to see the whole interior and so here it is:
The motherboard is ready for installation.
Go figure, the Temp Sensor is about two inches short..... :(
Here's the inside so far. Go figure, I was in a hurry to see it with the video card in and now I'll have to take it out. I won't be able to reach under the Video card to install my PCI cards and screw them in unless I do.
Here's the problem. My motherboard may not be compatible with the Vapochill. I have been doing test runs and some wiring modding to hopefully fix this problem without having to buy another mobo. Although I may HAVE to. The Vapochill does work and during the last use I got this:
I removed my PSU and motherboard so they could be tested without the Vapochill attached. My PSU ran fine.
But somewhere inbetween coming out of AF1 and going in to R2D2, my mobo is Dead. :(
My new mobo arrived. It's the Abit IC7-G.
And after the vapochill got down to -10 the system booted just fine.
Here's some pics with all the fans working. I don't think I'll be adding any cathodes.
Here's my CPU temp in the BIOS.
And my current OC of 3.61Ghz from 3.2. I will do more, I just need to do some testing to see how stable it currently is. Then I'll need to probably play around with the memory and CPU ratio's and CPU voltage. I want to get it up to 4Ghz stable.