Looking forward to seeing an update on this:bunny:
Glad to hear that you're back safe and sound:banana:
Enjoy your time with the family.
Then get back to bloody work !!!;):D
yours wecrookie:eek:

Printable View
Looking forward to seeing an update on this:bunny:
Glad to hear that you're back safe and sound:banana:
Enjoy your time with the family.
Then get back to bloody work !!!;):D
yours wecrookie:eek:
Welcome home!
Semper Fidelis
HELL YEAH. Glad to hear you are ok. Can't wait for an update.
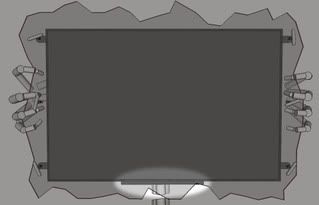
Guess what it's finally time, after a 7 month boat ride, for an update. Well it's more like a report of where I'm at and what I still need to do to finish my project. I first had to start by cleaning my work space, the garage, because my wife used the space as storage and it was a mess. She also stored some stuff on top of my monitor :mad:. Lucky I covered the monitor up enough to protect it from any damage. Well after a little spring cleaning it was time to get to work.
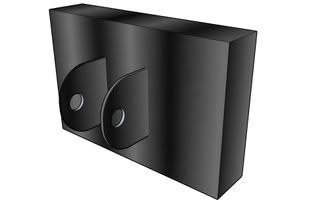
I went ahead and gave the monitor a test run to make sure it was still in working condition and it was. Plus this was the first time I was actually able to test out the bigger speakers I installed and they are 2-3 times louder than the original ones that came with the monitor :). During my ops check I noticed that some of the paint had transfered from the frame to the acrylic panel and was a huge eye soar.
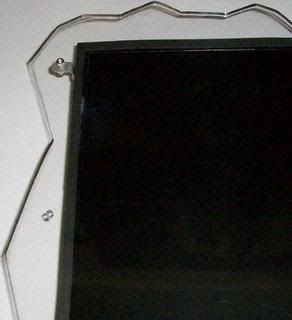
Luckily with some use of cotton balls, Q-tips and paint thinner I was able to clean off the paint on the acrylic panel. As for the monitor frame I came up with an easy quick fit. I'm just going to glue on some small thin strips of black foam and then secure the acrylic panel back in place. The foam should prevent any future paint transfer and also cover up the paint damage on the frame.
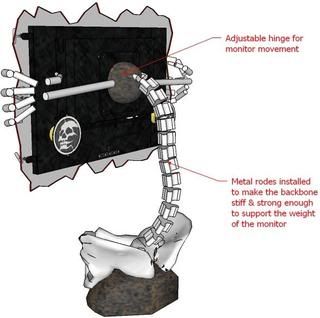
Now I need to work on how I want to operate the monitor buttons. I've mentioned it before that I would like to do something similar to what was done on the Steampunk Monitor but use finger bones instead.
I need to play around in SketchUp so I can have an idea of how I can wrap the finger bones around the acrylic panel.
As for the huge obstacle of making the backbone adjustable I've decided to just make the backbone itself completely stationary and make the monitor adjustable where it connects to the backbone.
So here's my TO DO LIST:
- Glue foam on front of frame to prevent paint transfer to acrylic panel
- Mount monitor function buttons with finger bones
- Install metal rods into backbone for support & shaping
- Install monitor adjustable hinge
- Use car filler to cover up monitor hinge & base
- Cut the filler so it doesn't interfere with the monitor's movement
- Wire in red LED bulbs to monitor circuit board to light up acrylic panel
- Paint bones & filler
Well I think that's it. Now I need to go shopping so I can finish this baby up.
I like the idea of a monitor mod. You usually only see this kind of thing for overpriced desktops and macs. It will be nice to see this completed.
Yay update, good to see ya back in the game and that everything is in working order.
Welcome home Spacehonkey! I'm glad you got home safe. Great to see an update.
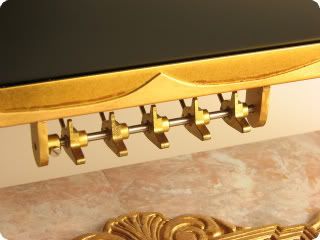
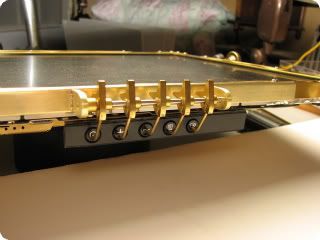
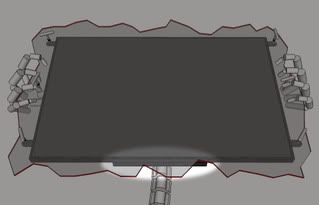
Well I found some black foam and glued that on the front of the monitor and it worked out pretty well.
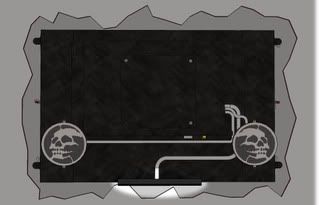
I also cut out the buttons on the the original monitor plastic frame and will be securing that to the bottom of the monitor frame. My plan about the finger bones wrapping around the acrylic panel is just a little to much for the project right now. I might add them in later after everything else is done. So I'll just keep it simple for now. I did update my SketchUp file a little so you can see what the button setup will look like. The buttons are located on the small rectangle piece on the bottom of the monitor.
As you can see it still goes with the flow of the design.
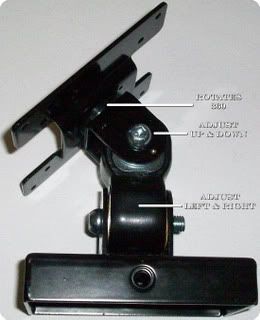
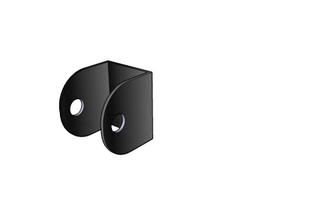
I did finally find an adjustable bracket that I think will work.
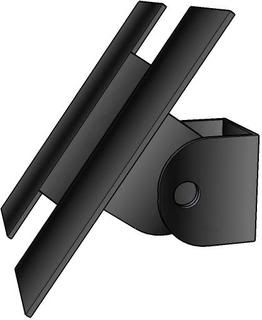
I'll have to make a few adjustment because it's to big and bulky. I don't have access to any metal cutting tools right now so I played around in SketchUp again so you guys can see what I plan on doing with it.
Well first off I need to cut out the huge back plate and just keep the small bracket in the middle.
Original bracket
After trim, only center piece left
Now I'll get rid of the center piece because I don't need the monitor to move left and right. I only need it to move up and down. So the finished mount will look something like this.
Changing the mount will shorted it from 4 1/2 inches long to only 2 3/8 and shave some weight off.
I've also put a 3/8 steel bar in the backbone to give it enough strength to support the weight of the monitor. I think that's about it for right now. Hopefully I'll be able to get some more done this week.
Can't wait for completion.
Welcome Back and thanks for the commitment. Looking forward to your update when you get the chance.