-
Re: the golden sail
I think it´s time for an update once again. These update will be a little bit bigger with 25 pictures.
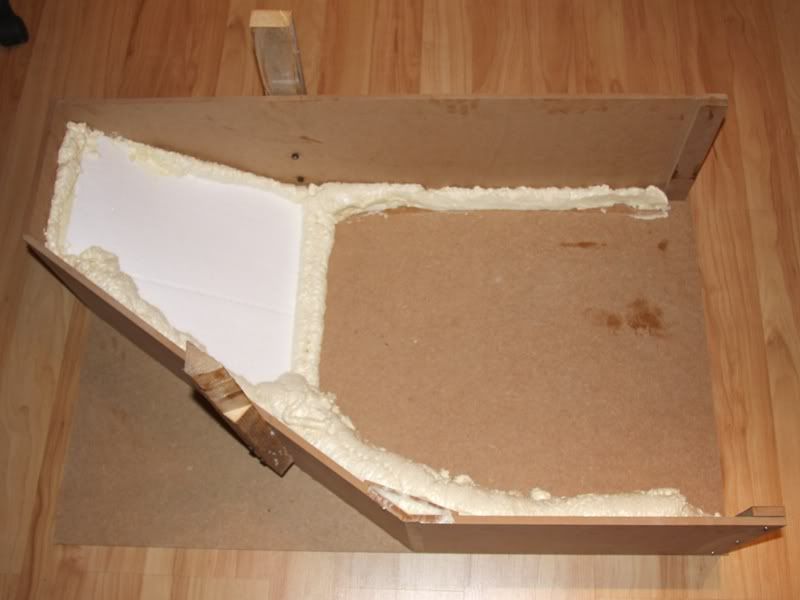
After I filled the left site of the form with Styrodur, I had to fill the right site, too. Ready with it looks so
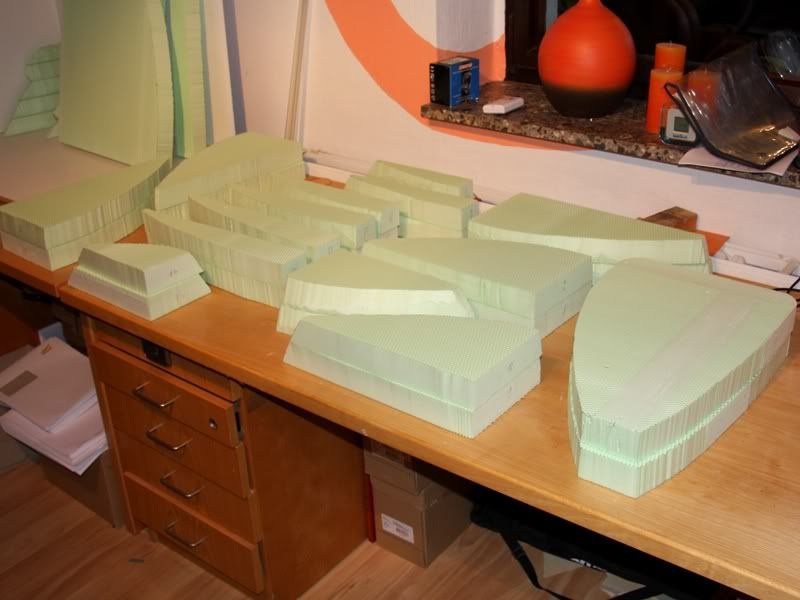
Now I had to glue the several pieces of the form. For this I thought it´s ideal to glue at first 4 pieces together and then the packages in the basic form. So I build pairs of two Stryodur pieces at first.
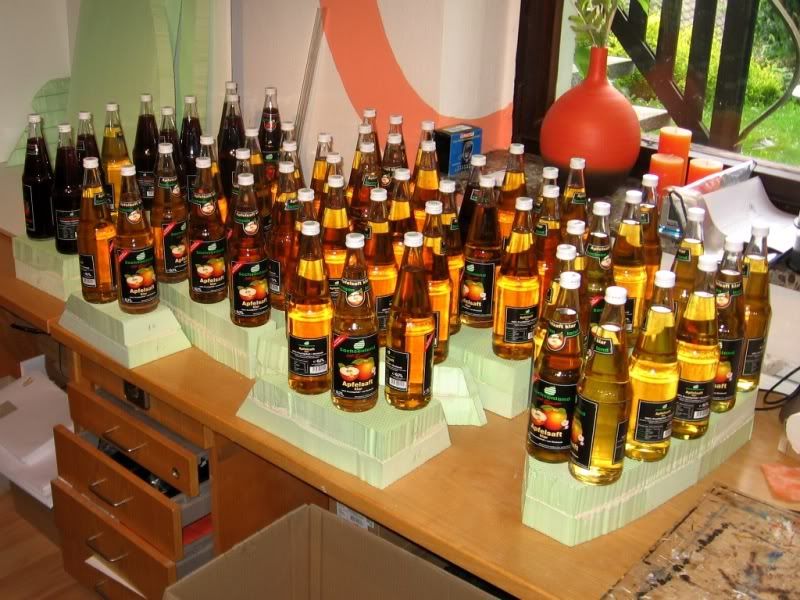
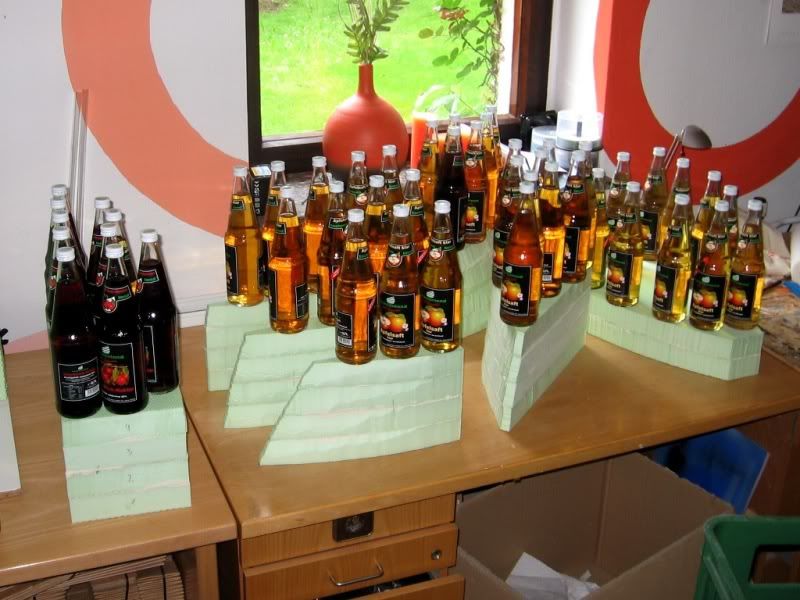
These pairs I glued with Styropor-/Stryodurglue that I bought in the DIY market for 7. To get a better result I ballast the separate pairs with glass bottles
After some hours I glued always two of this pairs together.
Nach ein paar Stunden habe ich dann jeweils 2 solcher Paare miteinander verklebt.
In the end I glued these packages in the basic form. Here I noticed that the packages weren´t very good and I would have a better result without these packages. But now it was too late and except 2 or 3 bigger slots it hasn´t more effects.
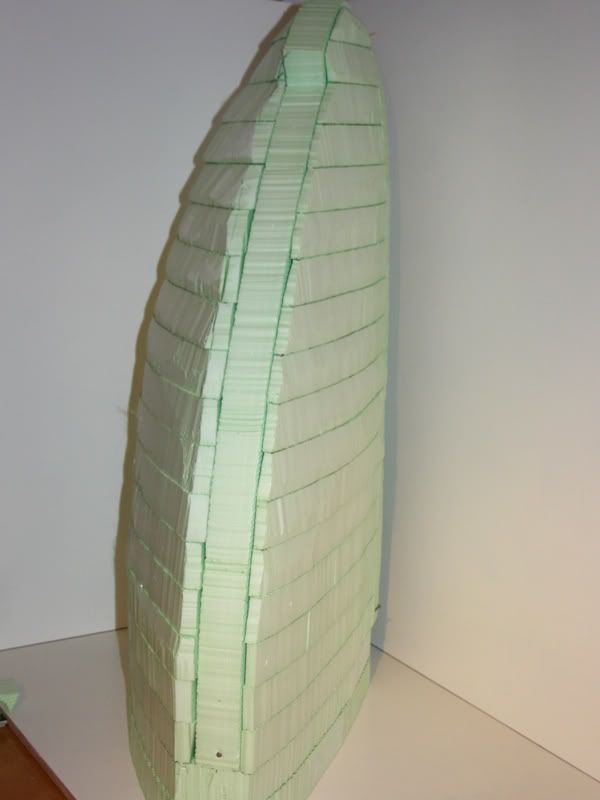
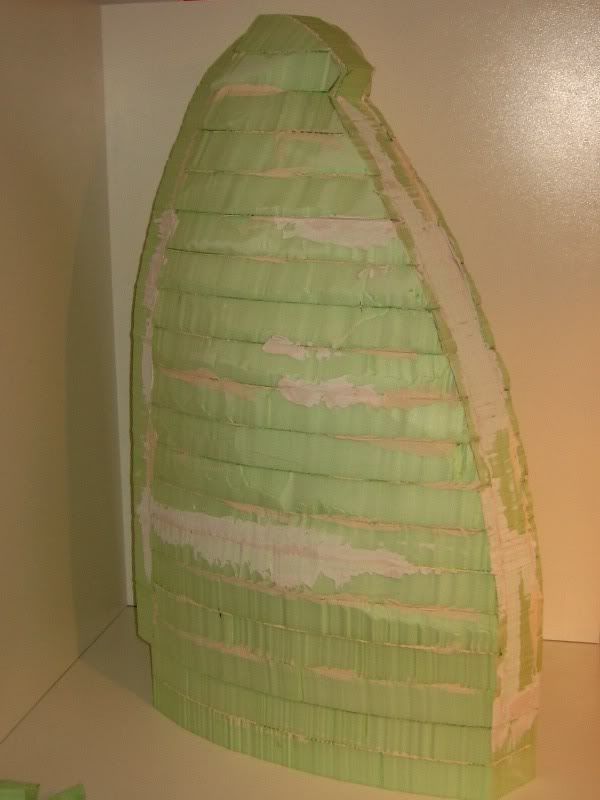
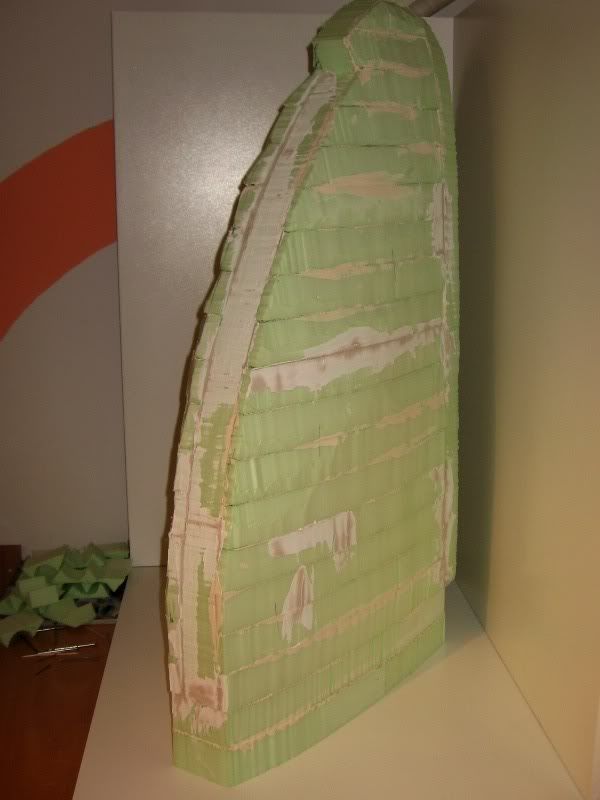
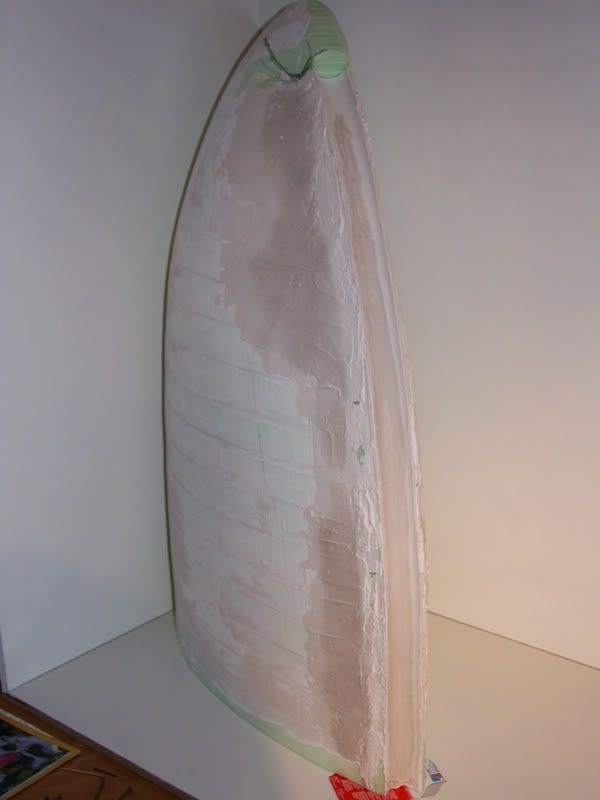
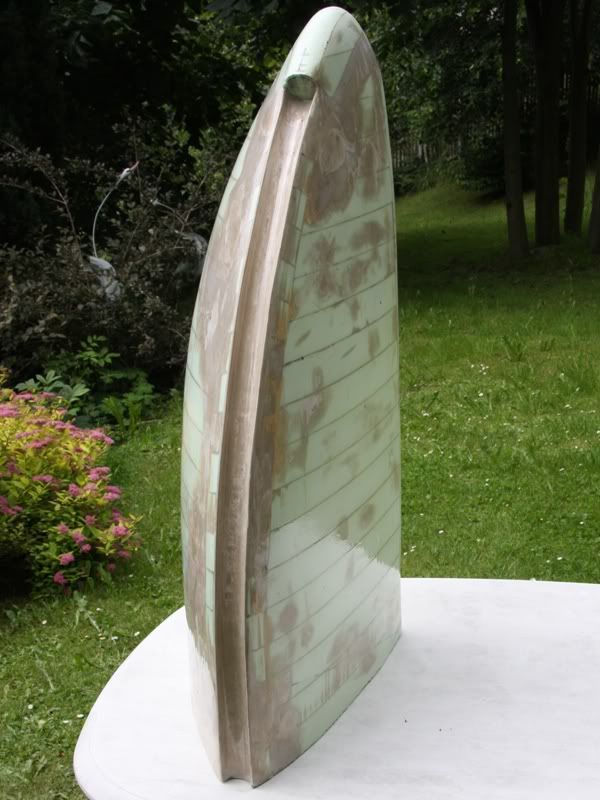
After the glue was dry I could started with grinding the shape and after two hours this was the result.
Certainly there were some holes in it, but all in all I was satisfied with the result and the holes I filled.
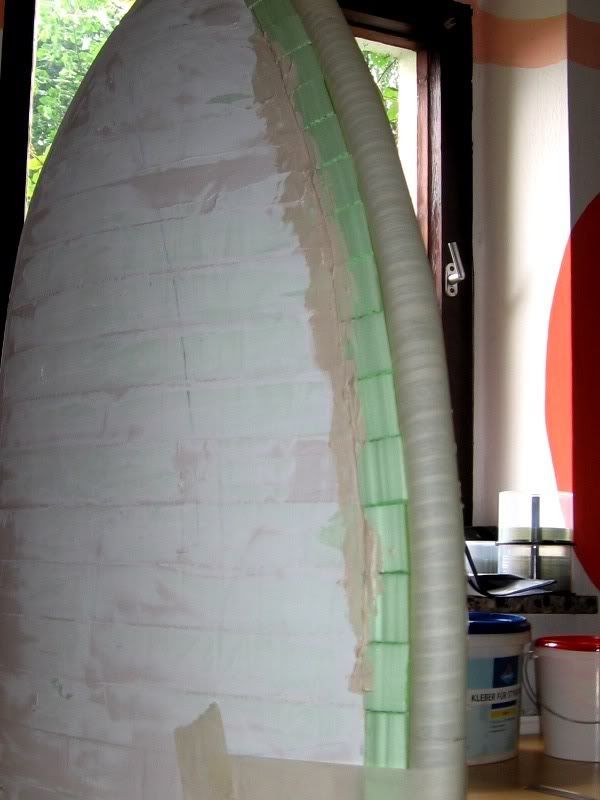
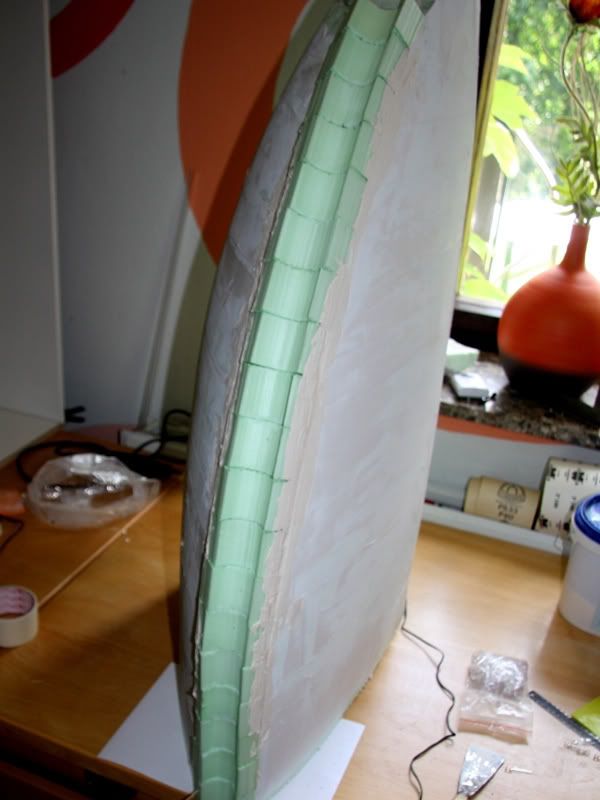
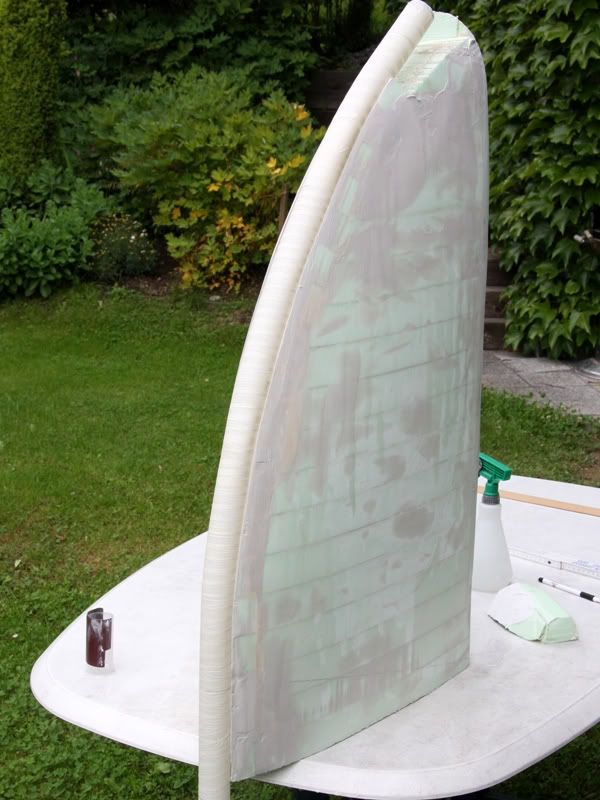
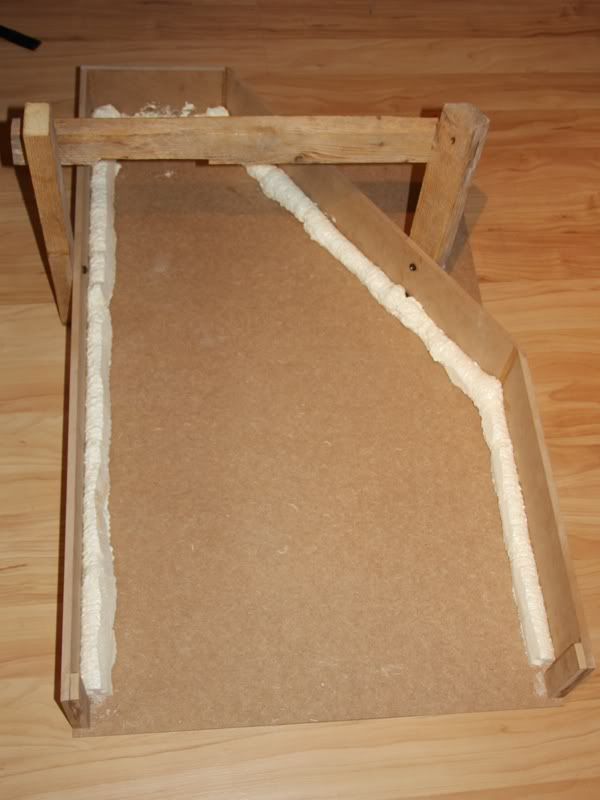
Ready with this I could start with the second heaviest work of the whole project. In fact after I bend the Plexiglas tube successfully (that was the heaviest work of the project) I had to adapt it very exactly. To realize this I cut out about 20 pieces that I glued at the front side. I aligned these while I press the tube into the immersion than the glue was still liquid.
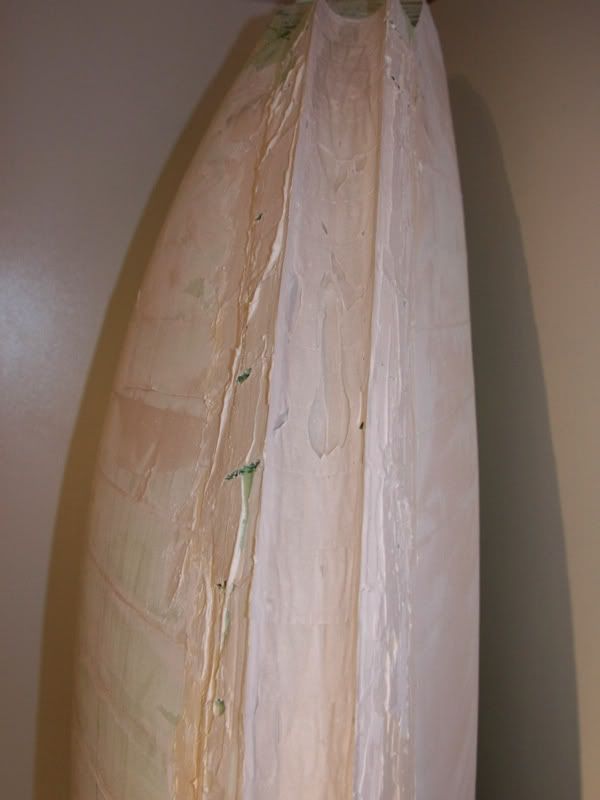
Naturally I had now firstly a rough form, because between the separate pieces there were slots how you could see here
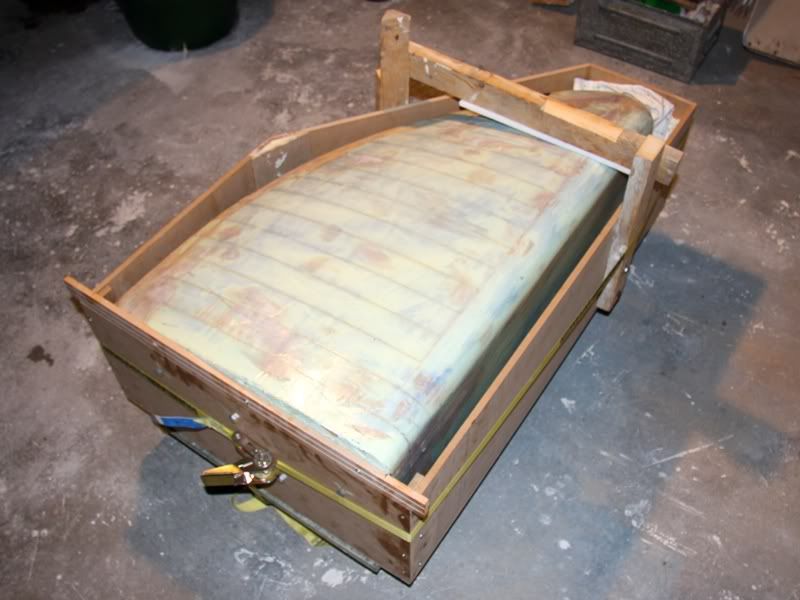
I had to fill these slots with filler, but this is easier said than done. To fill a 2cm radius freehand is not really easy (at least for me). To play it save I swathed the tube with baking paper at first.
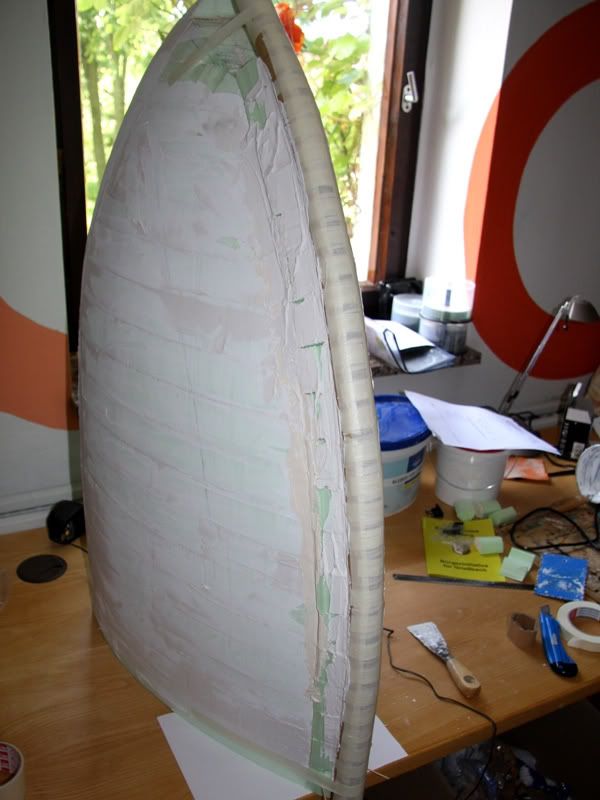
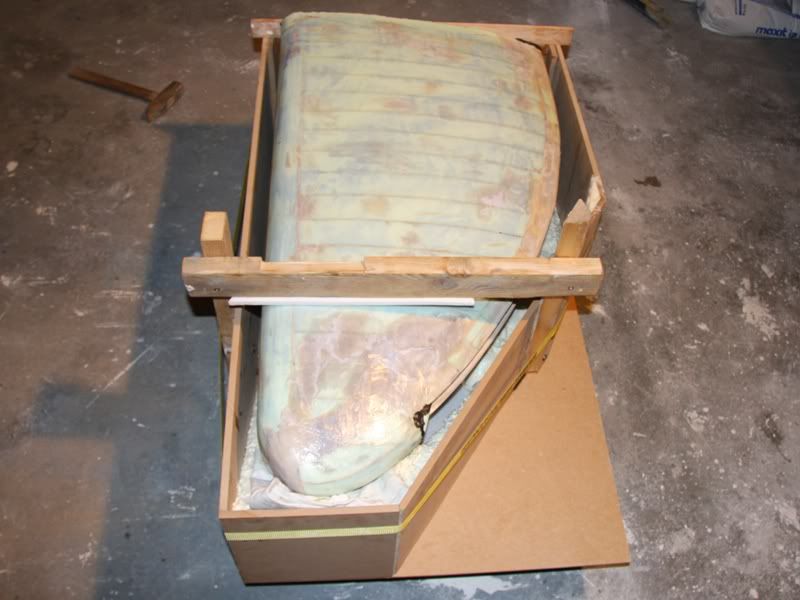
Now I fill the slots generously with filler and then I press the tube in the filler.
Because I swathed the tube with baking paper I was no problem to remove the tube after the filler was dry. Certainly I couldn´t find a complete smooth surface.
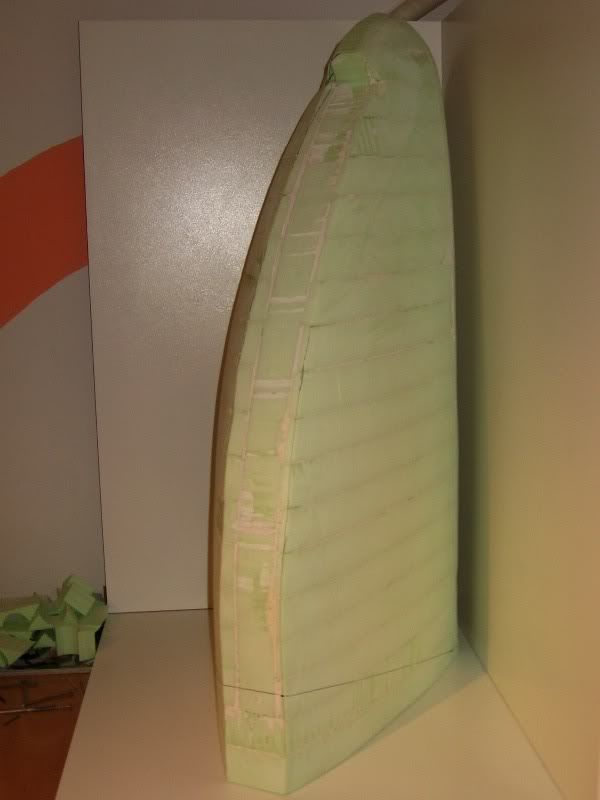
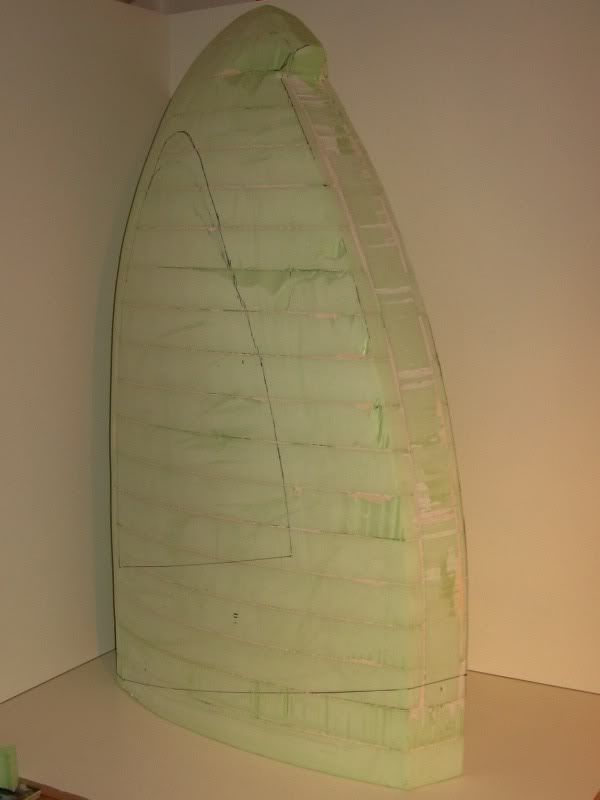
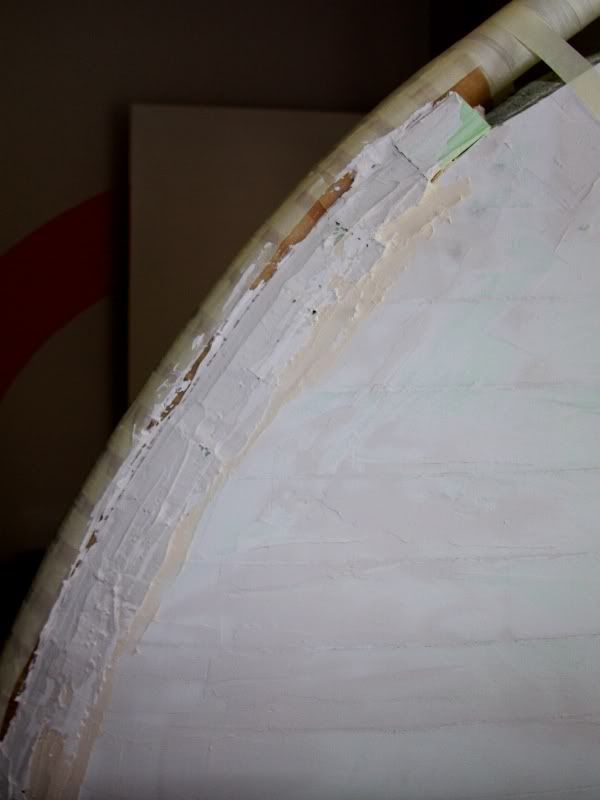
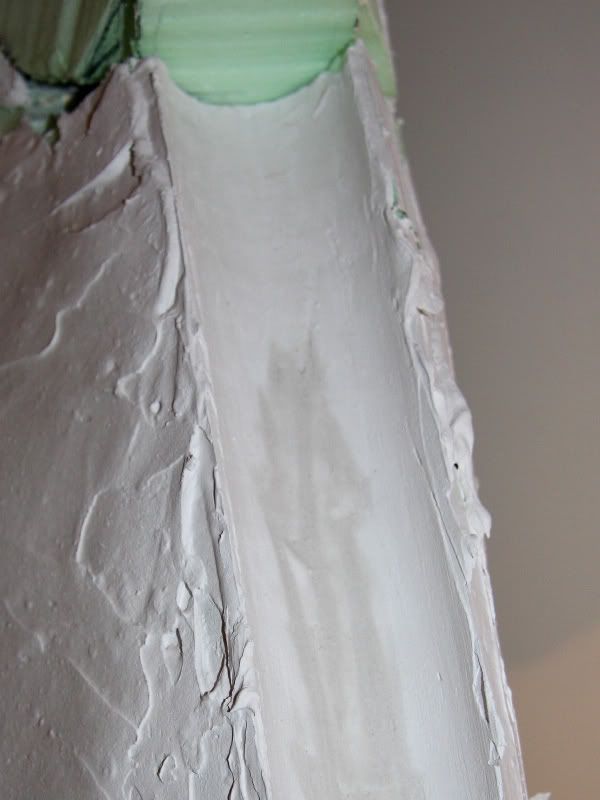
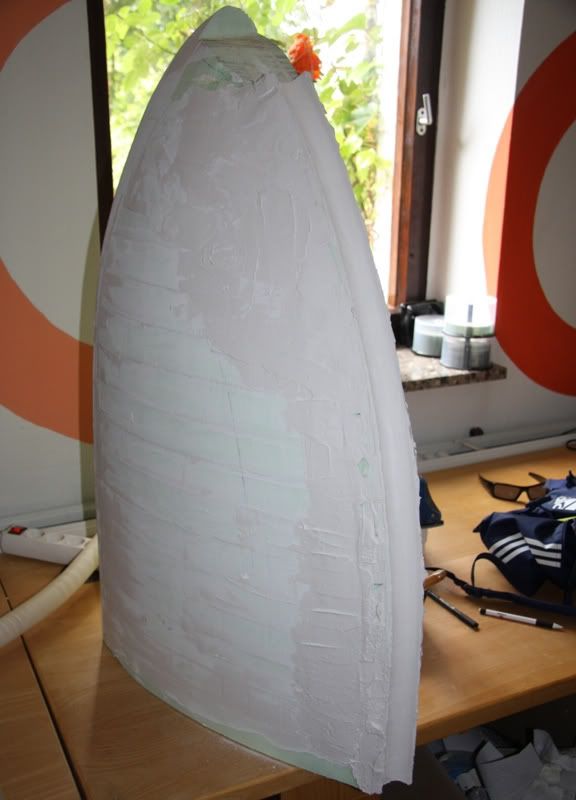
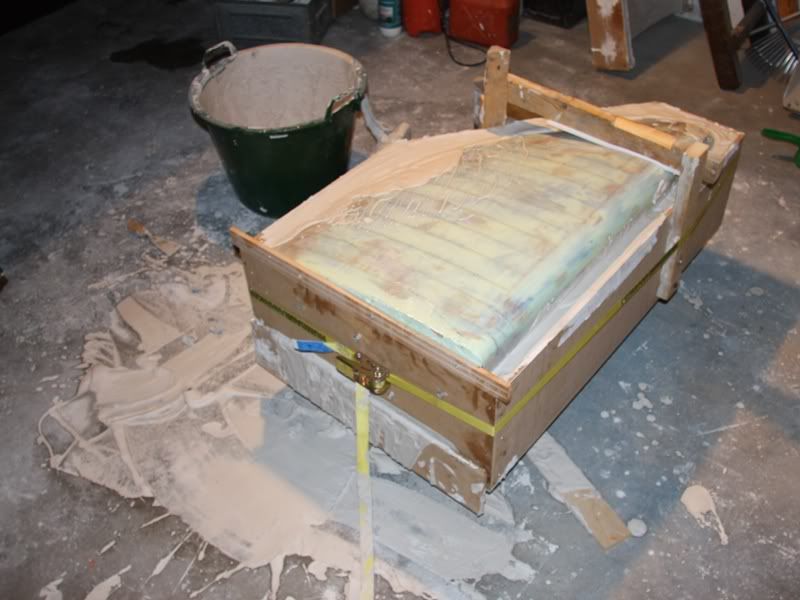
To get a smooth surface I built a kind of scraper made of Plexiglas. This scraper has on the one side a semicircle with a diameter of 4.1cm. After the first run with that scraper it looked so.
I also filled the transition.
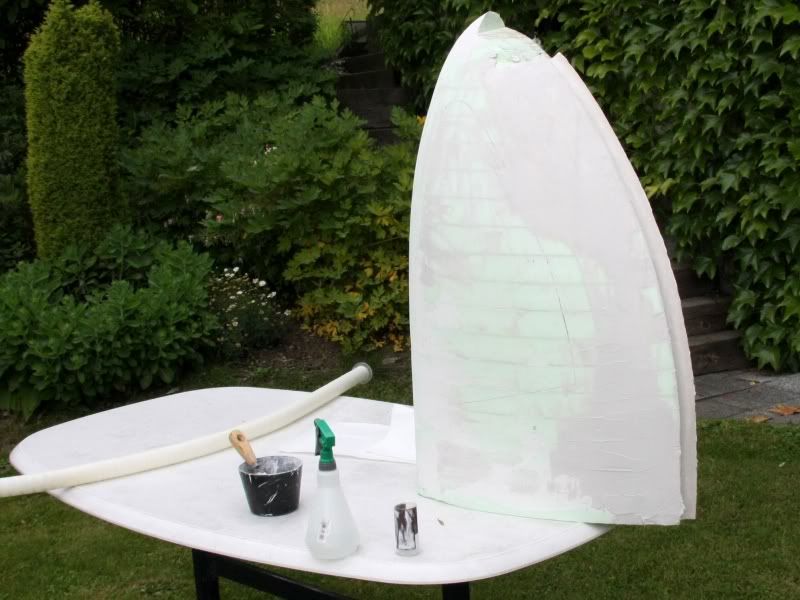
Unfortunately I hadn´t enough time to grind the form because the filler needs a lot of time to dry.
Beside the grind- and fill work I bend the inner tube for the reservoir. For this I had to built a new form, because the radius of the old form wasn´t still correct.
Now I built a kind of oven with a diameter of 8cm.
How you could see came the plexitube in the oven. The oven is headed with sand that got its temperature of 170°C in the baking oven before.
I fill the sand at first in the Plexiglas tube and then in the big tube. After some minutes the tube was soft enough to bend it.
Well I´m quite satisfied with the tube, because it´s almost perfect except one little bump. This bump I´ll grind out and because I´ll grind the whole tube matt it isn´t such a big problem.
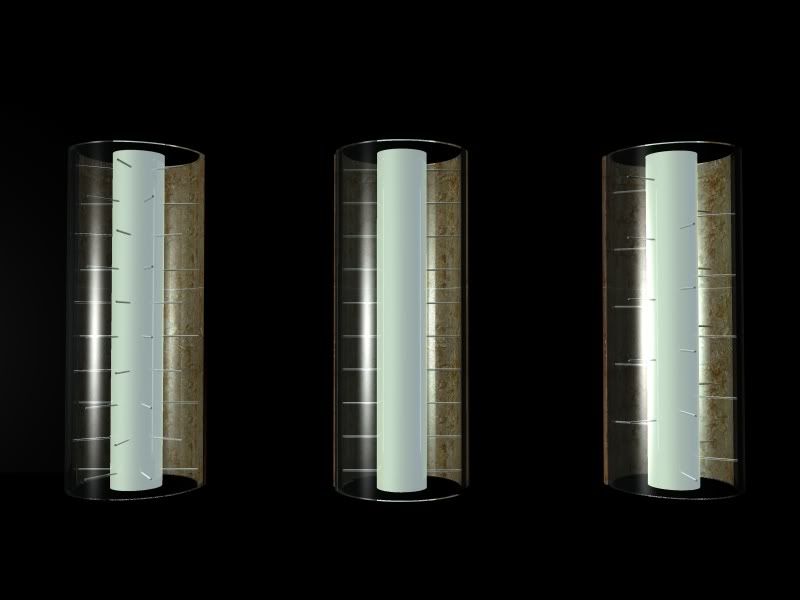
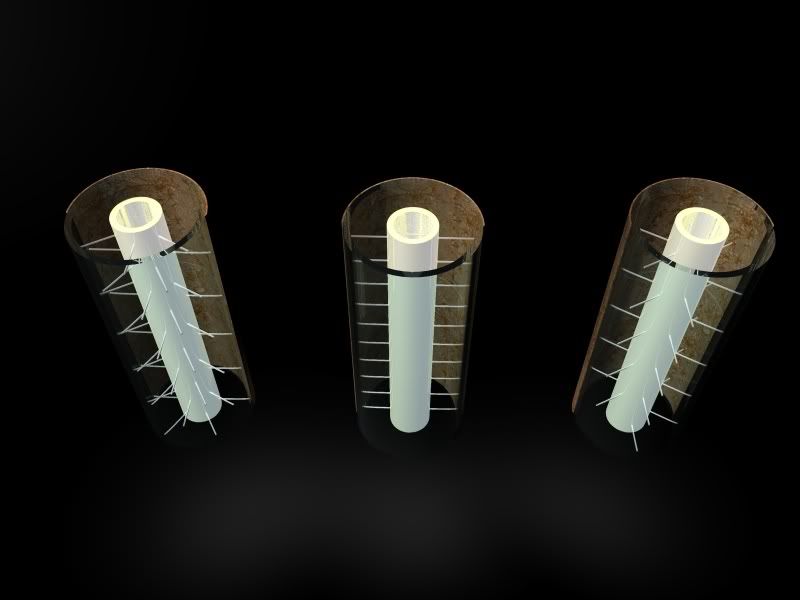
A bigger problem for me is, that I don´t know how I should bore the 0.6mm holes in the tube through that the water squirt. But maybe you could help me. Here are 3 possibilities.
So which one do you like mostly, or have you maybe other possibilities? The only condition is that holes should be bored at a line of 70cm, and in these 70cm I could only bore about 140 holes.
@OvRiDe: Oh sorry, I don´t see these other category, but I hope it´s no big problem for you to remove it. Well the thing with the title isn´t really important so you haven´t to change it.
-
Re: the golden sail
sweet! no1 left...
for sure
-
Re: the golden sail
omg amazing !!
Definitely worth rep :-)
-
Re: the golden sail
-
Re: the golden sail
Very interesting and imaginative idea!
-
Re: the golden sail
Hello, I it´s time for a further update. I know more little updates would be better, but anyway I don´t find for this. Therefore you have to settle for bigger updates every week or every two weeks unfortunately.
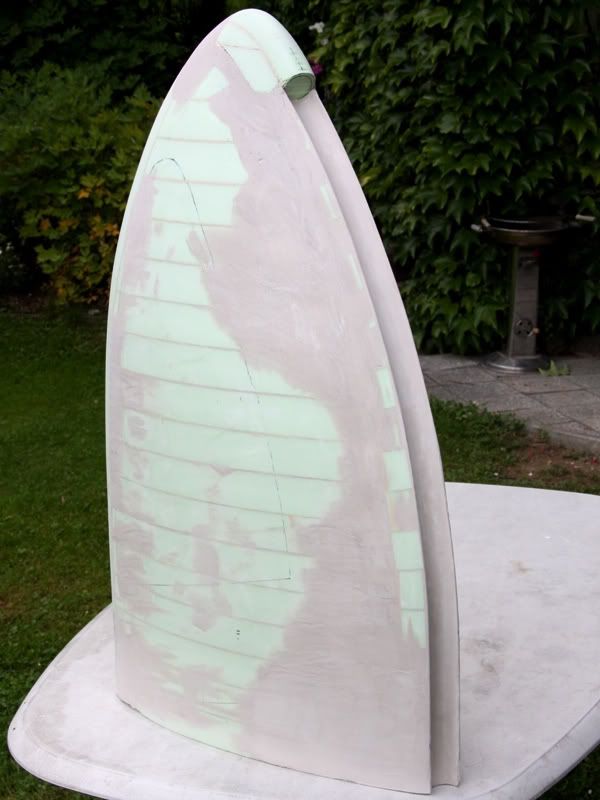
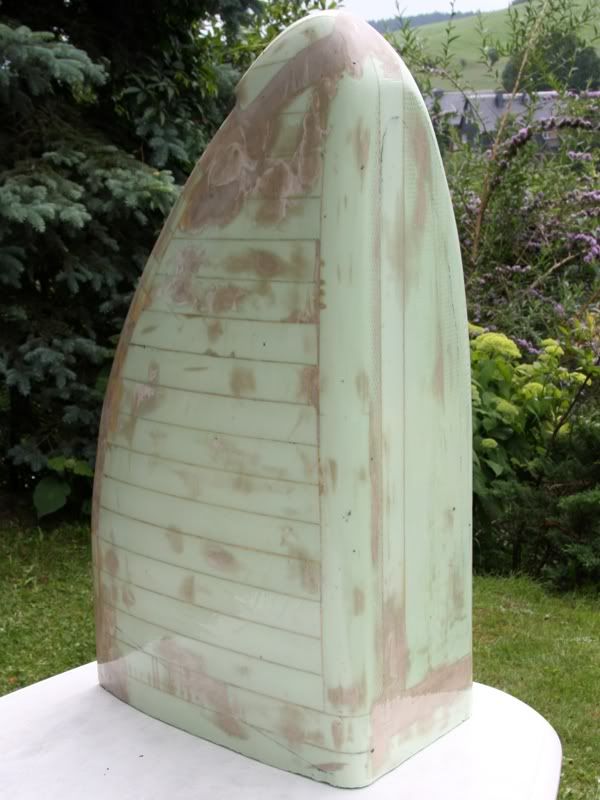
Well as might have been expected the first part of the update is about filling and grinding the positive form. After I glued the socket for the reservoir at the rest of the form I filled it with surfacer
And then I grinded it.
Ready with this I filled and grinded the front of the form, that the reservoir exactly fitted
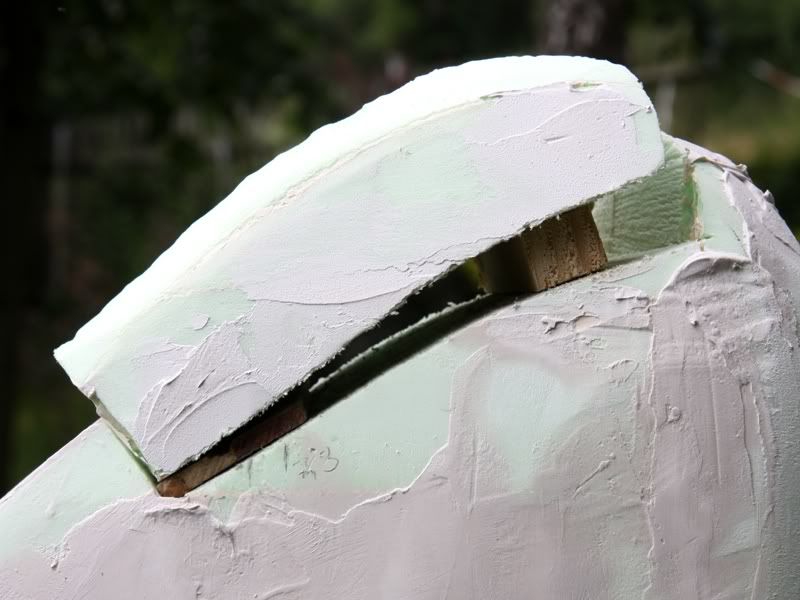
Thant he reservoir fitted I could put the peak of the form on the rest of the form
I don´t know why the peak is ca. 3cm higher than before
;-)
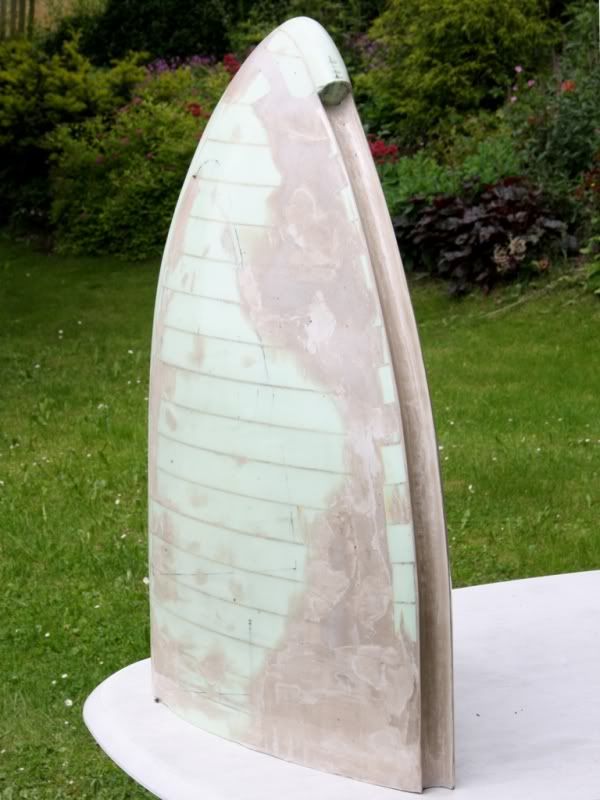
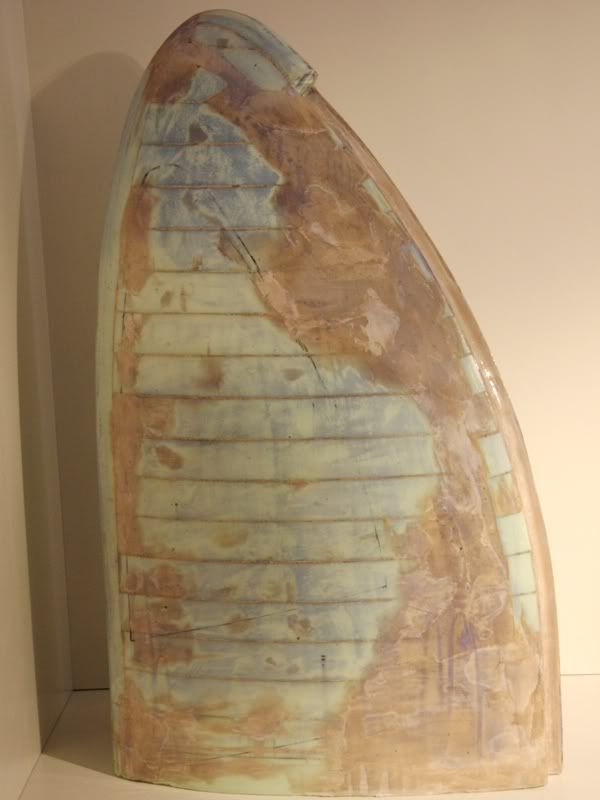
This gap I filled also with surfacer and after the surfacer was dry I grinded it. And at the end it looks so
Now the surface was really smooth, but because of the surfacer really absorbent, too. That means I had to seal the surface. For sealing it I decided for epoxy resin because it don´t damage the Styrodur.
After I was ready with spreading the form with epoxy resin I hit the sack for an hour and ditched the form in the sun. But this was a little mistake from be, because than I stood up I found this picture.
Unfortunately it wasn´t only one fly that taped at the form, but rather ca. 40 mini flies and ca. 10 bigger flies.
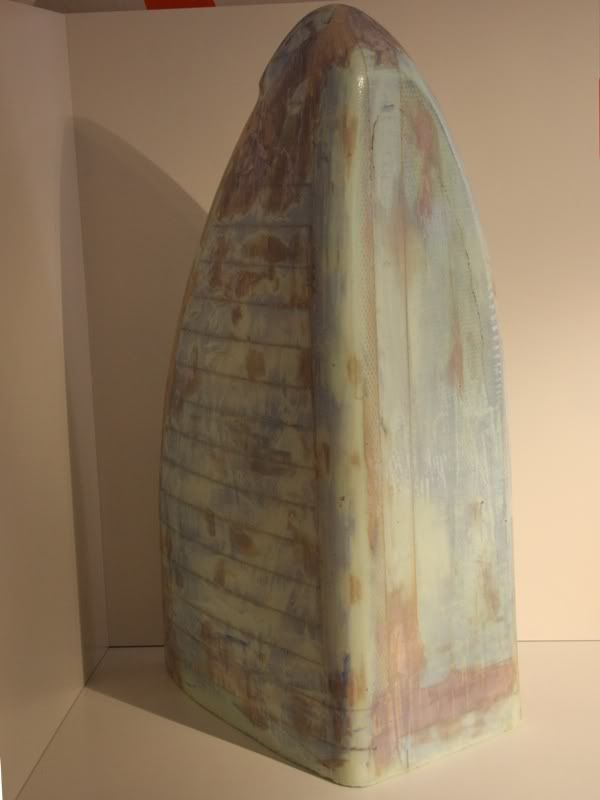
However I had blessing in disguise, because the flies were soaked with epoxy and therefore they were similar solid how the rest. Because of this I could grind the flies very easy how the rest. Therefore it wasn´t such a big extra time, because I had to grinded the form anyway.
With this step the filling and grinding of the positive form was concluded. After grinding the epoxy the surface was a little bit blunt. So I had treaded the form with car polish. Ready with this some party of the form get a blue hue based on the polish
;-)
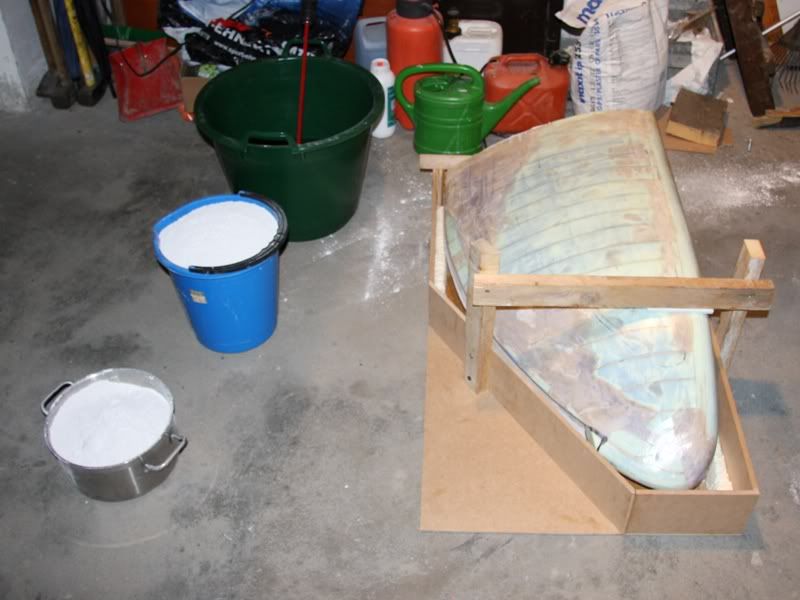
Ready with the positive form I could start with the negative. For this I thought a form made of plaster is the best thing. At first I would casted a complete form, but with a complete negative form I would have problems by laminating the form. So my plan was to made two forms, one from the right side, and the second from the left side
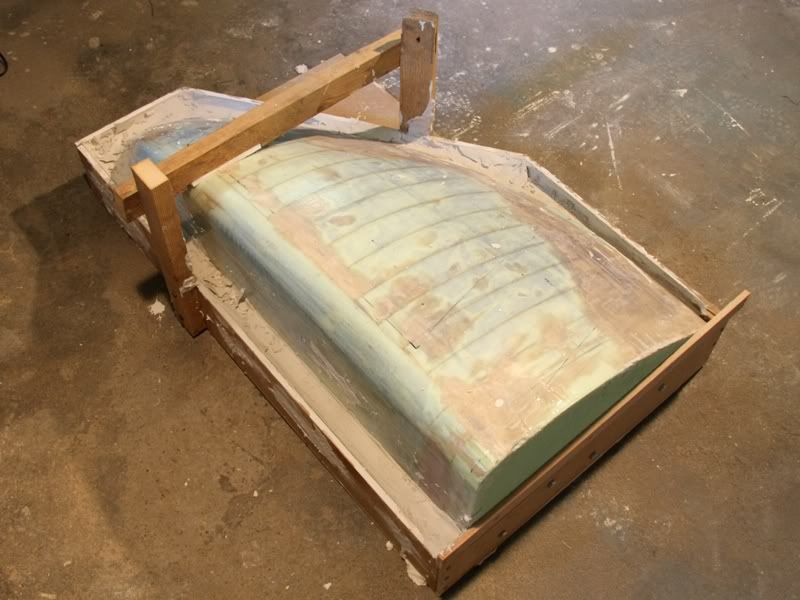
With this plan in my head I started with building a form in that I could put in the positive form and cast the plaster in it. I started with the form for the right side.
The edges I reinforced with architectural foam to get a better stability.
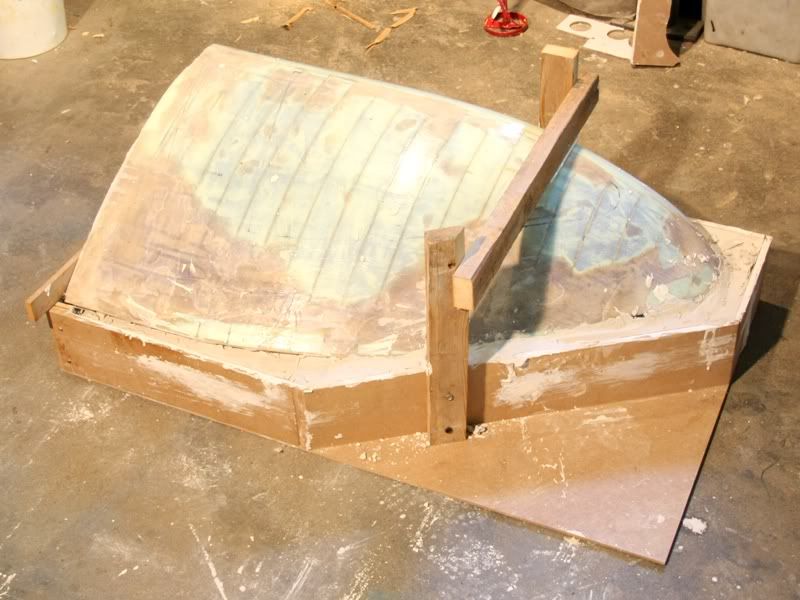
And so looked the form with the positive form in it.
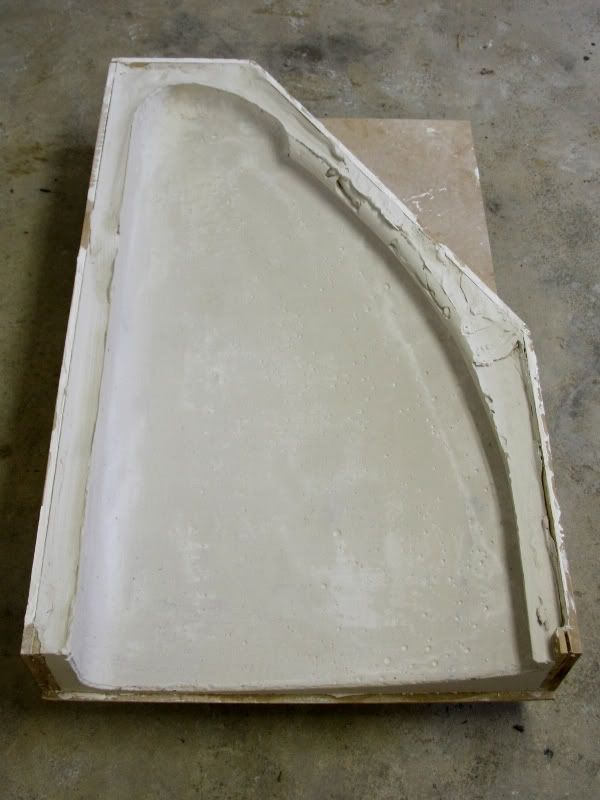
After I casted ca. 25kg plaster in the form it looked so.
Past 6 hours I could remove the positive form relative easy. Now the negative form looked how a Swiss cheese, but I think after I´ll fill it with surface it would be very smooth. And I think it´s better to have a lot of little air inclusions than few big air inclusions.
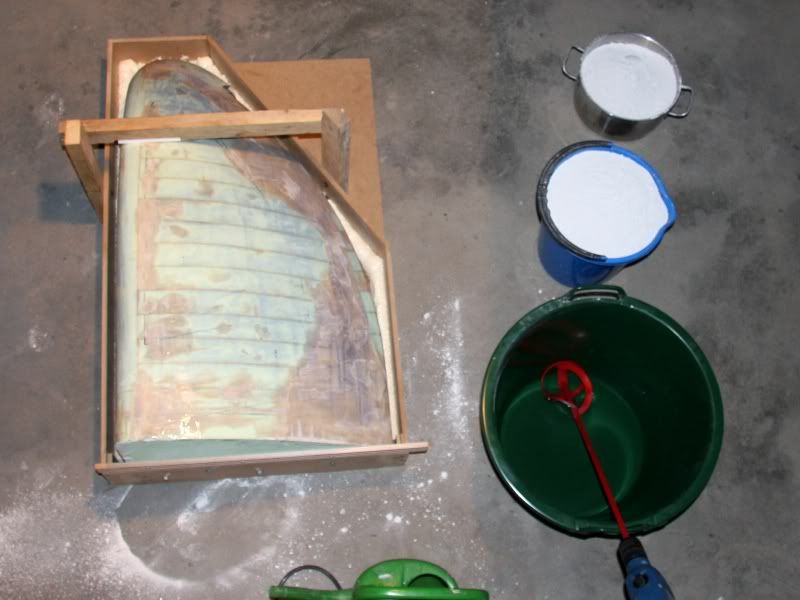
Ready with the right form I could started with the left form. At first I built the form for casting the plaster in it.
With the positive form in it, the form looked so.
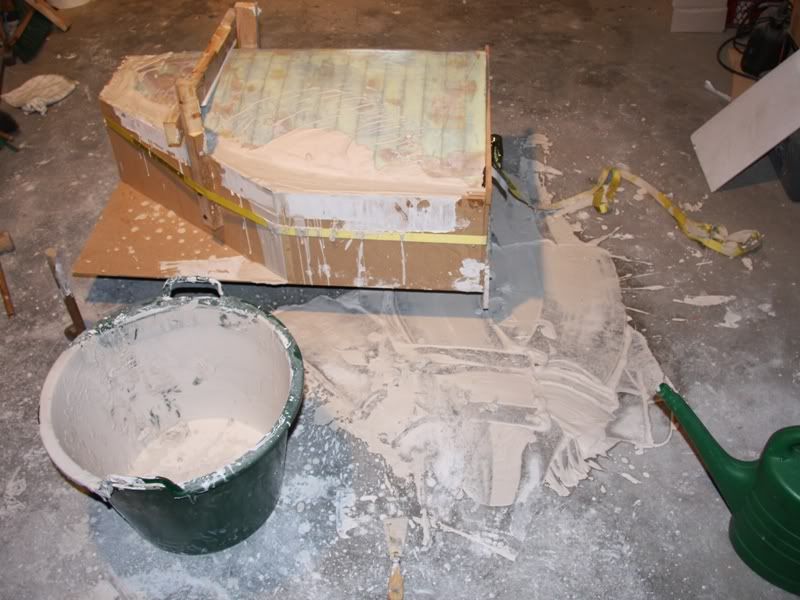
And so the havoc after the casting session.
How you could see was the leaky so the plaster flowed out because of the pressure of ca. 80kg plaster
;-)
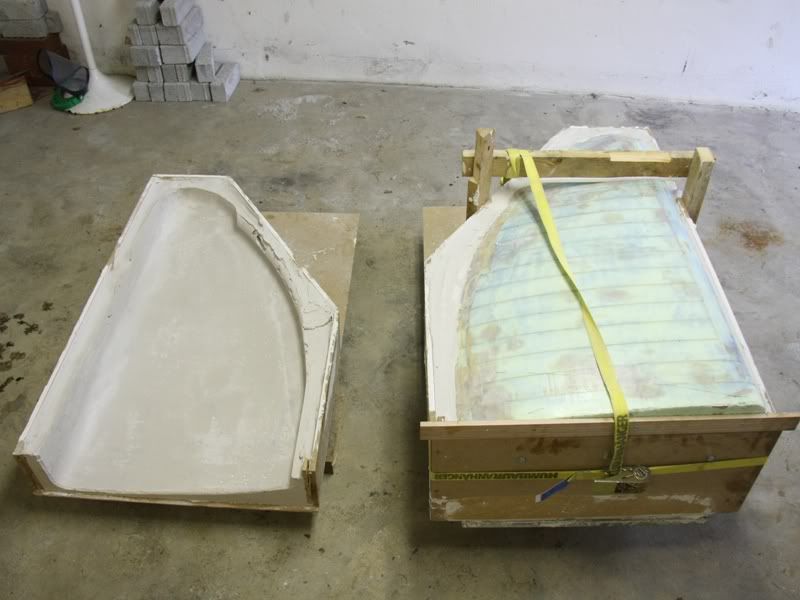
I´ll remove the positive form tomorrow, but at the following pictures you could see the two forms abreast.
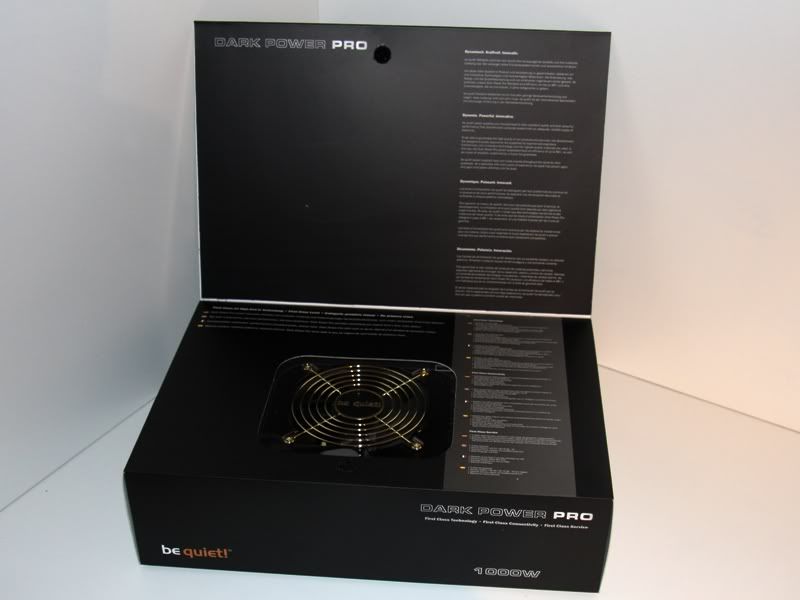
Well at least a little Hardware News, in fact I got a great packet last with the following content.
How you could see is this a Dark Power Pro 1000W that I got from be quiet. Therefore I would say a big, big THANKS to Aaron from be quiet for the great support!!!
-
Re: the golden sail
Looking quite exciting :D
-
Re: the golden sail
i really like it its looking really good mate
-
Re: the golden sail
Go on the curve master.:banana:
Another outstanding build taking form +rep:bowdown:.
-
Re: the golden sail
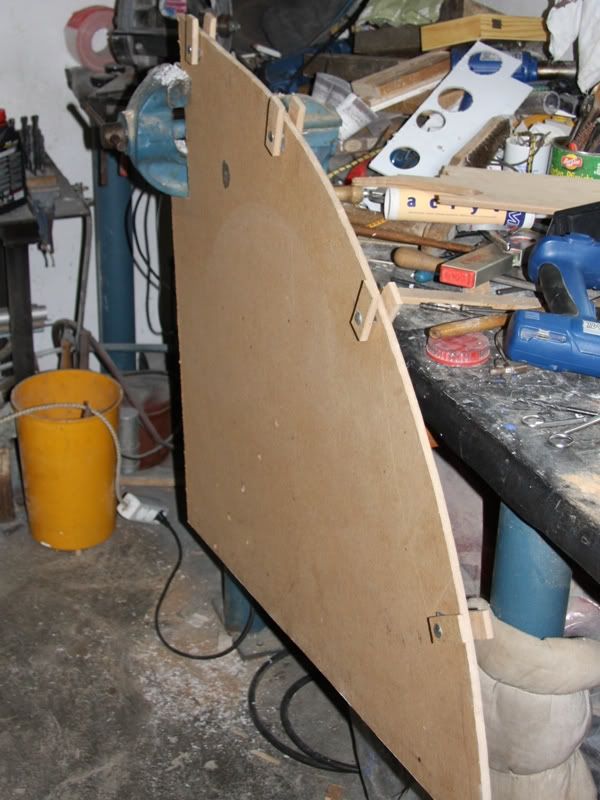
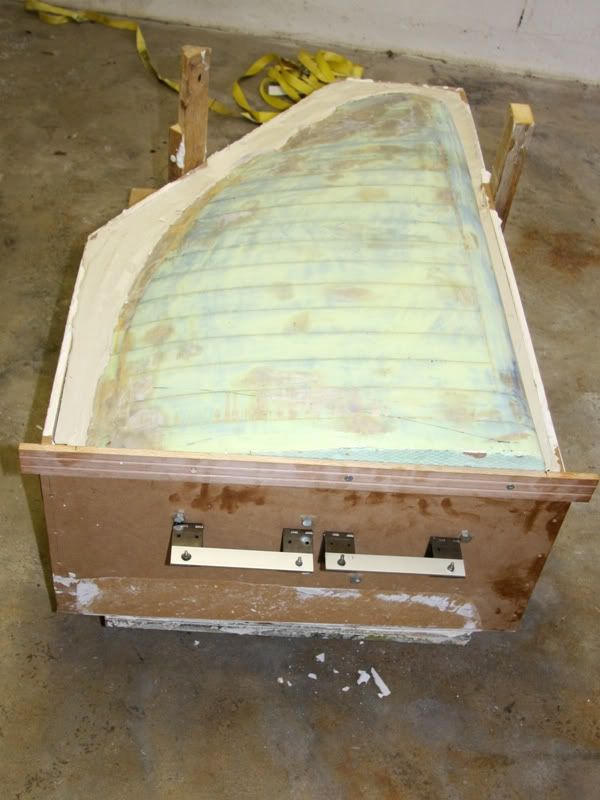
Hello, after I cast the big form with plaster and the plaster was try I could speculate about getting the positive form out of the plaster. For this I installed at first two self made grasps on the positive.
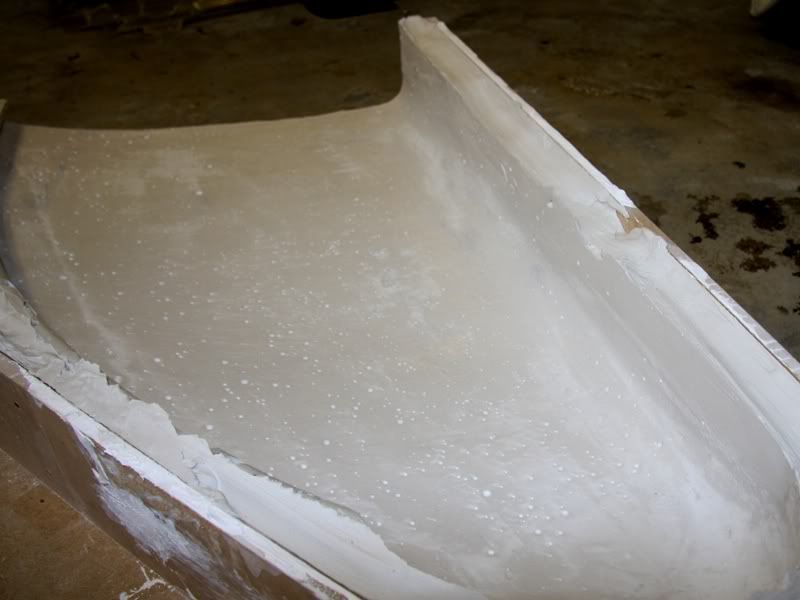
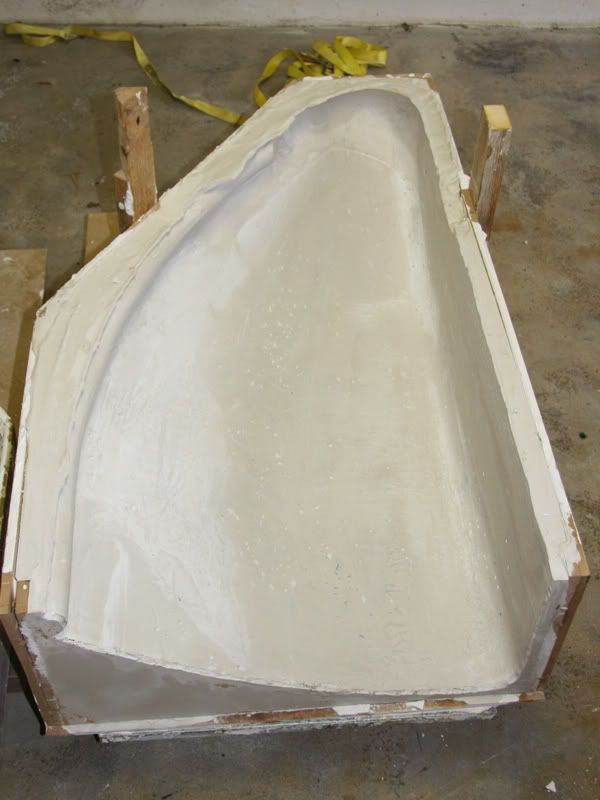
With this grasps it was really easy to get the positive out of the plaster and so I had two negative forms.
The result of the second form was a little bit better than of the first form, but only a little bit. That means there were a lot of air locks that I had to fill with surfacer.
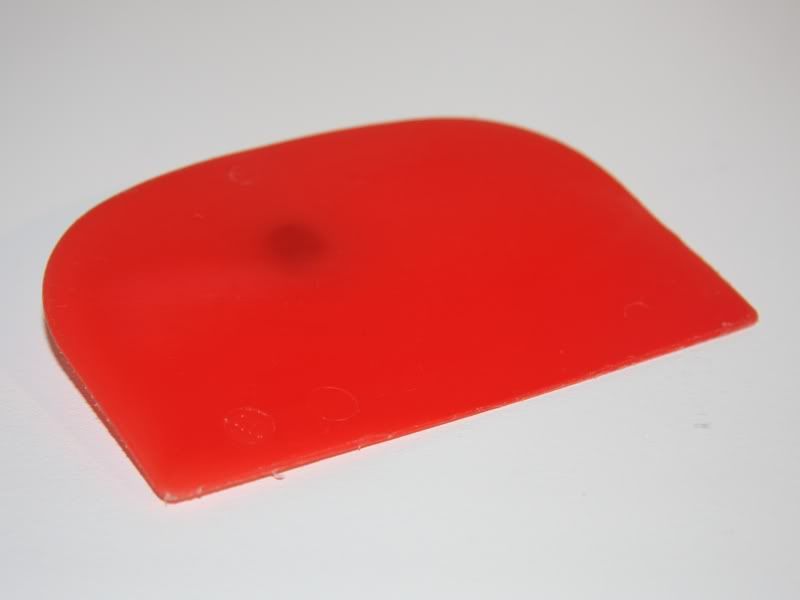
Well and so we are by the theme, because to fill a concave form with surfacer isn´t such a problem with a normal scraper, but to fill a convex form is a bigger problem with a normal scraper. So I had to look for another alternative. After I short look in our kitchen I found an ideal scraper.
This red thing made of plastic is an ice-cream scraper from the DDR that means more than 20years old. At this thing you see that you should never trash anything
;-). This scraper was ideal for the big convex surfaces, and for the tight radii I used a silicone scraper from the kitchen.
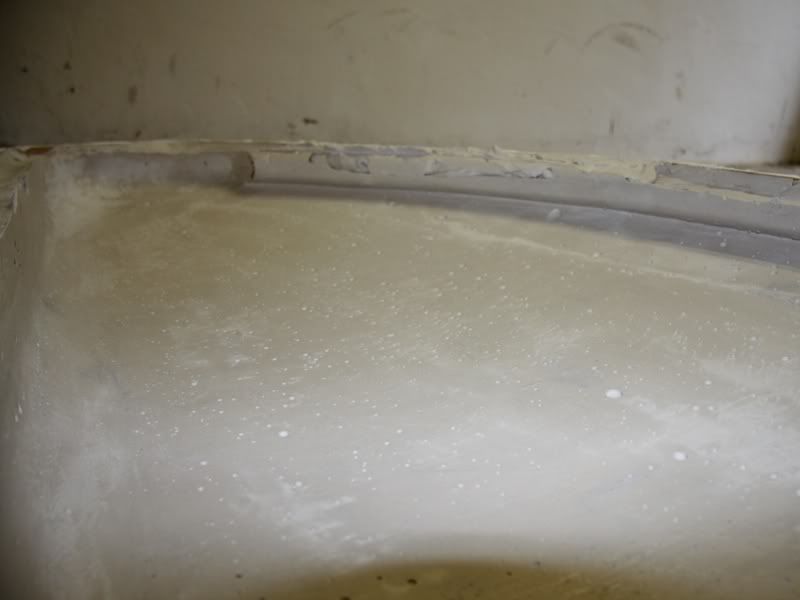
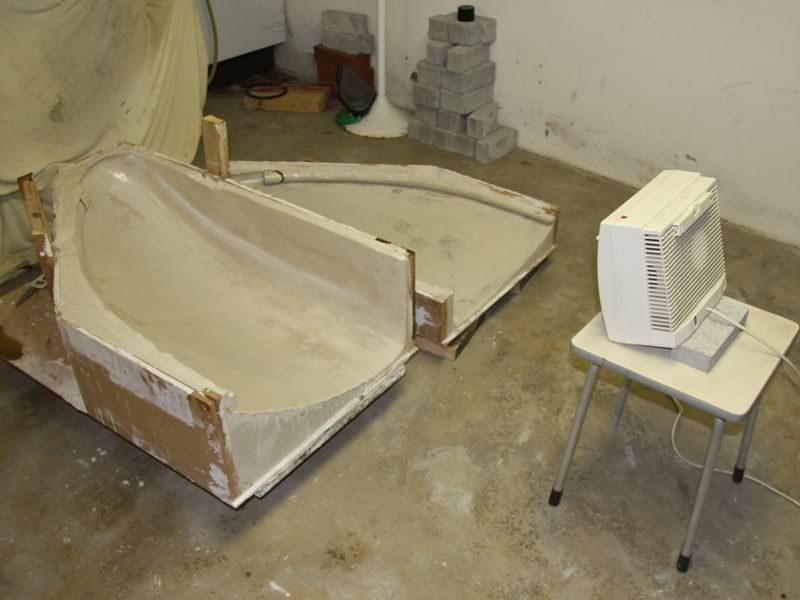
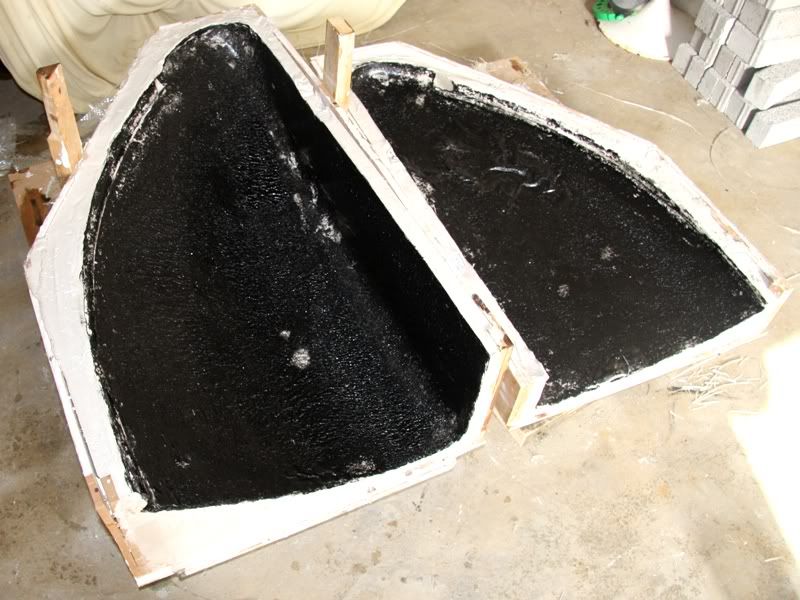
Ready with filling the air locks of the two forms I could start to seal the plaster surface with epoxy resin.
The white box is a blow-drier to accelerate the process of drying.
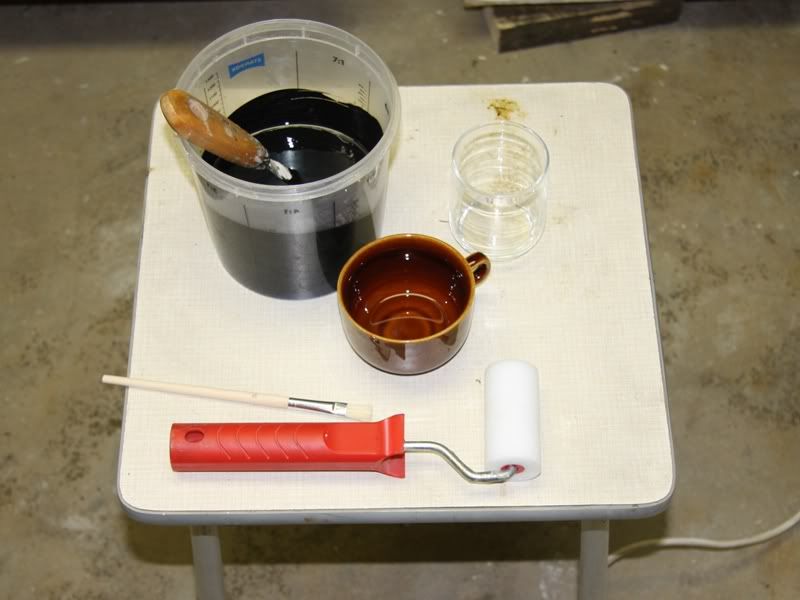
After the second layer of Epoxy I treated the form with wax to get the GRP-form easier out of the negative. Than the wax was dry I polished it and then the drama could start. At first I measured out the ingredients for the first layer.
This is gelcoat for the outer layer of the GRP-form to get a really smooth surface.
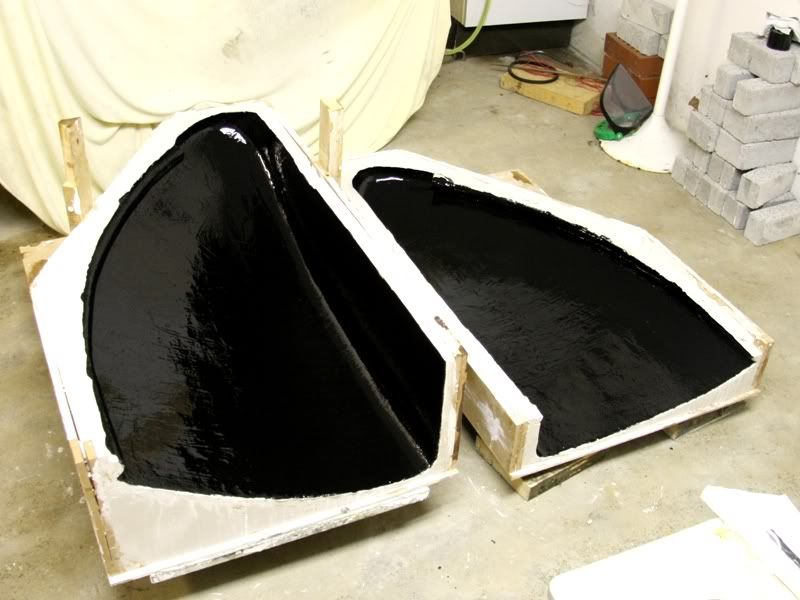
After I stirred all together I painted the gelcoat on the form with a roller.
The black color is more just for the hell of it, because the case will be varnished black either way at the end.
During the gelcoat dried I cut out the fibreglas mats.
Well and now I got the first little doubts because the gelcoat didn´t dried, that I wondered about. But a short internet research said me that the gelcoat haven´t dry at first, it will dry complete after the first layer of polyester resin.
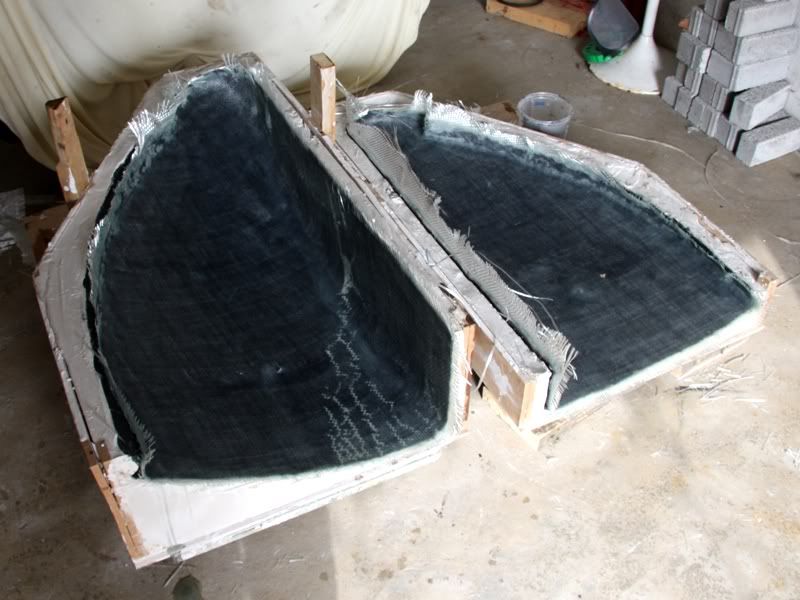
So I could continue without any doubts with the first layer of fibreglas and polyester resin.
And so looked the form after 3 layers of firbeglas.
Currently I got a real great problem. In fact I noticed that the gelcoat wasn´t dry after two days, and I haven´t had really big hopes that it will dry the next days. That means I had to change my plan.
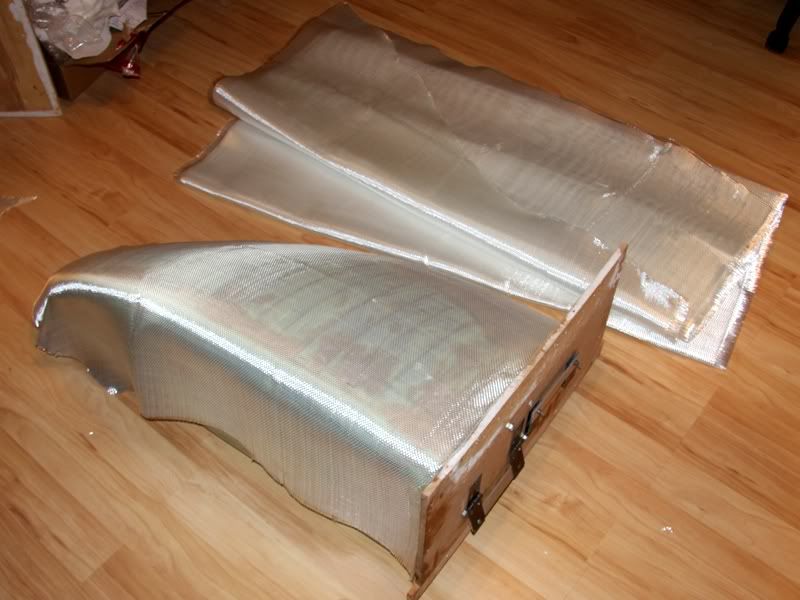
After I gave some thought to the problem I came to the decision to put the GRP-form out of the negative and then I would continue the work on it.
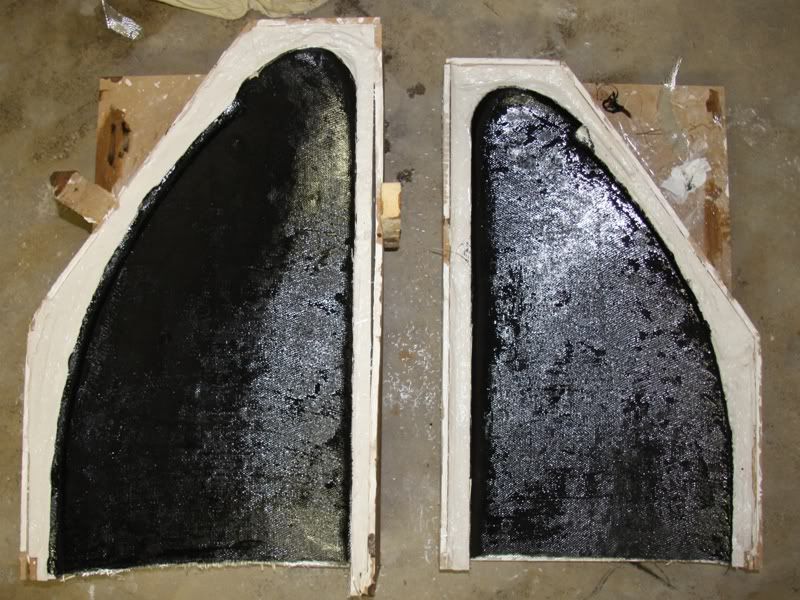
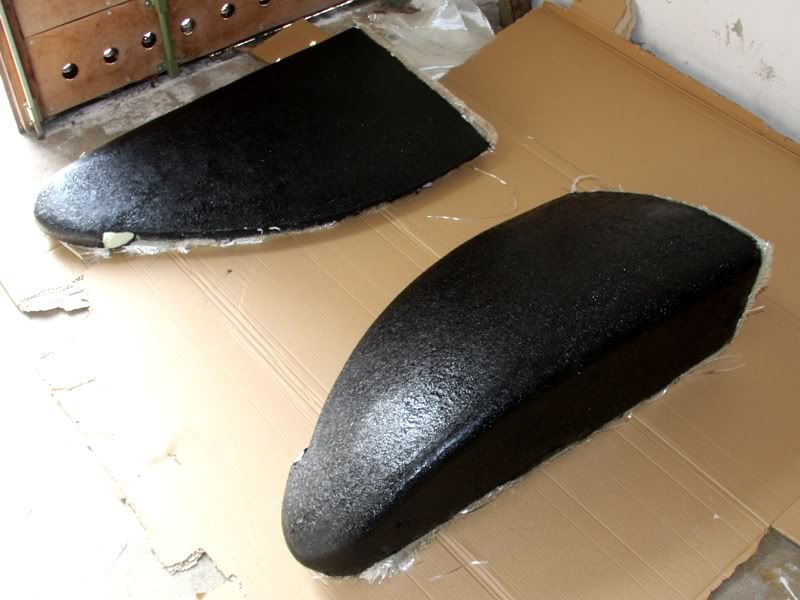
No sooner said than done and so looked the two GRP-forms.
And so the two negative forms made of plaster.
I´m actually satisfied with the two GRP-form. To get a better surface I pained the two forms with polyester resin and the following week I try to put the two forms to one form together. The result you´ll see hopefully next week.
At the end I´ve one question, namely I don´t know how I should install the LEDs in the interior to illuminate it really good. So if you have a great idea how I could integrate the LEDs in the design of the PC, please let me know it!