Nice progress on both the house and the case. :up: The floor looks great. I've done a bit of that, and it's not the fastest method (or easiest on the back), but boy does it look pretty. :D

Printable View
Nice progress on both the house and the case. :up: The floor looks great. I've done a bit of that, and it's not the fastest method (or easiest on the back), but boy does it look pretty. :D
They're both looking good. I can sympathize on the knees needing a break, in the process of redoing our bathroom (leaky toilet)2 day on hands and knees. And still can't get the wife to let me put a computer in the fake woodstove.
Lol!Quote:
Originally Posted by msmrx57
What's the matter with her. Everybody's doing it!;)
Thanks everyone. I should have more done soon. I need to grab a few parts today and then get back to it.
this mod is awesome
Thanks farlo:)
I'm trying to get this thing done in the next couple of weeks but I may be done even earlier. I can usually slam out a mod pretty quick if I am left alone to focus.
So here is the latest progress -
I assembled the hardware for the first "test fire" and to make sure I haven't forgotten anything. It all fit really nice and then I discovered how little space I had for getting my hands in there. It has great airflow too. I don't have the exhaust area started yet but that will be toward the end. I promise it will be cool..no pun intended.
I had to plug everything into the back of the monitor and hang it out since I can't get to it once the motherboard tray is in place.
It fired up with no errors and so back apart it goes. Now it's getting torn down for paint...but wait!!! I forgot something!! What about USB and a LAN port??!!
I sorta keep forgetting that everything is "completely inside this case" so there is no back panel for connecting anything.
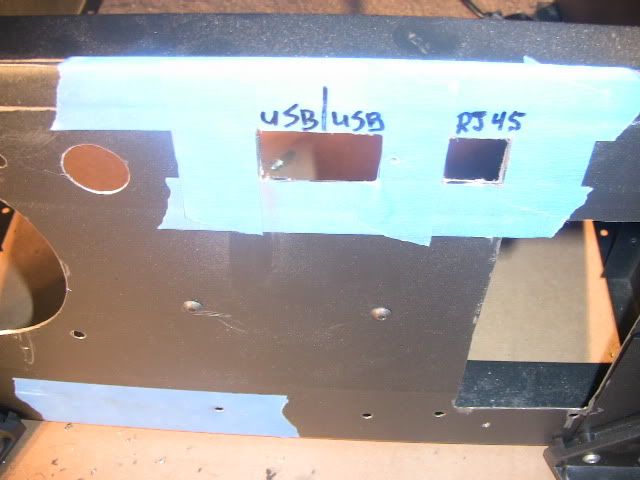
I figured out a good spot and started making an acrylic block for the USB ports. I'll just be using a couple 12" extensions to make this work. Real easy.
I'm keeping them at the back and the underneath side of the case so they won't be seen.
But wait a second...earlier I had drilled a hole for doing something but I don't remember why??
Oh ya....my plan was to run the power cord of the monitor through this hole and use an anchor to keep it from getting accidentally tugged on. It was a great idea except I wasn't thinking that the actual head of the plug won't fit through the hole..doh! Unless I want to chop the cord and patch it back together after I slip it through the hole.
Oh well I'll screw with that later ---
It's time for tear down and paint. I'll be painting all the pieces to match the black krinkle finish of the stove.
The monitor bracket I made has some holes in it and the ends are open. I think it needs cleaned up so I'm stripping it down and doing a little trick I learned while experimenting on another project.
So the trick is to put some tape over the area you want to dress up.
Then to clean the edges and make it look like it's capped off you take a file and hit the edges. This will cut the tape cleanly and blend it on the corner.
Now once I paint it you won't even notice that it was taped. And it holds just fine.
I've got all the parts painted and drying right now and should be ready by morning.
Huh, interesting trick with the tape...just don't do it anywhere that it might get poked. :P
Quote:
Originally Posted by x88x
Nobody better be pokin my puter..:lick:
You bring up a great point. If it is possible for someone to be touching/screwing around with these areas it may need a little something behind the tape. Or just bondo it. There are also plastic furniture caps that may be the right size to pop in but I didn't want to make a trip to the hardware store just for that.
lookin nice!
Paint turned out great. I was able to match the texture really well too. It has a grainy black finish on it.
Once I set everything next to the monitor I realized I really should paint the monitor too.
Then I assembled the hold down bracket. The picture makes it look kind of crusty but it actually looks nice. The ugly holes will be covered with rubber plugs once I screw it to the case. I need them there to insert the screws first.
I have begun final assembly ( I think ) and it's looking really good. I am starting wire management and need to sleeve everything. I've successfully voided the warranty on the PSU and started some shrink tubing.
I'm going with some really different sleeving that might surprise you. I think it will go well with the overall look. You'll see it on the next update.
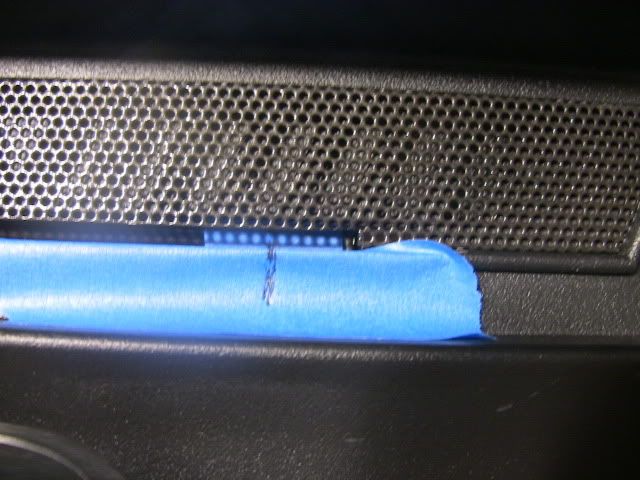
I have the DVD drive mounted and I thought I better put in an "eject" button instead of relying on a keyboard shortcut. So I have marked a spot where I can drill a tiny hole through the front grille. I will insert a small pin that will not be noticeable.
I drilled the hole and it's totally invisible. I will get the pin installed for the next update.
Well I didn't worry about getting the little pin installed but I did get a little wiring done. I hate wires everywhere and so I always make everything as hidden as possible. I spent about 8 hours cutting wires to length, soldering, shrink tubing, and sleeving. It takes a long time to do it right but it's worth it. The only thing with this case is that I'll hardly ever pop the back open but at least I'll know it looks good.
I did something really different for the sleeves. I thought since it's a plain black wood stove that it needed a few blingy parts. So I opted for some real stainless steel sleeving. It looks really awesome and goes great against the black.
It's hard to see in the pics, but it looks pretty cool. It will be very carefully routed since it is metal. I just love pushing my luck :P
I mounted the monitor and plugged off the holes using some rubber stoppers.
Much cleaner!
I mounted the monitor control panel under the front lip of the front bezel. You cannot see it when looking straight at the stove. The reset button and the HDD activity light can be seen over on the right. It was going to be the power button but I had a hole in the back I drilled earlier by mistake and the "real" power button fit in it perfectly.
Here's a pic of the bottom panel near the back. It shows the power button mounted and it shows the USB ports and the Ethernet port. It looks a little crappy in the pic but it's not bad at all in person. I will be touching it up however because now it's bugging me. I don't want it looking hacked up.
I'm pretty close to getting hardware put back in it. Then I have to work on the back panel which should be easy and I have something special in mind for the top. I've been working hard on something for it that will be awesome if it works the way I want. 8)
.