Oh ok cool, was just sayin:D thanks for the info.

Printable View
Oh ok cool, was just sayin:D thanks for the info.
No worries.
very nice man... very sleek....
.
.
.
you are encouraging my urge to make a water cooled cpu block.... thats right make.... lol
probably wont,,,,
very nice
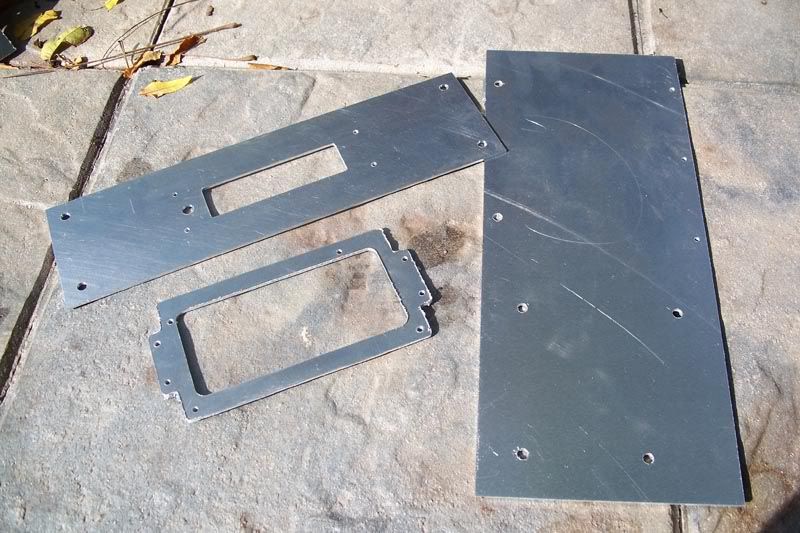
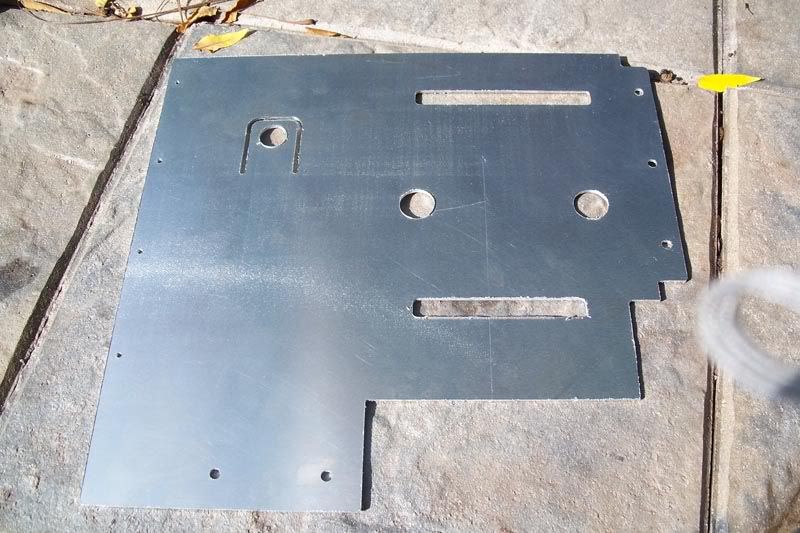
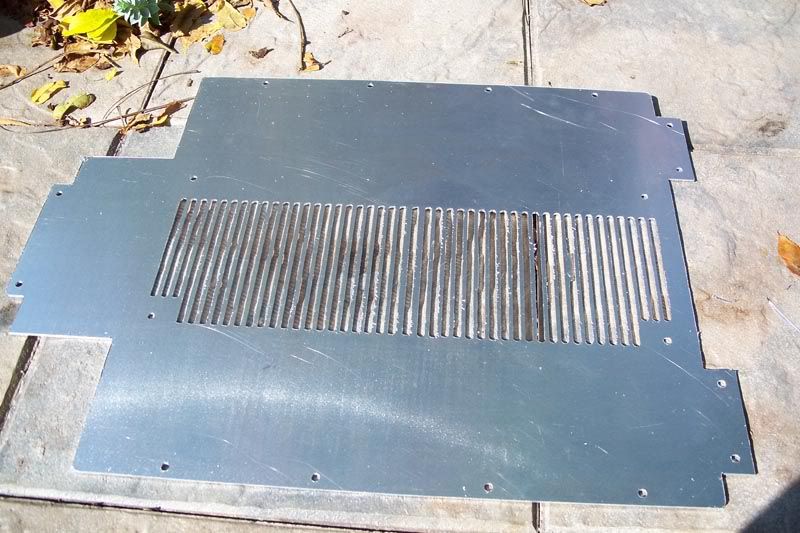
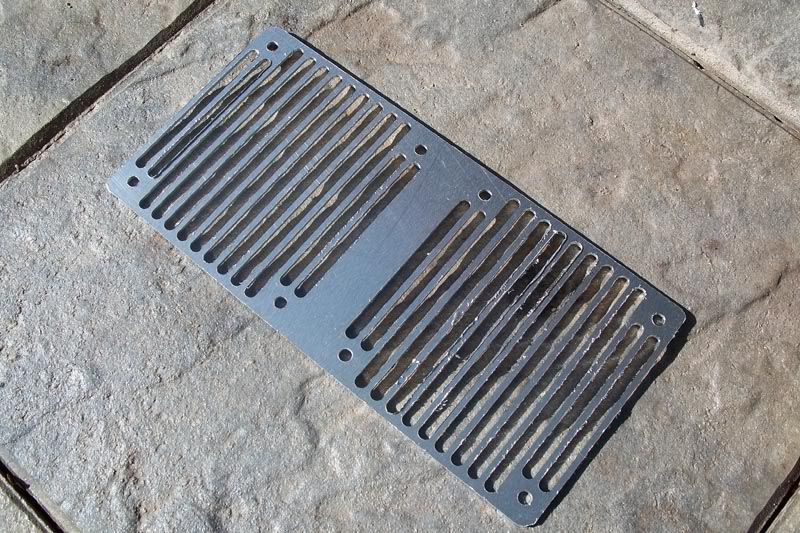
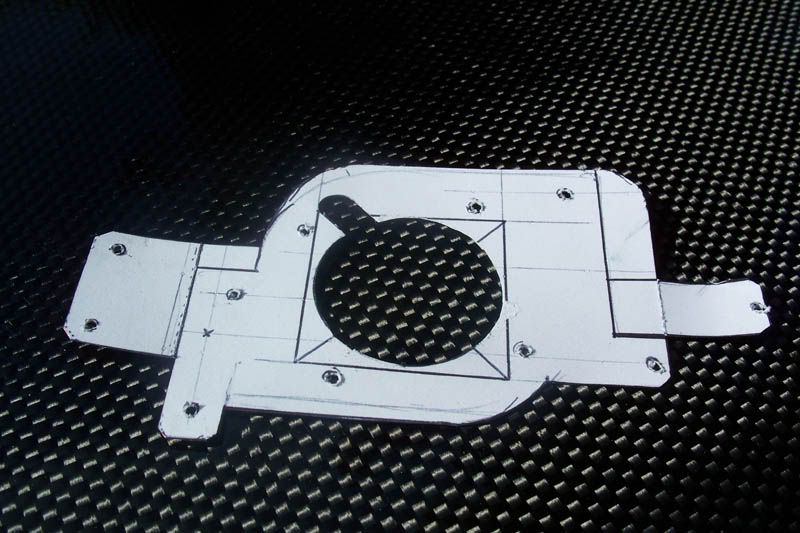
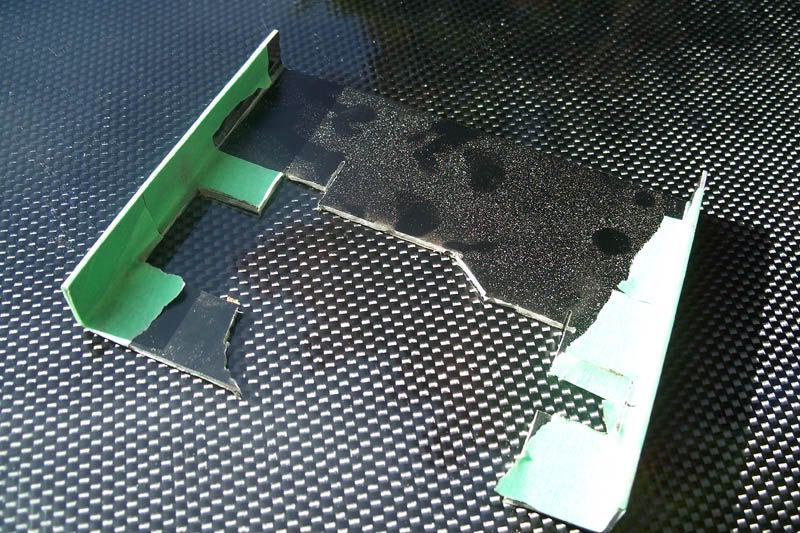
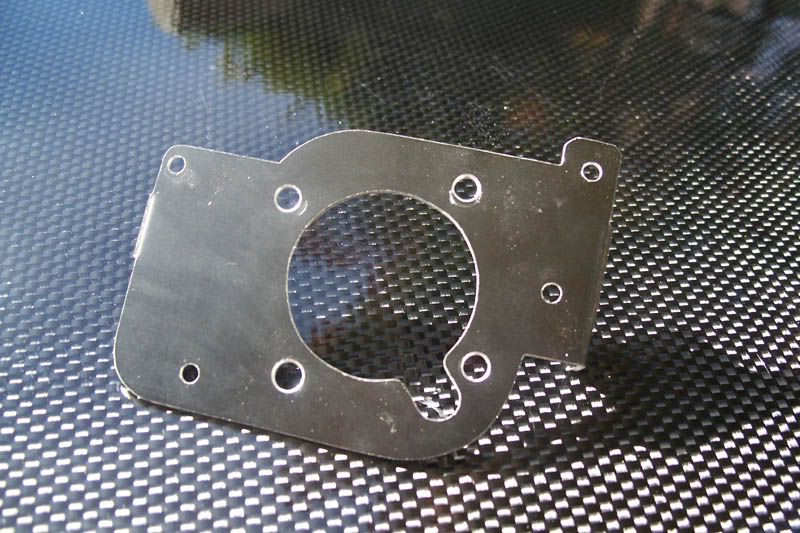
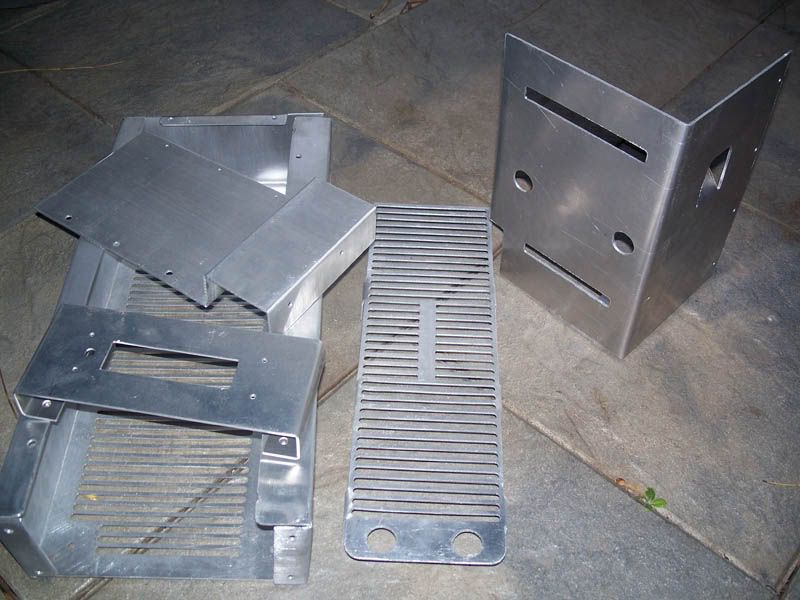
I HAVE UPDATES.
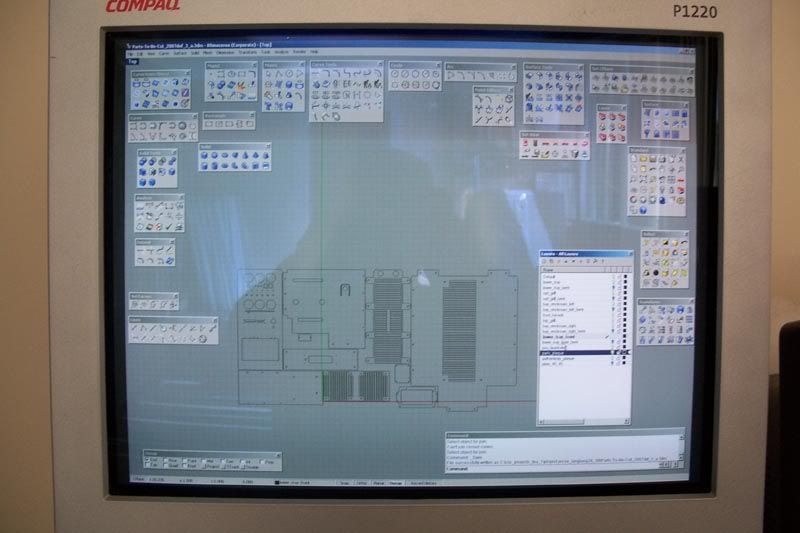
I spent two days learning Rhino/Visual Mill/ToolPath then I spent the last day cutting (actually I'd call it 'watching the machine cut').
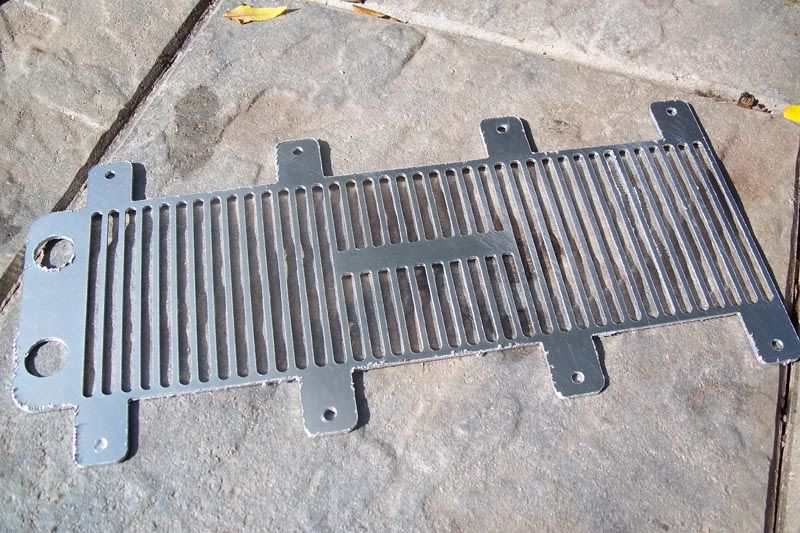
I admittedly went though a couple of 1/8 bits but I expected to break a few. The machine took just over 10hrs to cut the parts out (damn grills!). I've not yet started cleaning the edges of these prototypes but I'm doing that soon.
I'll let these teaser pics speak for themselves.
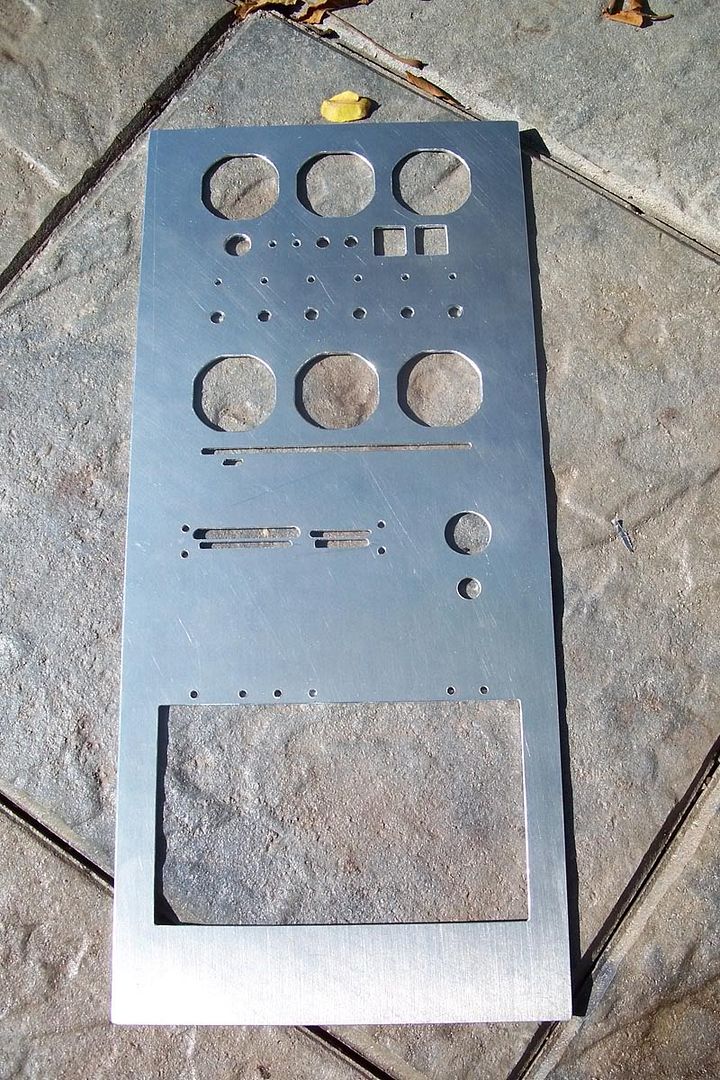
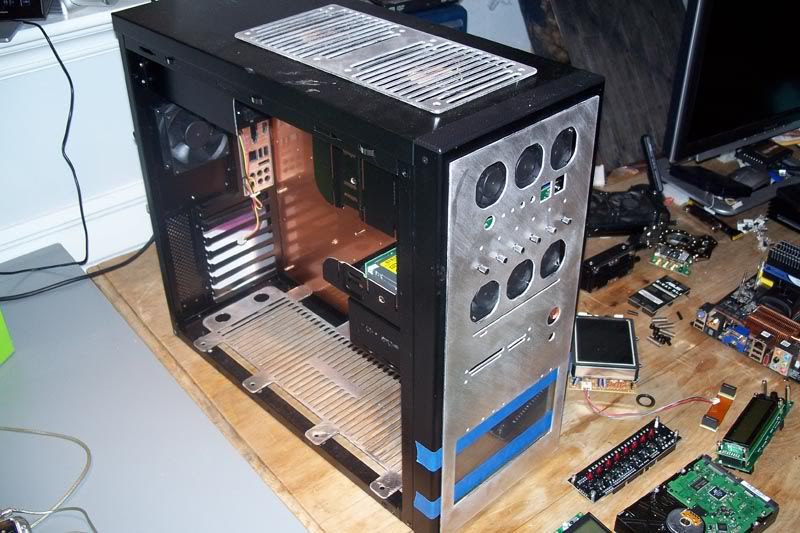
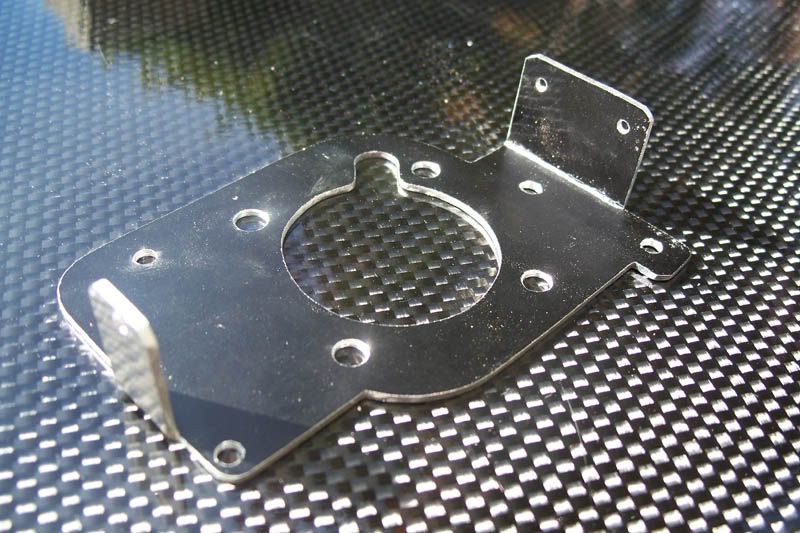
HERE are the aluminum prototypes that once filed/bent/installed will be replaced with finely machined copper.
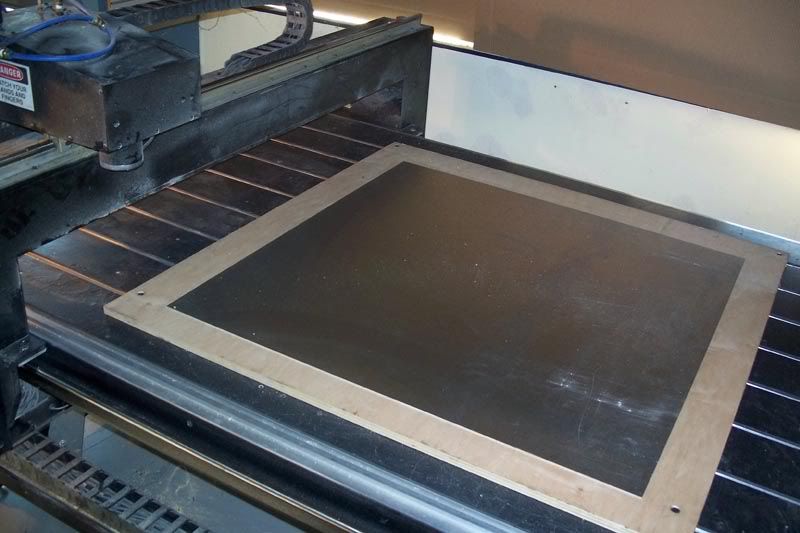
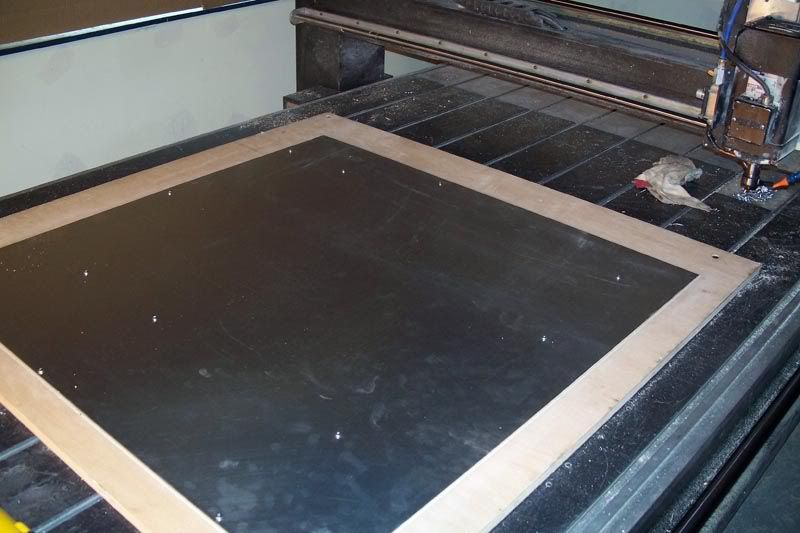
I started with some 1/2ply wood and a scrap 40"x40"x1/8" hunk of aluminum.
I then booted up rhino and prepared the parts for cutting.
Holes were drilled for screws to hold the aluminum down.
10 long boring hours later:
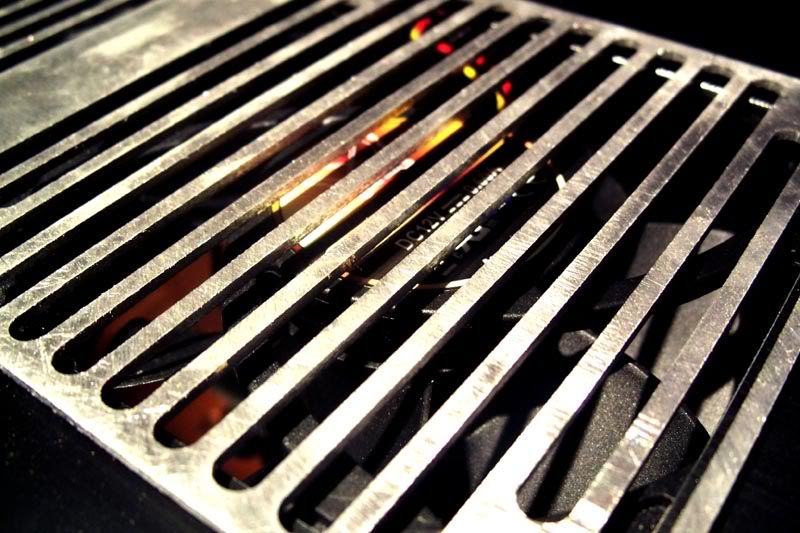
rad grill:
MatrixOrbital Typhoon enclosure/PSU mount/and Right side drive bay enclosure.
Left side drive bay enclosure:
Bottom rad housing - lower tray.
Top fan grill:
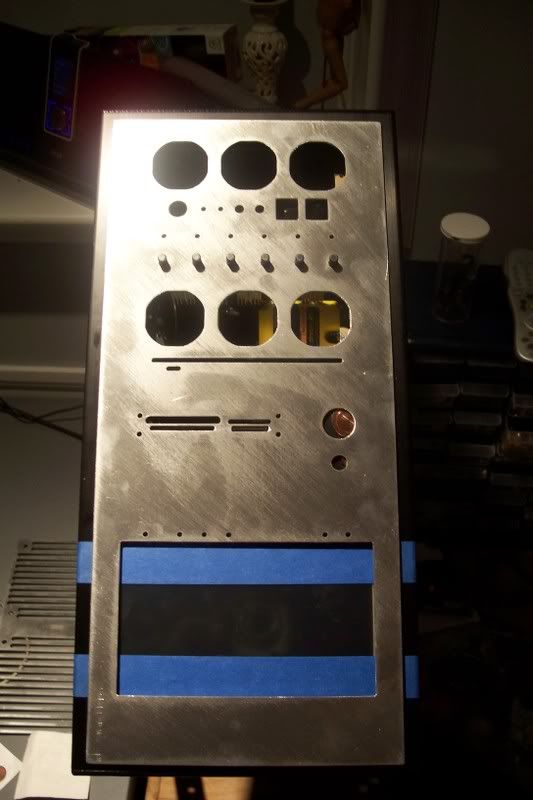
Front face plate:
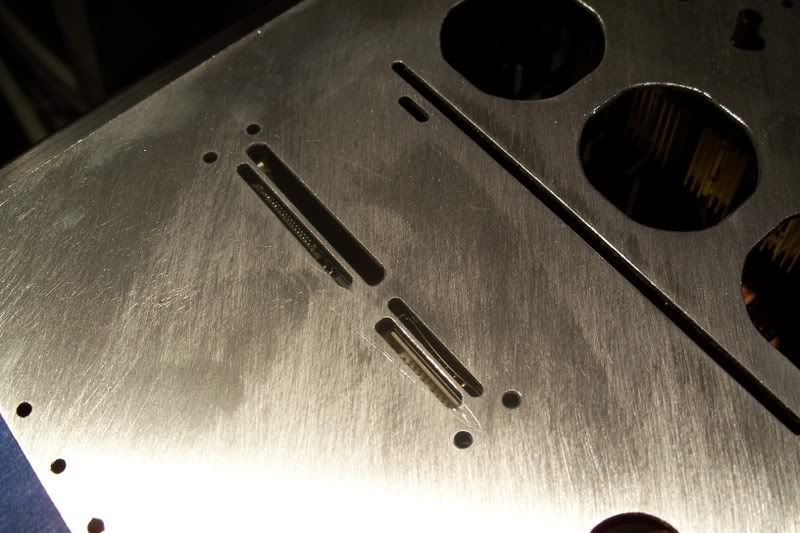
Some of the cuts look a little wonky in the pics but all the cuts are straight and clean - they just have quite a bit of burrs that need filing down - which I should be done by this weekend.
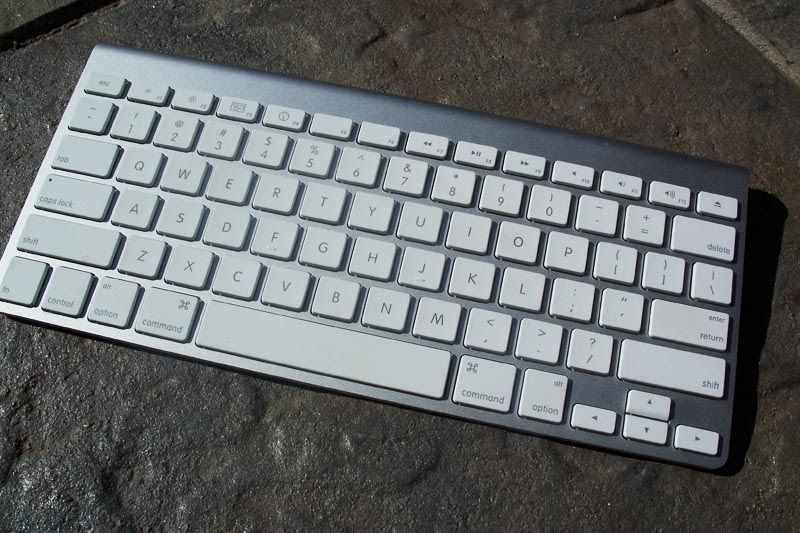
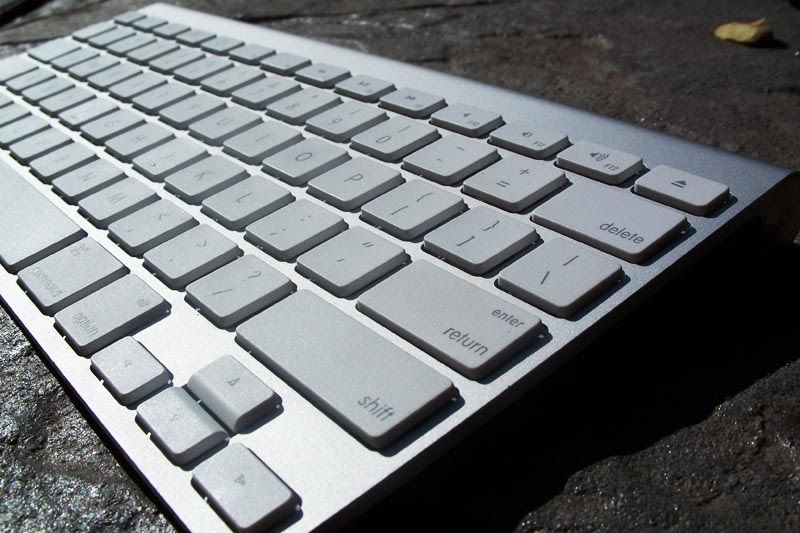
Here is the keyboard - pre-modding:
Thanks for reading - tune in soon.
looks good! but yeah. alot of filling has to be done:P
Damn 10 hours for a grill, it was worth it. Looking really good. I love that keyboard.
Those peices look great. Can't wait to see them all filed down and ready to be put on. That's a cool looking keyboad, what is it?
It's the slim apple wireless keyboard.
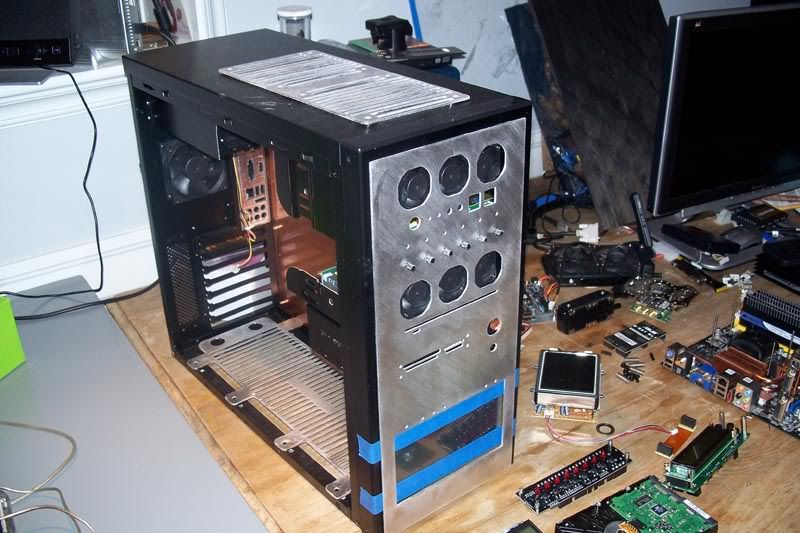
A quick and dirty test fit, everything looks to be really well measured. They fit perfectly.
That does fit perfectly. Looks excellent, can't wait for you to get the gear in there.
Thanks a lot guys, I really appreciate the support.
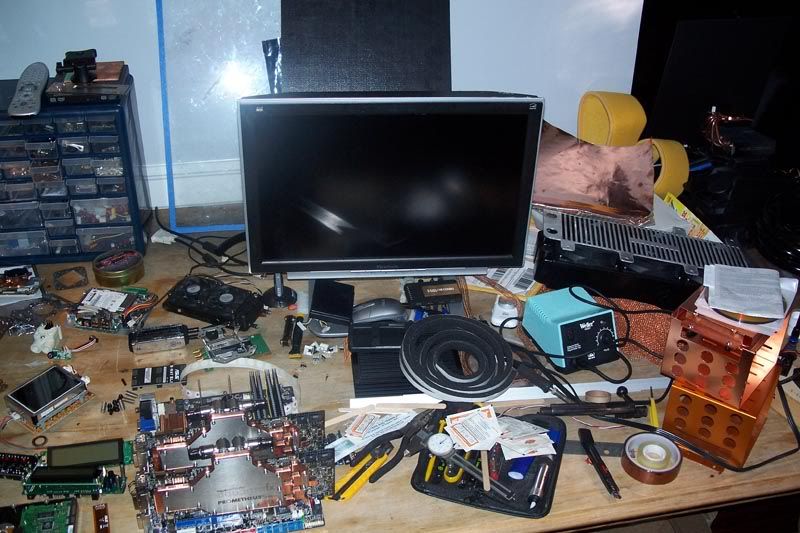
The CASE
The MESS! (parts everywhere - on an under the desk)
looking good so far + rep
Great to see each stage as it happens
wow so much cooler than i originaly thought....
She is looking fantastic my friend, keep it up.
Thanks a lot guys. I appreciate the support.
Update time.
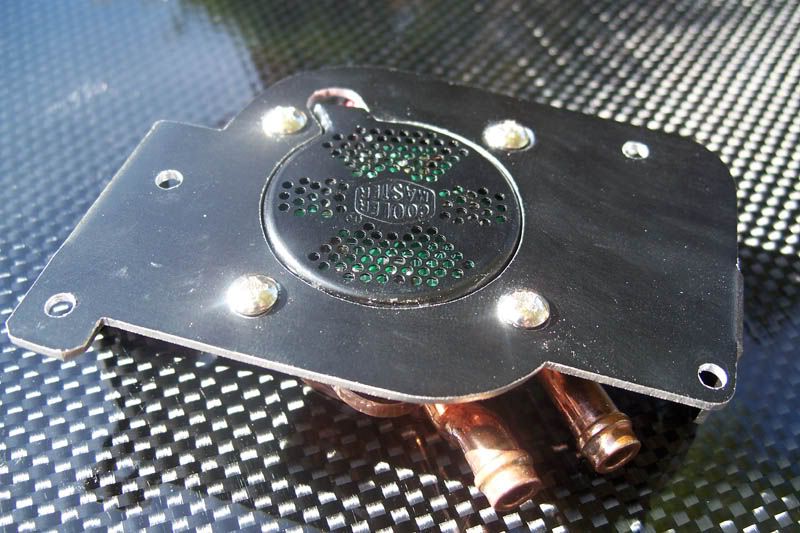
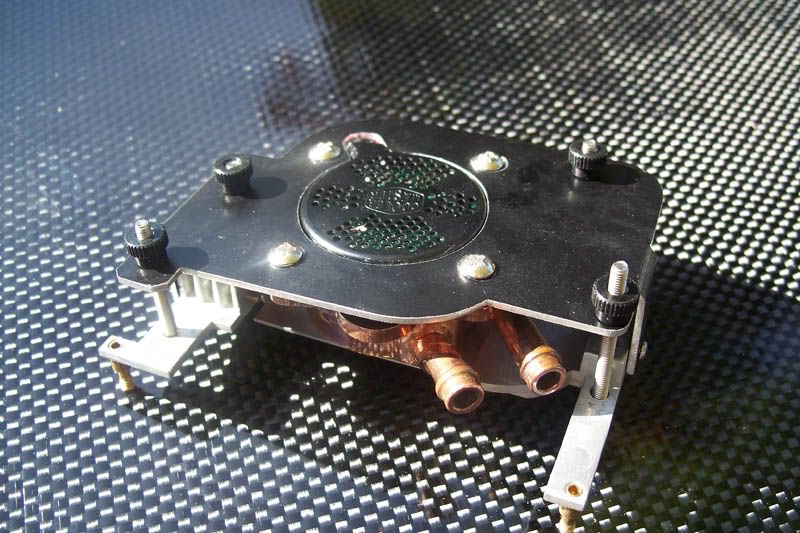
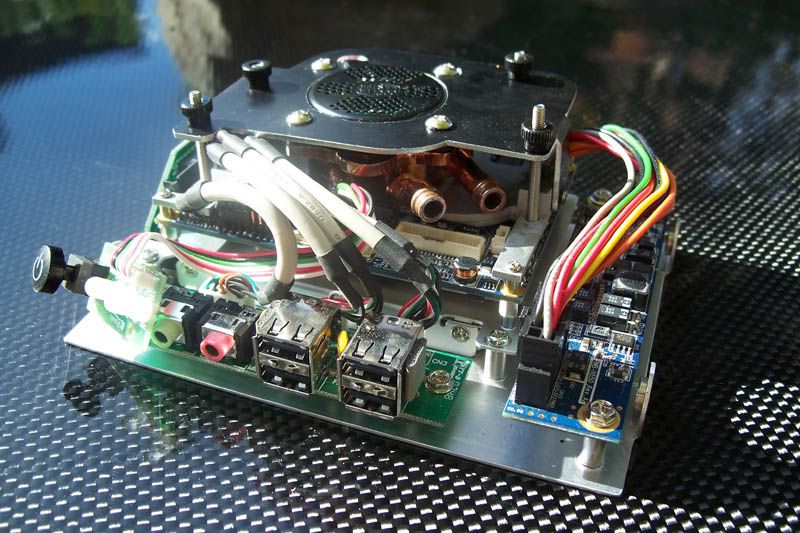
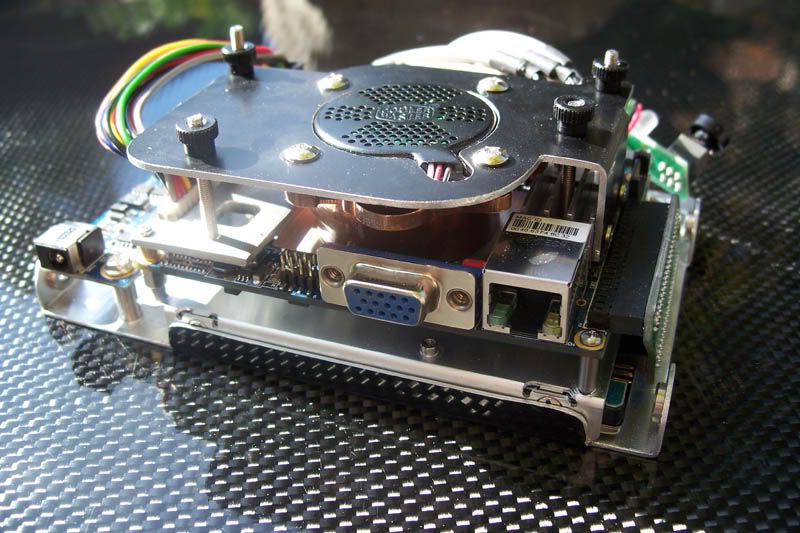
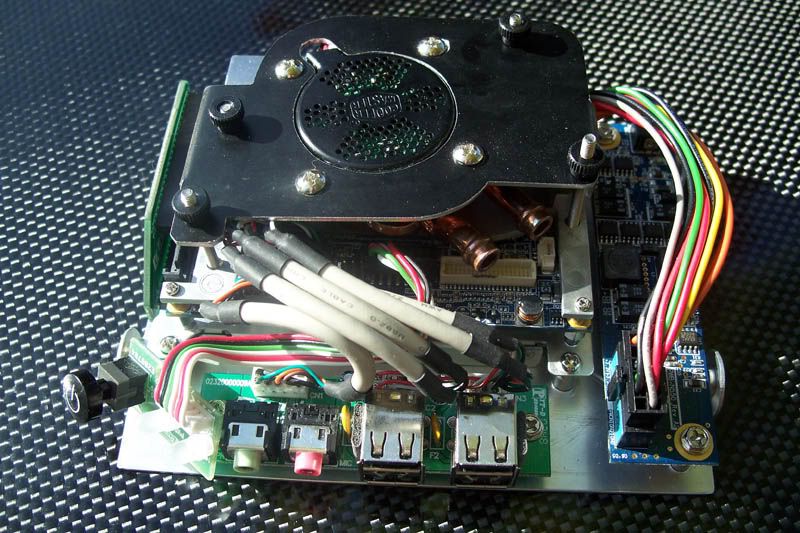
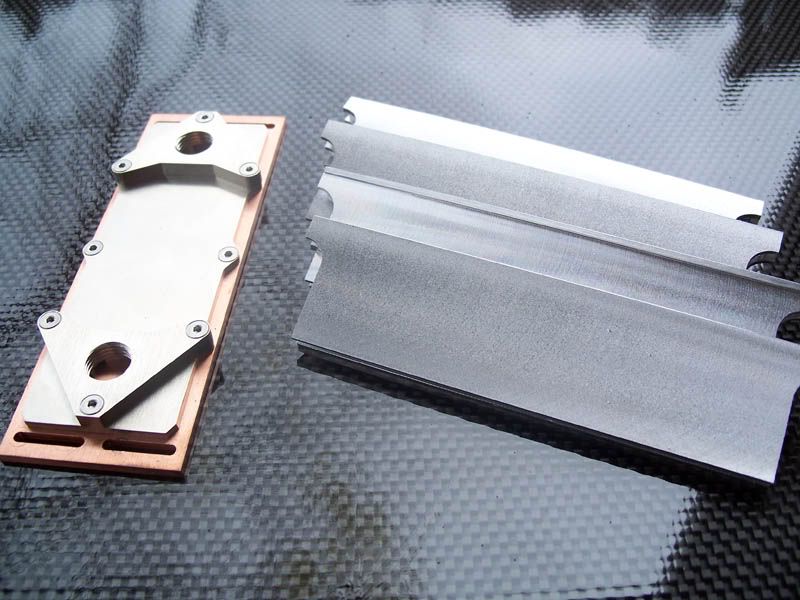
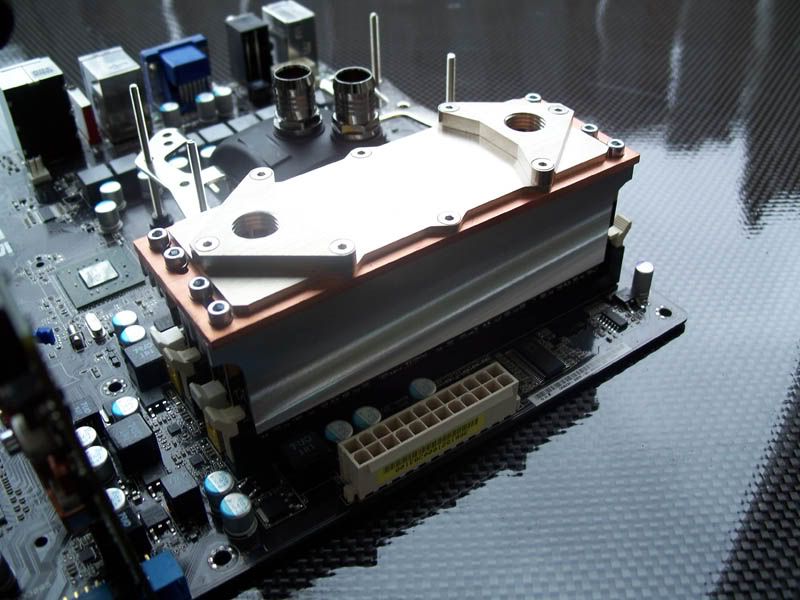
Today I decided to finally fabricate the mount for the Pico-ITX waterblock/pump.
First I made a prototype from cardstock at 1:1 scale.
The I busted out the dremel and attacked a scrap piece of aluminum - left over from an old Lian-Li mod.
After an hour or so of hand filing, a couple quick bends, and a few holes drilled we get this:
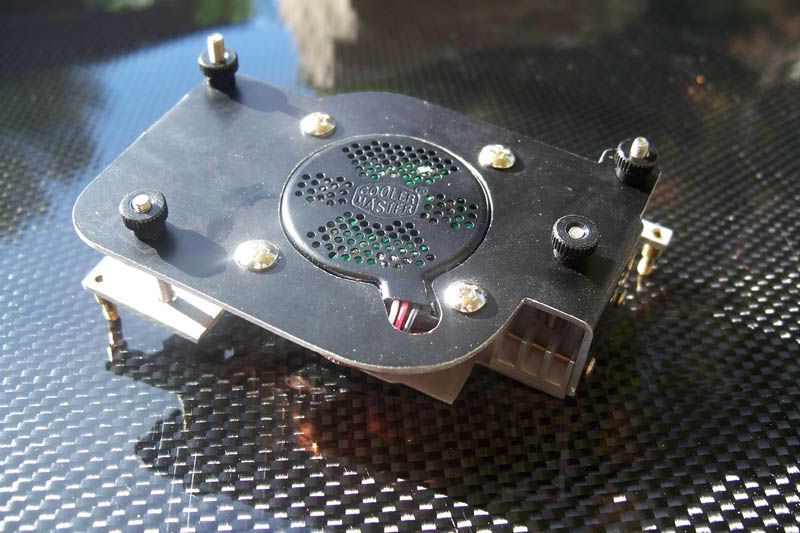
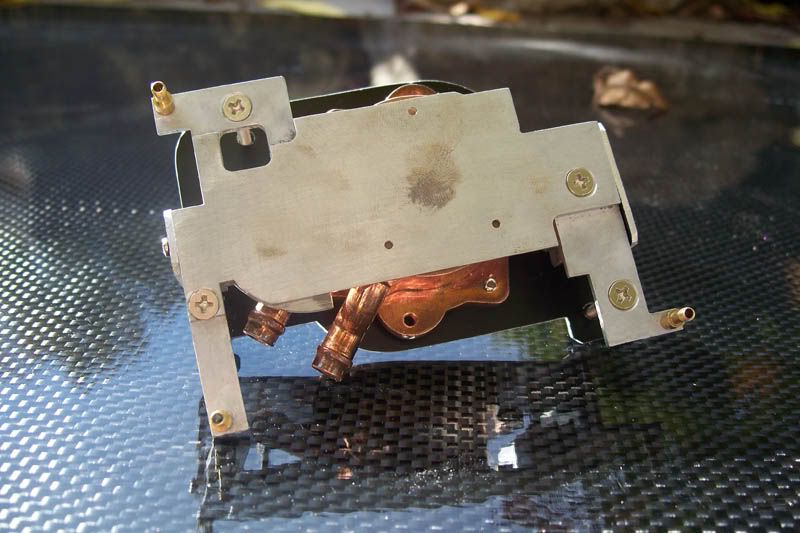
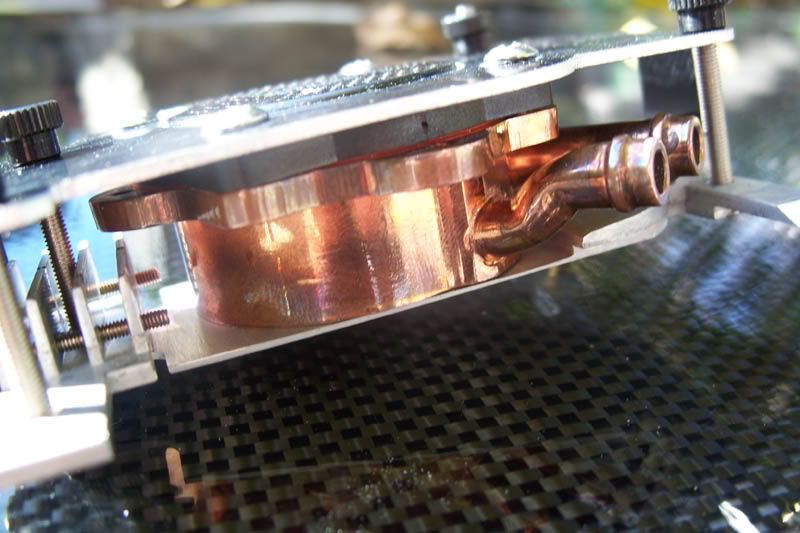
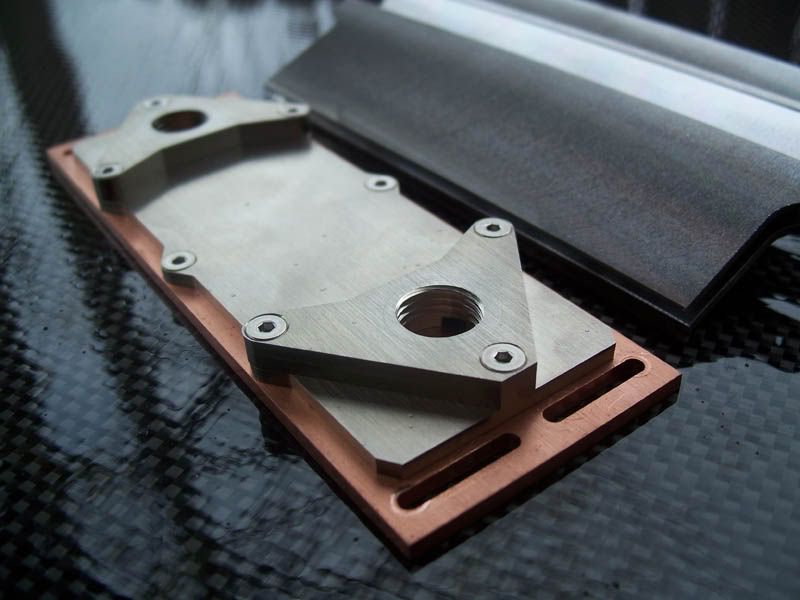
It's then mounted to the pump/waterblock:
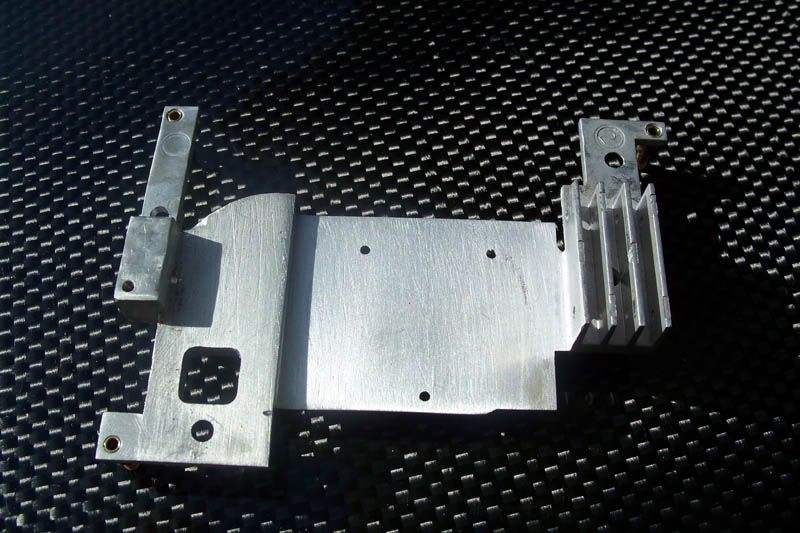
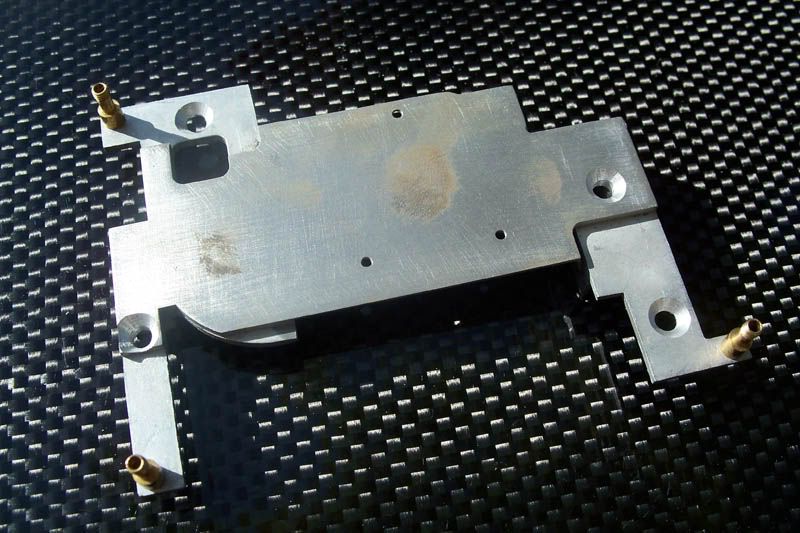
If you'll recall I did some modification to the stock Pico heatsink. I've now finished off these mods with a few counterbored holes:
The waterblock is installed onto the stock heatsink
Finally this entire assembly is mounted to the Pico-ITX board - which is already mounted onto a bracket holding its PSU/IO/HDD. The entire thing can now be mounted into a standard 5 1/4" drive bay.
The whole thing still needs some final edge cleaning and most likely a coat of black paint - other than that she's all done.
Thanks for reading - more to come soon.
Very, very cool! Can't wait to see what's next!
Every things looking great. The aluminum really stands out. Can't wait to see more. +rep
I am really impressed my friend, fantastic ingenuity . Also love that CF BTW.
I can't wait to finish LEXA and try to get my own PICO board for my new mod.
that's some mighty fine bit of modding there, bud.
+rep bigtime.
@Mach - Thanks! I still have much in store for you my friend.
@mittelmeier - Thanks man, I appreciate that.
@The boy 4rm oz - Thanks a lot mate. I'm stipulating that Pico's (and their successors) be a standard in all my projects hence forth.
@Dane Bramage - Thank you very much.
A simple question to Corsair has led to a some new developments which I will elaborate upon once the parcel arrives. This mystery parcel will be shipped tomorrow (hopefully).
I have to give a HUGE shout out to Robert from Corsair... who has been a massive help - even after that time I accidentally called his cell and woke him up (time zones are a pain). THANKS ROB!
Also some news from Mips
That RAM Freezer 4 has been reengineered and now supports Dominator class RAM. This new trinket was shipped out yesterday and is on it's way here from Germany as we speak. As an added bonus this item will soon be available from Mips if anyone else is interested.
New toys, lucky you. Can't wait to see those new RAM blocks.
Updates...many updates.
I have more to share but I'll save it for this evening.
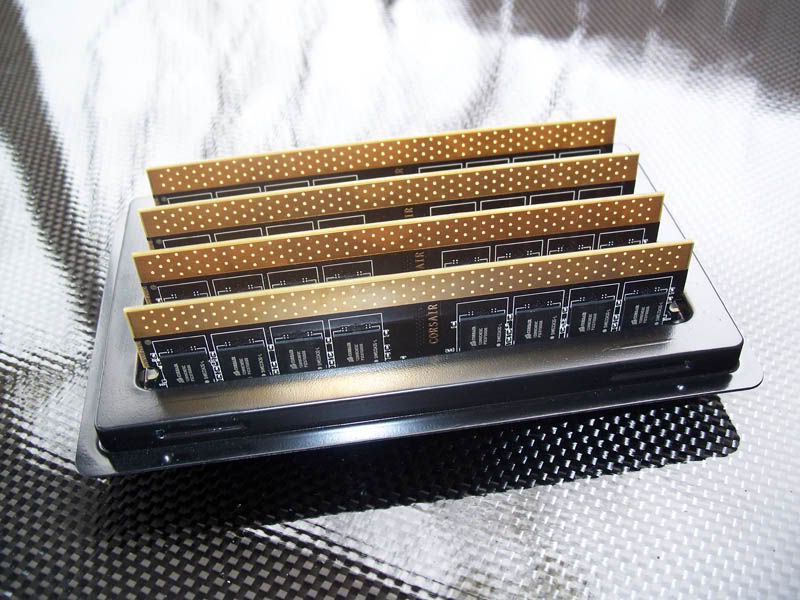
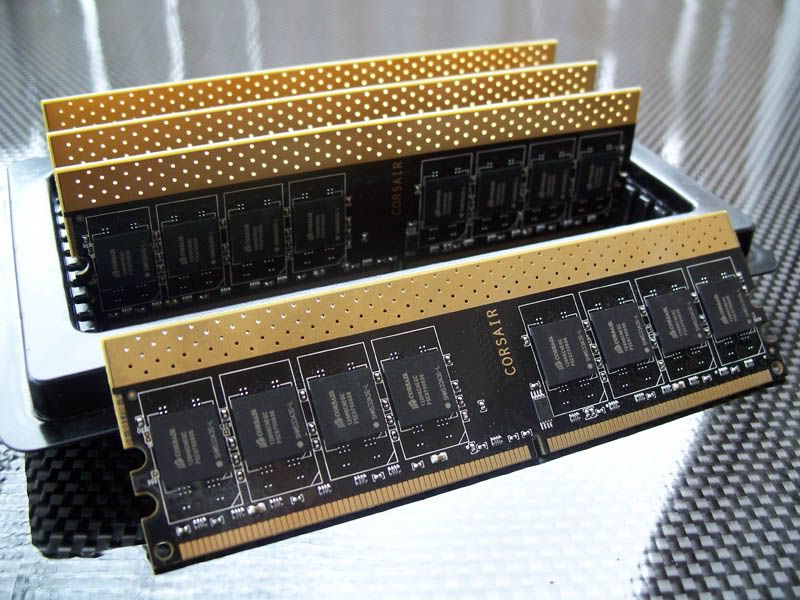
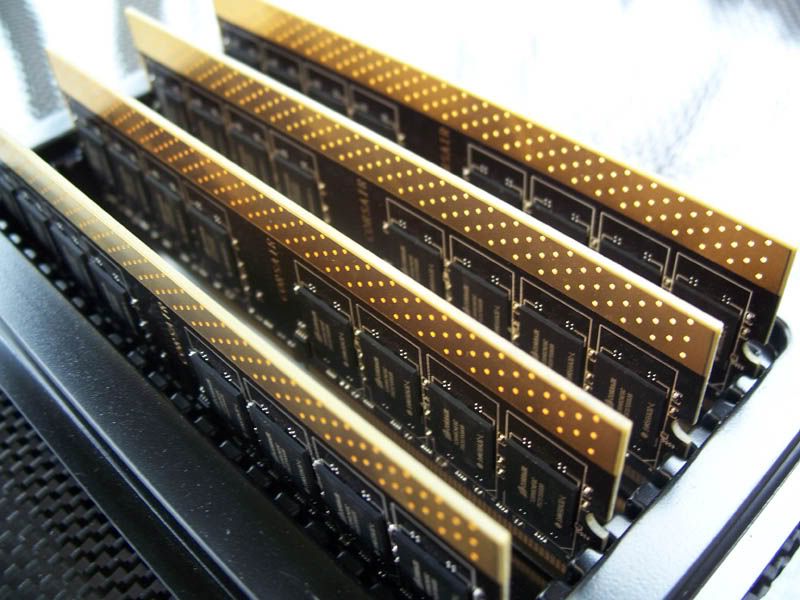
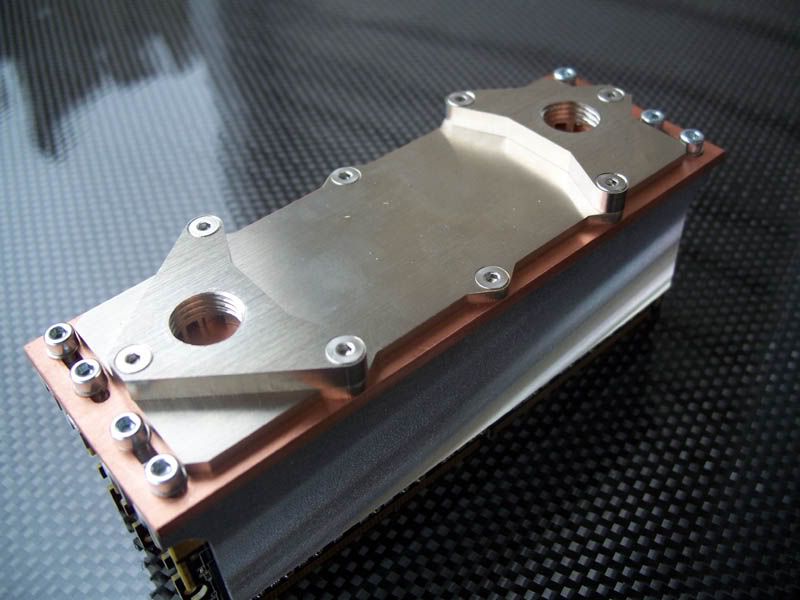
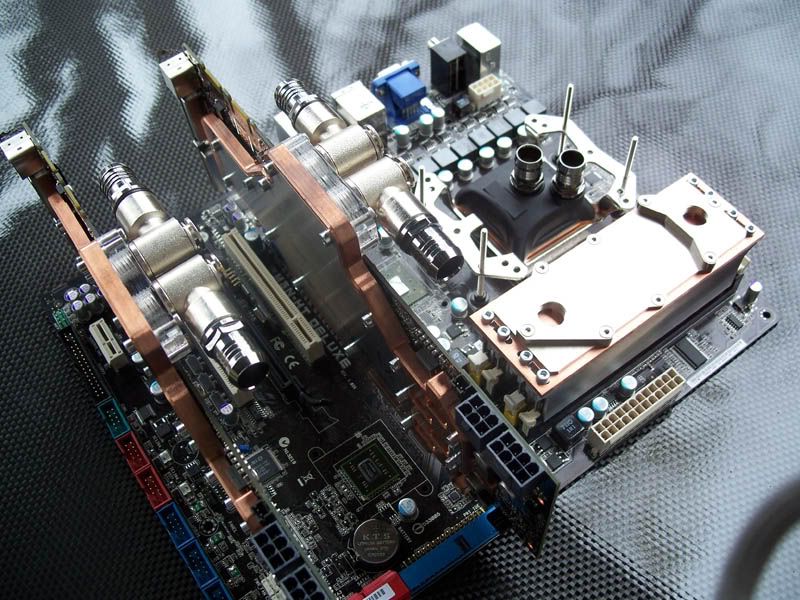
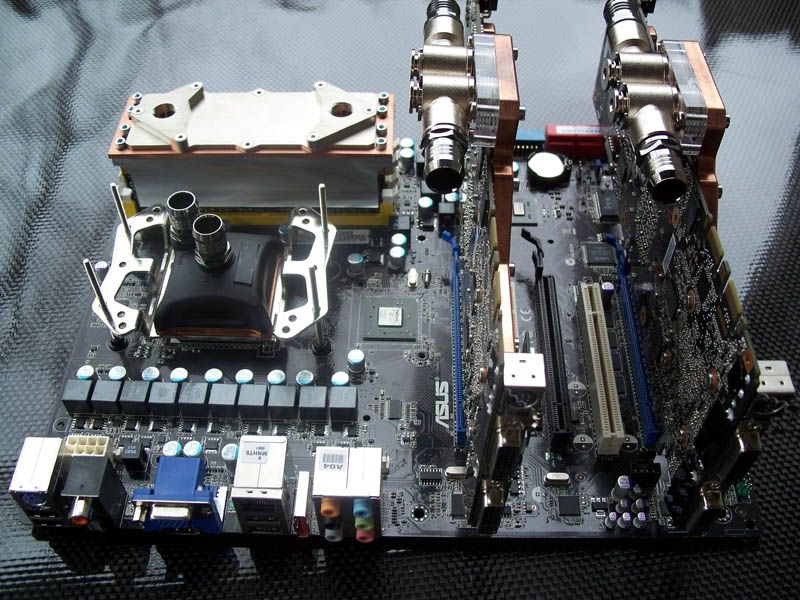
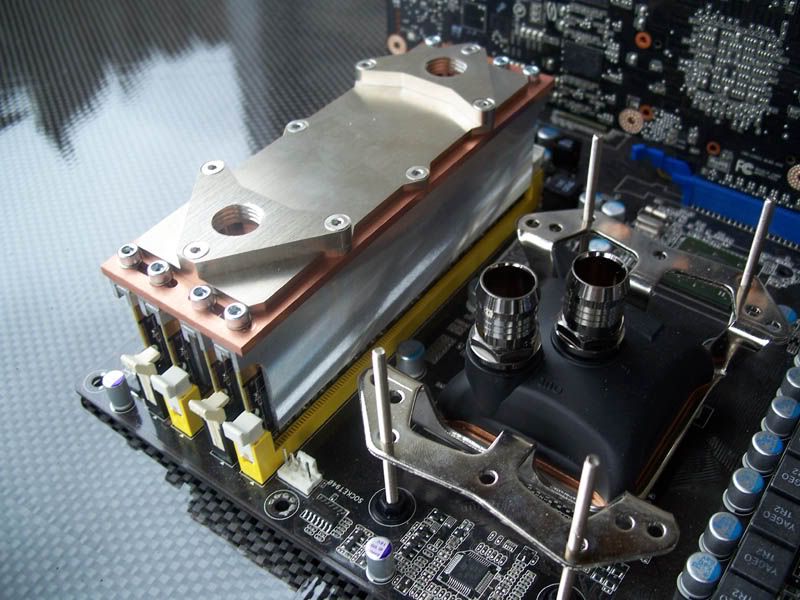
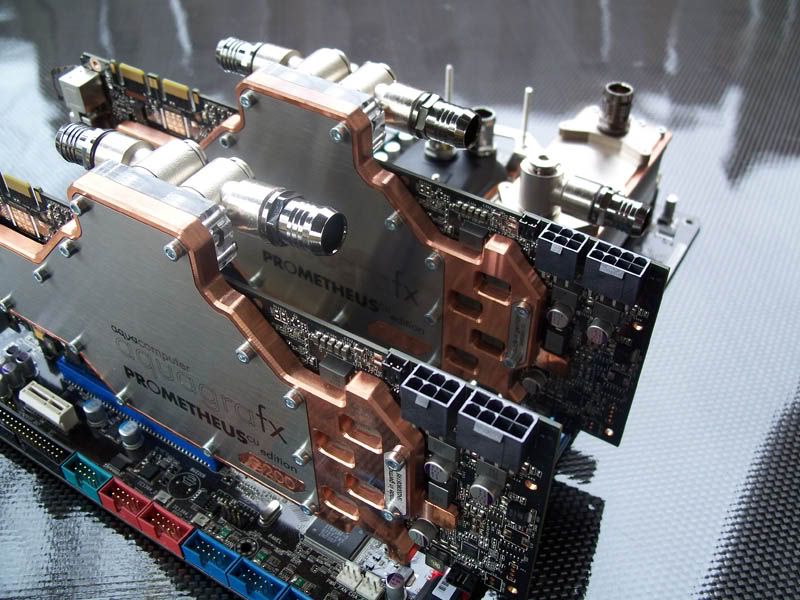
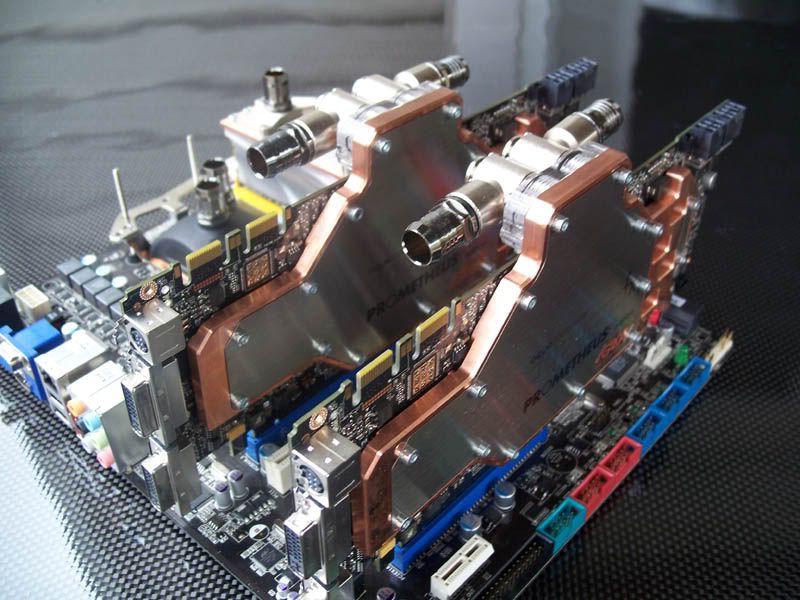
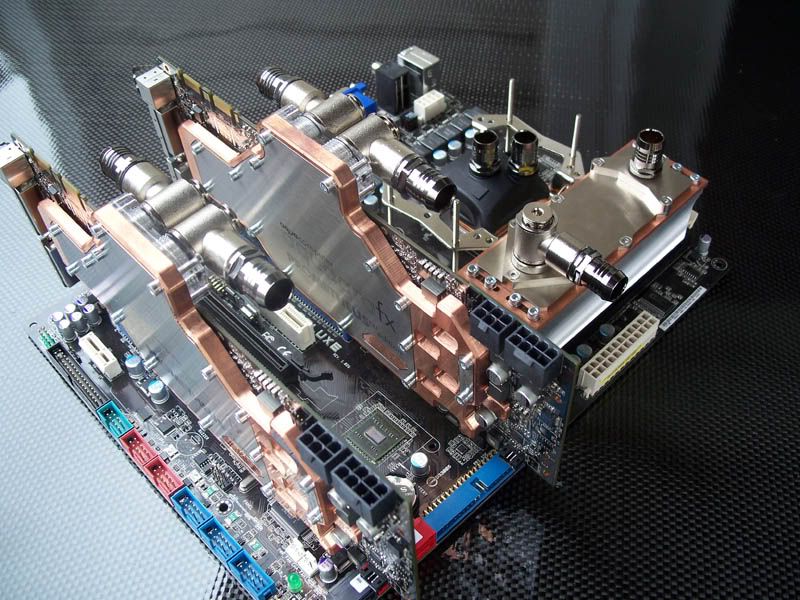
My NAKED RAM courtesy of Corsair - 8GB of 1066mhz Dominator.
My Dominator compatible Mips RAM Freezer 4 has arrived as well. This this is BEAUTIFUL, a fantastic peice of engineering. The build quality is top notch.
Here they are installed:
I have several more updates to share, but I've been really busy the past week and I've not had a chance to take pictures. I'll post more stuff this evening - with that will be pics of some more Corsair goodies.
Thanks for reading.
That looks awesome. I can't wait to see the rest of the progress tonight.
F'n sweet dude!
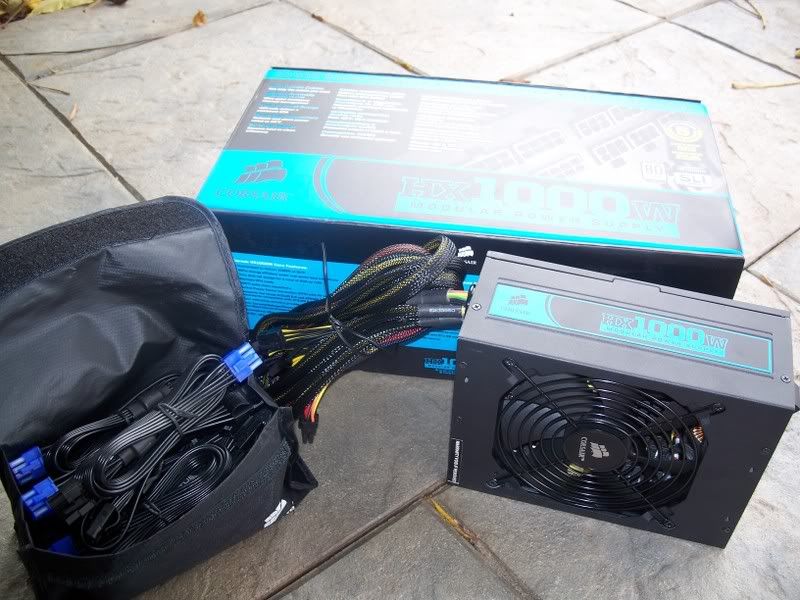
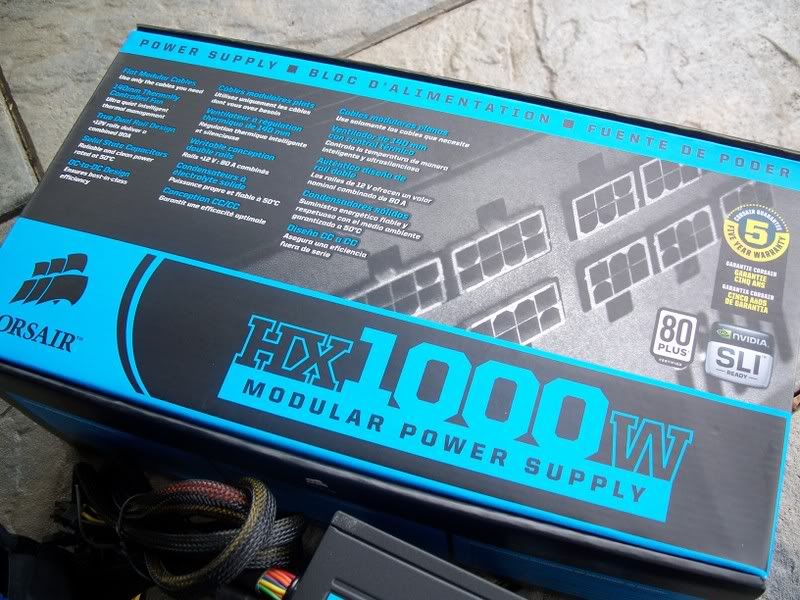
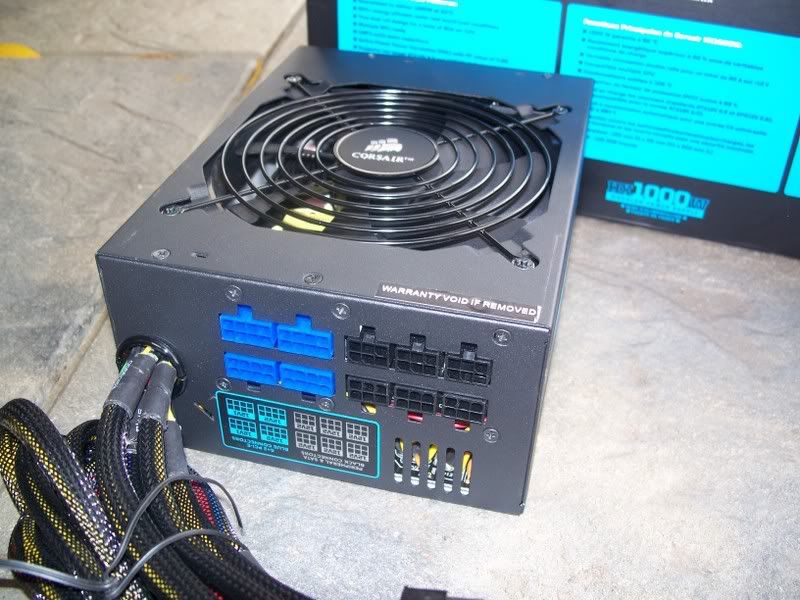
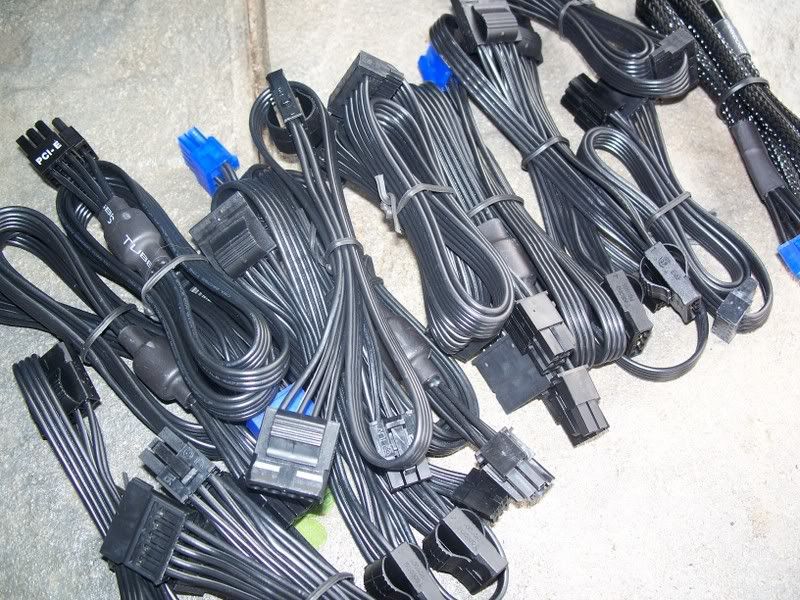
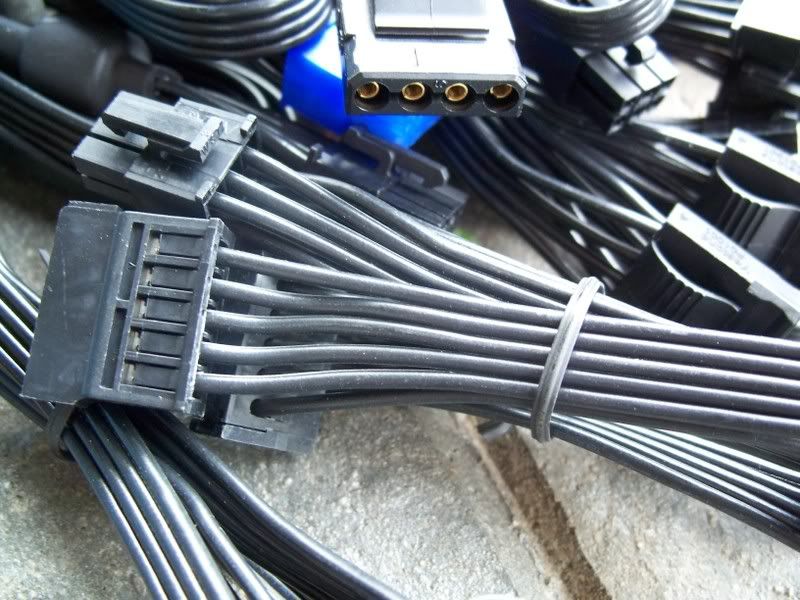
I had asked Corsair if they could at all provide me with the wires that go with their HX series PSUs.
They responded over and above to my request:
More to come tonight still, solong for now.
this things coming a long nicely :bowdown: thats a LOT of wires!
Awsome!!!! love the ram wb's
You really are lucky mate. A very sexy RAM cooler for some simply awesome RAM, very nice. Love the PSU. The board looks great with all those water blocks on them.
*drools*
What's the word I'm looking for? ... "Schu-weeet!" ;P
In all seriousness, that is a very clean mod. +rep for you, and props to your sponsors.
EDIT: got to spread rep around before I rep you again. :/
I just took the time to read through your worklog. I am extremely impressed! Looks amazing, I like the usage of multiple systems in one, and the fabrication is sweet!
Small update. I wanted to upload these pics last night but Photobucket had other ideas.
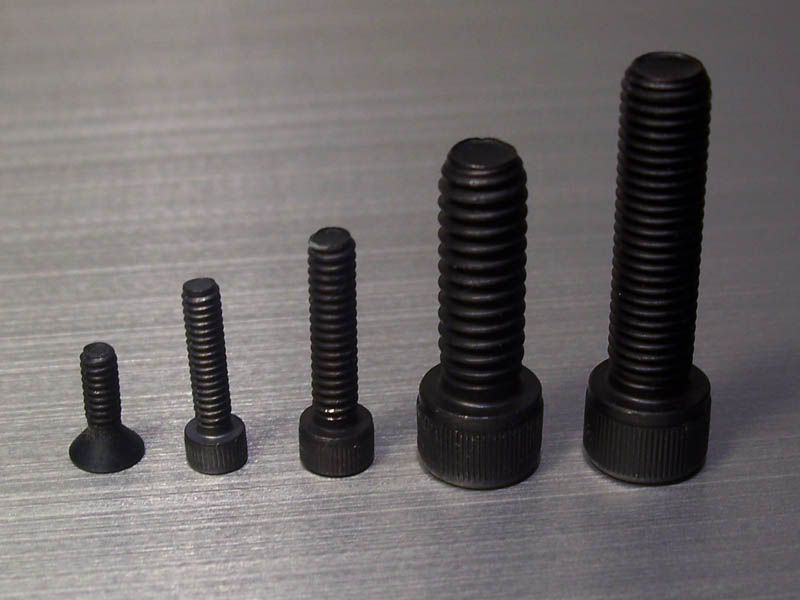
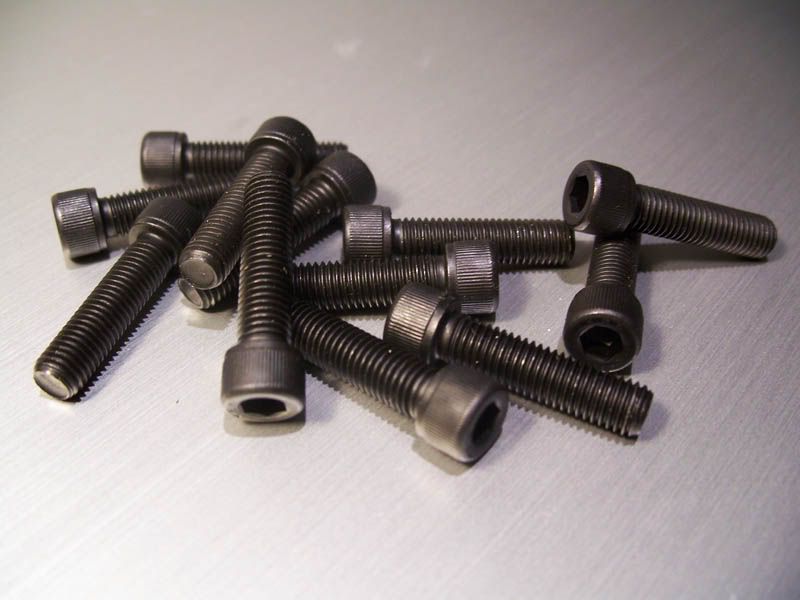
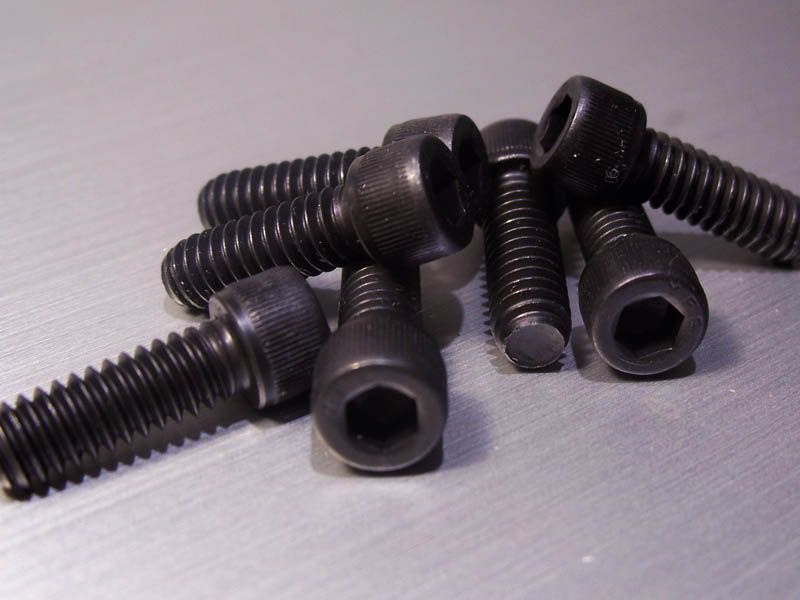
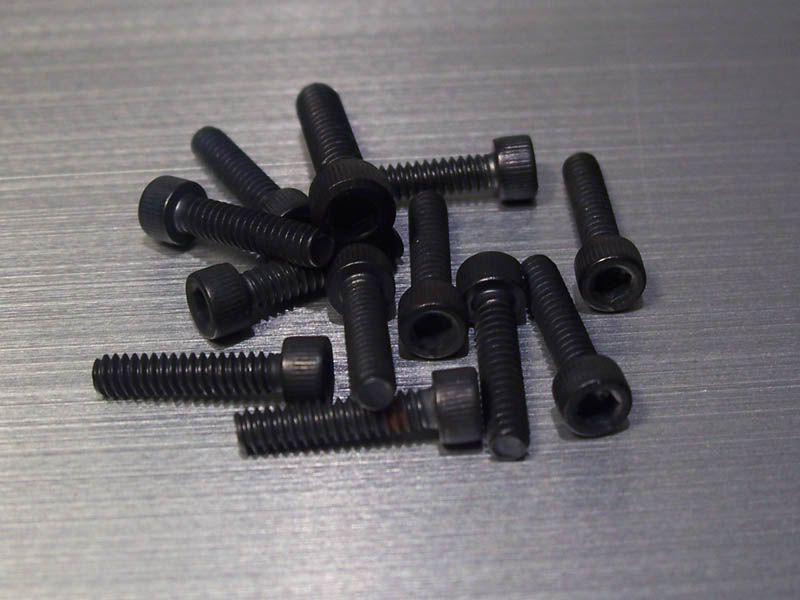
I've started ordering my hardware for this project. In the form of Brighton Socket Cap Allen Bolts, and Coutersunk Allen Bolts.
I still havent got my hands on the smaller bolts as they were special order, but here's the big stuff.
The below sizing ranges from 4-40, to 1/4-20 - I've ordered a couple hundred in each size.
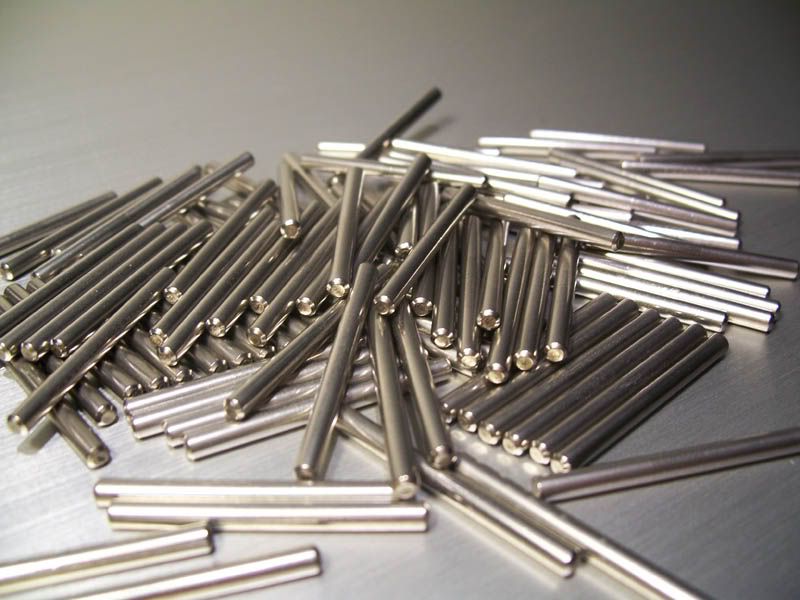
I got 100 carbide rods, the purpose of these will be revealed much later.
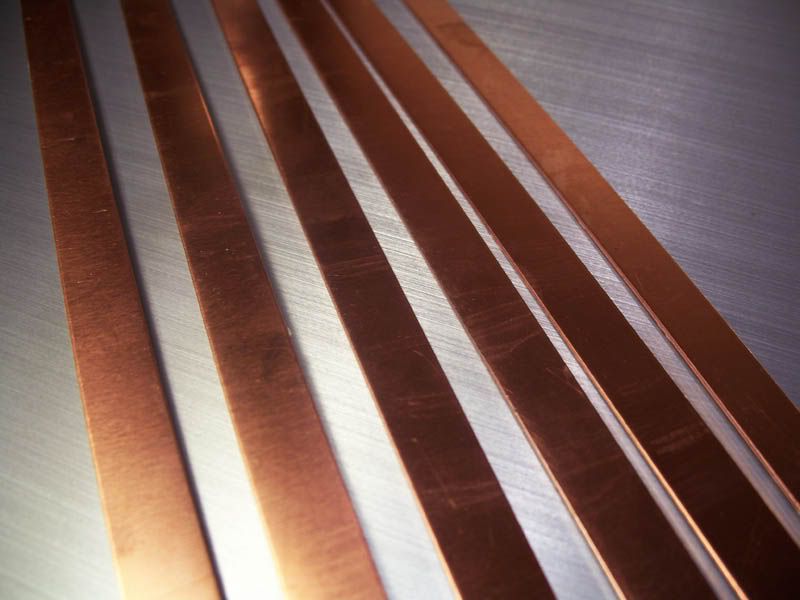
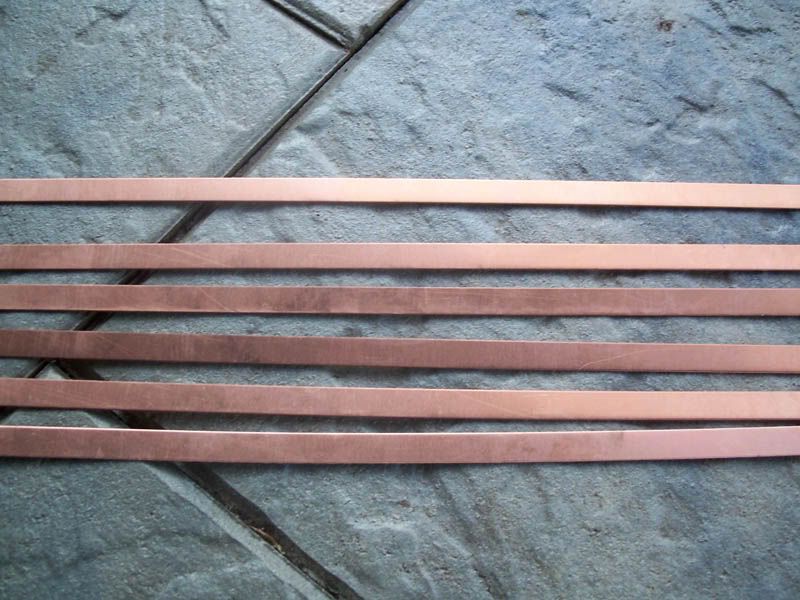
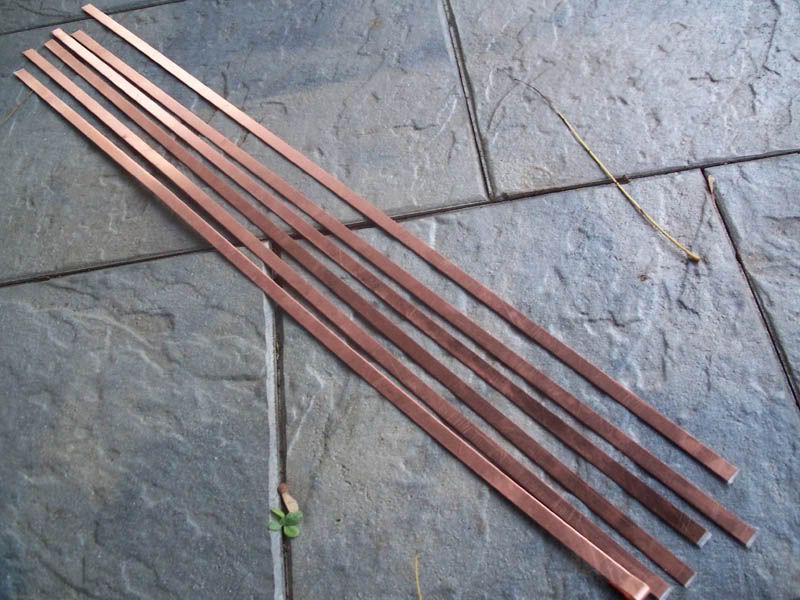
With those come six 36"x1/2"x1/16" copper flat bars. I will be bending these to fabricate cable ties and wire harness brackets.
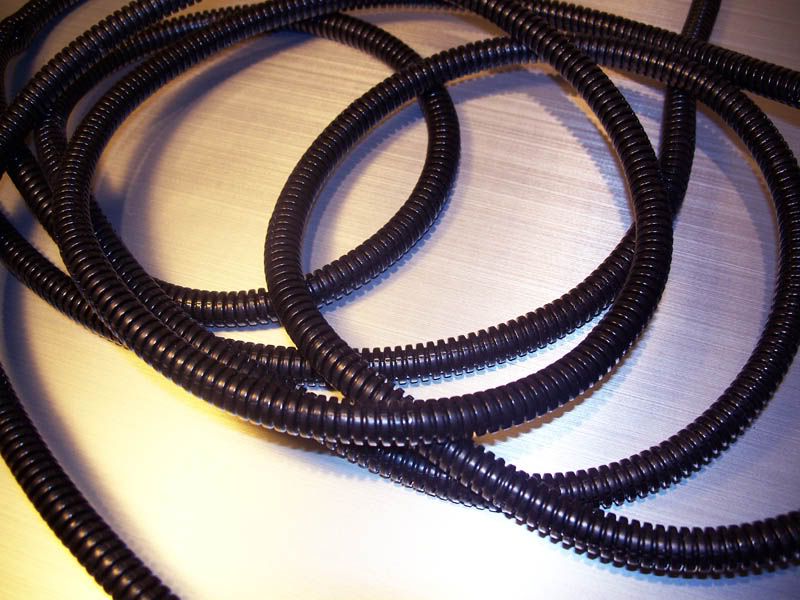
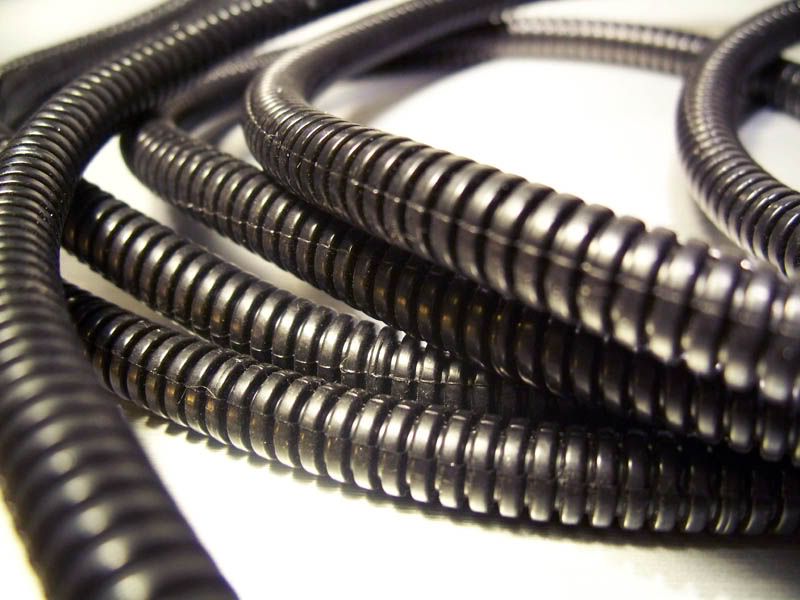
Also, 15' of 3/8" split loom tubing - this will be used on the Pico watercooling tubes, and on a couple wires that wont be seen.
I also started bending my prototypes, and as expected I don't have the tools to do this to the level that I desire.
In light of this I've taken the liberty of sending the whole fabrication of these parts to China.
I will have a Chinese company fabricate these things to perfection from copper plate in the near future.
The parts that I have will work perfectly for what I intended them to do - these aluminum bits will be installed to allow me to continue fabrication of other parts. Also I've already made a couple of design changes that will be applied to the final copper bits.
Thanks for reading, more to come very soon.
Lots of bolts. I can't wait to see those pieces made of copper.
definitely, will look amazing :D
Minor Update:
I've decided to add another loop to the mix for the motherboard - and it had to be fairly small to fit, so I've made a little order from Performance-PCs.
Products
3 x Chomerics Thermattach® T412 Conductive Tape
1 x Enzotech Forged Low Profile Copper Northbridge Heatsink
1 x Thermaltake CL-O0027 TG1 Extreme High Grade Thermal Grease
2 x Bitspower Rotary Fitting "T" - 180 Degree Water Cooling Accessory - Black Sparkle Finish
2 x Bitspower Case Top Water Fill/ Through Hole Fitting Set
2 x Bitspower Dual G1/4" High Flow Fitting - Male to Male Thread
2 x Koolance Tubing Spring Wrap, Black [10mm, 3/8"]
10 x PrimoFlex Pro LRT Black Tubing -3/8in. ID X 1/2in. OD
1 x Black Ice® GT Stealth 120 Highest Performance Radiator
10 x Bitspower Premium G1/4" High Flow 3/8" Fitting - Black Sparkle Finish
4 x Enzotech Pure Forged Copper Ramsinks
4 x Koolance Tubing Spring Wrap, Black [13mm, 1/2" ID; 19mm, 3/4" OD]
1 x Sunbeamtech Notebook Memory Heat Spreader
1 x Yate Loon 120x20mm Medium Speed Thin Silent Case Fan - D12SM-12C
I have a somewhat vague vision of cramming in another 120mm rad and Aquastream pump along with Mosfet/NB/SB coolers.
If I can make it work it will add yet another level of difficulty, and fun.
I'm revising my part drawings as well to accommodate the new parts + some minor errors I hadn't seen early on.
More to come as soon.
WOW you just keep making this harder and more fun for yourself aren't you lol. Good luck mate. I can't wait to see more.
*drools at all of the above* *drip, drip, drip*(pool of spit)
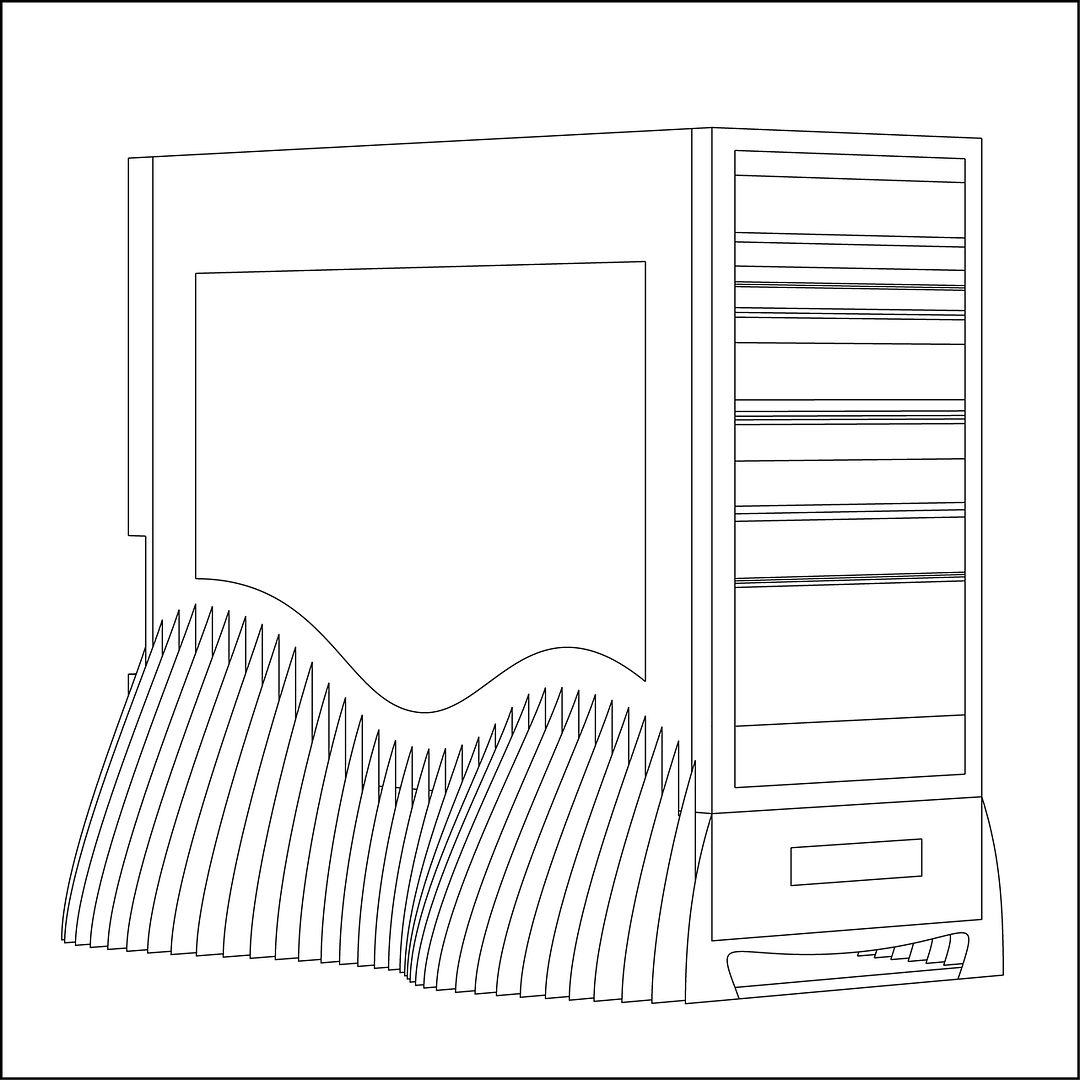
Since I want to minimize the airflow resistance on the main radiator mounted on the bottom of the unit I'll need to construct some feet that are 2.5-3" tall.
Aesthetically this is no easy task, and not something that I've addressed to date.
I've spent the past few hours in Illustrator trying to solve this large dilemma.
I've come up with the image below.
The intent here is to use a bunch of carbon fiber panels spaced ~0.5" apart to make a sort of skeletal base structure.
*click for big*
I've come up with a few extra surprises to go with this base design.
However...I'd like to ask what you all think of the concept first.
Note:
I've already devised a way of incorporating the PROMETHEUSCU logo into the mix - it was simply too complicated for me to be bothered drawing in perspective (at this time).
My intent is to put and LED in between every layer to allow crazy lighting effects
The flat part seen at the very bottom of the illustration acting as a flat base will be the uber carbon panel, shown earlier.
I'd love to hear your opinions and suggestions on how to add feet to this rig.
Thanks for helping and reading!
Awesome sketch! That is going to look amazing when you start getting it laid out. I can't wait.
Those feet are fantastic, takes the mod to a whole new level (literally) lol.
Will you be making the spines from copper or alu?
DO IT!!!!! looks bloody awsome