-
Re: I promised I'd post it. My 924 project (pic heavy)
Quote:
Originally Posted by
OvRiDe

Not to nitpick :P ... but the Conquest was the Chrysler/Dodge name.. the Mitsubishi was called a Starion. The same car. Not sure what the Starion designation was, but the TSi version of the Conquest was absolutely crazy quick for it's time.
I agree the widebody kits on the 924 does give it a lot of the same look, and I like it.
hah well i've always seen a Mitsubishi badge along the rear trunk so i always assumed it was a mitsu, Guess i saw a Chrysler version later that said conquest and put the two together.
And its always crazy to see a car that is as wide as a hummer H1 and only 4 or so foot tall.
especially with deep dish rims.
and FYI... yay someone else who knows about camber and contact patches. Forgot to mention that narrow sidewall tires also help keep your contact patch while under aggressive cornering (not those 1" low-pro tires.. real racing tires that look almost rounded along the lip) like this
http://www.postrelease.com/asset/view/370.jpg
Tires with large sidewall will also have center bulging at high speed that can dramatically decrease your CP with the ground. Thats the big difference between M+R rated tires and Z+ rated tires besides the compounds used.
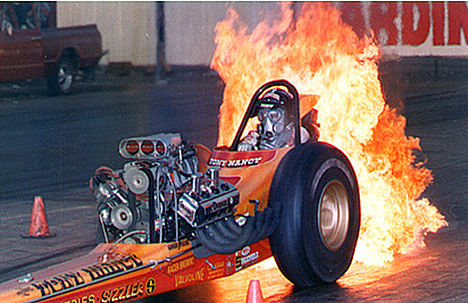
You'll also see a classic example of speed bulging when top fuelers roast the tires, or take off down the track
But those tires are designed to do that, So they provide maximum grip at the starting line, then bulge up to create less friction down the line... the trade off is you'll see them sway back and forth going down the line, and its easy...so so easy to loose control.
-
Re: I promised I'd post it. My 924 project (pic heavy)
The suspension in the sand rail I was referencing once the rear tires are getting enough torque the entire suspension actually increases the camber to help grip more. It was set up for hill climbing which I know nothing about so I am not sure how it works completely.
-
Re: I promised I'd post it. My 924 project (pic heavy)
Quote:
Originally Posted by
Snowman
The suspension in the sand rail I was referencing once the rear tires are getting enough torque the entire suspension actually increases the camber to help grip more. It was set up for hill climbing which I know nothing about so I am not sure how it works completely.
If its hill climbing you'd want a -/+ 0.00 camber i'd think to maintain the traction, plus its probably a locked rear differential so turning would be crap anyways.
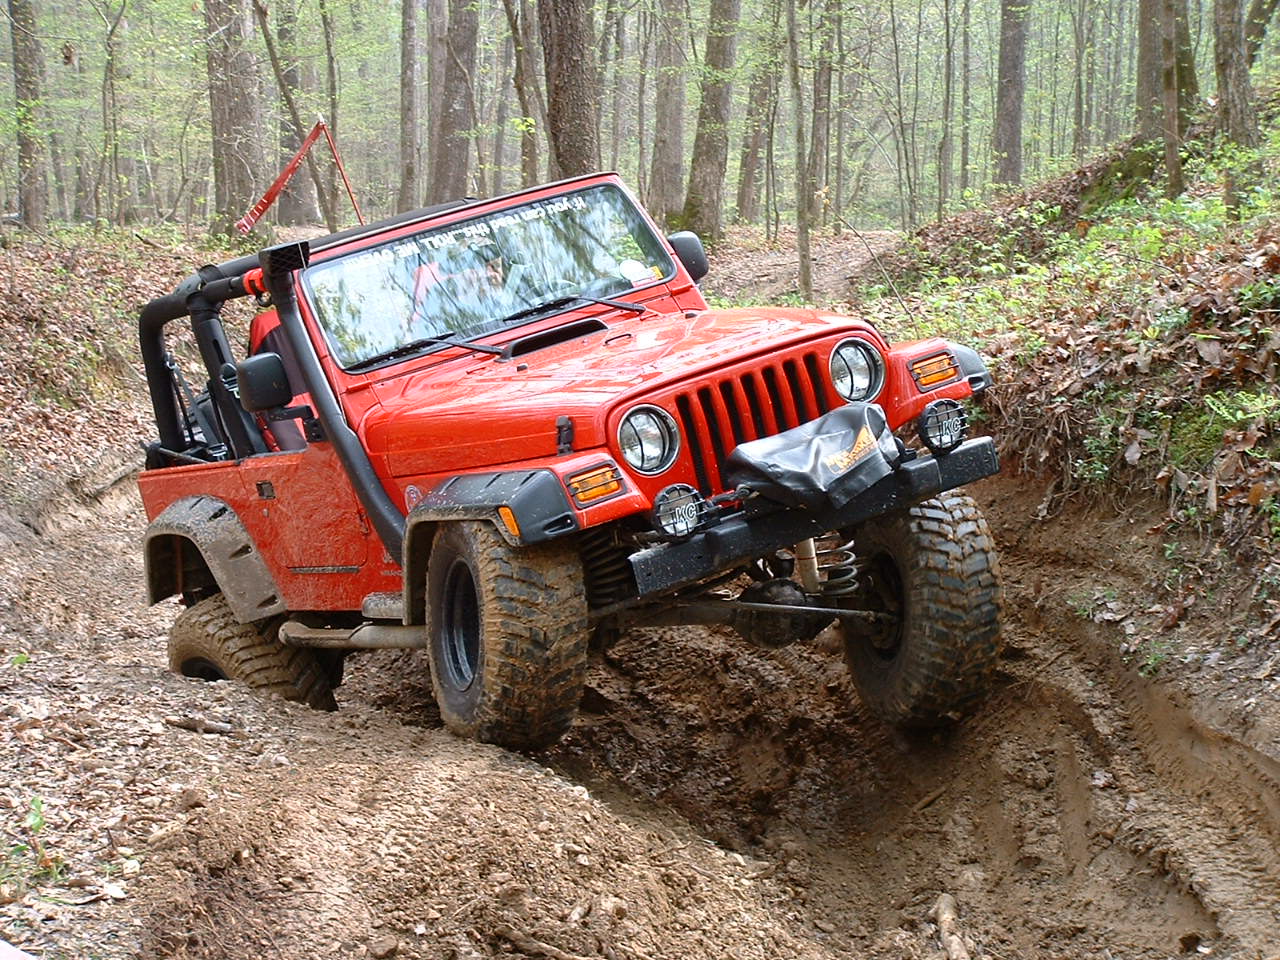
My jeep has locking front and rear differentials, You go and try to take any sort of corner and it feels like the wheels are going to fall off.
ALSO! depends on the front steering set up. Mines a solid axle front and rear with bone-knuckle steering, So my wheels tilt to the side when i cut the wheel naturally.
The steering and suspension is a lot different for sports cars then it is for big trucks with solid axles.
My wheels look like they camber really really hard when i get up on bumps or rocks, but its just the design of the steering and the solid axle that make it look like that
The wheel isn't actually physically cambered at all.
But then again people come up with some crazy s#@t so hell there could be a active camber system out there.
-
Re: I promised I'd post it. My 924 project (pic heavy)
Quote:
Originally Posted by
Snowman
The suspension in the sand rail I was referencing once the rear tires are getting enough torque the entire suspension actually increases the camber to help grip more. It was set up for hill climbing which I know nothing about so I am not sure how it works completely.
Ah I think I see what you mean. As suspension compresses it's possible it could change things if the suspension is setup right. Essentially, yes, if enough torque is applied and the suspension compressed, I could see that happening. I thought you meant just engine rpms, but I see you mean as the car goes faster or more power is applied, etc etc.. would be interesting to see pictures of that setup.
Probably going to finish up the brakes tomorrow. I got the master cyl rebuilt I just haven't posted pics. I'll snag some pics of the harness as I work on it too. Been a busy week for me so I haven't had much of a chance to update stuff.
-
Re: I promised I'd post it. My 924 project (pic heavy)
-
Re: I promised I'd post it. My 924 project (pic heavy)
I haven't been on the forums in a while. Been crazy busy. Sorry all.
Figured I'd update - I dropped the head and throttle bodies off at central composites. They are working on a carbon fiber intake manifold for me. I am pretty excited because I have had 2 different companies flake out on me on getting the manifold created, they finally took it serious, set a price, sat down and sketched up and made a mockup for me and got the ball rolling. They are INSANELY busy right now so I was told it wasn't "really high on priority" and is somewhat on the backburner but they will get it done soon as time allows it.
Pretty excited! once that is done I can FINALLY start hooking it all up and tuning this thing.
-
Re: I promised I'd post it. My 924 project (pic heavy)
Quote:
Originally Posted by
CorsePerVita
I haven't been on the forums in a while. Been crazy busy. Sorry all.
Figured I'd update - I dropped the head and throttle bodies off at central composites. They are working on a carbon fiber intake manifold for me. I am pretty excited because I have had 2 different companies flake out on me on getting the manifold created, they finally took it serious, set a price, sat down and sketched up and made a mockup for me and got the ball rolling. They are INSANELY busy right now so I was told it wasn't "really high on priority" and is somewhat on the backburner but they will get it done soon as time allows it.
Pretty excited! once that is done I can FINALLY start hooking it all up and tuning this thing.
Hey you would probably know this.
Would polishing a intake manifold to the point where its basically a mirror on the inside make a substantial difference on a engine?
we've got a 89' cobra intake manifold for a buddy's 86' lincoln.. and it looks pretty rough on the inside. I'm damn good at metal polishing, and i know that race cars do indeed do "port and polishing" on intake manifolds.
-
Re: I promised I'd post it. My 924 project (pic heavy)
On the intake side you want a rough-to-touch finish. The important thing when doing porting work is that you want smooth transitions, not really polish. Get rid of any rough casting, and bulges. The rough finish is important for mixing your fuel. On the exhaust side, you can go at it as much as you like!
You can also port match. Which is when you use the gasket as a guide to make the transition smooth. No edges sticking into one, or the other sides.
In general, gains are saw from doing the lower intake, and heads. Upper doesn't cause much fuss.
Google SBC porting. A ton of good guides on doing a small block Chevy, and it applies to any combustion engine (At least non-Direct Injection...).
-
Re: I promised I'd post it. My 924 project (pic heavy)
Altec is spot on. You don't want glass smooth. I know that sounds counter-intuitive, but the best part of port and polish is getting rid of the impurities that came in the head and intake manifold from the factory (as you said, rough spots, nasty edges, metal pieces from casting sticking out). Basically think of it like fluid dynamics, while you want good flow (which is improved by taking out crap imperfections out of stuff) you also have to keep in mind that you want good atomization and mixture. A rough to the touch finish as altec has mentioned achieves that because a perfectly smooth service can leave the fuel on the wall of the runners.
I recall seeing a really cool diagram that explained the phenomenon really well. Basically there was a tube that showed the flow of water through a pipe. On the walls of the pipe (the perfectly smooth area) the water flowed the SLOWEST, towards the middle of the pipe the velocity of the water was the FASTEST.
Now.. change the water to fuel. What do you want fuel to do. You DO want it to mix with the air. What do you want it to NOT do? Fail to atomize (turn into droplets, come together). If you get a glass smooth port and polish the fuel tends to bind together, become droplets or run slowly along the wall instead of going where they need to.
It's been shown that a semi-rough finish will result in better atomization/breakup/mixture of the fuel and better flow. It of course is most crucial for such a finish where the fuel actually enters. If you have an intake manifold that for instance mixes fuel (injector actually is near the valve) then it's a different story. However, on a setup like mine where the runner mixes the fuel up towards the ITB, the finish inside is crucial.
-
Re: I promised I'd post it. My 924 project (pic heavy)
Oh and on a very happy note - i got a report today that the manifold mockup is done and they are currently shaping it. It will be finished hopefully this week. I am VERY excited.
-
Re: I promised I'd post it. My 924 project (pic heavy)
Quote:
Originally Posted by
CorsePerVita
Altec is spot on. You don't want glass smooth. I know that sounds counter-intuitive, but the best part of port and polish is getting rid of the impurities that came in the head and intake manifold from the factory (as you said, rough spots, nasty edges, metal pieces from casting sticking out). Basically think of it like fluid dynamics, while you want good flow (which is improved by taking out crap imperfections out of stuff) you also have to keep in mind that you want good atomization and mixture. A rough to the touch finish as altec has mentioned achieves that because a perfectly smooth service can leave the fuel on the wall of the runners.
I recall seeing a really cool diagram that explained the phenomenon really well. Basically there was a tube that showed the flow of water through a pipe. On the walls of the pipe (the perfectly smooth area) the water flowed the SLOWEST, towards the middle of the pipe the velocity of the water was the FASTEST.
Now.. change the water to fuel. What do you want fuel to do. You DO want it to mix with the air. What do you want it to NOT do? Fail to atomize (turn into droplets, come together). If you get a glass smooth port and polish the fuel tends to bind together, become droplets or run slowly along the wall instead of going where they need to.
It's been shown that a semi-rough finish will result in better atomization/breakup/mixture of the fuel and better flow. It of course is most crucial for such a finish where the fuel actually enters. If you have an intake manifold that for instance mixes fuel (injector actually is near the valve) then it's a different story. However, on a setup like mine where the runner mixes the fuel up towards the ITB, the finish inside is crucial.
I thought on a fuel injected engine, the fuel injectors sprayed that s@#t straight into the cylinder tube deal itself, and the intake manifold just delivered air to the intake valve deals?

-
Re: I promised I'd post it. My 924 project (pic heavy)
Quote:
Originally Posted by
Twigsoffury
I thought on a fuel injected engine, the fuel injectors sprayed that s@#t straight into the cylinder tube deal itself, and the intake manifold just delivered air to the intake valve deals?
That would be direct injection. Whole different animal. Most injected engines spray the fuel into the manifold, most do it close to the cylinder head.
-
Re: I promised I'd post it. My 924 project (pic heavy)
Quote:
Originally Posted by
msmrx57
That would be direct injection. Whole different animal. Most injected engines spray the fuel into the manifold, most do it close to the cylinder head.
Yep. Direct Injection on gassers is still pretty new in production vehicles. Diesel engines on the other hand have been using it for a while.
Like msmrx said, normally you have a injector per cylinder, or some times a couple very large injectors in the throttle body (Old TBI setups).
What is interesting is the million different ways they control them... Some are very basic, firing half the injectors at a time, and some fire just one injector at a time.
I don't know to much about ideal porting for DI setups.
-
Re: I promised I'd post it. My 924 project (pic heavy)
it's a 302ci 5.0L Windsor V8 (1986)
Same engine as the fox body Mustang's. I do think its direct fuel injection. It's got Fuel rails?
lincoln
The intake manifold is backwards in design, but functions the same on a lincoln. I'm pretty sure its direct injection (i remember a badge of some type saying that) but i'll ask again today.
-
Re: I promised I'd post it. My 924 project (pic heavy)
The 5.0 used a sequential fuel injection. Not a direct injection setup. The supercharged example in your post shows it best. Those gold colored cylinders going straight down into the intake, with a blue rail above it is the injectors. The blue piece is the fuel rail.
A direct injection setup has the injector in the combustion chamber. If you look at the cut away you posted earlier, the injector is after the intake valve in the head. On the 5.0, it is before the intake valve in the intake. :)
-
Re: I promised I'd post it. My 924 project (pic heavy)
Quote:
Originally Posted by
altec
The 5.0 used a sequential fuel injection. Not a direct injection setup. The supercharged example in your post shows it best. Those gold colored cylinders going straight down into the intake, with a blue rail above it is the injectors. The blue piece is the fuel rail.
A direct injection setup has the injector in the combustion chamber. If you look at the cut away you posted earlier, the injector is after the intake valve in the head. On the 5.0, it is before the intake valve in the intake. :)
Oh well that's cool as hell (learn something new everyday)
But would the polish still matter if its a sequential fuel injection?
The hells the "real" difference between the two by the way? just efficiency?
-
Re: I promised I'd post it. My 924 project (pic heavy)
For a sequential fuel injection, polishing isn't necessary, or advised for the reasons mention before about mixing the fuel. The best thing you could do for the intake is smooth out any rough casting using a bur bit on a die grinder, and some rough sanding drums.
However, you can polish the hell out of the outside!
You hit the nail on the head about the difference between DI, and others. It is more efficient. But, more expensive. More R&D, a more complicated injection system, and much beefier injectors to handle cylinder pressures.
-
Re: I promised I'd post it. My 924 project (pic heavy)
Quote:
Originally Posted by
altec
You hit the nail on the head about the difference between DI, and others. It is more efficient. But, more expensive. More R&D, a more complicated injection system, and much beefier injectors to handle cylinder pressures.
That sounds like more expensive replacement parts, and a less reliable engine.
Well okay, were going to at some point in the future take the top end off and clean out the 185,000 miles worth of deposits he's pretty sure is all along the inside.
-
Re: I promised I'd post it. My 924 project (pic heavy)
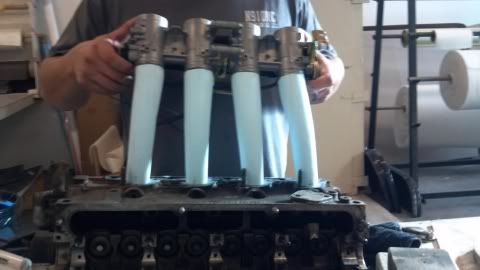
So the actual part where the manifold will bolt is apparently being cut out of aluminum. They've apparently finished that part. The mockup they had last time I saw was quite rough. They've now shaped the runners to fit to the manifold. Here's a pic as a teaser.
They got the angles correct and even got the length where I want it. The last time I saw it, the mockup was rough and still held together by sticks, so I'm happy to see they got the shaping finished.
My understanding is that from here they'll make a way to mold it and then start on the tubes and be finished shortly.
-
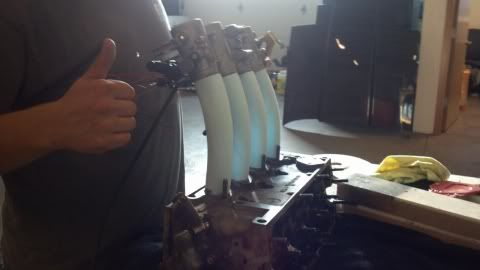
Re: I promised I'd post it. My 924 project (pic heavy)
Neat! What are those forms for the runners made of? Foam?
-
Re: I promised I'd post it. My 924 project (pic heavy)
Yeah he said he likes to carve it up in foam first because it's easy to do and easy to carve up, and if you make a mistake it's easy to just add more foam. Then he uses something to make a mold out of that and then uses that to make a final mold for the part. (if i understand his process correct)
-
Re: I promised I'd post it. My 924 project (pic heavy)
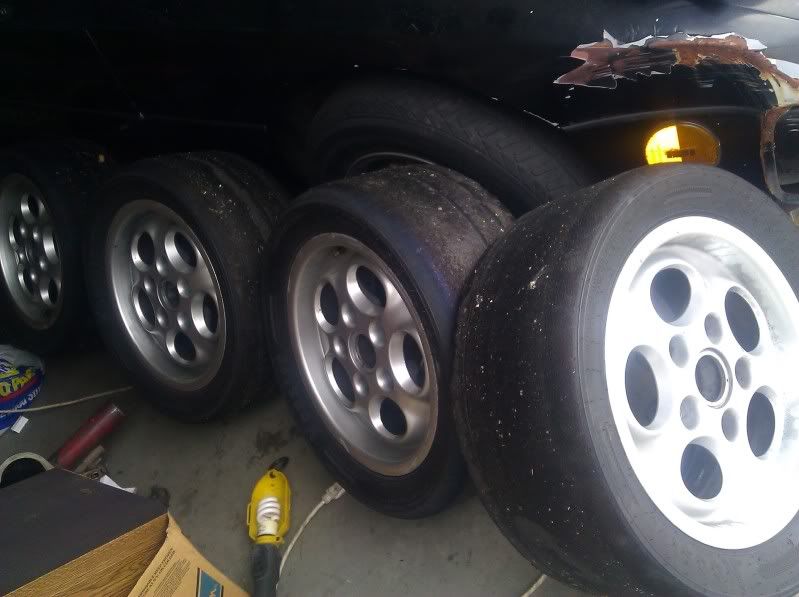
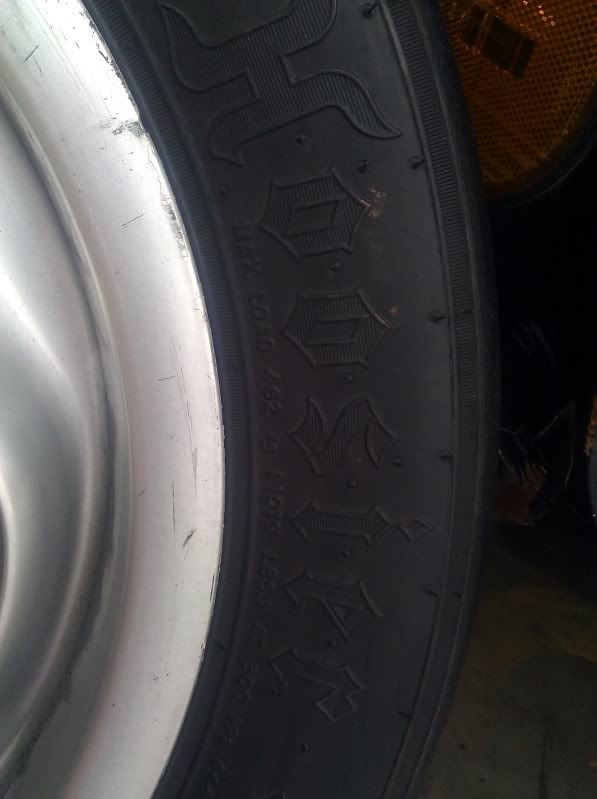
When deals pop up, I take them. Especially if I can plan in advance. I needed some winter wheels for the 911, just happens that early 944 rims are the same offset and will in fact fit. These wheels happened to have hoosier racing slicks on them, the bbs wheels are the same size... meaning I can put them on the bbs wheels and put snow tires on the phone dial rims.
WHY? BECAUSE RACE CAR!
Why Hoosier racing slicks on phone dials? BECAUSE RACE CAR!
-
Re: I promised I'd post it. My 924 project (pic heavy)
thems some nice tires if i do say good sir.
-
Re: I promised I'd post it. My 924 project (pic heavy)
Always nice when you can get a deal, especially if it knocks out two things at once.
-
Re: I promised I'd post it. My 924 project (pic heavy)
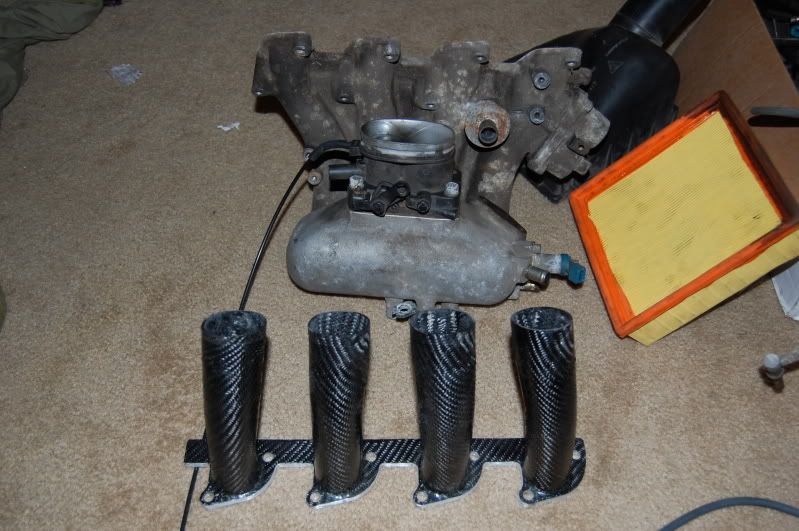
Runners are finished, needs the flange finished and it's a done deal.
-
Re: I promised I'd post it. My 924 project (pic heavy)
Intake manifold is finished!
I am VERY HAPPY with the finished results!
-
Re: I promised I'd post it. My 924 project (pic heavy)
hah, how much weight you think you just shaved off the scales with that new intake?
-
Re: I promised I'd post it. My 924 project (pic heavy)
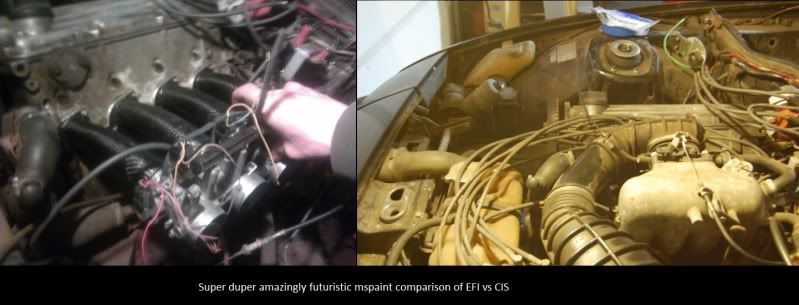
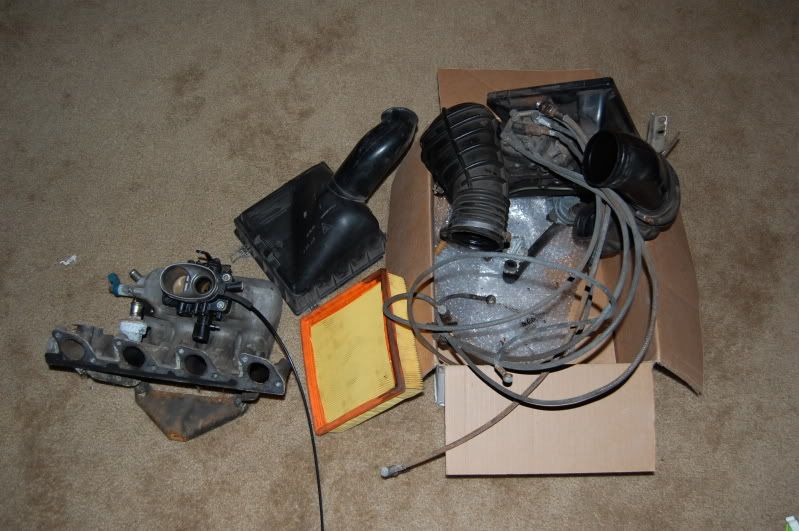
Herp derp for entertainment purposes of my 1337 mspaint skills.
Stock 924 metering plate plus boot - 12lbs
Stock 924 intake manifold - 13lbs
Stock 924 intake box with filter - 3lbs
Elbow to CIS system - 4lbs
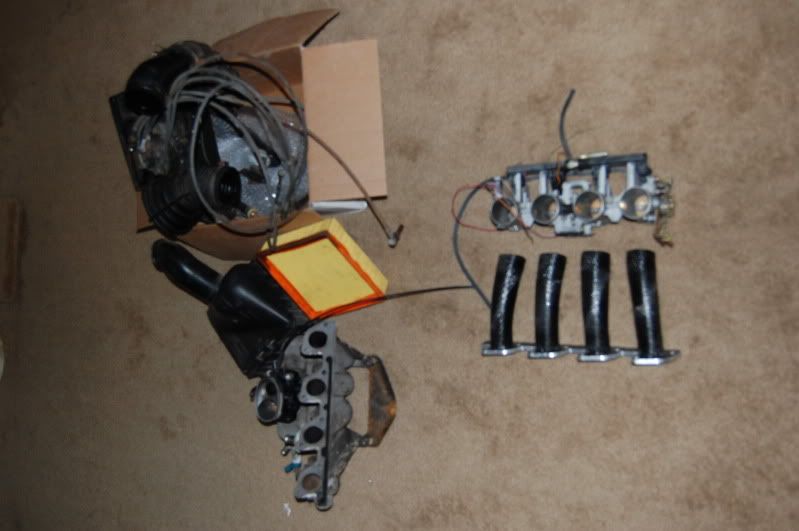
Carbon fiber intake manifold PLUS throttle bodies off of a gsxr-1000. DRUM ROLL PLEASE!........................................5lb s.
Intake manifold vs.... intake manifold.
Oh joy!
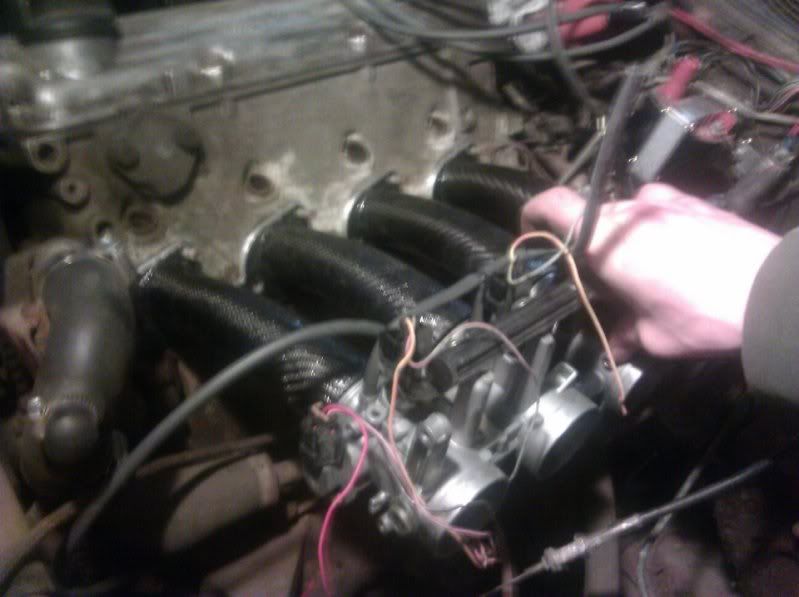
Intake mani and tbs on the right, CIS on the left.
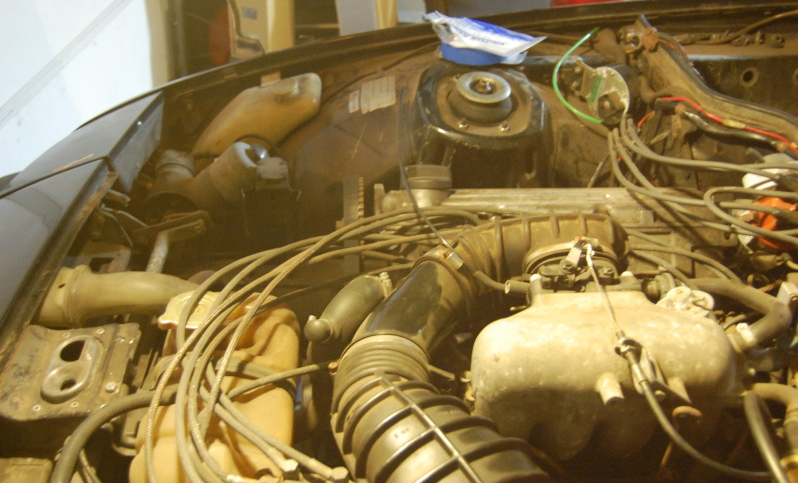
What the cluttered engine bay looks like with CIS everywhere.
The simplicity of EFI.
-
Re: I promised I'd post it. My 924 project (pic heavy)
~25 pounds off the front end is gonna help you tons!!!
Are you gonna shift your battery to the back cabin and try to even out the weight a little bit more?
-
Re: I promised I'd post it. My 924 project (pic heavy)
why did i read this whole worklog? because racecar!
actually I didn't read 100% of it, but what I did see is awesome as hell.
-
Re: I promised I'd post it. My 924 project (pic heavy)
Quote:
Originally Posted by
Omega
why did i read this whole worklog? because racecar!
actually I didn't read 100% of it, but what I did see is awesome as hell.
hehehe I can see this is just the tip of the ice burg of what this guy has planned for this black stallion of a 924
-
Re: I promised I'd post it. My 924 project (pic heavy)
Quote:
Originally Posted by
Twigsoffury
~25 pounds off the front end is gonna help you tons!!!
Are you gonna shift your battery to the back cabin and try to even out the weight a little bit more?
The battery position is actually pretty good. The cars are a 51/49 weight distribution so I'm not too worried about losing too much weight in the front or rear. I'd prefer to go with the current plan of weight reduction and then if it feels wonky I can always change things.
Quote:
Originally Posted by
Omega
why did i read this whole worklog? because racecar!
actually I didn't read 100% of it, but what I did see is awesome as hell.
I'm glad you are enjoying it! :) I'm excited to get it running hopefully soon.
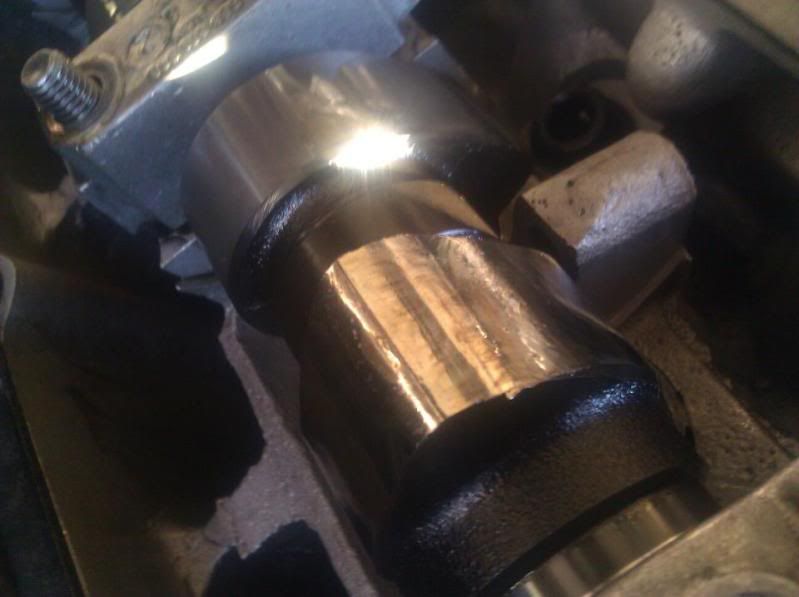
I have unfortunately ran into a bit of a problem though. I went to take the head off so I could do the head gasket, and what I found was most displeasing...
Basically, this stems back to some vandalizing caused by a neighbor draining the oil out of my car because he didn't like me. I blew a head gasket, etc etc... I had no idea the top end suffered damage. On top of this, after looking through the oil tube, one side of the tube was clogged and was starving one side of the cam. So where the damage began, it got worse and worse. I'll be borrowing the engine hoist from my dad since he isn't using it and pull the entire engine this coming weekend.
I was going to hold off on rebuilding it entirely, but in light of this damage, it is best if I tear down engine #1 completely, bring in engine #1 and #2 into a machine shop, see what can be salvaged and make one good engine. I was going to rebuild it next season anyway, so it'll be a season early basically.
The GOOD news is that cam out of engine #2 is in near flawless shape. The main bearings are in great shape and even the crank out of engine #2 is great. If there is no scoring in the cylinders on engine #1 I will likely throw all the internals out of #2 into #1 after getting everything machined.
In the mean time my concentration will be working on the rest of the engine harness and wiring on the car which is coming along nicely.
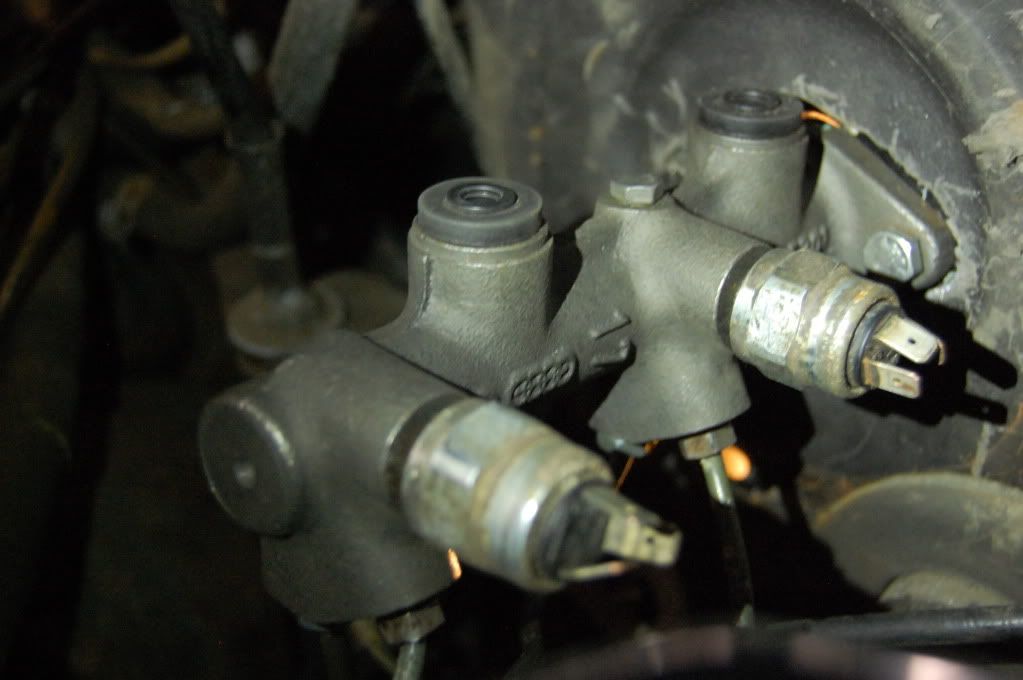
I also finished the plumbing for the brakes as well so that's a good feeling. Now the big thing is to get the leverage right and working with the pedal properly since it is now a manual brake setup.
-
Re: I promised I'd post it. My 924 project (pic heavy)
Bumpy stick got a little less bumpy...
I can only assume your neighbor is hanging out with a few bags of lye these days?
Gonna be running the entire valve train from #2, or just the cams?
Are there any good performance cams out there for your engine? Can't hurt to get it breathing a little better then stock...
-
Re: I promised I'd post it. My 924 project (pic heavy)
Quote:
Originally Posted by
CorsePerVita
The battery position is actually pretty good. The cars are a 51/49 weight distribution so I'm not too worried about losing too much weight in the front or rear. I'd prefer to go with the current plan of weight reduction and then if it feels wonky I can always change things.
I keep forgetting were talking about a car that at some point would of cost 60,000+
-
Re: I promised I'd post it. My 924 project (pic heavy)
Quote:
Originally Posted by
Twigsoffury
I keep forgetting were talking about a car that at some point would of cost 60,000+
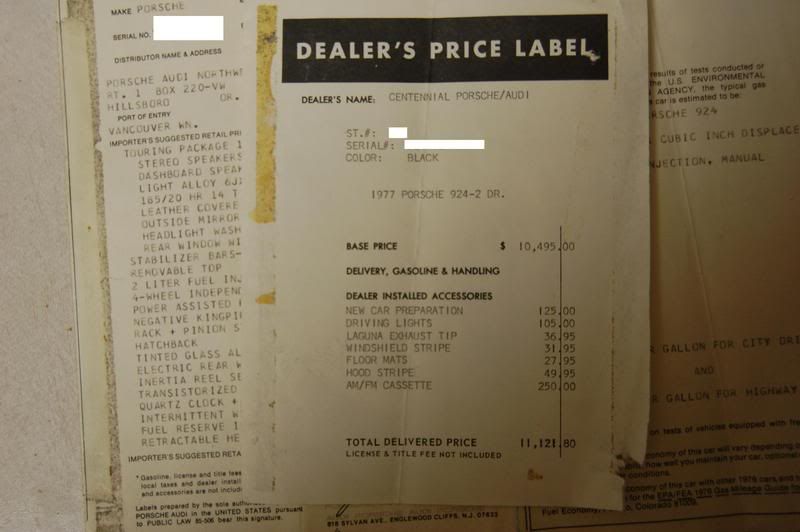
Well maybe thats what it would be in today's money.. but they retailed for right around 10K..
Considering a 1977 Camaro Z28 started right around $5K + options.
By 1988 the 924 had climbed as high as 26K for the base.
10K bought alot of engineering 35 years ago!
-
Re: I promised I'd post it. My 924 project (pic heavy)
Quote:
Originally Posted by
altec
Bumpy stick got a little less bumpy...
I can only assume your neighbor is hanging out with a few bags of lye these days?
Gonna be running the entire valve train from #2, or just the cams?
Are there any good performance cams out there for your engine? Can't hurt to get it breathing a little better then stock...
There are actually. I'm still debating if I'm going to go that route or run it with a stock cam this season since I do have a good cam from engine #2.
Quote:
Originally Posted by
Twigsoffury
I keep forgetting were talking about a car that at some point would of cost 60,000+
Quote:
Originally Posted by
OvRiDe
Well maybe thats what it would be in today's money.. but they retailed for right around 10K..
Considering a 1977 Camaro Z28 started right around $5K + options.
By 1988 the 924 had climbed as high as 26K for the base.
10K bought alot of engineering 35 years ago!
Yep that's what it cost back then. Anymore you can find a near pristine 924 that needs little to nothing for about $4-5k. They are not insanely expensive cars. Not to mention, the 924 is easy to work on. The 944... well... not so much.
Gutted the last bit of wiring out of the car tonight. Also removed the heater. Will be taking the heater core out tomorrow (Probably going to try and find a lightweight electric heater instead).
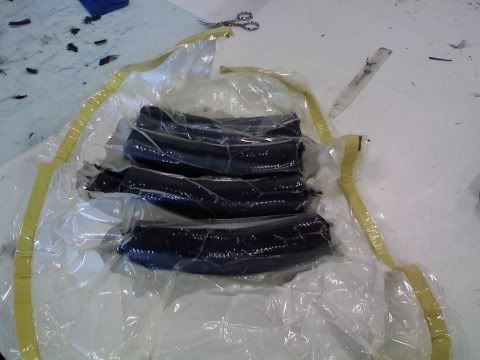
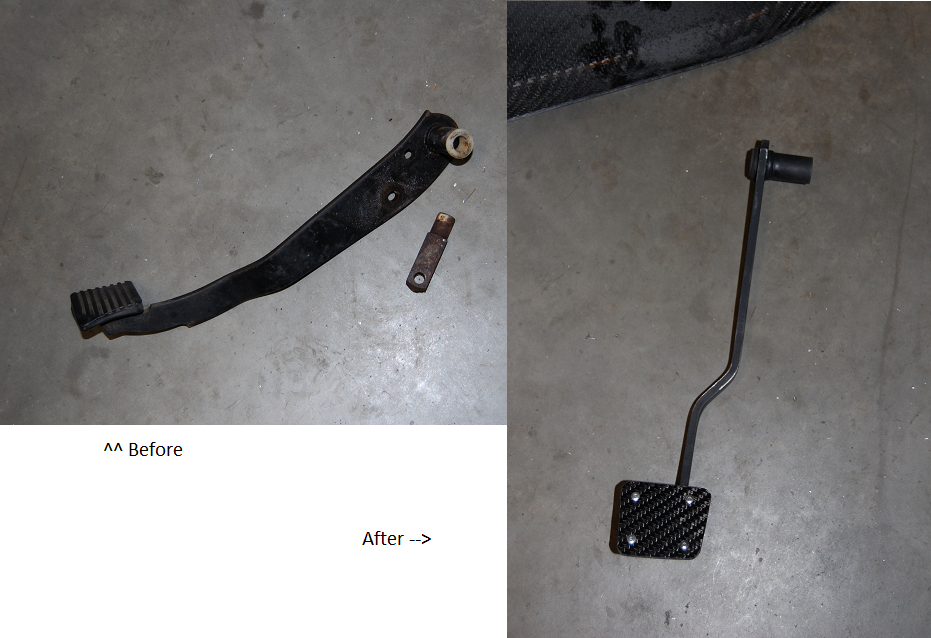
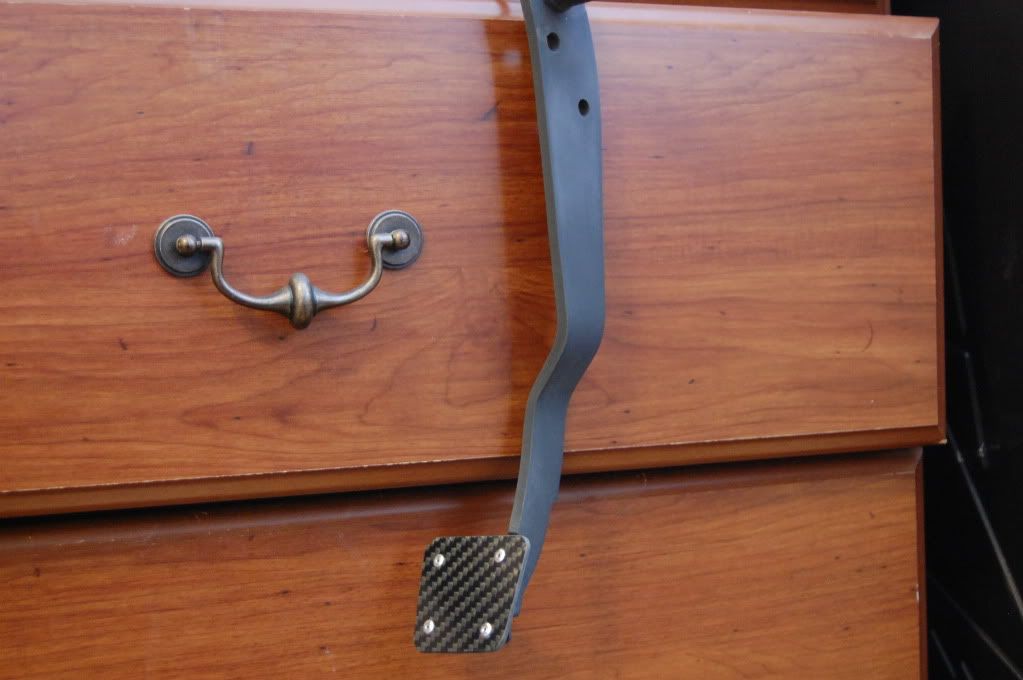
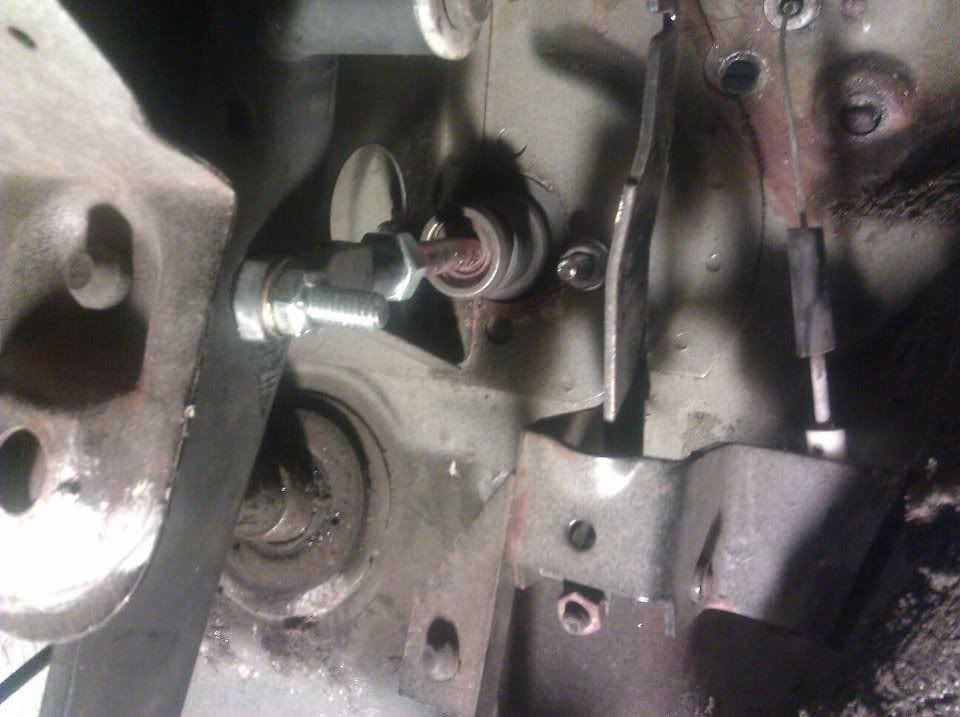
While I was at it, I took the last bit of the old brake system out and got mine ready to install the master cyl. I also yanked out the pedals so I could fix them as they were starting to show their age. The brake pedal even had bends on one part of the pedal, not sure how. But I sealed it up and have been putting more coats on it. Here it is (not entirely finished), my mod for the week.
-
Re: I promised I'd post it. My 924 project (pic heavy)
-
Re: I promised I'd post it. My 924 project (pic heavy)
Colors are all messed up in this picture. The rusty looking stuff is actually glue from all the sound deadening removal. The bolt is actually a stainless steel bolt but it's colored red, but it's new hardware. That's what I get for a cell phone pic.
Anyway, brakes successfully converted. Too tired to bleed them right now. I'm tired.
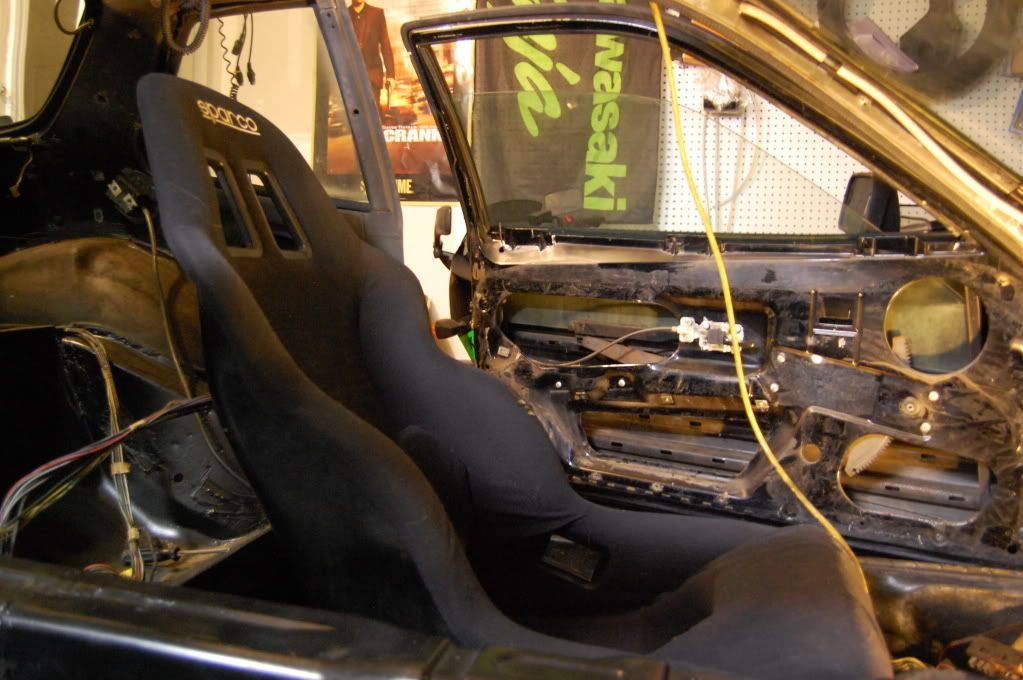
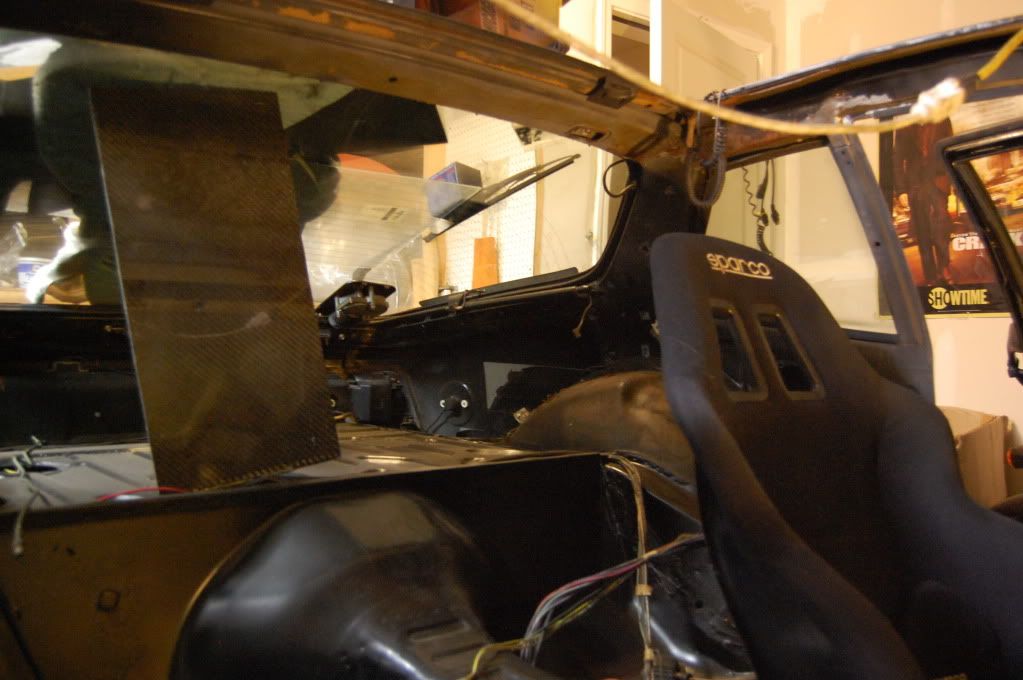
Had some quirks with the rails not lining up like I wanted them to so I removed them and got the seat fitment right where I wanted it and adjusted things.
Party on dudes
-
Re: I promised I'd post it. My 924 project (pic heavy)
-
Re: I promised I'd post it. My 924 project (pic heavy)
What did you use to seal your trunk and floor?