Can Iride itplay on it when you're done?

Printable View
Can Iride itplay on it when you're done?
Sorry, there's a 35lb weight limit. :PQuote:
Originally Posted by AmEv
Sweet! My daughter can drive it around.Quote:
Originally Posted by Boddaker
lolQuote:
Originally Posted by Fuganater's kid
Sweet... On the GRID I weigh less then 35lbs! I hope that counts. :crossed:Quote:
Originally Posted by Boddaker
Great work Bod! Looking fantastic.
haha I should get a picture of my daughter on it, she should still be under the limit. ;)
Thanks everyone for the great comments. I think I'm having the most fun with this build, and it's mostly due to you guys and your awesome feedback. :)
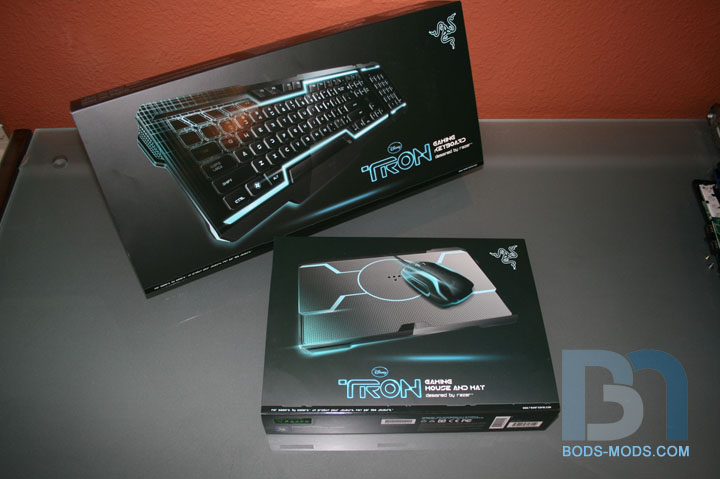
Ok, more goodies! I couldn't resist getting Razer's TRON themed keyboard and mouse with mouse pad to go with the build. I usually mod the peripherals to fit the given theme of my projects anyway, so this was a bonus And I have to say that Razer did a great job with the TRON design. I doubt I could have done as good a job, or even come close to the level of awesomeness!
Let me just show you with pics:
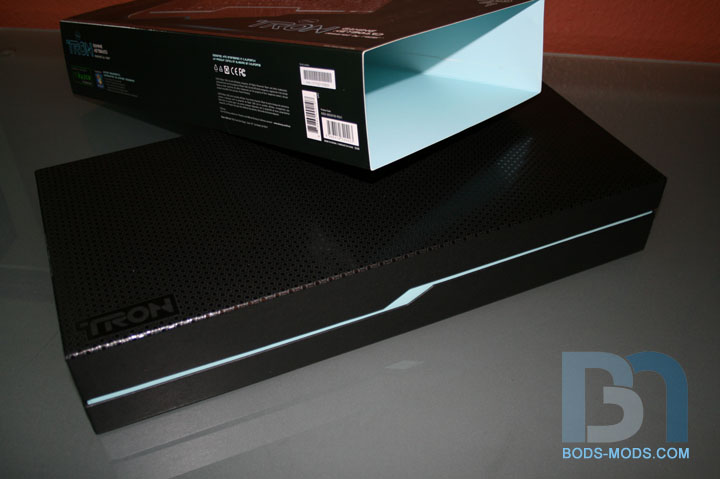
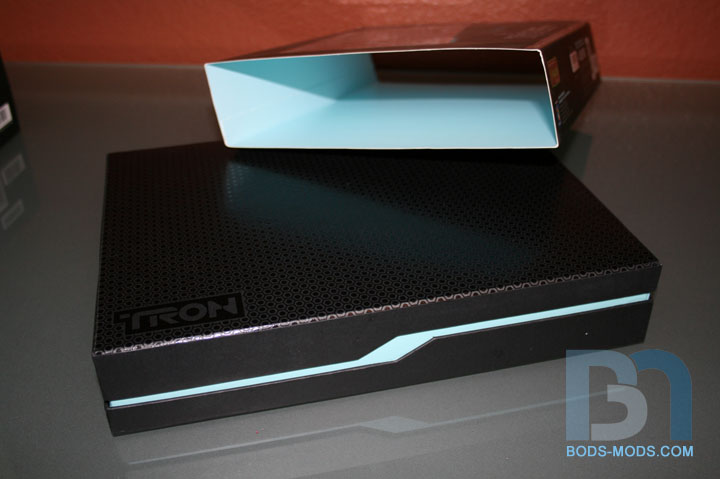
Even the packaging is cool! Opening the box revealed a thick smoked acrylic cover over the keyboard, with subtle TRON and Razer logos on it.
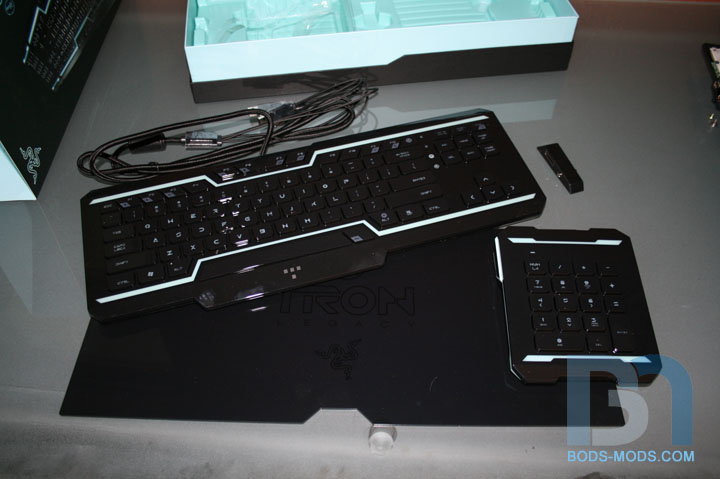
The keyboard is well-built with TRON style lettering that lights up, and a separate number keypad that can be mounted on either side of the keyboard with the provided connector piece.
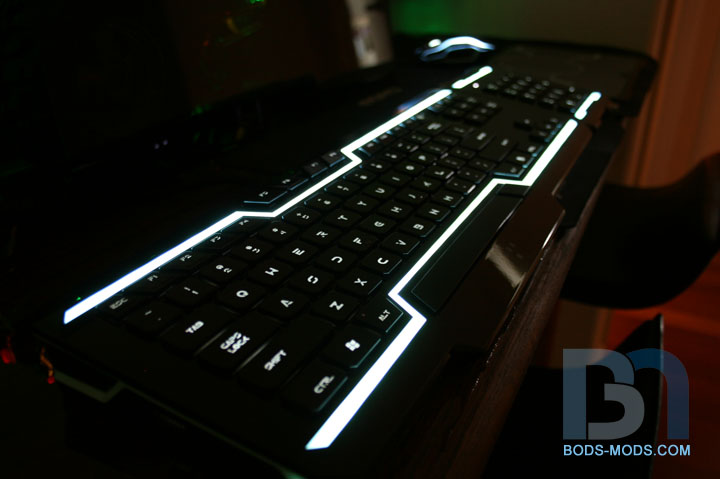
Here it is lit up. There are audio connections on the keyboard as well, so I can plug my headphones in right there.
The mouse/pad kit came in the same killer box with protective smoked acrylic cover.
Pure TRON pr0n lol.
And the best part, the mouse pad has an electro-luminescent coating on it that reacts to a special led under the mouse, so it leaves a light trail as it moves across the pad, just like the lightcycle! :D
ok, i have been lusting over the tron mouse and keyboard since i first saw them, but had already spent my moneys on a r.a.t. mouse.
i can't believe that thought to use these on your light cycle case never even came close to entering my mind. glad you thought of it.
of course now that i see the lettering lights up on the keyboard and the mouse pad leaves a trail, i may have to start saving for these.
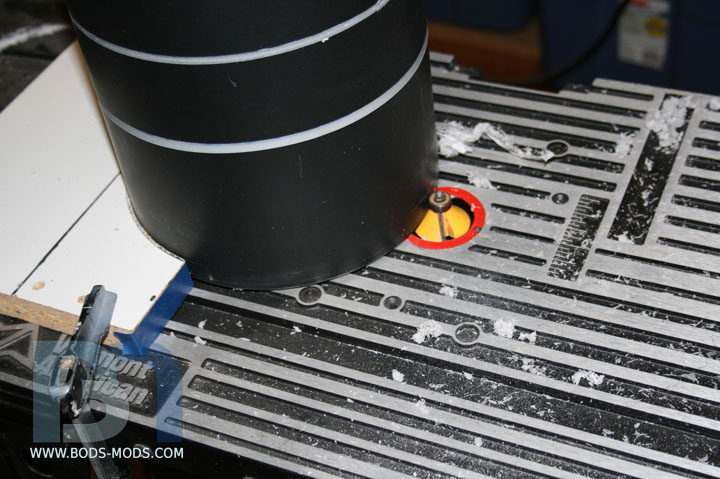
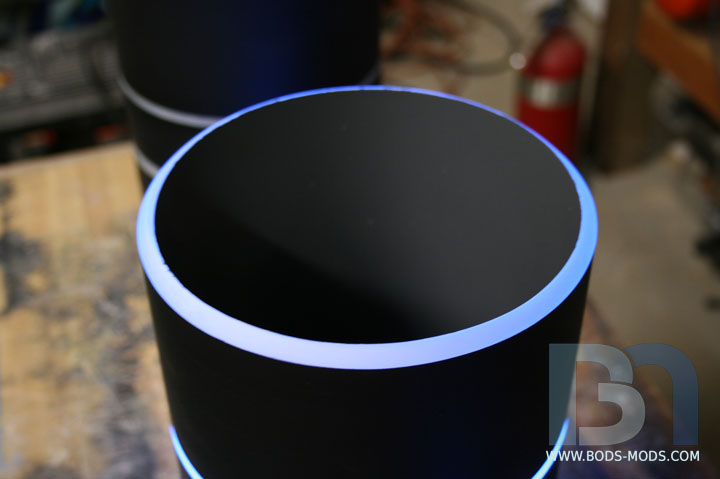
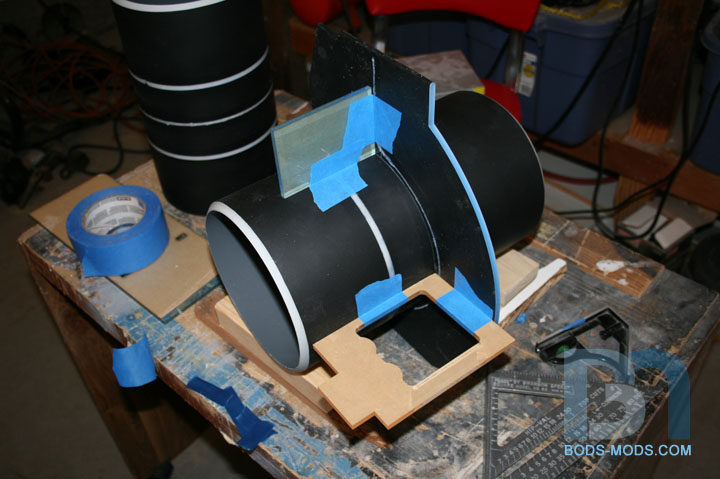
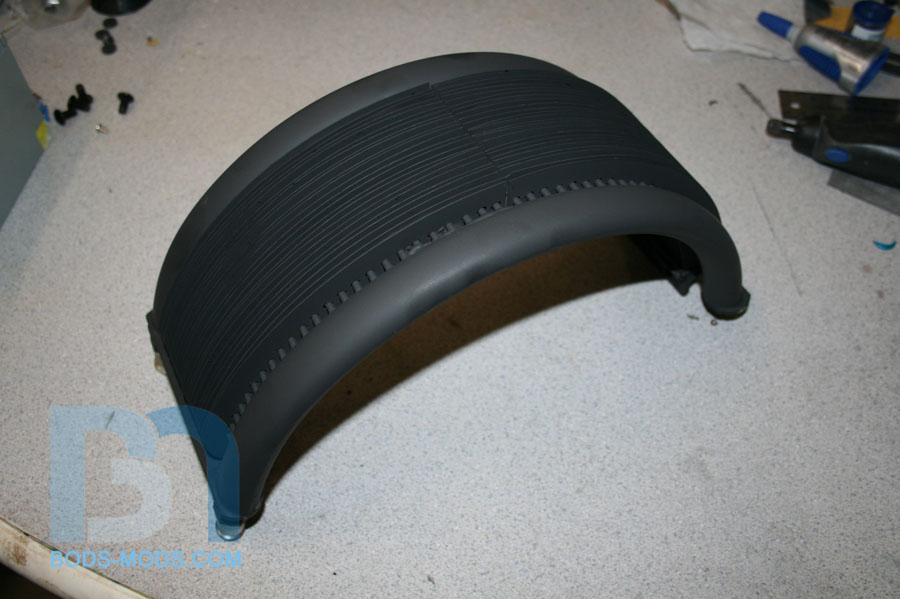
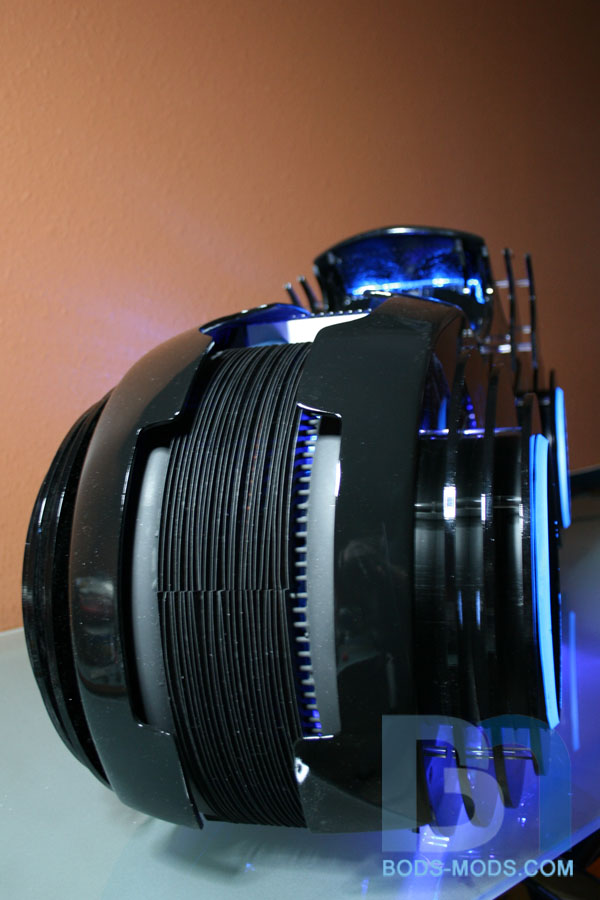
More progress on the tubes. Got them painted inside and out, after taping off the areas where the ribs will be glued. Then after doing a light test, I decided to chamfer the ends to widen the glow area a bit.
I set up the router table with a 45° chamfer bit, and made a semi-circuler fence for the tube to fit in so it wouldn't go anywhere, then I slowly rotated it by hand 360°.
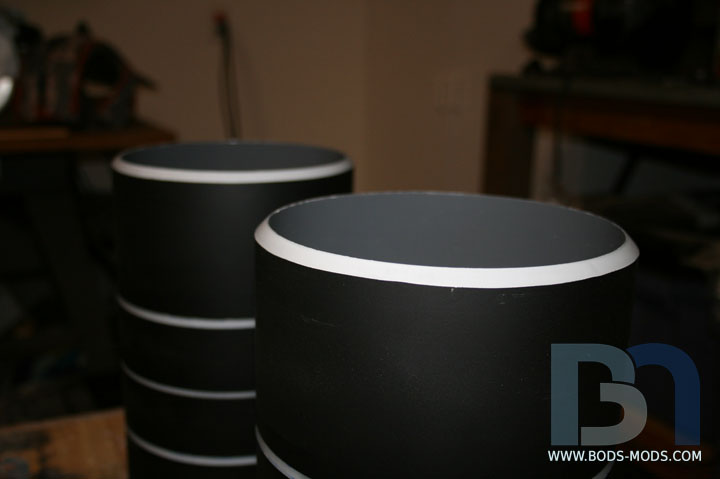
All four ends done.
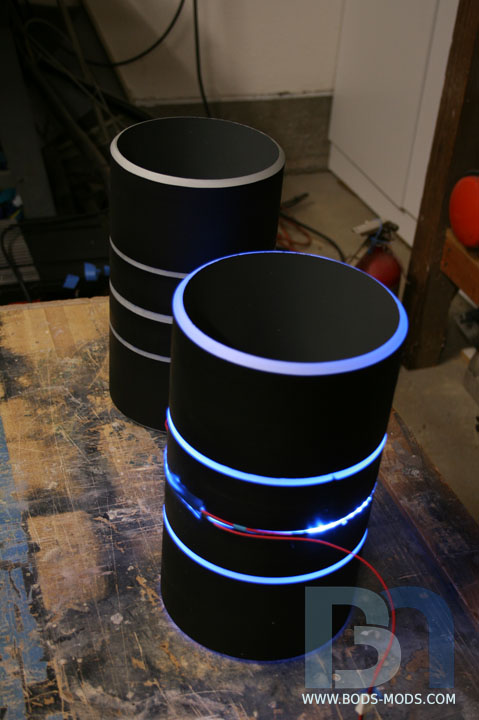
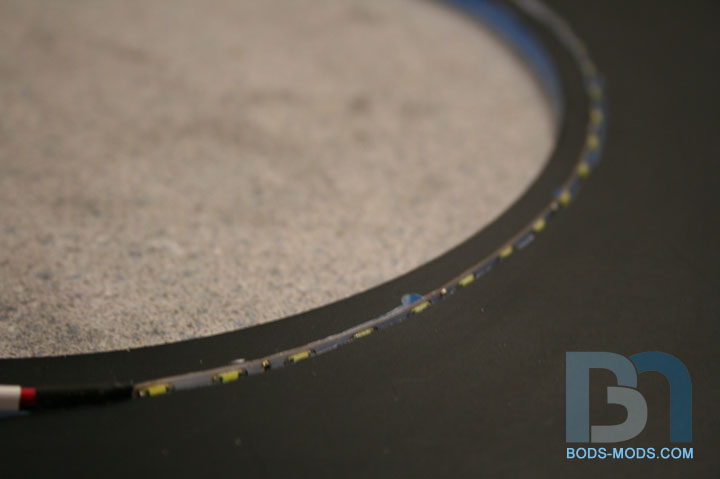
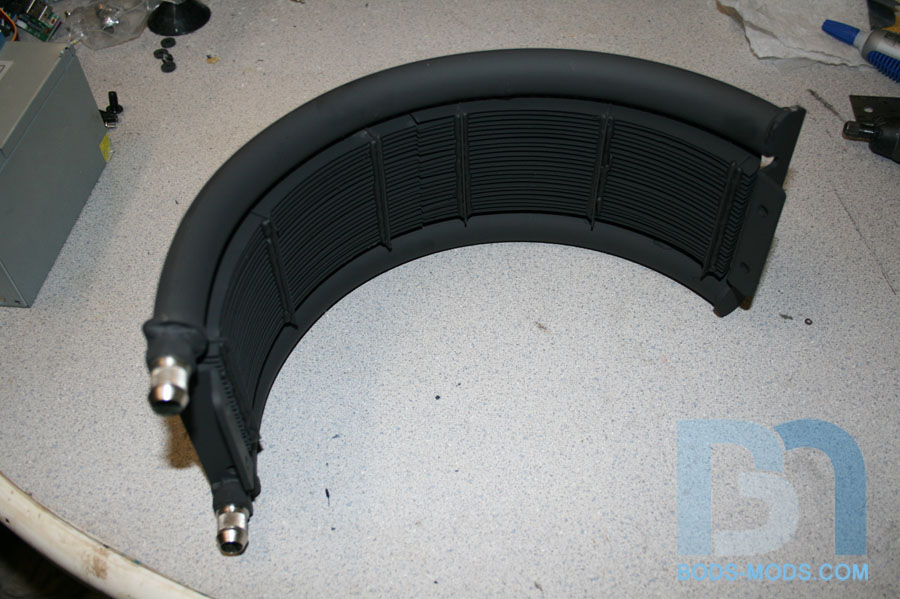
For lighting, I'll be using these blue light strips wrapped around the tube center...
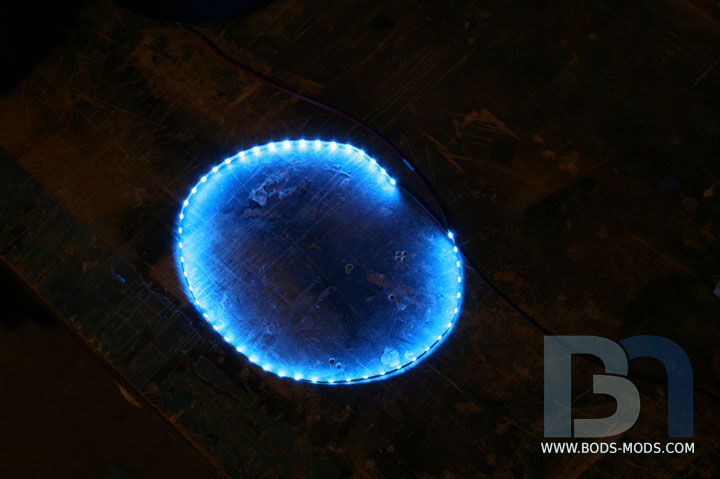
... like so.
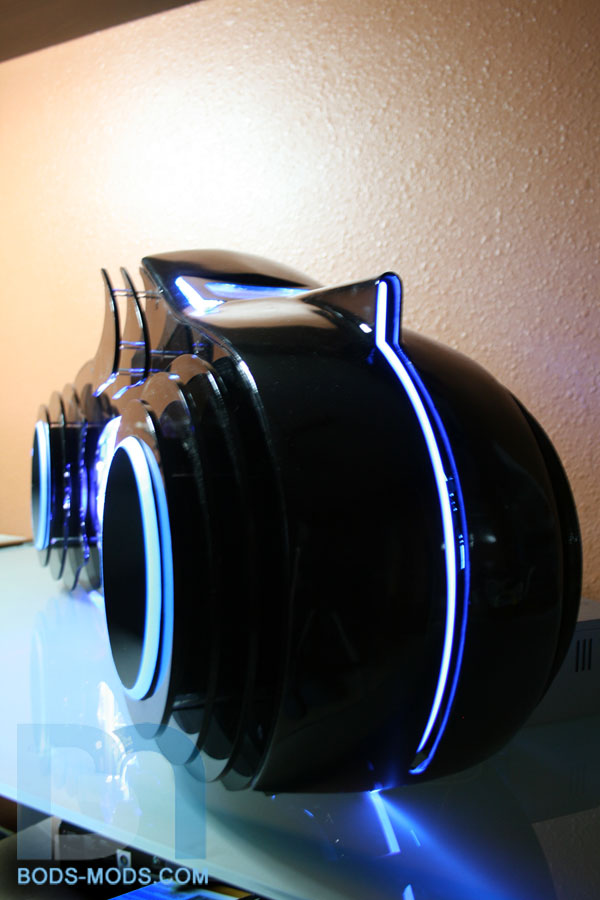
A close up shot of the glowing end.
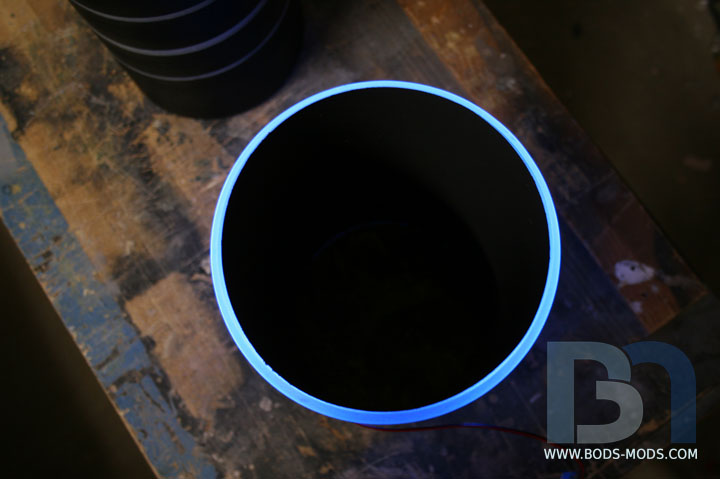
And an overhead shot.
The part on the bottom is darker because there is about a 3" gap between the ends of the light strip (it's 20" long, and the circumference of the tube is roughly 23"). I will cut a 2nd strip down to fill in that area. Otherwise, I think that is pretty much the look I was going for. :)
Looking good. I love that Tron keyboard and mouse. Too bad it isn't in a different color.
Looks great, and good idea with that semi-circular guide. :up:
Ohhh Bod I nearly missed this update, this tron theme is working perfect & those wheels really are super fantastic, this mod is gonna look awesome overload faint worthy if seen with the eye lol :D.
Thanks Wayne, at least you caught the update over on the other forum lol.Quote:
Originally Posted by Waynio
Smallish update...
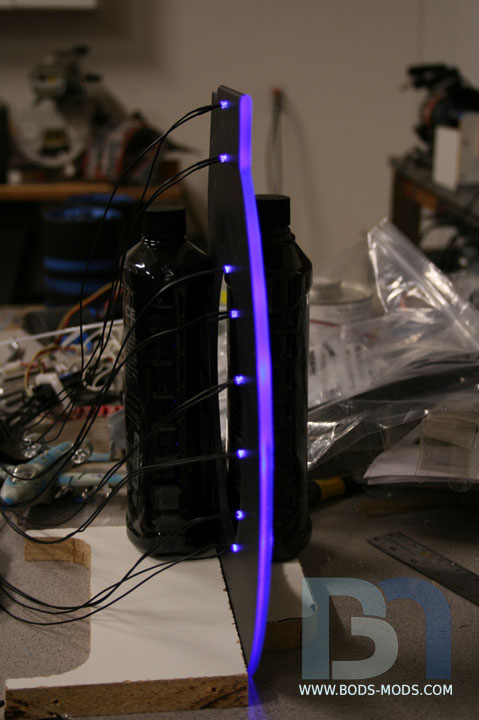
Playing with different lighting for the lightwall emitter. I drilled a few holes in the side of the center rib to accept 3mm uv leds, and fired them up to see how they look.
For some reason they look too purple here, not at all the same color as the SSD Engine. Maybe it's because these leds are embedded into the acrylic, whereas the SSD engine had the uv lights hanging over the pieces.
So then I tried white leds and got a better blue hue, but the leds were too far apart and I could see gaps in the lighting. So I went to a white led lightstrip curved along the inside edge. Looks much better! I think I'll be going with door number three, Bob.
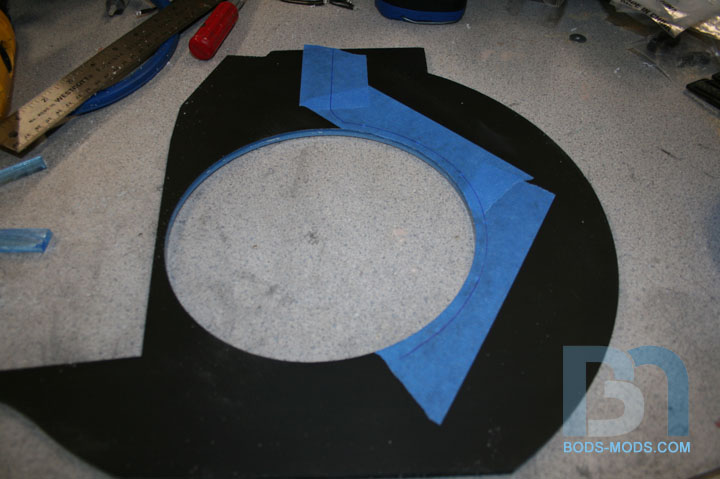
So since I can't put the lightstrip where I'll be gluing the center rib to the tube, I had to cut a new groove in the side. So I taped off the area and drew my cut line.
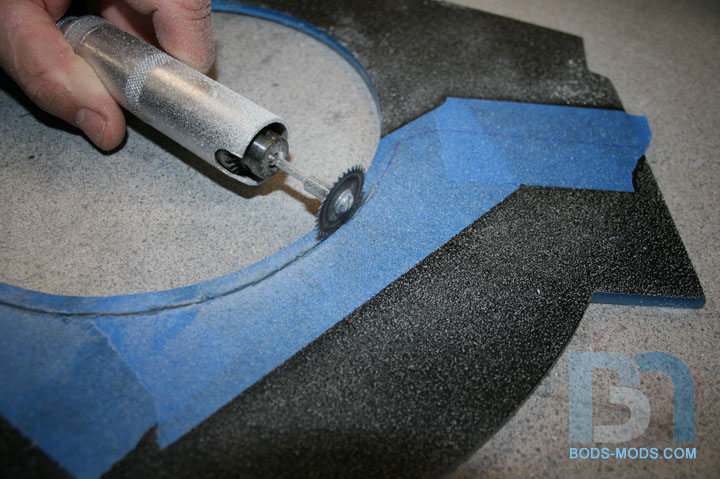
Using the rotary tool, I carefully cut a thin groove just wide enough and deep enough for the lightstrip. I didn't want to cut through to the other side, so I put a mark on the saw blade for a depth guage.
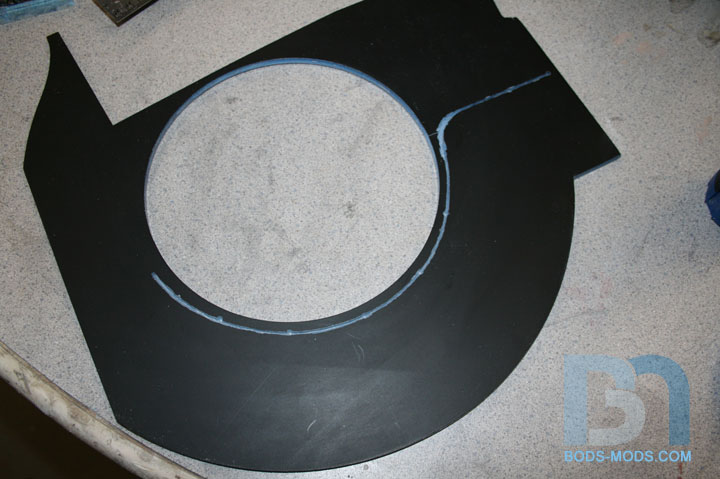
Groove is cut, and the other side is unscathed!
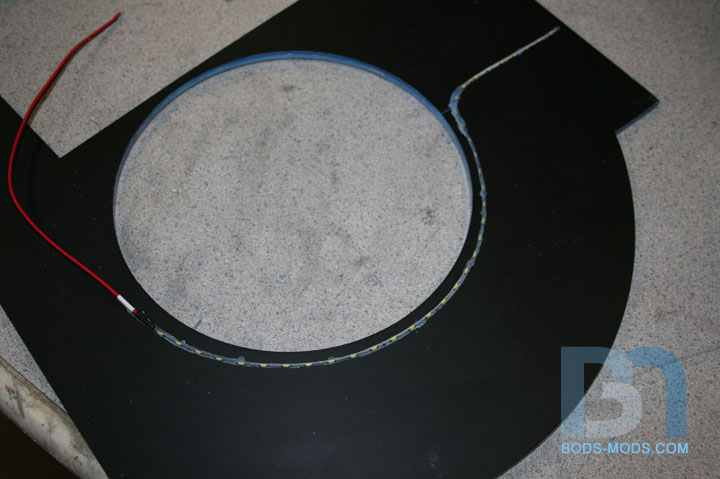
The light strip fits right in.
It's just deep enough for the width of the strip.
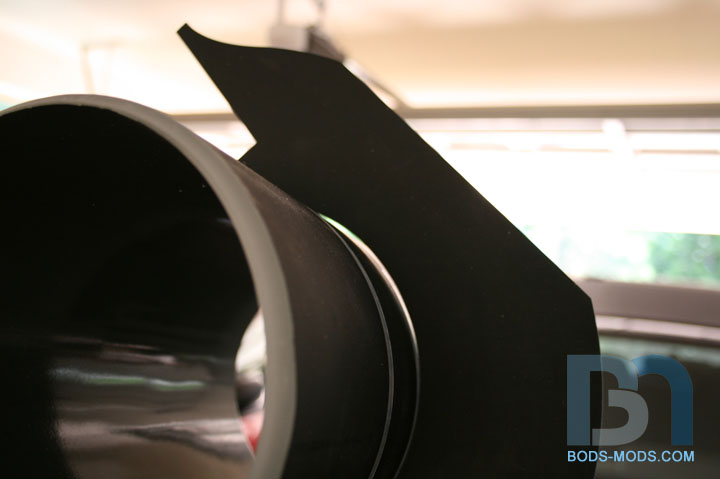
With that taken care of, I can now glue the center rib to the tube. I used various pieces of scrap wood and acrylic to keep everything level, square, and plumb.
Back when I first dry-fitted the ribs and tubes, I realized that the tubes weren't a perfect cylinder. Holding the tube and center rib up to the light, you can really see how imperfect it really is.
I'll be filling in the gaps with some JB Weld, now that the two pieces are tacked together.
More tomorrow!
I just Love this mod, and it is something that makes me want to mod even more, I love the way you cut the groove for the LED light strip, it sort of like I suggested earlier, but a more modern way (no light strips were around when I did the led in side wall, to make etches pop, Ill think ill try that on my next mod in the future... Well the one after that, forgot about my mini pc lol.
P.S hope you got that razor setup for free via sponsorship :P
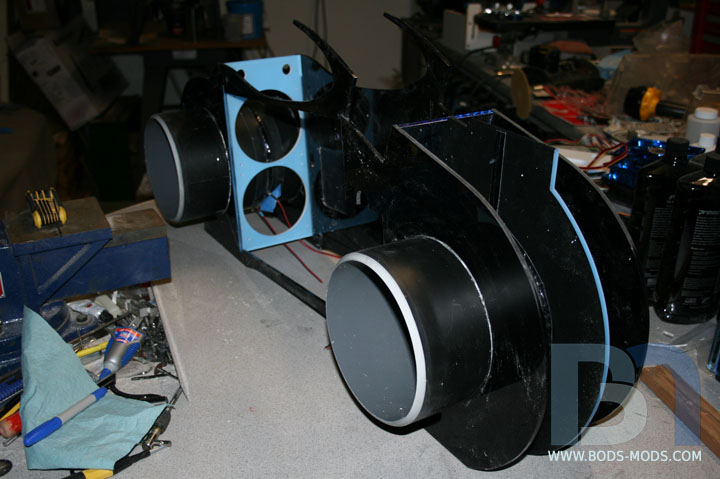
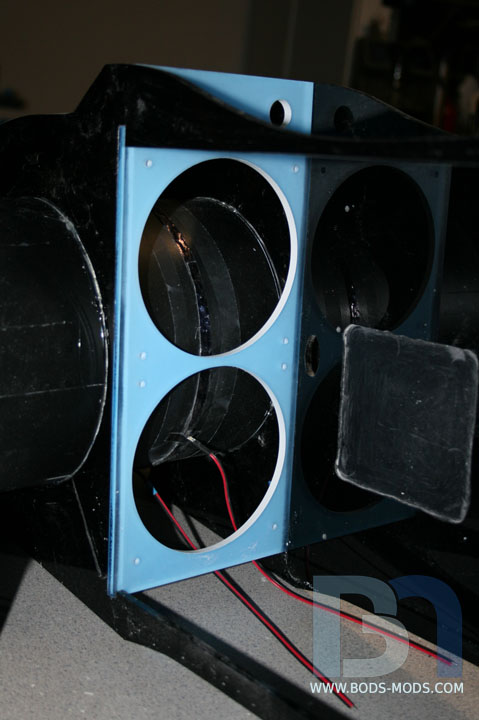
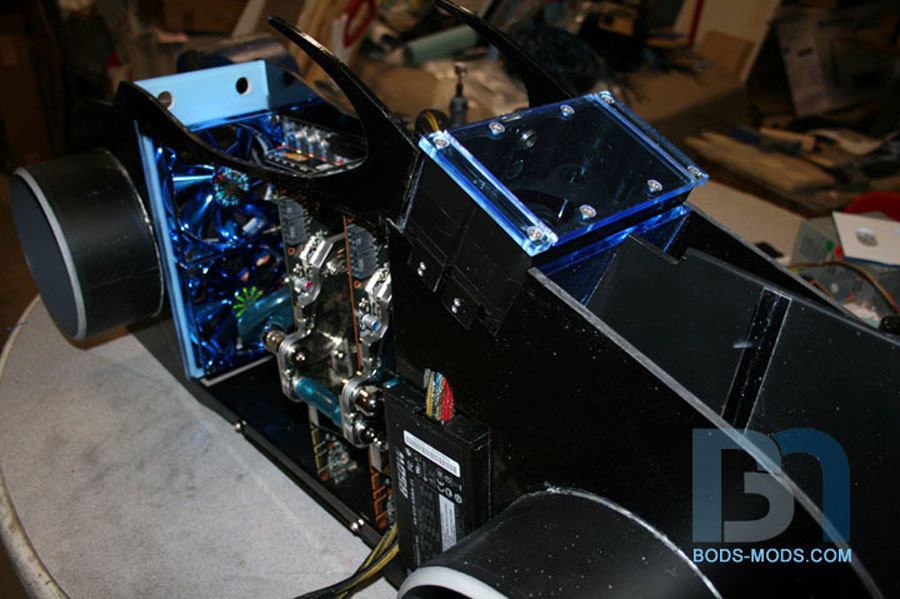
Assembly finally begins! I got both main ribs attached and some cross supports in, like the dual 120mm fan mount.
I scuffed them up and painted the back face white to give it a lighter blue look, and to aid in the glow.
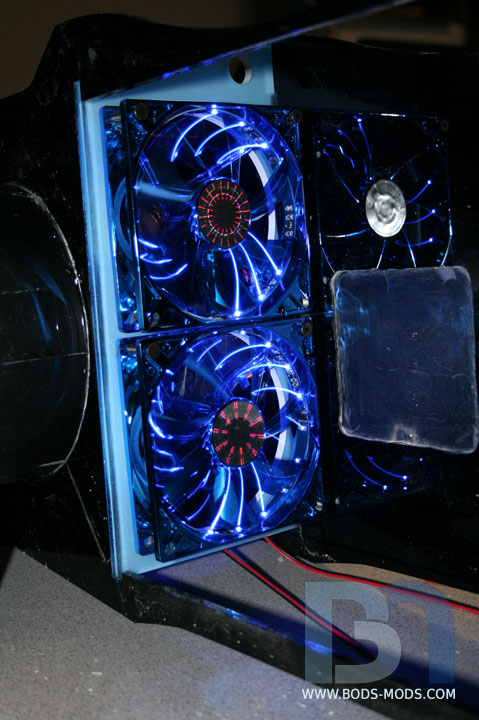
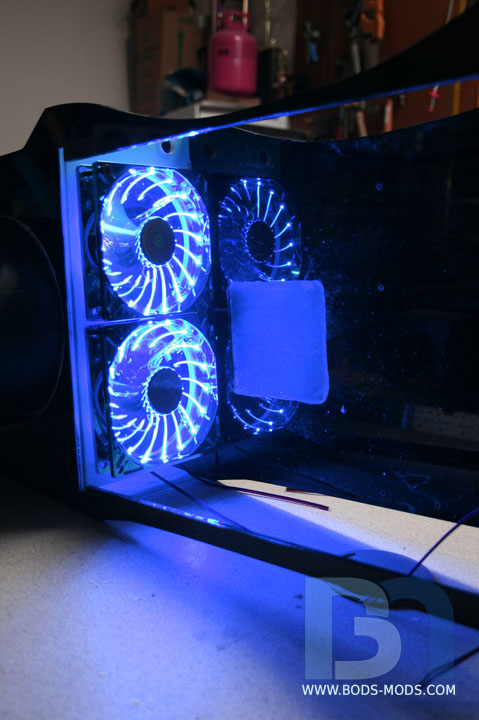
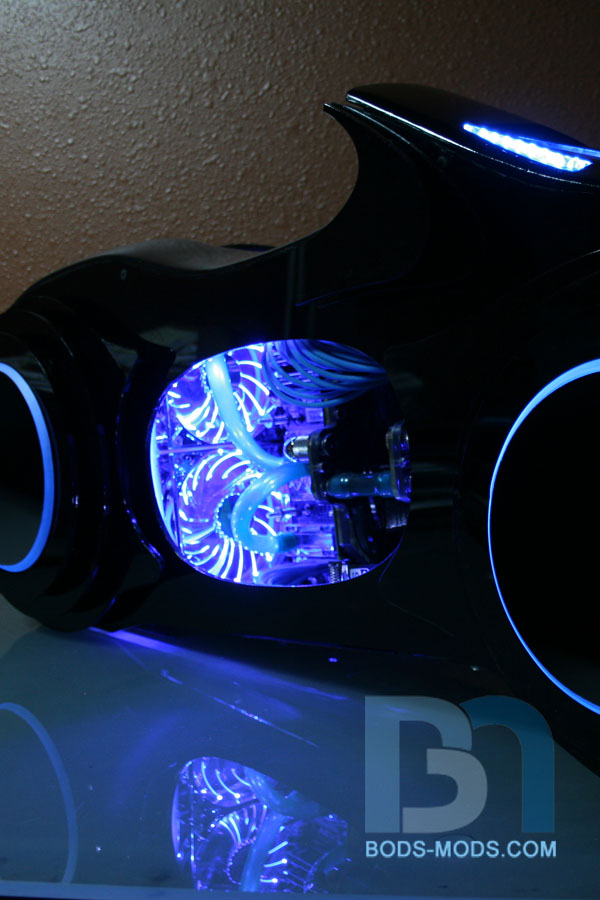
Then I opted for these Enermax Appollish fans for some bling. It has different modes for the leds. Here it's got a triple blade rotation going. Reminiscent of a Flux Capacitor. :)
Here's the "all-on" setting. I can also adjust the speed of the fans with the controller.
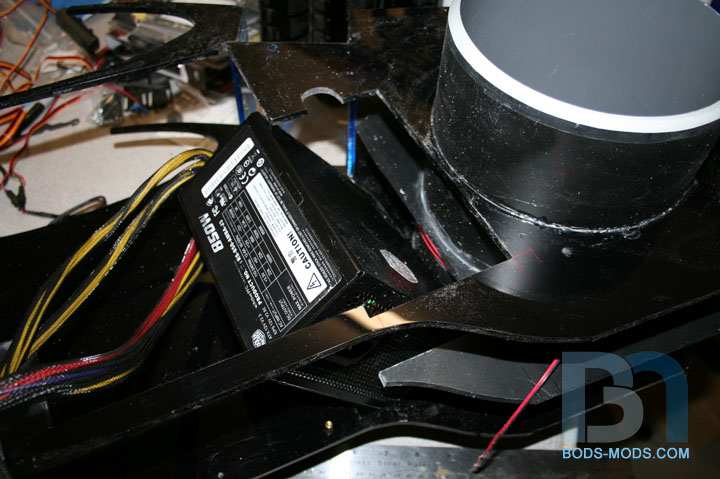
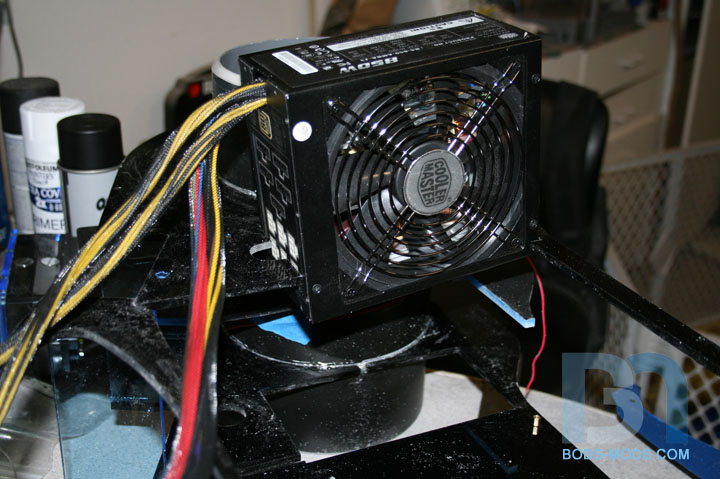
Next up is the power supply. Finally getting some components in! :D
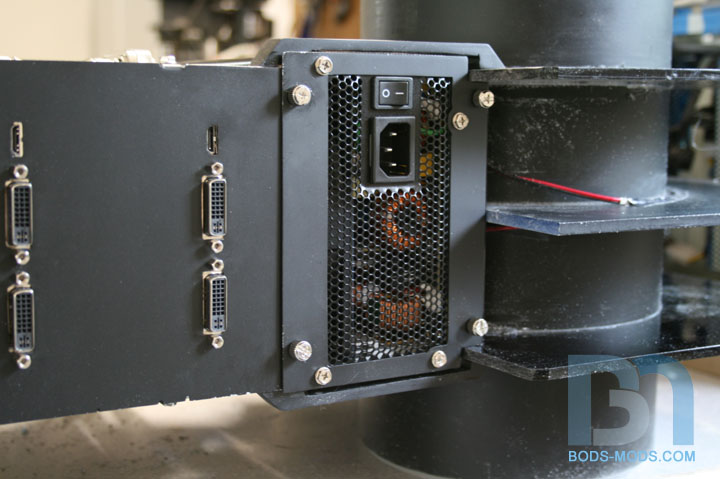
All right, good progress today! I got the power supply mounted, as well as the whole bottom IO plate made so I could install the motherboard and video cards. woot!
Ok, the power supply didn't quite fit at first lol. This is just one of those things that no amount of forethought and planning in Sketchup could prevent. With all the ribs in place, I couldn't work the psu into it's spot.
It wouldn't slide in sideways either. This is how I originally envisioned it going in, but for whatever reason, it was just too tight clearance-wise. (I blame it on the power supply's bulging rear mesh!)
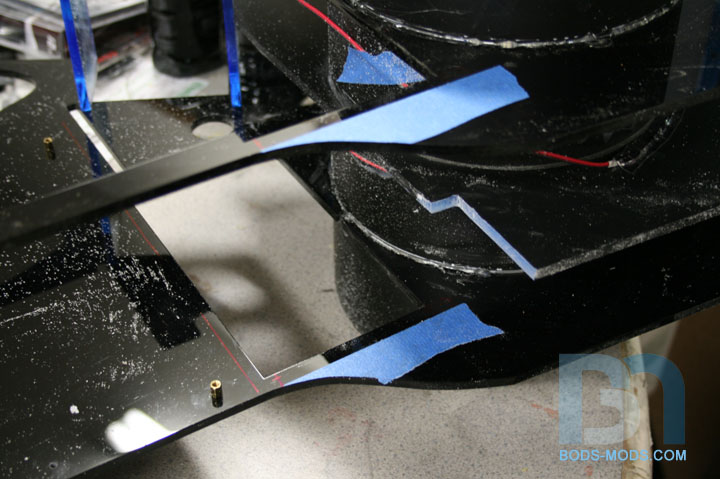
So, I had to rethink the psu situation, and come up with a plan that will work better in the end. I decided to make a mounting flange that will bolt to the psu, then attach to the bottom framing. This way the psu can just drop down and out if I need to remove it later. So first thing was to start removing the lower portions of the ribs. Center rib went first.
Then I glued in some cross supports before cutting away the top and bottom rib sections. These supports will be where the flange will screw into.
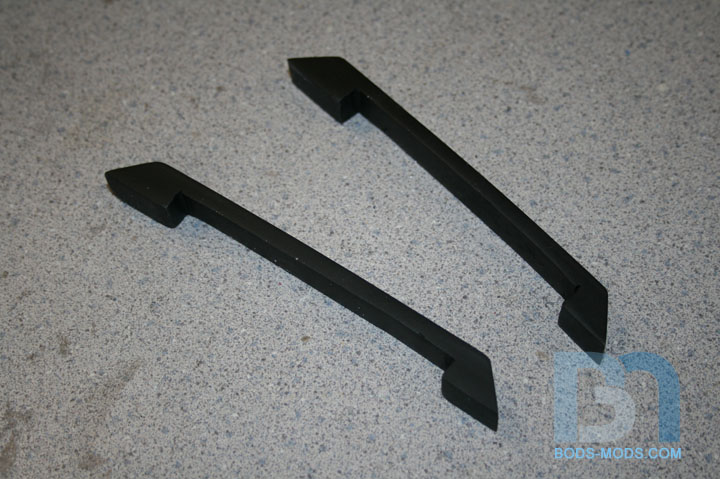
Then I whipped up a couple handle-looking pieces, that will re-attach the rib sections together.
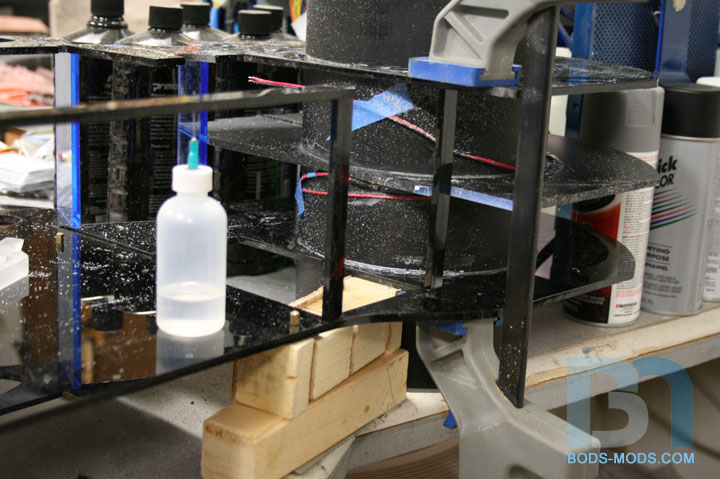
Here's the top handle glued in.
And the bottom handle glued, with the bottom rib section removed as well. Now the power supply can slip up into its place without any obstruction.
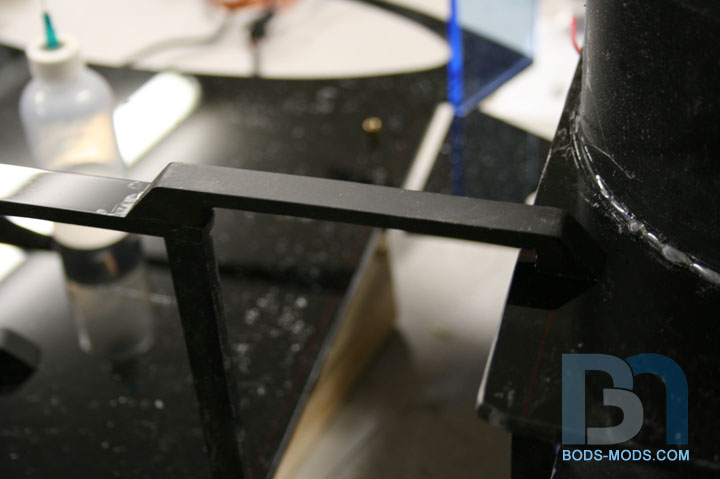
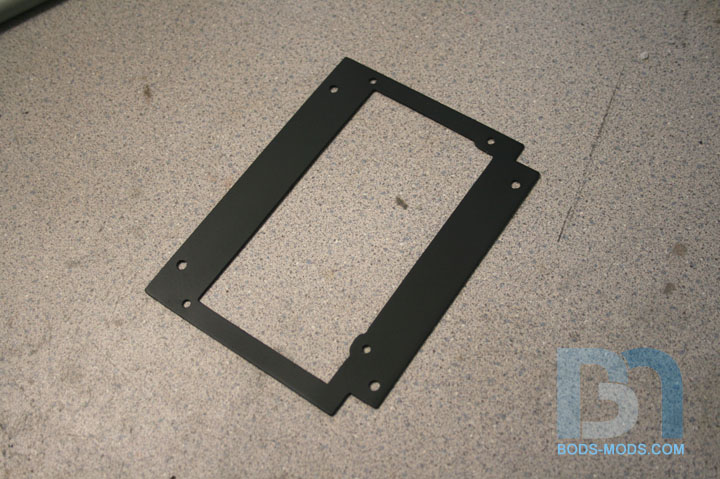
Here's the flange I made which will secure the psu to the framing.
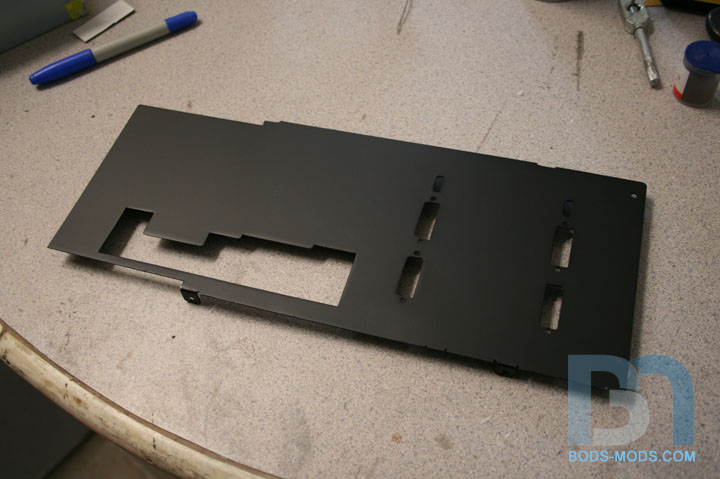
With that done, I could turn my attention to the IO plate. I went to town on this piece, measuring and cutting all the openings and never once thought to grab the camera. So all you get is the finished pics, sorry!
The plate is secured to the ribs via tabs and 4 screws (2 on each side). I incorporated the DVI and HDMI openings into this plate as well, so I could do away with the rear video cards' IO bracket.
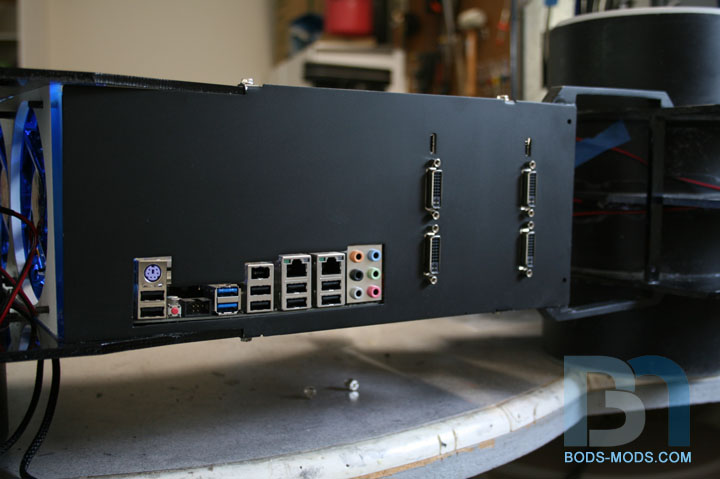
A close up of the motherboard IO ports.
And a close up shot of the video card ports. the DVI screws are what holds the video card in place, so no need for any IO bracket screws.
Here's a shot of the psu installed with the flange. I used 4 thumb screws to hold it in place. Two of which are shared by the IO plate.
Now that I finally have some hardware in the case, I can start installing some watercooling gear. If I can be as productive tomorrow as I was today, I might even be able to do some leak testing. Let's just hope I don't stumble upon any more harsh realities lol.
Thanks for reading! :)
Dont you just hate that... you plan and plan away and then one thing does not look quite right or does not fit right lol...
I feel your pain and love this...
That IO plate looks brilliant Bod, how on earth did you manage to get your measurements so spot on? Great solution for your PSU issue too, looks like you planned it that way from the start! Really great to see this starting to take its final shape, looking forward to the end result!
Yep, with every new project, I now expect at least one thing that will require changing after the design process. But it always works out for the better. The old way had really no provisions for securing the psu. It was just floating in that space lol.Quote:
Originally Posted by Richie123
Thanks Munty. I made a paper template for the IO ports, then once I had that cut out, I measured along the motherboard from the bottom right corner over to the video card brackets. Then I just took one off the card, used it as a template, and transferred the DVI & screw hole openings to my new IO plate. ;)Quote:
Originally Posted by Munty
this thing just gets better and better :D
Thanks SXR!
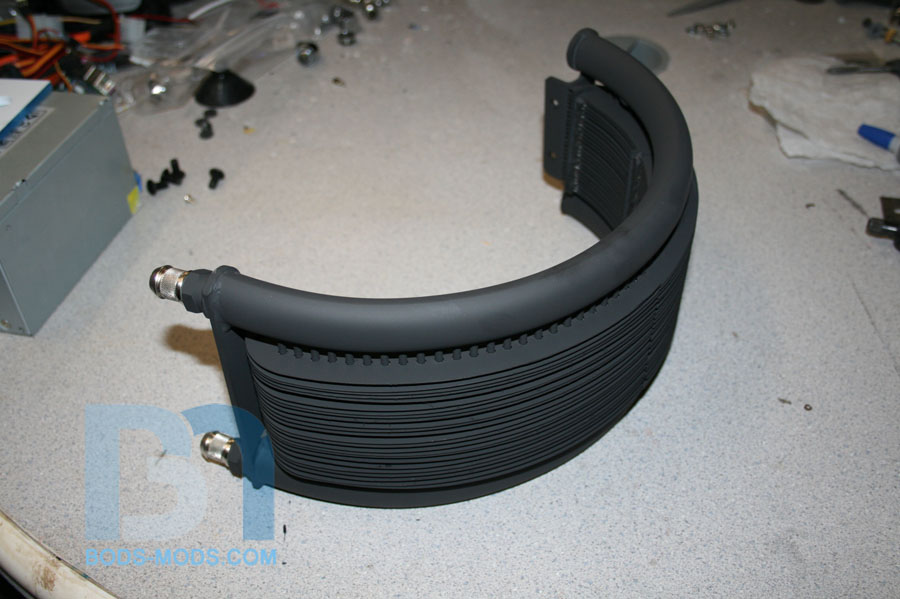
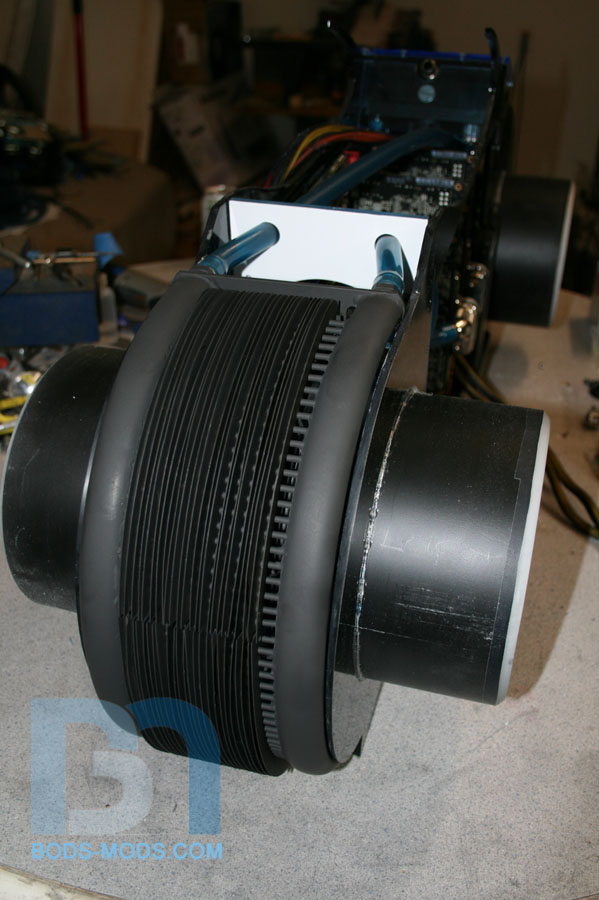
Getting the watercooling system in, running hoses and such. This will be a single loop, running Primochill's new Myriad bay res with D5 pump, going into a custom curved radiator, then thru the components (cpu, chipsets, vid cards) and back to the res. (sorry some pics are a bit blurry)
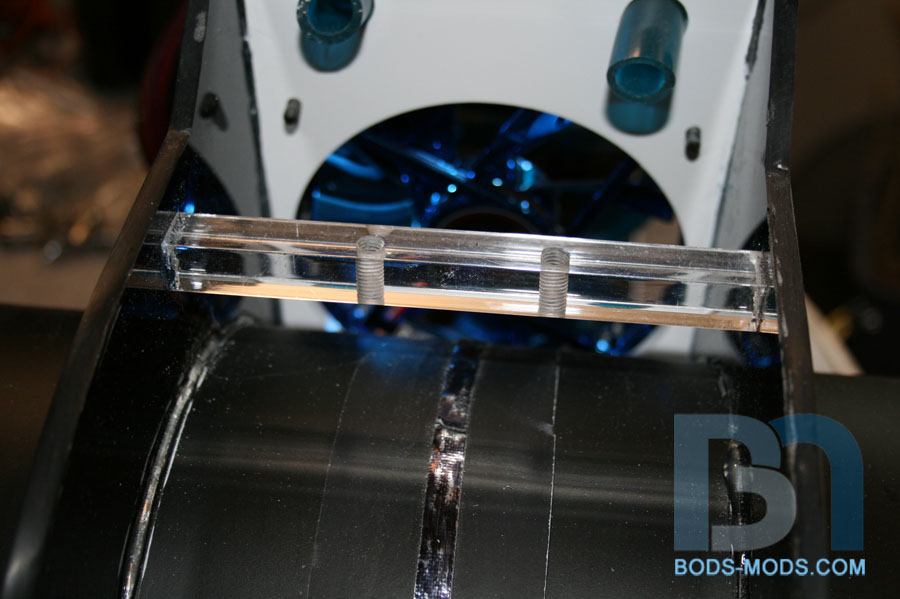
Here's the custom curved radiator I had made specifically for the TRON bike. There was no room for a conventional 240 rad, so with the help of Moddersmart, I had a curved one made up to take advantage of the available space around the wheel hub. Working in Sketchup, I made a rough model, and sent the specs along with reference pics to them and this is what I got back. :D
Here's a shot of the mounting method I devised to hold the rad. Two 1/2" square acrylic rods glued in between the two main ribs, one on top and one on the bottom.
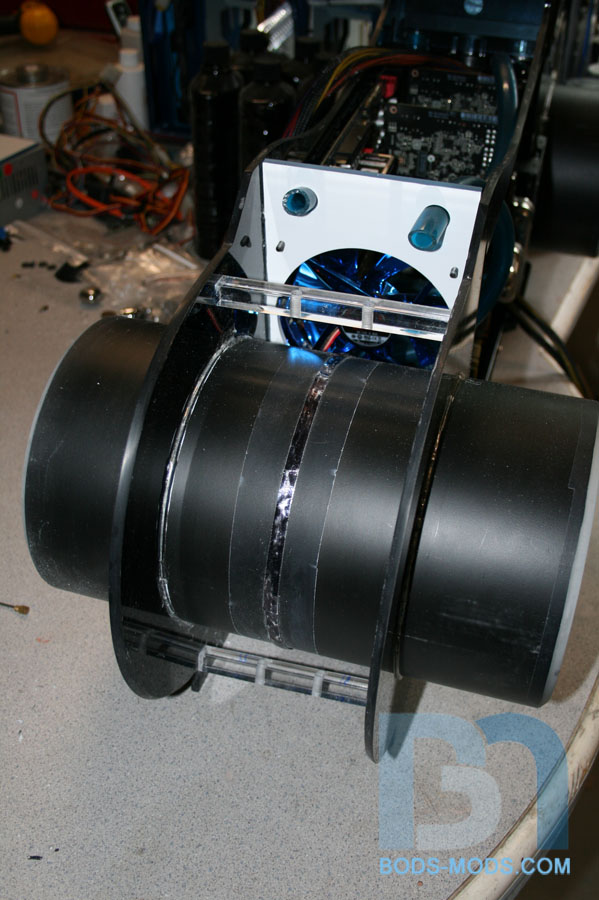
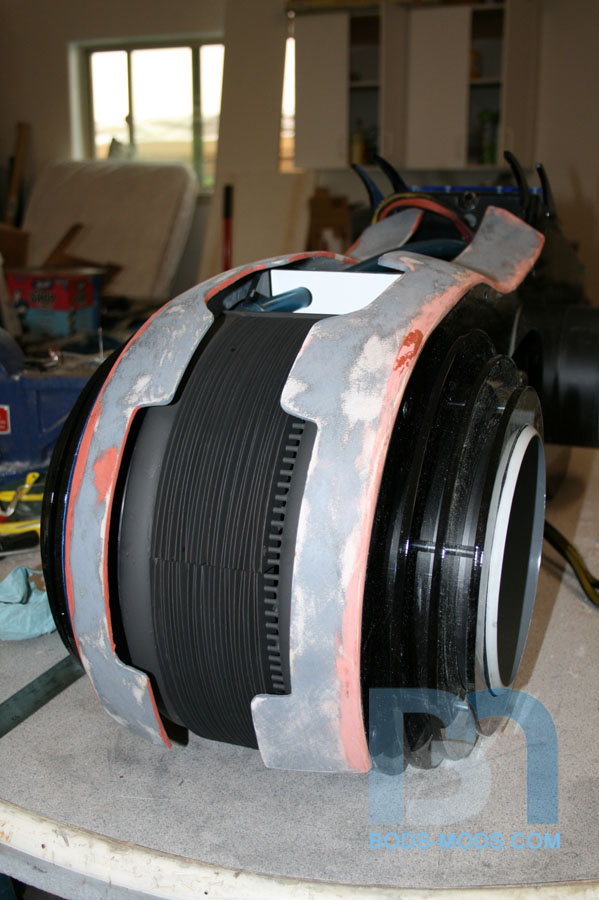
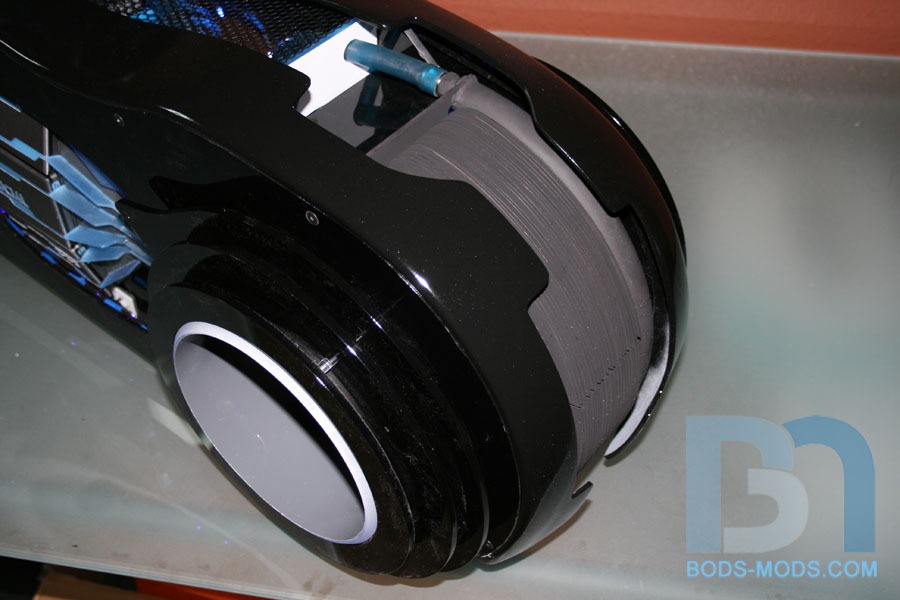
And here's the radiator mounted on the bike.
And a shot with the front fairings on with the wheel rings. My goal was to make the radiator act as the front tire for the bike, and I think I achieved that look.
I will need to add some sort of bottom plate to make sure air goes through the rad and not out the bottom. Who knows how well this will cool all the parts, but at this point, who cares! lol
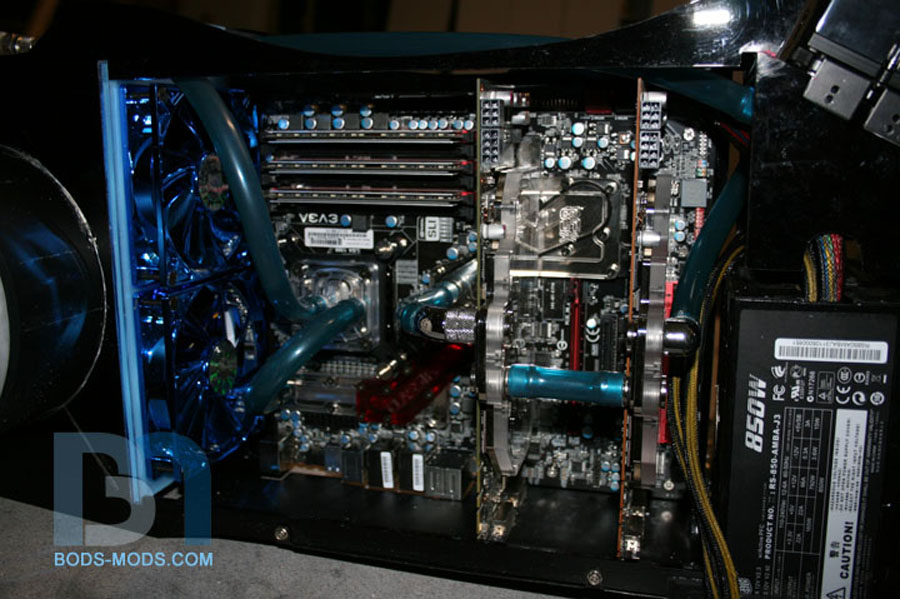
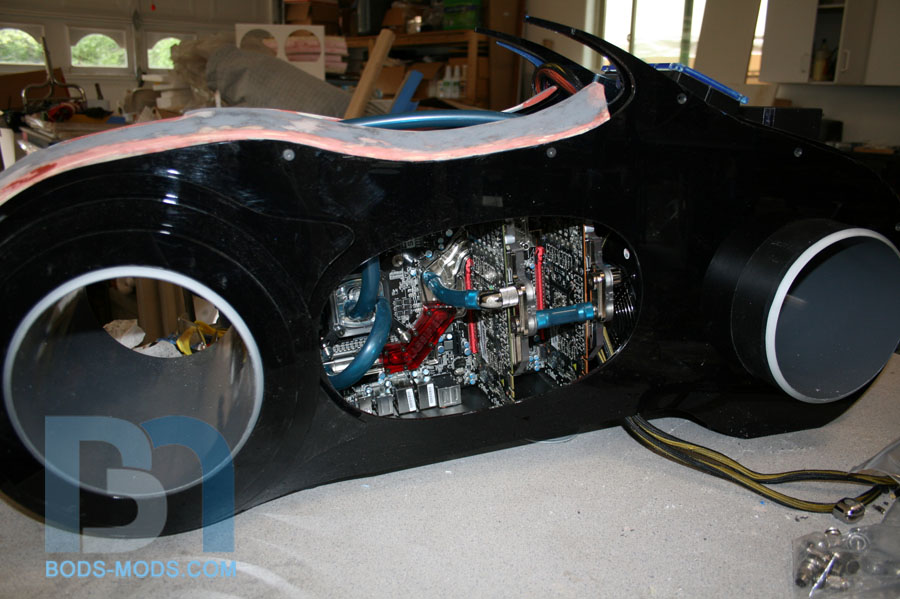
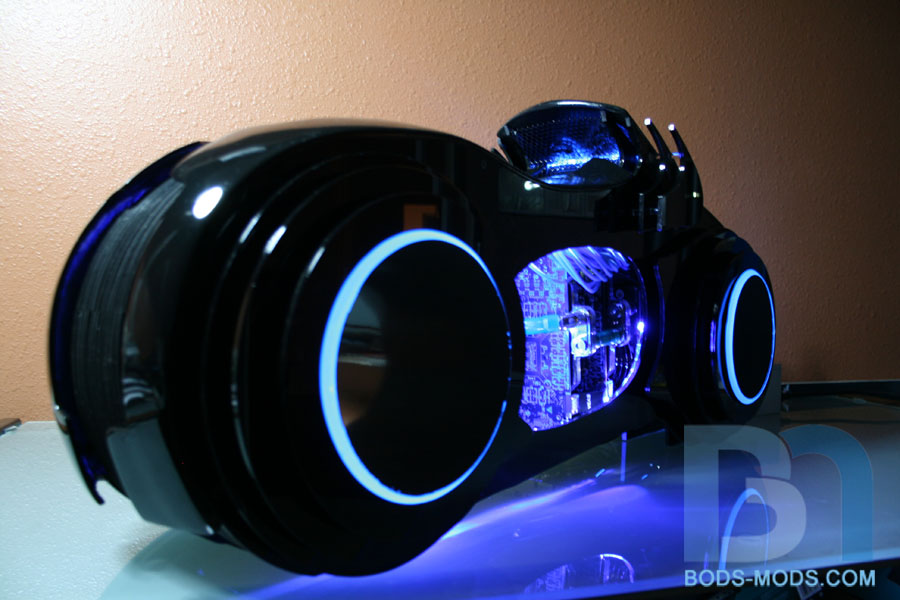
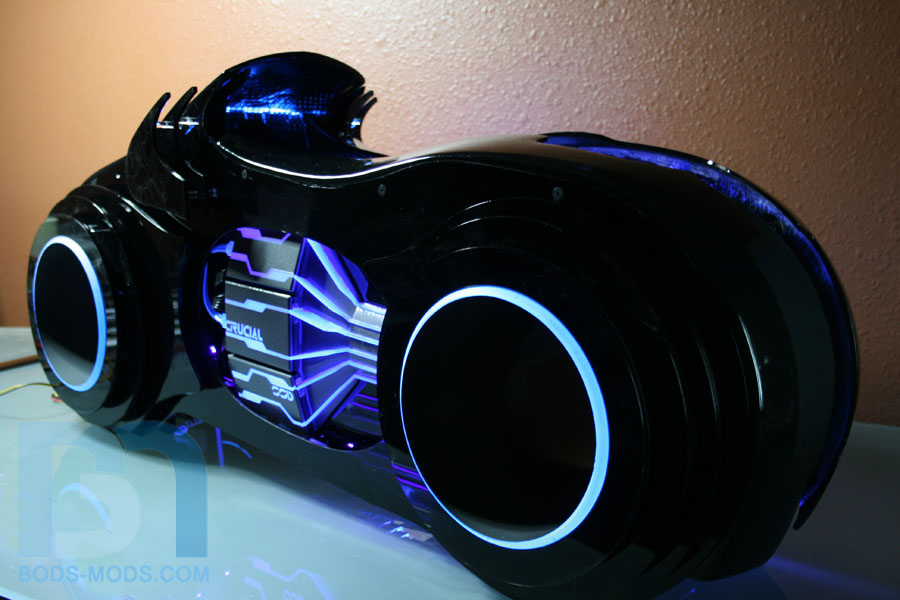
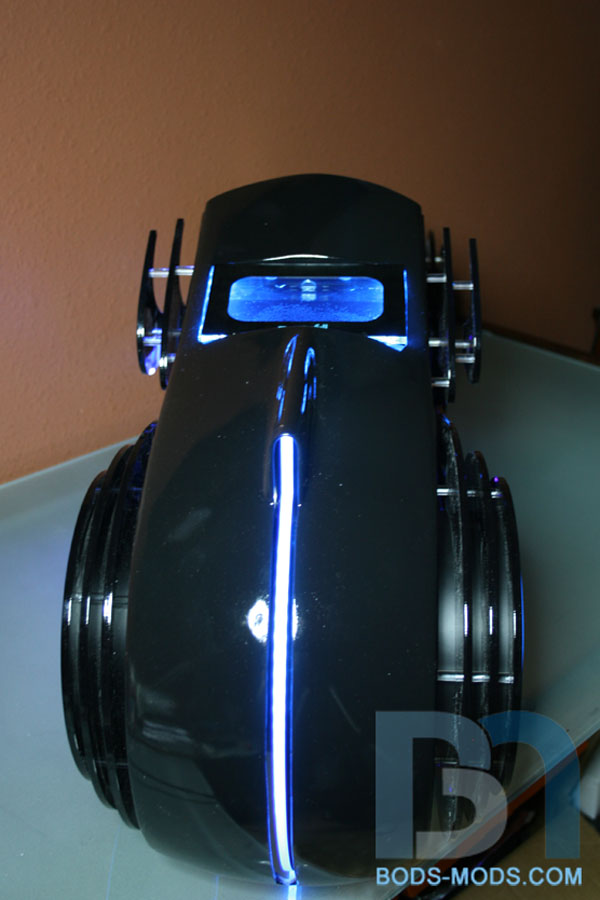
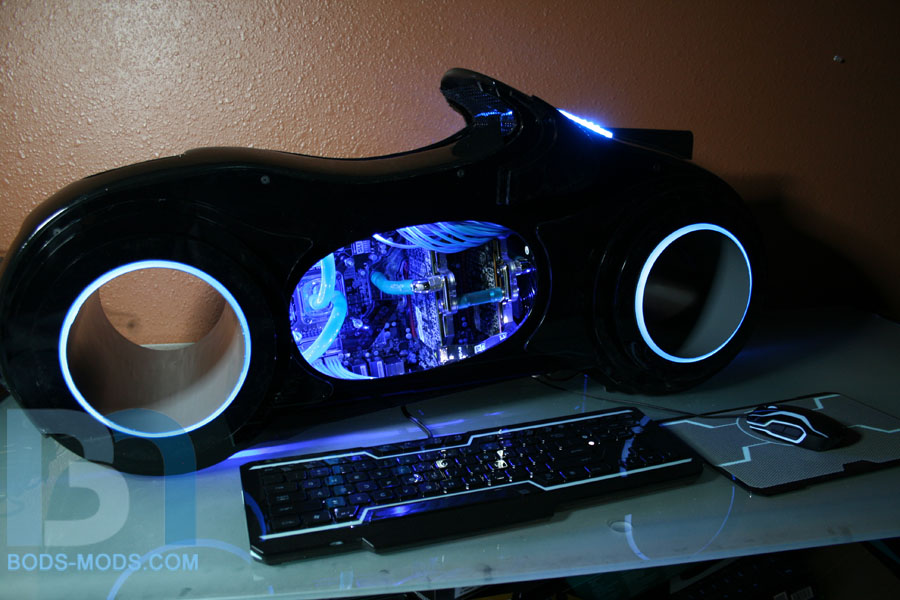
I thought I'd throw in a window shot of the bike. It's finally coming together!
Thanks for tuning in. :)
i don't even want to think about how much that radiator cost.
:stupid: That'll cost ya.
I'll give you a hint.
Not that :P
That matte black finish on the rad is awesome! Very cool custom piece to tie together a totally amazing build!
Huge congrats on the MAX PC feature!
http://www.maximumpc.com/article/fea...comment-141946
Just in case you didnt know
ya that radiator is impressive.Quote:
Originally Posted by TheMainMan
i was wondering what the weight on that thing is going to be once its finished.
And how does the PSU breathe inside the chassis?
Thanks everyone for the comments!
Sweet, I didn't know they featured it. Thanks for the link!Quote:
Originally Posted by diluzio91
I'm guessing it weighs about 50-60lbs. And the psu intake fan is adjacent to the video card and exhausts out the bottom of the case.Quote:
Originally Posted by Twigsoffury
--------------------
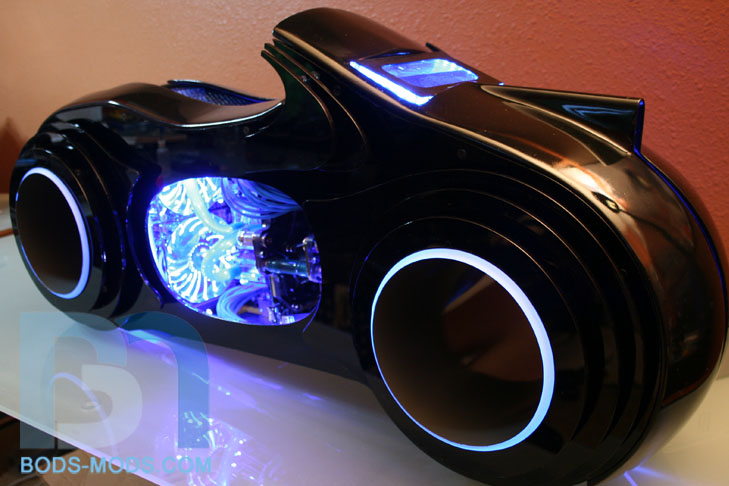
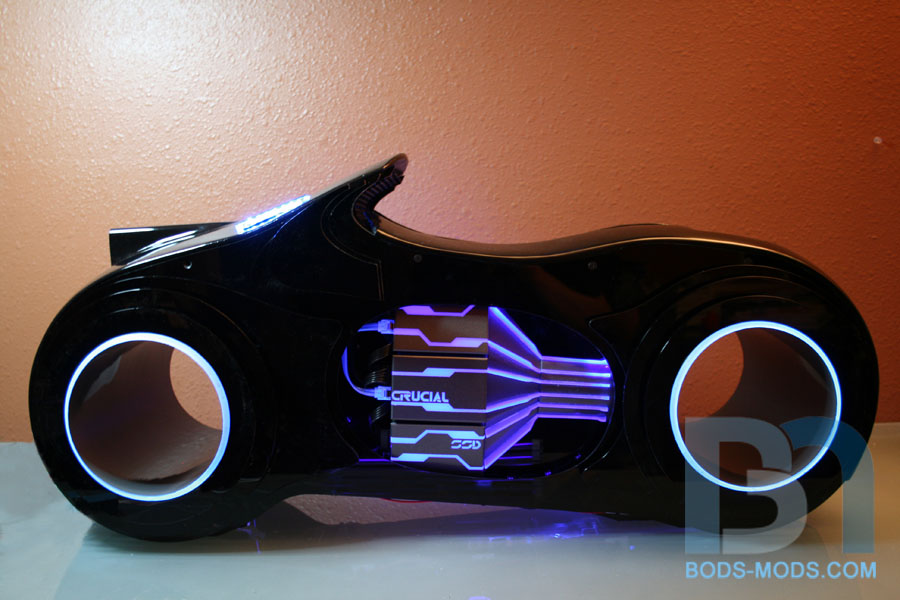
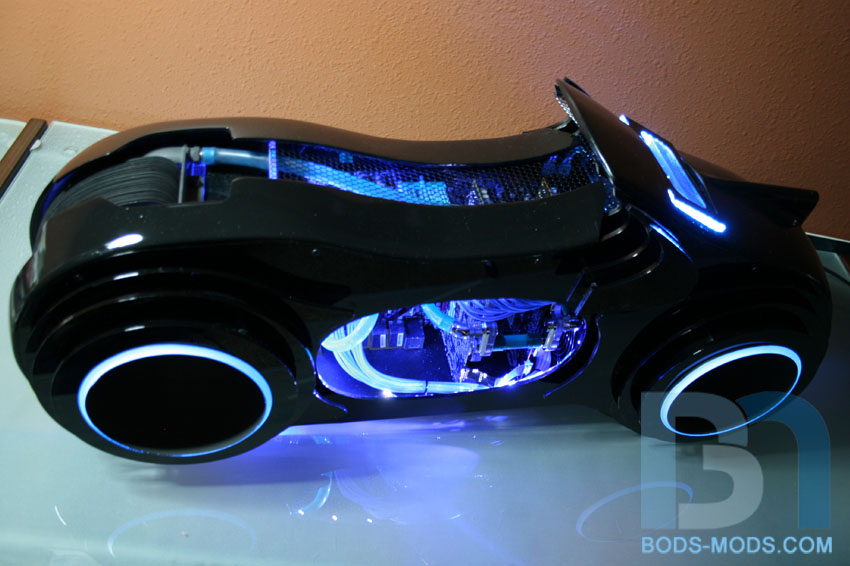
Well, the good news is, I finished it in time. :clap: The bad news is I couldn't get it to power up. :wallbash: Some kind of short in the wiring prevented anything from running more than a second, and me with no time to troubleshoot.
Regardless, here are the final pics (power to lights and fans provided by spare psu). Enjoy, and I'm off to sleep for a couple days. ;)
Absolutely stunning Bod! Congrats on the feature, seems we're not the only forum that loves your work! Good luck with the contest and hope you get your short sorted in time to show it off in all it's glory ;)
wicked.
Awesome mod man. Good luck in the competition.
Excuse me while I bring a mp ad byy a bew kebyd
Got my Vote in the coolermaster contest.
Thanks everyone!
Ok, voting has been activated. If you haven't already, please go here and cast your votes for your favorite tower mod and scratch build!
:eek: :eek: 'nuff said :bowdown:
So I'm happy to say the wiring issues have been worked out, and its up and running. But it's now on its merry way to be shown at Computex, and I didn't get a chance to do any testing on that rad. So a temps report will have to wait until I get it back after the show.
That thing looks amazing! Razer has this up on their Facebook page.
I think we know who the winner is................
No 1 knows :)
Cooler Master has 70% of the end voting in hands.