looks good bro, love the c4 trigger idea. would be cool if you could put a knife on the side with Battlefield 2 or something on the blade itself, but they probably wouldnt let you inside a lan with that thing, would they?

Printable View
looks good bro, love the c4 trigger idea. would be cool if you could put a knife on the side with Battlefield 2 or something on the blade itself, but they probably wouldnt let you inside a lan with that thing, would they?
Probably not,... but good idea. I was going to put a knife on this but the inscribed wording sounds cool.
I plan on getting more of the case done today, I just need to get up off of my lazy but and do it :dead: .
actually, probably sketching the total ammount of knife kills, but that goes up everyday :D
something like "256 knife kills since 2006 and counting" would be a cool idea
That would be one exciting case fire, overclocking accident.Quote:
The bullets are mine, just .22 caliber. I used about 150 of them in this pic .
Dude, I'm so loving this mod. Keep up the good work. +rep
Good Work
+rep
That detonator came out great dude! Props on the TCBS spirit also!
Thanks everyone for all the support. :D
I finished the bondo work on the front panel but my camera is charging so Ill post some pics in the morning. Ill also start on the mobo tray and supports. The fan holes in the front and back should also be a posibility soon.
Thanks again.
Danthegeek
That detonator looks a lot better than I would've expected, great job. Whenever you finish this thing, I have to see this in person. And hey, if you need a hand/better tools I'd be glad to help out.
Holy cow, I just noticed the sticker. TBCS.com. How did you do that? It's awesome. I would love to be able to figure out an easy way to paint small lettering. It's one of my goals. It's pretty hush hush in the airbrush world.Quote:
I like the sticker. Nothing like a little TBCS love!
Thanks to your "Detonator-starter" thing, I've been inspired to make my own remote starting thing for SilverDawn. Probably won't be C4-detonater-themed, but still.
Good job. Looks pretty freakin' ace.
Commando- I just print out the sticker using inkjet "sticker paper." I did put a little extra adhesive (krazy glue) for a permanent hold.
Omega- let me know if you need any help. Its pretty easy setup (PM me if so).
Thanks again everyone.
Good luck and nice work
I didnt get anything done today but i do have some pics as promised
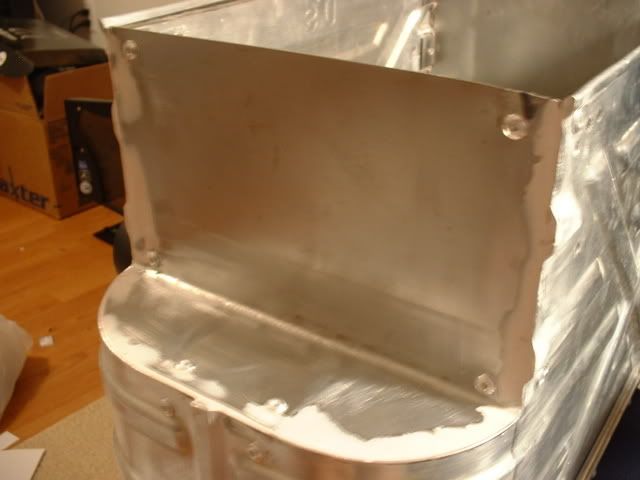
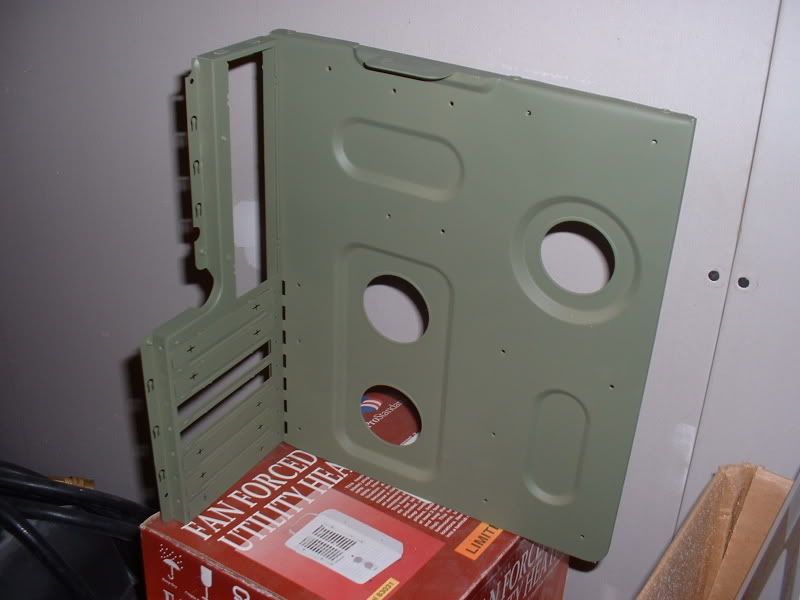
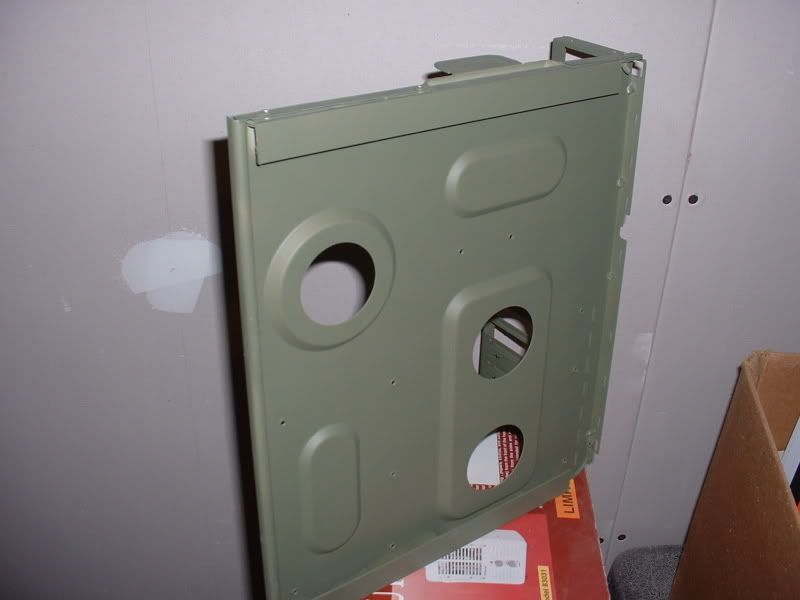
This is the front view of the case. I used a little bondo to make the edges nice and straight. I will also be making a new door for this asap. I hope it turns out!
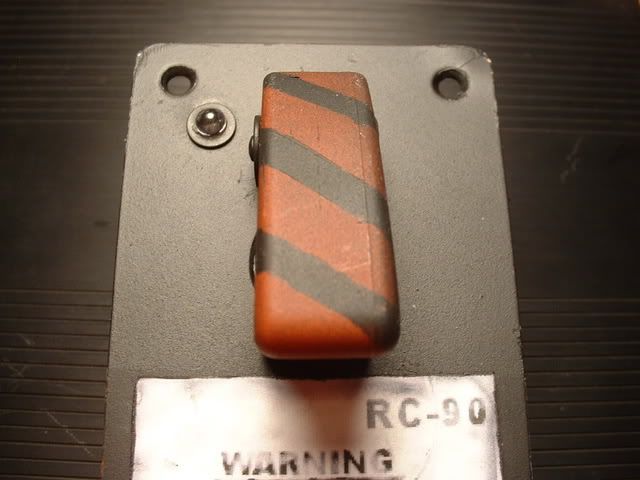
I did a little modding to the to the remote AGAIN. I needed some stripes so a little masking tape and a razer blade helped me out with this. Note it is all done freehand, not bad for my first time.
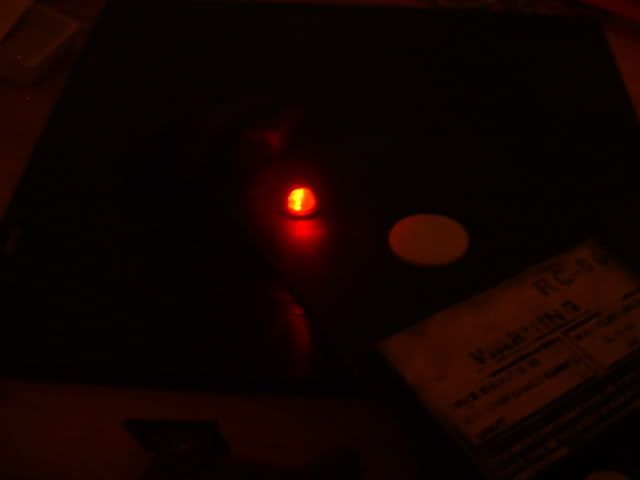
A night shot of the working led on the remote, Im not sure why i never posted any pics of this before.
Well, that is it for now. More work on this tomorrow.
Danthegeek.
It just keeps getting better and better (and better).
Keep it up.
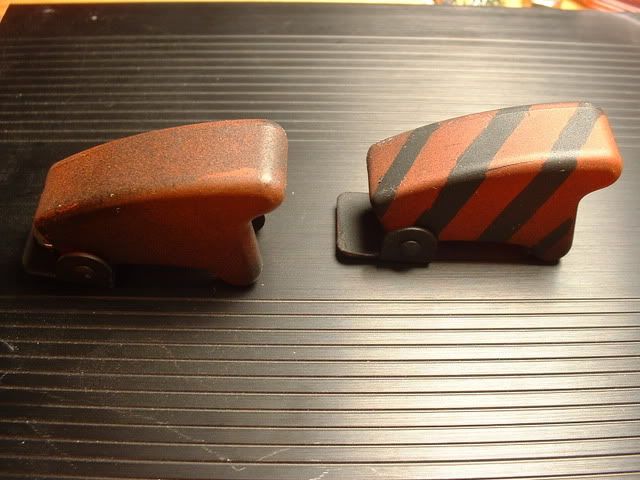
I think that looked better without the stripes, even though thay came out nice for freehanding. Just my opinion.
with or without, its still a cool ass addition to a bad ass mod
Thanks for the comments. :banana:
As for the switch cover, I do still have both ones so I can choose which one to keep. Im more partial to the original one myself but, the striped one matches the remote from BF2
Thanks again.
danthegeek
How did you get that "aged" eefect on the buttons? They look fantastic, I just can't figure out how you painted them.
Man, this is one awesome mod, I wish i woulda caught my eye on it sooner. I cant wait to see this paint job on the case, Definately +Rep worthy. Keep up the good work man
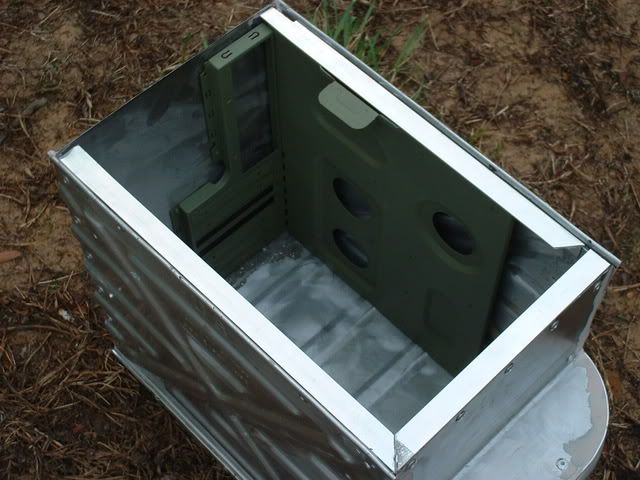
Well I did some more work on my case today. I made the motherboard tray, well actually modified an existing one. It was take out of a cheapo $10 case:D . Since the tray and rear panel were in seperate pieces I riveted them together.
In this pic you can see the two pieces together. I also painted the thing to give a nice clean finish even though it will probably never be seen.:smoker:
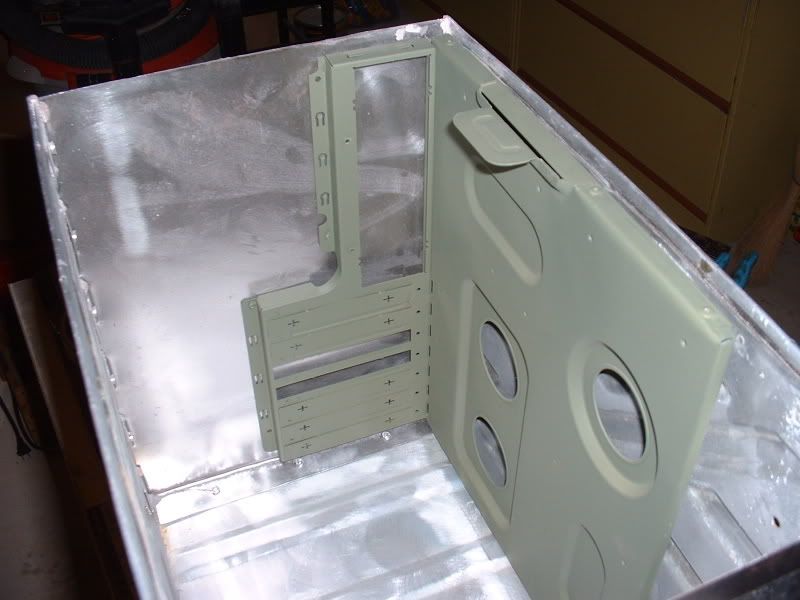
In this pic you can see the two pieces of angled aluminum that was attached to the back of the MB tray. This is for structural support as well were the screws will hold the tray to the case.
And a quick preview of how this all fits in the case. Note that i am not dealing with much room left :rolleyes: .
I also tried to make the front door for the case but that didnt go so well. I dont have any pics of it because I got extremely frustrated with it, beat it with a hammer, and threw it in the woods.:hurt:
thanks again
-dantheggek
I know exactly how you feel. I was painting mine outside. . a wind came along and whoosh a true camo mod.. :DQuote:
Originally Posted by danthegeek
Your butt-kickin remote detonator made this weeks front page, nice work DTG!
http://www.thebestcasescenario.com
congrats on that, you put your mind to something and anything is possible.. of course if you have the money to do the possible :devious:Quote:
Originally Posted by jdbnsn
Holy crap.. I made the front page.:D Go me........ ok I'm done
Well It looks like I cant give-up yet. Ill work on this thing some more tomorrow.
A thanks to everyone for the support. (tear) :)
danthegeek
made ya a little something since I'm enjoying this case so much.
http://img20.imageshack.us/img20/6795/lanpcha0.jpg
Wow you are ace. Thanks for the sig. Ill defenitley be using this :) .
+rep dude.
Thanks to jdbnsn I am thinking about changing the paint scheme on the case. Instead of the olive drab, he suggested a tan as seen on an Abrams with a weathered look. I think this will look great considering all of the rivets on this case. I will get a sketchup asap.
Man, I just saw some clips from BF2. I might just be getting that game here soon. I'm usually a BF2142 guy myself, but I'm liking what I see with BF2.
I wonder what a weathered Abrams looks like. I'm thinking I might have seen one of those somewhere.........Quote:
Instead of the olive drab, he suggested a tan as seen on an Abrams with a weathered look.
Well I cant get a worn look with sketchup so heres the color im thinkin about goin with. I know it looks a little off but trust me when I say, It will not on the real case :smoker: .
More work on it tomorrow.
note to self: watch the worklogs more often . definitly a kickassmod.
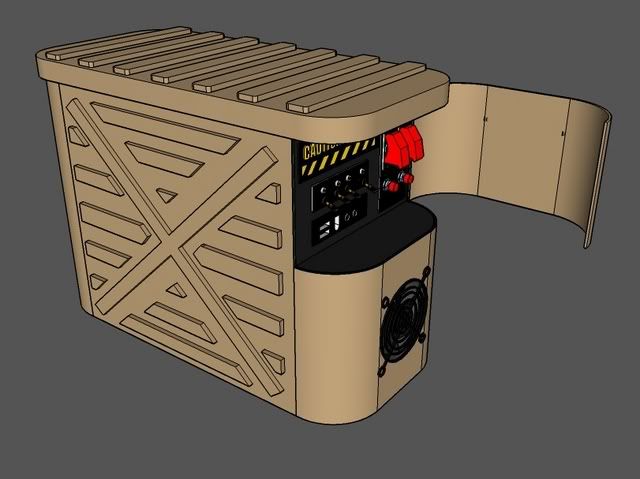
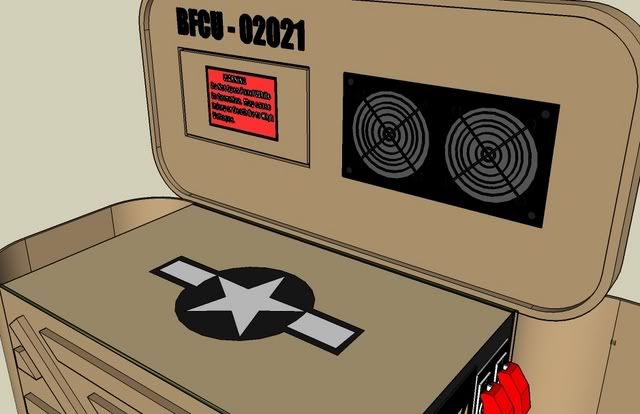
I have a sketchup for the top panel and lid configuration
The speakers are to the right and a storage panel for wires to the left
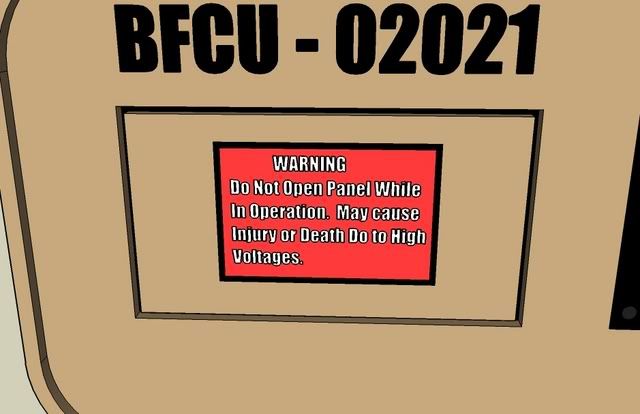
A closer look at the panel
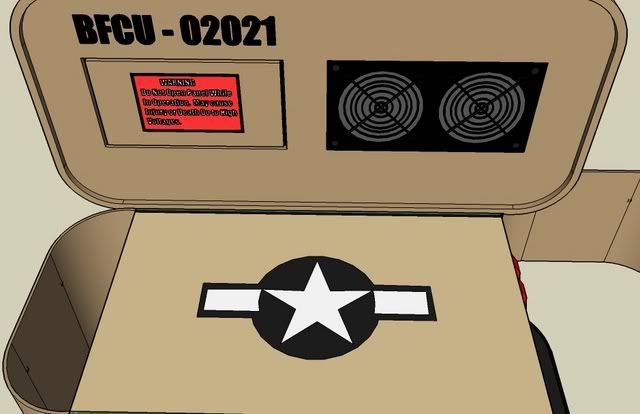
And a closer look at the logo for the top. The part in white will be cut out of the top piece and frosted plexi will be added. I will use white leds to make it glow.
Thanks again
its supposed to be "due" not "do". The Design looks great though, good work
And the great ideas keep coming...I love this mod.Quote:
Originally Posted by danthegeek
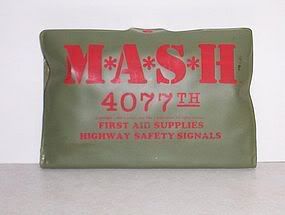
With the C4 trigger, you added the Spec-Ops kit to the case, throw in a Medic emblem on the side somewhere?
Sorry, had to do this:Quote:
Originally Posted by thehilitereel
Greatest. Show. Ever.
/end hijack.
Seriously, I second the medic symbol.
Well I did a little bit of work on the case today. I did have to stop when the drill slipped and I cut my finger to the bone. But anyways some pics are what you guys want so here you go.
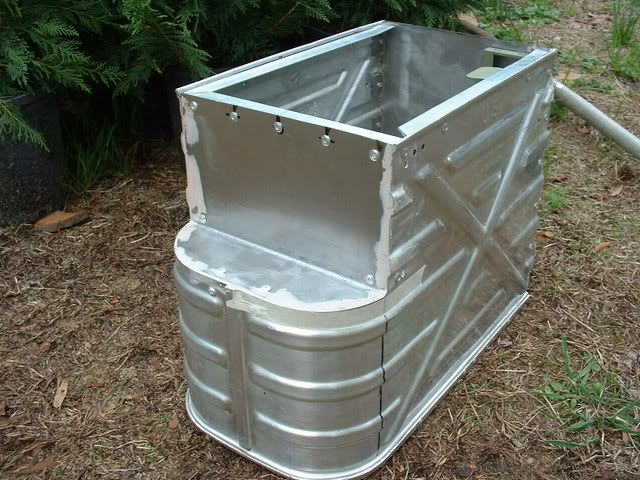
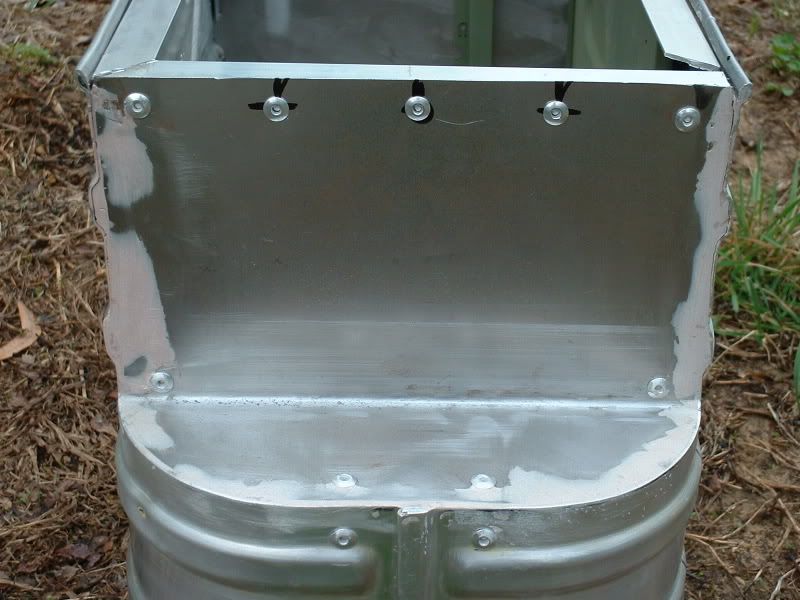
I mounted some 90 degree angled aluminum on the inner part of the case for some support and for the top panel to have a place to mount to.
Heres an overall picture of the case so far.
On the front panel you can see were I cracked the bondo from moving the face plate back. It wasnt straight enough and a little more bondo will have it looking pretty again.
I bet you cant guess how many rivets are in this case so far. :think:
The answer is : 42 and im not done yet. :dead: . I still have to rivet the hinges, latches, MB tray, hard drive cage, DVD rom cage, etc. Uhh
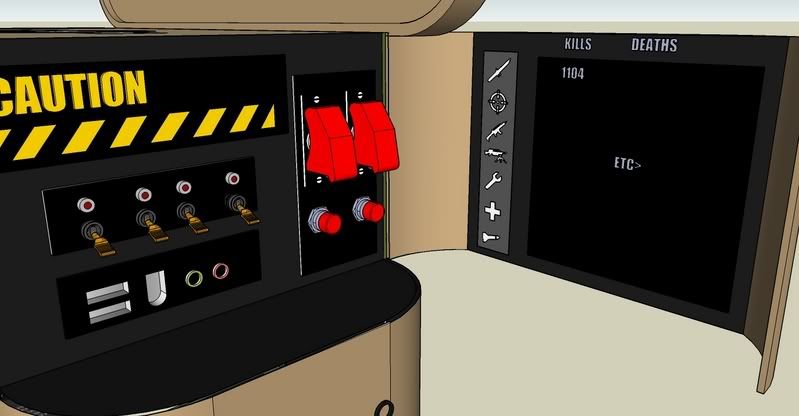
Anyway, I took the idea you guys thew in into consideration. But instead of having just the one class I came up with this.
This panel will display the overall kills and deaths for all of the classes in my account. I will just have to find an LCD and someone who can program very well. If not Ill just paint the current stats when the case is almost finished.
Ouch that sounds painful, are you allright?Quote:
Originally Posted by danthegeek
The case is looking very good right now!
wow, sketchup models are looking LEET!
hope you didnt hurt yourself 2 badd with that drill?
how did it happen?i dont c how u can hurt yourself drilling unless your in an awkward position.....
Im ok now that I took some good pain killer. It happened when I was drilling out a rivet on a 90 degree steel bracket. I didnt have enough room for pliers so I used my hand :dead: . I didnt have my hand over the rivet, just next to it but, the drill poped through the hole because I was using to much pressure and I hit My hand at full speed. Thats an 18 volt Dewalt as fast as it will spin. So I hit my middle finger and I started oozing blood. Dumb me, I wiped it off on my pants and wrapped it in masking tape so i could keep working. After about an hour the tape was soaked a dripping and I had blood everywhere. So I got some peroxide and cleaned it out. Thats when i noticed I went to the bone, I could see my insides, and I think I cut the tendon because I cant bend it well. Oh well, just anther story. 8)
I want pictures of your finger.