Looks like you are gonna be putting a few drives in there.

Printable View
Looks like you are gonna be putting a few drives in there.
he could always put a window on the top, maybe =D
Man this is a sweet mod. I can envision a lot of things like this that I'd like to do, but can't envision how to get it done. Truly an inspiration ole boy. Look forward to watching this progress. :up: :up:
Wow that is looking verrrry sweet my friend. Those HD bays look nice and accessable. Those cuts look like they should turn out nice considering your LEETness towards metal :)
How bout the song from his first bombing? The one from the scene where he firsts meets evee (or however you spell it)? Beautiful song! I can't believe I don't remember what its called? ><Quote:
I will definately have a sound clip from the movie as my windoze start sound, just haven't decided exactly what to put yet. :)
-SnowFire
Its Evey. And I just heard that song on a commercial and cant remember the name either.
-Cool-
Dude... you are crazy!! This thing is coming up awesome, I can't wait for the final product, I wish I had a workshop like you do, all I have is a drill, a dremel and a couple of screw drivers.
uhh yeah, that would be the overture of 1812 guys good idea, good work, good night
Gotta love the 1812 Overture.Quote:
Originally Posted by JacobS
instead of the overture you could always put his first speech on there. or evee line after that "are you a crazy person" or something along those lines
You know, looking at this, I was thinking it would be neat if you could somehow incorporate any of the signs/fliers from the movie with the V spray painted on them. The case itself, could be a wall/facade with the flyers and signs on there. Probably a bit late in the design process to be tossing that out, but yeah. The case just has a very futuristic industrial building feel to me. I can't wait to see this thing assembled.
Hi guys! With this whole week off from work I finally got my first full day in on "V" today. It wasn't as productive as I would have liked it to be, but I did manage to get some things accomplished.
Unfortunately as I've progressed further into the project and come closer to cutting the two side panels, I've come to the conclusion that my painstakingly handcrafted hinges are too bulky and will interfere too greatly with the view of the interior. :(
Which of course serves to further remind me that my next scratch-built project will consist of a more conventional shape.
It also means that I wasted A LOT of build time on something I'm not actually going to use. The resultant frustration is probably the reason I didn't get as much done today as I should have.:mad::redface::dead:
Anyhow ... on to the update.
Some people have said they wished they had my shop to work in, and I get the impression that they are overestimating the kind of tools I have at my disposal.
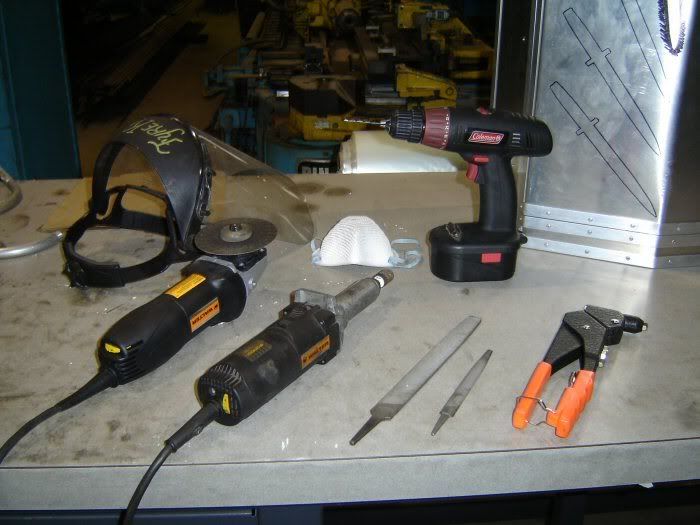
Sorry to disappoint, but for 95% of the work this is what I use...
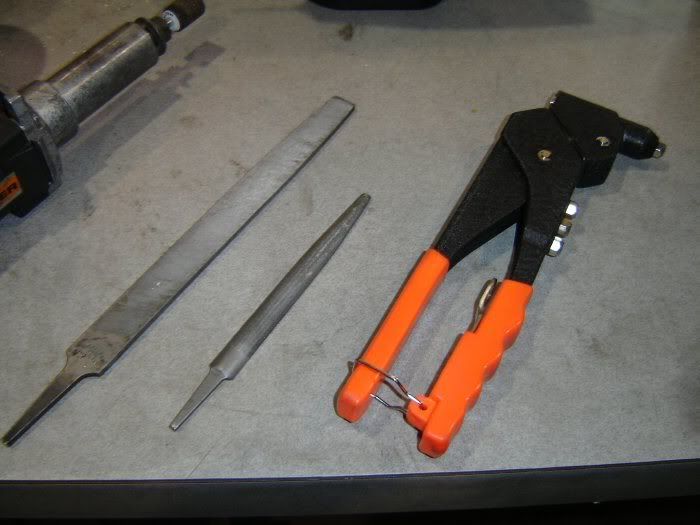
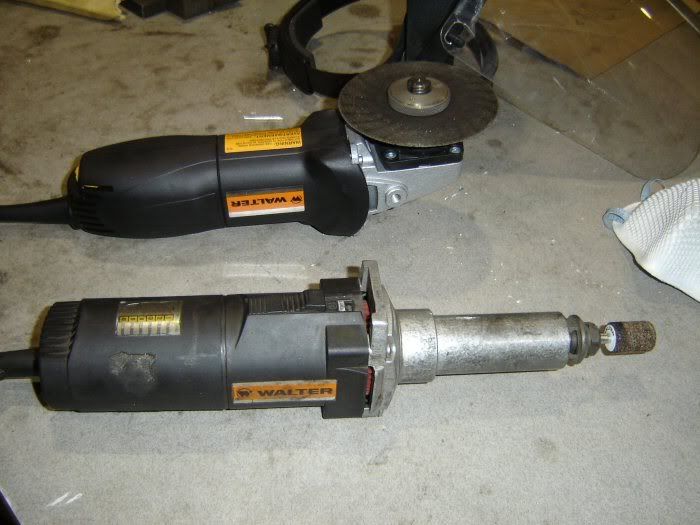
A cordless drill, a couple of files, an angle grinder, and a die grinder. I have various bits for the drill, cutting disks and sanding pads for the angle grinder, and cutting wheels, sanding(flap-wheels), and grinding stones for the die grinder. Of course there's also my trusty pop rivet tool. :)
I also have a band saw (made for cutting metal) which I've used to do some of the notching and angle cutting, and a drill press which I used to stack-drill the hinge plates.
The majority of the work is done manually.
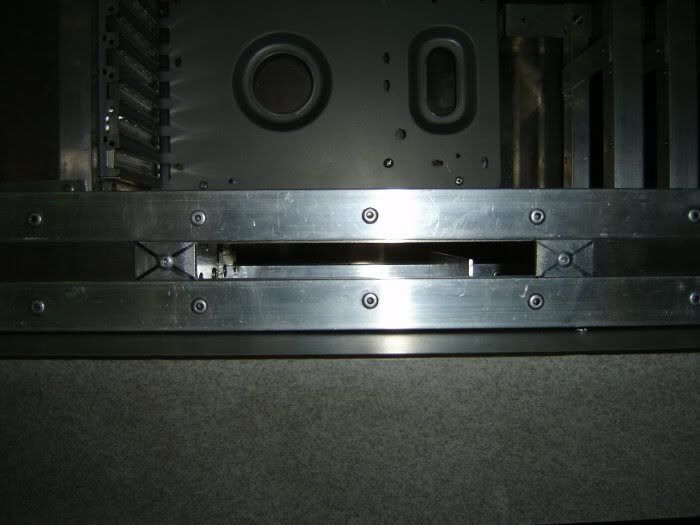
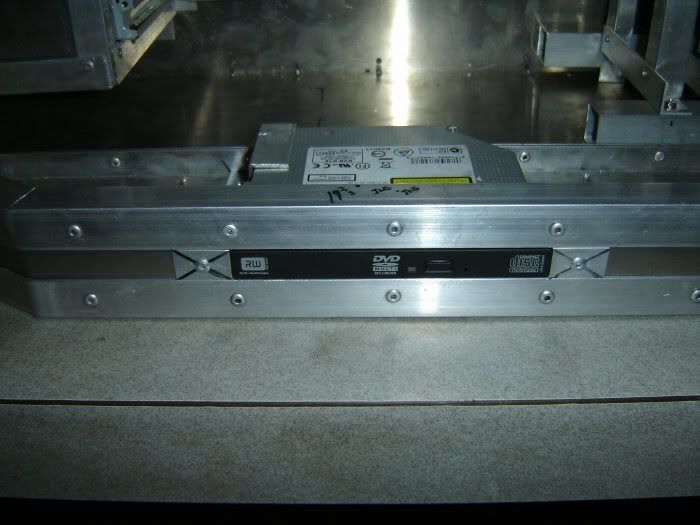
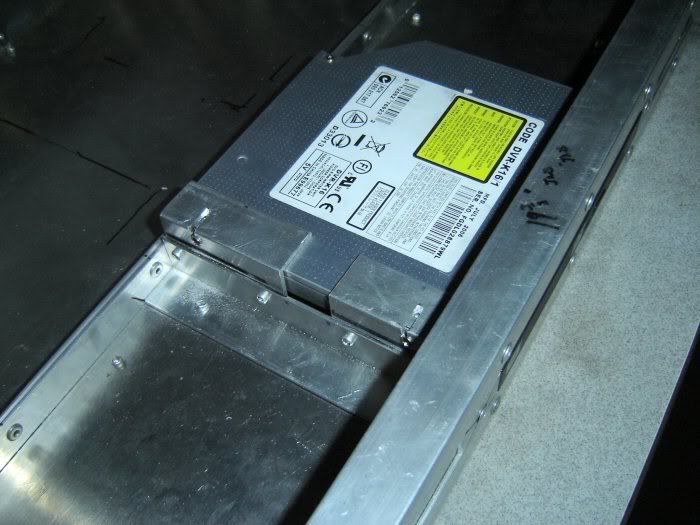
Today's work involved taking apart and removing all of the hinge assembly, cutting the hole for the slim optical drive and building the mounting for it, and planning/mounting the water pumps. I also spent a fair bit of time trying to plan the case wiring, and design a mount for the LCD that will let it remain in the case when I remove the front. (that way I don't have to disconnect it constantly) Tomorrow I will try and implement those plans and perhaps finally cut the window panels (which I still keep modifying :P )
And ... here are the pics. Sorry for the lack of WIP pics, but I just don't seem to be good at getting those.
There's still so very much to do, at times it seems like it will never get done... but I still have high hopes for it looking halfway decent when it's all finally finished.
Once again I'd like to thank everyone for all of the comments and encouragement. For my first mod I think it's coming along ok, but sometimes I think you guys are viewing it through "rose-colored-glasses", 'cause when I look at it I see all the things I don't like. :)
Someday I'd like to be able to make something as awesome as Paul's "Mars City" or Franklin's "AlumaxX" ... or any of the other AWESOME projects I've seen on this site that just blow my mind, there are just too many to list. For now however, I'll be happy if I can make this thing 1/4 as good and get it completed without going completely mad. :P
That's it for today ... thanks for takin' a look, and thanks for listening to my inane ramblings.
Peace all.
FyreKnight
i love your work man keep it up i wait like all week to see a update and they are always good.
with how awesome this case is...im surprised it hasnt hit featured yet....
lots of excellent craftsmanship went into this case...looks like its gonna be beautiful when done......kinda rare (but becoming more popular) to see scratch built cases like this
Haha, I was suprised slightly at the fact that you're using an angle grinder (however, that would be my first option as opposed to dremel due to their power).
Much respect, man. The case looks great. Just goes to show what some bored geeks can do with power and hand tools. Oh, and easy access to aluminium.
+rep.
First off, most everyone I know who produces art is less impressed with their own work than other are impressed by it. May look simple to you, but we see some very complicated structural design that is very well built. Nice theme, bonus for the added technology (LCD screen) and the best part was already mentioned...scratch built is always impressive to me.Quote:
sometimes I think you guys are viewing it through "rose-colored-glasses"
Looks fantastic so far! One question though:
With such a large case, why are you using a laptop optical drive? You may have considered a Plextor with SATA connection and much better performance. The MTBF for laptop drives is also a consideration. Just an observation.
Thanks for bringing this great project to the folks here!
OMG, I nearly had a heart attack ... logged in and "V" wasn't where I left him. I was like "What the....??? I posted yesterday, how could he be bumped to page 2 of the "Works In Progress" already?", so I went to page 2 .... nothing!! I started to panic. "What happened?" I thought, "Did I do something wrong and someone erased "V" as punishment?".
Then a thought struck me "Featured? No way?!", so with a faint hope that my worklog had not been wisked away into the ether never to be seen again, I clicked on the Featured Worklogs link...and...BAM!!, there was "V".
I don't know what to say except thank you guys, and OMG!!! I don't know how I fit in with mod-gods in this section :redface:, but now I'm gonna have to work extra hard to feel worthy of being in here. OMG OMG OMG!!!
Now ... it's a late post for me as it's currently 4:30AM, got home an hour ago from the shop working on "V". I'm dead a$$ed tired but I had to post what I accomplished, and what I didn't. :(
First the "didn't"... I did not get the windows cut out today, much to my dismay, nor did I manage to construct the support for the LCD. Although I did get this >< much closer to figuring a way to do so.
What I "did" get done today was kind of like one step back and two steps forward. I have a feeling that there's going to be a lot of that as I get closer to the end of this project, the result of too many "on the fly" design changes. C'est la Vie!
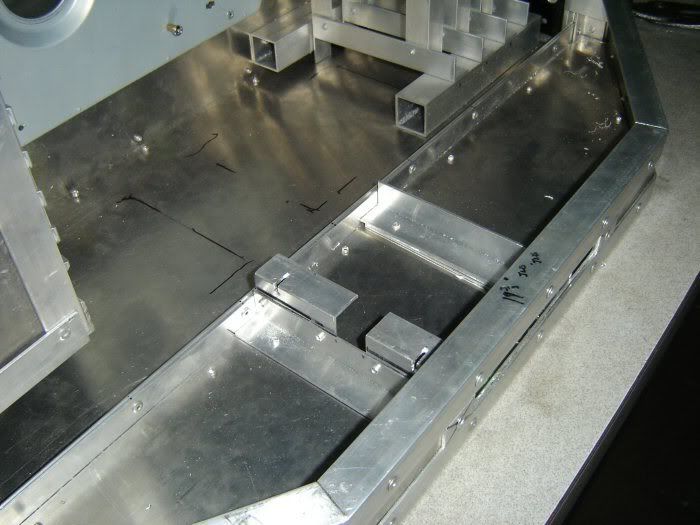
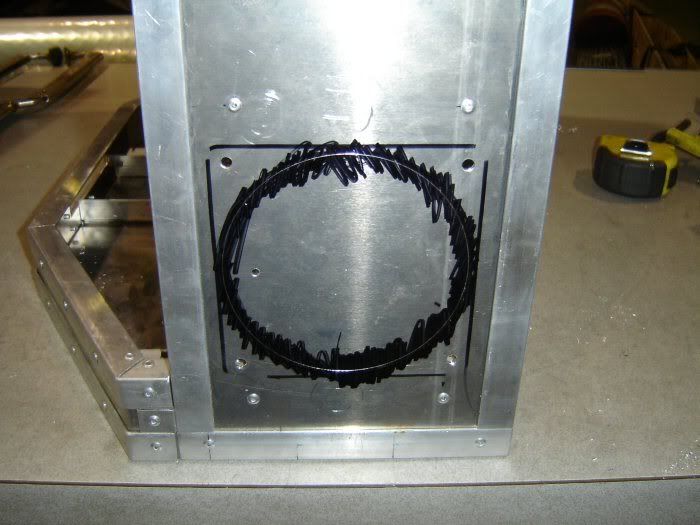
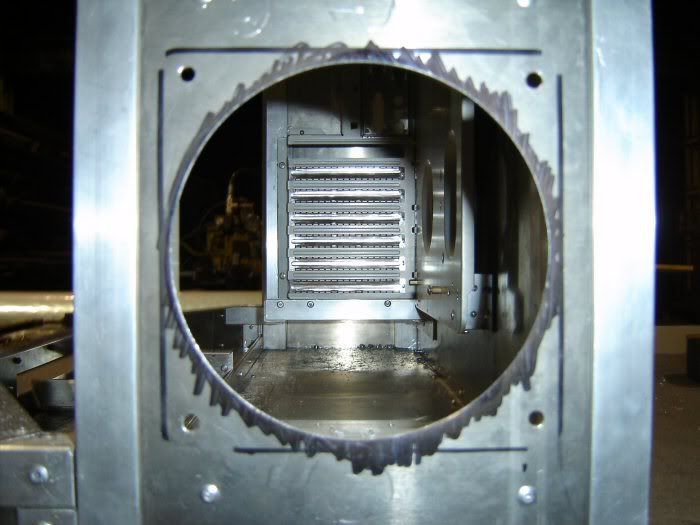
First, I decided I didn't like the placement of the HD rack, so I repositioned it more to my liking, then I cut a new fan opening behind the rack to help keep 'em drives cool. After that I was trying to envision the placement and routing of the resevoir, waterlines, and power wiring... which needless to say was difficult since I still don't have my resevoir. So I decided to make my own. :)
And now ... the pics! I even managed to take some WIP shots this time. :) :up:
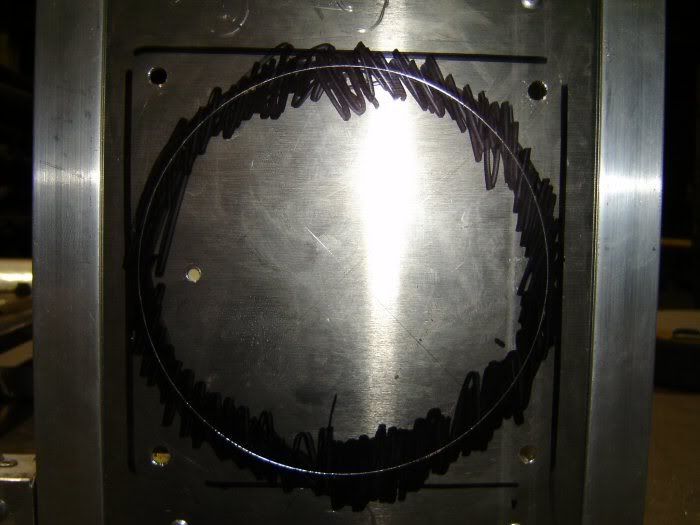
Here you can see I've drilled the mounting holes for the new fan and marked out the circle for cutting.
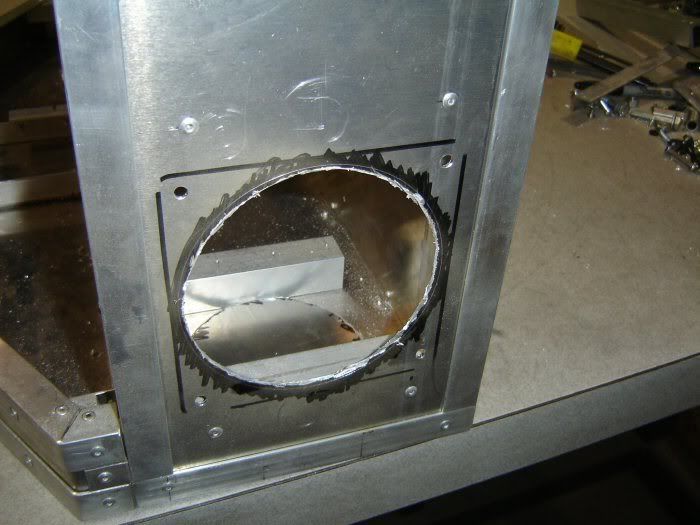
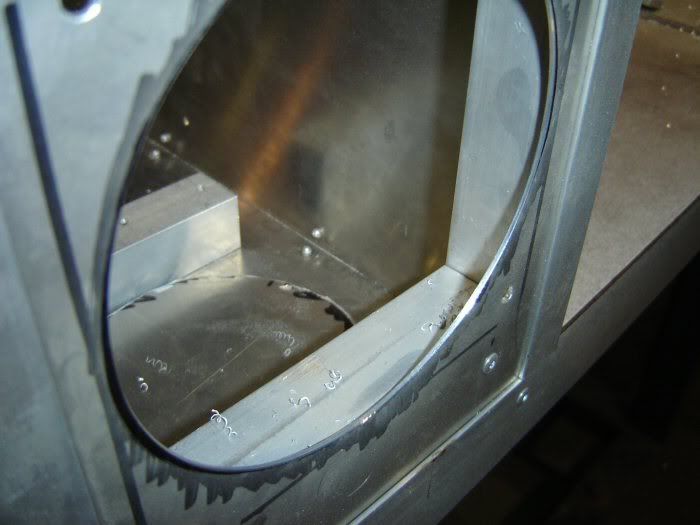
And after the initial cutting ...
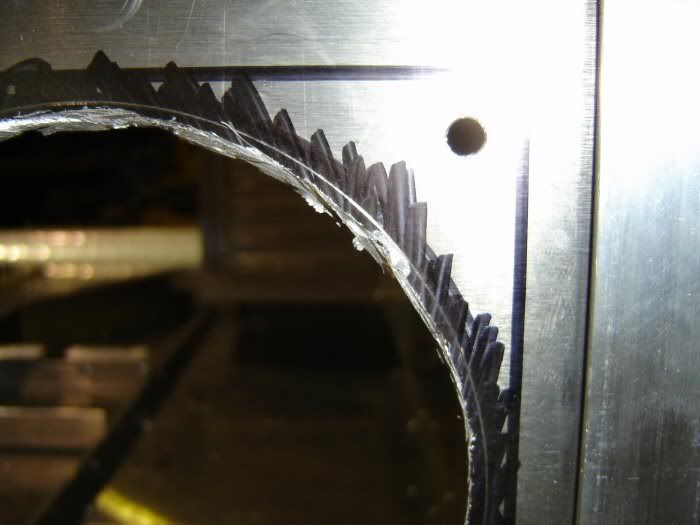
And finally, after careful carving with the cut-off disc, grinding with a die stone, and smoothing with a flap-wheel. (all bits for the die-grinder)
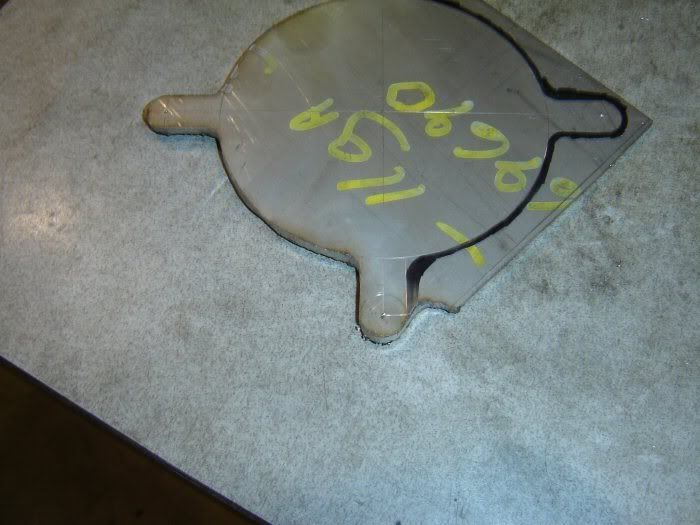
And here's the pics for the Res... for this I brought out some of the "special equipment".
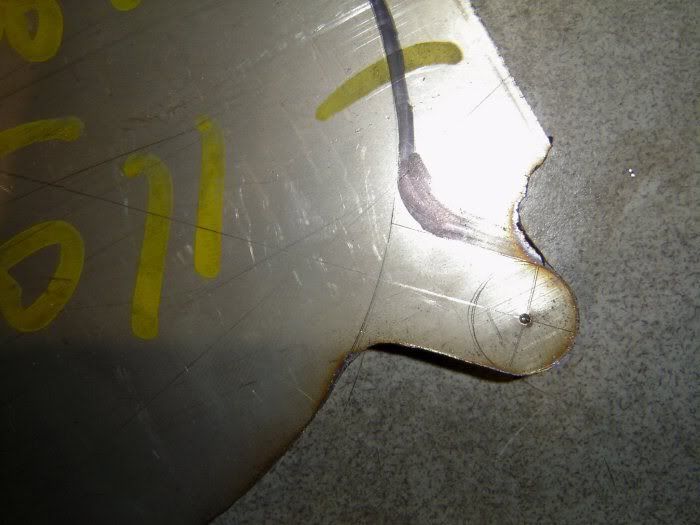
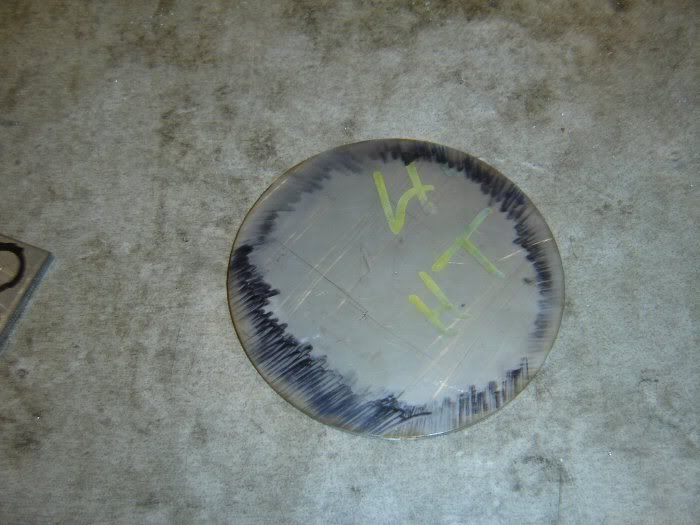
First marking out the shape for the base on 3/16" stainless steel plate, then grinding away the excess with the angle grinder...
Same thing for the top ...
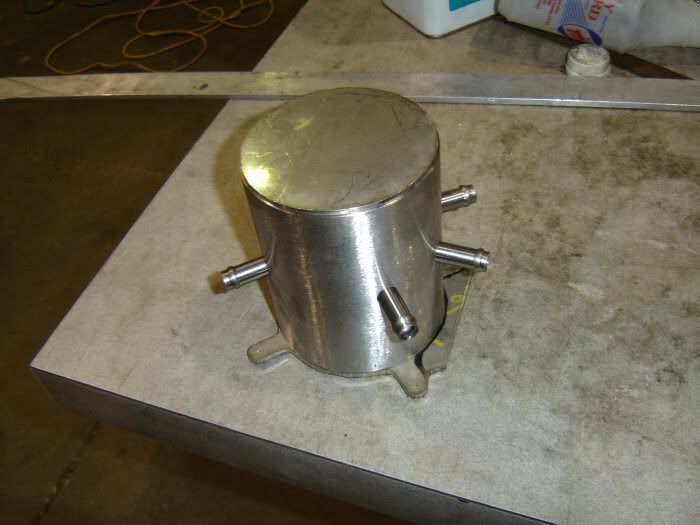
Grinding complete, cut a piece of 4 1/2" OD stainless pipe, drill holes for barbs...
Made the barbs out of 1/2" OD stainless tube, beaded the ends to make for very secure hose fitting... test fit it all together...
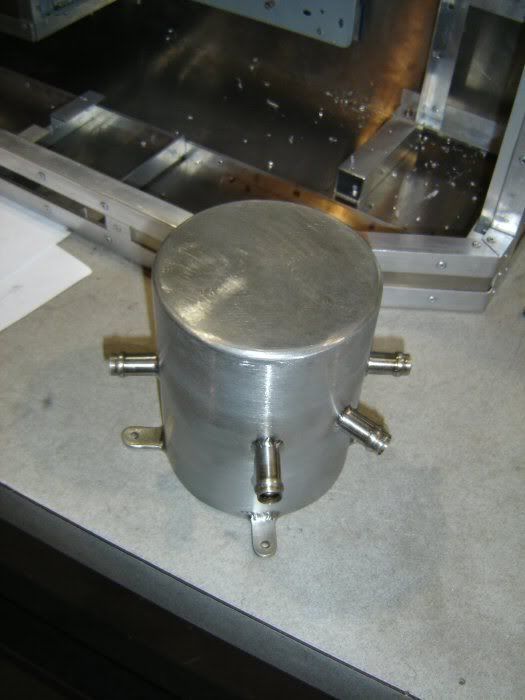
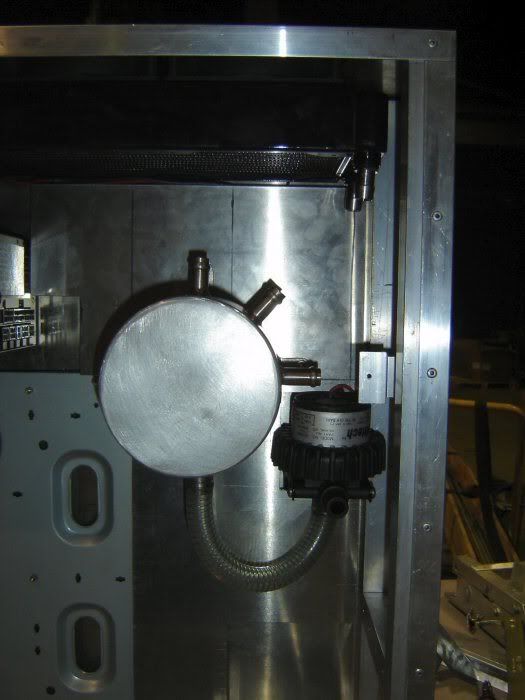
Tig weld the whole mess together and polish it up a bit, and tada I have a nice shiny new water resevoir ... yes it is a little big, but I like it. :)
And here's a trial mount of the finished product, the orientation is not right and I may yet decide to change it's location a little but there you have it.
You can also see in this pic (kind of) the change in the HD rack position.
Now, I'm about falling asleep at the keyboard here so I'm off to bed. I'm taking a break from "V" tomorrow (today now), but I might be able to squeeze in another day or two over the weekend and New Years Day.
Thanks for all the great comments and suggestions as always, it keeps me going at times like this. :)
Peace all.
FyreKnight
Oh yeah ... Crimson, I used the lappy optical because it fit where I needed it to. Although the case looks and actually is big, there is surprisingly little functional room inside of it because of A: the irregular shape, and B: the rear access box which takes up a huge amount of space. The MTBF of the drive doesn't concern me greatly as I don't actually use my optical drives very often, and the performance difference is well ... meh!?! What's another 10mins on a program install? No biggie. :)
I hate you. I hate that you can weld aluminum in the shop. But I LOVE the reservoir! damn thats cool.
I am with you on this Crimson, and in awe. I love the work on this!Quote:
Originally Posted by Crimson Sky
hehe i so called the feature coming!
congrats man...love the project....almost reminds me of something i was workin on in my machining class
Happy New Year All!!!
I managed to get one last day in at the shop working on "V" before the end of my holidays. Overall I'd say I'm pleased with the results but disappointed that I didn't get more done. It's surprising sometimes how much time ticks away while working on a particular thing, then when you add a few of those things together with a generous helping of design/planning time, and suddenly the day is gone. Of course the two steps forward-one step back aspect of this phase in the project doesn't help much, but I think I've got a handle on the situation now and there shouldn't (hopefully) be too much more of that.:neutral:
Now ... the progress.
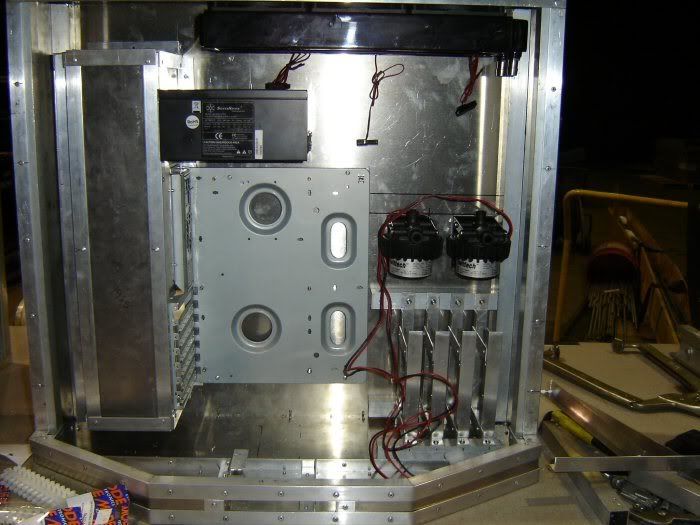
After many layout trials and much frustration I finally got the resevoir and the pump in their final locations. I decided to run a single pump for now as space limitations and visual appeal considerations won't allow for the second one. If there is need for it later when I watercool more than just the CPU and GPU I believe I have thought of a way to add the second pump, but I won't know for sure until the rest of the case is finished.
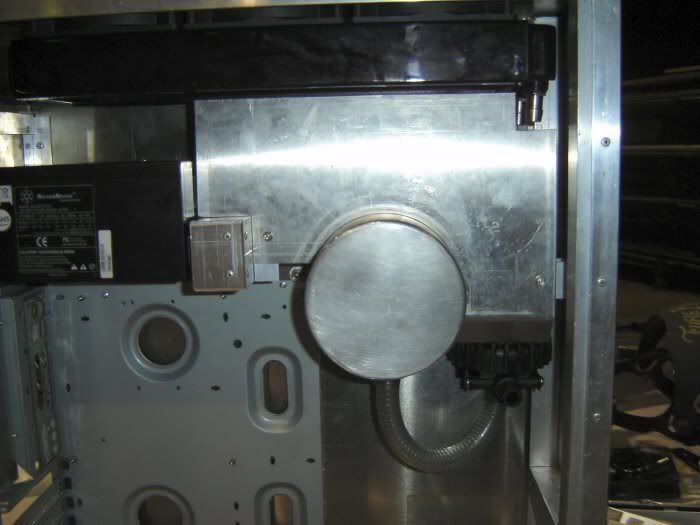
Once I had finally settled on the single pump and found the permanent homes for it and the resevoir I made a false back plate to raise the resevoir off of the rear of the case. This allows me the space I need to route the case wiring out of sight. :) Then I made a shield to cover the majority of the cooling lines and the inlets of the resevoir, and a small extension to conceal the wiring as it exits the power supply.
And of course ... some pics :)
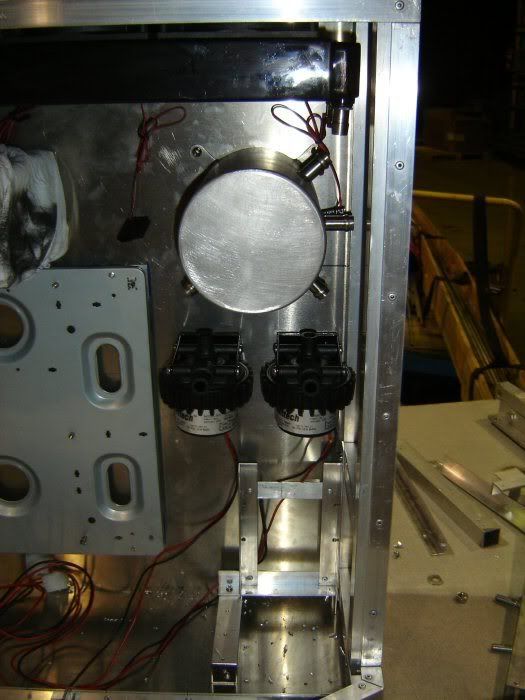
First, the pump and resevoir in their final locations ... the riser plate is already installed underneath the res., you can almost make it out in the pic.
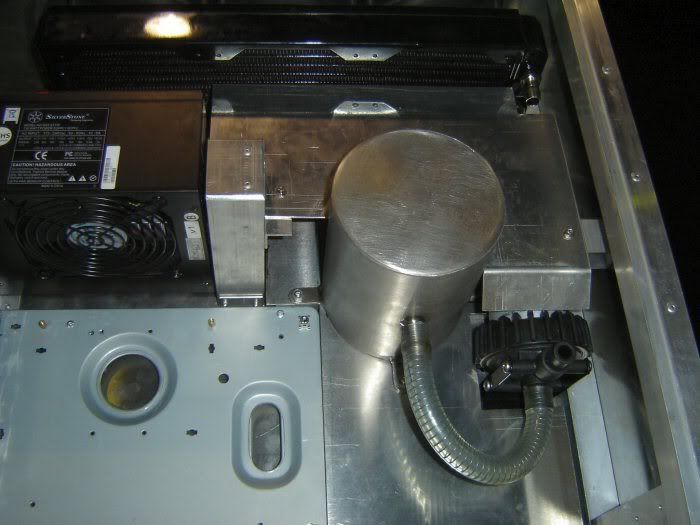
Then, a couple of shots with the shielding in place ... I'm quite pleased with the way this turned out, although there was some serious bits of frustration along the way there. :D
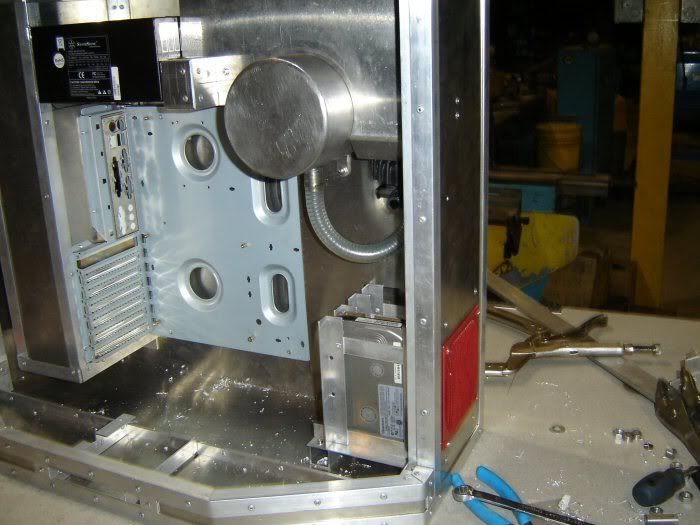
And finally, one overview shot of the case interior as it stands right now ... it's getting there! :P
That's it for now .. time for me to head to bed, back to work tomorrow :( :down:
Thanks once again for the great comments, those and suggestions are always most welcomed. :)
P.S. Crimson: Although we DO have the capability to weld aluminum in my shop it's not something I've ever tried to do, apparently it takes quite a "knack" to do. What I welded there was stainless steel. :) (Hey I had to bring out the "special tools" at some point didn't I? Don't make me have to start using the lathe and the milling machine too, people will start to cry "FOUL !!" lol)
Peace all !!
FyreKnight
Another +Rep for keeping this great worklog going.
Yo the man, dude!
-Dave
Great work man, Your metal skillz are rediculous. Nice engineering ;)
Phenomenal work...
Hey Fyreknight,
It might be kinda cool if you could scribe that rant that V goes on after beating the crap out of the two fingermen,
Although it's long as hell, it would look sweet as trim around the border somewhere since you have plenty of surface area, maybe as printed decals? Anyway, just a thought albeit a nutty one...Quote:
Voilà! In view, a humble vaudevillian veteran, cast vicariously as both victim and villain by the vicissitudes of Fate. This visage, no mere veneer of vanity, is a vestige of the vox populi, now vacant, vanished. However, this valorous visitation of a by-gone vexation, stands vivified and has vowed to vanquish these venal and virulent vermin van-guarding vice and vouchsafing the violently vicious and voracious violation of volition. The only verdict is vengeance; a vendetta, held as a votive, not in vain, for the value and veracity of such shall one day vindicate the vigilant and the virtuous.
Verily, this vichyssoise of verbiage veers most verbose, so let me simply add that it's my very good honor to meet you and you may call me V.
Jon
one hell of a build FyreKnight...
Wow this is still going:eek: ! Nice Man Keep it up.:D :up:
You gotta be good to say that the way he did. He gets some good roles, but he deserves better ones. :)Quote:
Voilà! In view, a humble vaudevillian veteran, cast vicariously as both victim and villain by the vicissitudes of Fate. This visage, no mere veneer of vanity, is a vestige of the vox populi, now vacant, vanished. However, this valorous visitation of a by-gone vexation, stands vivified and has vowed to vanquish these venal and virulent vermin van-guarding vice and vouchsafing the violently vicious and voracious violation of volition. The only verdict is vengeance; a vendetta, held as a votive, not in vain, for the value and veracity of such shall one day vindicate the vigilant and the virtuous.
Verily, this vichyssoise of verbiage veers most verbose, so let me simply add that it's my very good honor to meet you and you may call me V.
-Dave
there is no such thing as extremely unique or very unique it can only be unique its either unique or not !!!!!Quote:
Originally Posted by elbarto241
Cool project
Love that movie
C'mon fyreeeee finish this master piece :) <3
Man, you are really doing an excellent job on this! keep up the good work.
Did Fyre die? :(
I think we're gonna have to wait till November...heh heh.
-Dave
Its the first time ive seen this one. Some real brain power used in this mod. .My god man that thing is baddd as. :up: :up:
I think we all want to see this project continue.
Alan Moore is the man.
If anyone has read V for Vandetta and liked the graphic novel, try Warren Ellis' Transmetropolitan.
Or Alan Moore's the Watchmen.
Great, great stuff.
Watch him finish it on the 5th of November... just to co-inside with his mod.
Haha i didnt realize it when you 1st said in november dave. I was thinking to myself why november? Then i remembered what this mod was based off of haha funny stuff
If he does I'd give him proper drama points, but I am worried that we haven't seen anything in a while. Hope this is scrapped.Quote:
Watch him finish it on the 5th of November... just to co-inside with his mod.