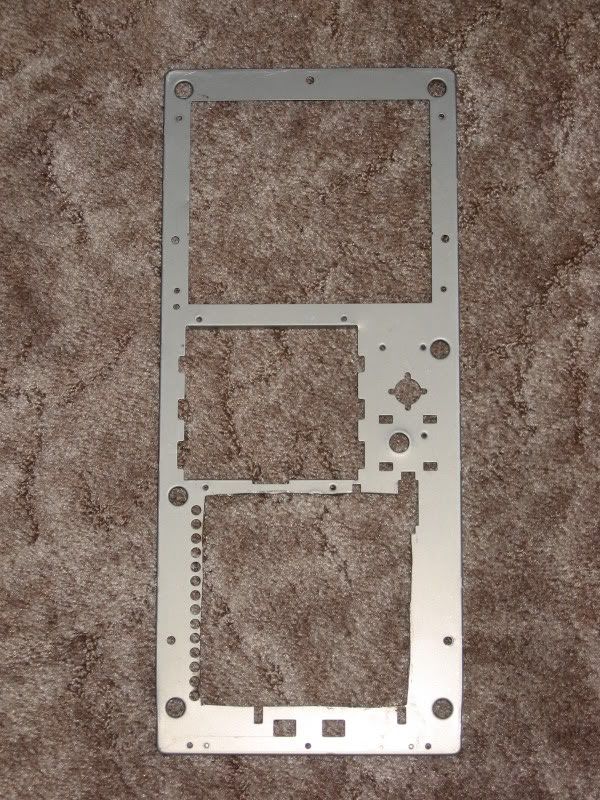
-
Re: Project: Frankenstripe
Quote:
Originally Posted by
Jim Beam

you can spray the foam with primer then use the bondo
I was kinda kicking around that same idea earlier--either a primer or a sealant. Or perhaps even some automotive undercoating so the bondo would have something to grip.
+rep for the idea, I'll see what I can come up with on Friday (day off).
-
Re: Project: Frankenstripe
Quote:
Originally Posted by
Jim Beam
you can spray the foam with primer then use the bondo
Be careful using a rattle can primer though. The solvents in it to make it thin enough to spray can eat away at the foam, just like if you spray paint it. Try it on a scrap piece first and see what it does.
Another way may be just to put a coat of paint or primer on with a brush, then bondo.
-
Re: Project: Frankenstripe
Wow--haven't done jack squat with this since July. That's not good.
Anyways, I busted out the good ol tracing paper tonight, and came up with what will become my other 120 mm fanguard:
Creating this should prove interesting. The flames themselves extend far enough to feasibly cover the screw holes, but what about the bottom?
Must think a bit more on this one.
And I retraced the swirl logo again. Tomorrow (time permitting of course) I shall retrace it again...and again...and, well, you get the idea. And after it has become second nature to me, I shall engrave it. *Note to self: better practice it backwards.*
And if all goes well with the LCD portion of the filing cabinet server box, the spare might or might not show up in here somewhere. I like the idea, but don't think I can incorporate it unless I undo a bunch of stuff that's already done.
-
Re: Project: Frankenstripe
lookin good +rep. so what grit did you use for sanding that aluminum side panel?
-
Re: Project: Frankenstripe
Quote:
Originally Posted by
billygoat333
lookin good +rep. so what grit did you use for sanding that aluminum side panel?
I busted out the wire brush attachment for my DeWalt drill. Took me around an hour or so to get it to it's current state. Looking at it right now, I'm noticing that I've got some small areas that are still painted--mostly on the top corners. A bit too cold to do much with it right now though.
Minor update in a bit--I'm gonna try my hand at etching some scrap plexi that's laying around. Hell, I might even etch something into my main rig's side panel.
-
Re: Project: Frankenstripe
nice. I never thought about using a brush bit. sounds like a good idea! (thinkin on what to use on my aluminum for my ps2 mod. did a shabby job cutting it so there are some nicks, black marks, etc. on it. want it to be shiny! and as far as etching goes, good luck. I tried etching and i decided that i need more practice with real drawing first. (at least, a brush up, haven't drawn a picture since i was a sophmore in high school. :P
-
Re: Project: Frankenstripe
First ever attempt @ etching. I'm impressed, as these pics (as usual) do not do any justice at all to the real deal.
Lights on.
Under the Black Light. This thing absolutely glows and looks cool as hell. I smudged the top flame on the V a bit, but that was due to working on such a small scale. For reference:
That hole is the same size as two floppy bays. And this pic is the only one that really shows how vivid this piece of scrap is under a blacklight. Damn near have to wear shades when you're lookin at it!
-
Re: Project: Frankenstripe
looks wicked. like the glittery effect on the plexi too :)
-
Re: Project: Frankenstripe
I have requested a quote on some 1/4" transparent red plexiglass from Estreet Plastics, with the intention of having it ordered before the end of the week. I have also scrapped the magnifying glass for this mod, but it very well might return in a different mod down the road. Or I might just use it for working of PCB's--time will tell.
I'm off of work tomorrow, so I might be able to do some actual work on this. I haven't touched the front panel since July of last year, so if nothing else, I'd like to get that sanded down (currently covered in bondo), and prepped (read: hacked up) for the next step.
Weather permitting, of course.
-
Re: Project: Frankenstripe
Minor update; slim chance I'll get some work done on this this weekend--weather permitting (as usual).
Got my plexi in today!
And I've got a redesigned window for both sides in mind--hence the smaller piece of plexi.
Stay tuned...
-
Re: Project: Frankenstripe
So I've been scratching my head for the last couple days pondering this question:
Do I use red LEDs or white LEDs?
I'm gonna see if I can get a quick video up of my little experiment with the LEDs...
-
Re: Project: Frankenstripe
-
Re: Project: Frankenstripe
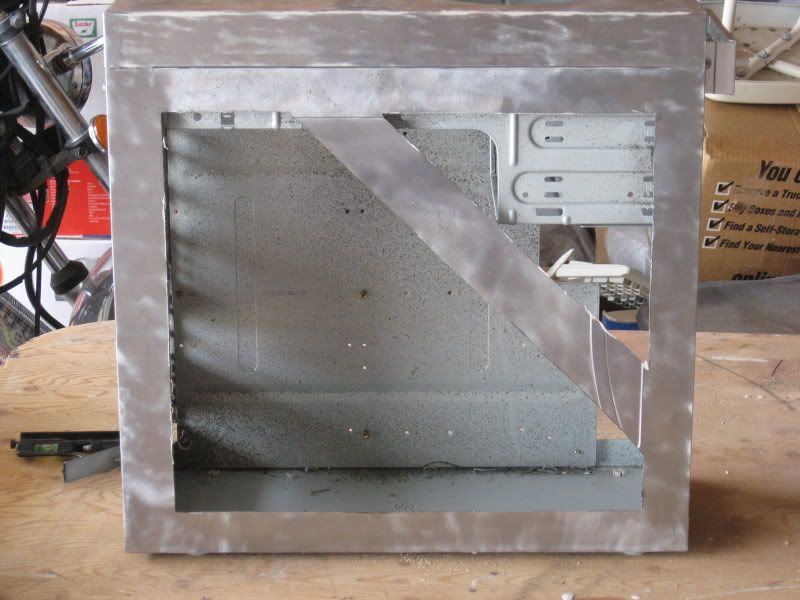
Side panel window is cut. Now all I have to do on it is a bunch of cleanup.
Taped and drawn out.
Finished Product. As I said, I've got some cleanup to do. Here's why:
Regarding the second pic, that bend is a trick of the camera. It doesn't do that, honestly!
Guess what I'm doing over the next couple of days!
-
Re: Project: Frankenstripe
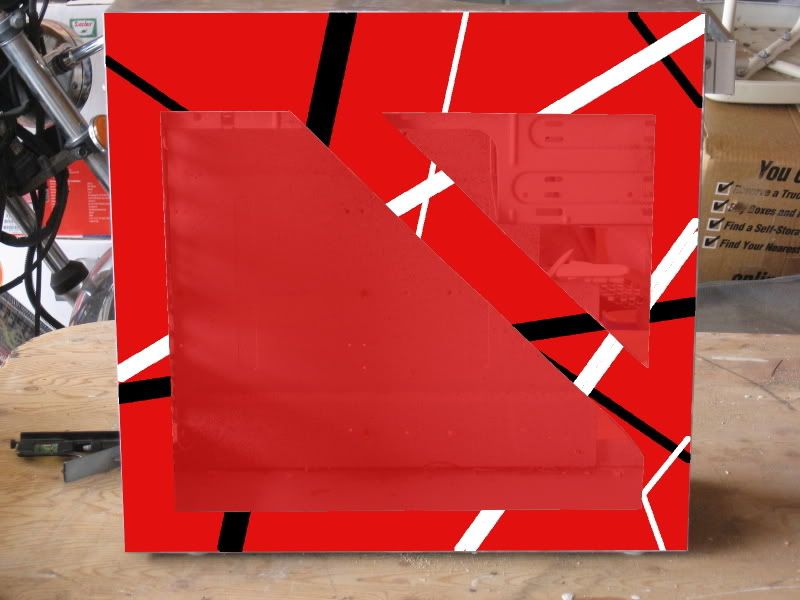
Mock up. Please ignore the clutter, that'll be taken care of before the end of the week.
Envision, if you will, a few more pieces of metal dividing the window up even more. Something similar to this:
Where the black bars are the metal dividers (for lack of a better term). However, what I have in mind will not be as cluttered looking.
But first, I gotta get some work done with the good ol file set. Not to mention get that damn front panel cleaned up so I can steal an idea from one of the new members!
-
Re: Project: Frankenstripe
looking good so far.
What make of guitar is that?
-
Re: Project: Frankenstripe
That particular guitar is a Fender. If you look closely at the headstock, you can see the new Fender logo. The original Frankenstein, however, was a mongrel put together by Eddie back in the mid 1970's--a Boogie body that was a second (meaning it had imperfections), a humbucker out of a Gibson, and a Linn Ellisworth neck.
Edit: Here's a great link that details the history of Ed's arsenal.
-
Re: Project: Frankenstripe
-
Re: Project: Frankenstripe
Quote:
Originally Posted by
sirkillalot617
cool thanks You Play?
Yes and no. I know how to, but I haven't touched a guitar in about three years. In fact, I used to own a Peavey Wolfgang; I sold it to finance a trip to Denver to see Van Halen in 2004. I miss that guitar, but you gotta do what ya gotta do, you know?
-
Re: Project: Frankenstripe
yup good luck with the mod and maybe you will play again some day.
-
Re: Project: Frankenstripe
Small update--I'm back to sqaure 1 on the front panel. And I think I've got a plan that'll actually work this time.
I've knocked off all the excess bondo. I'll hit the top half with some spot putty and higher grit sandpaper.
Ok, phear my mad paint skillz:
See the area within the red box? I'll be removing that completely soon. And I'm planning on making a false front (not unlike McCoy's) and covering up the gaping hole.
Still undecided on how to use my soon to be made real estate though. Time will tell.
I've also retaped my window, and will be redrawing lines so I can tidy it up with the dremel. Hoping to get that knocked out this weekend, along with a ton of work on the server.
-
Re: Project: Frankenstripe
As much as I like the false front idea, I don't think it's going to see the light of day. I was doing some cleaning and rearranging and came across some styrene sheets that I forgot that I bought.
Fairly thick stuff--I'll have to take either the jigsaw or the dremel to it to cut it down to shape.
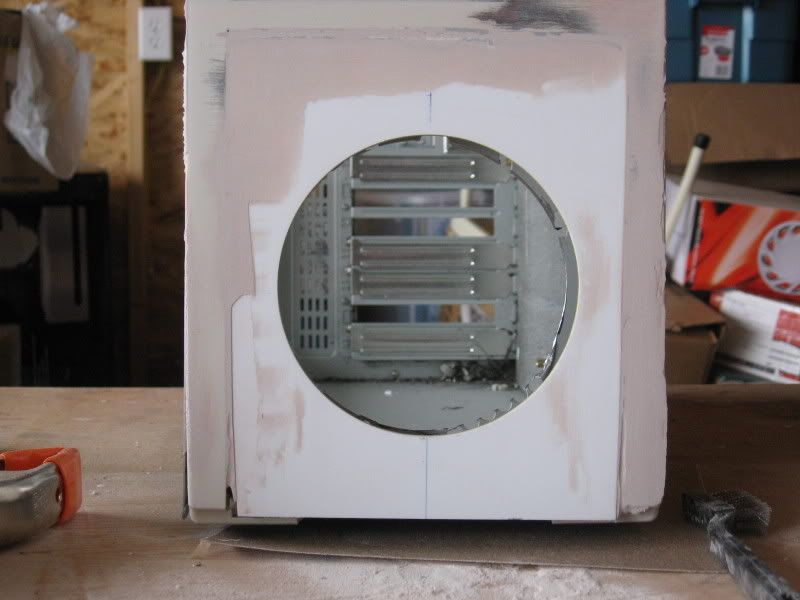
Then it will be measuring time. The blowhole is going to be resurrected. No lip this time, completely flush, and covered with the gutter guard and a custom yet to be made fan guard, the design of which has been posted already.
A little cleanup left to do. Not much, but enough to annoy the hell outta me.
I finally got around to popping the 5 1/4" drive bays out. Something tells me that I might want to hold onto these...
80mm fan? I think not. 120 mm is more like it. I now know where to put those two knockouts. JB Weld ftw.
Case feet that need to be replaced. With what is yet to be seen, but I'm sure I'll think of something...rollers might be a possibility. I'll have to look around and see what I can find.
I'm hoping like hell I'll be able to have an actual update tonight.
-
Re: Project: Frankenstripe
It was a beautiful day outside...so I spent a good chunk of the afternoon working on this case.
Busted out the dremel and the window now looks pretty damn good, if I do say so myself. But hey, don't take my word for it, have a look yourself:
So, having fixed that mess, I turned my attention to the front panel. And I like where this is going. Here's some progress pics with a bit of chit chat from me where I feel it is appropriate:
Ok, so there wasn't any chit chat from me after all. The pics speak for themselves. Obviously, I've got a lil bit of bondo work left to do, but now that I am privy to how to work with it properly, it's gonna be no sweat at all. I've also got to strengthen the bottom half of this as well--the bondo didn't hold up too well and started coming off--too big of a gap for it to fill. I've got all sorts of scrap plastic around here, so filling it in shouldn't pose too much of a hassle.
My biggest threat right now is the weather. T'was 60 degrees today, tomorrow it's suppose to get to 35 and snow. Next week's out of the question, I've got a trip to Kalispell MT planned for a doctor's appointment (that'll be a 1 day trip thankfully) and then my parents are going to be in town for the weekend.
Anyways, here's what I can think of that's left to do:
Order window trim
Make custom fan guards
Case feet (I know how I'm going to approach this one now, you're just going to have to wait to see for yourself)
LEDs. Lots of LEDs. White and red. Probably should wire em up too :D
Paint
I'm going to price the trim (and possibly order) tonight, along with what I need for the feet.
-
Re: Project: Frankenstripe
Forgot to add this:
Fear my photoshopping skillz!!!
Honestly, if the end product looks half a good as this does to me, I'll be very happy.
-
Re: Project: Frankenstripe
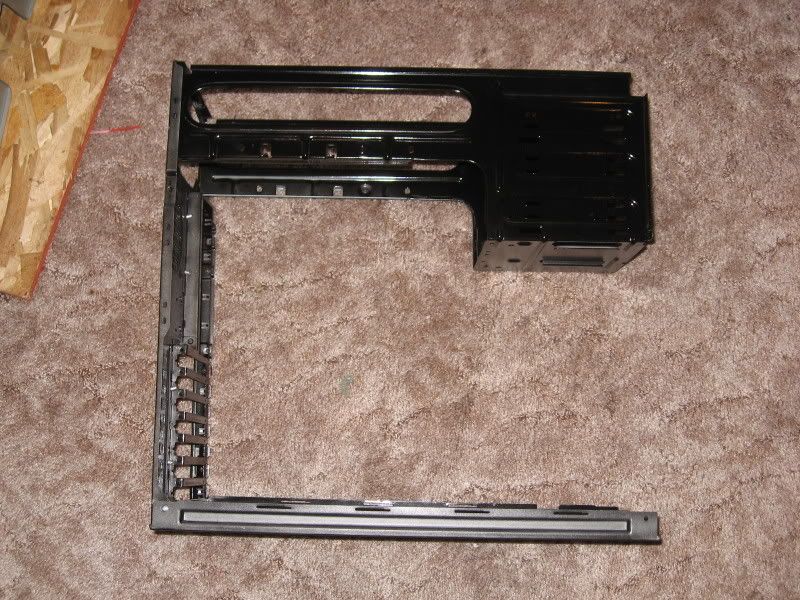
Urgent update: I've just made a bit more work for myself--the case took a small (less than a foot) drop but landed in such a way that I bent the frame. :mad:
Even though I was planning on tearing it down completely, I wasn't planning on doing it this damn soon. And I sure wasn't planning on trying to straighten the frame either.
Edit: The damage:
-
Re: Project: Frankenstripe
Feet! I've decided what to do for the feet!
Four of these lit by four of these.
I'm still working on how to attach these to the case. My initial idea was to drill and tap, and that might still be a possibility if I use an odd numbered side of the die.
I'm planning on implementing something similar for the fan controller knobs and possibly the on/off and reset switches as well.
Edit--just realized how small 19 mm is. I'll have to keep looking, I'm thinking the smallest I can feasibly go is 25 mm for the feet. But this is the general idea.
-
Re: Project: Frankenstripe
More of a reference for me than anything else: rivets that are about to be removed.
I've got the JB on standby just in case this gets ugly.
And since I'm going to have this beast completely torn down, I might as well figure out what color to paint the chasis.
-
Re: Project: Frankenstripe
Hey Joe,
I'm sorry I haven't had time to browse the worklogs in a while but after you mentioned your mod in the CR I had to come check it out. I haven't seen this in a long time, it's coming along great! I'm a big VH fan and even painted my first elec guitar in that pattern (somehow thinking it would make me play better, it didn't). It's been so long since I've read this from the beginning I need to go back through, but before I do I thought I would throw a couple of ideas at you (hoping that they aren't already in the pages before). You know what I think would look cool? Replacing those fan control knobs with tuning keys and placing alternating red and white LED's behind the knobs.
Okay, I'm going back to the beginning to see if I'm stating the redundant.
-
Re: Project: Frankenstripe
Quote:
Originally Posted by
jdbnsn
Hey Joe,
You know what I think would look cool? Replacing those fan control knobs with tuning keys and placing alternating red and white LED's behind the knobs.
Okay, I'm going back to the beginning to see if I'm stating the redundant.
I was thinking about getting some knobs off of a 5150 head and using them. But the tuning knobs, that sounds like it might be a tad bit cheaper. I'll look into it some more.
Red and white leds...hmm...lots of possibilities. Alternate, or wire em up somehow to the pots inside the control unit? Start with red at the low end and white at the top end maybe? Or perhaps wire in some kind of sound activated module? LOL, damnit Jon, now you've got me curious. And since I'm already knee deep into some pretty serious soldering on the jukebox, I'm thinking I've got a good chunk of resistors and whatnot I'd need for the sound unit.
Anyways, I'm thinking I've got the front and back panels back to some sort of straightness.
I'll be finding out, well next week now. Painting throughout this week and will let this cure for a week before I rivet it back together.
Thanks for the input Jon, I can understand being busy. Especially given your occupation.
-
Re: Project: Frankenstripe
Quote:
Red and white leds...hmm...lots of possibilities. Alternate, or wire em up somehow to the pots inside the control unit? Start with red at the low end and white at the top end maybe? Or perhaps wire in some kind of sound activated module? LOL, damnit Jon, now you've got me curious. And since I'm already knee deep into some pretty serious soldering on the jukebox, I'm thinking I've got a good chunk of resistors and whatnot I'd need for the sound unit.
I was talking about using two of each color, one per knob. Not alternating colors in a single knob, but arranging them red-white-red-white. I don't know how hard it would be to do what you were talking about.
-
Re: Project: Frankenstripe
Got the feet. Now I just gotta drill, tap and mount some LEDs.
Also picked up some inspiration for my next mod:
The Dark Tower Comic Book, issues 1 through 7.
-
Re: Project: Frankenstripe
Quote:
Originally Posted by
jdbnsn
I'm a big VH fan and even painted my first elec guitar in that pattern (somehow thinking it would make me play better, it didn't).
if only it did mate we would all rock really hard
-
Re: Project: Frankenstripe
Instead of replacing those knobs with those off a 5150 (I assume its a guitar), have you thought about using some clear dice for knobs, like the ones you used for the feet? I think that would look sweet, especially if you could wire 'em to be lit from the inside.
-
Re: Project: Frankenstripe
Quote:
Originally Posted by
Pointy_Stick
Instead of replacing those knobs with those off a 5150 (I assume its a guitar), have you thought about using some clear dice for knobs, like the ones you used for the feet? I think that would look sweet, especially if you could wire 'em to be lit from the inside.
5150.
I'm still debating on how to do the knobs--the dice idea did cross my mind.
+rep for having the same idea!
-
Re: Project: Frankenstripe
Tonight I plan, tomorrow I begin painting.
Yes, I realize that the front panel is still needing to be finished--this isn't nearly as big of a deal as it seems, as I'll be able to lay the paint down on it seperately and tape the stripes off by mocking it up to the rest of the finished product.
The chassis is going to be straight black--I've done quite a bit of debating over this and have decided that a glossy black will look absolutely wicked with the frankentheme paintjob.
I also need to drill a few more holes in a few spots and cut a bit more on the front part of the chasis, but I'll be able to knock that out tomorrow no sweat.
Expect a Tech-Daddy inspired pic or three tomorrow.
-
Re: Project: Frankenstripe
Mmm... very awesome. :D Love the music, Love the guitar, Love the case! +rep man.
-
Re: Project: Frankenstripe
Update time!
I spent the afternoon turning that no color gray color of steel into something a bit more pleasing to the eyes. Still a bit of work to do on the front panel, that's why it didn't get painted--I'm hoping that the weather will be cooperative next Sunday so I can get a bit more work done.
First stage of the back panel. 4 coats of glossy black; I'm going to let it cure for a week, tape and lay down some flat white.
Now I know I said that there was going to be a Tech-Daddy inspired update. My original plans were to have this stuff hanging from rain gutters and whatnot. However, with the wind blowing a steady 25 mph outside, I didn't really feel the urge to chance it. I did, however, consider hanging all this inside from the rafters in my in-law's garage; but since it's their garage and not mine, I couldn't justify hanging a tarp up for just a few hours. Who knows, I may take this approach down the road.
One more pic before I start to rearrange my office:
I scratched up the back a little bit trying to get the 'feel' of the riveter that I borrowed from my dad. I was going to fix it with some touchup paint, but then realized that the guitar I'm basing this paint job on has been literally beat to ****, so I'll leave any screwups as they are--it'll add authenticity or some crazy thing to the final product!
I also realized I painted the wrong side of the motherboard tray--whoops. I'll have to fix that this next weekend, weather permitting as usual.
-
Re: Project: Frankenstripe
-
Re: Project: Frankenstripe
To Do/Buy List:
Buy
LEDs -- Both Red and Clear
Acrylic tube, diameter tbd
Vandal resistant switch
USB front panel -- found a supplier, but they're a bit on the pricey side, so there'll be some dumpster diving in my near future. Or I might just keep an eye on Ebay and score a cheap case with front side USB.
Reset switch -- still deciding on what style of switch to use
To Do
Mount Feet
Mount LEDs
Finish front panel, chasis -- most likely this weekend
Finish front panel -- hoping to knock this out at the same time as the chasis
Paint
And a decision needs to be made -- keep the current nearly outdated 939 board for now or just bite the bullet and jump to an AM2+ compatible board?
-
Re: Project: Frankenstripe
Staying true to form with the whole notion of the 'Do It Yourself' revolution that Eddie had a part in kicking off in the 1980s...
I chiseled out a hole for a 120 mm fan to fit in. Said fan will be attached to my new and improved front panel that I've started on already (see previous posts for pics).
I'm going to file the sharp edges down later today and am hoping to get a couple of layers of paint down Tuesday, with completion of putting the chassis back together on Wednesday.
So here's hoping I straightened the damn thing enough to make this work. Otherwise I'll be back to square one, and will be forced to break out the heavy artillery.
-
Re: Project: Frankenstripe
Good news on this front--I managed to beat the case back into enough shape to fit properly. I've got some minor problems down the road a ways, but I can deal with them when the time comes.
Red goes down this coming Saturday.