Re: Project: Reality Bytes - Card Plexi Covers
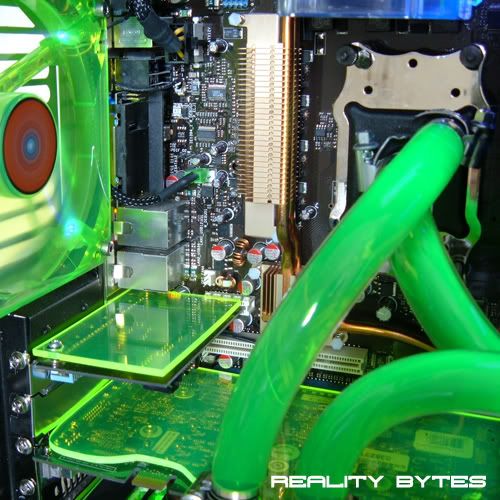
I had the soundcard out of the system today whilst I was taking some measurements, so thought I would show you how the plexi cover was added to it.
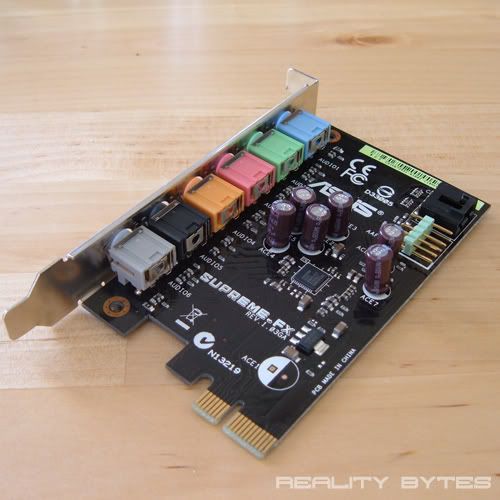
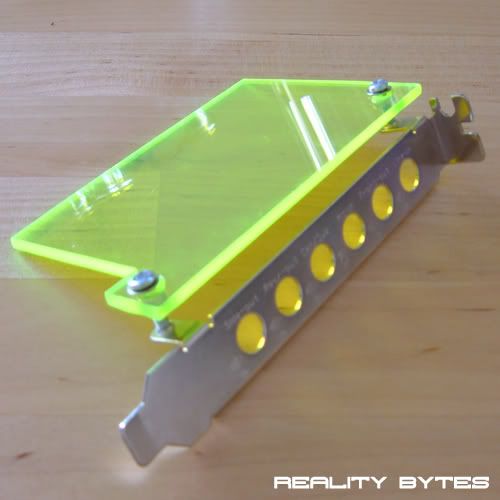
To get started here is the original soundcard that came with the motherboard. Notice the small screws that hold the actual PCB to the backplate have been removed.
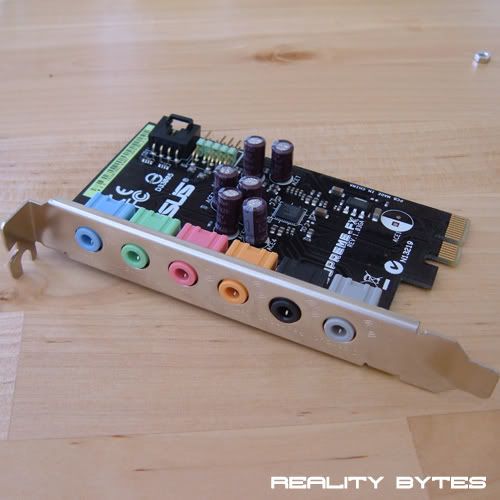
This is to allow the backplate to be removed form the card so the holes can be used to mount the plexi, like this.
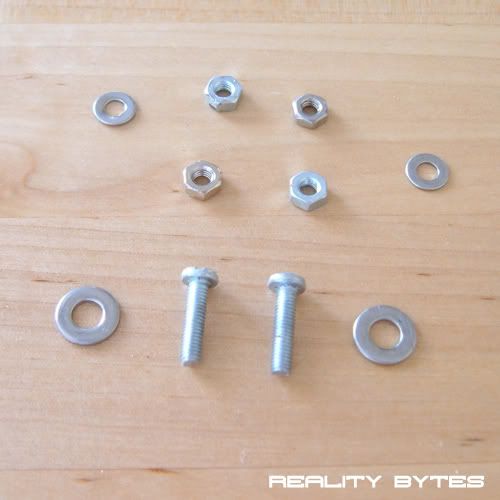
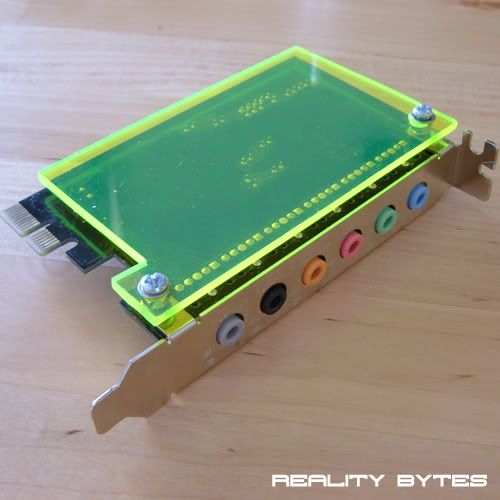
Now to cut a sheet of the 3mm Plexi in the same shape as the PCB, making sure it will cover the PCB itself and also the screw holes for the backing plate. 3mm diameter holes also need to be drilled through the plexi to allow mounting through the backplate. I will be using M3 bolts, nuts and washers.
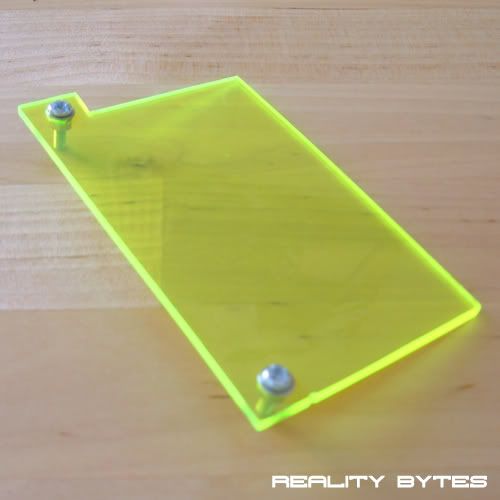
Then simply place a washer on each of the bolts and place through the plexi. I then tightened a nut on the bolt to raise the plexi off the top of the PCB and to keep it straight. Next the two bolts thread through the holes in the backplate and then thought the PCB, before lastly tightening the ends with the remaining nuts.
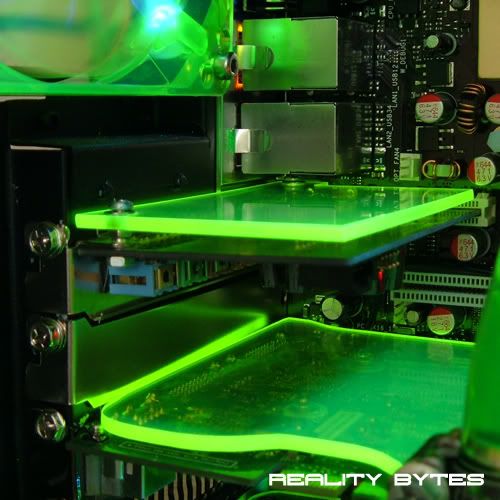
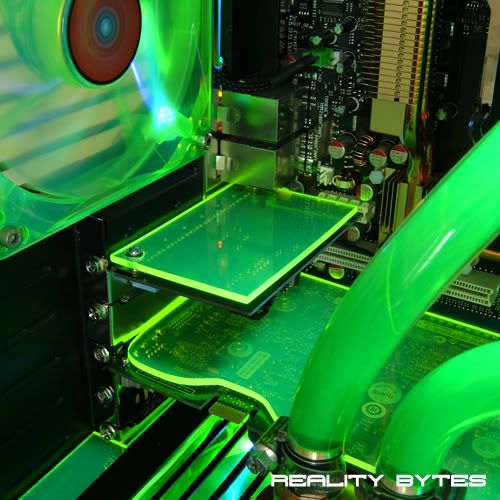
Now just pop it back into the motherboard and secure in place. Here are some final shots. Both under UV light in a dark and light room.
Thanks for reading.
Re: Project: Reality Bytes
UV glow is just about as badass as it gets. That, and pearlized paint.
It's the simple ideas that make a mod really shine, and you upped the own 10-fold with those covers. Keep up the great work man. This is one of my new favorite mods.
Re: Project: Reality Bytes
Mate that looks fantastic, do you mind if I do the same thing to my wireless LAN card? I would do it to my 8800GTX but it is too damn long, I got something else in store for it though ;)
BTW: that RAM cooler your looking at looks great, will suit your mod perfectly. I looked at the Thermaltake Cylo but opted not to get it cos it was rather bulky.
Re: Project: Reality Bytes
Two things..
1. That looks fan_freakin_tastic!
2. What kind of camera are you using? Your pictures are amazingly clear even up close.
+rep
Re: Project: Reality Bytes
Quote:
Originally Posted by
The boy 4rm oz

Mate that looks fantastic, do you mind if I do the same thing to my wireless LAN card? I would do it to my 8800GTX but it is too damn long, I got something else in store for it though ;)
BTW: that RAM cooler your looking at looks great, will suit your mod perfectly. I looked at the Thermaltake Cylo but opted not to get it cos it was rather bulky.
Thanks, yeah NP fell free to use the idea. I looked at that one too and the OCZ XTC Cooler, but as you say, a little to bulky.
Quote:
Originally Posted by
SgtM
Two things..
1. That looks fan_freakin_tastic!
2. What kind of camera are you using? Your pictures are amazingly clear even up close.
+rep
The camera is nothing special, its a Fujifilm Finepix A340. I am using it with a tripod though and always use the self timer to take the pictures. That way there is no camera shake so the pictures always seem to come out very clear and sharp.
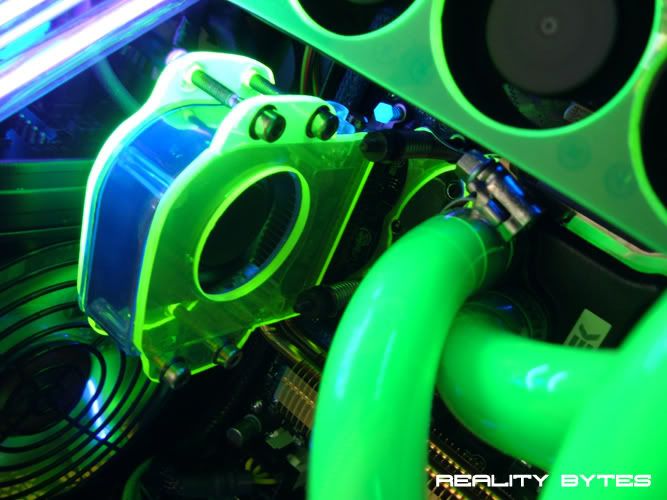
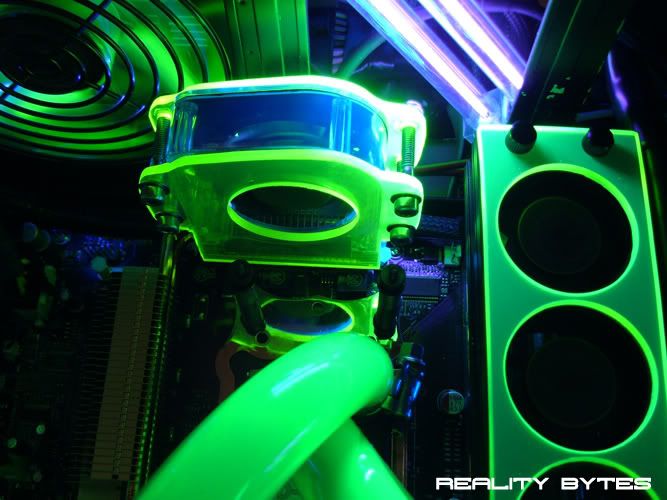
Re: Project: Reality Bytes - Mobo Fan Cover
Small update from todays time spent in the garage.
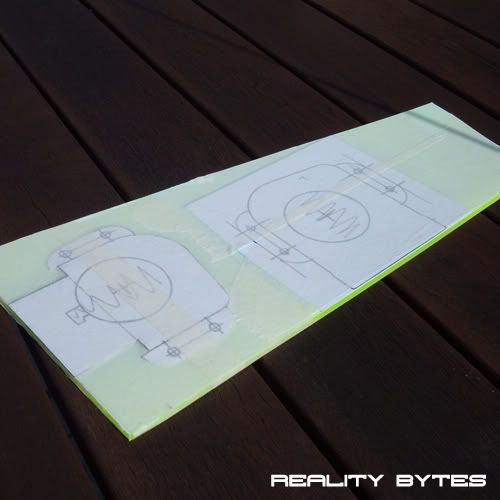
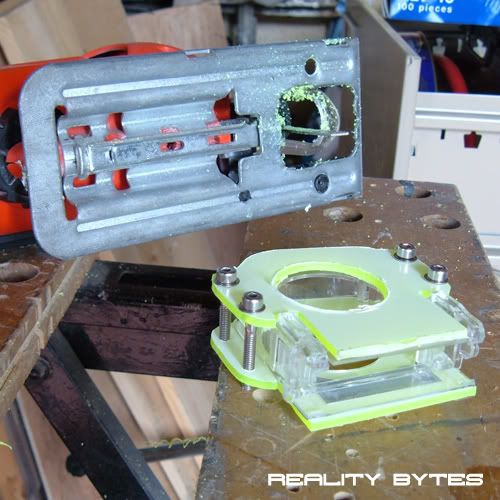
It was the motherboard fans turn today to have a new plexi suit made. By motherboard fan I am talking about the ASUS one which came with my motherboard and is used to cool NB, SB and the voltage regs via the heatpipe.
My problem with the standard fan was that it seemed to like catching UV light and glowing purple, which in a green/black project just isn't good enough.
Here is the fan before (hard to tell from the picture but it does glow bright purple)
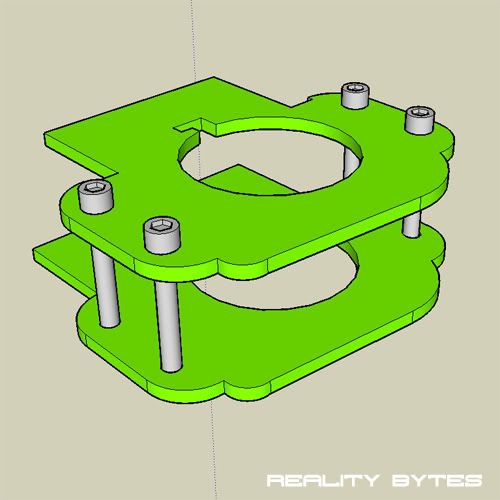
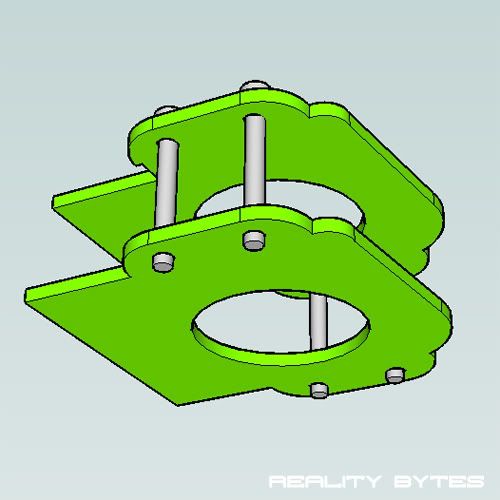
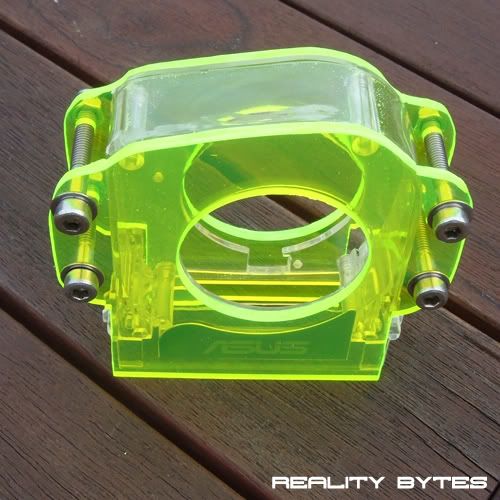
So my plan was to cover each side of the fan with UV green plexi held in place by some socket headed bolts. Like in the simple sketchups below.
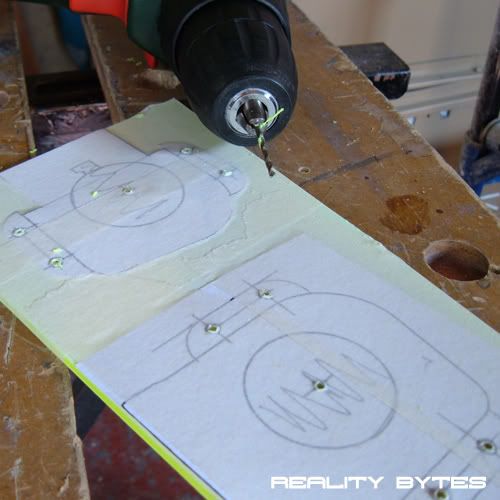
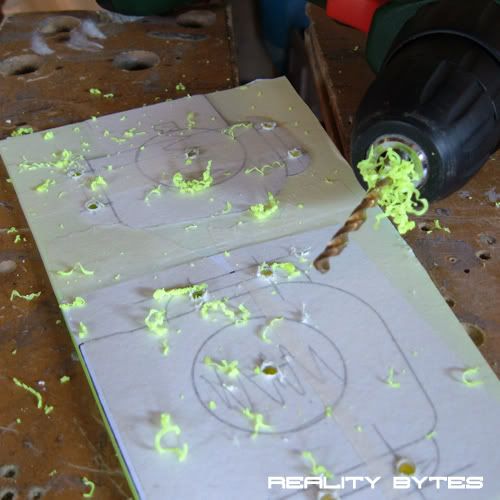
I started by marking the designs out on some 3mm UV green plexi. Then drilling 2mm pilot holes for the air intake and the 4 bolt holes.
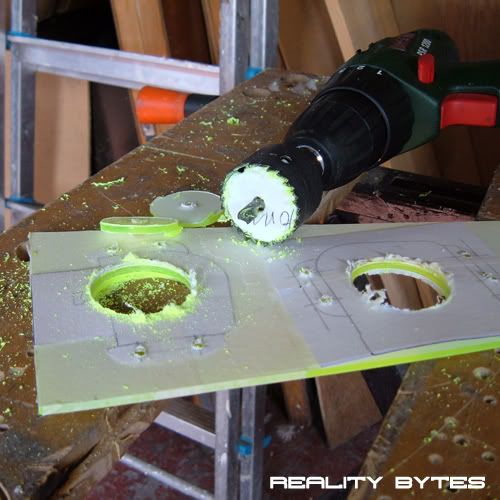
Next I increased the hole sizes to 4mm and lastly the air intakes to 37mm using a hole saw.
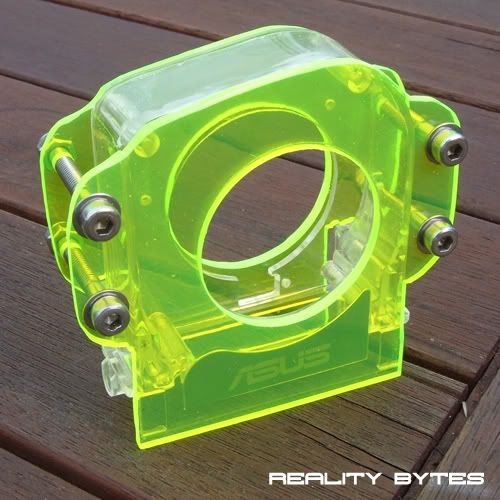
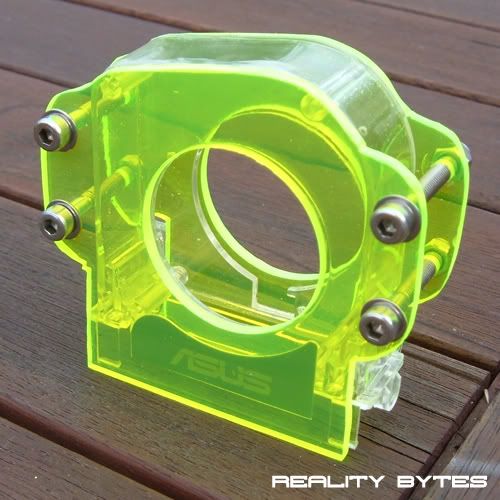
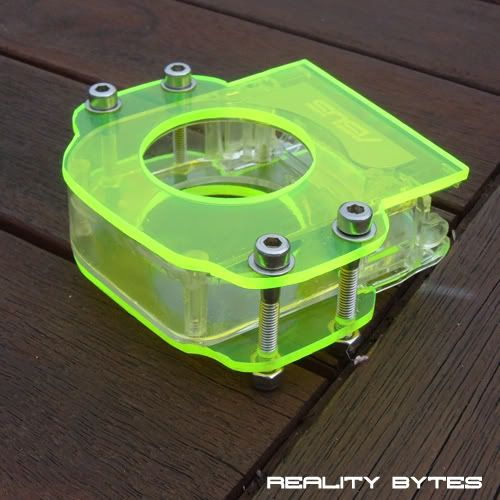
This is how it looked after cutting with a jigsaw and fastening together using M4 socket headed bolts, zinc washers and nylon locking nuts. I used the empty shell of an ASUS fan to line it all up.
After quite abit of sanding and some touching up with the dremel the plexi parts where complete, a few pictures
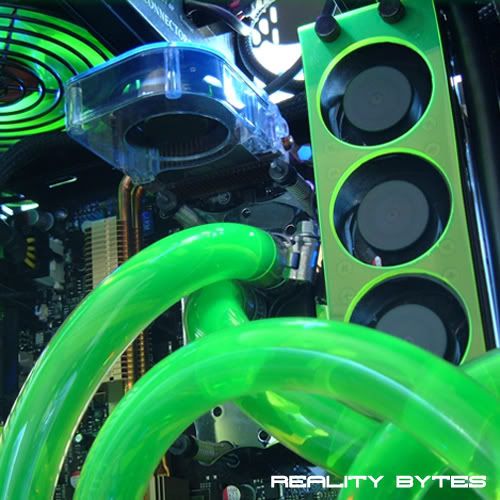
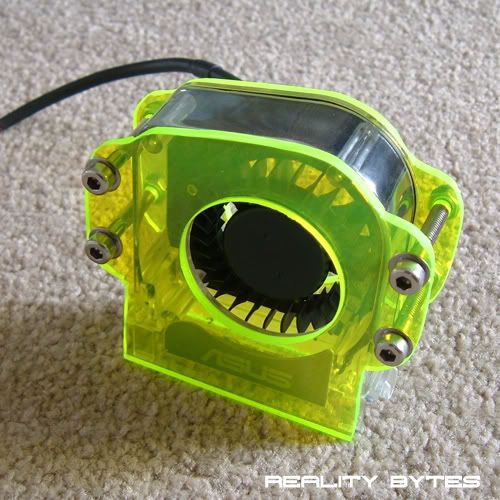
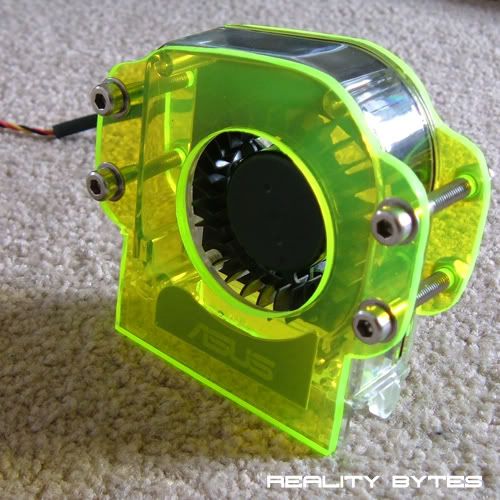
Next I switched the empty fan case for the fan from the system leaving it now finished and looking like this.
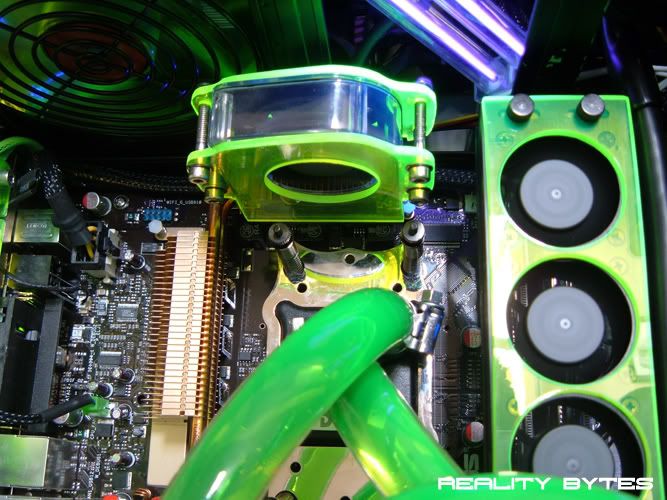
Finally here it is fitted into the system and fired up.
Overall I am very pleased with the outcome of this 'mini mod'. The cutting is by no means perfect but mounted in the system I think it looks much better than it did 3 hours ago.
Just itching for my black and clear plexi to arrive so I can get cracking on the side panel. Until next time,
Thanks For Reading
Re: Project: Reality Bytes
Re: Project: Reality Bytes
Re: Project: Reality Bytes
Quote:
Originally Posted by
Xperiment
Thanks, yeah NP fell free to use the idea. I looked at that one too and the OCZ XTC Cooler, but as you say, a little to bulky.
The camera is nothing special, its a Fujifilm Finepix A340. I am using it with a tripod though and always use the self timer to take the pictures. That way there is no camera shake so the pictures always seem to come out very clear and sharp.
That's the exact same camera I have. I guess I need to play around with it more.
ON Topic:
This is looking GREAT! +rep
Re: Project: Reality Bytes
Mate that looks fantastic, would give you some rep but I "ave to spread some around first" lol. Clear plastic tends to glow a bit, the plastic "T" and 90 degrees I'm using in my water cooling loop glow blue , it's a great contrast to the green coolant due to the other blue parts of the case.