My RAM showed up on Monday, and supposedly the board will be here later today.
I already have the proc, so this should be up and running by Wednesday at the very latest.

Printable View
My RAM showed up on Monday, and supposedly the board will be here later today.
I already have the proc, so this should be up and running by Wednesday at the very latest.
Brown dropped off my mobo, so here's a few pictures:
Ooooh....shiny
Everything is all hooked up, just waiting to POST
{/best Dr. Frankenstein voice}It's alive!{/end voice}
For some odd reason the mobo is only detecting 64 megs of ram, and yet it's a 128 meg chip. I'm going to play around with it tonight via knoppix and see what the hell is going on.
I'm also working on a new design for the fan ports. Again, I know what I want but I can't draw worth a damn.
Oh, and Friday, I'm painting!
Just in time for Halloween....I'm resurrecting the dead.::banana: :D
It's back, and will be done before the end of the year in some shape or form!
I've torn everything down to damn near the basic file cabinet; the floor is still attached due to some minor work that will be done tomorrow (read: installing the PSU). Then I'm going to strip that ugly beige off and toss a coat of primer on, weather permitting of course (supposedly going to be in the 60's tomorrow, that's good enough for me).
And I ran into one minor problem:
The back panel of the mobo is a tad bit newer than the flimsy cover on the back of the tray. Nothing the dremel can't knock out.
So for tomorrow:
Cut the back of the cabinet so it will accept the PSU.
Grind the fan holes, since they're still a bit ragged.
Install HD chassis (1 for now, but it will receive another in the future).
Paint (door for sure, the rest might get primered).
Mockup stage, as far as I'm concerned, is complete. Looks like this will temporarily hold 220 gigs (roughly) of storage, as I have two 80s and a 60 gig at my disposal.
And with RAM prices plummeting, I'm also looking at two gigs for Blue. The one gig that is currently in here will end up in my wife's machine, and the 512 meg chip that she has will go to the FCS.
Alright, first off, the weatherman lied (big surprise there).
And secondly, I did a little research on another mod that who's worklog has been posted here, and has inspired at least one other modder (yes jbdnsn, I do mean you! :D).
So I played around a bit with some balsa wood and did a bit of a mockup:
I'm planning on wrapping this motif, if you will, down the sides. And I've got an idea for an improved door as well. This will also allow for me to fix the flub on the exhaust hole.
I'm also kicking around a couple different ideas regarding the paintjob. The purple, obviously, is out the door. Olive drab green is too overdone in my opinion, but it might work as a base. A trip to Ace is in my imminent future.
I'm also hoping to get a bit more done this weekend, as I'm taking 4 days off and heading out to my parents for some much needed rest, relaxation, and enjoying the great outdoors with my .270 and 12 gauge.
Woohoo! Joe's back to work on my new server! Heehee, glad to see you are still plugging away at it man.
More goodies for the Server, although it's slowly turning into a multipurpose system now. I kinda figured as much.
Couldn't pass this deal up. $20 clearance item @ Shopko, and there's one left just in case I screw this up. And as an added bonus, I found a guide for modding the gamecube version of this unit. So, just a little bit more research and we'll see what happens!
I'll be tearing this apart *maybe* this afternoon. We'll see what happens for sure though.
More screenwork done for tonight, I'm going to leave the unit stripped as it for now. I also ran into a minor problem that will be resolved with a quick trip to Radio Shack.
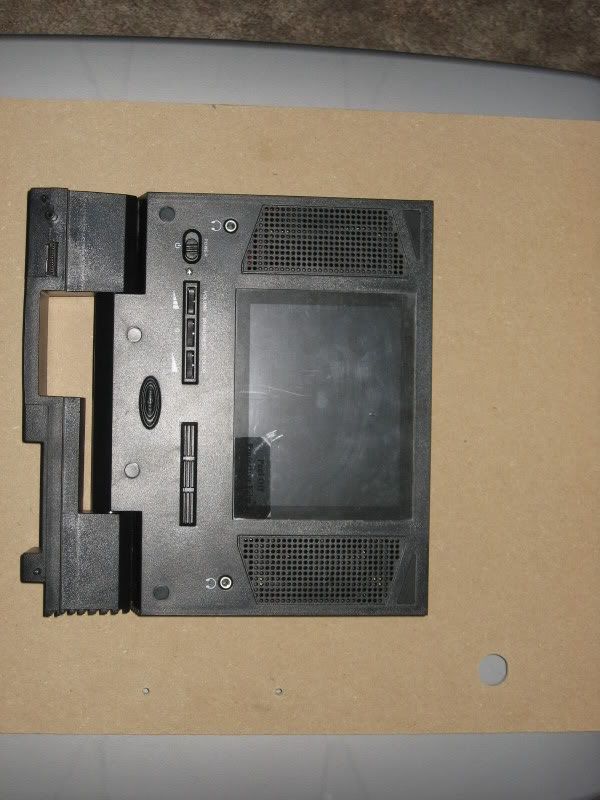
Back cover off, crappy speakers disposed of, just need to finesse the bottom plate off.
Missed a screw. Was having a helluva time trying to get it off, then inspiration hit and I removed the label.
Like I said, was having a helluva time. This piece is permanently bent like this--the powers of a hairdryer!
I stayed at this part for a good 30 minutes, during which time I was surfing the net trying to find some schematics so I could figure out what wires do what. After several dead ends and a little bit of spyware, I said screw it and googled the screen model (Sharp LM6Q4O1), and found out what pins do what thanks to the guys over at MP3car.com. Kudos to them!
And here's where I'm at:
And here lies my minor problem: the connector is a POS. Like I said, a quick trip to Radio Shack should remedy that.
The pins themselves go like this: (cut and pasted from the other site)
1 2 3 4 5
6 7 8 9 10
1 - NC
2 - Blue
3 - Red
4 - +12v
5 - Gnd
6 - NC
7 - Composite Sync
8 - Green
9 - +12v
10 - Gnd
And the VGA connector is like this: (also copied from the other site)
DB15 or VGA connector:
1 - Red
2 - Green
3 - Blue
13 - Horizontal Sync (connect to composite sync)
10 - Gnd
Power comes from a molex on either 4 and 5 or 9 and 10, but not both from what I've read.
I'll hopefully will be busting out the soldering iron this next weekend after hellweek in the grocery business is over with.
Lookin good man. + rep.
5 1/2" x 4 3/8" x 1 1/8". Those are the overall dimensions of this lil screen. So now that I know what I'm working with, away we go to Sketchup to work out some ideas for the housing:
Head on with some dimensions. For reference, metal colored part is the actual housing, the black part is the plexi cover that I popped out of the Gamer's screen unit and the smoky grey part is the actual LCD screen.
And a side view.
Here's the deal though: I don't like the boxy-ness of my mounting housing. The front face plate needs to protrude more than the rest of the housing. So, back to Sketchup. Here's where I'm at:
It's starting to look decent. The top cover extends 1" on each side, which will allow enough room for an on/off switch and a LED light to show that it's on.
First off, my main machine had a few 'issues' over the weekend. I've got some new RAM coming my way, and have installed three of the four hard drives into Blue that were originally going into the server. No biggie, as this actually opens up a bit more space (~320 gigs vs. ~250 jbod configuration I had originally planned).
So having said that...
A quick update:
Borrowed a donor case from my wife's uncle. This will allow me to get this beast up and running...
Decided that a LAMP configuration would be my best choice. If nothing else, it will give me a bit of 'real world' experience.
RAM should be here by Wednesday at the latest. Once I install the 1 gig of matched DDR into Blue, the remaining 512 meg chip is going to go into the 478 board. 640 megs *should* be enough for Xubuntu. And I also need to find the tutorial that was posted elsewhere on the net (bit tech iirc).
Tuesday is looking like the beginning of 'armor'ing the cabinet. I bought a coping saw and a set of blades at Home Depot Saturday, along with a soldering iron, as my old one got lost due to many a move. I'm hoping to shorten the wires leading from the HSF to the connector later today (Monday).
And I'll get some pics up tomorrow as well. I'm running a gimped system at the moment (dual channel architecture + 1 stick of RAM = FAIL), and don't wish to put an overly heavy load on Blue atm.