Looking really good Cobra. The skull flames look even better painted with that blue. The hardware is looking good.

Printable View
Looking really good Cobra. The skull flames look even better painted with that blue. The hardware is looking good.
ty bud. working on the wiring this week.. might actually be able to put this one to bed within the next 2 weeks and start the planning of my next mod. i have to keep reminding myself not to slap things together (patience never was one of my strong points lol) removing some of the wiring from the psu , shortening other bits so its not a wiring mess when the final fitting takes place, then all i have left is to sort the lighting and fan controller then boot it up. wife is already playing on hers with windows 7. threw it into a few benchmarking apps to see where it sits and for what it is i cant really fault it much.
once i hit that stage with mine i will post the screenies and compare the 2 to see if there is any difference even tho hdwe is technically the same on both.
cya in a few days with some more pics =o)
mmmmmmmmmmm candy..... did you know that strangers have the best tasting candy?
eh.... am i not strange enough? o.O hehe
mm... true... u are strange :P..... send me some candy and ill eat it :P
Broke everything down again to start final fitting,
installed the case fans,
shortened wires on the PSU
removed unneeded wires from same PSU (wifey was a bit leary about me cutting bits off it =oX)
working on sleeving everything i can and snapping pics along the way.
should have a decent update by this weekend
tis almost done, that means its nearly play time.
i can use this new one to plan my next mod lol
cya in a few days with pics of all that i get done
cool looking forward to it
ok i had an eventful few days or workin on hellfire =o)
i installed the fans in thier rightful places and did a bit of wiring cleanup on the PSU.
first the sata cables that came on the PSU were way too long. so i cut em heh
luckily they came with nice little push type connectors which made shortening them rather easy.
just popped the side caps off of the mid way ones and pulled off the connectors.
then i cut the wires near the PSU so i could keep the Last plug with the pins n stuff so they had a finished look.
i soldered the wiring back together and covered the connections with shrink tubing and sleeving.
overall it looks alot cleaner with the shorter wiring there.
once those were shortened i cut all but one molex plug off the PSU. all the molex powers is the lighting so i had no need for the 5 extra plugs
now it was time to sort the lighting wiring out.
not so many pics for this as i was kinda on a roll and with the finish line looming near i didnt really feel like stopping every 3 mins to take a pic (sorry)
for the front fan controller i didnt want mine to light up like a christmass tree , wifeys is a bit bright in my opinion.
so i hit em with the same candy blue overcoat to both tone them down and blend them in a bit.
i think they will look good when installed.
got all those fitted and snapped the front panel on.
tricky bit here was i now had to affix my front dvd drive bay covers so they sat flush with the front panel.i needed to find a spacer to make this achievable.
did some lookin around and found something just the right size for what i needed..
swiped a few pens from wifeys desk (shhhhh)
dissassembled and trimmed down they will work fine as spacers
temporarily affixed then with some superglue.
once in place i ran a bead of epoxy along the top and bottom of them to make sure they were permanent.
once those were set i started mounting the lighting
i used one ccfl on the front edge to light up the flames
but i needed something a bit more to set off both the front turbine intake and the top skull vent cover.
i found a set of these on the net..round ccfl fan grills.
they only had em in 80mm so i will make due as usual.
i started by disassembling them so i had the bits i needed.
luckily they seemed to be just a press fit and came apart easy.
pulled the light rings out.
using the 2 larger ones for this mod and saving the 2 smaller ones for my next project.
positioned the first ring on the backside of the front turbine fan and epoxied it in place.
the top fan since it was in upside down position cause it is exhaust i had no framework to affix the lighting to.hmmmm
cut a piece of mesh down to bridge the mounting holes in the underside of the fan and then epoxied the light to the mesh.
did what i needed and things worked out well
wifey picked me up a few skull keychains from the bay that she was hoping i could use in the build.. me never wanting to dissapoint the wifey just had to find something to do with em =o)
heres the top 4 that will protect my ex fan grill
that left me with 2 more
one for the front turbine intake
and one for inside the case just as an accent piece.
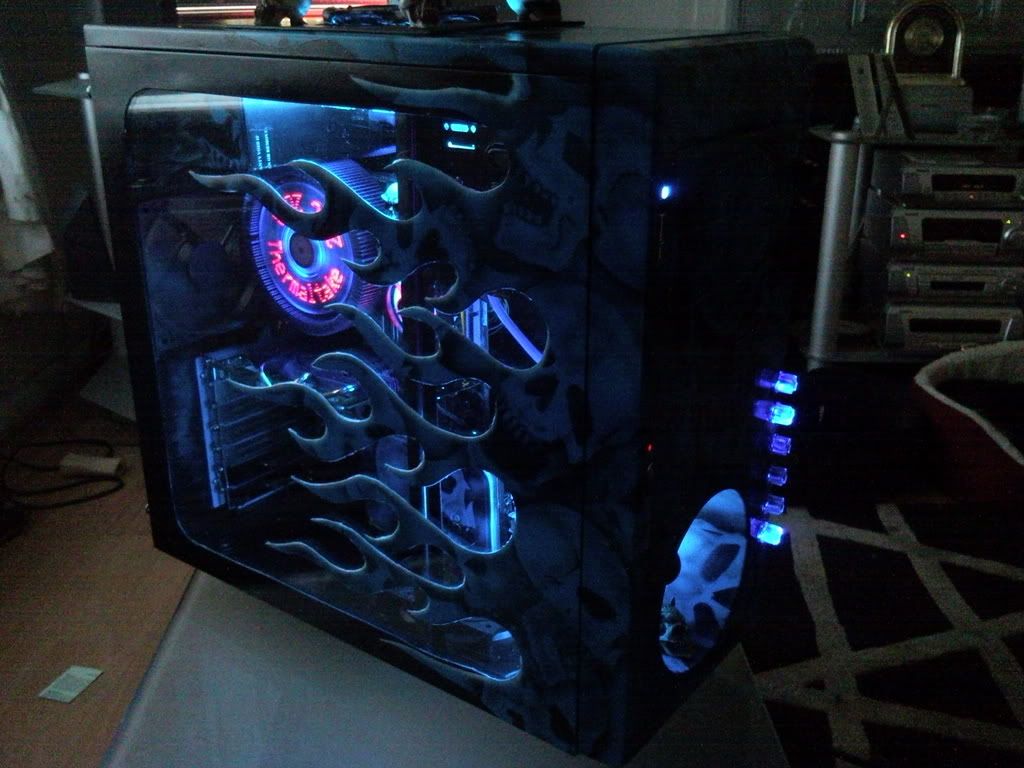
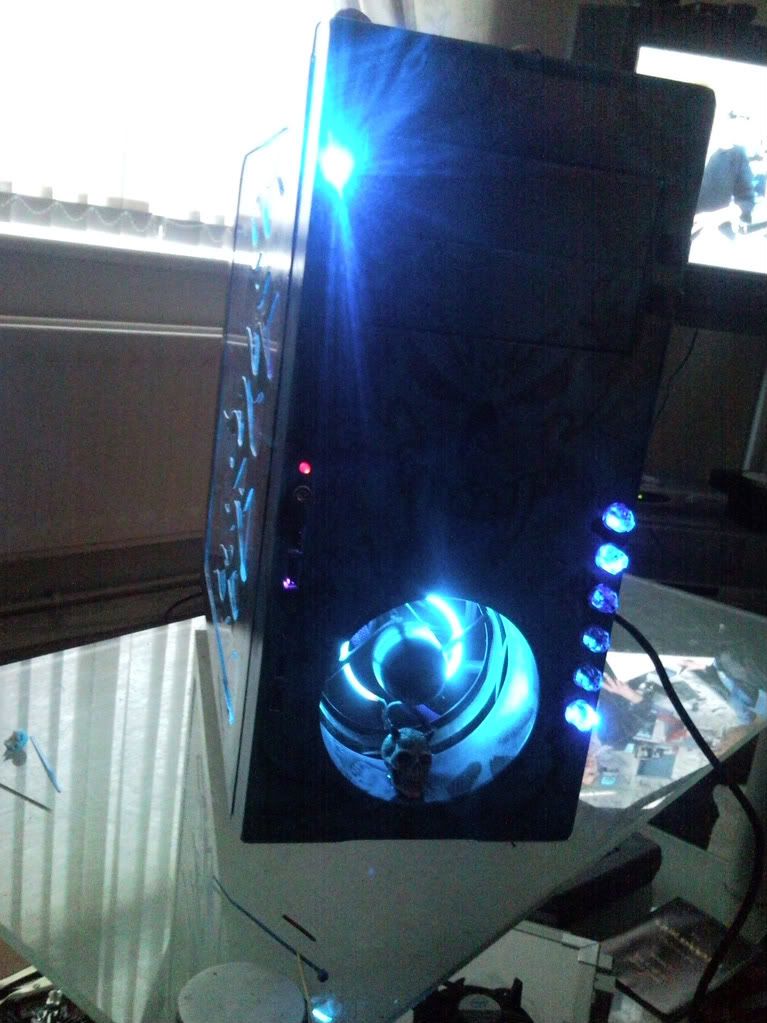
with all lighting in place it was time for testing them out
what would a day be without a bit of drama.
get em all wired to my switch and turn them on ...hmmm only the front ccfl tube is working, nothing from my 2 light rings...grrrrr
a bit of this and a bit of that later and come to find out the lil effin resistor box for the round ones was bad.. glad i ordered 2 of them when i got em.
swapped out the converter and now they are all purty.
heh i like it =o)
now it is time for final assembly ( yes i actually said final assembly)
all hdwe went in without much drama
yep winner!!
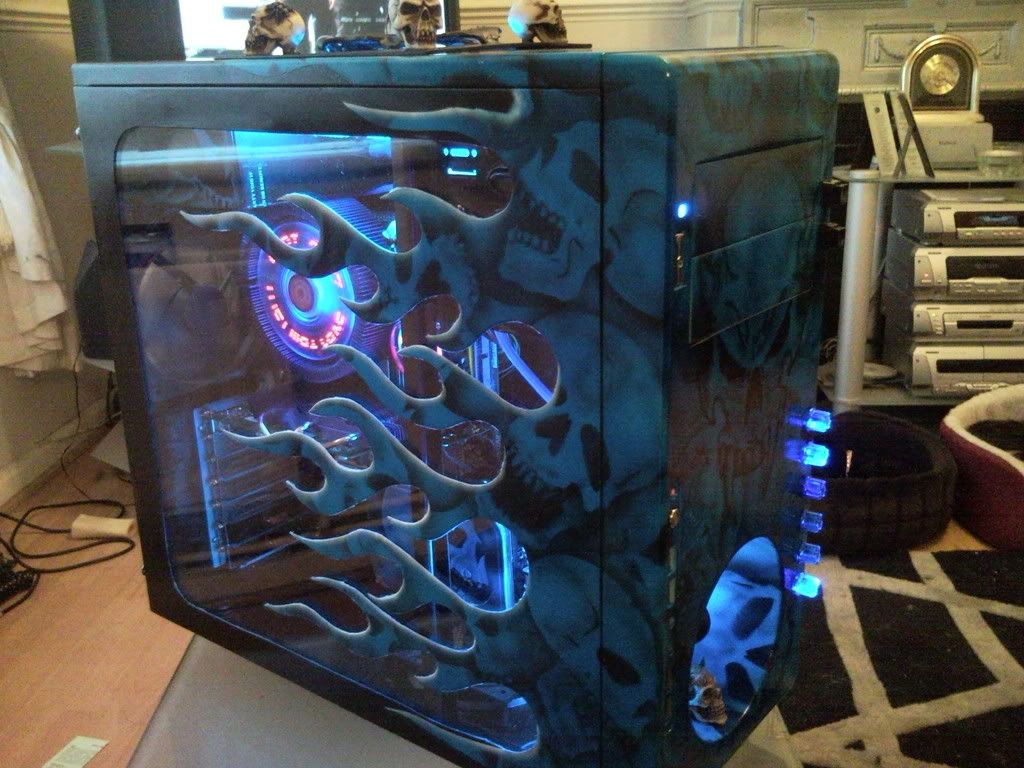
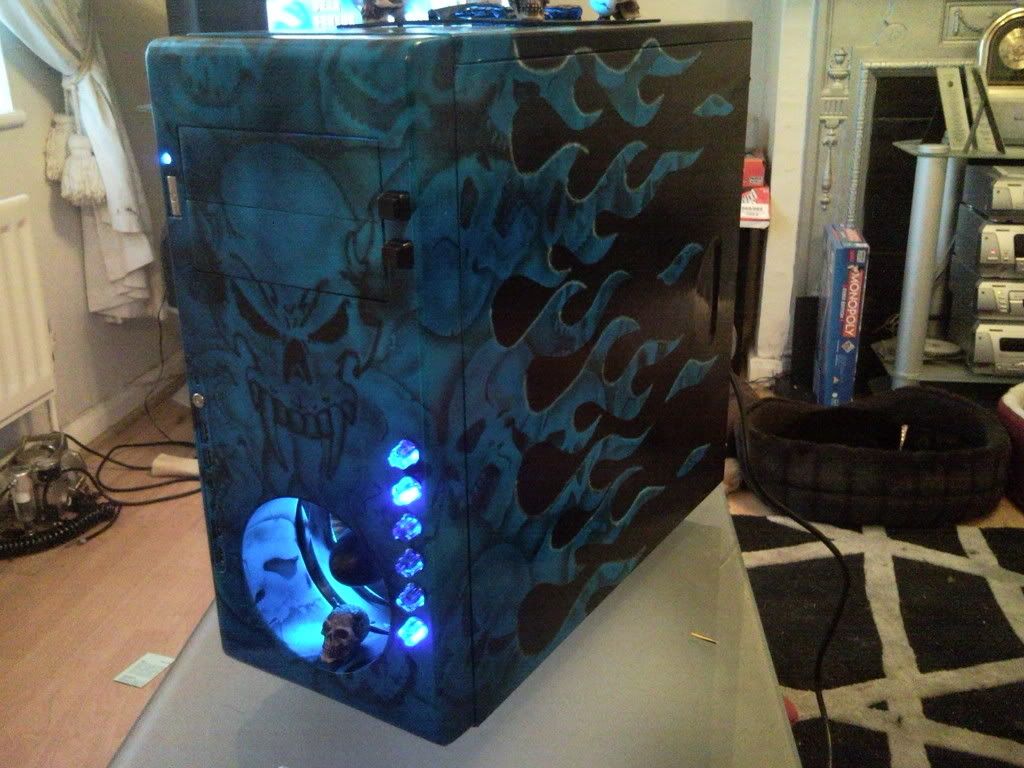
got everything all installed and back together.
here is the finished product..
stick a fork in it. i am callin this one done.
overall i did what i wanted to do. i have a decent case and a rig that can play any of the games i want it to with little or no fuss.
i am doing some benchmarking tonight to see where it sits and i will post screenies of that.
i already have another project on the horizon but i plan to take about a month before i really start on it so i have time to play with my newly finished toy.
thank you to all who have been following the worklog, i hope i havent dissapointed too many of you in the build but at the end of the day i am happy with the results and i have learned alot from everyone on these forums during the whole build process.
most off, thank you to Wifey!! for putting up with me while i left pc bits all over the house hehe.
heres a bit of a spoiler for ya
early plans are shuttle,home server with about 6 hd's improved cooling and lighting and double as a monitor stand on my desk, and of course some air brushing on that one as well.
wish me luck and see you all in a while with this new one =o)
very nice work, loving the accents and the use of skulls to complete the look!
only thing i would maybe try to change is the silver power button, could do with some candy blue on it imo :D
sweet tho :D (love that ram cooler :drool: )
Great work, looks really cool !
+rep mate, a very nice end result. You have some killer air brush skills, mind sharing some ;), you could write a tut.
i promise on the next build i will detail the airbrushing a bit better. this time through i felt myself a bit too rusty to go into detail .
next one i plan to have quite a bit more subtle detail throughout.
thank you for the kind comments throughout.
makes the whole build that much more enjoyable when others are interested in what you are doing.
cya soon
Can't wait for ya next build mate ;).
can your case have my children? its orgasmic man... i would give.. my left nut... hell toss in my right too for a case painted that nicely..
HEY HEY, no bonking my case , or should i say if anyone is it will be me lol.
the case has the effect i wanted. if i had to do it again there are a few things i would have done different but i will carry those ideas over to my next Mod and use em there.
cya in a bit
wow my god thats so awsome...
wow..... looks sweet paint job..
ty much
ok someone recommend me some good benchmarking software.
the only one i have is SiSoft Sandra and either i dont know how to use it properly cause all i get is a text output file with specs for my machine or i need a diff app to give me a graphical representation of the benchmarks.
help!! lol
For the CPU Hexus Pifast,wPrime, Cinebench R10 and Everest Ultimate are all very good. For the graphics side of things 3DMark06/Vantage are very good and I think Crysis has a tech demo that can be used to bench.
thanks for the list bud, i will go app hunting this evening and see which of those do what i need
No worries mate. There are plenty of apps around but I have found them useful.
I did forget to list 2 however. Fluid Mark and Lightsmark. Fluid Mark is basically an app to test out your PhysX calculations (gives you a score like 3DMark) and Lightsmark runs your PC through Global Illumination Renders (basically a 3DMark but calculating lighting and shadows).
Here are the links:
Fluid Mark:
http://www.ozone3d.net/benchmarks/ph...x.php#download
Lightsmark:
http://www.dee.cz/lightsmark/
eh i came up average across the boards with what i expected. nothing dramatic so i am not worried about screenshots for the min.now to use the new system for starting planning on the next mod.. see ya in a few weeks
Outstanding results, congrats! +rep :D
Can't wait to see what you bring to the table next time bud ;).
yeah hmm another dual case build or just for you?
thanks guys, i will try to keep detail level up to par on the next one.
wifeys is done so she does not need or want another playtoy, i am just basically building Dragon Rising to act as a NAS server to store the families collective tv/game/music/movie inventory so tis only gonna be the one piece build
cya when i do some sketchup work and thanks again
cool looking forward to it ... good luck and seeya soon