Nice Bod, the sketch looks great!

Printable View
Nice Bod, the sketch looks great!
looking lots better.. i like it ... its really sweet and it fits in nicely
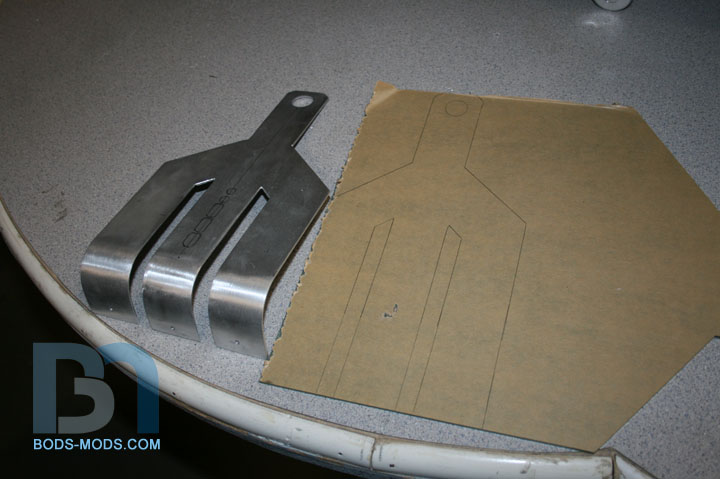
Got some actual work done on the front! :D Was so anxious to start working on it, I neglected to take
pics of the cutting. But that's just basic stuff anyways... measure, mark, measure, cut.
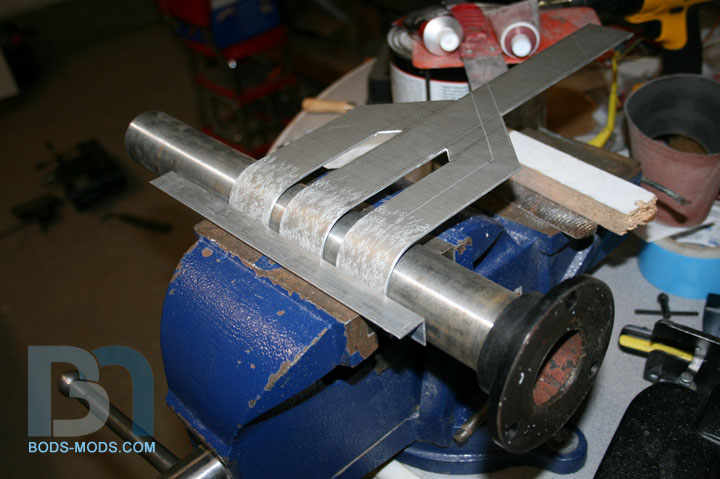
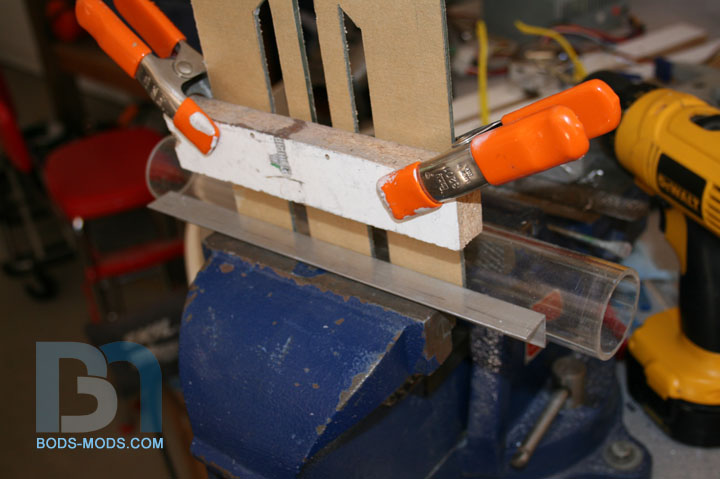
After cutting and filing the edges, I proceeded to bend the bottom tips of the trident. Looking around the garage
for a suitable object to bend around, I spotted the post of my drill press, and saw how easy it was to dismantle lol.
Moments later, I had it in the vise and beating the trident into submission.
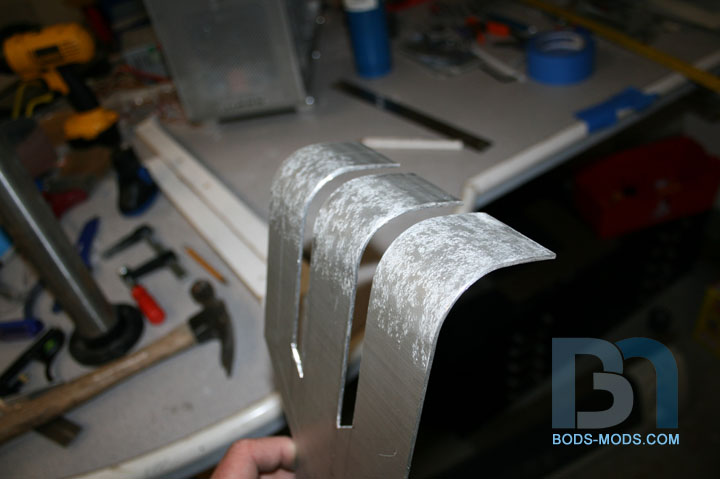
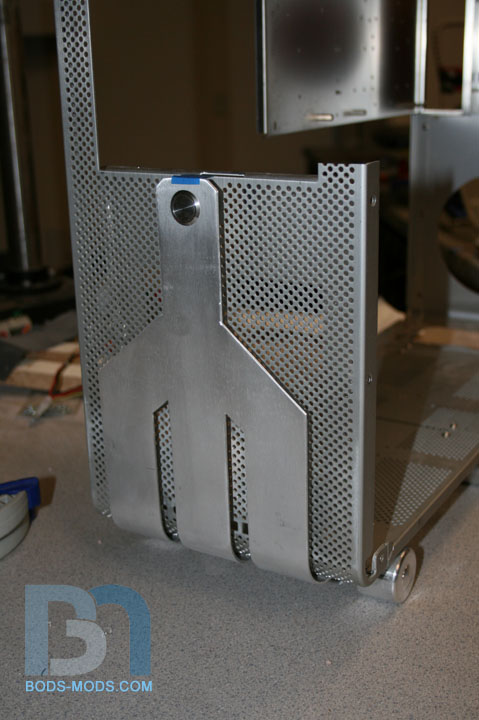
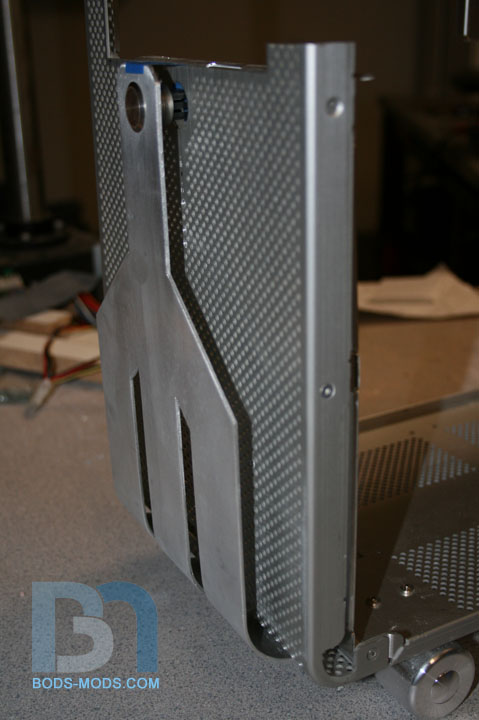
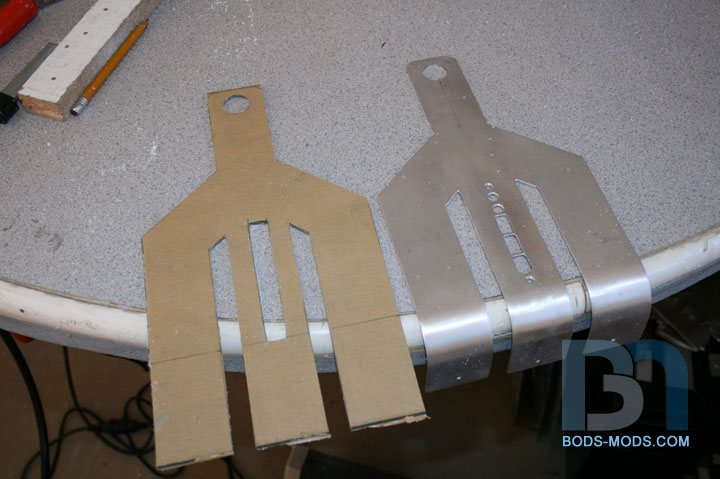
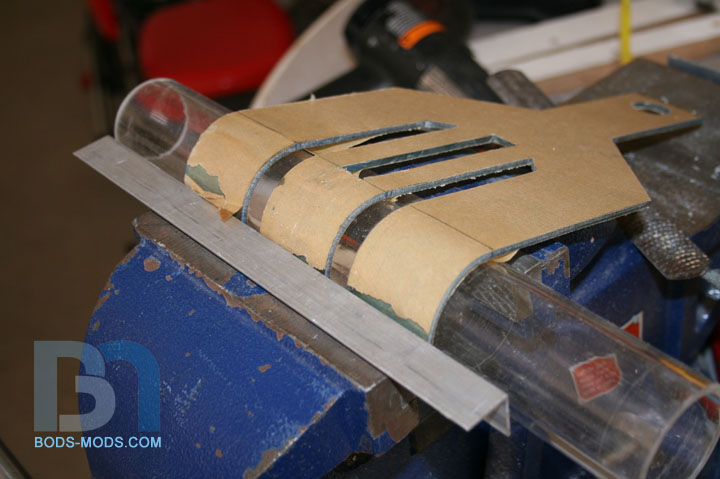
The result. The surface is a bit weathered, but it's nothing a good sanding won't cure. I'm just focusing on the
smooth curve for now.
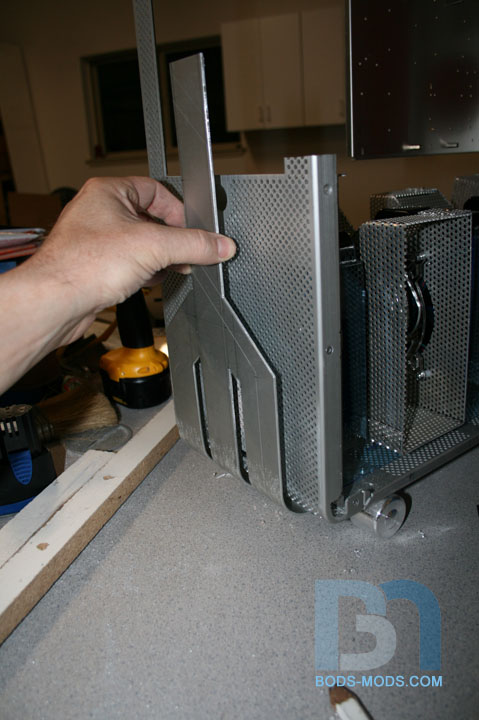
Positioning it onto the case it looks to be about right. This will give me about a 1/2" space between
the trident and the mesh.
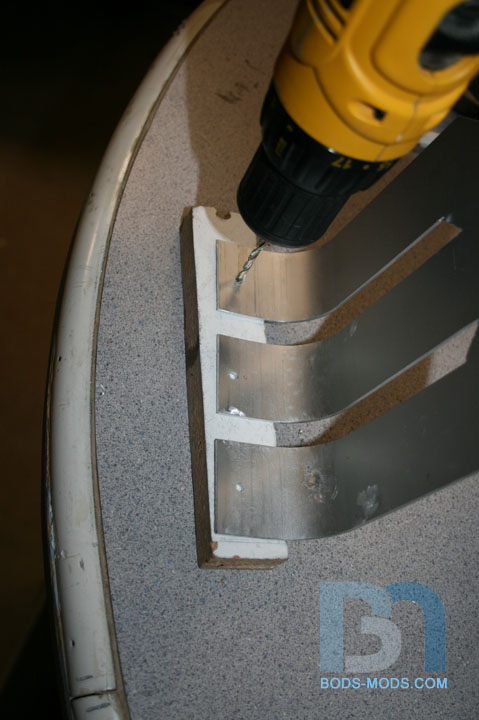
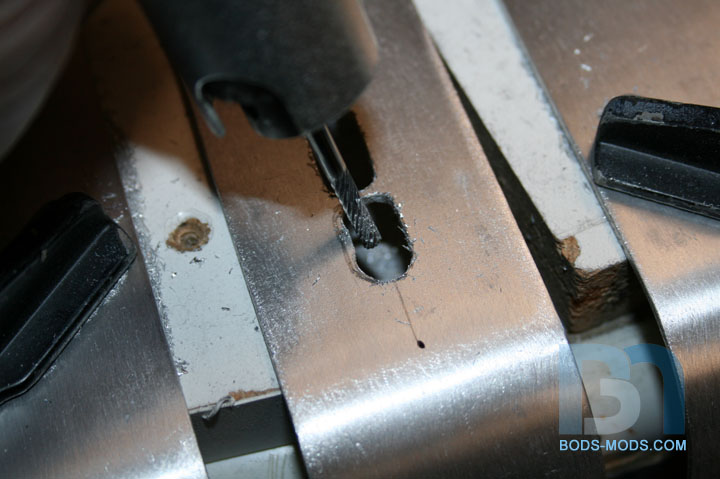
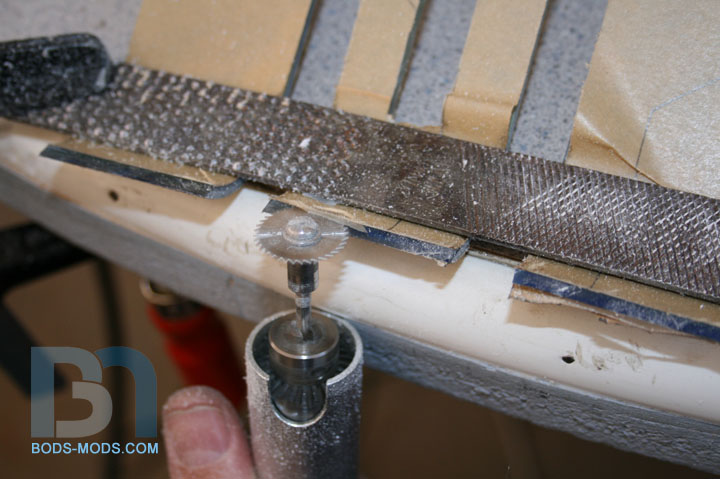
So I marked some holes and drilled them out.
Screwed it right into the mesh.
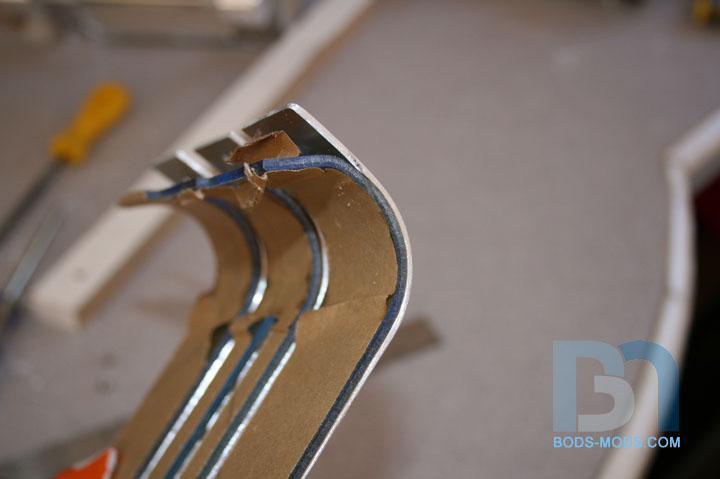
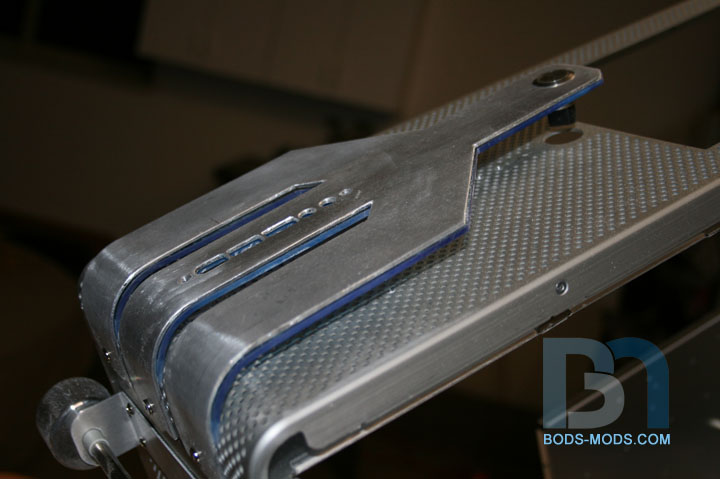
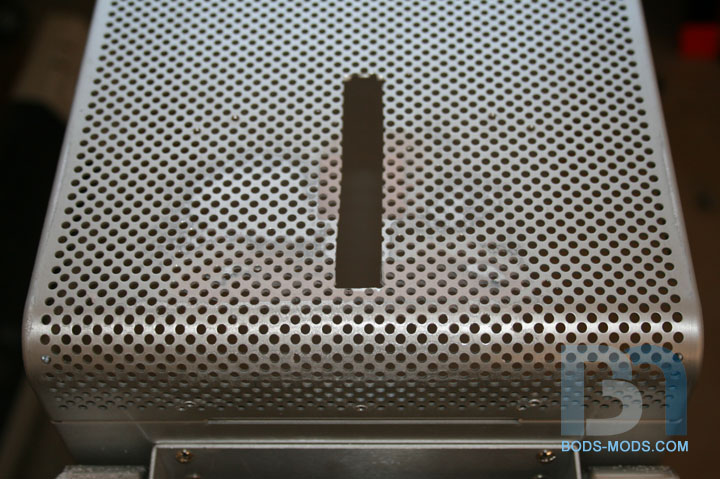
I removed it again and cut the top off level with the bottom of the drive bays, then drilled a 3/4" hole
for the power button. After a good sanding and clean-up, it looks like this:
I will be adding a piece of blue transparent acrylic behind the trident as well as a short tube to cover the
back side of the switch. Also have to drill some small holes to accommodate the pwr and hd leds.
More to come!
wow... looks sweet... you are a genius man... a modding god... not just cuz of this update but everything ive seen you do... reggage...
EDIT: wow... that sounds gay
Front trident really does look good. I was wondering how you measure out for those bends, I can't quite get my head around it lol (pardon the pun). I am thinking of making a rounded edged case for my next build and want to make it Silverstone style from a single piece of alu and want to get it right the first time.
Thanks Jeff... and that didn't sound gay, until you said it sounded gay lol!
For those bends, I didn't actually measure anything. I just started bending the ends around the pipe and kept checking its position on the front until I got the center of the trident about where I needed it, then went back and straightened the ends to give me a flat mounting surface. I figured I could just cut off any excess if I needed to, but it turned out to be about right. Then once that was done, I just lopped off the top to fit.Quote:
Originally Posted by The boy 4rm oz
For your case, just make sure you leave enough material on the ends so that after the bends you can just cut them down as needed. That way you dont have to compensate for the metal stretching from all the bending.
Thanks for the info, I never thought of bending it first and cutting off the excess later lol. 1 More question, how this was that alu you used, is it pretty strong? I was thinking of using 3-4mm for my case, you think that's strong enough?
3-4mm alumi... will be plenty strong enough... imho
Yeah but you can get soft and hard alu, thickness needed really depends how sturdy the alu is to start with. The alu base on LEXA is 3mm but with the hole I cut for the rad plus the pressure of the feet it bows inwards into the case slightly, a minor design falt on my part.
I'm re-using alu from the original windowed lian li side panel, and it's thickness is .08, which I believe equates to 1.5mm. It's plenty strong, so it must be a harder aluminum than what you used on Lexa.Quote:
Originally Posted by The boy 4rm oz
Yeah I used the stock alu from the case on LEXA, really light and cut like butter lol.
ah ok... i get the hard alumi :) its the only stuff i have avalible to me...
they use it to build trucks so its strong
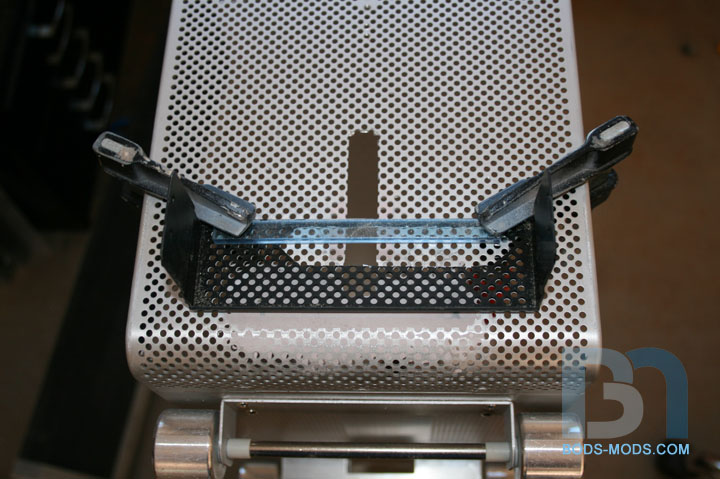
Work continues on the front piece...
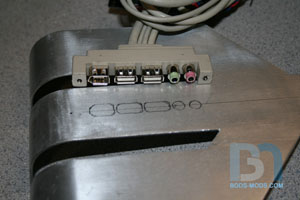
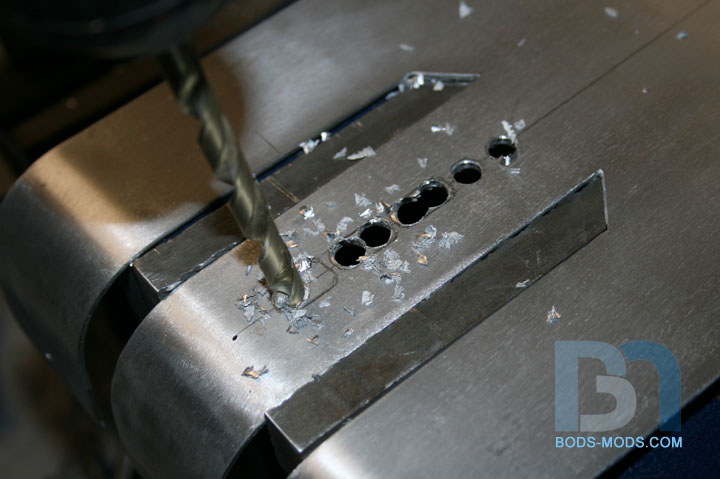
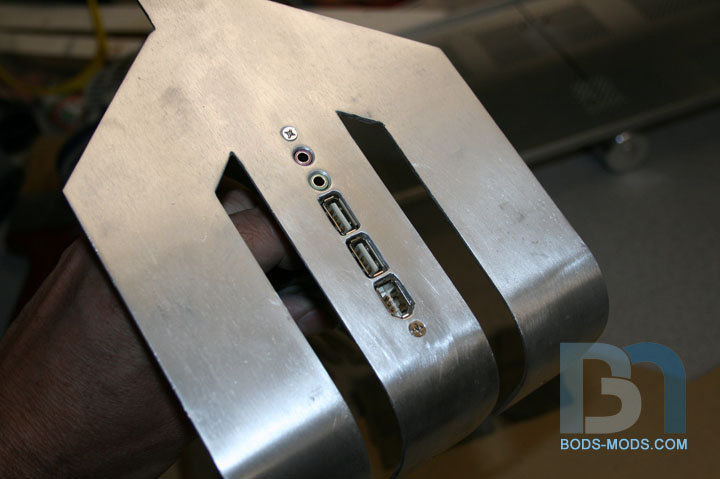
Marked out the location of the front IO ports.
I started by drilling out the center of the holes,
Then went in with the rotary tool to trim out towards the lines.
Finished up with a bit of filing and sanding. Once that was done, I made the mounting holes and screwed in
the port module for a test fit.
Next up is the acrylic counterpart. Stay tuned! :)
:O that's very nicely done... gw mate
Nice work, the front trident looks sweet!
Almost as if it was stock ;), good work Bod.
Thanks guys. Now I just have to figure out how to hide the stock holes lol.
This build keeps getting better, great work. Front panel with IO ports looks really good.
Hey Bod, That front panel looks really good. Looks like you are using the same front panel port I used on my case. Keep up the good work!
Thanks YeeHa!Quote:
Originally Posted by YeeHa
Thanks Dan, I hope the cables will be long enough to reach all the way up to the top of the motherboard lol. :think:Quote:
Originally Posted by rendermandan
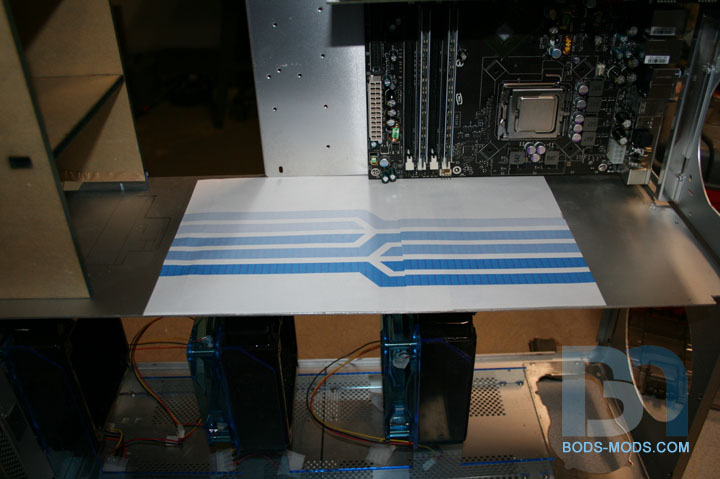
And now, the acrylic portion of the front trident:
I traced the shape onto a piece of blue transparent acrylic.
Used my scroll saw to cut it out. As you can see, I cut a rectangular hole for the IO module to fit through.
No need to cut individual holes. :)
Then it was time to do the bends. I found this piece of acrylic tube to be the right diameter. Had to be careful
though not to melt it while heating up the trident piece lol!
Bent. I did distort the tube a bit, but it wasn't enough to worry about.
I bent a little bit more than I needed to, just to make sure I had a nice curve. I marked the aluminum
trident where it meets the case.
Then transferred that mark to the acrylic and cut off the excess.
I sanded it down to a nice sharp edge...
...so it will fit snugly in between the case and the outer piece.
It still needs a bit of cleanup and polish around the outside, but it's pretty much there.
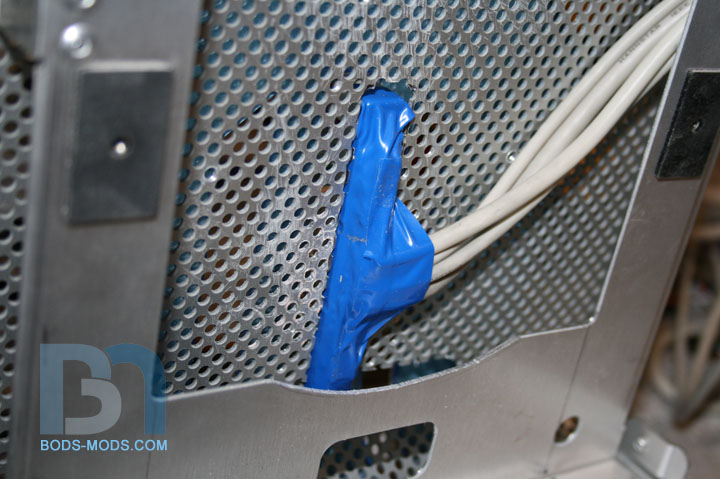
Next up: running the IO cabling through the mesh, and covering the backside of the power button. :)
cooleo..
looking good as always bod..
lookin nice :up:
Nice plexi work Bod. I am thinking you should keep the case silver lol, looks awesome with the blue accents.
P.S - Hey Bod, I found some RAM for this Rig. G.Skill Trident:
http://www.techpowerup.com/90470/G.S...mory_Kits.html
Hehe The one thing on this mod that doesn't follow the "3" them is the dual channel memory lol. Rather than going out and buying a new motherboard and an i7 cpu, I opted to stick with my trusty eVGA 790i board. The Crucial Ballistix I have is DDR3, so that still qualifies! That G-Skill memory looks pretty cool tho. :)Quote:
Originally Posted by The boy 4rm oz
im not gunna see this for 2 weekss :(
hope you will have some surprises for me when i come back
Hey everyone, hope you all had a great Easter weekend. Mine was excellent, the kids had a blast searching for eggs in the yard. :)
But because of that, I don't have too much to show, progress-wise, but it's progress none-the-less! :D
So we left off last time fitting the acrylic piece behind the aluminum Trident up front. Well I got the IO
port module to fit, but had to make some "adjustments" to it first lol.
I marked the area to be removed. Too bad it goes right through where I de-badgified the case lol.
Oh well, it was going to be covered up by the front Trident anyways.
And cut.
I also removed the old IO port openings. This will get addressed a bit later.
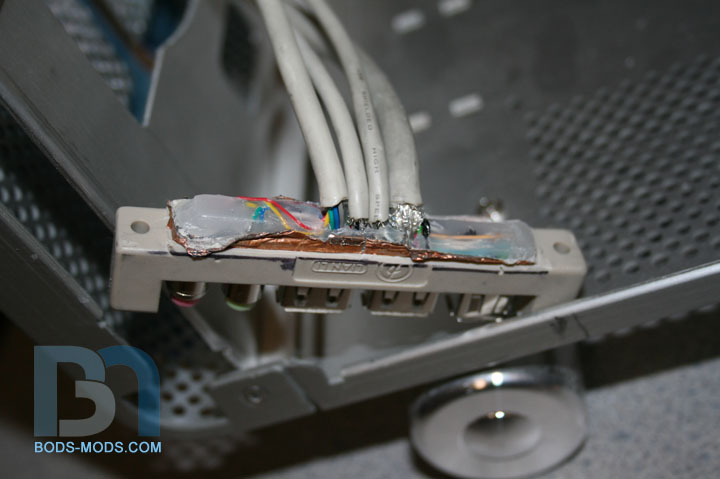
Here's what I had to do to the module. There was a clearance issue with it and the front radiator fan, so I had to
get the cables to lay over to one side. To do this I removed the exterior molding and some of the surrounding glue/wax stuff.
Here's what it looks like from the bask side. The cables will be sleeved and organized better for final assembly.
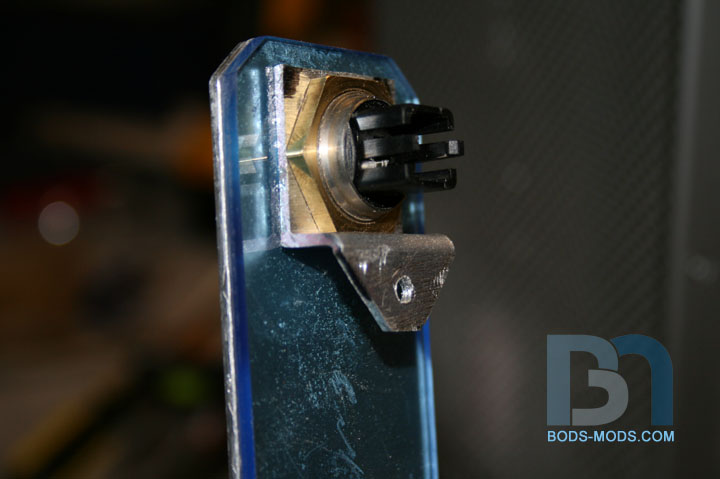
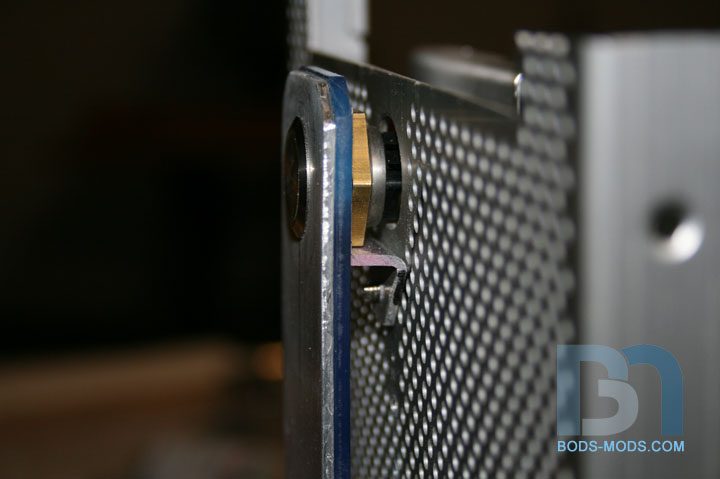
In order to secure the top of the Trident to the case, I fabbed up a small mounting bracket that takes
advantage of how the power button is secured. This way I avoid having any unsightly fasteners on the front face.
The bracket is attached to the case with one screw from behind.
Here's a side view..
Done, with the exception of one thing... lighting! That will be next on the list.
lookin good :up:
Looks nice!
wow nice update mate... been away for 2 weeks... wondering how this was going
Hey man, hope you had a nice vacation. I haven't gotten much done on this for the past few weeks,Quote:
Originally Posted by DonT-FeaR
so you didnt miss much! Other pressing matters been taking up my time. But I did manage to get in the
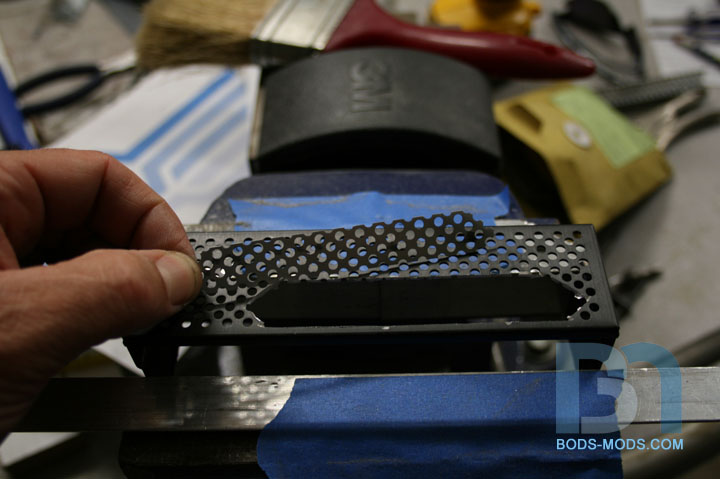
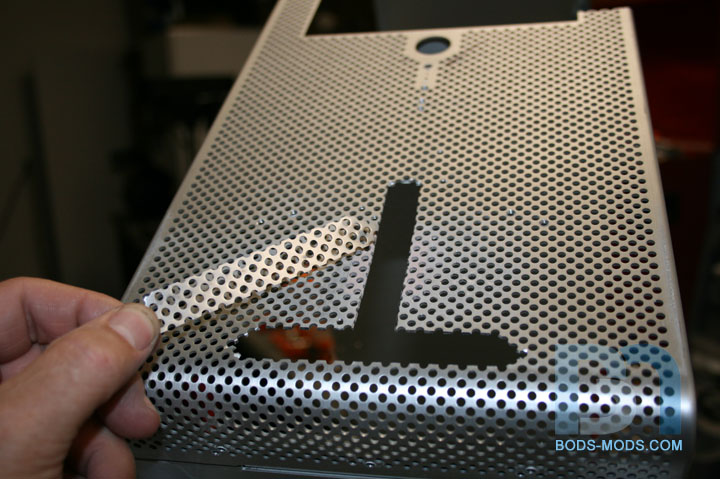
garage and finish up the IO hole...
I got an extra front bay cover so I could use it as a patch. So I placed it behind the hole
and traced out the area to be cut, and cut it out.
Sanded off the anodizing and filed the edges til I had a nice snug fit.
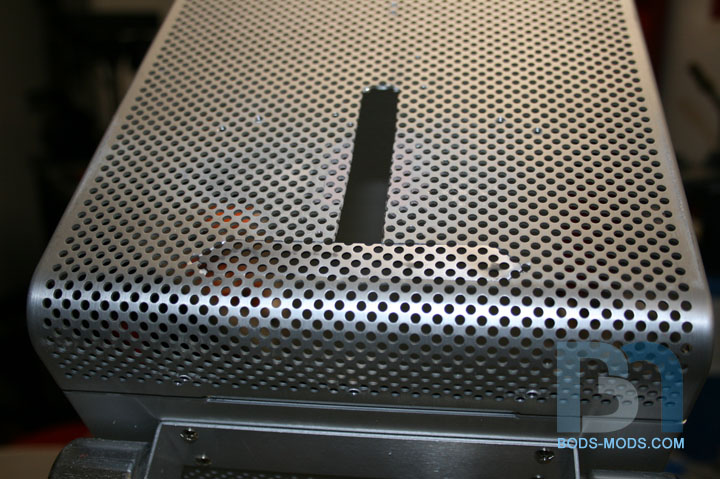
A shot of the "nice snug fit"
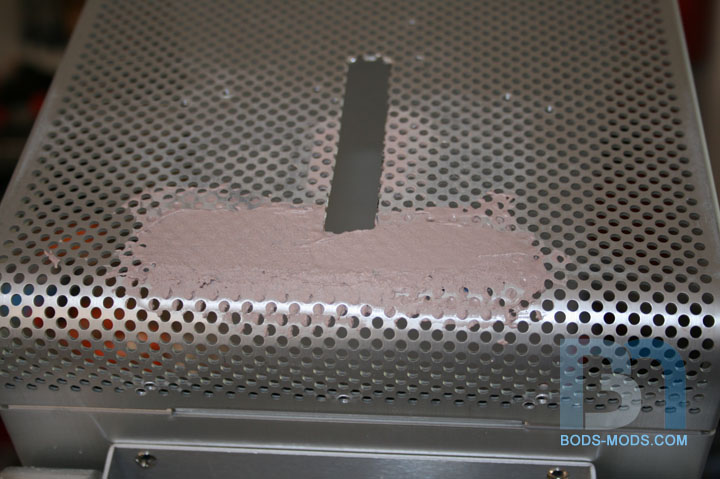
I taped it from behind and slapped some bondo on it.
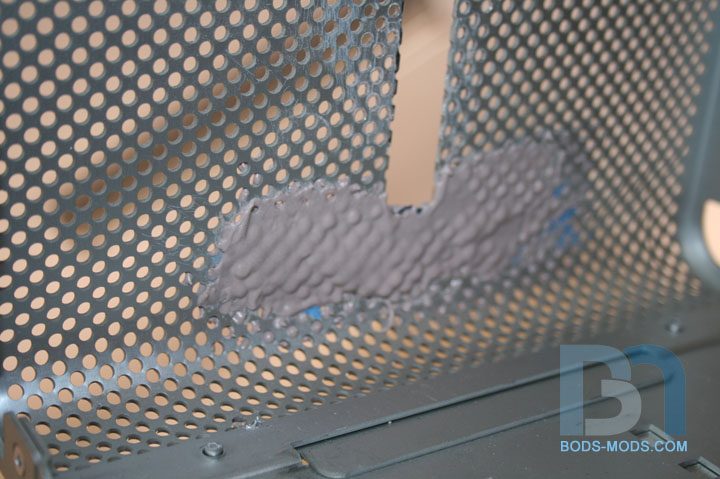
Since the patch was a bit thinner material than the case was, I decided to bondo the back side as well.
After it set up, I sanded it down, first using a cheese grater file, then a orbital sander.
Then I used the bay cover as my drill guide, and drilled out the holes.
Done! Can barely tell it was even there. Once the primer is on, it will disappear completely. :D
:dead: genious... im loveing this mod so far! REPPAGE
Awesome outcome there mate, I can't even tell there was a hole there previously lol.
thats amazing:D looks like something you could just as easily do in photoshop! great work
Ok, I got some stuff to show you. :D
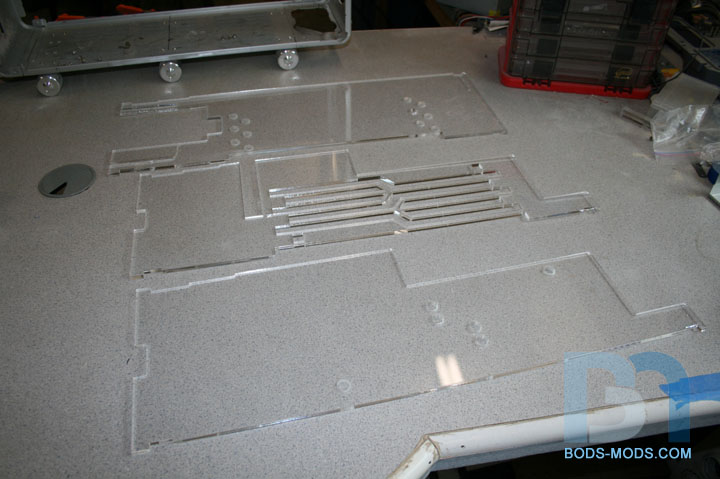
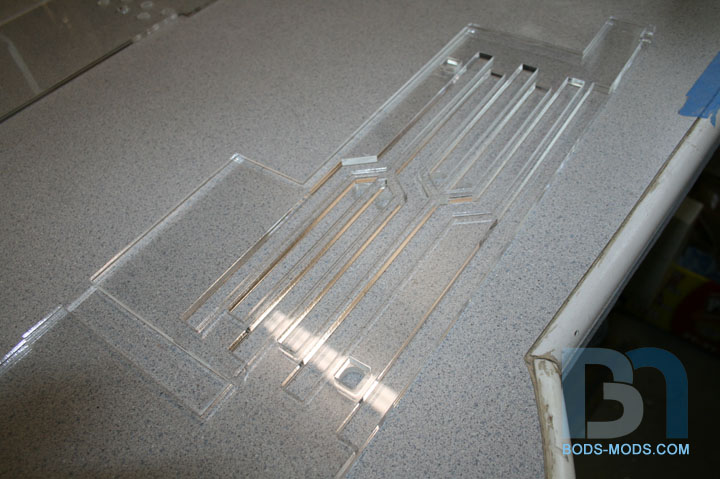
I have been working on a new floor design with Geno from Boxgods, in an attempt to alleviate some of the mess
of tubing down by the radiators. The floor is made up of three sheets of 1/4" clear acrylic and there
will be six channels through the middle, each 1/2" wide, with compression fittings on each end.
Of course the design had to be trident-approved. ;-)
As you can see, I color-coded the channels so you can tell the three loops apart.
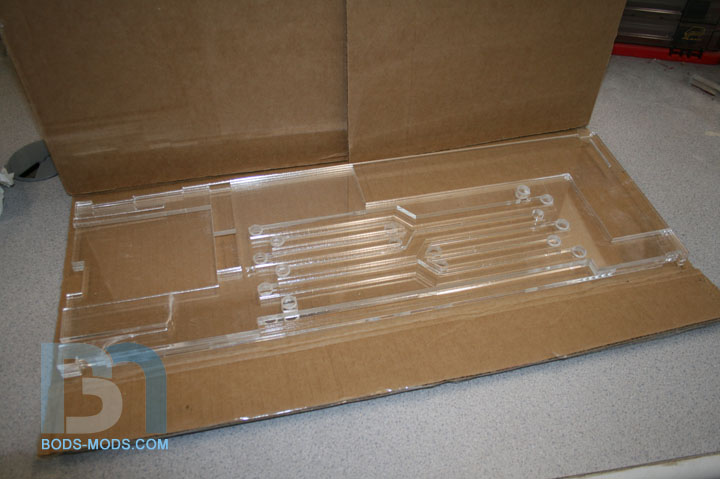
Here are the three floor layers, the top being the farthest away. I also incorporated cut-aways
for the optical drive, power cables, and lighting, as well as notches for case fitment and alignment.
This is not the final version, as there are some areas that need minor adjustments (which
weren't apparent until I did the mockup tests).
Here's a shot of the middle layer with the channels placed on top of the bottom layer.
And all three layers together. I set them on a piece of cardboard so they might be easier to see.
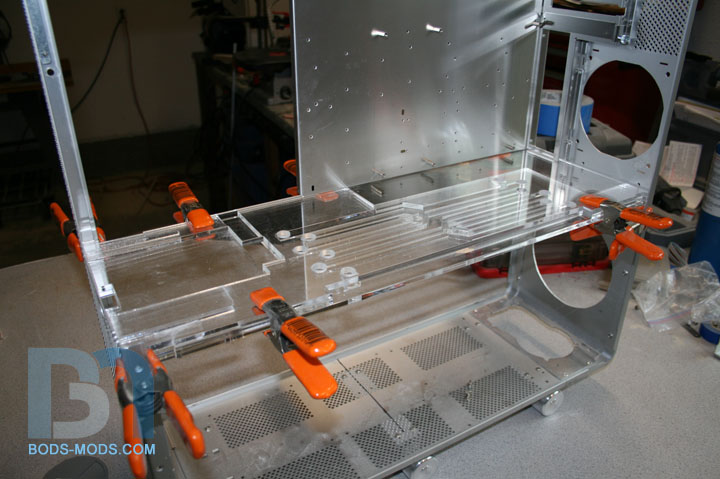
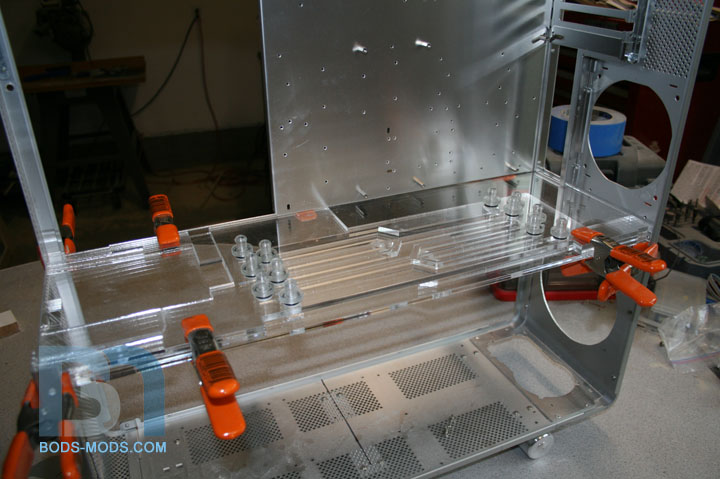
Here is the floor assembly clamped in place in the case.
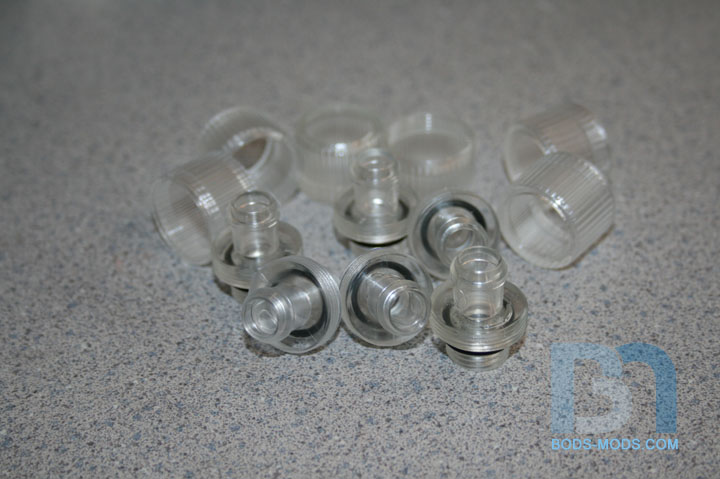
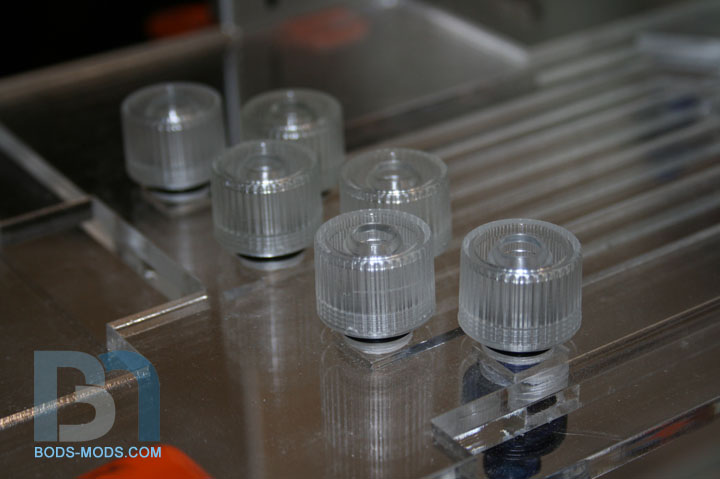
I will also be employing the new compression fittings from Primochill. :D
I screwed them into the floor to see how they fit. This is when I realized the bottom holes were too close
together. So that will be addressed in the final revision.
A closer up shot:
And with the compression rings on.
In addition to minimizing the amount of tubing, this new floor design will look pretty cool with the
coolant running through it. I plan to paint the underside of it so you won't be able to see through
to the radiator compartment.
Now the trick to pulling this off will lie within the gluing process. If I screw it up, I will have leaks and
cross-channel mixing of fluid (which will not be good since I will be using three different colors of coolant).
I've got some scrap pieces I can practice with, and I will make a jig so that the layers will be lined up
correctly. Should be interesting, so stay tuned! :D
neat idea! cant wait to see it!
Dude that is a sweet idea, and what a result you will get when it's done. The one thing I don't like are the compression fittings, I fear for their durability. The plastic looks like it may go brittle over time and you don't want any leaks, I would use chrome bitspower fittings personally.
Thanks, but after all is said and done, I will have 48 total fittings in this thing, 18 for the floor alone. And at $10 per fitting (yikes!) for Bitspower, well you can do the math... :-)Quote:
Originally Posted by The boy 4rm oz
And I'm told these fittings are poly carbonate, UV stabilized, and plenty strong, so will last quite a long time.
wow... gunna be great
i like the new addition :)
OMFG that's $480 for the fittings lol. Well as long as your sure those plastic fittings will be ok. If you don't mind me asking, how much do those plastic compression fittings cost? I have never seen them before.