Sounds good. Good luck. can't wait for the finished product.

Printable View
Sounds good. Good luck. can't wait for the finished product.
that layered shot of the EL wire blew my mind, nice job
great job on the EL wire, keep up the great work!
Thanks for your comments. I was able to borrow an air compressor and dual action air brush from a friend, Now I have to learn how to use it. :)
Verry stylish project! +rep
I like the idea and the design of the surface.
Also the idea with the glowire is great, but why do you change the design on the second layer? All other cutouts are very accurate and look symmetric but the second layer looks like you glued on the pieces left over from former work in a cluttered way... Or is it only for testing the glow effect?
LOL, No its not the left overs from the bottom section. Its meant look like that. Think of an futureistic jet engine with lots of layers, wires, parts etc. So it is meant to look "cluttered" and non-uniform. The bottom is different because its a completley different part of the turbine. It is meant to look like the fuel pod for the engine with the tubes comming up into the top back part to feed the jet. Get it?
Up date next after my pics upload...
ok, here we go...
I finished doing right side of the turbine tube:
Here is a close up:
Then I moved to the other side:
Here it is finished.
The glow wire on the window side will follow the shape of the window and be concealed by a trim ring. I still have to add a little detail to its surface and I can't install it untill I get it painted:
Speaking of paint. I started to mask off the 3 light bars on the tube. I had to cut a long strip of masking tape to a very thin piece, so I used my stripe cutter from my Airplane modeling days.
here is a piece of mask on the top section:
I finished the other 2 sections with mask and now its ready for paint.
My son's birthday is tomorrow so I probably won't get anything done untill after he goes to bed, So I may or may not have another update tomorrow night.
Later,
Okay, got it ;) Sorry it my post sounded a little harsh. With more layers and pieces the effect comes out better.
That stripe-cutting-machine is a nice tool, cant wait to see the turbine painted!
Happy birthday to your son.
This is by far one of the best worklogs I've seen on this site. I'm very anxious to see it finished. Great work, awesome idea. LOVE IT!!
+rep
NQ, thats ok, no offense taken. :)
Thanks for the reps and positive comments guys!
Here we go again,
Ask and you shall receive, you wanted to see it painted, here it is in black. BORING black base coat. I have a lot more air brushing to do, but for now I just applied the base coat.
While the body was drying I turned my attention to the supports for the resevoir inside. I cut and glued up some strips of plastic.
Then I used my dremel and a sanding drum to rough out the shape:
The shape is meant to look kind of like an airplane wing so air will flow smoothly around them.
I covered it in fine filler:
Then I used my straight edge sanding block to smooth it out:
here is the final piece:
I have to cut it into 6 sections to use around the resevoir. I also have to figure out how I'm going to attach them to the resevoir. so for now, thats it.
Cheers!
This is really cool! +rep!
Are you going to leave the paint as is or are you going to give it a little more contrast? It looks great as is, but I think it would look pretty cool to have a darker black or something to set off the detail pieces on the turbine. Give it more depth I guess its called? Just a thought. ^_^
Looking great! Can't wait to see more updates!
oh man that looks really sick +rep
are you going to cover or do anything with the tubing?
on a side note i fixed up the sketchup i made before.
ummm Not sure what you mean?Quote:
Originally Posted by Spawn-Inc
:eek: OMG there is no words to describe awesomest of this turbine,truely......I want that turbine right now:D :D
Man, this is so fricking cool! After seeing this, I definitely want to build my own res when I get my watercooling stuff. +rep for sure!
Hey, my led's showed up from LSDiodes.com -Only one small problem. I didn't get my free Sticker. Booohooo:( Oh well. looks like tonight I can start to make the led light bar for the underside. Yippie
i mean are you just going to leave the tubing clear or are you going to paint it or light it up?
well, my original intention was to leave it clear. I'm hopeing with all the led lighting I've got going on with the resevoir, and the "Fake fuel tank" that they will be lit with a soft blue glow. At least thats the idea.:rolleyes:
Once again, here is the nightly update:
Tonight I decided to turn my attention to building the LED light bar for the "Fuel Tank". Here are the Leds and Resistors I got from LSDiodes.com
I started by cutting 2 strips and drilling small holes in them equally spaced for the leds.
Then I added a thin plastic spacer to act as an insulator between the wires.
Here it is with the led's in place.
and here is the negative side wired together.
Here is the positive side soldered together with the resistors.
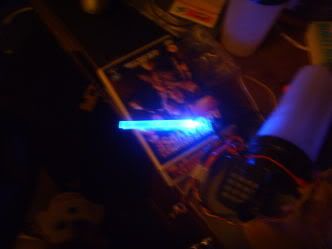
Here is a test. They all light up. Excellent the third one from the right on the bottom seems like its not as bright as the others. I might have to replace that one.
I put it under the tube and put the translucent cover in place.
OH NO! it looks like ****! The led's have too great of a spot light effect and leave very distinct bright spots. I hate it!
Looks like I may be going back to the cold catholdes, they were a little bright, but atleast it was uniform light.
What to do.....?
Frost/sand the tops of the LED's. It will diffuse the light, and will be more uniform.
::EDIT::
Great progress on this!
What about this??
I drew this idea in Illustrator CS2.
The idea is to have the outside plates catch the "spot light". The reflection should create a nice glow.
ya, thats what i would do/was going to suggest. looks great aside from that though. i like the way you wired them all up.Quote:
Originally Posted by SgtM
this is strickly advice, not complaining. if you don't like something about your other post, eg the picture not working there is a edit button on the bottem right side so you can just edit rather then posting so much.Quote:
Originally Posted by Remy
the link doesn't work or is taking for every to load. maybe try rehosting it?
Render,
Just found this in a TCBS worklog. The guy filed the ends flat on his LEDs, gave exactly the look I think you're going for.
http://www.thebestcasescenario.com/f...t=8838&page=10
i experimented with frosting a peice of clear acrylic then shining a led down it the effect was fantastic dont see why you couldnt use this here i think a worklog called ice by defyant was the first to use this effect, and more recently there was one over at Bit - tech that used frosted white acrylic although i forget the name now
any way i think that is exaclty what your after
This is very, very nice. I like those computer-related mods, which isn't just computers :) Keep it up.
Yeah, I'd say sanding the tips would be a good way to fix it. Otherwise, do what Remy said and put a piece of frosted plexi in front of them.
Wow, thanks for everyones input. I really didn't expect to get such a great responce. I'll deffinetly try sanding them down. and if that doesn't work, I can try and and an intermediate frosted plexi piece between the led's and the outside like Remy suggested. Thanks alot you guys!!!!
The plexi idea works great even with out direct contact with an LED. The closer the LED is the brighter the effect. The frosted plexi just defuses the glow. You could even mix two colours together like blue and red to get purple. I think Defyant did that in one of his mods. If your are looking for any tips or ideas for plexi check out any of Defyant's work. HP Res Mega being one of his more well known mods around here.
Great job so far man, its looking excellent. I love the idea of the turbine such a cool look imo. +rep for sure, cant wait to see the finished product.
well, +rep to Sgtm for the first to suggest sanding the tops of the led's, that worked great! Thank you.
I tried it on the left one first.
Before:
After: Very nice and diffused!
And here it is on the body: Much smoother glow, it still has a few "hot" spots but deffinetly not as bad. I can live with that.
I added a little detail and rivits to the window trim and tube: -I know it looks like alot, but after airbrushing, they will fade away an be hardly noticed.
I also painted the frame on the exhaust fan.
Then I cut the supports for the resevoir to 3 equal lengths to fit inside the tube:
here they are as a mock up holding the resevoir centered in a spare piece of the tube:
I have to notch the end of each one to fit around the chrome mounting ring.
One down, 5 more to go...
+rep right back at ya for such a cool mod. I can't take the credit for the LED thing though. Froop suggested it to me on my mod..
http://www.thebestcasescenario.com/f...t=5940&page=20
That looks incredible. Great work.
Wow, becomes cooler and cooler, even without any cooling liquid in it :glasses:
On the pic the white holes look like if they would glow on the black paint. I am curious on the finished paint job.
The diffuse light from the LEDs looks perfect now. I think it is even "more realistic" if you have some brighter spots in it than a complete uniform glow.
Noob question: What is that white stuff you use for modelling? Looks like plastic but you cut it with a knife, don't you?
Looks like plasticard to me. It's basically a sheet of plastic that is as thin as a piece of card board, plastic cardboard> plastic card> plasticard. It can be found at most art/craft store add mabye some supermarkets or hardware stores.
That would be styrene. Never used it, but I hear it's worth it's weight in gold.Quote:
Originally Posted by |NQ|Squelsh
LOL, I was wondering when someone would ask me about what material I'm using. Yes, some of it is plastic sheet of different thicknesses. however most of the detail work is made from Mat. Its the mat material that is used around paintings. I got a huge 30"x42" piece at a local craft shop in smooth white. It comes in every color imaginable and textured too. This was a much cheaper alternative to buying plastic sheet not to mention, it cuts easily with an exacto knife. So there you have it.
+rep for bringing this amazing mod [have 2 spread it around first]. words cant describe this mod. imagine if you transfer this genius onto a case :D [hyperventilating].....
Actually I do have plans to continue this design into a case. Basically everything will be hidden behind panels that light up and be motorized to expose the case and inside. It will be crazy! Not to mention how much work it will be getting all the motorization working.Quote:
Originally Posted by elbarto241
There are 4 seperate motorized items:
1. Doors that open to a blow hole in the front
2. A dvd burner that motorizes up from the top to expose the slot loading mechanism
3. Motorized flip over panel to acces the fan controller, memory card reader and light switches
4. Some type of covering over the side window to expose a side fan and inside of the case. (still working on the design for this)
But first things first. I have to finish the cooling system, then I can start on the case.
Sounds good. Hope it works out for you.
all of that sounds amazing, if it looks at least half as good as this turbine looks it would be amazing at least