Re: ASPHIAX - VENATOR Class Republic Star Destroyer
Requirements :
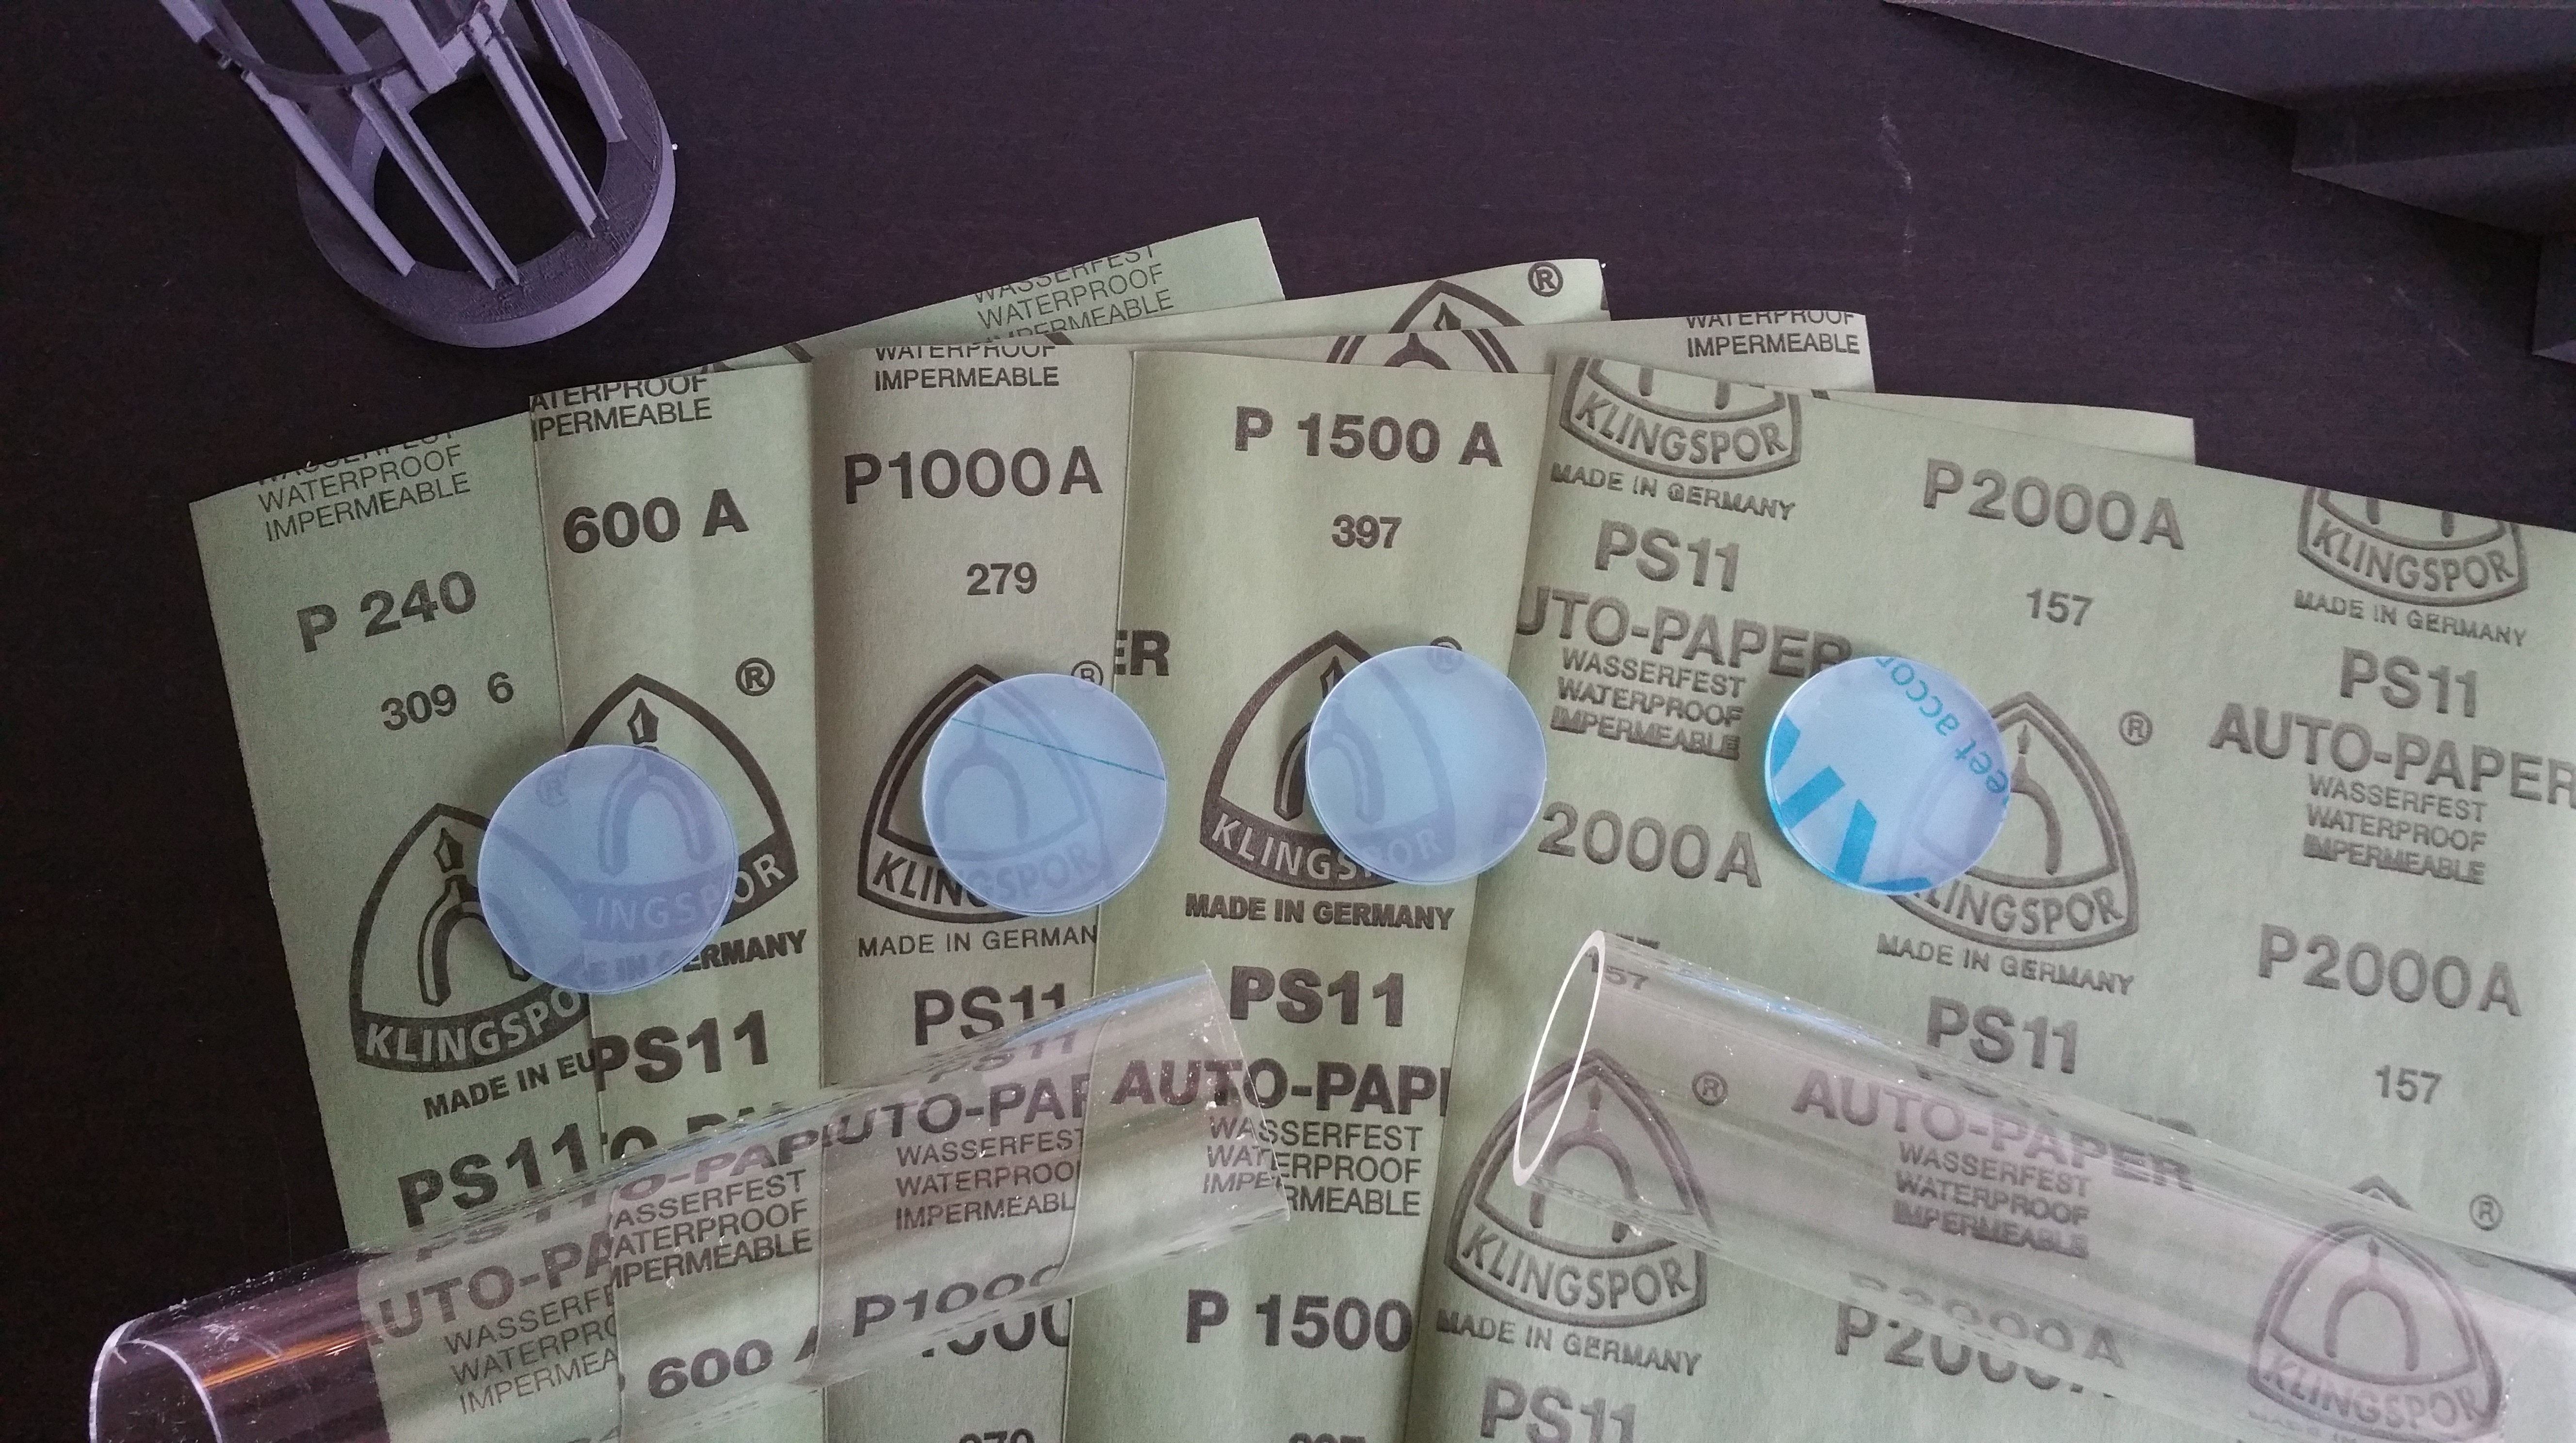
1 x 50mm acrylic tube
2 x 50mm acrylic disks
Sandpaper (wet/dry) ranging from 240 to 2000 in 5 steps
Cup of water
non abrasive cloth
silver polish
old molex cable
ACRYLIC glue that is water thin
Hypodermic needle
29/64 inch drill
Tap G1/4
Powered Drillmachine (or stationary drill)
Some old fittings and tube
Ok so instead of just showing I made my own reservoir, i want to show you how to make one yourself as it is pretty easy.
You just need to have the right tools and glue!
So I ordered 2 pieces of 50/3 mm tube and 4 pieces of 3mm acrylic cut into circles of 50 mm
Got some wet/dry sandpaper ranging from 240 to 2000 grit and start put your sandpaper on a completely flat surface
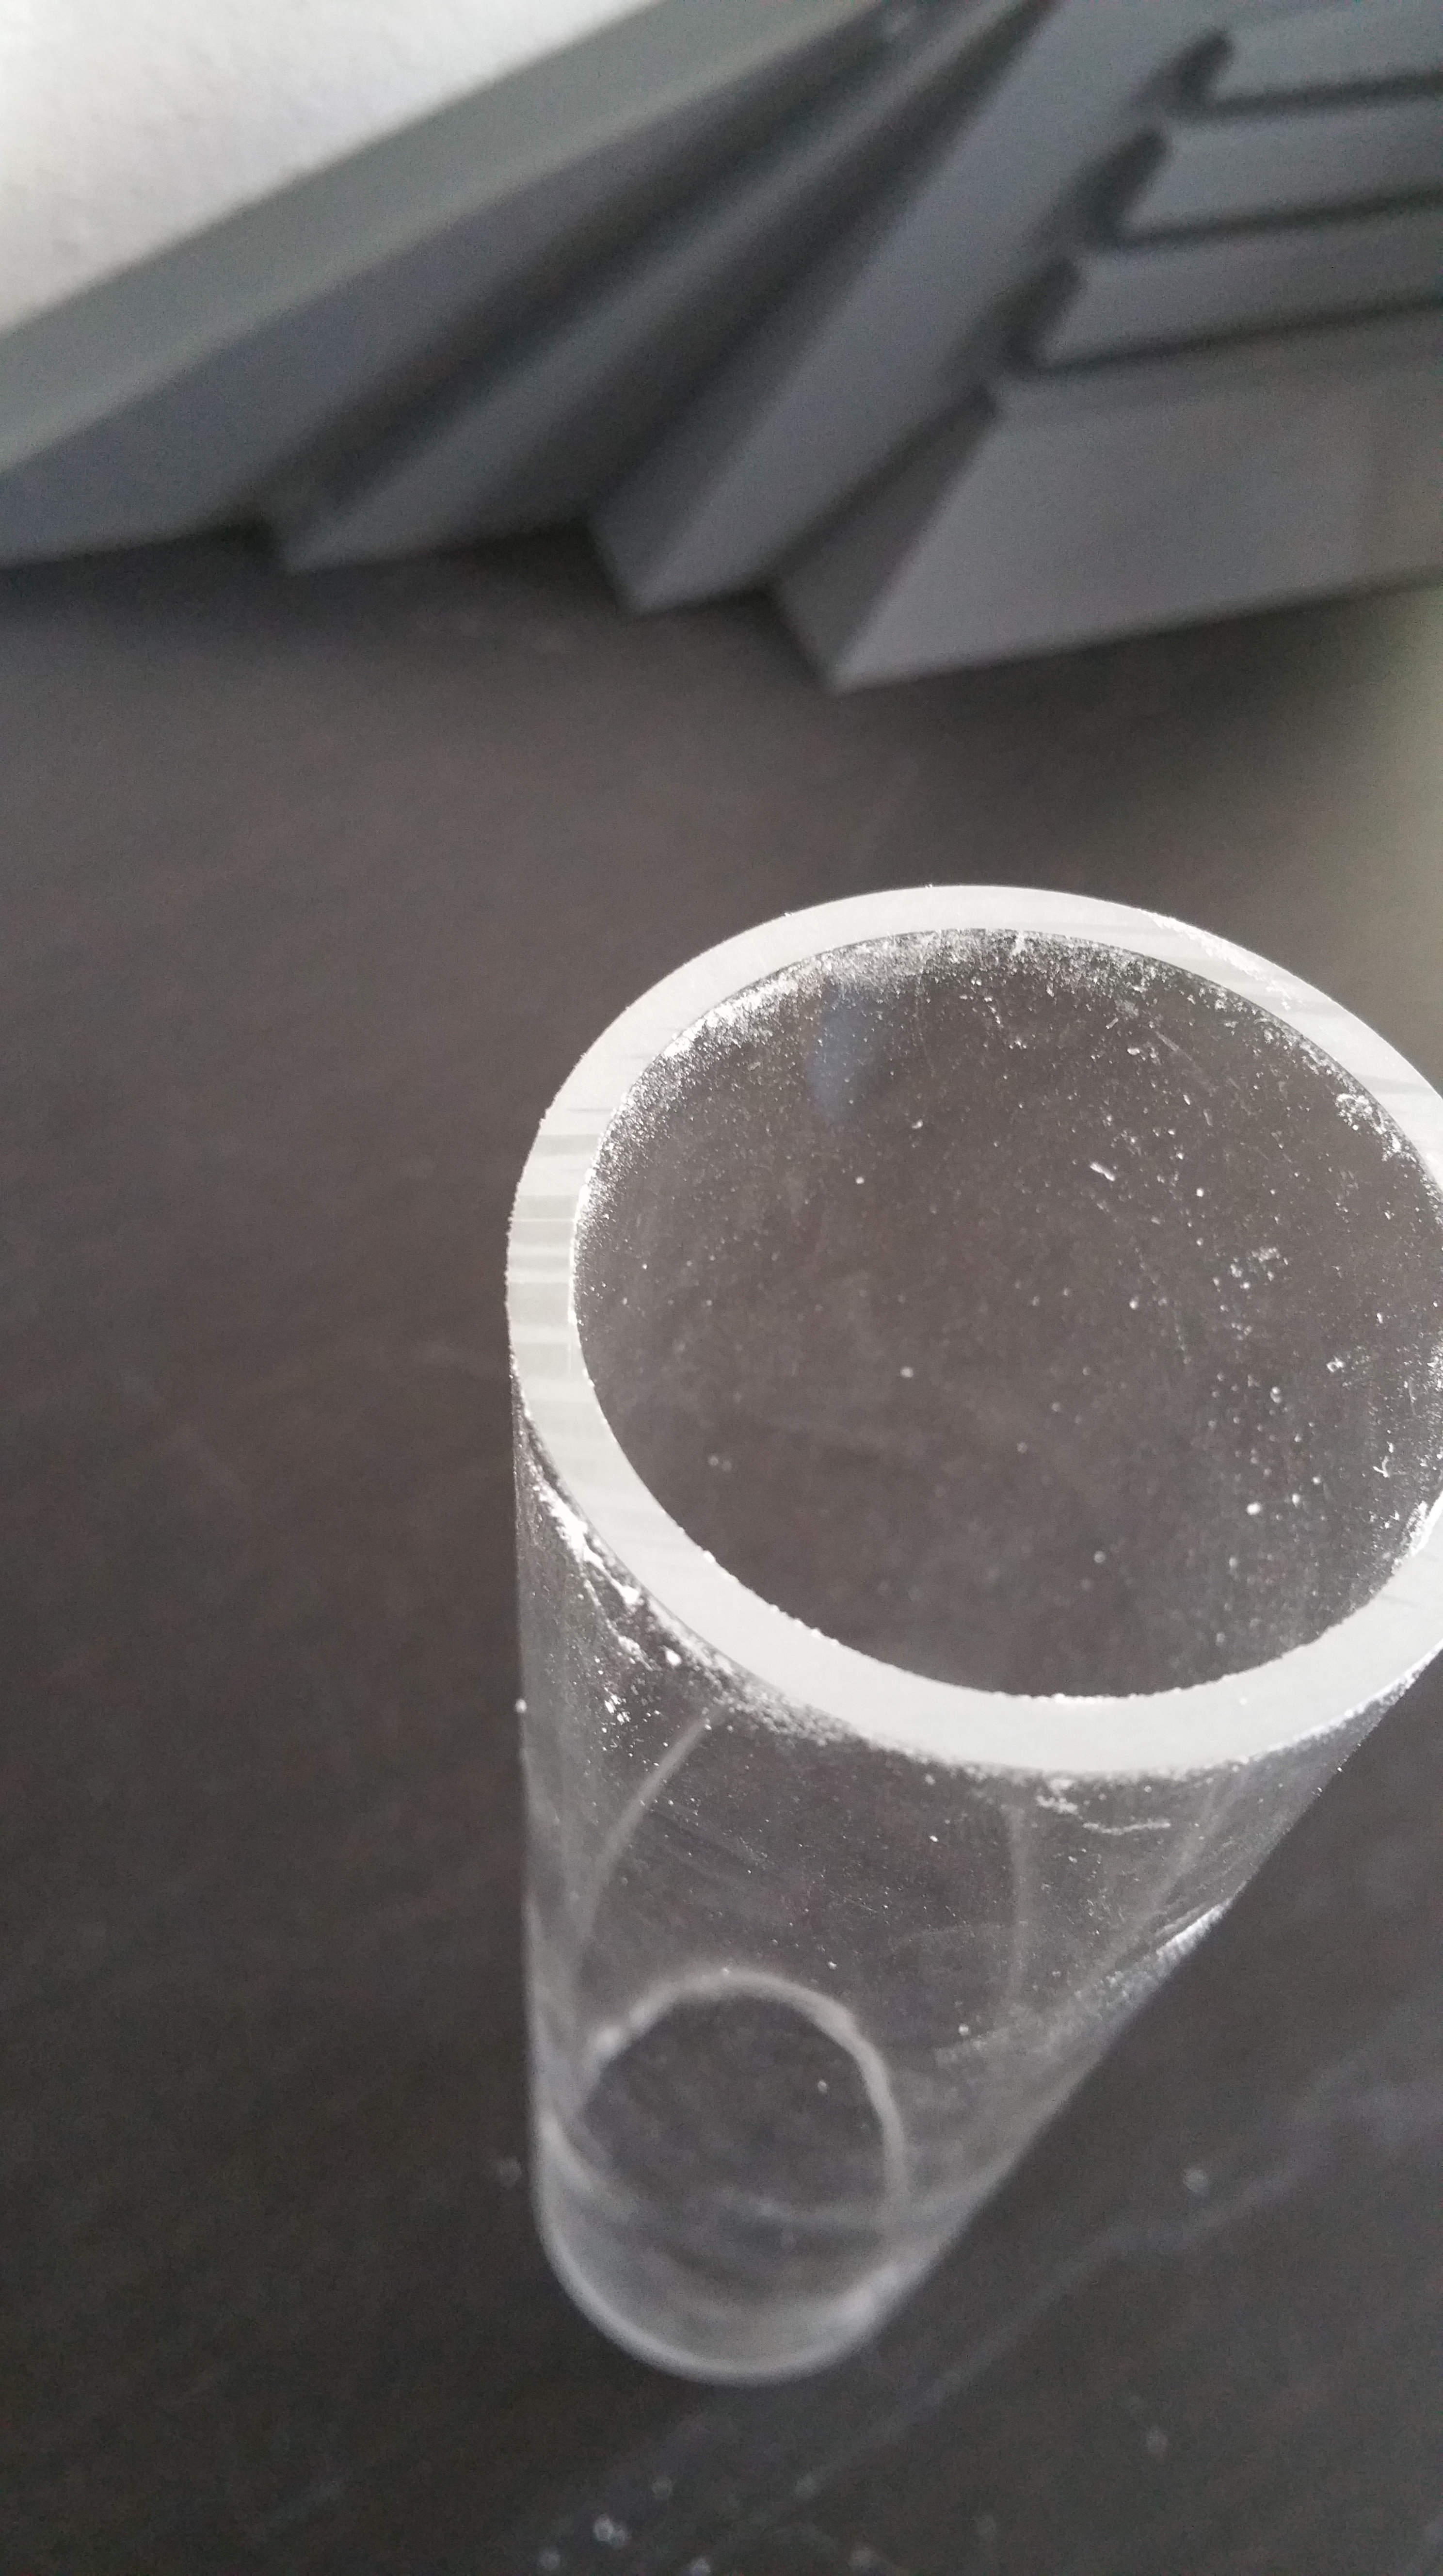
Above you can see how much you need to sand. The slightly coloured pieces are deeper and made by the sawteeth of the factory.
Just sand with the 240 grit until they have disappeared. Make sure you keep the tube completely level with the sandpaper and use a circular move.
No need to apply big pressure, if you notice that the tube is hopping over the sandpaper, use less force and smaller circles.
When you dont see anymore sawteeth marks, take the 600 grit and repeat the procedure ( i do at least 3 x 20 circles per side)
When thats done, time to break out the water. From 1000 I always use water, just works better
Stick the tube into the cup and pull the tube out leaving the drops on the tube and place it on the sandpaper.
That is enough water to sand it with.
After 20 circles, dip it again in the cup and repeat at least 3 x per side of the tube.
Continue with the 1500 and 2000 grit.
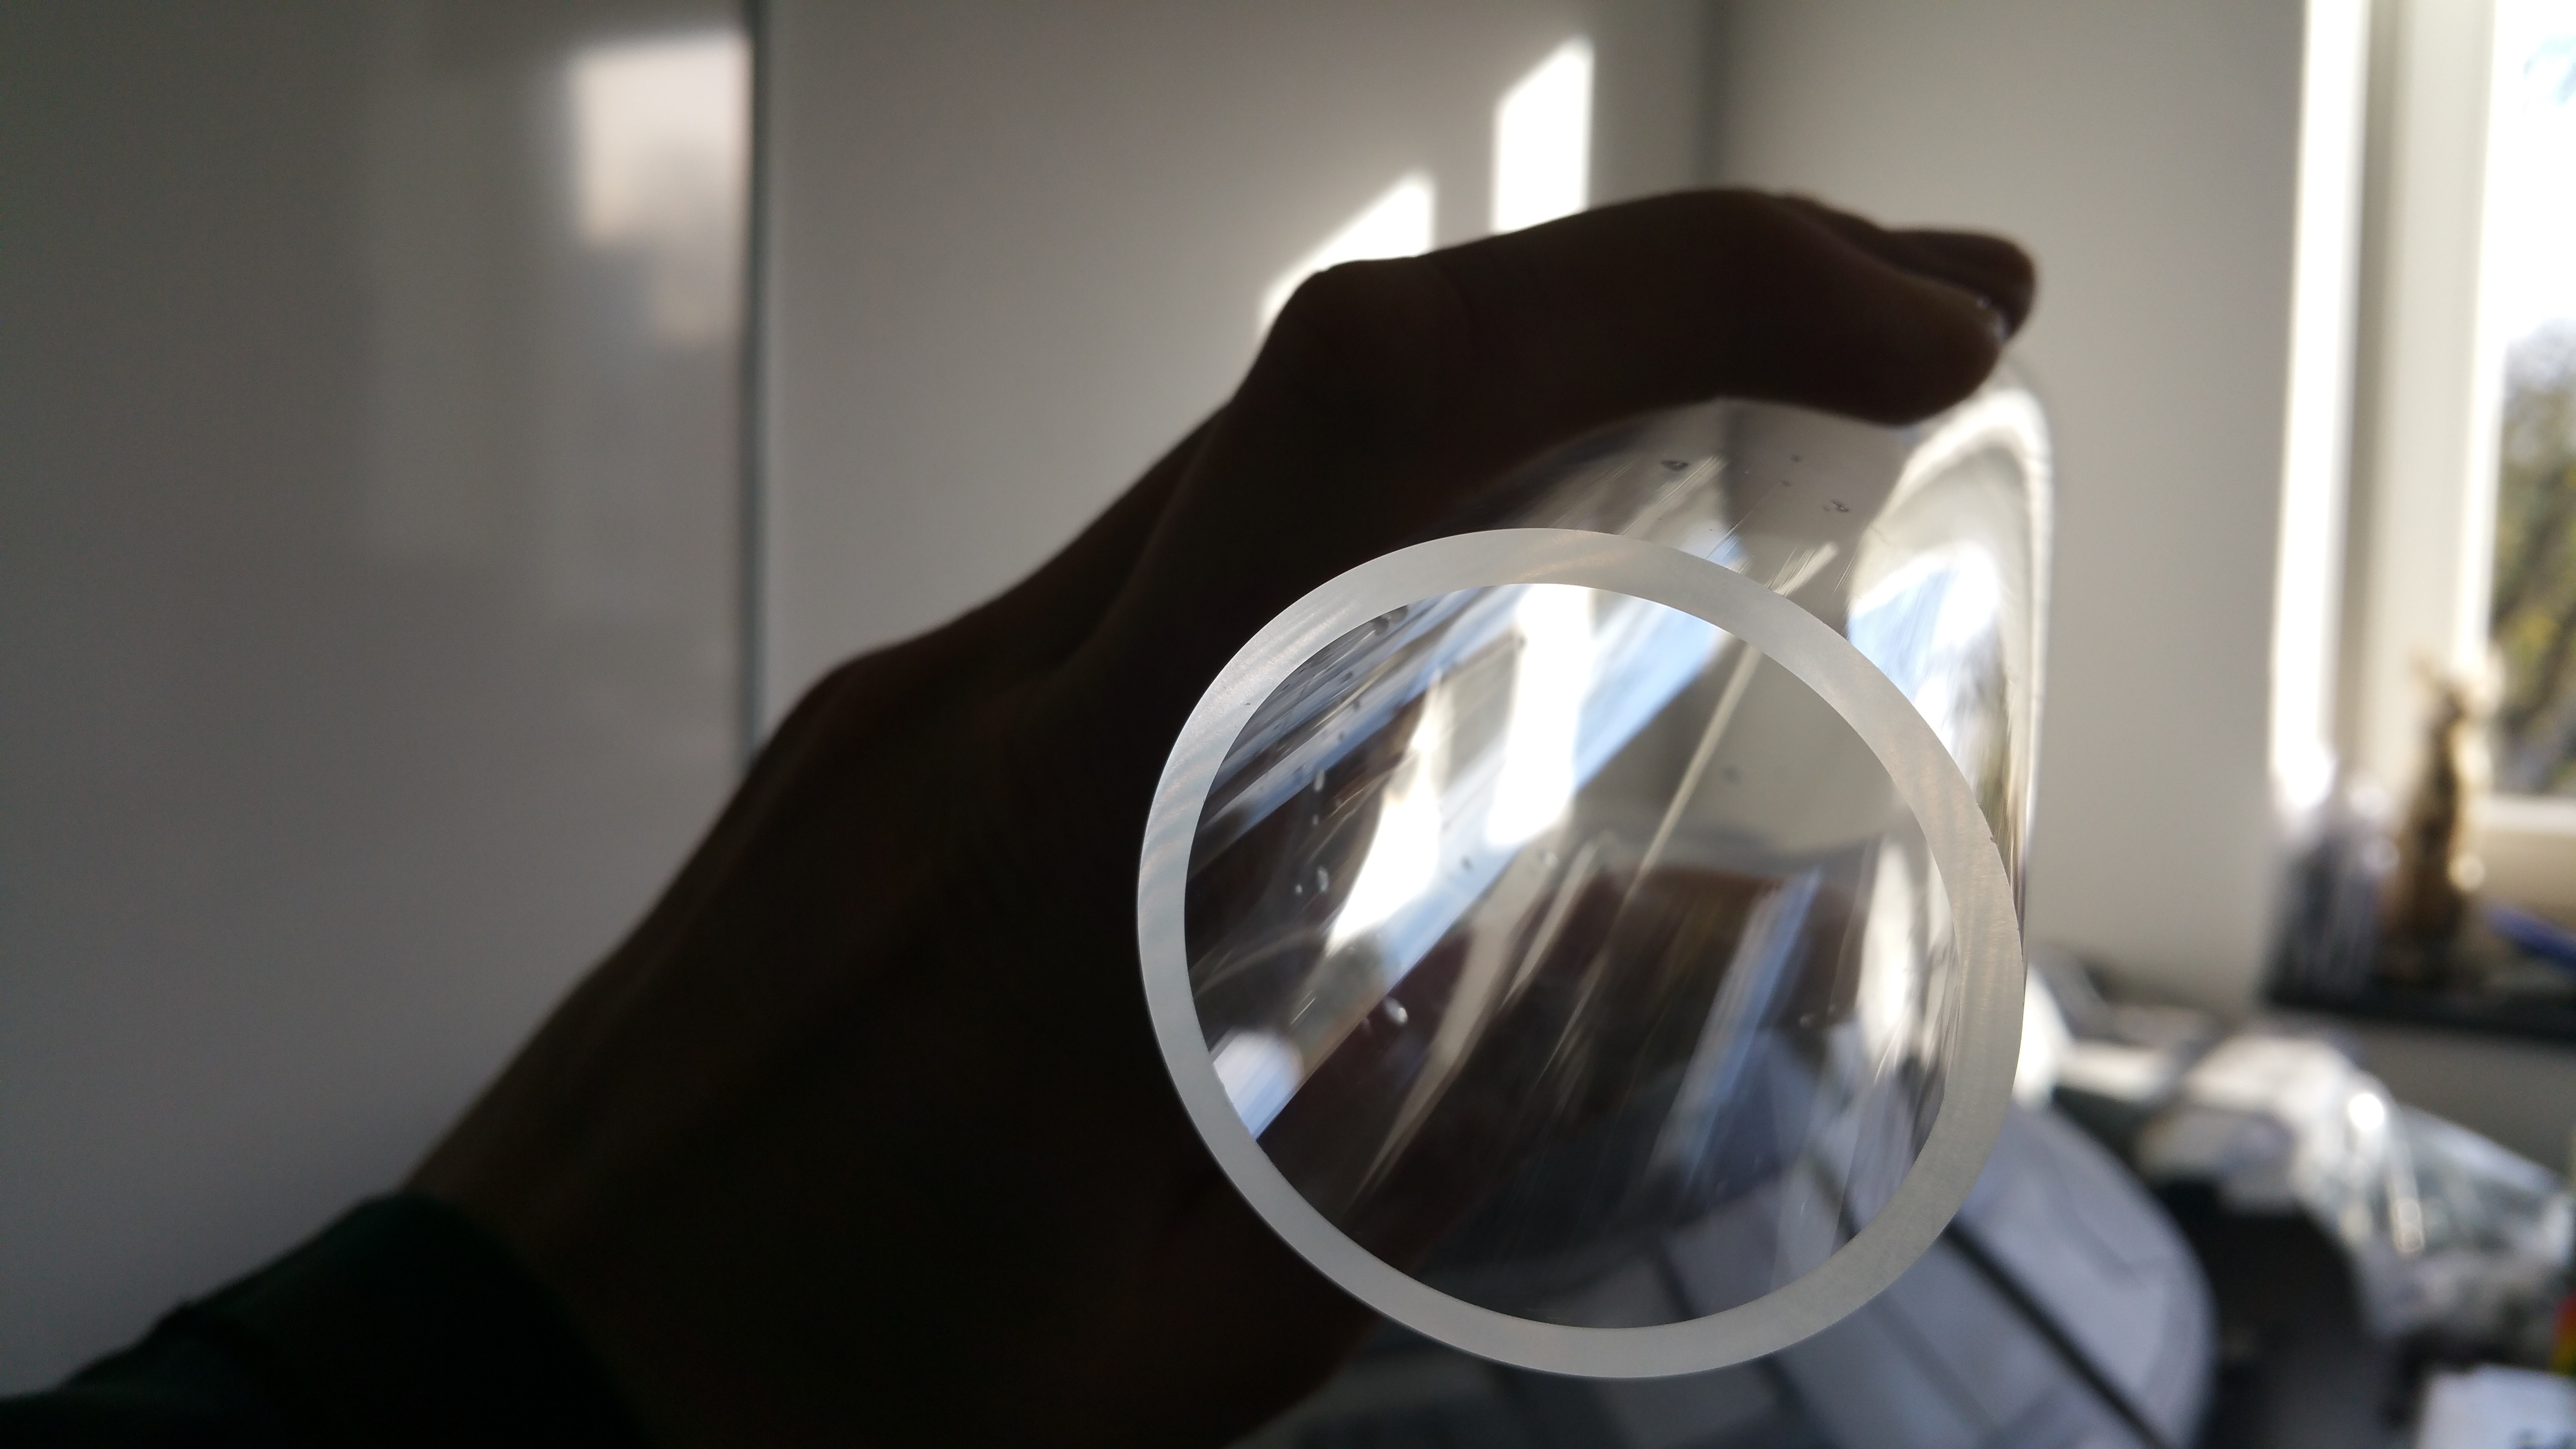
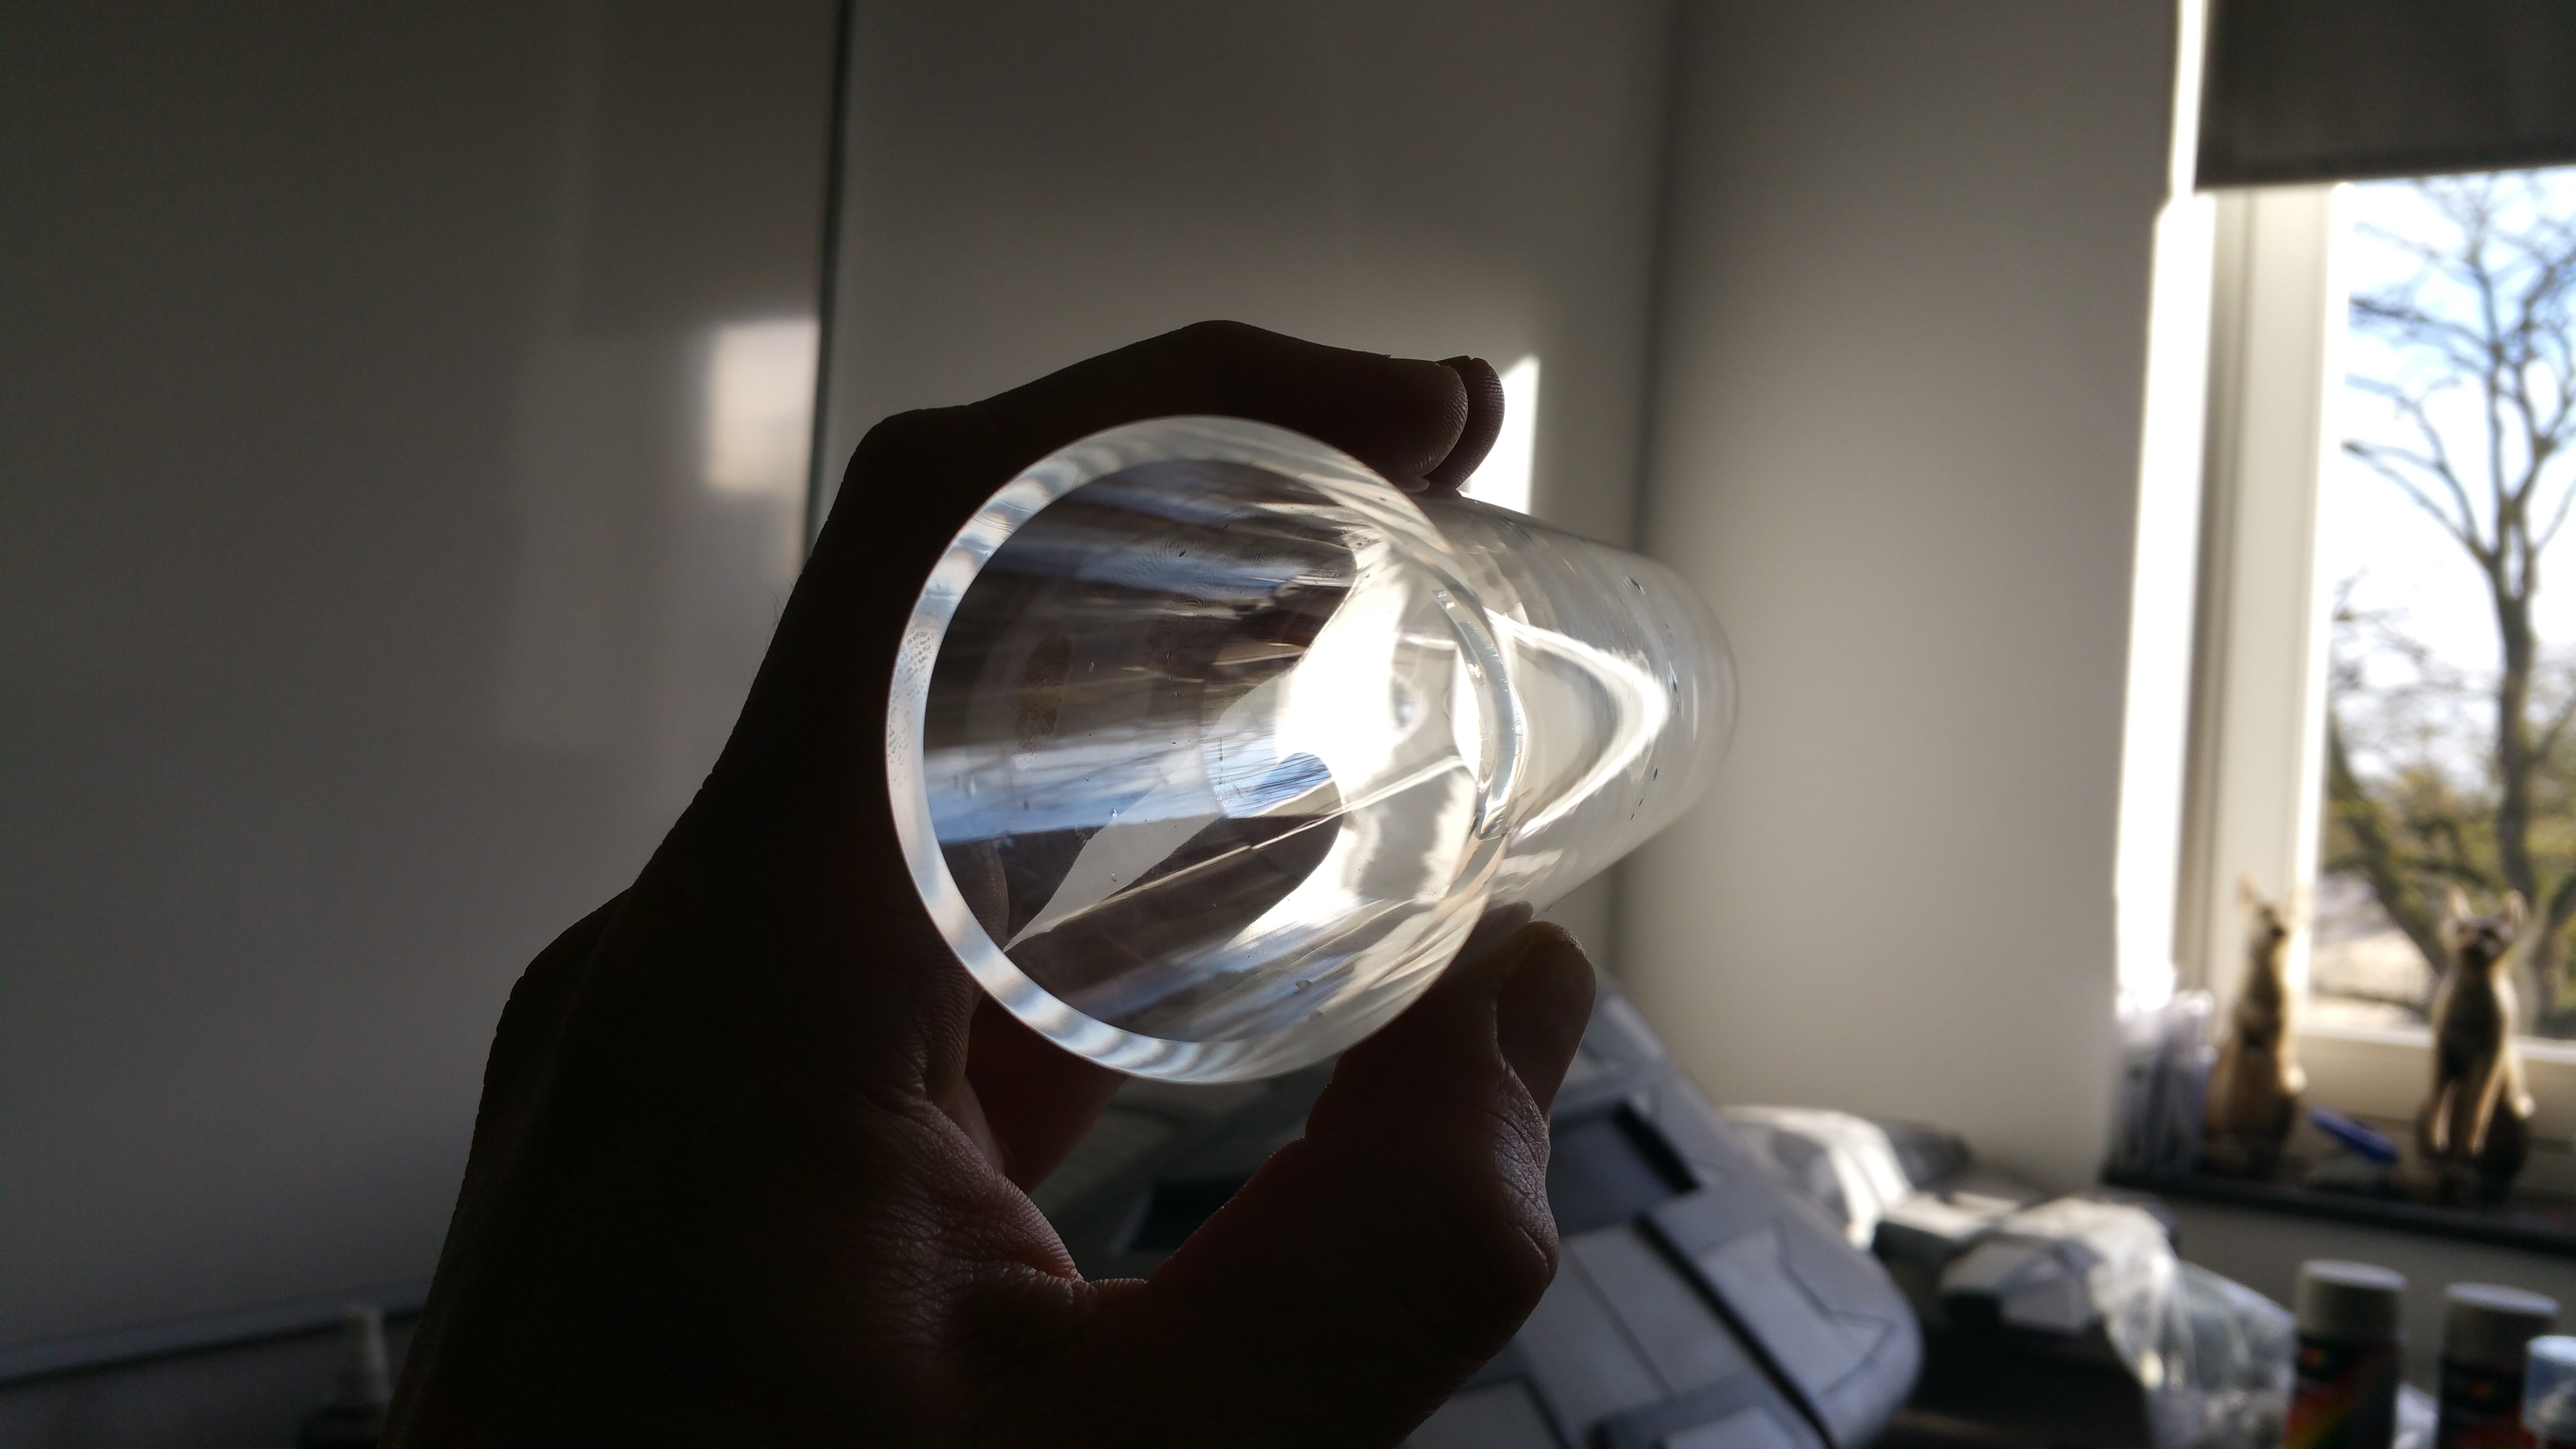
After finishing with the 2000 grit, it should look like this. You can start making out the reflections of the tube itself inside the acrylic.
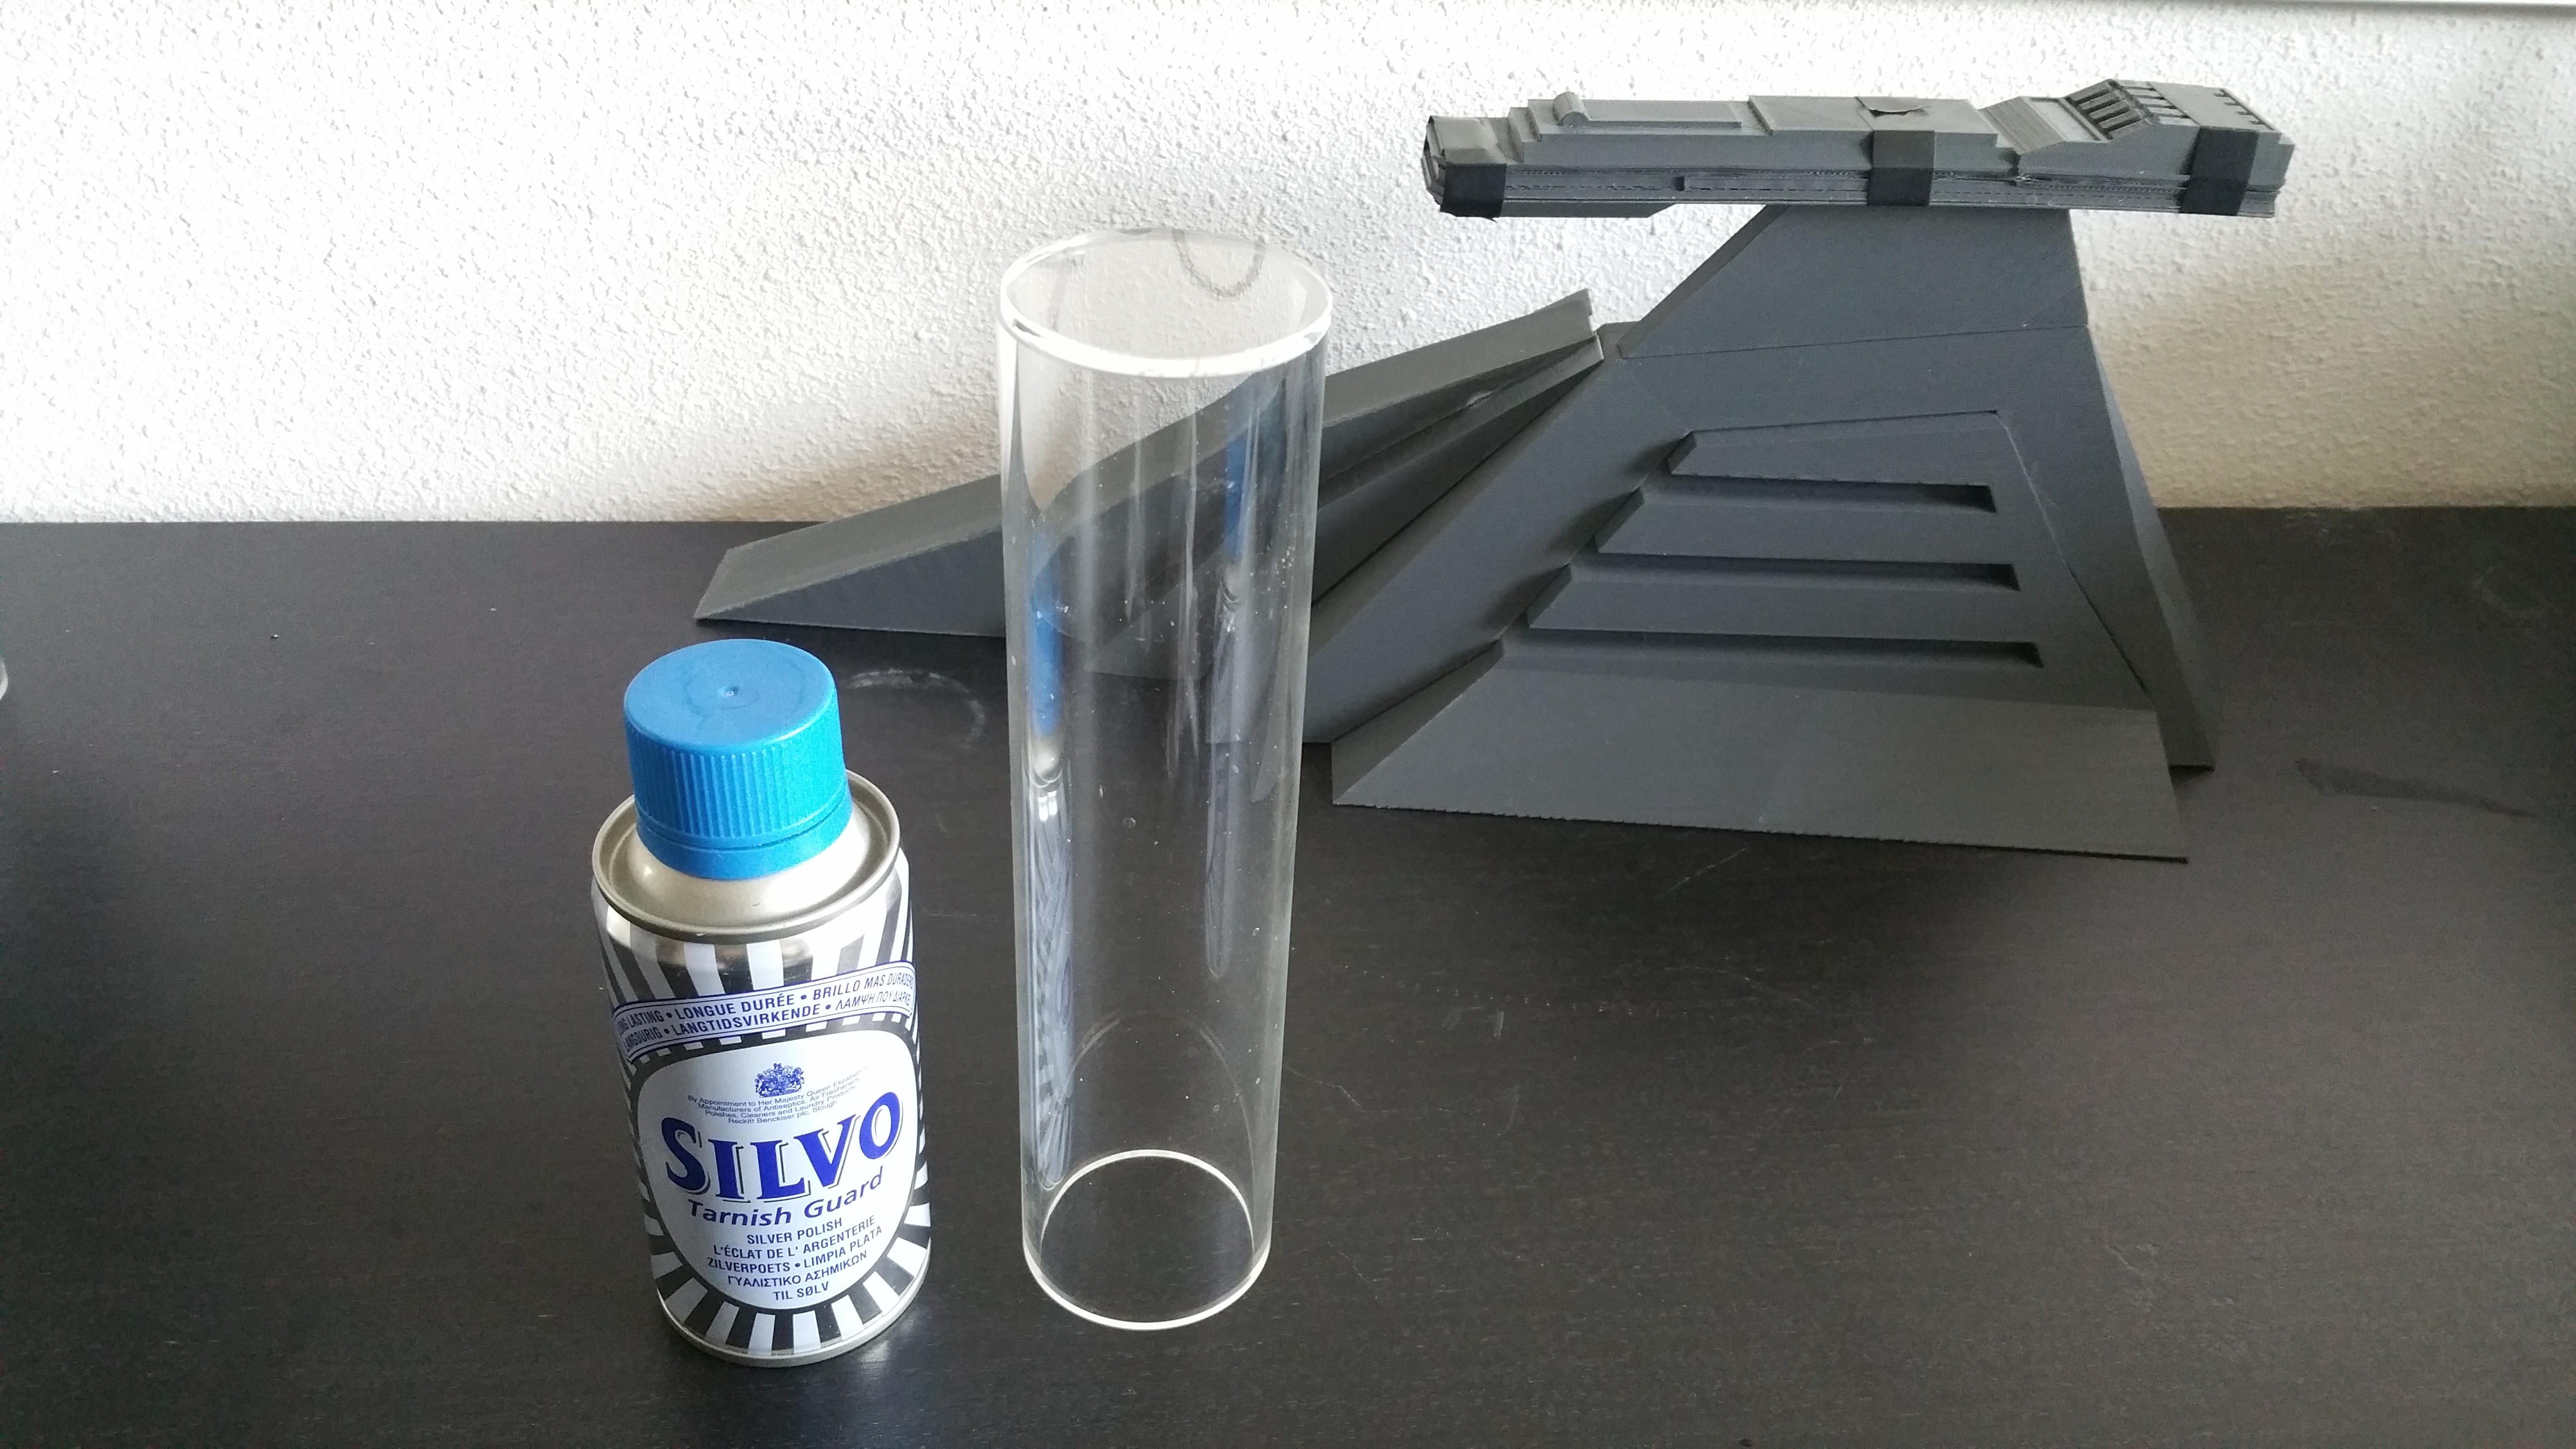
Then the final step to make it perfectly smooth. Everybody has their own preferred brand but I always use this silver polish as it has no special chemicals added.
Those would possibly ruin the acrylic. You just have to try some on a old piece of acrylic and leave at least 24 hours to see if it degrades or stains the piece.
After the polish you should see a lot of internal reflections in the tube wall.
Next step, find yourself an old molex cable. You must have some lying around ;-)
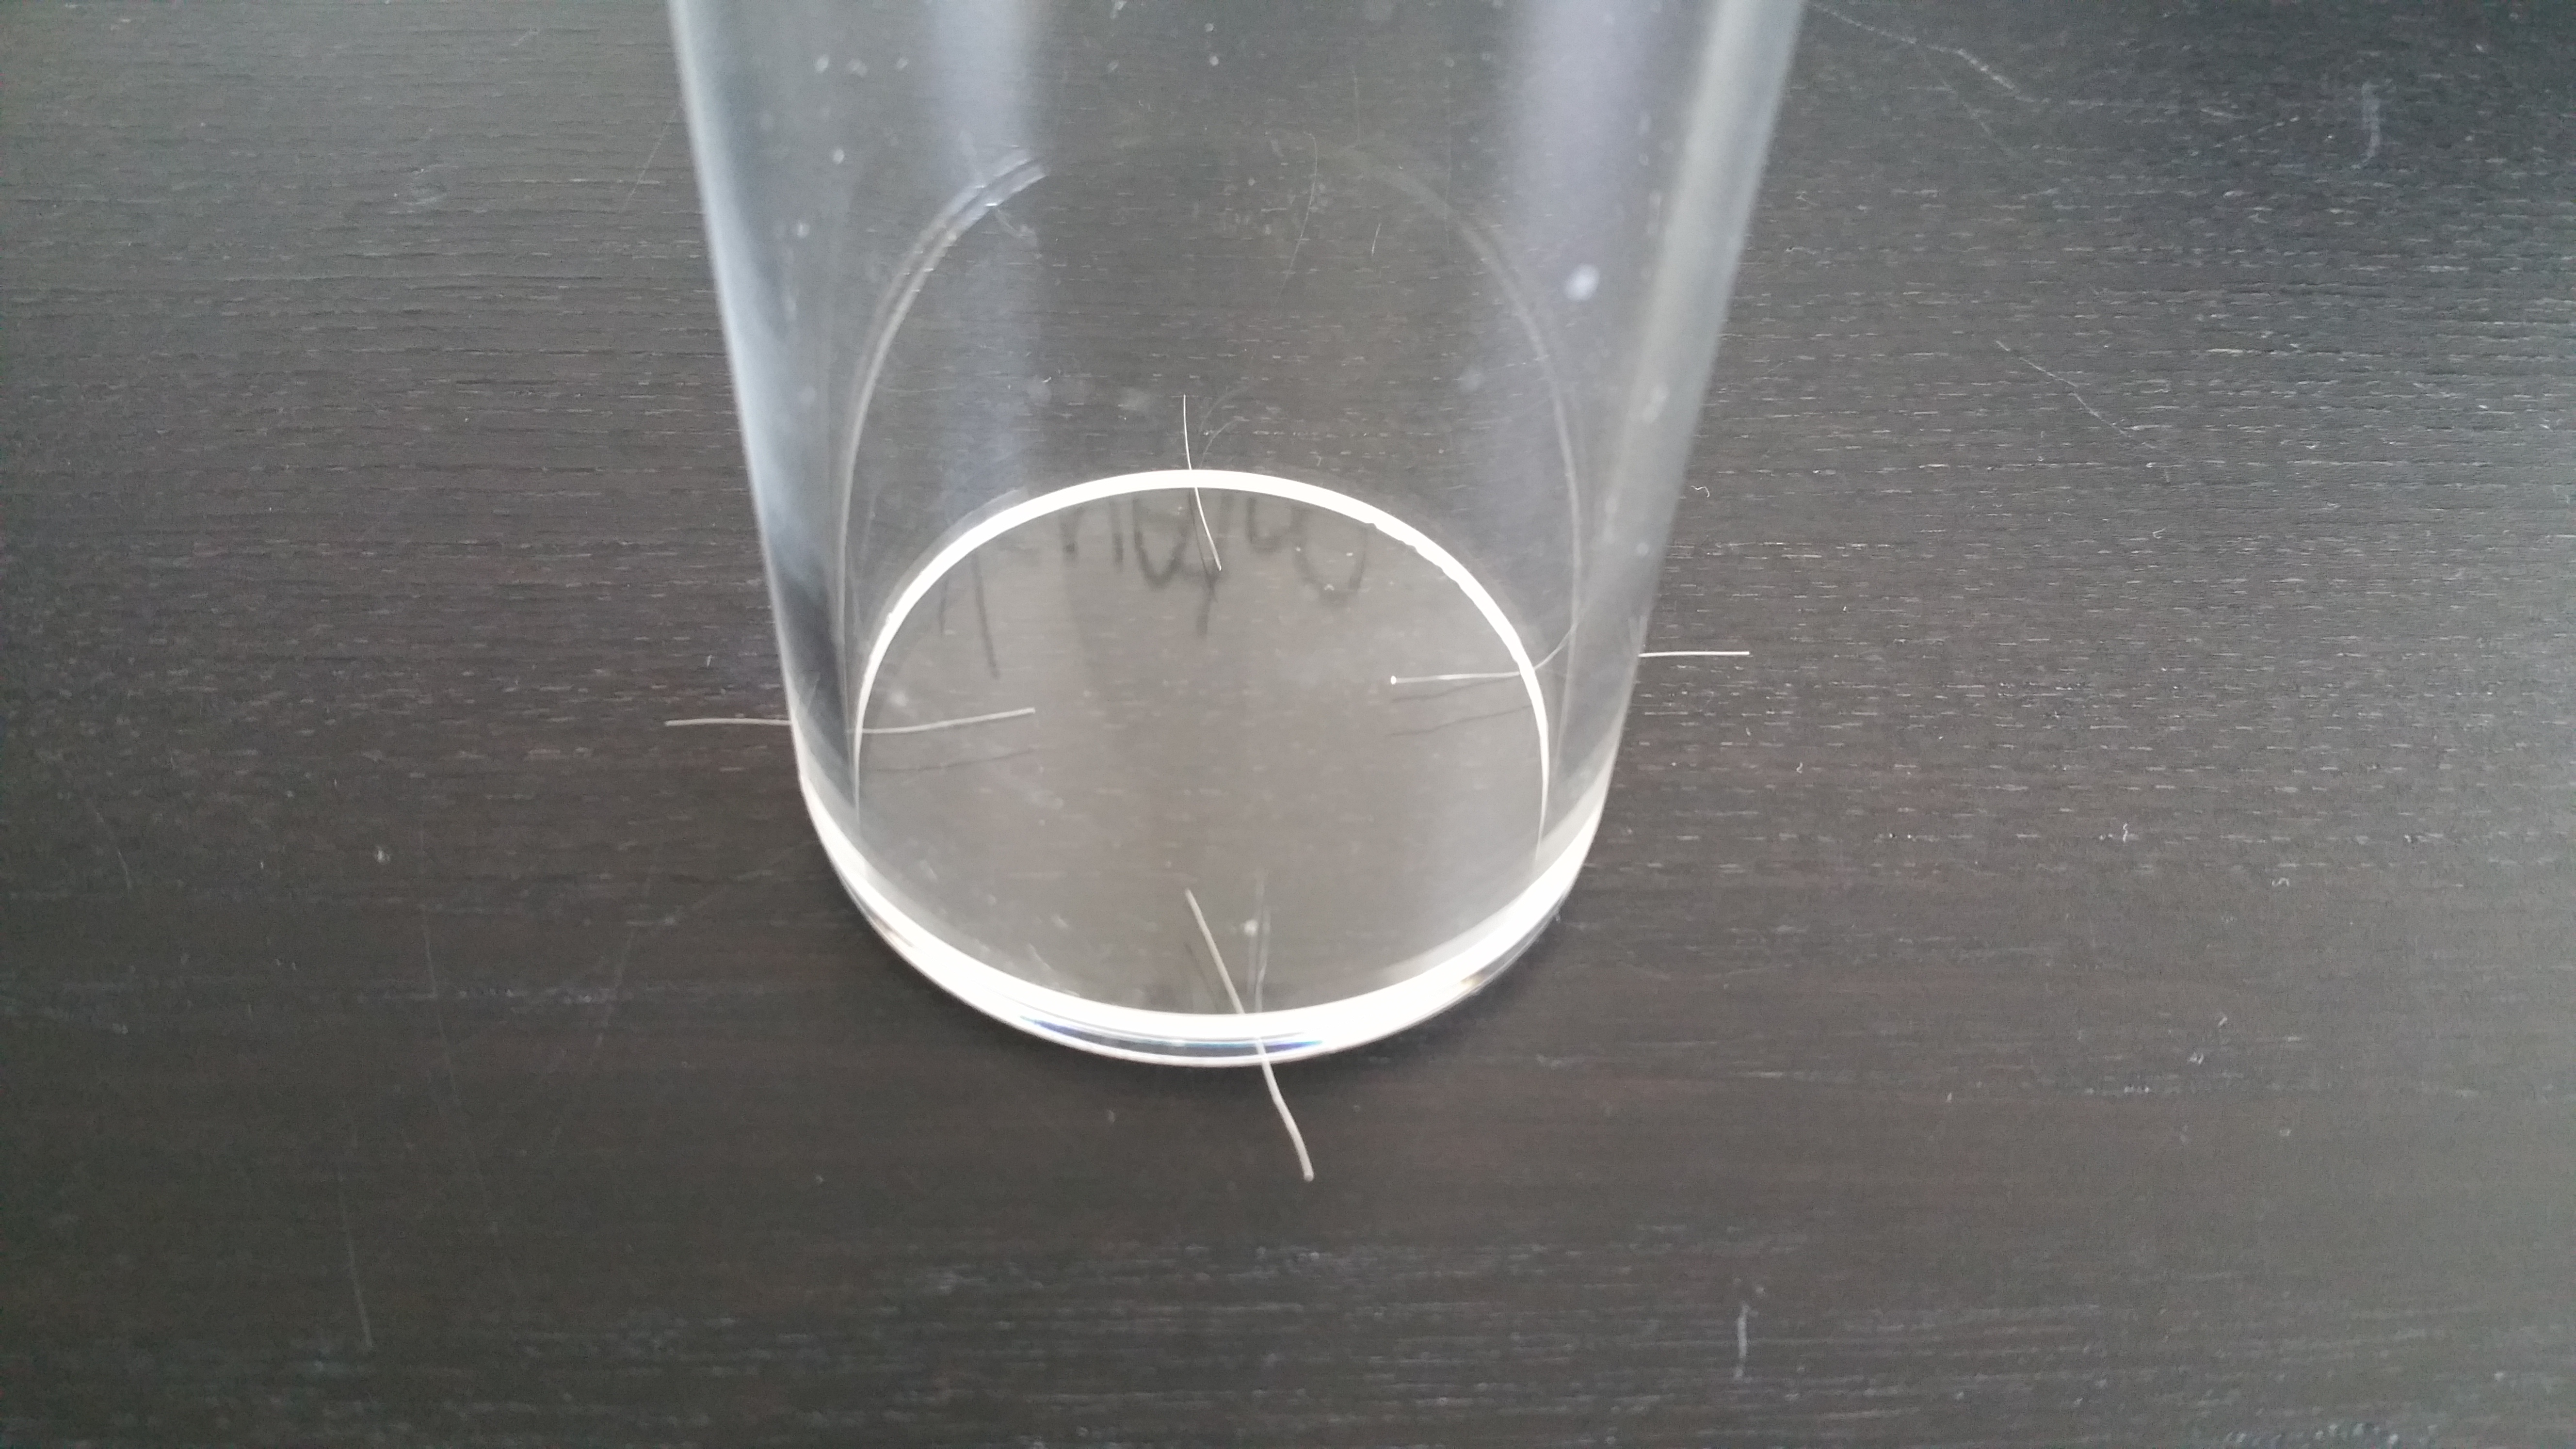
Strip the cable and place 4 of the small strands between the tube and the disk.
This creates a very small cavity into which the acrylic glue will be "sucked"
This is called the capillairy action and is very usefull.
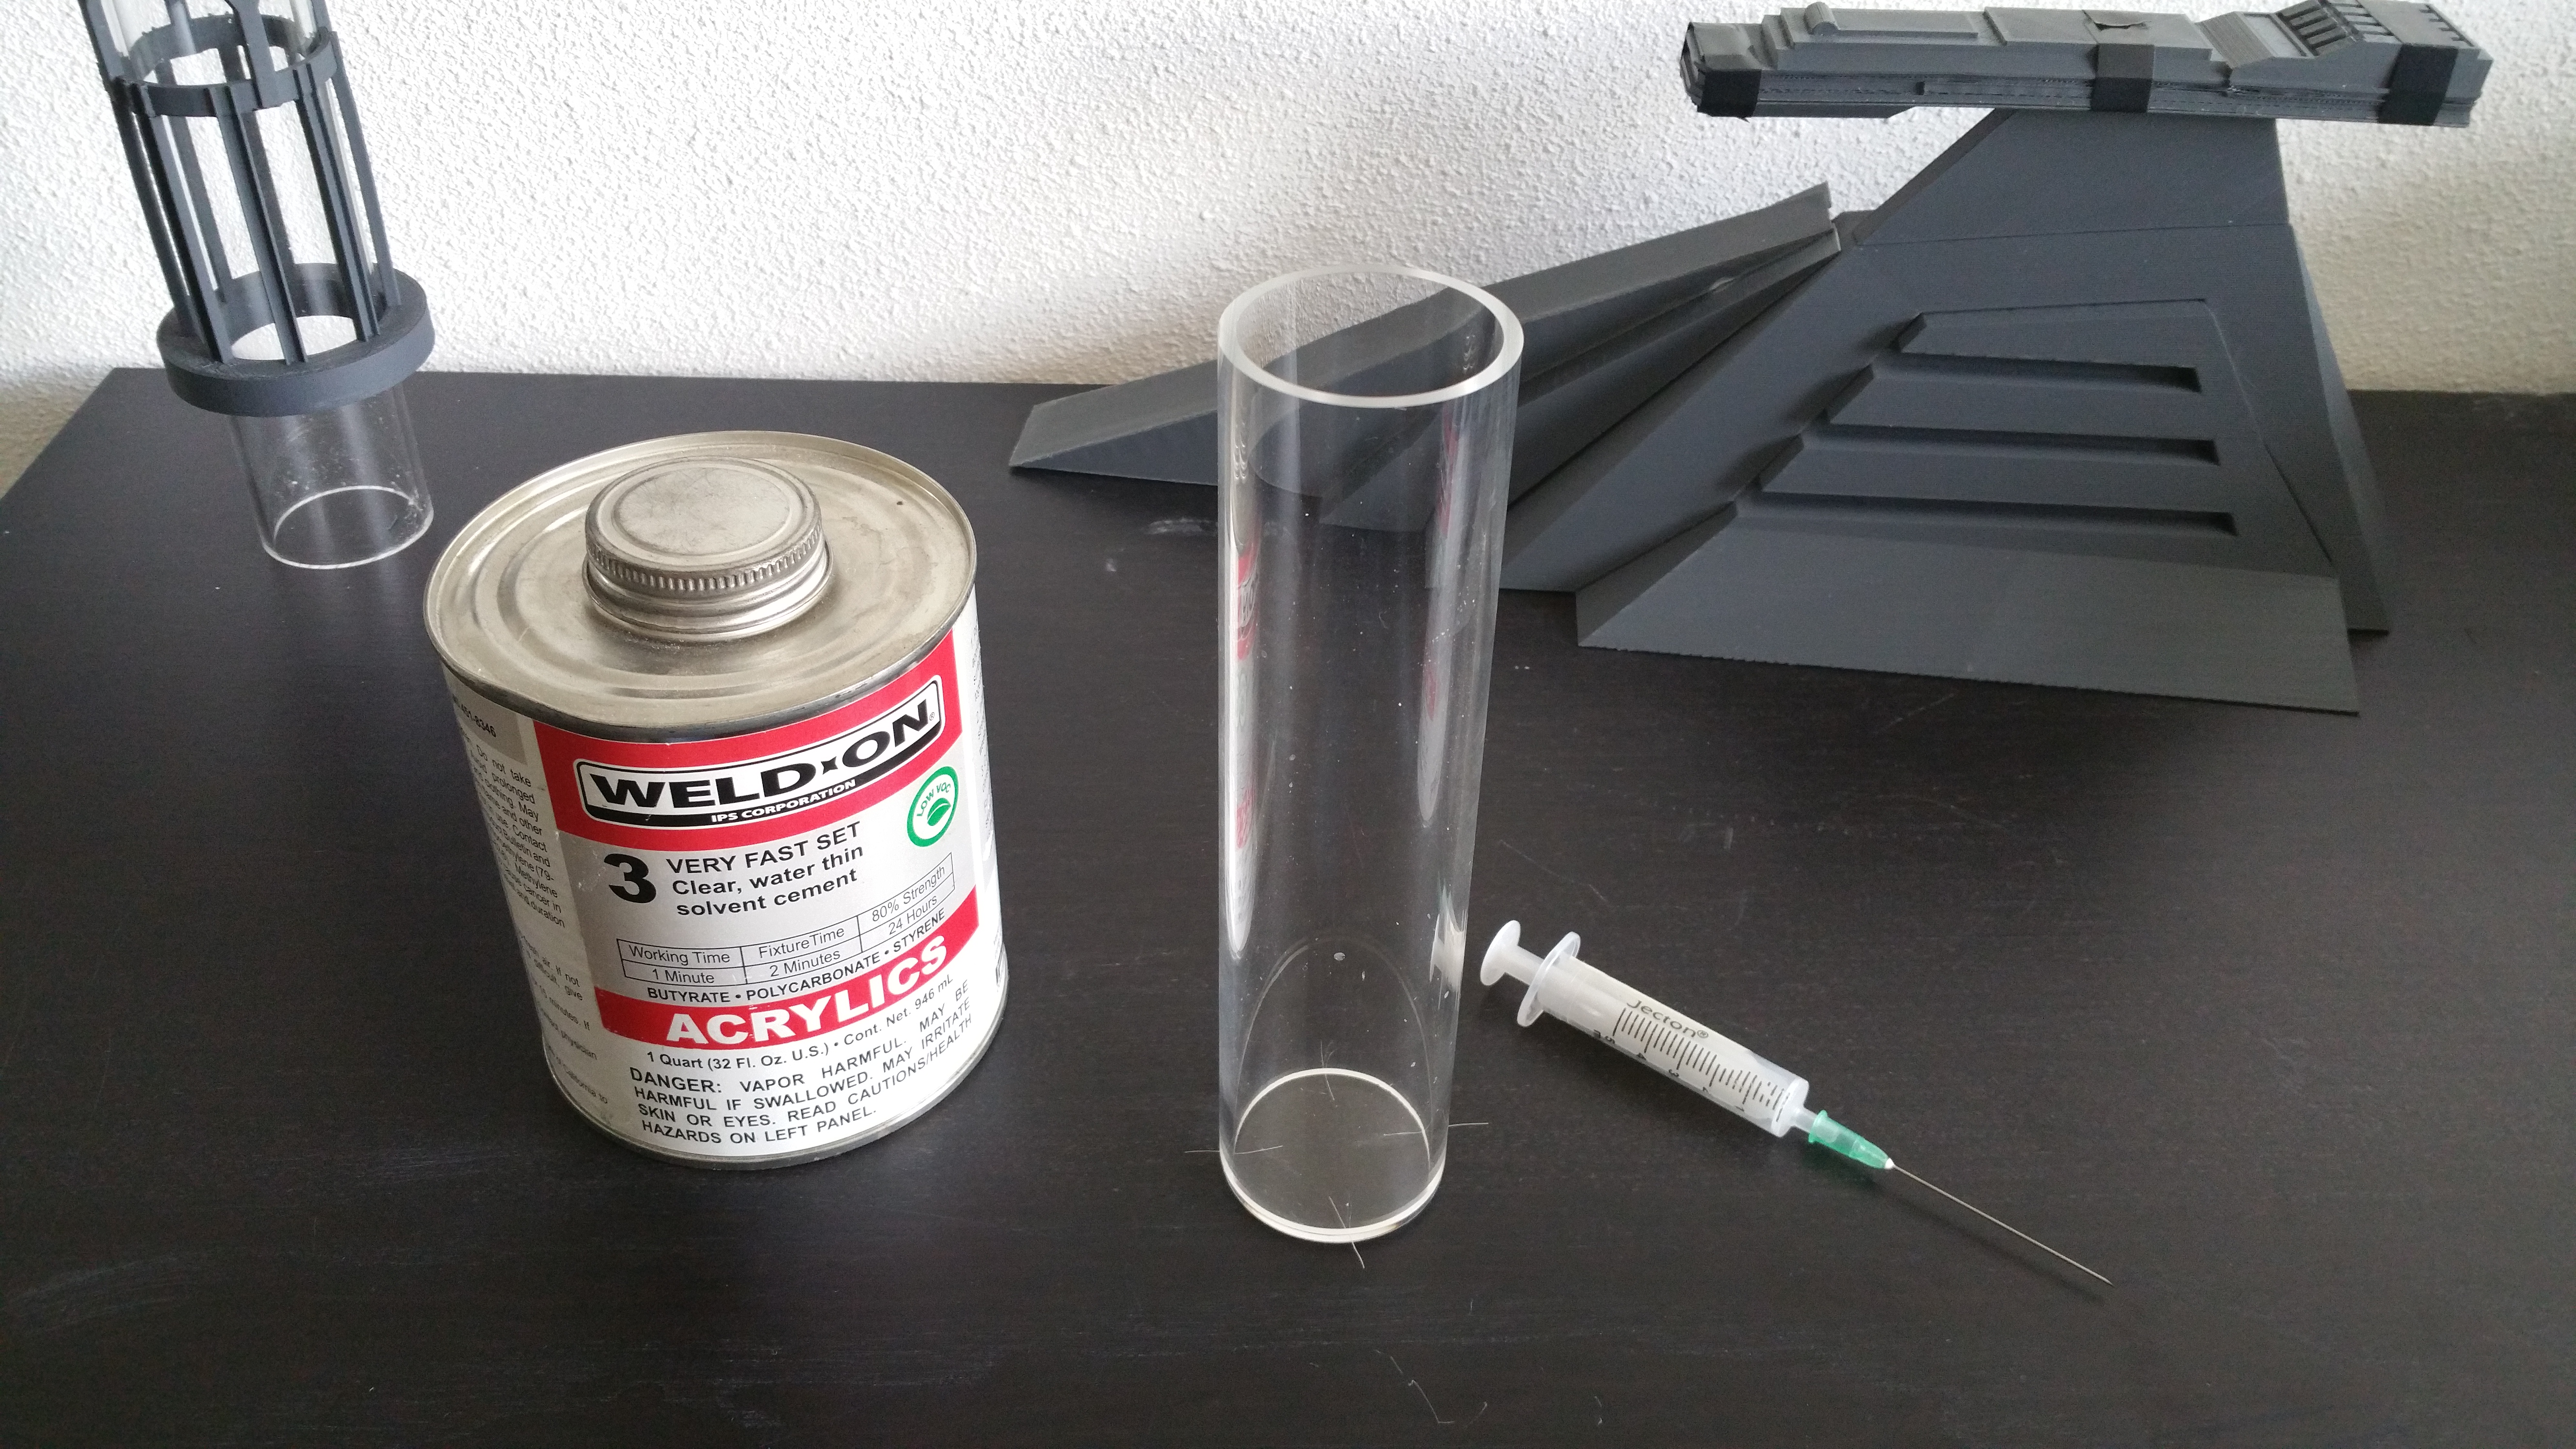
I was lucky to have found the last weld-on 3 in europe. They are not sold anymore due to a specific chemical thats used.
Appereantly you can make a bomb with it. But thats next on the MCGyver show ...
This can will probably be enough for my grandkids to build reservoirs with.
Take the syringe and suck a tiny amount out of the can. Then find the cavity between the tube and disk and VERY, VERY slowly push the glue out while following the cavity along the disk.
When you come to a strand, pull it out and continue. WATCH OUT : you will only have about 20 seconds to replace the tube if you knock it over or move it.
You will see the glue being sucked into the cavity and spread out.
DO NOT push on the tube, just let gravity work its magic.
(PUSHING will create a crackled appereance and potentially ruin the weld)
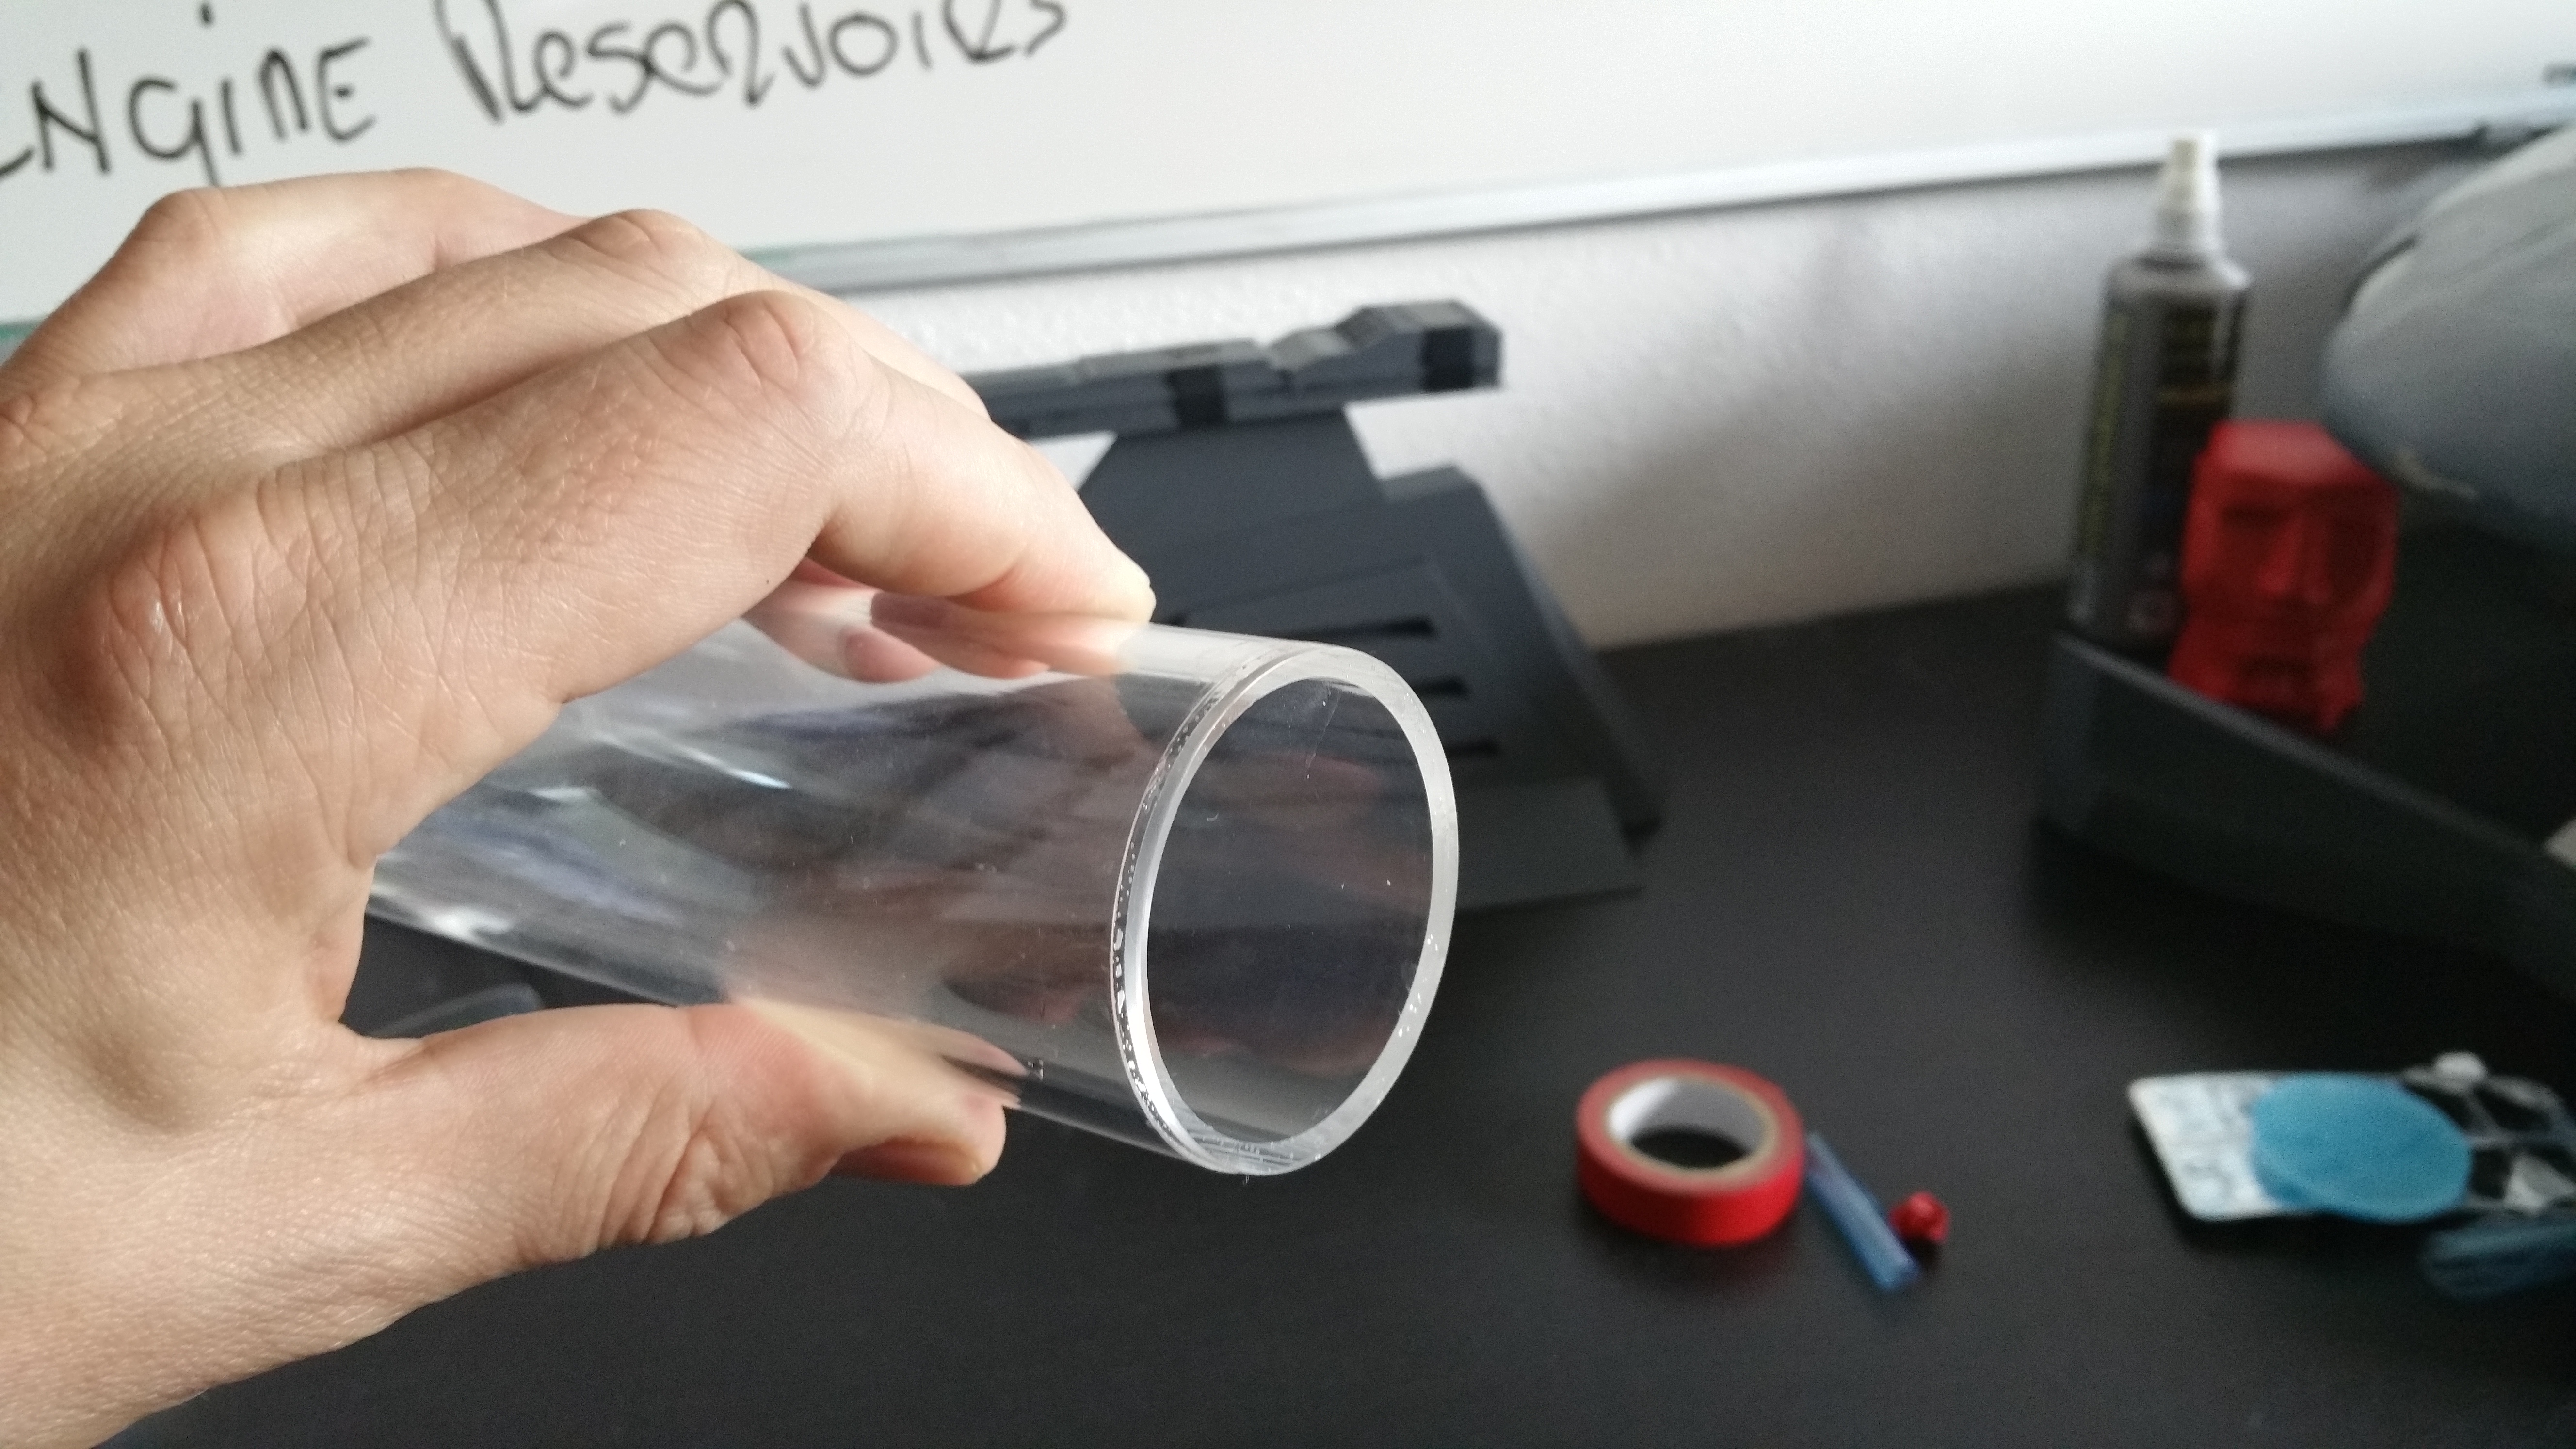
If you squirt out to much of the glue please do not be tempted to whipe it off as I intentionally did here.
The glue is so powerfull it will stain the acrylic. Just let it dry and use the previous method of sanding and polishing to clean it up.
As you can see here. Mind you, it will never become as transparant as it was so better safe then sorry!
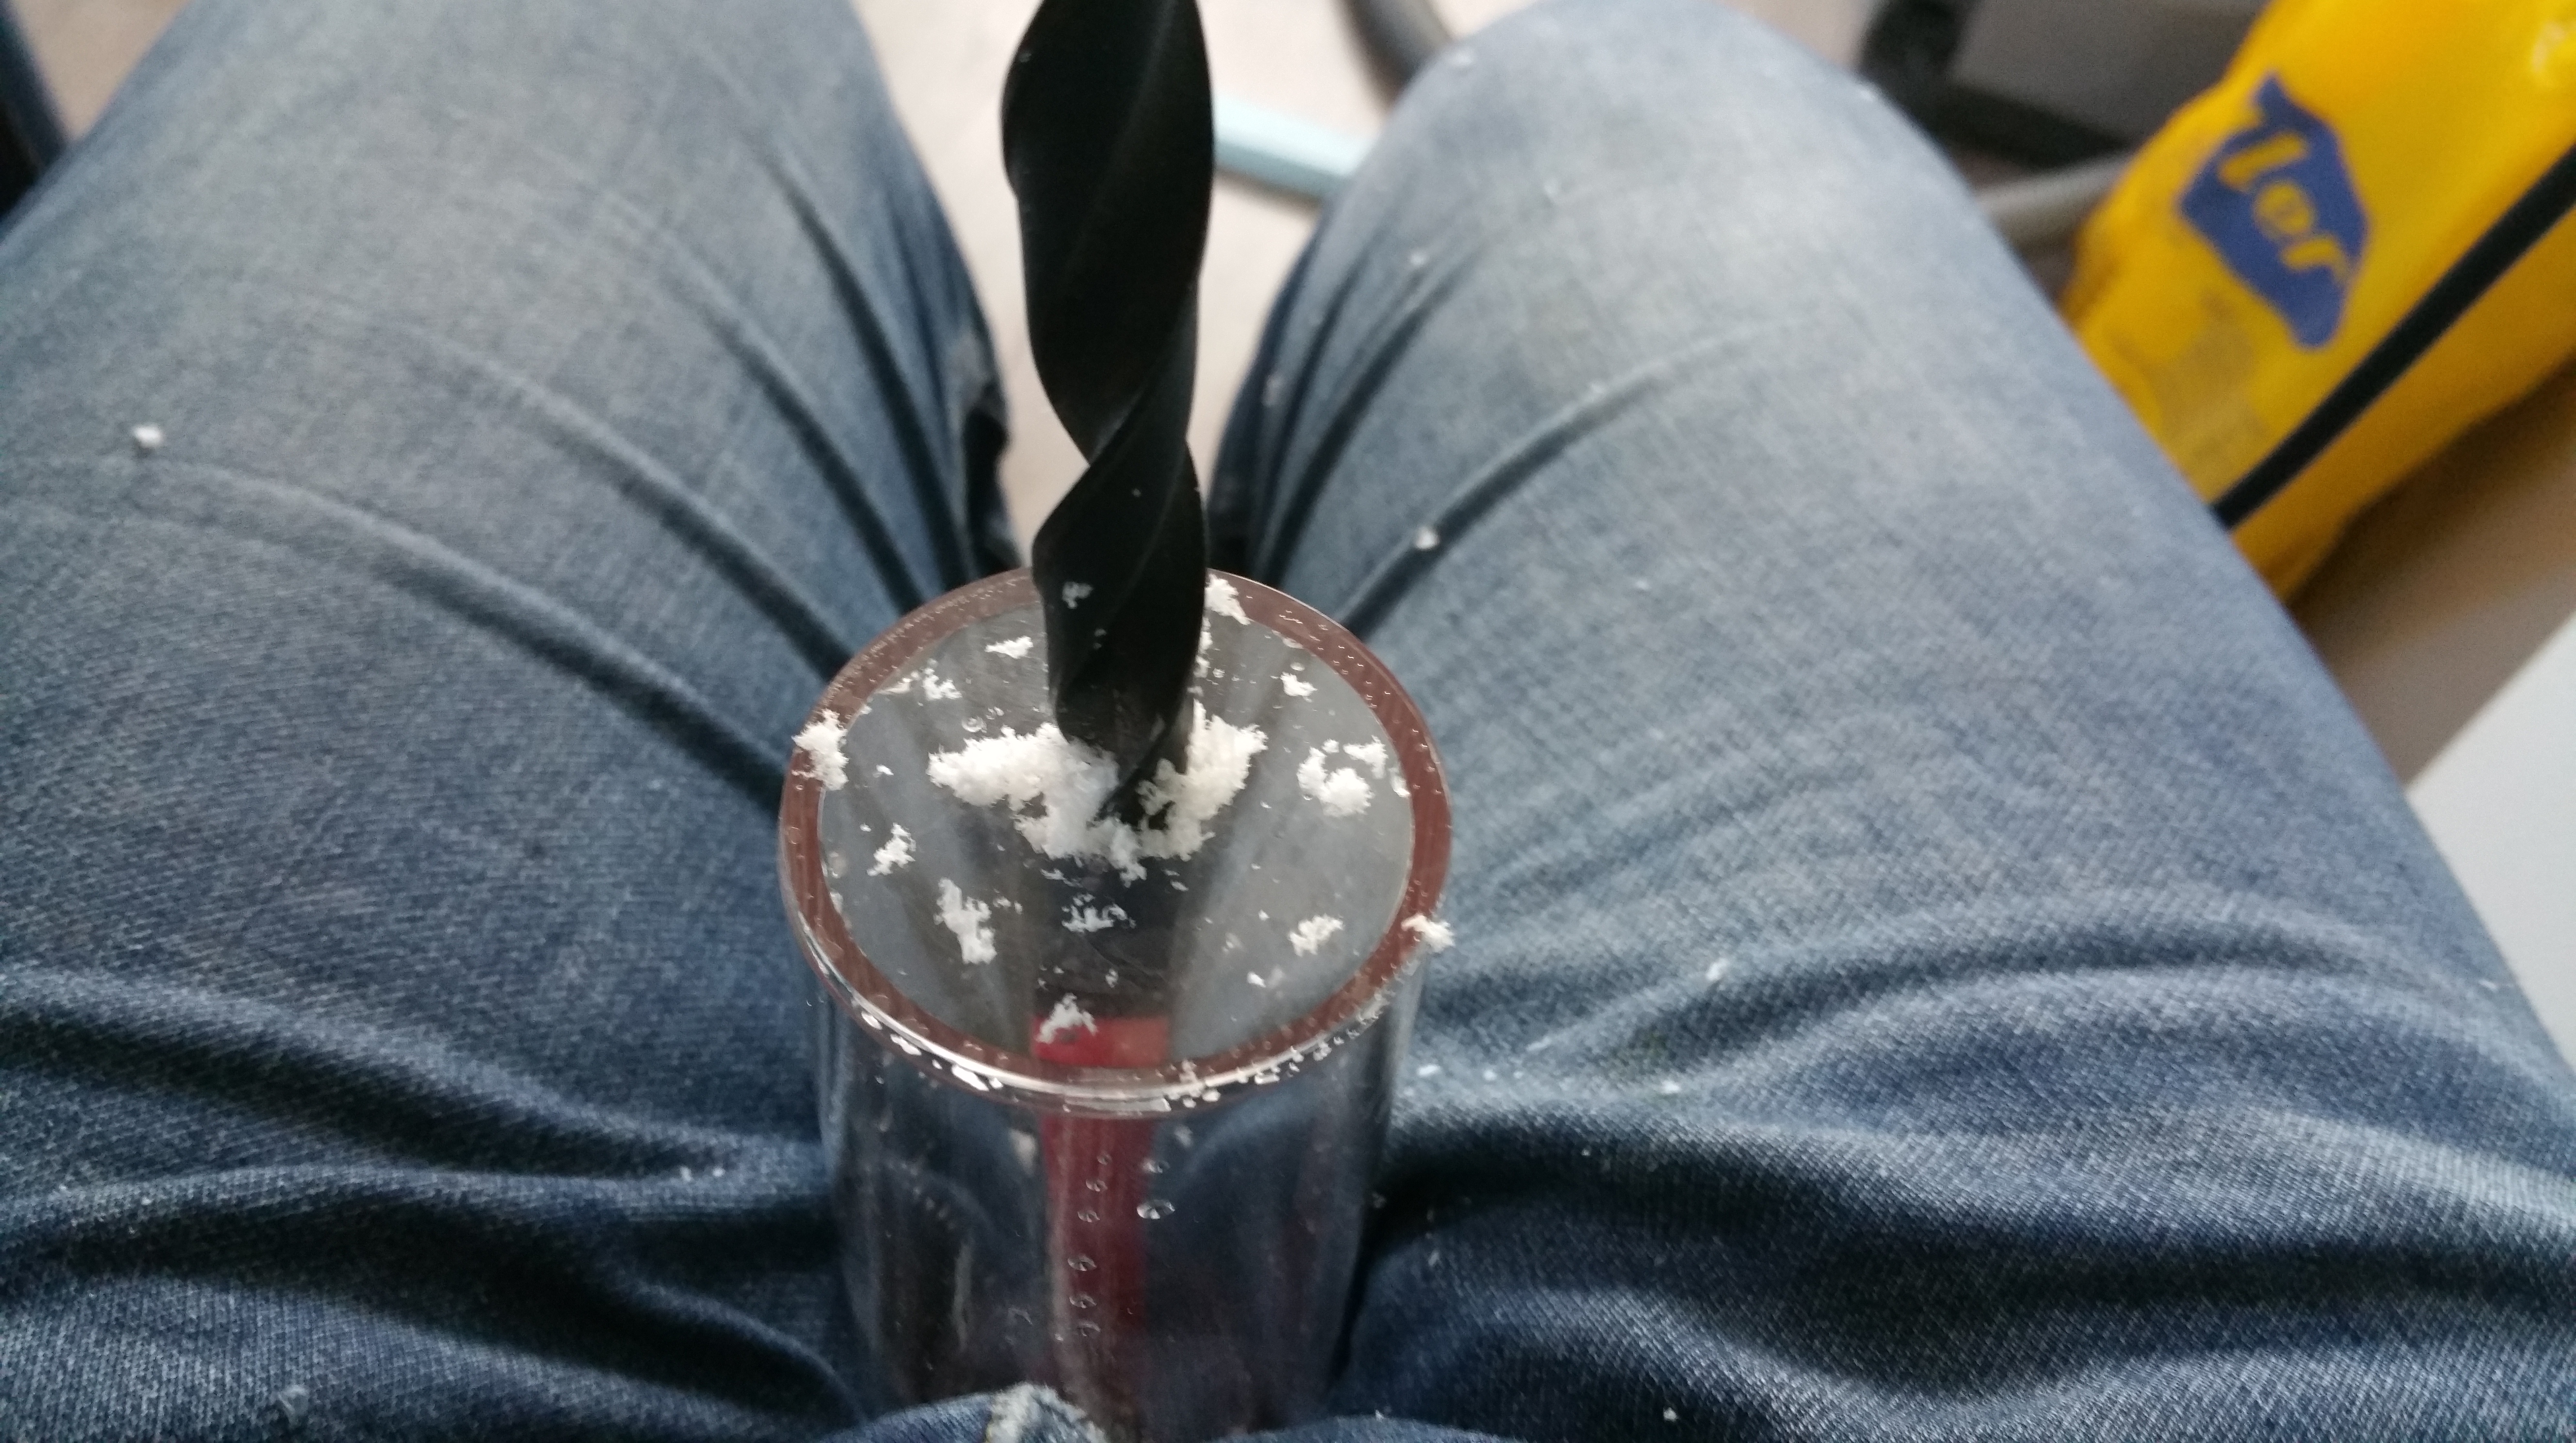
Next up, drilling and tapping the G1/4 port.
I had a very hard time finding the correct drill as its a non standard size here in the netherlands.
Luckely I found the correct drill and tap over at the E22 store!
The human body and mind is perfectly capable of drilling perfectly straight but you can probably better do THIS .. with a vice or stationary drill.
The flakes you want is about the size above. Go very very slow, spinning to fast will melt the acrylic and ruin the reservoir.
Let gravity again do its work and blow away the flakes regularly from tube and vise.
WATCH OUT : The drill will lockup at some point , usually when almost through the acrylic. Be ready for it and immediately stop drilling.
Spin up the drill and gently push it down. The speed of the drill will remove the lockup part and you are cutting acrylic again!
Now onto tapping.
Again better to do this with a vice but you can do it by hand. Just takes some practise.
Drive the tap to about halfway , dont stop to soon, the fittings will like that ;-)
And two last tips ..
How to get those darned flakes out of the tube...
Do you know what the fastest way is to empty a bottle?
Fill the bottle with liquid and spin it so the liquid makes a vortex towards the cap. Air replacing the liquid inside will have a unobstructed way in while the water can get out.
Dont believe me, try it with a coke bottle!
Also, due to the vortex the flakes (lighter then water) will spin down in the center of the vortex and flush out in one go .. guaranteed!
And the last one : Simple Leaktest
Add the fittings and tube and for a leak test, keep one end of the tube closed off with a finger and blow on the tube on the other end.
Put the entire reservoir under water (use a bucket or a bath) and if you see bubbles, you got a LEAK!
(see if you can add some additional glue, if not start again unfortunately!)
And there you have it, your own tube reservoir.
Thanks for watching and if you like this DIY (or have some improvements or comments) leave me a comment.
Starting to think I am talking to myself here lol
Untill next time!
Mod-on
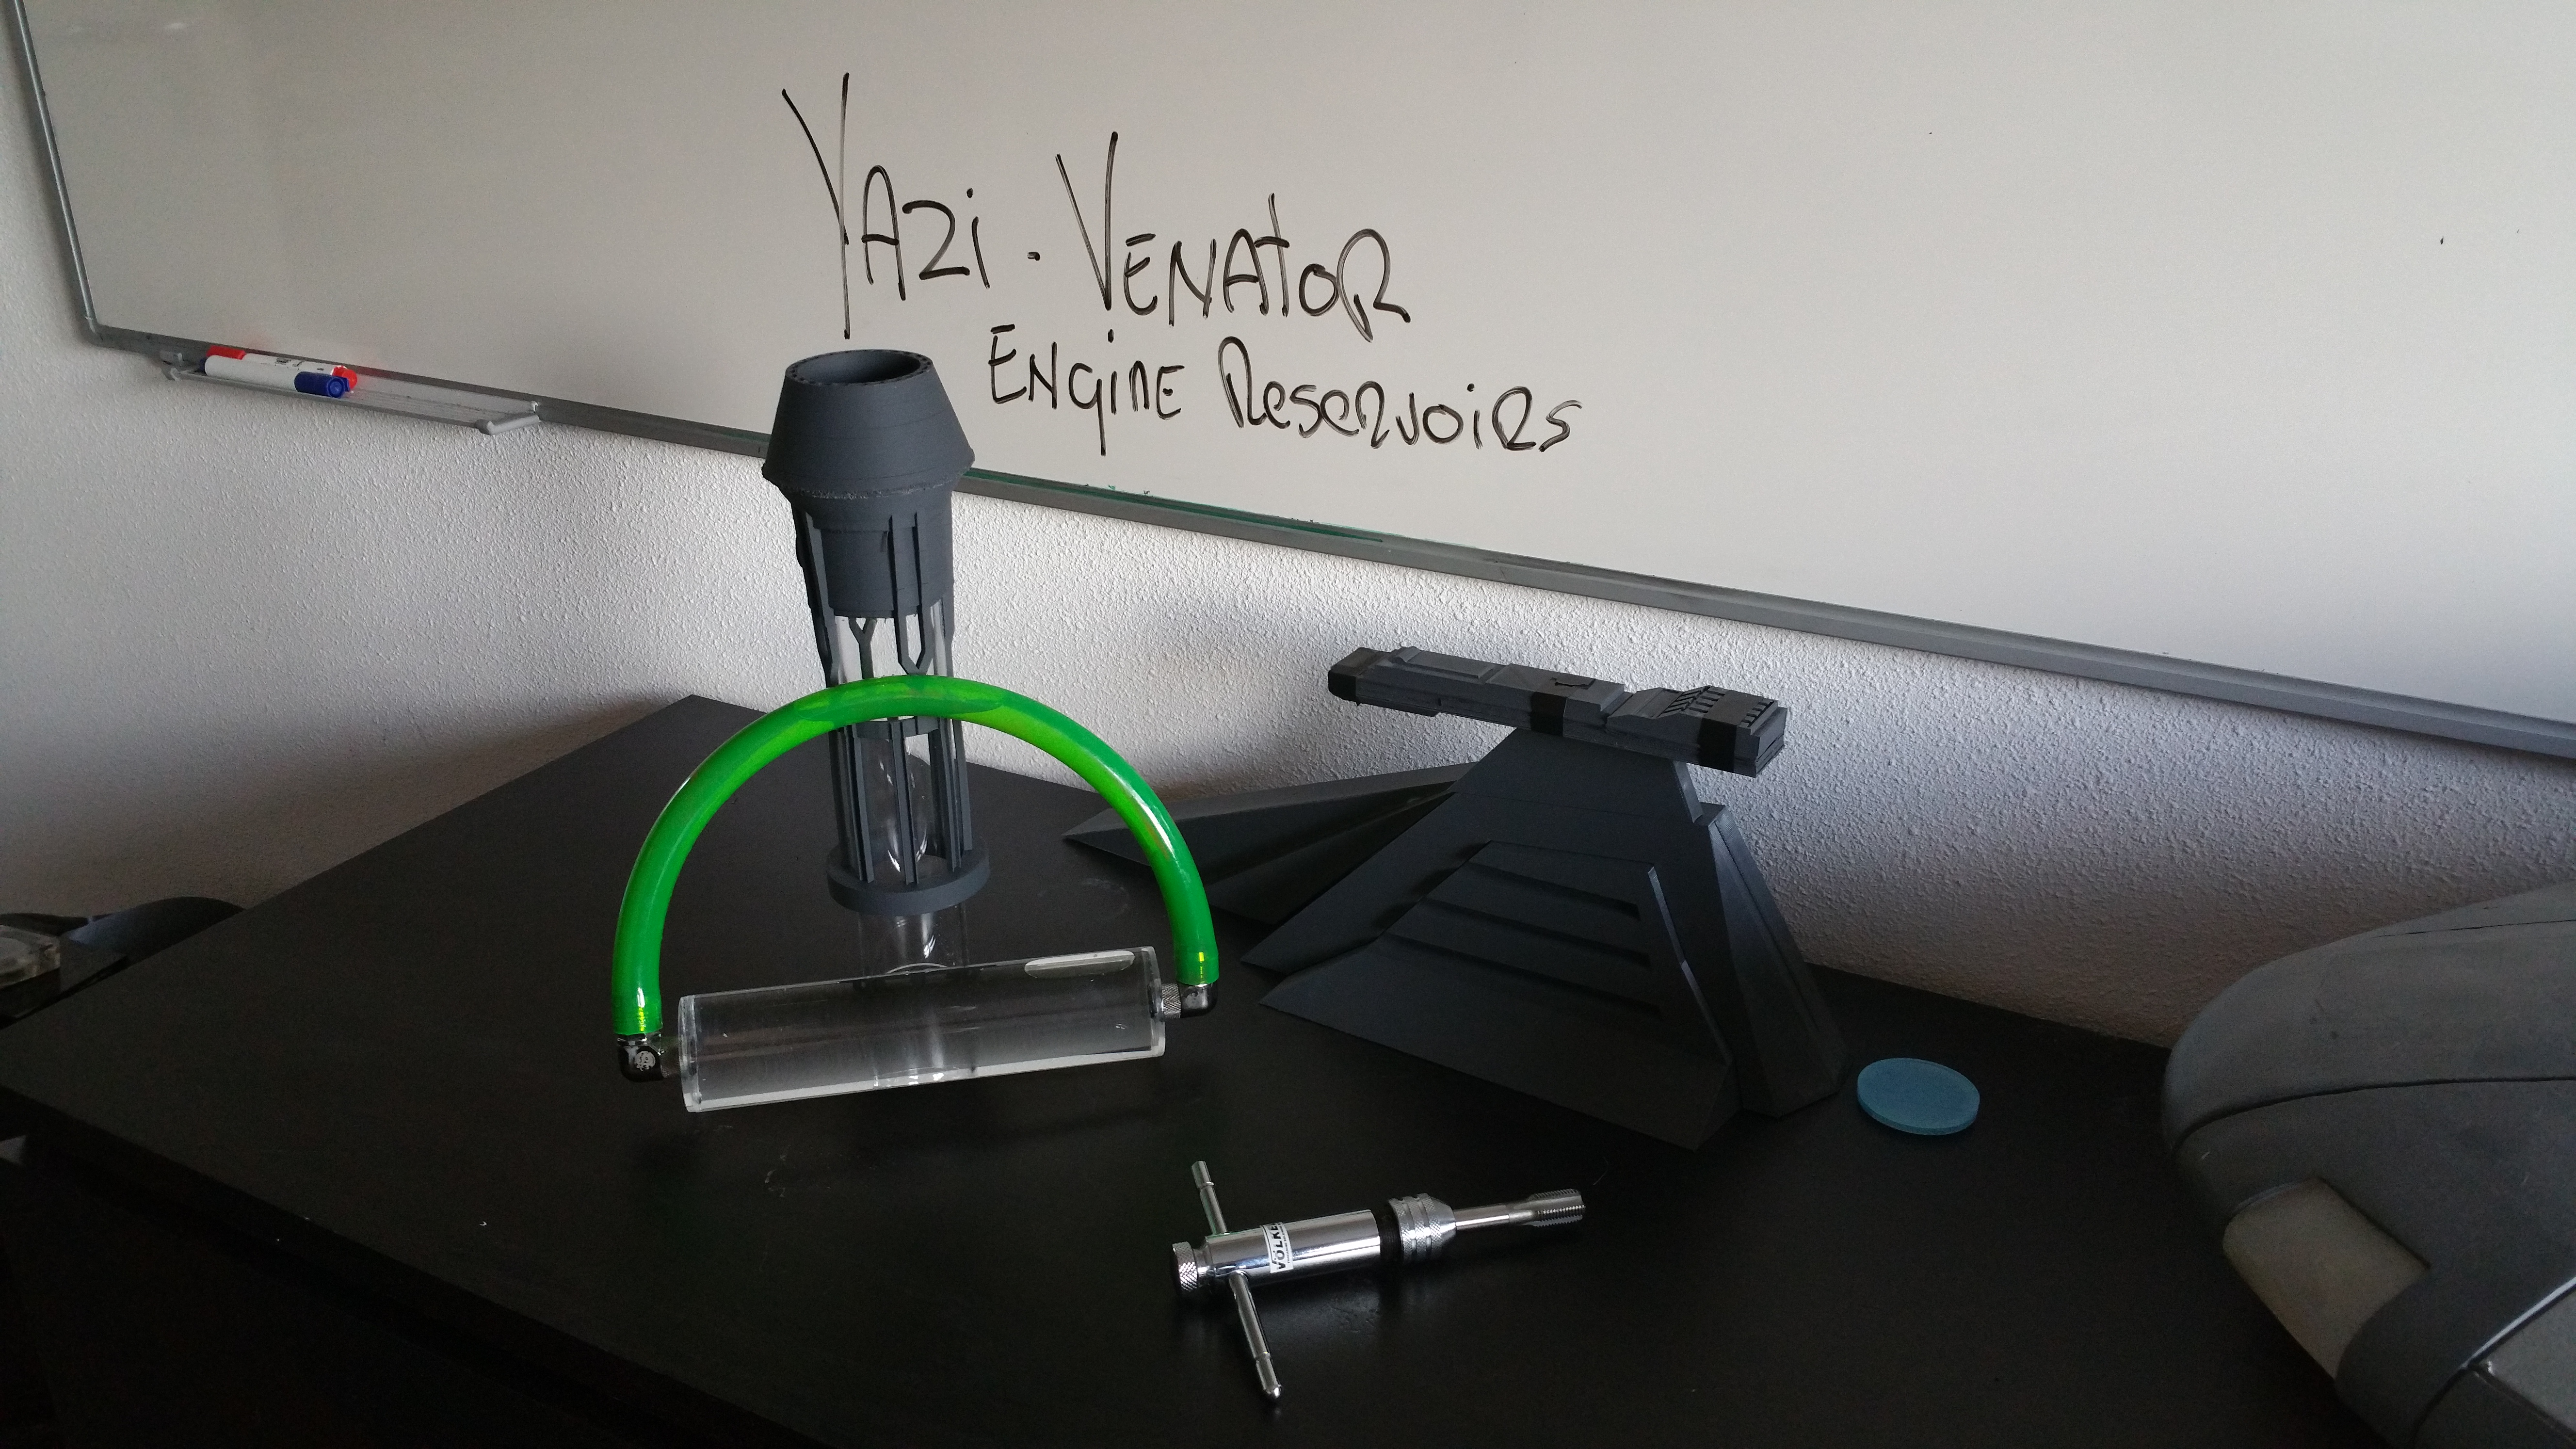
Re: ASPHIAX - VENATOR Class Republic Star Destroyer
Did a quick test fitting of the reservoir. The resholder is very solid and has a good overall feel.
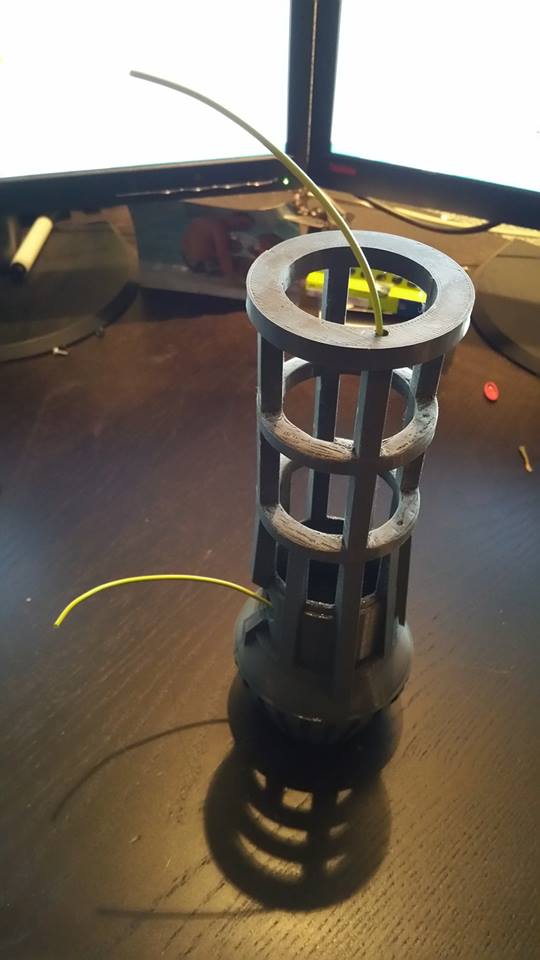
The benefit of designing with 3D is that just before the final version was ready to print I thought it might be handy to have a inbuilt LED wiring channel in one of the legs.
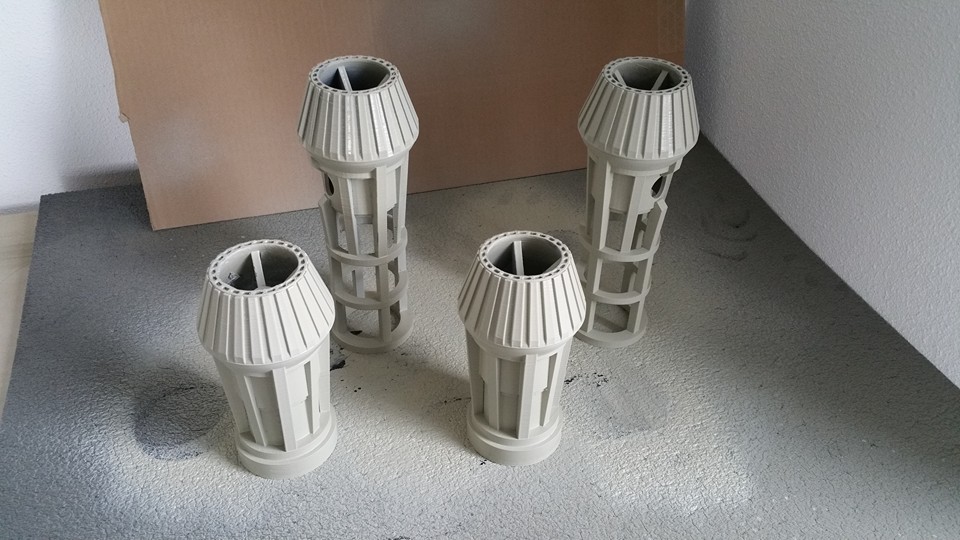
They are multiplying ...
And after so additional love and care they are now ready for airbrush and lighting !
Untill the next update !
Re: ASPHIAX - VENATOR Class Republic Star Destroyer
Looking good! What was the print time on those?
Re: ASPHIAX - VENATOR Class Republic Star Destroyer
The big ones about 20 hours, the small ones about 16.
That was with 0.20mm layers. I can go to 0.1mm layers. You can almost not see the printlines anymore then but it doubles the print time so was a trade off this.
Re: ASPHIAX - VENATOR Class Republic Star Destroyer
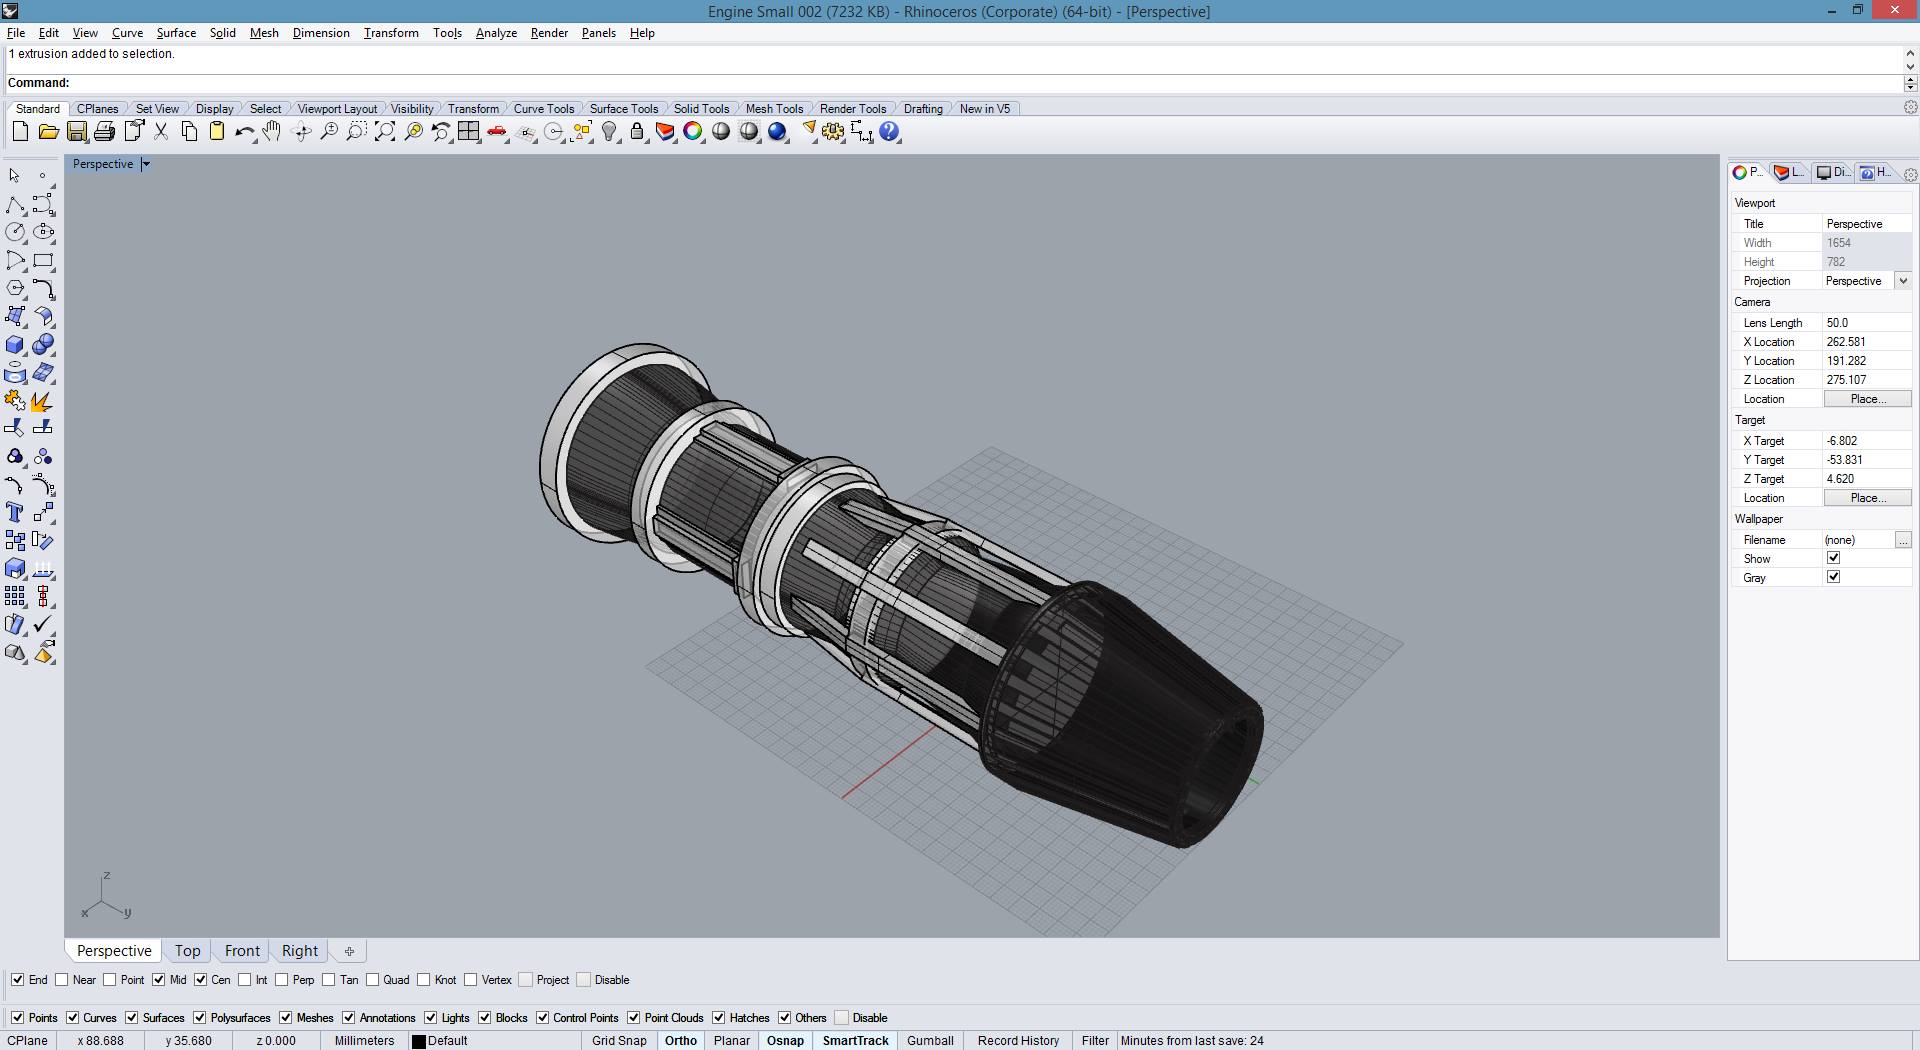
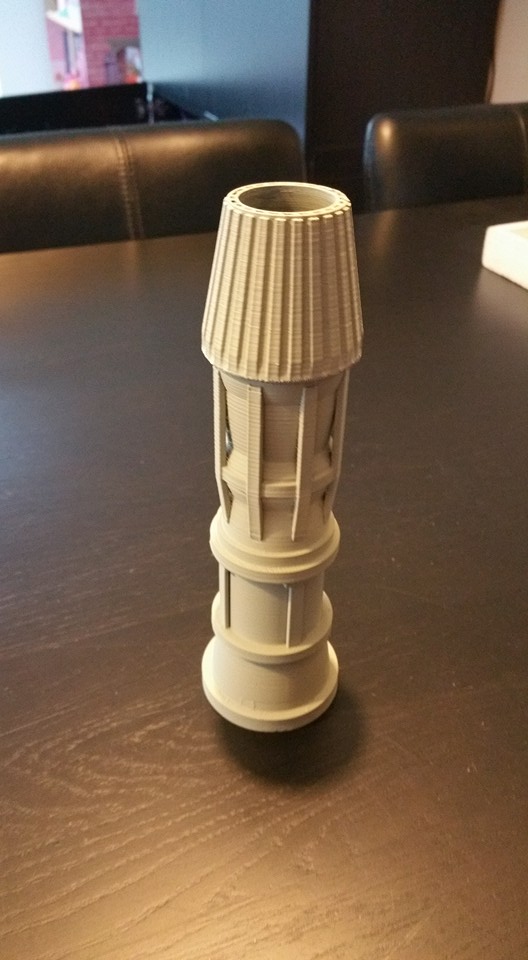
And finally the 3rd engine designed and printed !
The force is strong in your family ..
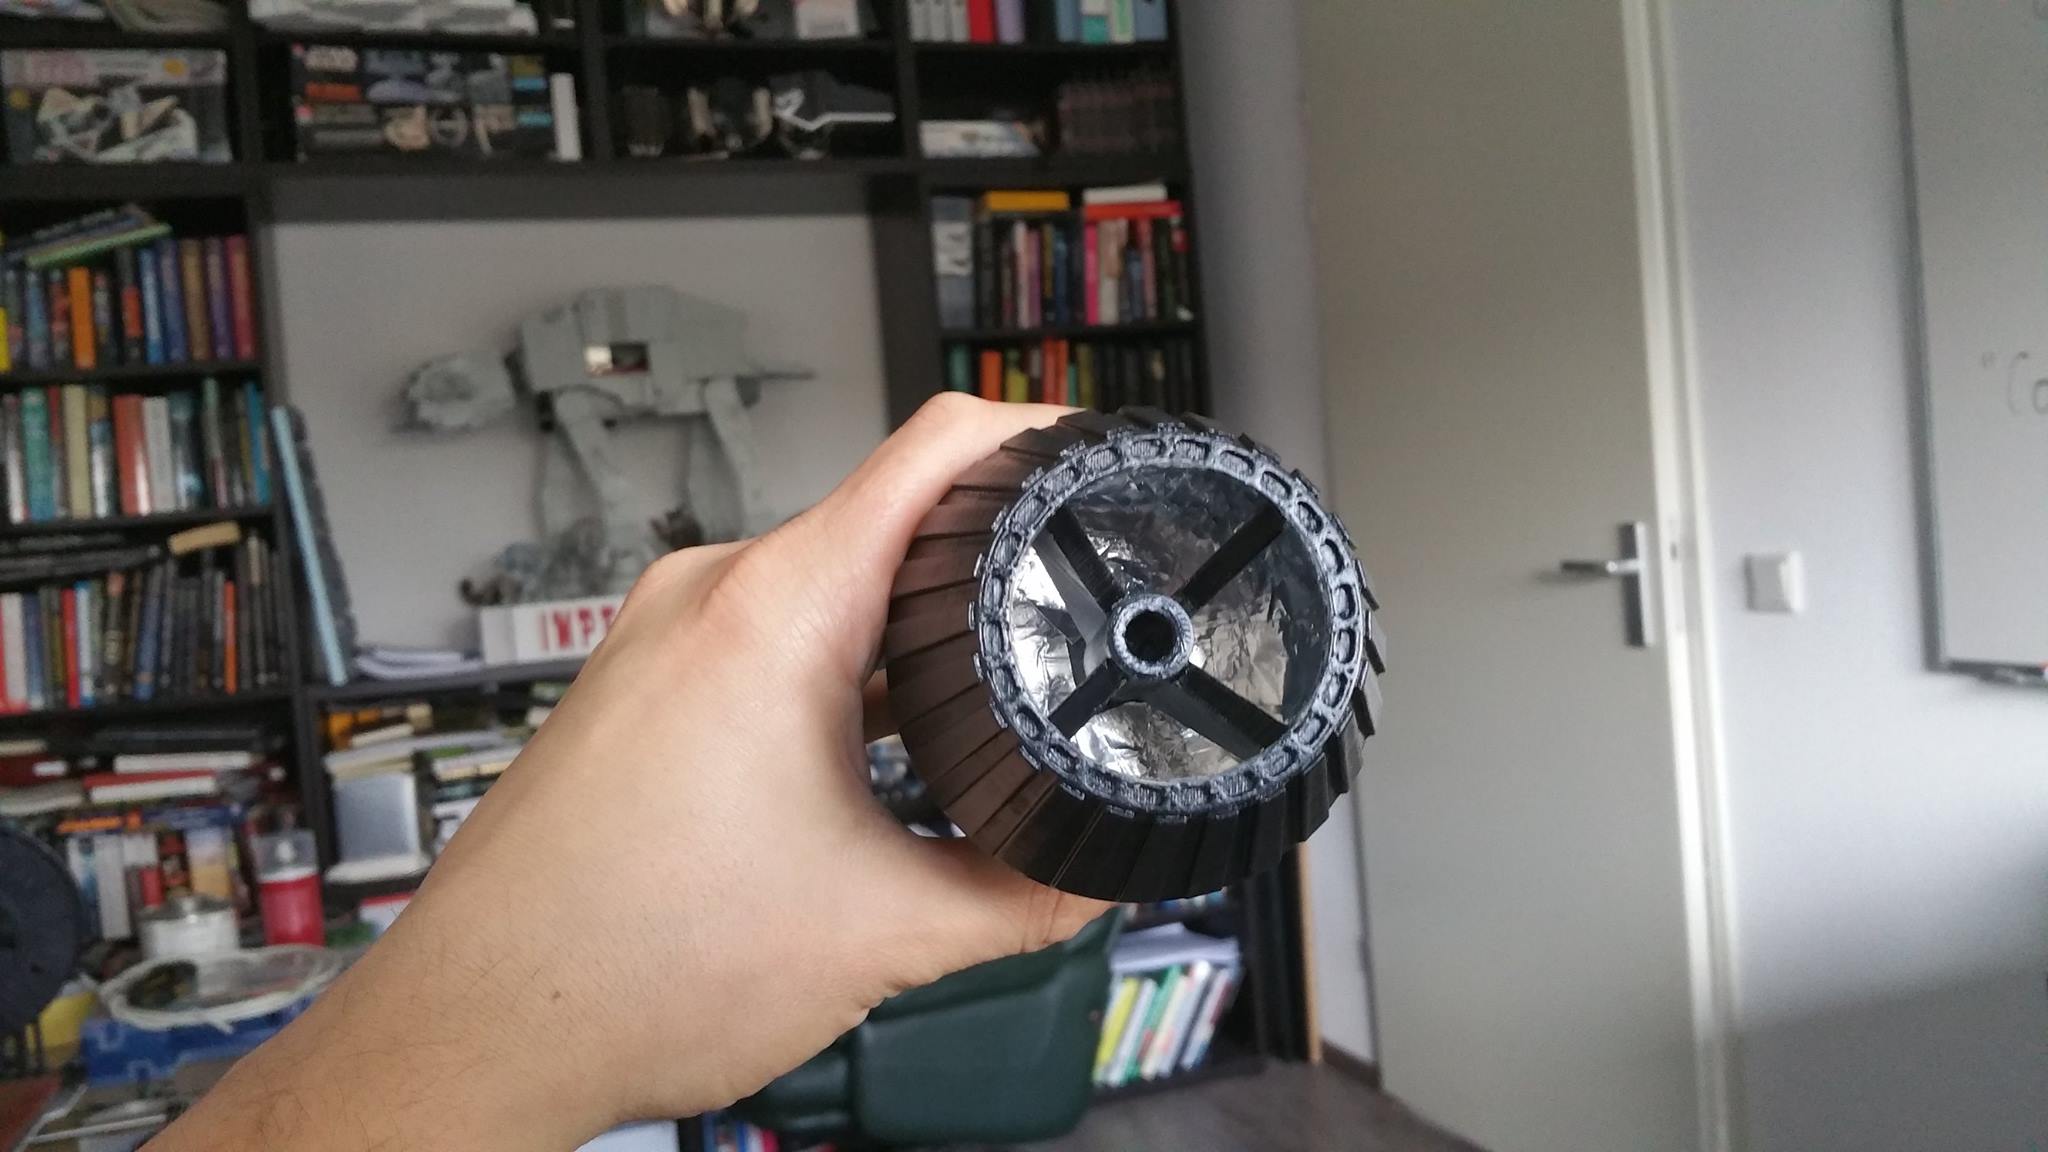
Also started on the lightplan for the YAZI by covering the internals of the engines with aluminum tape*
You know you are getting good progress when you start designing the hardware / internal structures of your build ..
Re: ASPHIAX - VENATOR Class Republic Star Destroyer
And to show what can go wrong if you design to fast and dont take enough time to properly analyse the part you have created in 3D.
Printing supersmooth, almost looks like a mirror with no feelable bumps or lines ...
Oh **** .. the 3D design is missing a single surface somewhere deep in the design ..
After some fidling and testing in the printsoftware it turned out ok ...
Why not use the misprint for a glue ....
Laters !
Re: ASPHIAX - VENATOR Class Republic Star Destroyer
Wow, you've really upped your game with this build! Thanks for showing us the process of the 3D printed parts, I'm finding it really neat to see how the pieces look and then how they fit into the design.
Re: ASPHIAX - VENATOR Class Republic Star Destroyer
Quote:
Originally Posted by
TheMainMan

Wow, you've really upped your game with this build! Thanks for showing us the process of the 3D printed parts, I'm finding it really neat to see how the pieces look and then how they fit into the design.
Thanks man! I have got to say that with this printer the creative energy flows freely.
I was planning on doing a timelapse from creating the 3D design to printing it to airbrushing it with some nice music behind it.
Re: ASPHIAX - VENATOR Class Republic Star Destroyer
Re: ASPHIAX - VENATOR Class Republic Star Destroyer