Noooooooooo!!!!!!!! Say it aint so! Pulease tell me you aren't scrapping this mod, first my pet tapeworm dies and now this?

Printable View
Noooooooooo!!!!!!!! Say it aint so! Pulease tell me you aren't scrapping this mod, first my pet tapeworm dies and now this?
OK, Ive had time to cool off and I think I can finish it if I get some more bondo tonight. GOD WHY???????
Ill try and post some pics but photobucket is being dumb right now.
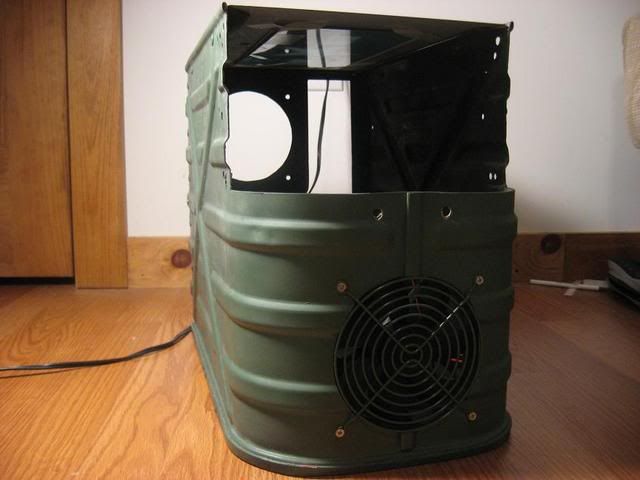
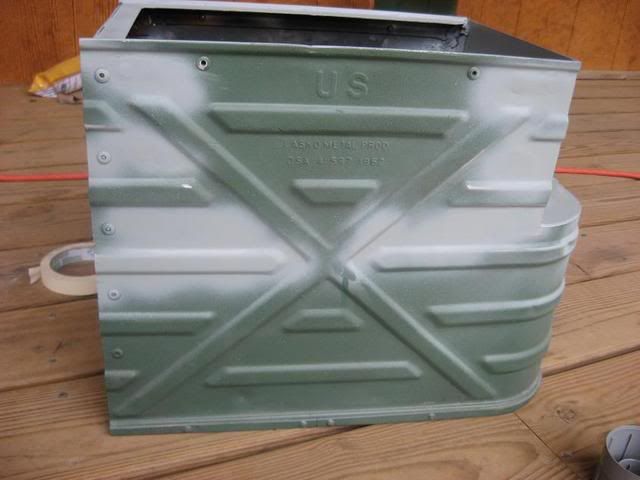
Ok I have some pics
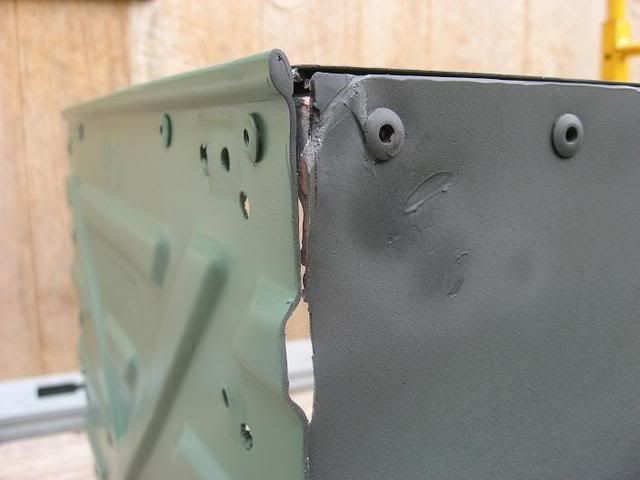
The damage!!!!
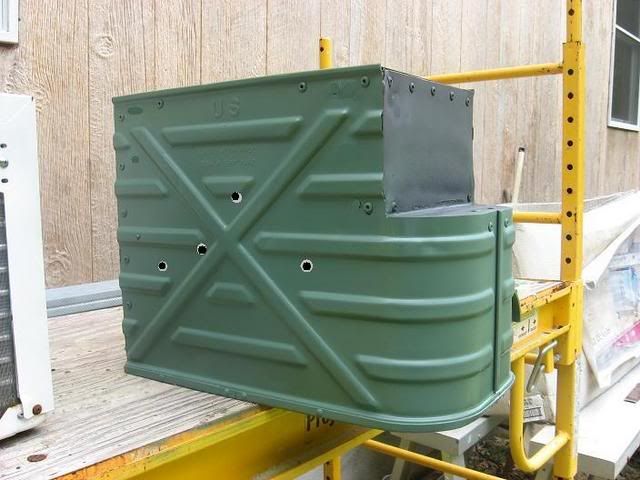
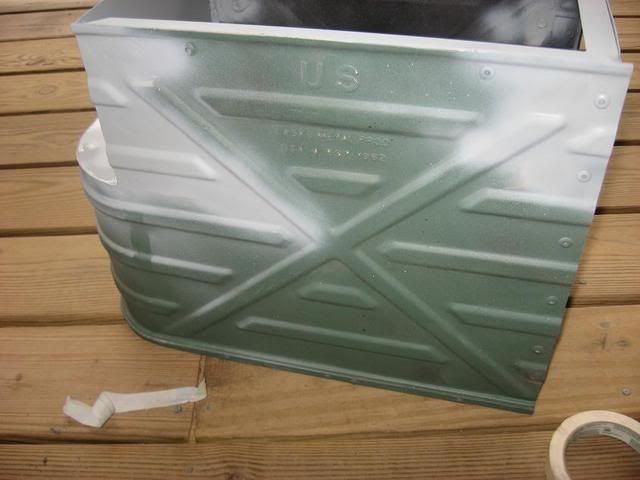
The paint
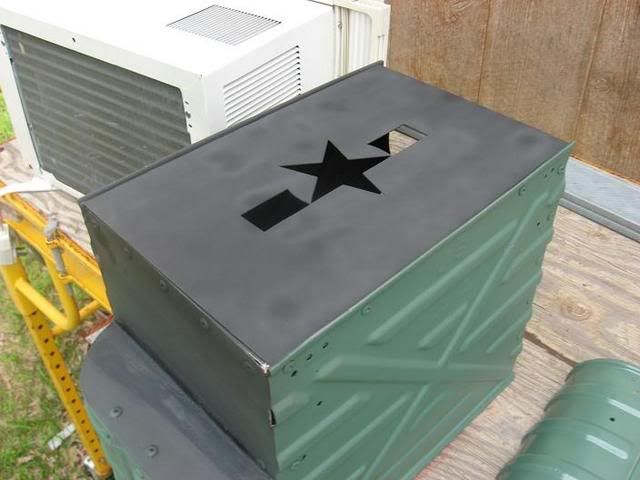
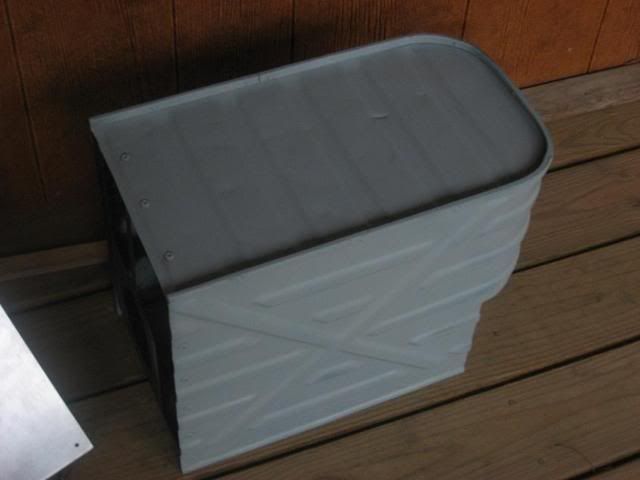
Top view
I still have alot of work so i dont know if I can complete it or not
-danthegeek
If you don't finish this, Send it to me and I will at least profusely claim that I will.
=D
Thats not a flaw ... Thats a FEATURE! Its not damaged ... its ARTISTIC. It looks like perfectly good BATTLE DAMAGE to me. :D I have complete confidence that with your talent and creativity you will be able to either fix it back like it never happened or incorporate it in to the plan. Either way it IS a GREAT mod and and WILL be a GREAT mod when its done!
Y MUST GOOD CASES DIE SO YOUNG!
dud u gots to finish this case! it looks so good!
a little dent never stopped a tank from running! live the dream!
oh and i need some competition in the case mod conest ;) (like i don't have enough)
This mod must not die......you've spilled blood and sweat!
I love the theme and the rough military styling. I know a few ammo box mods and this one is much nicer than the run of the mill!
Please finish it!
Ouch!
You can do it. You can do it. Just work through it. You can do it.
Well I wont be done in time for the NJ show but I will continue the project. Just, not today. Its 105 degrees outside my house and i thought I was going to pass out while doing bondo work on it earlier. I am going to remake the front bezel just because i want it to be as nice as it can be. Well time for a shower, Im drenched in my own sweat.
Glad to hear this mod wont die. This mod is one of the reasons I spent so much time here. I need to see it completed. Good luck.
you should bring it anyway! i might be bringing my OPP csae without a comp inside (atleast a working one ;))Quote:
Well I wont be done in time for the NJ show
Its a 2 1/2 hour drive. Its a little far just to show a work in progress. When is the next show around the baltimore and philly area?Quote:
Originally Posted by lukeisthecoolest
EDIT- What do you guys think about bullet holes? Should I thow a couple in or leave it the way it is. I would cover the holes in plaxi and have the red lights shine through.
Idea??
Oh, if you have any suggestions on hole placement pm me a pic..
I bought some milliput putty from ebay to fill all of the unneeded holes in the side of the case. Hopefully it will be here soon and the temperature will cool off a bit outside so i can get rockin on this case. Im really starting to get excited :D about this again.
-danthegeek
danthegeek
Keep modin' !!!
This is mod I like ones. Let's Kick it !
As I see this bullet holes were shoped, right?
Not to bad. But also not to awesome.
I think that u should make ones when u finsh this. It's to ealier to get them in ur project. IMHO :P.
Keep goin' man. I like it.
EDIT
I would rather to kick it in real then goin' with bullet holes. Realy. Ram it, smash it maby.
It would look like from real first front line. Real Battlefield should bring it to U.
Thats my thoutghs :P.
I gotta say, my first thoughts were to go for real bullet holes as well. I dont know about where you are, but here they even have places where you can rent a fully auto machine gun...
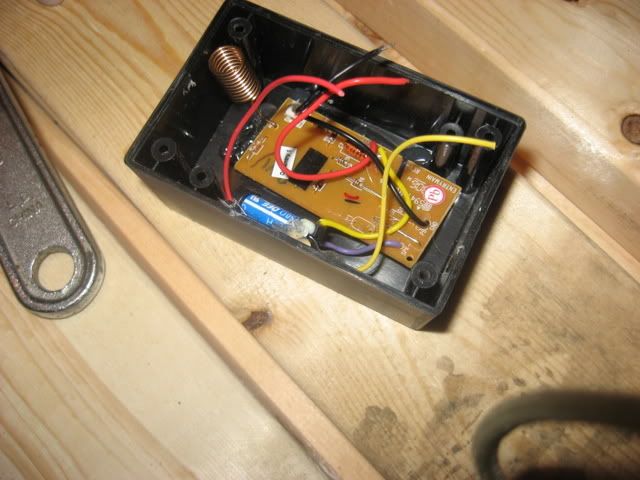
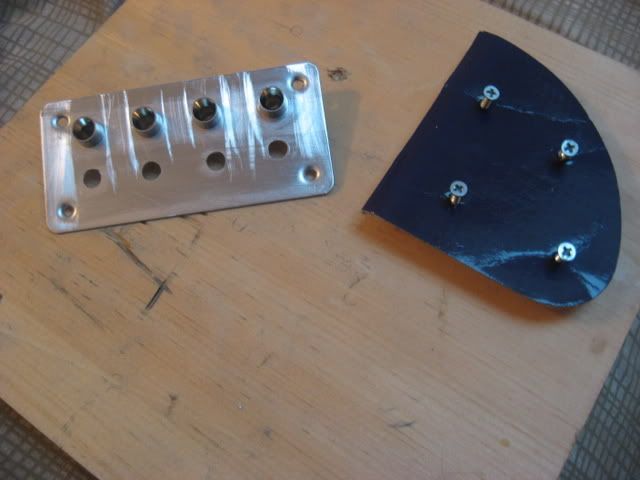
I continued work today on the receiver for the remote start.
I started by taking some 3 pin connectors from old fans and wiring them to the receiver. I did this so I can easily disconnect it from the power and motherboard.
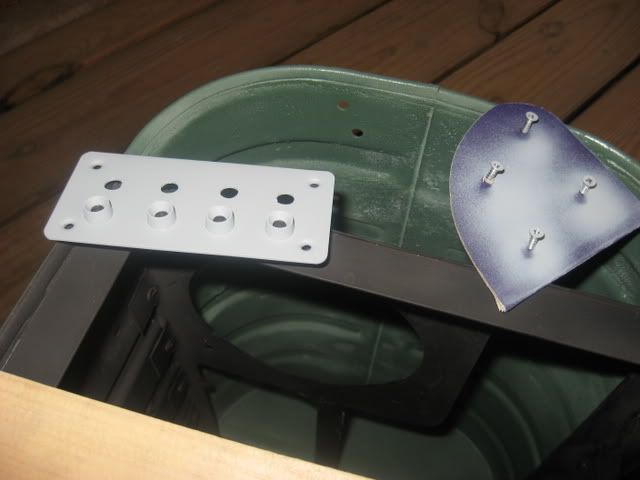
I then started to sand, primer, and paint the receiver box and the front cover of the switch box.
I didnt get much done today sense it was raining outside most of the day. Well, tomorrow some more interesting stuff. I start on cutting the front bezel and the front fan hole.
are u going to th NJ show at all? we need as many TBCS members as we can get!
just bring your armour case! ;)
one member down -> many more to go
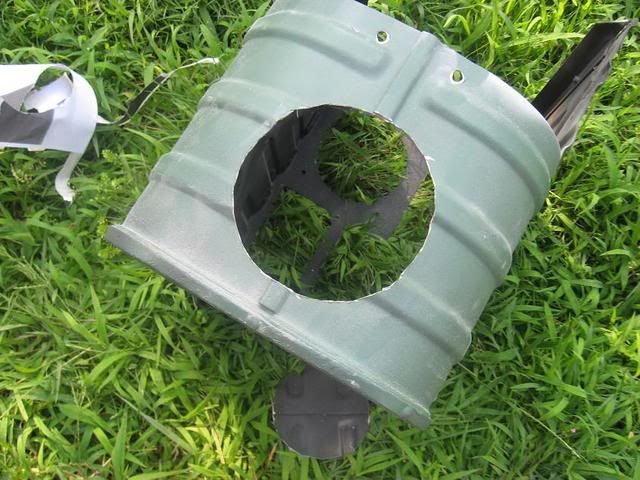
Today i only had time to cut the front hole for the 120mm front fan.
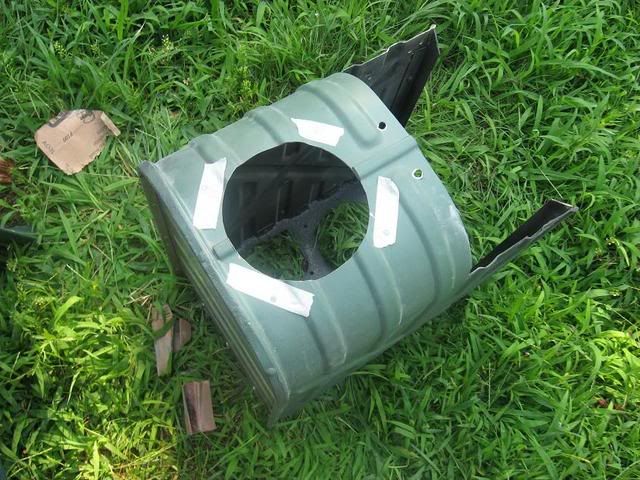
I traced an outline and made my ruff cut first
I then cleaned it up with the dremel, sandpaper, and the marked the spots to drill the holes for the screws.
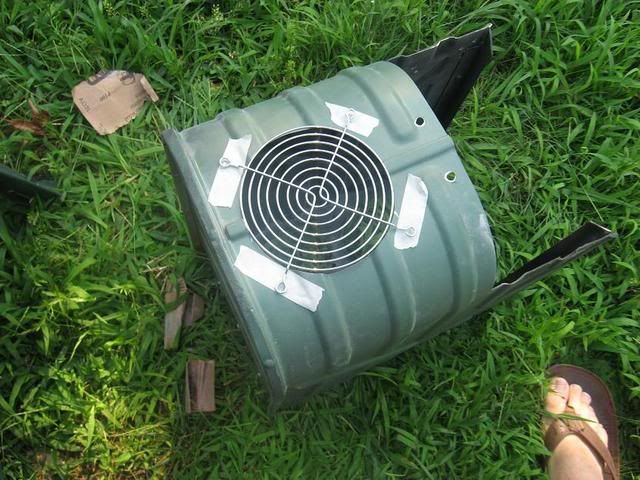
I ended by primer and painting the edges of my cut and the front fan grill. I havent decided if I will keep it green or paint it black. The green seems to blend in and make it seem like it is built in.
Ill post a small update later of the fan installed once it has dried. And what color should I paint the fan; black or green?
-danthegeek
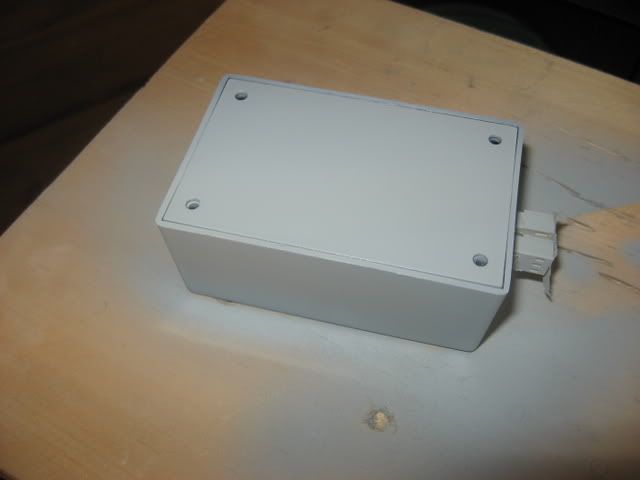
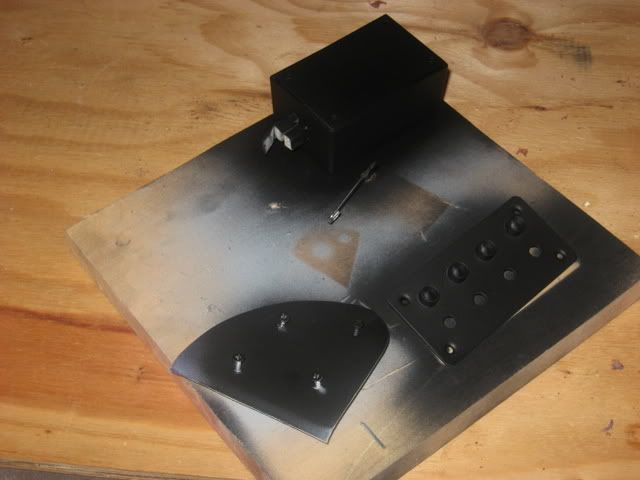
Heres a few pics of the receiver box and the switch box
The switch box with its new paint.
The receiver
I made a sticker and took some sand paper to it and the cover to make it look worn.
-danthegeek
why not go for a 140 mm fan?, and it should be black:P... think it would look to green with a green fan as well
Well I dont have a 140 fan and I like cheap. Also, a 120 in the front and back will be plenty for this system. As for the fan color, I think black will be a good color as well. It should give it a bit more contrast and match the inside.Quote:
Originally Posted by p0Pe
Well I just got back from photographing a wedding. Fun night, anyways I wont be updating until Tuesday because i will be gone. Im going to my girlfriend water front home for some fun.
Oh, anyone else have any comments on the fan color or other things on the previous page?
This looks very nicely done.
Thanks for showing me the quick-replace Dremel discs... I didn't know those existed... but, WOW!
I. Need. Those.
I think this mod is going super great.
The BattleField theme is really coming together.
The switch panel with the lights, very nicely done.
I like the 'weathered' look you gave to the sticker.
:up: :up: Dan!
And, have fun @ your girlfriend's!!! :D
bown chicka wow-wowQuote:
Originally Posted by danthegeek
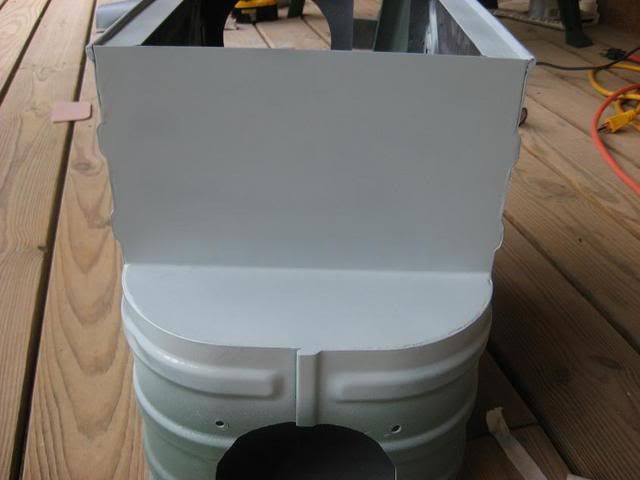
I have some progress pics.
Not much done but at least this gives an idea of what I have been doing.
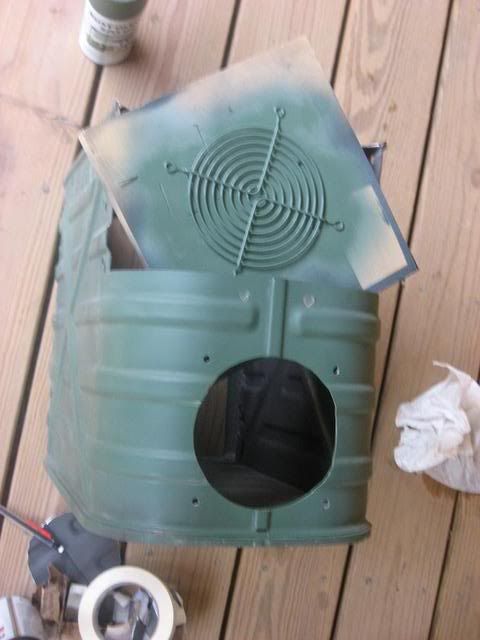
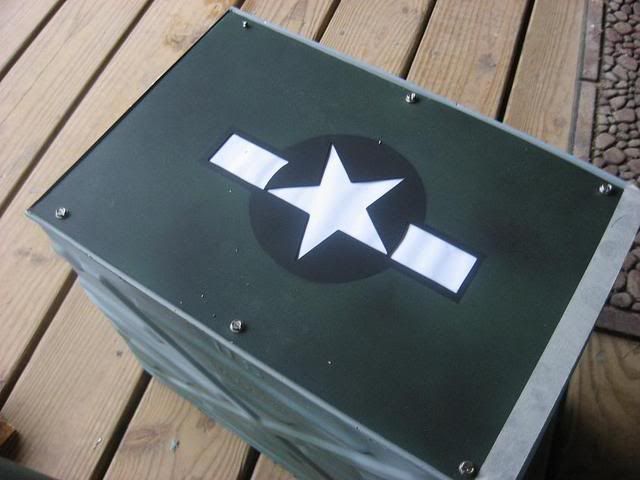
I painted the top panel. The white area is actually paper but It gives you an idea of what the frosted plexi wil look like. I did a little bit of aging to the top and I will continue it on the rest of the case.
The front fan finished, I just need to paint the bolts.
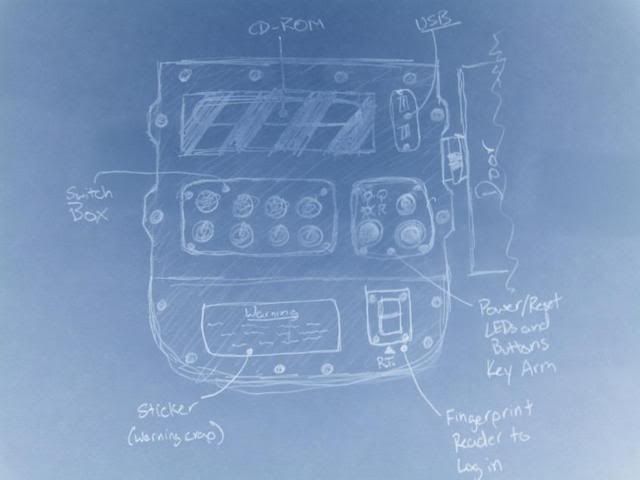
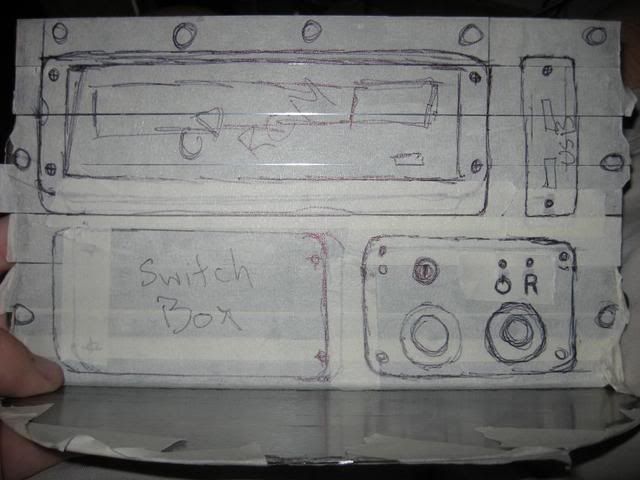
EDIT-I also did a quick sketch on the front bezel setup. I think I may finally be certain on the order of things.
what type of switches are you going to use on the front panel? I've recently been experimenting with different types of toggle and push swtichs for power, reset etc. Momentary toggle switches give a great 1970s early computer look. Would also look good here.
Im kinda confused, you have a c4 detonator, yet after you "trigger" it, you have to bend over and put your finger in the thumb reader?
I say drop the reader and center the sticker, it makes more sense.
Other then that it looks fine.
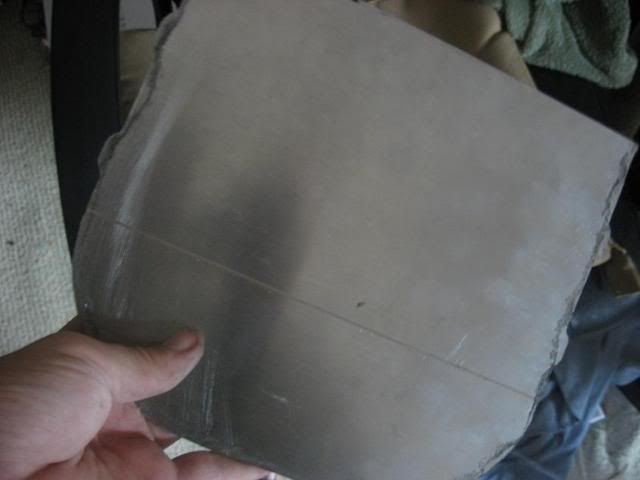
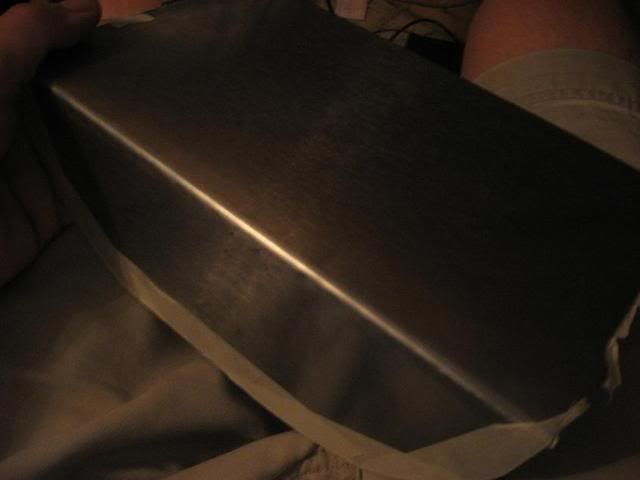
Anyways, I now have my front bezel cut out.
I then bent it at a 90 degree angle as best i could with a Rubber mallet and some angled aluminum.
I laid out the front(actual size) and I will start cutting the holes and brackets for the stuff tomorrow. I have to make metal plates that everything fits into so i can remove stuff by taking out screws. Should look good.
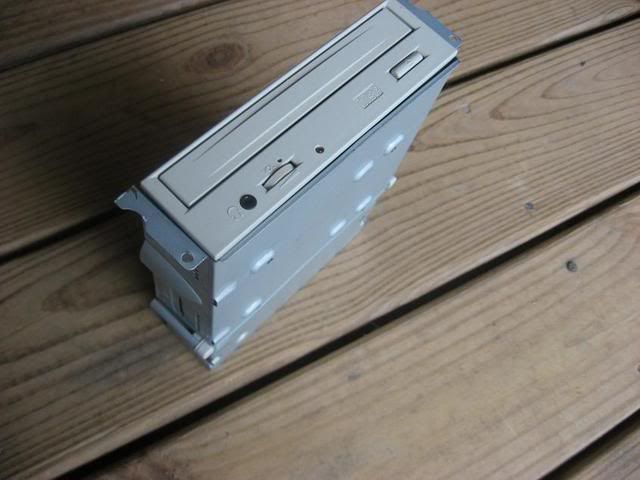
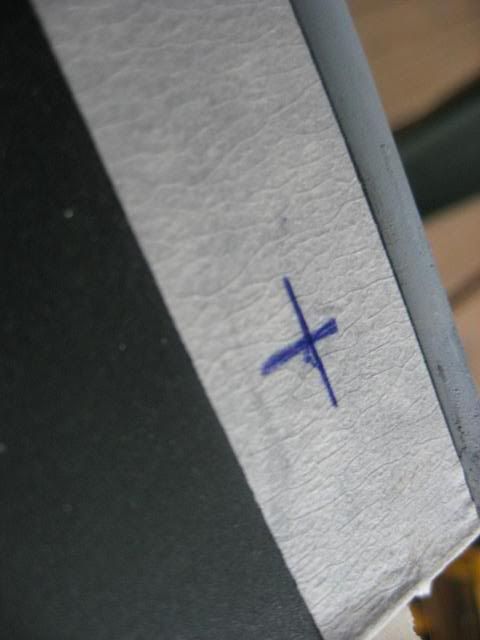
Oh, and this is what I will use to attach the cd rom to the front. I just have to cut it along the bottom tape marks and then support it with something.
EDIT- On a side note, If anyone is wondering why I went with green for the color instead of beige, well it was beige. It made it look like an old office computer. So, I went with green to give it more "flare."
That is hilarious, I never thought of that but beize is the cardinal sin of modding, good call! 8)Quote:
If anyone is wondering why I went with green for the color instead of beige, well it was beige.
I will be using THESE. They are big and look cool.Quote:
Originally Posted by Air Cooling Fan
OK time for an UPDATE!!!
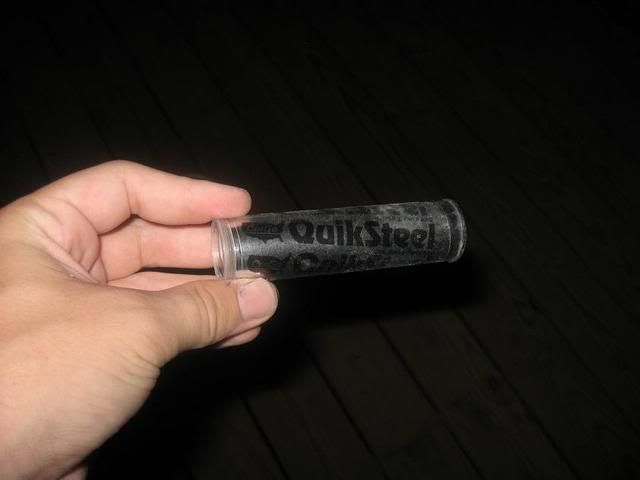
I needed something to fix the unneeded holes in the side of the case. So, I went to Autozone and bought some "Quick Steel." So I used this and it worked great. Its so strong, I dont have to worry about the holes anymore. If I need to drill a smaller hole in the same spot I can.
Right Side holes fixed and primed.
Left Side holes fixed and primed.
For the front I used the "Quick steel" again to attach the front panel and primed. Trust me, it isnt coming off. I tested it with other scrap pieces and a hammer. I destroyed the steel before it even started to crack. I just need to fill in the gaps a bit and sand the primer smooth.
While the primer was drying, I cut the bracket for the CD-ROM drive. Easy enough
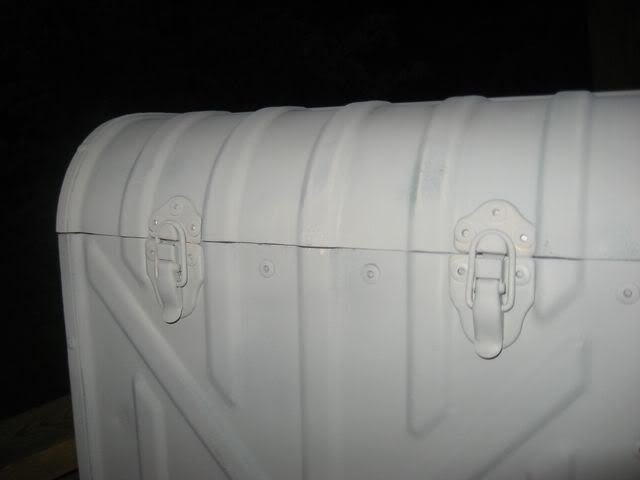
I went ahead and marked to screw holes for the top cover.
The I used a small drill bit (forget the size) and made a hole for the sheet metal screws.
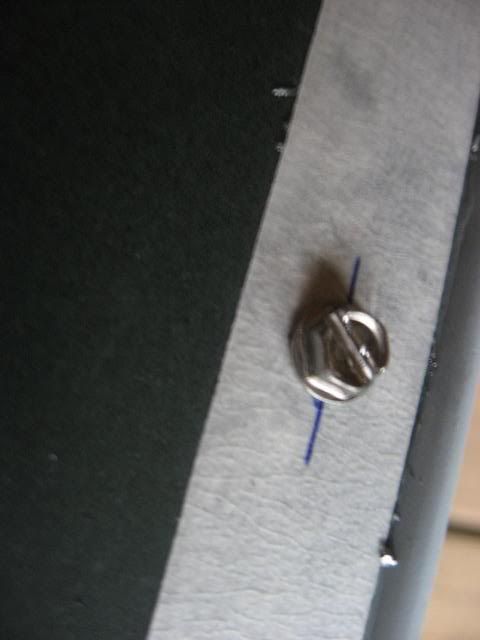
The finished product. If you notice the top left screw has a brocken head. Nothing some vice-grips cant fix.:) .
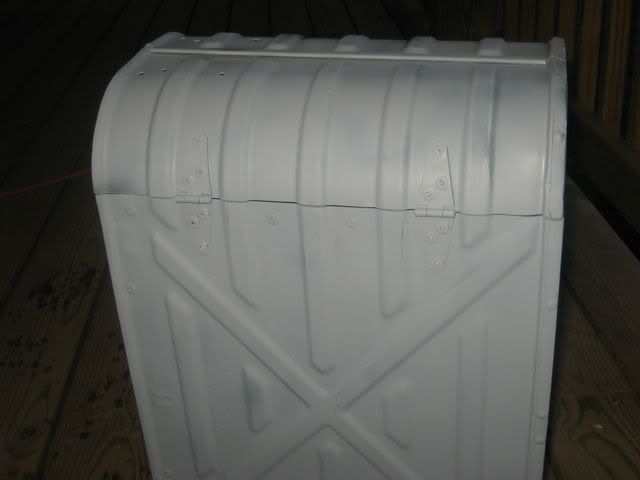
Once the primer was dry I sanded the entire case and primed it. A little smoother and I will need this when I paint it and blacken in some areas like I did for the top cover.
Once that was dry I took some black paint and painted the underside of top cover and the case. Ill let them dry over night and start work again tomorrow.
Thanx for viewing.
-danthegeek
Looking incredible man. Can't wait to see the front panel finished. That's when I'll lose it. Just awesome.
+Rep
so nice, but wouldnt it fit better with some... more military liking switches or are you gonna paint them?
I really need to find a nice, big ammo can now =p
seriously
+rep if you build a pc into one of these things:DQuote:
Originally Posted by Omega
http://www.bf-games.net/images/bf2/waffen/kord.jp
sry for off topic, but could be a great mod right:p
yeah, no =p
I doubt you could fit anything larger than a mobile-itx in there anyways (and it would have to be in the hopper)
not to mention the last thing I need is cops to come into my house and see that I have (what appears to be) a support weapon...
Omega, I can get ammo cases here in Vegas... Got friends on base. Got a particular size yer looking for? I have one right now that is roughly standard case size. I forget what ammo it carried originally, as I sprayed it black a long time ago. Can probably get a couple more of those fairly easily (I think it was 20mil ammo)
Well, omegas right. Its to small and to big at the same time.Quote:
Originally Posted by p0Pe
Ill try to update tomorrow, nothing got done today since me and my girlfriend where out all day.
-danthegeek
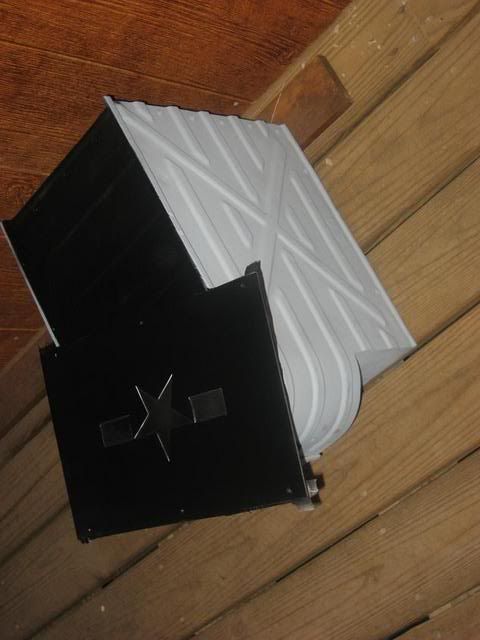
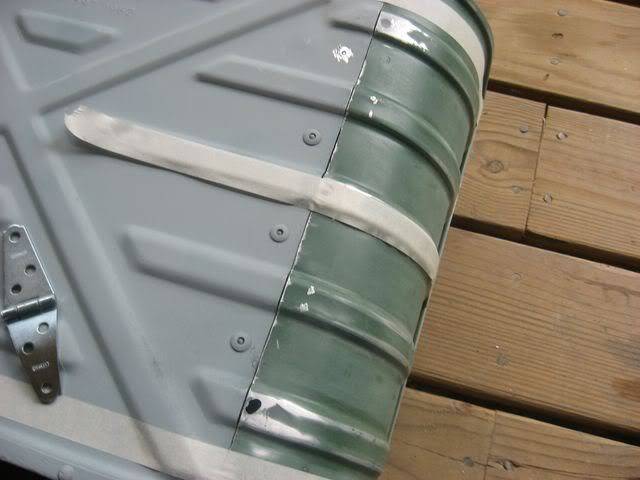
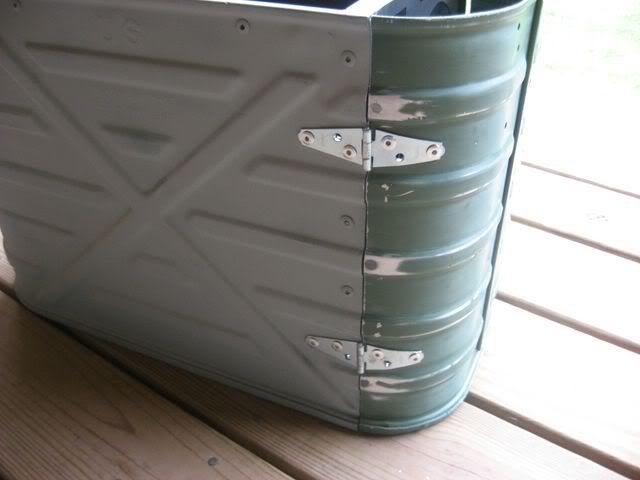
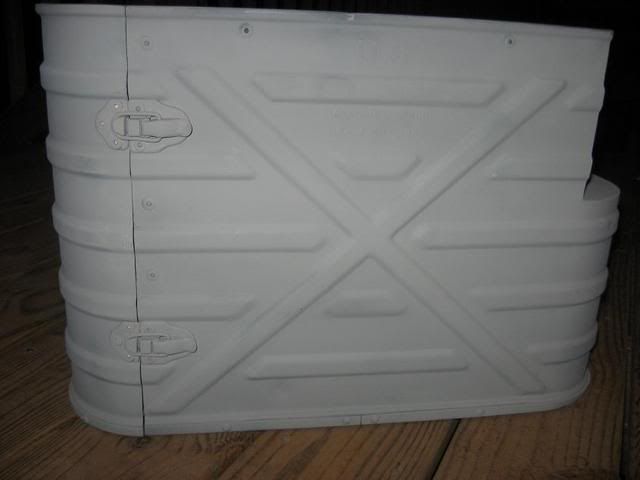
OH I finished the back door.
I started by evening up the door to the case as much as possible. Its close enough. I also had to cut off two rivet heads on the left side of the case so i could attach the hinges.
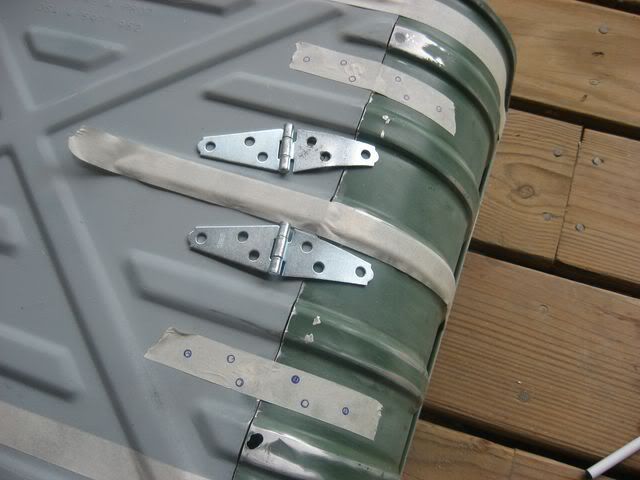
After they were cut, I taped everything up to mark the holes and then drilled.
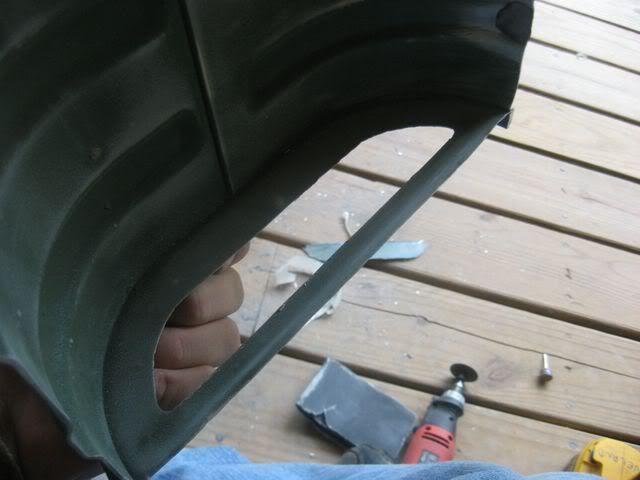
Before I attached the door, I wanted to cut a small hole in the bottom for air ventilation. So, I marked it off and then cut it with the handy dremel. I intend to put some mesh in the hole as well.
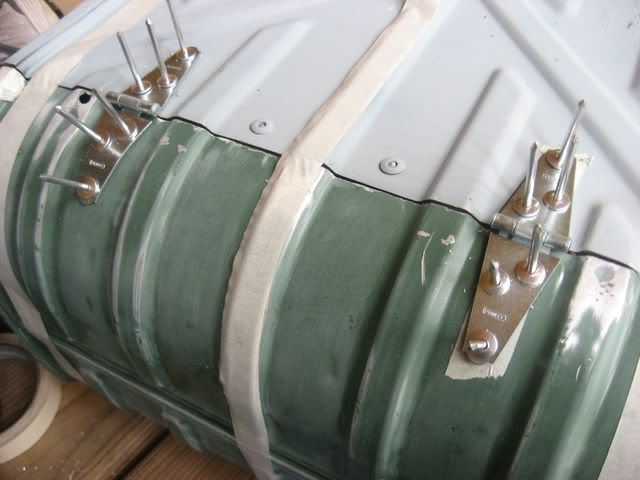
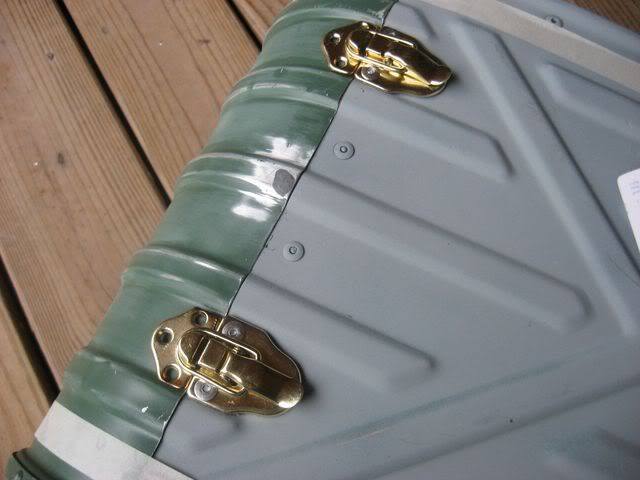
After that, I attached the door with the hinges.
I then marked the holes for the latches and attached them as well.
I then sanded and threw on some primer to protect the metal.
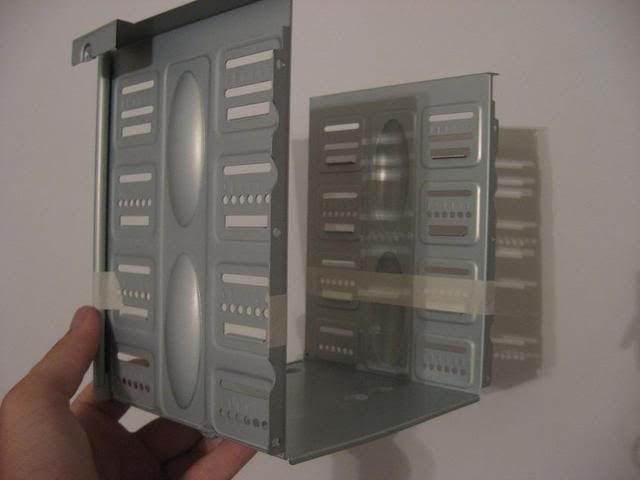
I hope to start the front tomorrow but that will be a challenge. I have to cut a piece out of another case to create a door for this one. O just hope I dont screw-up the measurements.;)
Thanx for looking,
-danthegeek
On a side note:
I think it looks much better then it did before the overhaul.
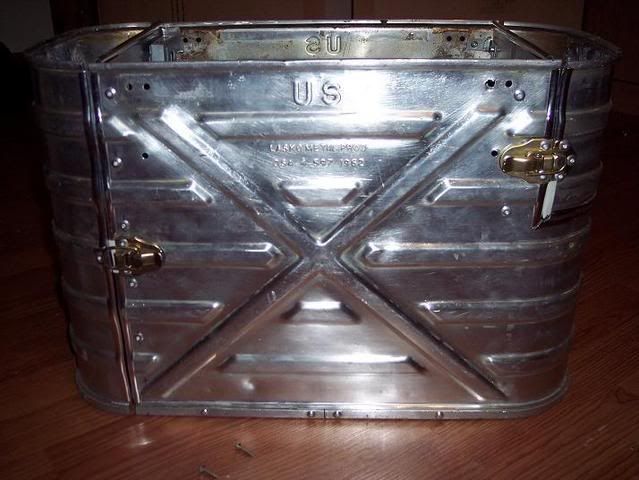
Before
After
I don't know man. I think it looks awesome after the renovation. I cant wait to see this one finished. Then I can start my ammo can mod after this. This mod is an inspiration. Good luck with the rest. I'll be watching.