-
Re: R2server
Got a Little Painting done this week after work in the evenings.
My group of Resin Detail Pieces here are primered Gray then covered with Rustoleum Come finish. After working with the Chrome the best way to use it is a top coat...more like a candy, because if you try to build up layers like with normal paint the shininess of the surface goes away, get bumpy and distorted. The Next group will get primered 2 coats of silver paint, a top coat of chrome, and a couple light coats of clear (to much and the shine goes away).
Here's one of the Leg Hubs up close.
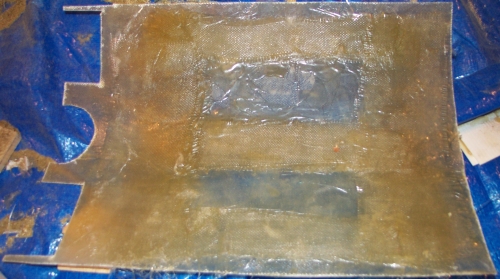
I also Tested an off white paint for R2. The Real R2 is a Cream color (that's because it shows up on film as white, but doesn't blend into the Stark white interiors of the ships :) ) But since My R2 is not going to be filmed I just want him a little off white not Almond. So I picked up a can of Biscuit paint. This foot shell still need some details cut out so I did most of the body work (Bondo the corners and some of the dents, not to many Cause R2 needs to look used not right off the show room floor!) A couple of coats of primer some wet sanding and some color coats (2). This is what you get.
Let me remind you that this foot was made out of an old PC Case, That I hand bent and Spot welded together (I've still gotta make the Center foot So I'll take Pics as it Happens so I can Post them!).....Not bad for a HIllBilly with a hammer!
Crazybillybob
-
Re: R2server
I'm going to be out of town this week (Working in Indy) So I don't think I'll get much done....Check back later though (next weekend is full on modathon!).
Thanks,
Crazybillybob
-
Re: R2server
Congrats on getting Featured here @ TBCS
-
Re: R2server
wow man this mod is looking awsome i cant belirve how well its coming along
i mean the inginuity in this project is amazing
i cant believe u already put so much detail in
well keep on going
is there any peticular advantages to haveing a server based board and if so what
-
Re: R2server
Well I didn't get the big thing I wanted to done this weekend, R2's legs mounted.
It would seem my wife's been checking out Tribal's thread... She wanted a new workbench in the garage, We've talked about it for 2 months this weekend she decides to start it.... :? Well I don't think she did a bad job on ! :)
Now there's only 2 More to build (they'll have plywood tops for mounting tools).
I did get several smaller thing done on R2 though,
I got the Rear Access Door cut out (both the styrene and Fiberglass)
I also Reinforced the Fiberglass to keep it from distorting when the unit is attached to the hinges.
The frame was prepped for the front skins to be glued on, a few places on the frame had to be ground down or cut out to make room for the resin details.
Before
After
And one of the Aluminum details was made. It's called a coin return (cause that's what it looks like!) R2 has 3 of them, 2 in the back and a larger one in the front.
I started with some flat Aluminum sheet and bent up the pocket bit of the return.
Then cut out the front plates.
A bit of dremeling, some filing later, and the slightest hint of JB kwik, It's done!
Here's what it looks like in the skins (just set in for now!)
I'm still hoping to get the legs mounted this week...
Only problem is I have to remake the mounting plate, I miss aligned them by 1/2" ....I've got almost 1Gb of drawings, pics, etc. for this mod and I mess up the little things....you know the part that holds all the weight! :mad: Just goes to show you even with planning there's always mistakes!
More Later
Crazybillybob
-
Re: R2server
:omg: that is too cool---this is really great to watch---keep it up!
-
Re: R2server
I got a little more done on the rear Access door last night.
The styrene skin and the fiberglass stiffener were glued together (with gorilla glue...I love this stuff!) and Clamped.
Then Quick before I left for work I stuck it into place (with some tape)..I've gotta clean up some of the glue that leaked out and adjust it for final fit, but it looks like that is going to be minor adjustments at this point! :D
I also ordered three motor speed controllers
Bi-directional Speed Controller from Electronics123
These will run the Main feet drive, and in the future the dome drive too.
I also ordered 1 Pic flasher to drive all those LEDs in the rear of the dome (why reinvent the wheel)
Pic Flasher from Carl’s Electronics
That's it for now. Thanks for stopping by I'll have more up soon (and some other R2 pics...The Michigan R2 builders are meeting this Saturday In Detroit!)
Crazybillybob
-
Re: R2server
:omg: LoL..you have everything but clothespins and hair barrets clamping that piece down ---lookin great..did you laminate seperate pieces of styrene to get the raised panel look on the body or is that scribed?
-
Re: R2server
All the skins are 2 layers of 0.04" styrene....I've been meaning to put up a how it was done segment here (Maybe I should finish it and get it posted) as the skins were done long before I started the Log. The 2 layer method takes more time but I love the look it gives! plus it's easier to flex then a solid 0.08" sheet, but is stronger then a 0.04" sheet. (means when I hit things with him I will not have to patch holes!).
Crazybillybob
By the Way those little binder clips (little black metal ones from the office stores) Work great as clamps for small pieces...the Jaw force is strong, the can get into tight places that my bigger clamps/clips can't...and they can be disposable because their cheap! :D (free some places) I like to keep some around to be my extra fingers..... Plus I live in the City now :mad: (move here because of my wife's schooling ) and we have one of those Electric Driers
so we have no clothes pins here, or There probably would have been a few on there too! :D
-
Re: R2server
The layered laminating method is the best way for big panels like yours--you obviously did your homework ;) People have no idea how strong this stuff is once its laminated together--incredible.