I can't wait to see the pieces painted, they should look insane. I am wanting to do a gloss white interior on the new LEXA mod I want to do.

Printable View
I can't wait to see the pieces painted, they should look insane. I am wanting to do a gloss white interior on the new LEXA mod I want to do.
I just flew trough this project at lightspeed, watching pictures, and it's awesome!
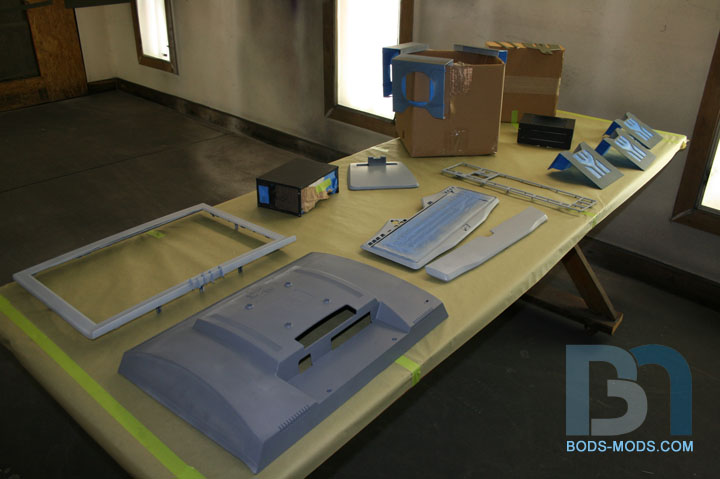
PAINT PHASE ONE: BASE COAT
Here's my painting progress for today. We first laid out all the parts in the paint booth and wiped them with a tack cloth.
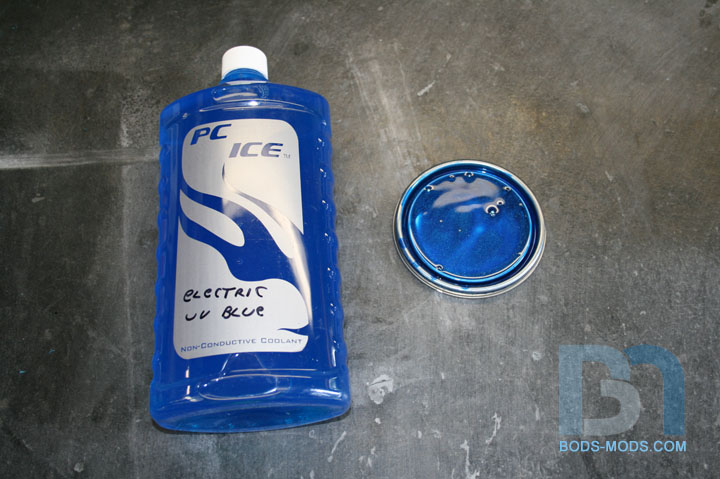
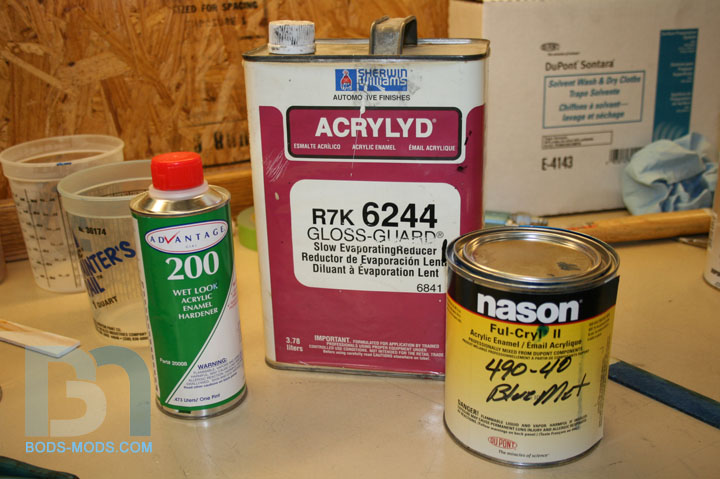
I brought with me the color of coolant I will be using so we could match the paint. But my buddy already had some
blue sitting on the shelf and thought we'd see how close it was. Turns out the first can we opened was a perfect match! woot!!
It also meant we didn't have to use the water-based paints he had to mix & match, which would have been more difficult.
So we could stick with acrylic enamel all the way through. :D The paint is Nason blue metallic by Dupont.
Mixing the paint with reducer and hardener..
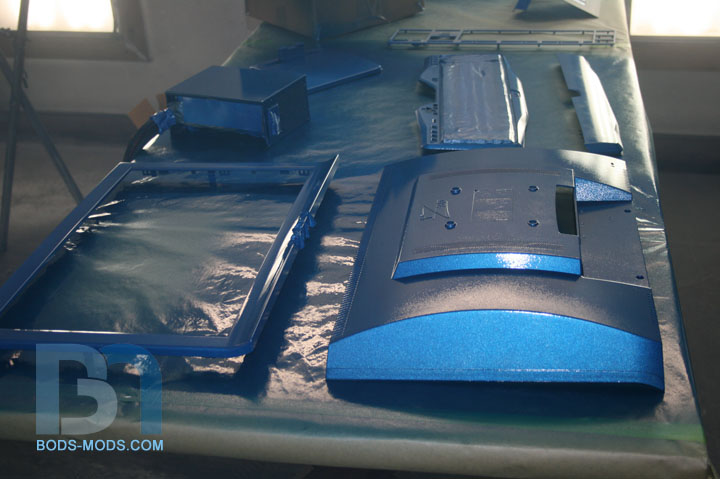
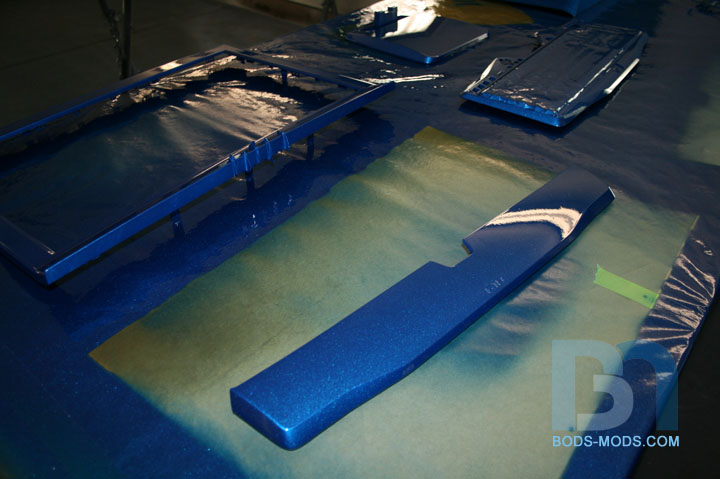
Base coat laid down:
I still can't get over how well it matches the coolant!
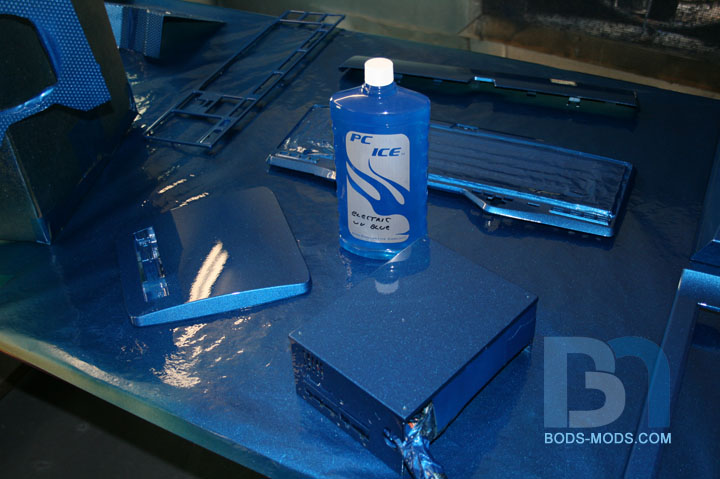
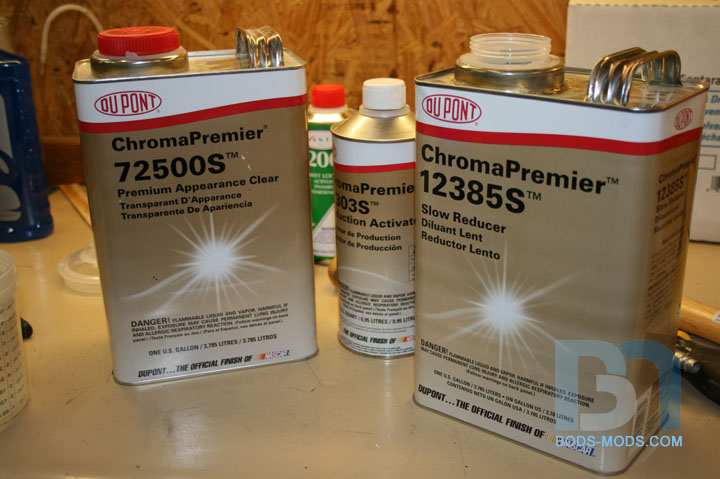
PAINT PHASE TWO: CLEAR COAT
After the base set up for about a half hour, we mixed up the clear coat. This is necessary to seal the metallic so
when we prep for the water-drop phase, we won't disturb the metal flakes in the base.
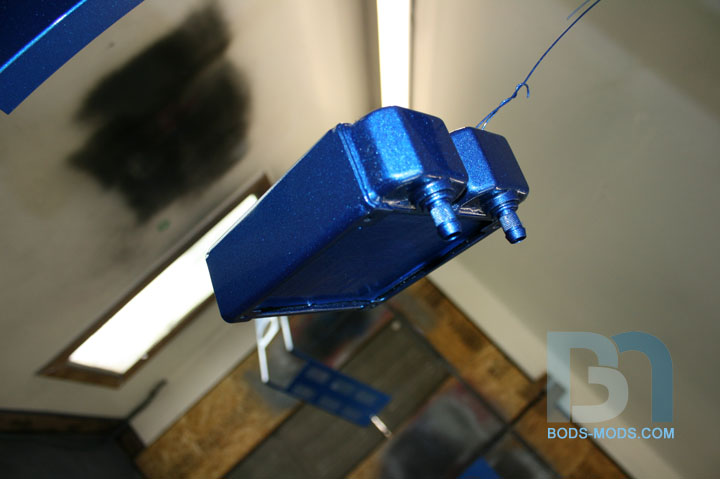
After the clear was shot, I snuck in the booth for some beauty shots. Shiny!
So that will have to cure for a few days before we can do anything else. Unfortunately, I won't be able to get back
up to lay down the water drops for another week or two. However, Scott may have some time to do a few test pieces,
and if he takes some pics, I'll post them up in the interim. So until then!
That is a beautiful shade of blue, looks very nice, lucky you ;).
awesome painting - I love it !! :D, and I'll bet you and many others do ^^
epic win!
they are perfect!
impressive clean work, and nice paint room.
Thanks guys!
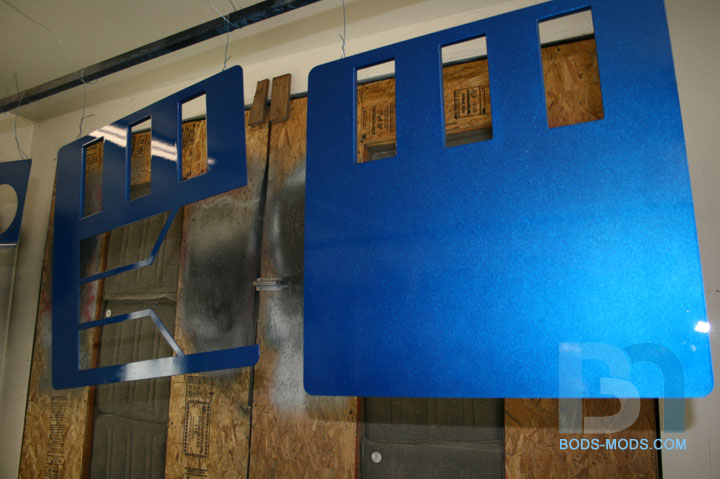
Got a bunch done today, and was able to get most of the interior white pieces painted. :D
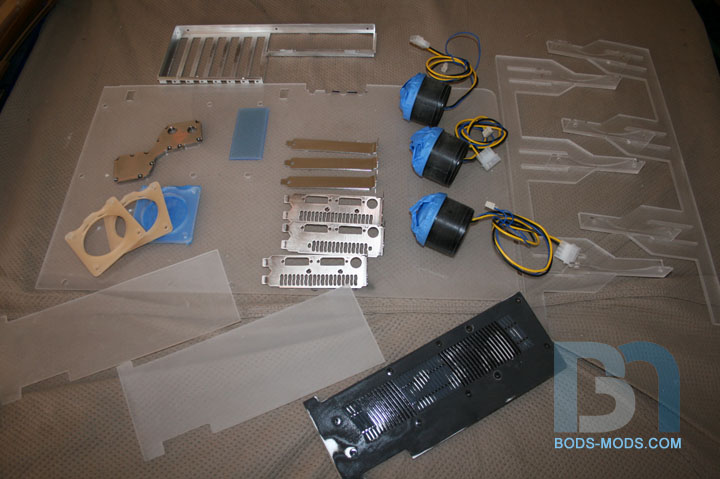
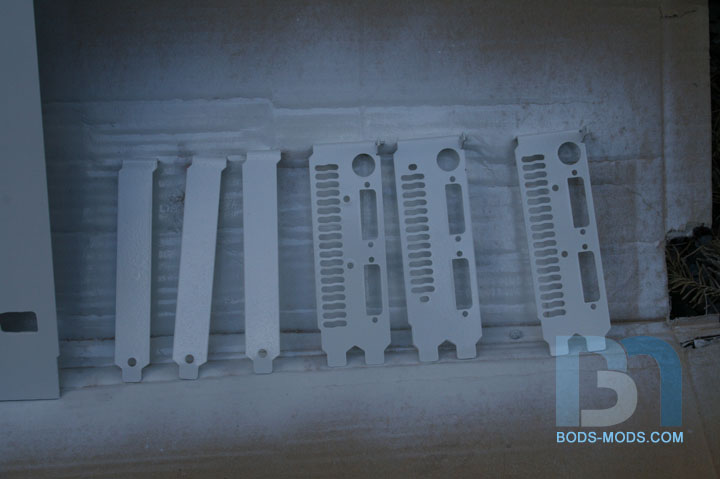
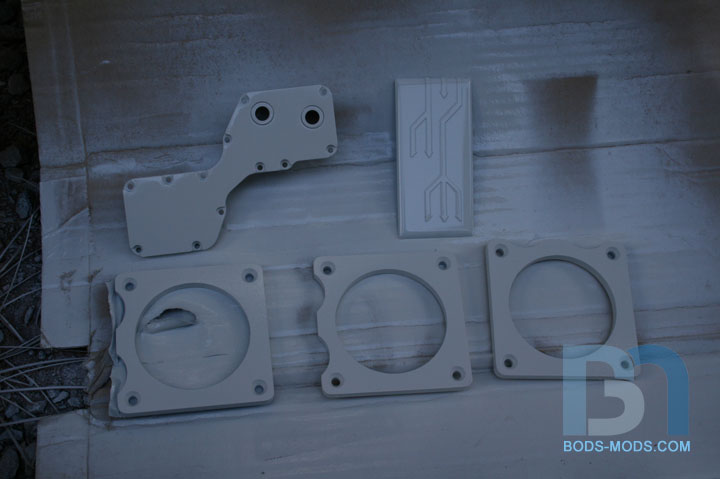
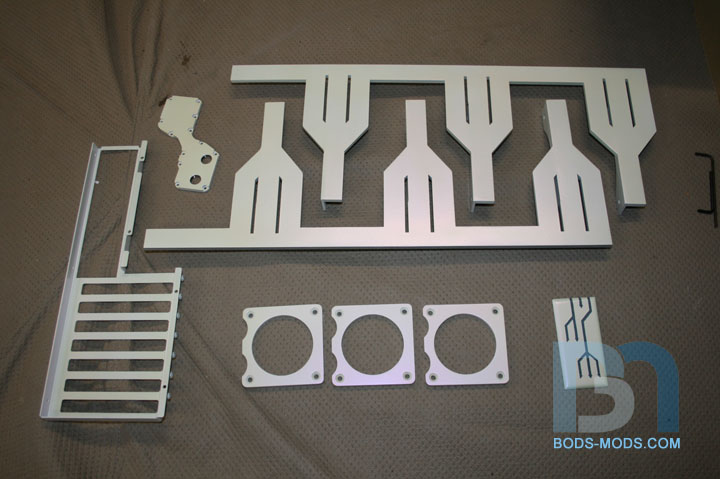
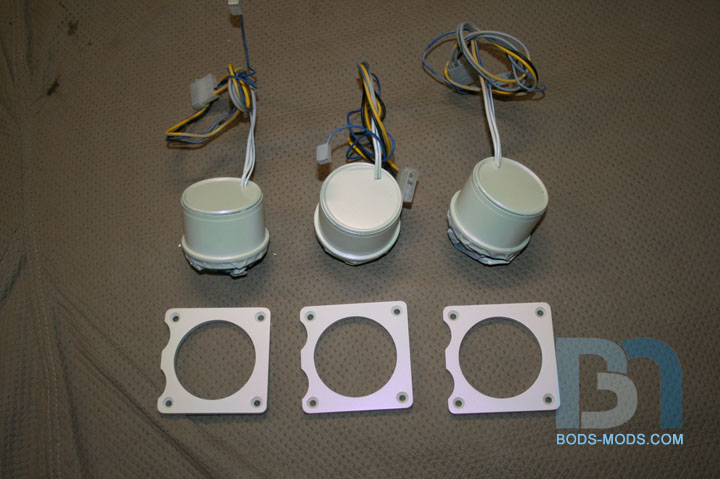
Cleaned and prepped all the pieces to be painted pearl white:
Motherboard IO plate; video card IO plates; IO cover plates; water pumps; water pump mounting brackets;
mobo tray cover; new & improved rad/fan mounting brackets; SLI connector cover; video card covers; NB/SB block;
compression fitting rings (not shown); & CPU block mounting bracket (not shown).
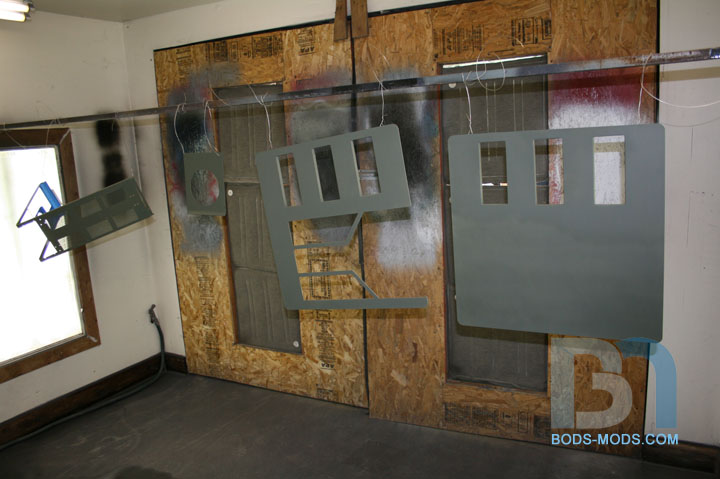
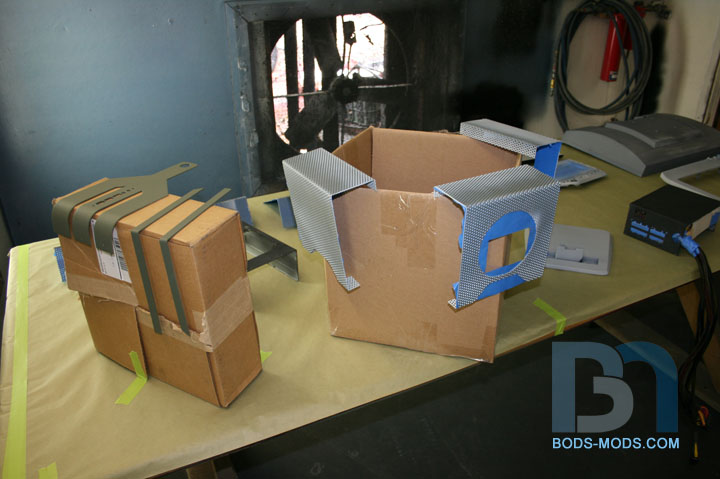
Not having full-time access to my buddy's paint booth, I had to improvise. Set up a make-shift hanging rack
by tying a rope from the ladder to the garage door track lol.
These compression fitting rings are paintable, so they're getting a coat of pearl white as well. :)
Other pieces that couldn't or didn't have to be hung were placed on a piece of cardboard.
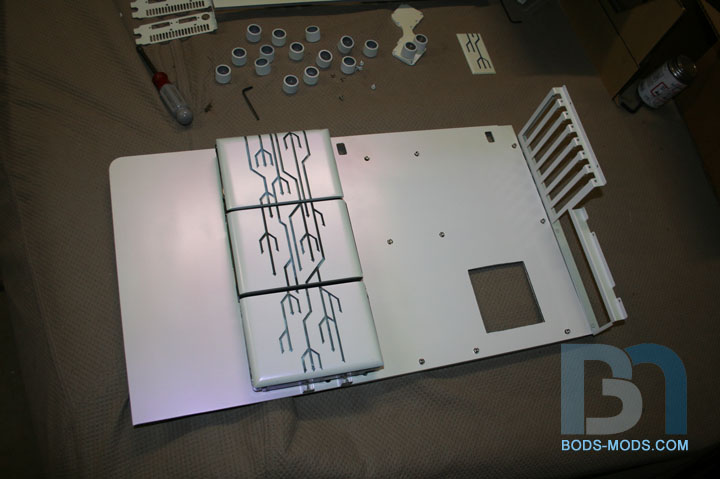
After the pearl top coat:
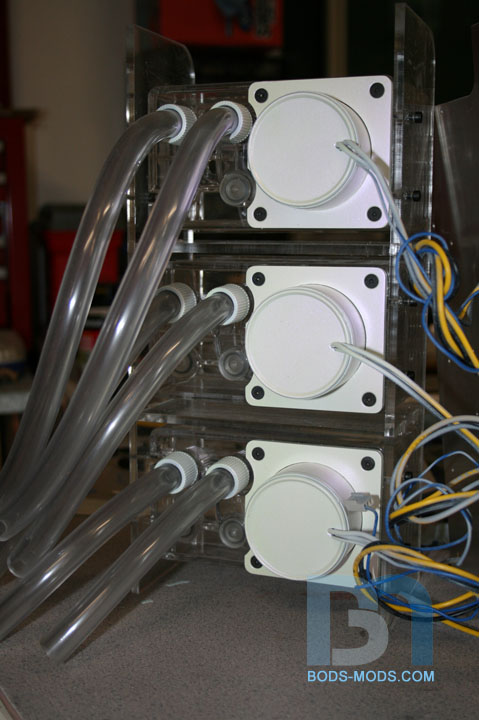
After a few hours, the pieces were dry enough to handle, so of course I had to assemble some things to see
how they looked! I mounted the water pumps and screwed in some fittings:
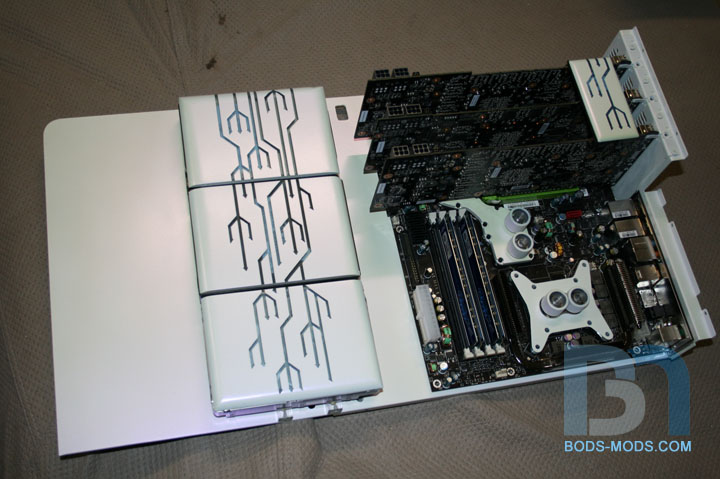
Fastened the IO plate back onto the motherboard tray:
That looked great, so I had to set the mobo tray cover on as well as the hard drives and covers:
Should I go get the motherboard and video cards? Sure why not! :D
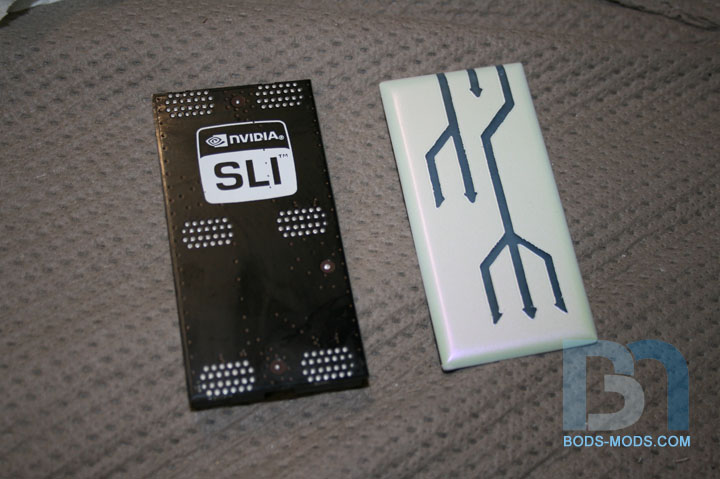
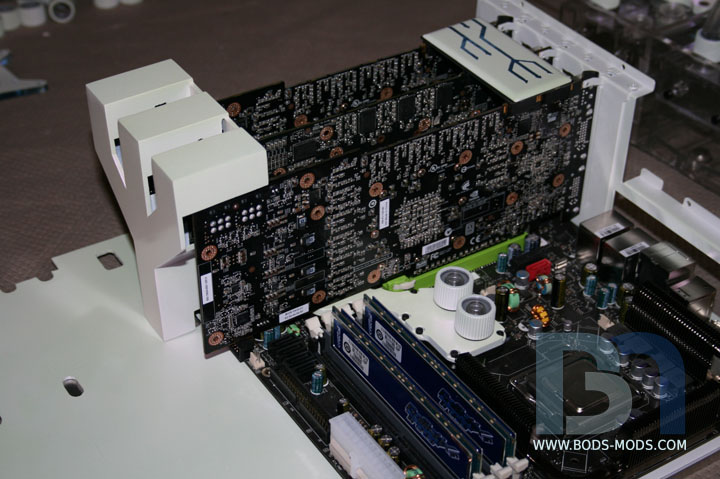
A close up of the SLI connector. I masked it off to match the hard drive covers:
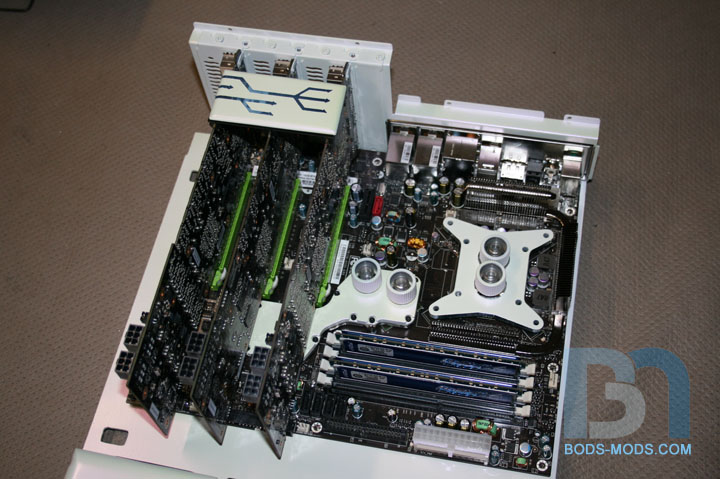
Another angle of the motherboard. I don't have the cpu block yet, so the mounting bracket and fittings are just there for effect.
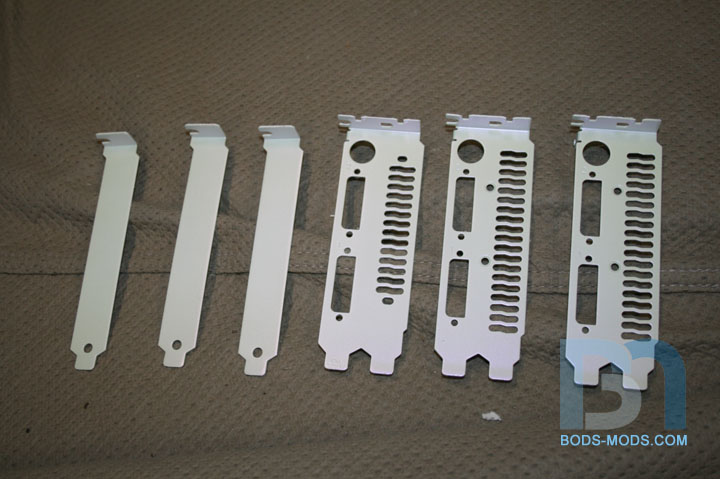
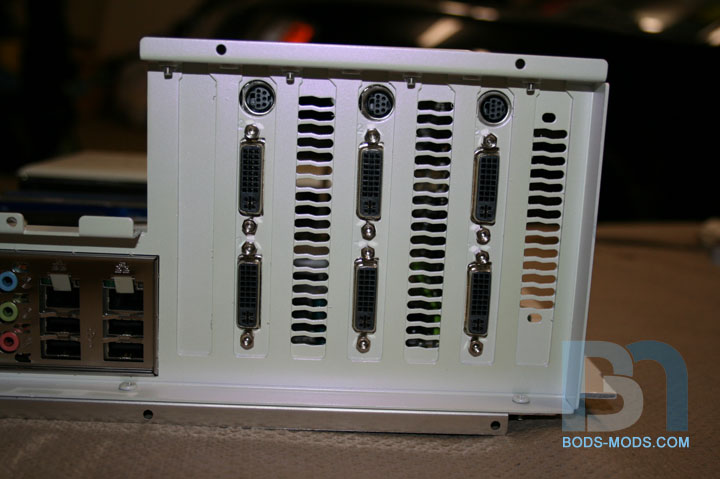
And a shot of the video card back plates. The one on the right is different because I am using slightly different versions
of GTX 260s. They are all EVGA cards, just one is a bit older than the other two. I'll probably put the odd one in the middle:
I'm still working on the video card covers, so I didn't get those painted just yet. I got something planned for them,
and I think you'll dig it, so stay tuned!
OOOOOOOOOOO pretty :D. Lovin' the SLI bridge cover, very cool. The reservoirs with the pumps installed also look awesome.
looks soooo FIRGAN SWEEEEEEET!!!! i really really am going to try steal that...
lol
thats amazing!
wow, just amazing man! great job, keep it up!
are that three video cards?... why the hell you need that for???
doesnt mean i dont like it! :D
-AntraxLife
Yep, those are 3 video cards. Bod doesn't need em, he has them cos he can hahahahaha.
Oh, I love it when you finally get to start assembling all those shiny pieces together. Excellent work my friend! +rep.
Quote:
Originally Posted by AntraxLife
Well, I can't very well have just two cards in a "three"-themed case now can I! :pQuote:
Originally Posted by The boy 4rm oz
Thanks Dan! It's getting real close now, only a few more weeks to final assembly. :banana:Quote:
Originally Posted by rendermandan
No you can't , it wouldn't be natural hahaha. Mod on!!!Quote:
Originally Posted by Boddaker
/\ agreed
Congratz on your MOTM nom at Bit-Tech Bod, you got my vote ;).
haha thanks man! It was quite a surprise to see my case nominated, especially since it's so late in the month, I thought they discontinued MotM completely lol.Quote:
Originally Posted by The boy 4rm oz
yup, you got my vote 2
all the succes !! you realy deserve it :P
Mod on !! :D
My wife loves this build. I think its top notch as well!
Thanks guys!
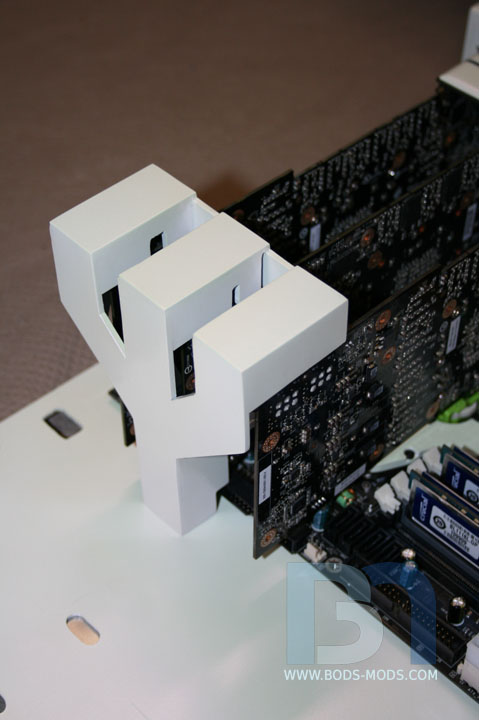
I'm finishing up a cool piece for the video cards, and should have another update for ya tomorrow. It's a cable cover that will route all those unsightly video card power cables down through the motherboard tray and hidden from view. And of course it's trident shaped. :p
This looks great, awesome job.
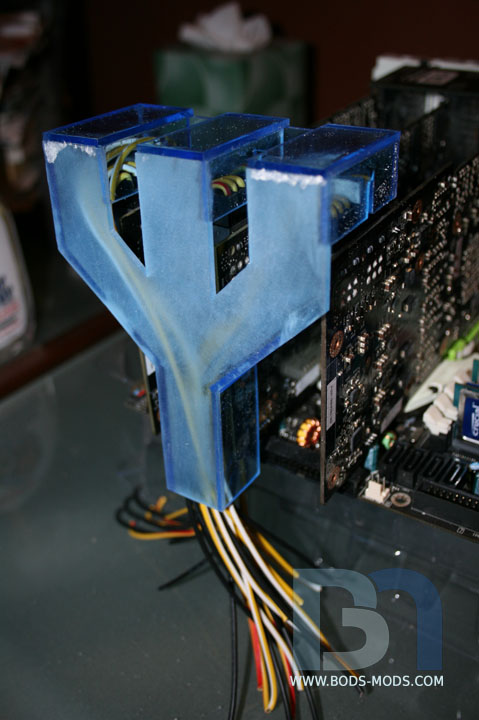
Made a piece to cover the ends of the video cards, where all the power cables plug in. I wanted the cables to be hidden,
so I fashioned a trident-shaped cover that routes the cables down and through the motherboard tray. I'm making
my own extension cables too, so the actual power cables from the psu will plug into these behind the mobo tray.
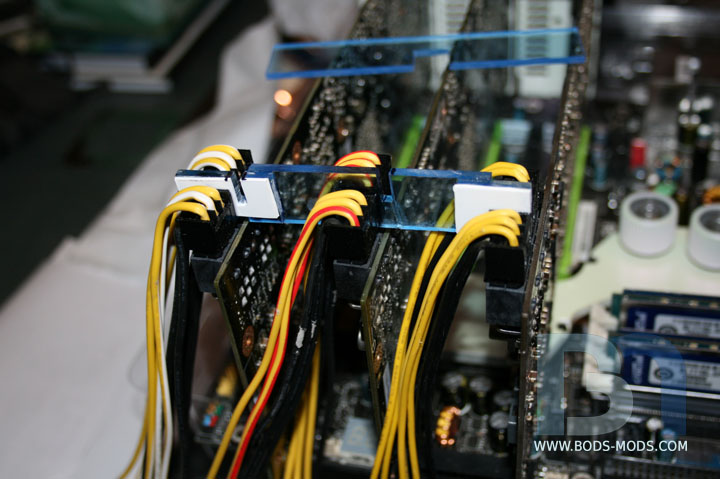
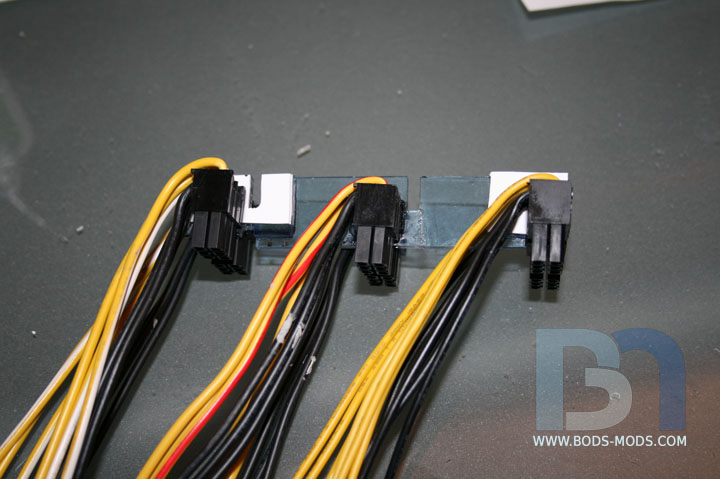
Here is the mess of cables: two 6-pin plugs for each card = 36 wires!
First thing I did was glue them all together with some acrylic and styrene spacers.
Once glued, I can remove them all as one.
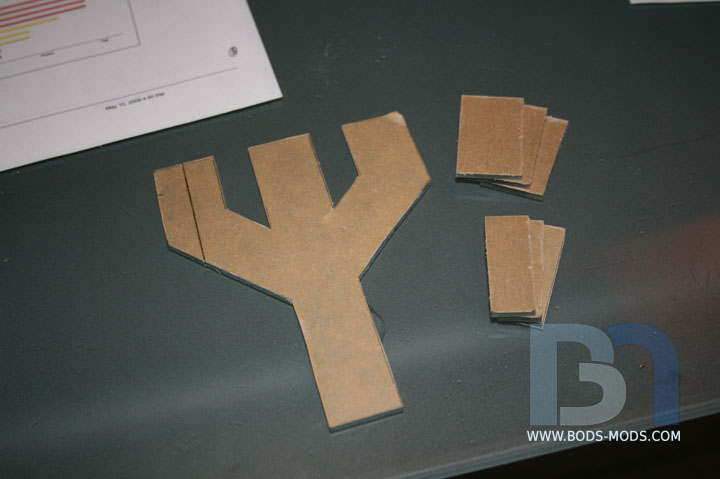
After measuring, I cut out the trident shape and side pieces.
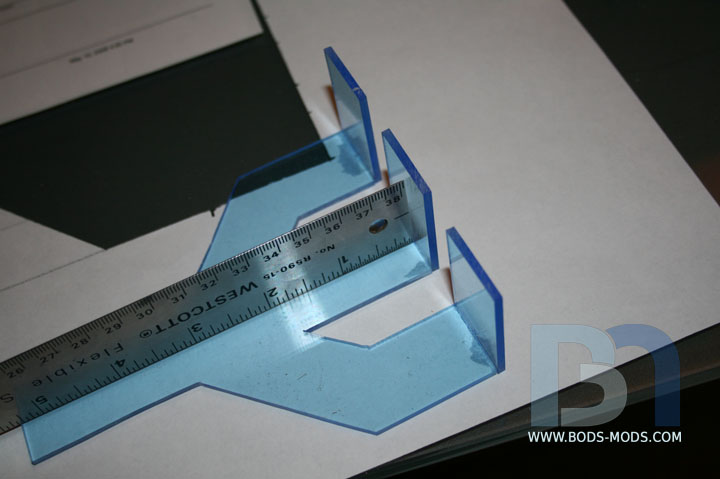
Gluing them together, using the ruler as a square:
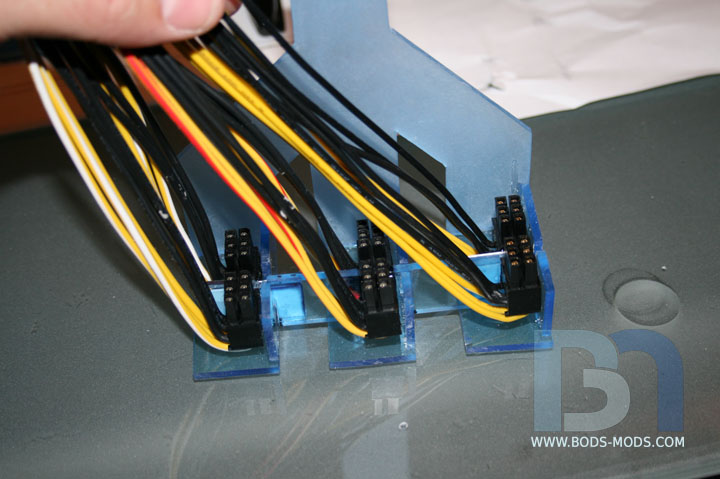
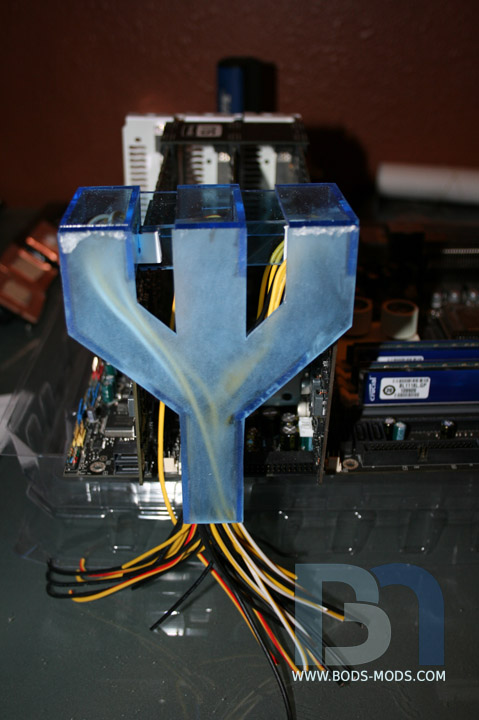
Testing the cable assembly in the cover..
Test fit on the cards (one of many, many test fits lol)
Another test fit, this time with more side pieces glued onto the cover:
You can see how the cables are being routed to the center of the cover and down.
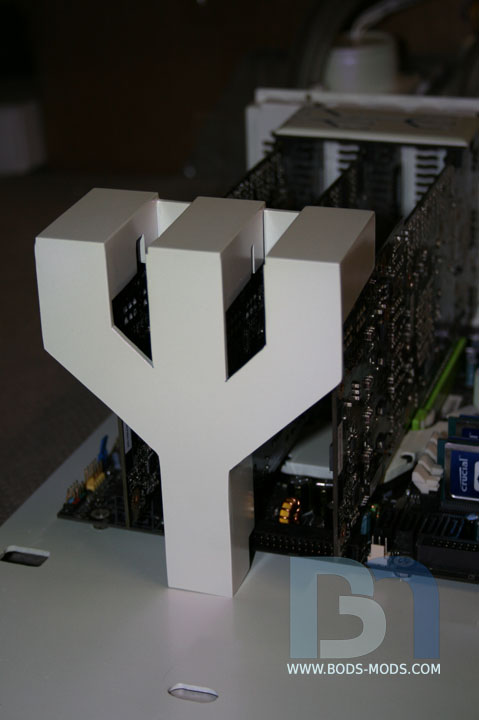
After the usual sanding-filling-sanding routine, the cover got a coat of white and pearl, like the others.
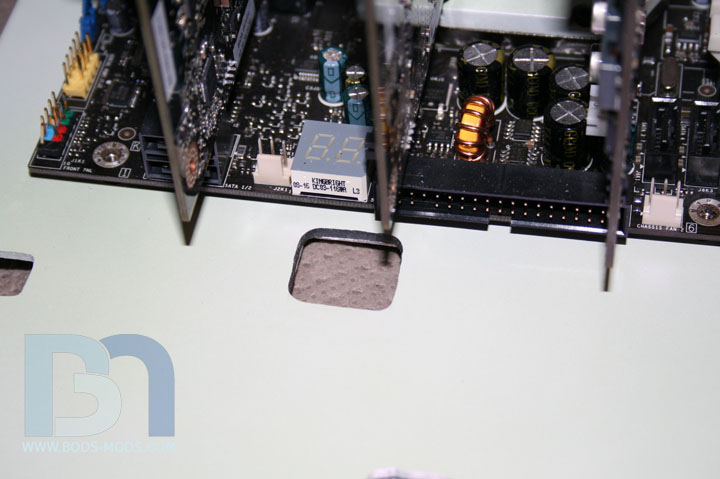
Here's a close up shot of the hole I made in the motherboard tray, where all the wires will go through. The cover will
conceal this hole from view.
A wide shot of the video cards with cover. The cables are not plugged in yet. I will need to have the case reassembled
to finish the wiring on the other side of the mobo tray.
A final close up shot of the cover. I had hopes of permanently gluing the cable assembly into the cover, but plugging
all six connectors in at once proved very difficult at best, and would be near impossible when concealed by the cover.
So I will be leaving the cover loose.
Next up are the three custom bottom plates for the vid cards. :D
Nice idea with that cover. Maybe a light effect under it, would be nice.
Would be nice, but hard to do with the wires in there, I would assume.Quote:
Originally Posted by Kumo
Mate, that was suck a cool idea. I have never thought to do anything like that, very nice idea.
I'm loving those power connectors, if you don't mind I'd like to copy off of that idea for my future crossfire setup.
Every post you find another place to perfectly integrate the trident theme. Not only is this mod clean, but it uses some creativity...I like that.
-Indybird
Quote:
Originally Posted by Kumo
Yeah, I was thinking about doing a glowy effect on this piece as well (which is why I made it from the blue transparent acrylic), but I decided against it since it will be right next to the hard drives, and the vid card bottom plates will have a glowy EVGA logo on them. And I dont want to overdo it.Quote:
Originally Posted by nevermind1534
Quote:
Originally Posted by The boy 4rm oz
Thanks guys. I always disliked how the power cables on video cards are always placed right out in the middle of everything, so I sought out to do something about it. :)Quote:
Originally Posted by Indybird
:O i love it
Dude...... So nice!
Wow, looking very cool :D
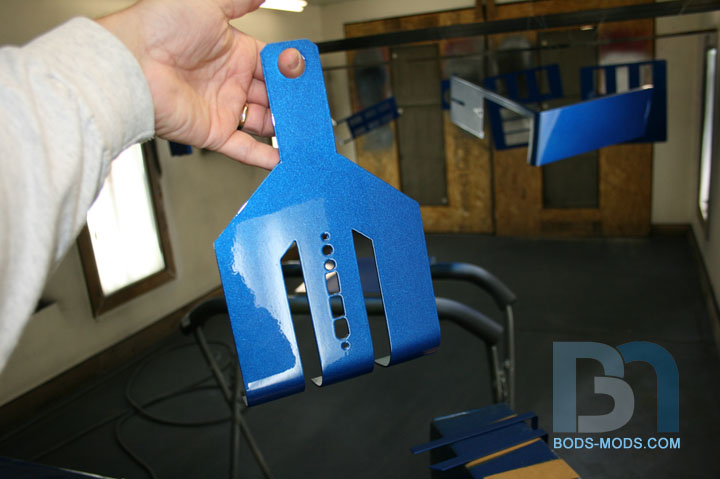
I finished up the video card bottom plates tonight. Get ready for some more UV glowy goodness! :D
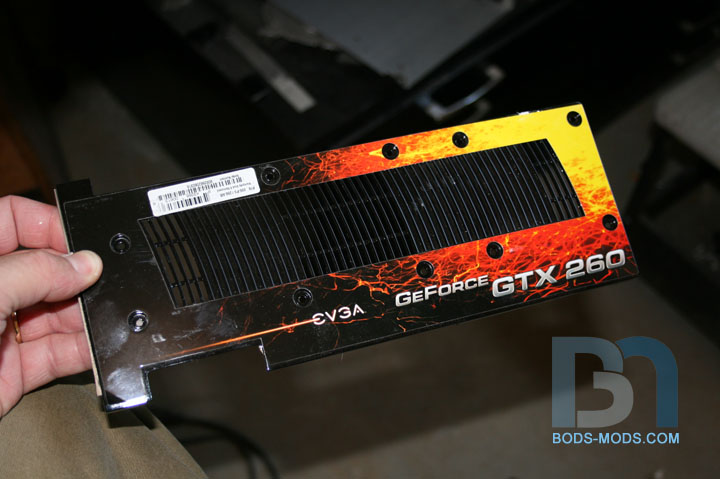
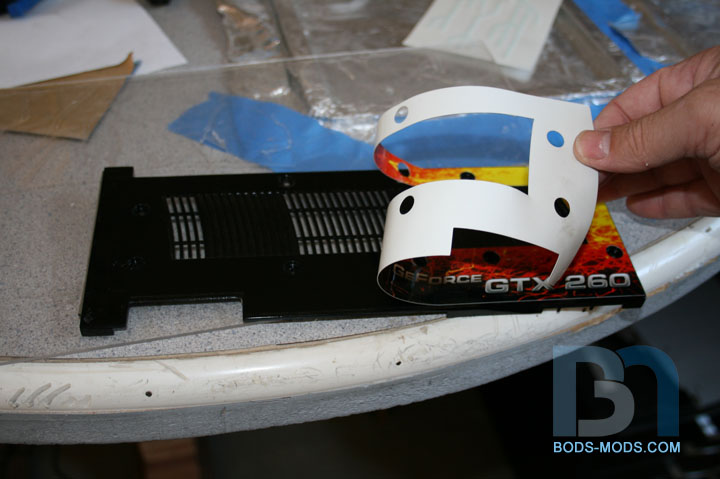
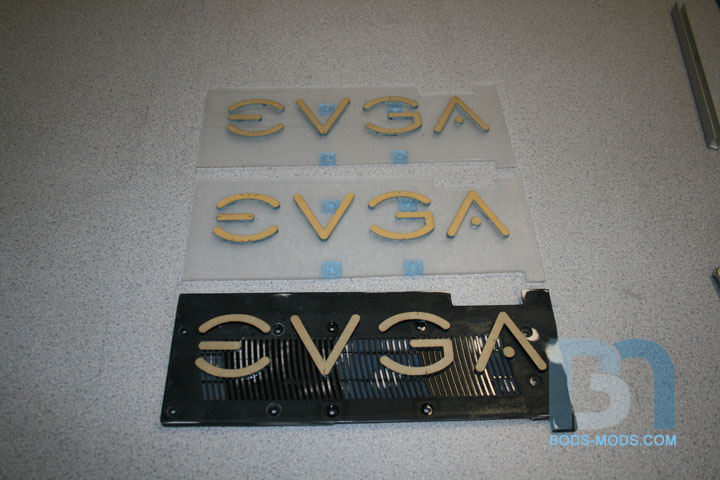
One of my 260 cards already has an aluminum bottom plate, but it has this factory decal on it.
...which was easily removed.
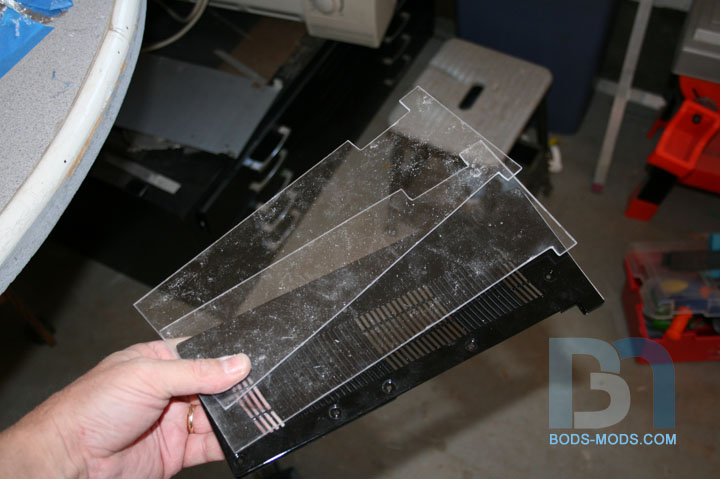
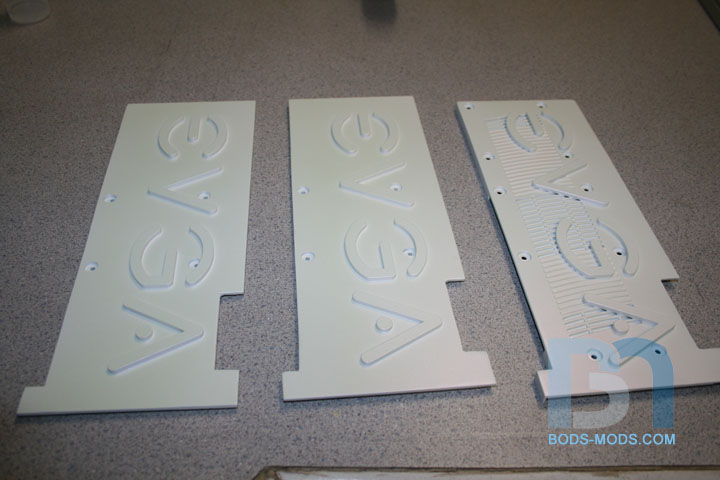
My other two cards do not have a bottom plate. But that's no problem, I just made two more from acrylic using the
existing one as a template.
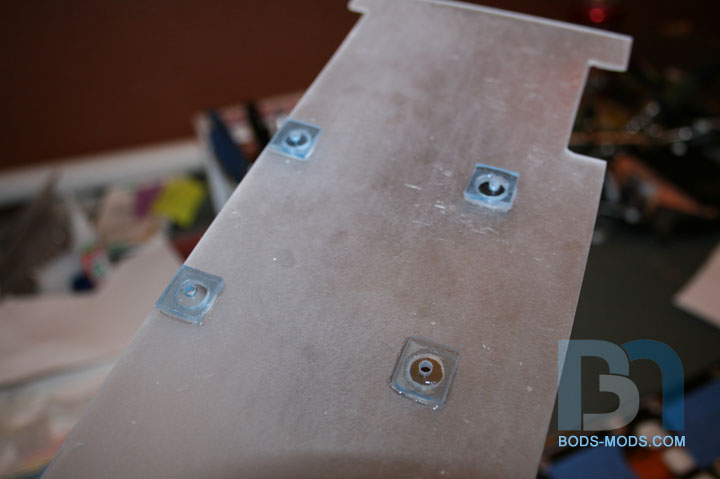
The stock plate has raised mounting posts where it's screwed to the card, to clear certain parts on the pcb.
so I had to replicate that on the acrylic copies. I basically cut a bunch of squares from 1/8" acrylic and glued
them on the back of the plates after drilling the large diameter holes. Then I went back and drilled the smaller
holes through the squares.
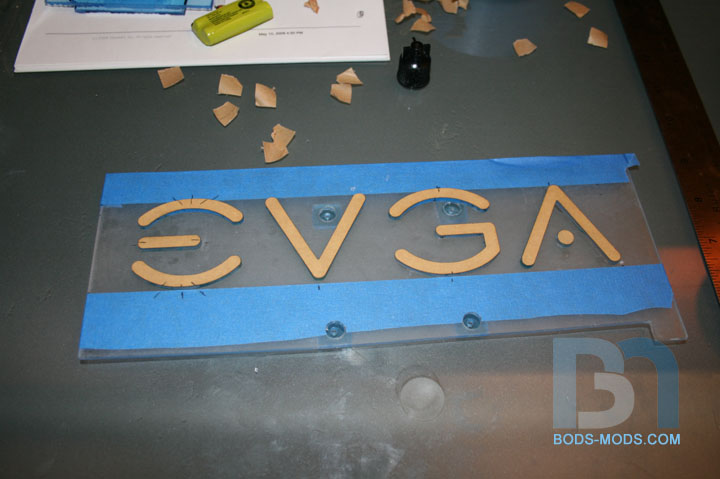
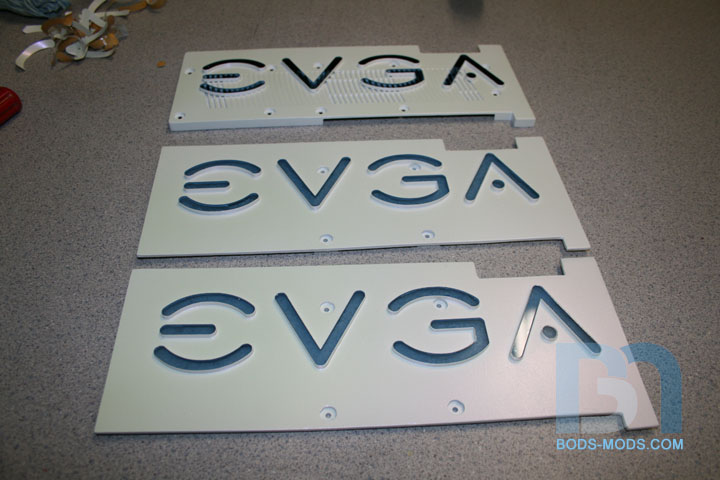
Since I pretty much stripped these cards of all their identity, I wanted to put some of that back on, so I had Moddersmart
cut me a few EVGA logos out of 1/8" blue transparent acrylic. I could have just made all three plates out of the blue
acrylic and masked off the EVGA lettering, but I thought the raised logos would stand out a bit more, giving them a
more 3-dimensional look.
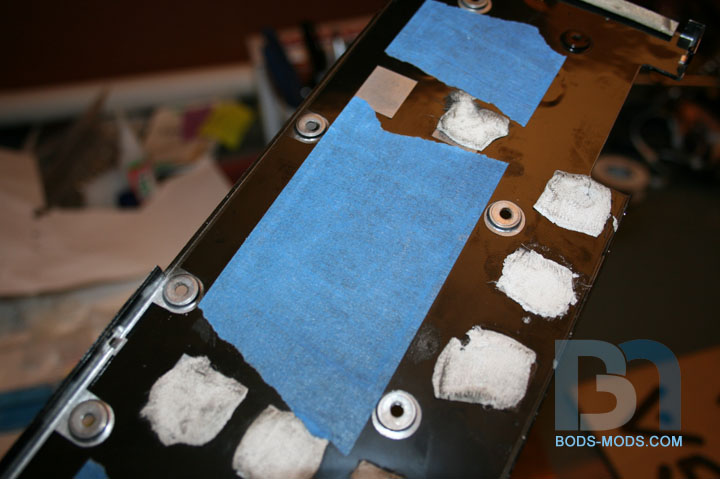
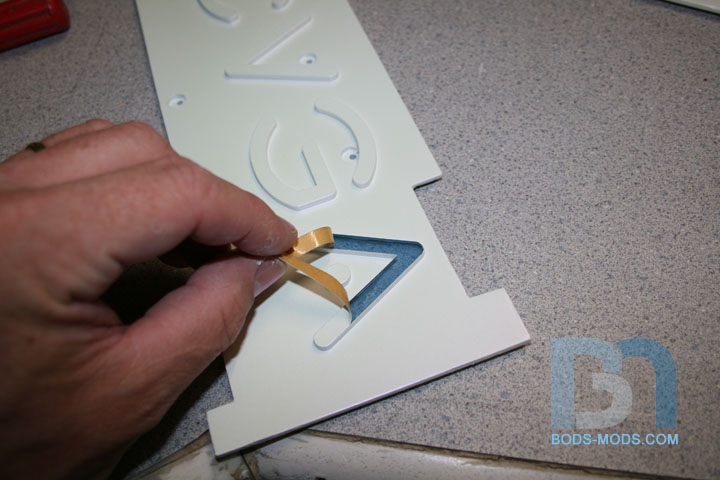
I laid the letters out on the plates, lining them up with pieces of tape as guides. After marking each piece's position,
I removed the paper backing on one side and glued them down.
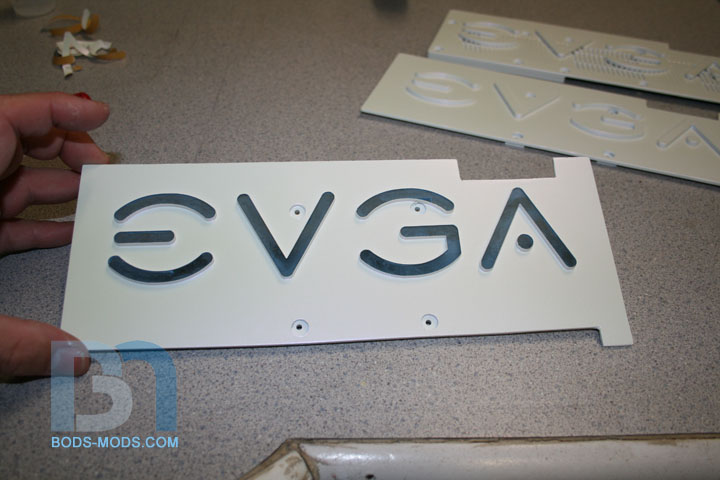
Here are all the plates with the logos glued on and ready for paint. Notice I left the paper backing on the lettering.
Makes a perfect mask!
Primed, painted, pearled. lol
Time to take the masking off!
Me like, iz goood!
All the plates de-masked:
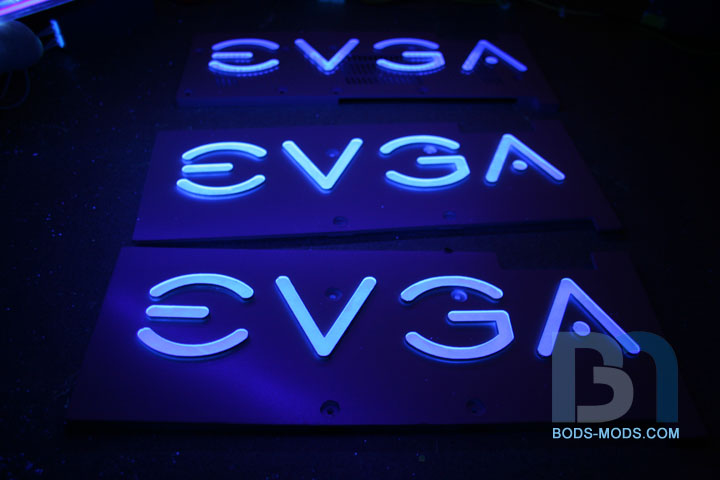
They looked so good, I got out the UV cathodes for some glowy pimpage...
Lights on:
Lights off:
Of course with the flash off, the camera lets in way more light than normal, causing an exaggerated effect, but it's still cool!
I was going to get a shot of the plates on the cards, but I ran out of time. I'll see if I can do that after work. 'Til then!
Bod, you don't need me to tell you how awesome those back plates look lol.
:stupid: looks amazing! :bowdown:
daym... quit your job, and finish this thing! im dying to see the end result Ó_ò
Thanks guys!
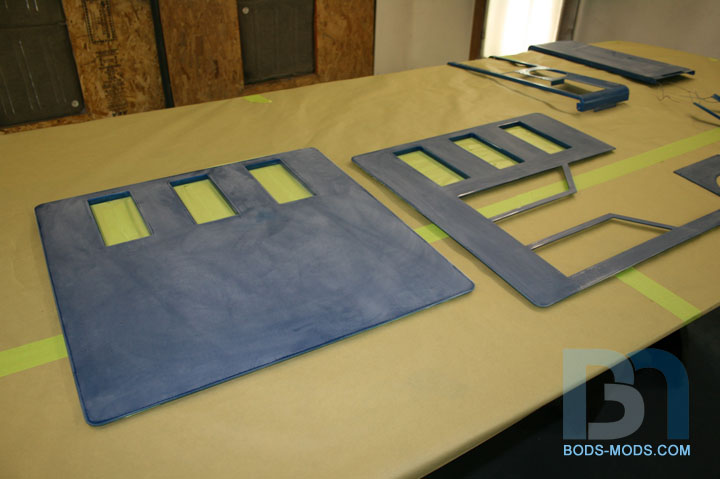
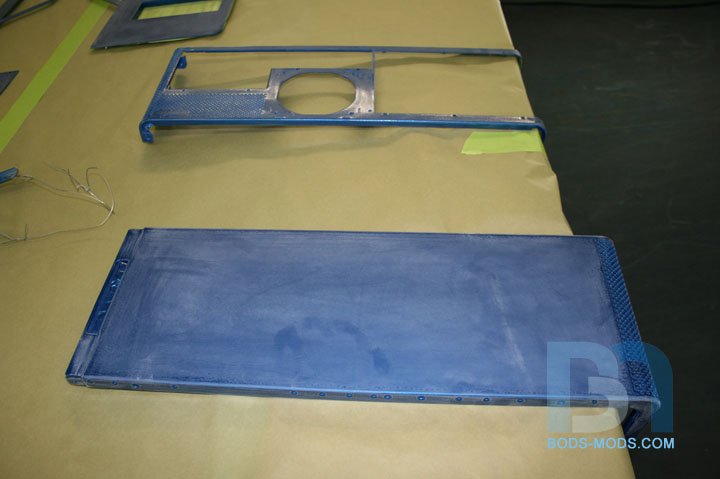
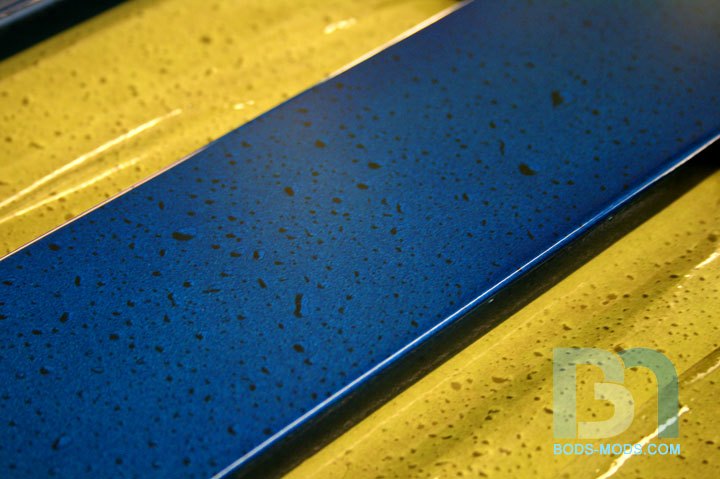
PAINT PHASE III: Water Droplets
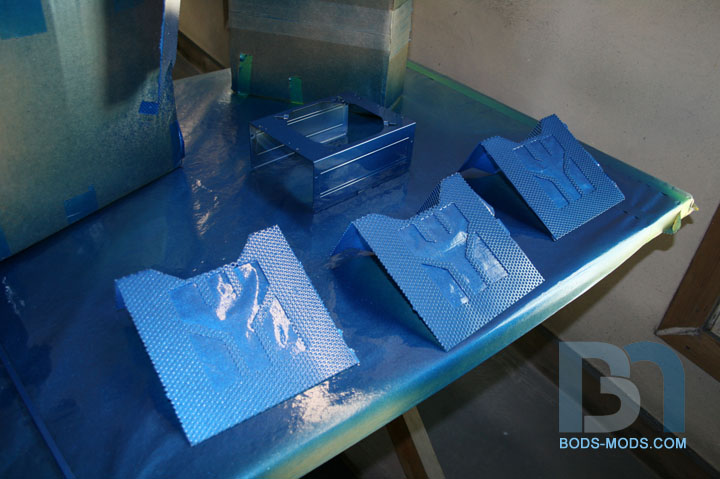
Got the water droplets on all the parts today! :D It wasn't as easy as it seems though, and we had to try numerous
methods before we got the water to bead properly, but I think we succeeded. First we scuffed up the parts, getting them
ready to accept the next layer of paint.
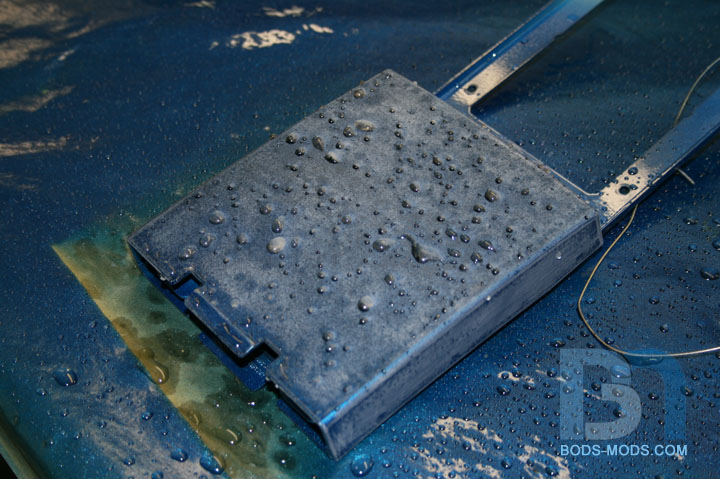
However, the scuffed surface didn't yield satisfactory results, because the water didn't bead at all on the scuffed surface,
because it was too rough. So we tried leaving a bit of dust to help with the beading, but that didn't work to well either.
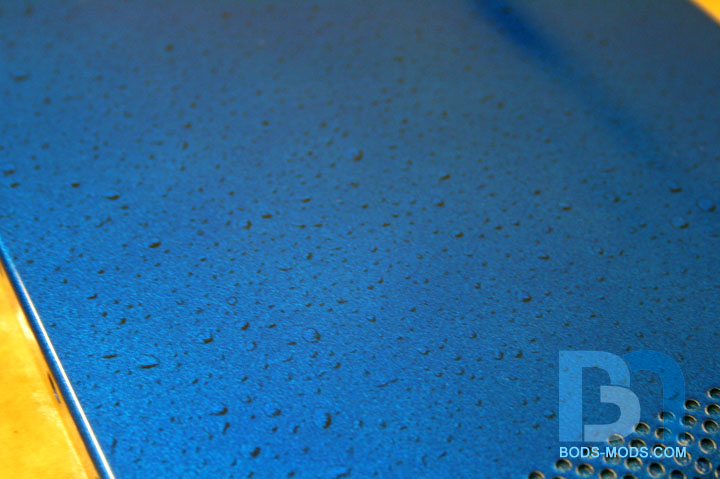
Then we noticed the water beading up perfectly on the table (look next to the part) and realized we needed to re-clear
everything and not scuff them at all.
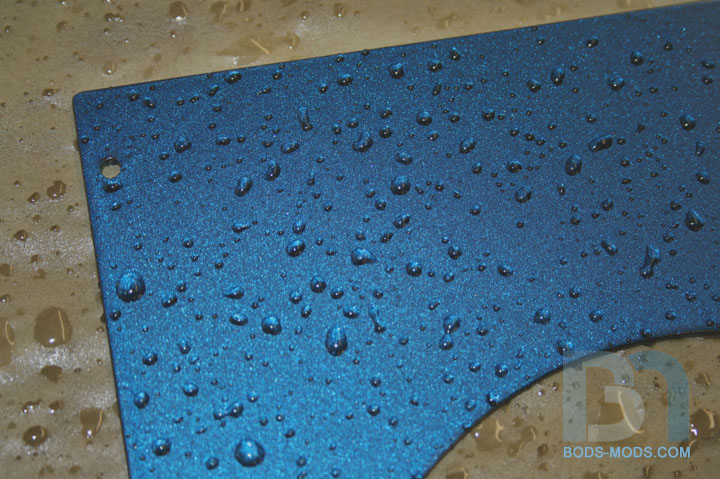
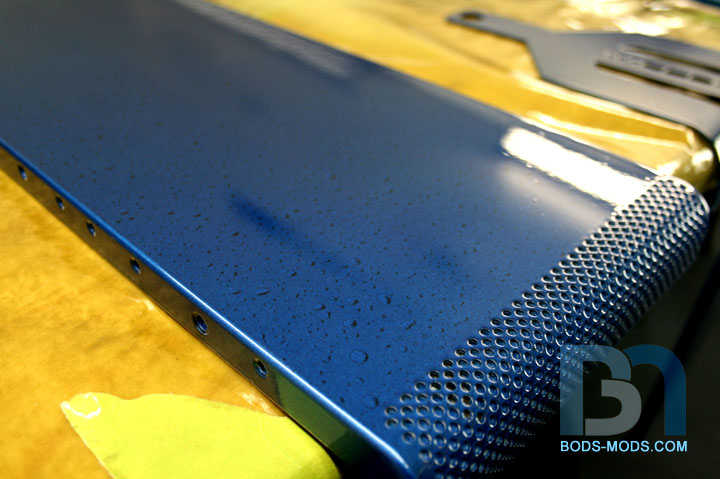
After clearing everything again, we waited about :30 minutes to let it tack up, then went in with the water bottle and the black paint.
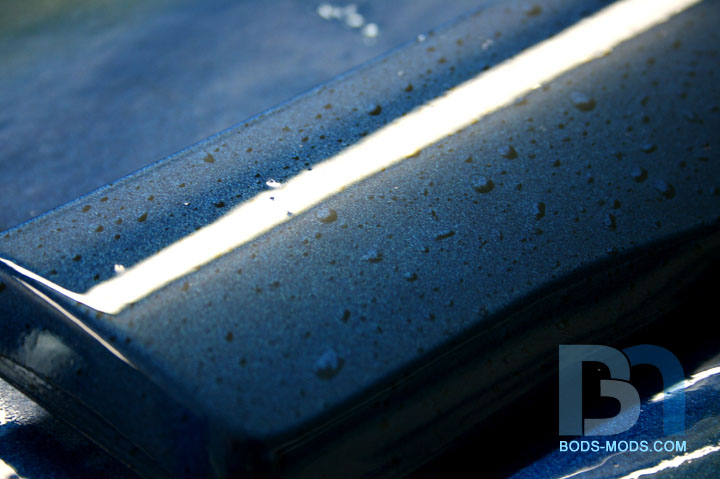
Here you can see how well the water beads up on a freshly cleared part:
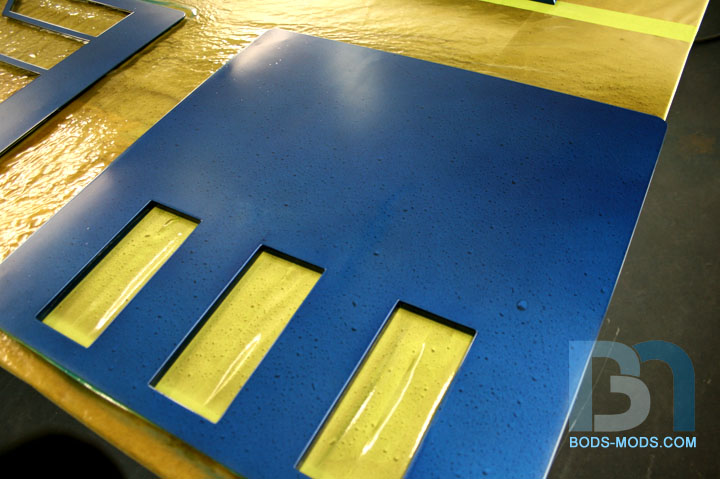
A close up shot. This is what we are aiming for the final look:
So after we laid down the black over the water drops, we just let the water evaporate away, then went back in for
one last wet coat of clear. And here are the results:
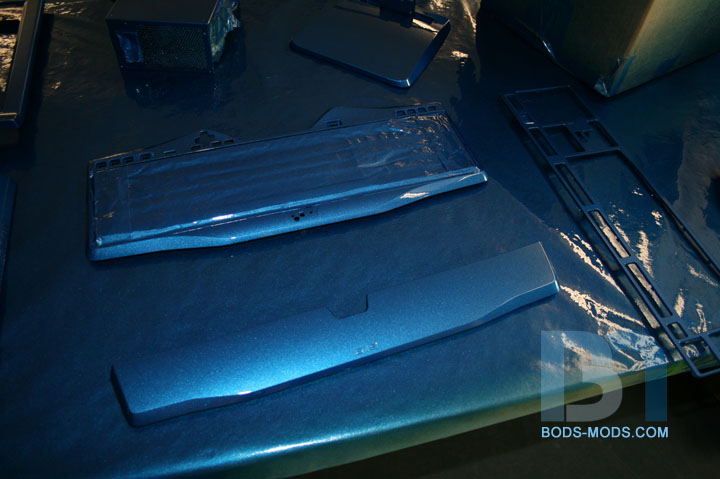
Side panel:
Close up:
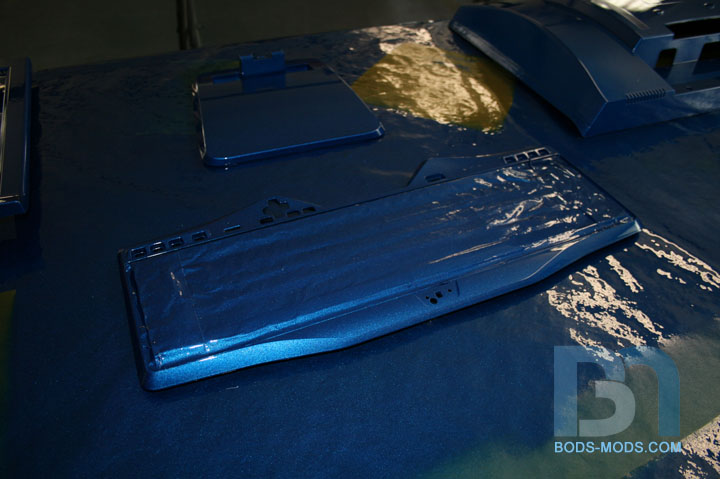
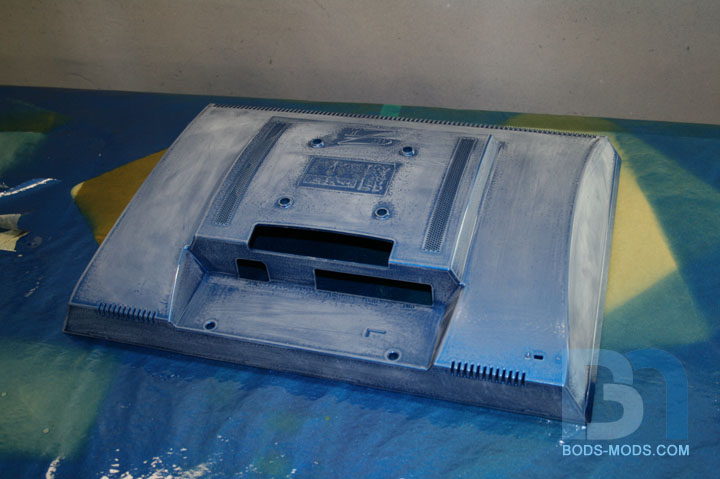
Case top:
Close up:
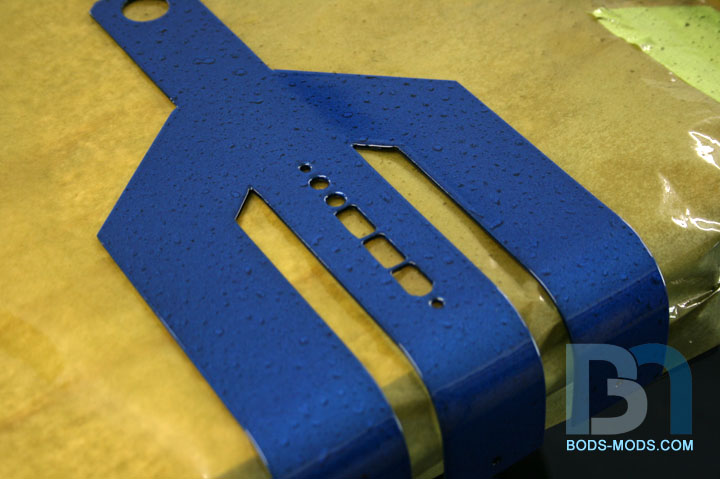
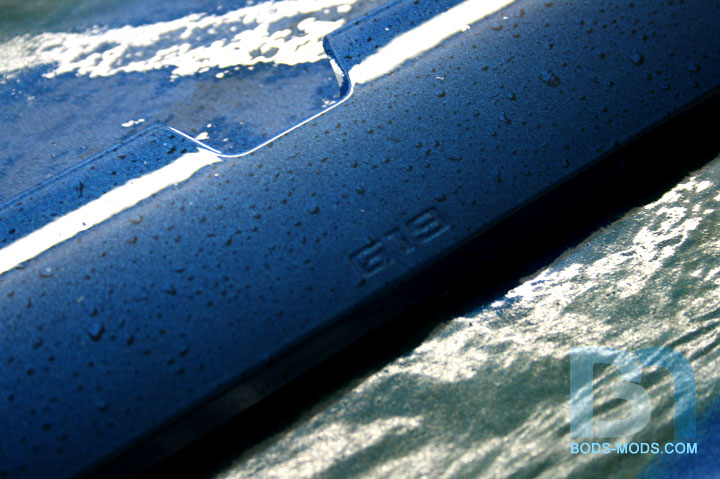
Front I/O trident:
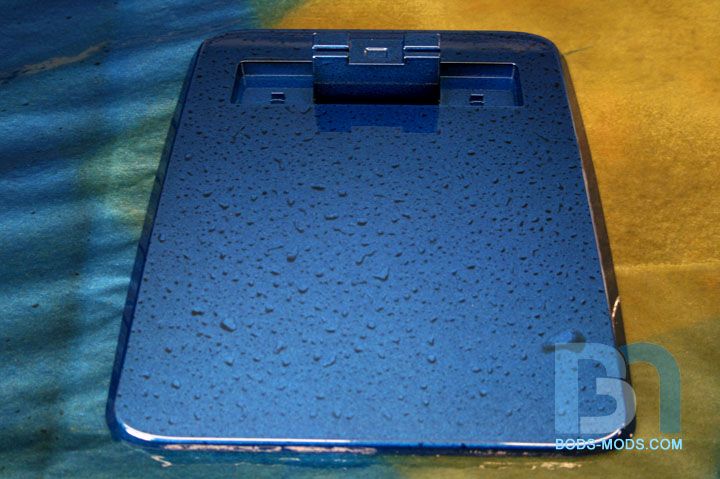
Monitor Base:
Keyboard palm rest:
Close up:
So after some trial and error, I think we got it pretty close to what we were looking for. I have to leave the parts in the
booth for a few days for the clear to cure, then I can re-assemble the case.
:)
Man the paint effect turned out very well, well done.
indeed, looks great! :up:
dude... this is one of my fav mods atm! keep it up:banana:
Awesome Paint!!!