that lighting looks amazing :bowdown:

Printable View
that lighting looks amazing :bowdown:
Agreed, great job on the lighting!
Took me a while to give a good response to this.
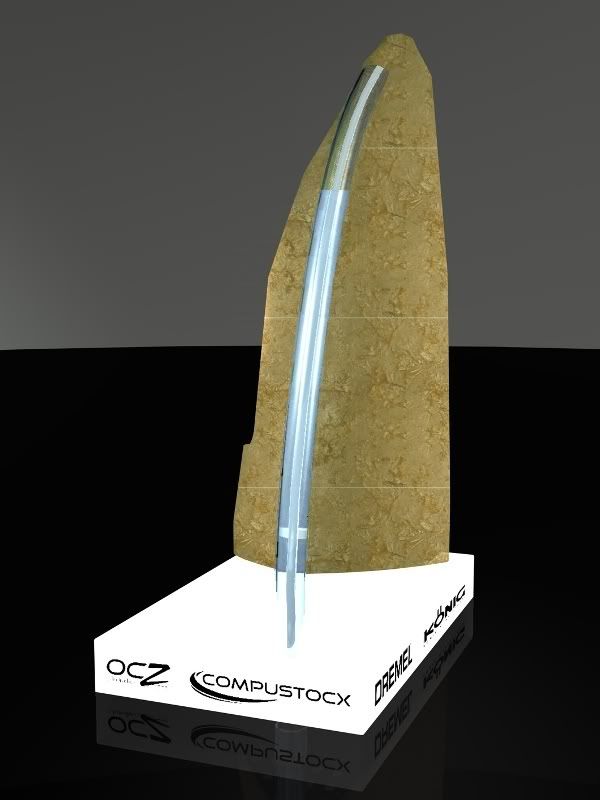
To your request of opinion - I'm gonna say black for the base, to go with the motherboard and all the black accents inside the case & to break it up from being all white and it should define the angle gap beneath the main case better and all the sponser logo's are very nicely done.
Would it not be possible to have a white base painted black but with the logo areas frosted & masked up with leds behind them so the logos glow too or is that a bit too much work, I think it would look very amazing rather than flat logo's and with you being so good with leds, either way thou it will still look awesome :).
And yes the lighting on this is fantastic, nice warm glow of white rather than overly bright light looks really nice, I want to get good at putting leds together like this for future mods, ccfl's are arkward to deal with, can be much more creative with leds, keep it up mate, awesome so far. :)
After I used the last 3. weeks before my third semester started intensive with modding it´s time for a further update of this project.
Because the PC should look very tidy under the GRP-bonnet, too it was time again for planning the inner space.
The straight lines at the left side symbolize two water tubes, and the over lines right besides symbolize cables. The cables that come from the upper case will be connected with golden 3,5mm headphone plugs. The cables are for the LEDs and some buttons. The cables that come out of the lower box will be connected with the M-TEC controllcenter, and the cables that come from the long slot left besides that box are from the mainboard.
After the plan was ready I built two models with carton.
Satisfied with this models I consider the material that I´ll use for building that two boxes. At the end I decided to build a frame made of Plexiglas. That frame I´ll glue with Acryfix at the big plate and on that box I´ll screw on an aluminum plate.
In the meantime I received a package from Bielefeld (Germany) with the following volume.
For this I want to say a big thank you to [url=http://www.aquatuning.co.uk/ [/url] for this great support.
After I had controlled that package with a lot of fun I could devote to the I/O blind and the slot blinds. For this I measured all and mark it.
I cut out the holes with a jigsaw and after this I used a file to got a realy accurate result.
Ready with theses holes I came to the bottom plate, namely to the fan holes.
With this printout it was no more problem to mark the more than 200 holes exactly. Next I bored the 8,5mm holes and countersinked it at the end.
With this plate the last big piece for the basic case was ready and I could build the case provisional together. At first I screwed the two side panels made of Plexiglas on the bottom plate.
You see at the picture also the PSU-holder and the mounting for the 3 fans. At the end I´ll glue all these things with the 3mm aluminum bottom. So it´s impossible for the bottom plate to sag. All that you could see at the picture will get a white varnish at the end.
Now I installed the PSU and the 3 80mm fans. Certainly I´ll use other screws for the PSU that look a bit more decent.
After this the CoolIT radiators and the two 120mm Noisblocker fans came to their position over the three 80mm fans.
I decided to cut a big hole in one of the two side panels at the bottom area. So it´s possible to see the hardware that´s in it, in case the GRP-bonnet isn´t over it.
Next I screwed on the intermediate floor at the two side panels.
At this picture you see the mountering for the slot-in drive. The box is a bit higher than the slimline drive because under and over the drive I´ll apply 3mm cellular rubber. Moreover the slot will be illuminated with 8 LEDs that I glue in the stripe made of Plexiglas.
The 8 LEDs will be connected with the status LED from the disk drive with help of an opto-coupler. So the slot won´t glow always but replaces the normal status LED from the disk drive.
Let´s come to the pictures of the back panel that I mentioned at the beginning of this update.
How watch the picture more exact noticed that the upper box is absent and that in the lower bix are two bigger holes. The absent box is nearly ready and I have only to glue it. The holes are a kind of fan holes for the inner space.
I hope you understand my plan after watching that picture. The two 80mm fans will blow against the mainboard. Because the mainboard has a distance to the back panel of 15mm the air will stream under the mainboard in the inner space and than through the 150 4,5mm holes in the upper part of the back side out of the case.
Certainly the box with the M-TEC controll center won´t be open but a aluminum plate come over it.
I´ll overdraw this plate with leaf guiding and in addition I´ll use black M3 screws. The rest of the back panel will be white at the end
All the cables will be sleeved white and with the aid of a mounting forced to lie exactly vertical.
Now we come from the back side to the front side.
The white pieces made of Plexiglas are only for the moment and will bail at the end.
So and now it´s time for the solution how I´ll make the mounting for the slot blinds.
How you could see at this picture is it impossible for me to use standard blinds and so I have to make all for myself. But I hope that isn´t such a big problem. The blinds will be screwed on with M3 screws at the mountings that you could see at the picture
At the following pictures you could see how the holes case looks like.
And now we are nearly at the end of this update, but only nearly. Like in almost every update I´ll finish this update with hardware news as related to the graphic card. Namely the company mushkin will support me with a HD5850.
@ Mark_Hardware/ SXRguyinMA/ Datech: Thank you for your compliments!!!
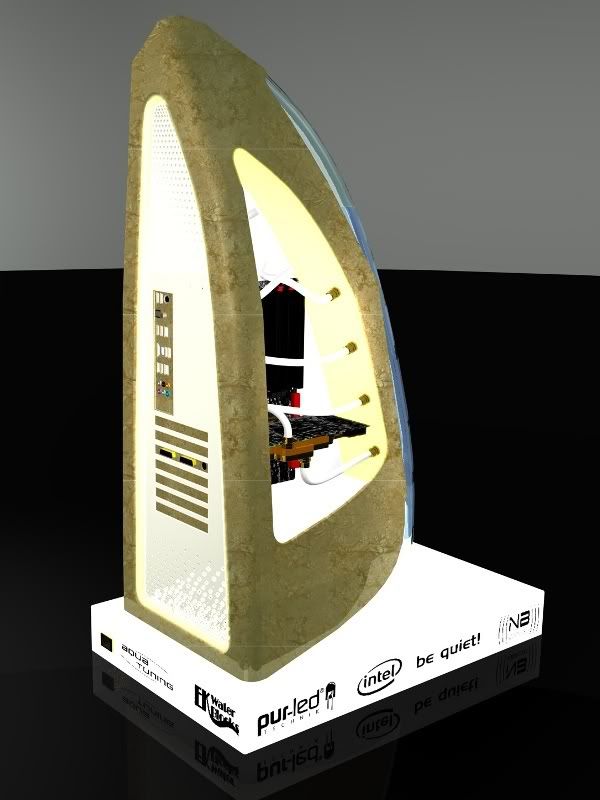
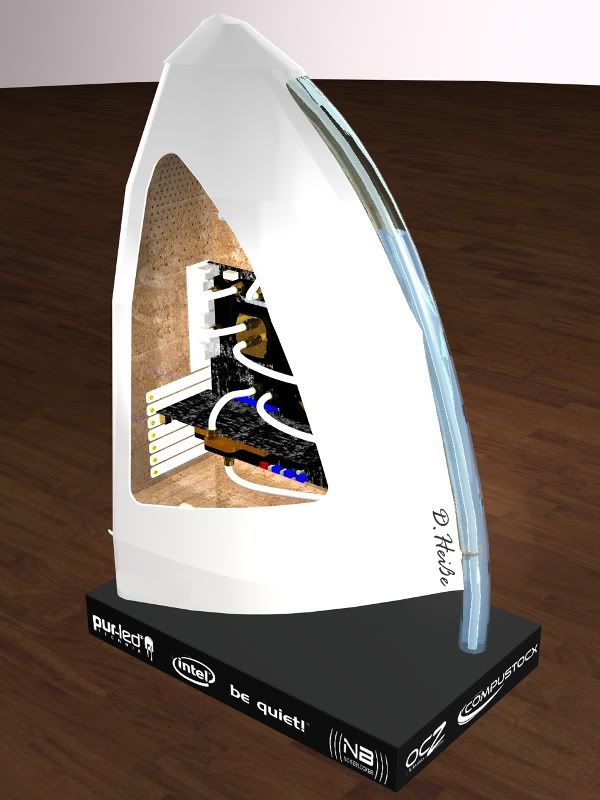
@Waynio: Thanks for your opinion, but I´m unfortunately a bit undecided how I´ll make the socket. Because I think the black is a very hard contrast to the white sail I think maybe a dark grey socket is maybe better than a true black socket. The other thing is I had to find a company that anodizes me the socket in dark gray. To find a company for black is no problem but dark gray I´ll see.
The idea with the glowing logos is great, but I think if I´ll make it the socket would be to bothersome and steals maybe the sail the show.
looking more and more beautiful every day!
looking great, and congrats on the sponsorship!
Excellent work mate :up::):up:.
I'm liking the hand made back io panel, something I want to pull off myself on my next mod, coming along perfect 8) :bowdown:.
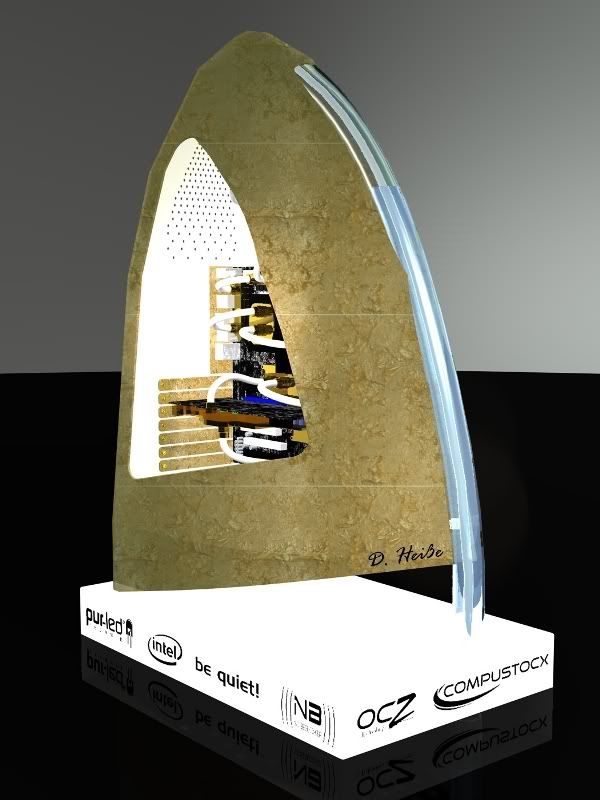
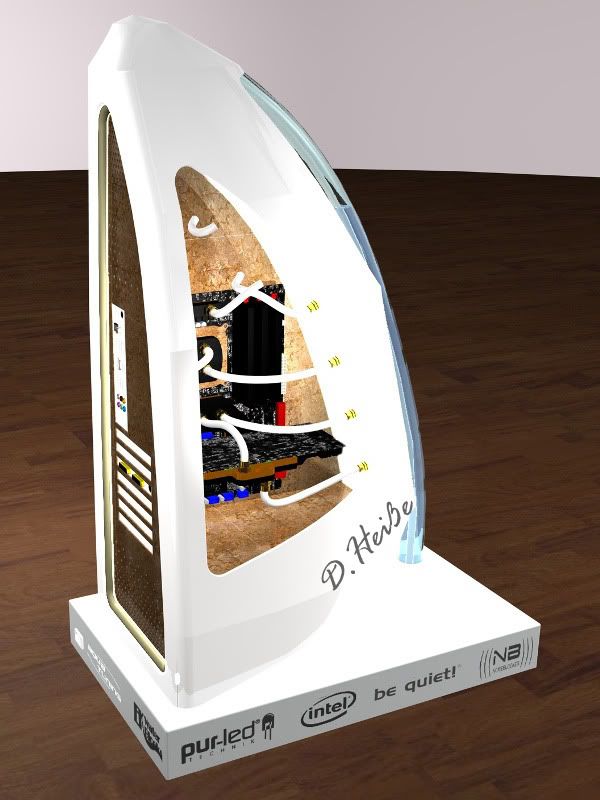
Compared with the other update this update is really short and contains only renderings.
By way of comparison the old rendering.
Well and now I would be very happy if you could post your opinion to the suggestions/ options.
personally i like the gold with the white base but if this were my project id try to make the sponsors names in a bolder text so as to break up the white a bit more, and maybe some kind of graphic on the top of the base(nothing overpowering maybe some simple pinstripping) cause theres alot of white on there and i dont know it looks just to plain
i second this.Quote:
Originally Posted by raistnox
i admit i haven't read the whole log, so i don't know your whole plan. But a 24k gold leaf case would be kick a%$. maybe a gold case with a black base?
Top notch building at any rate. looks like it should sit in a fine art gallery.
i also liked the large horizontal signature along the side, over the others.
(thats a hell of alot of drilling btw)