Small bunch of night shots, couldn't finish off without these ;), just wish my camera could see as good as I can, can't capture how good it looks at night but it's still infinitely better than the camera I started out with.
:up:.

Printable View
Small bunch of night shots, couldn't finish off without these ;), just wish my camera could see as good as I can, can't capture how good it looks at night but it's still infinitely better than the camera I started out with.
:up:.
Beautiful!
The 2 toned patterns really do look awesome, you get a great effect from them.
Nice work on the photo booth as well BTW, I should really look at making one for myself lol.
Thank you blue :):up:.
Thanks Jase :):up:, can't get any cheaper than that for a photo boothe lol, just wish I thought of it before I ordered the supplies doh! :D, but still the parts will be good for any upcoming projects ;).
Looks beautiful. :up: The different colors just give it more depth. And your final photos look great.
Thanks msmrx57 :):up:.
I've been way out of touch with the PC modding world for a while, so I didn't follow this build - your update to the completed log clued me in...And I'm glad! Wow, excellent build! Well done.
Thanks Crippler :):up:, I'll check out your sig projects tomorrow, I'm knackered, 2am lol.
This turned out awesome. I love it. :)
Thanks billygoat :), trying to gather my thoughts for what next so whenever an idea pops into my head I do a rough sketch on paper & throw it in a basket so I have a big bunch of ideas for what to do next & when the time comes I'll design it in sketchup & figure out what materials I'll need :), but mostly messing about with games I missed out on playing while building it & I'm very excited about Mafia II being released this month :D.
I'd guess maybe march I'll start a new premium project, for my next though I want to upgrade all my system components, psu, mobo, cpu, mem, maybe sli with dedicated physx or a high end gpu with a dedicated physx card so setting a date of march gives me plenty of time to get saving up :up:.
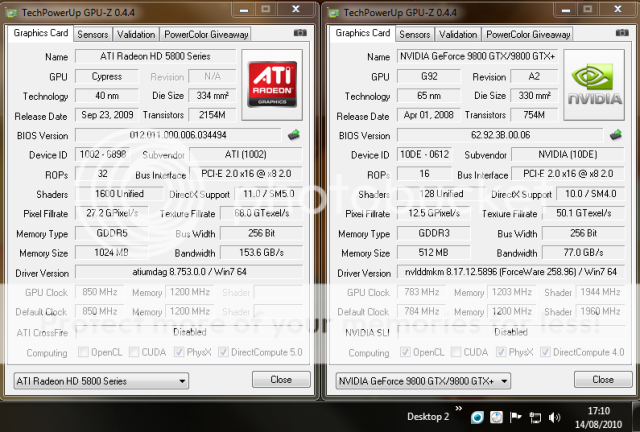
Just found out about hybrid physx about a week ago so though I'd try it out with me having a spare 9800GTX.
Hybrid physx (best thing I've heared of in tech lately :banana:), only found out about it a week ago & was intrigued with me having a spare 9800gtx doing nothing, I'm on an oldish p45 motherboard also so didn't even think I could use 2 gpu's, using the latest ati & nvidia drivers but for nvidia drivers it needs patching in safe mode in windows 7, also need to setup a fake extended display in screen resolution too, but I'm buzzing now I have best of both worlds, tested it out on the Mafia II demo & can have physx on high with massively better fps :D, the only reason I want to get a gtx460 is so I can have all the apex cloth physx with good fps, I deleted all the apex physx cloth files except for main characters clothes, I'm sure that with a GTX460 I could keep all the apex physx coth on so thats my next pc upgrade :).
Link to the source so glad I tried it :banana:.
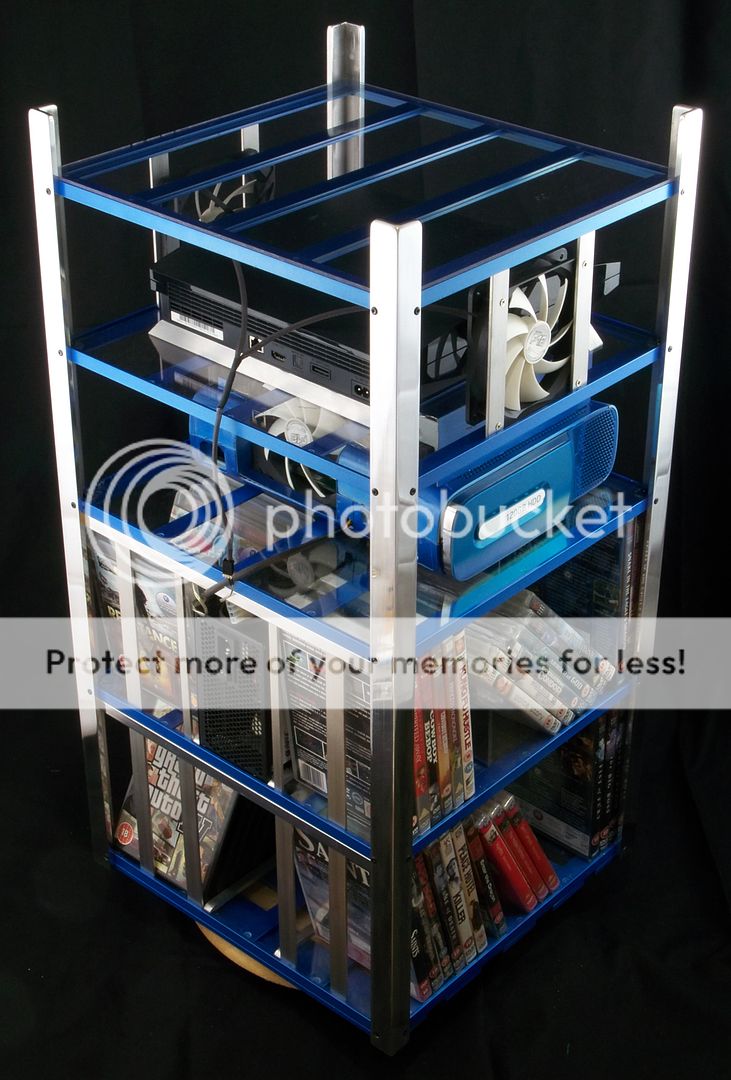
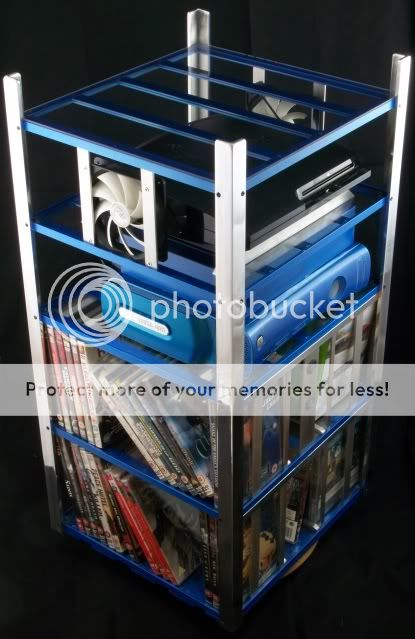
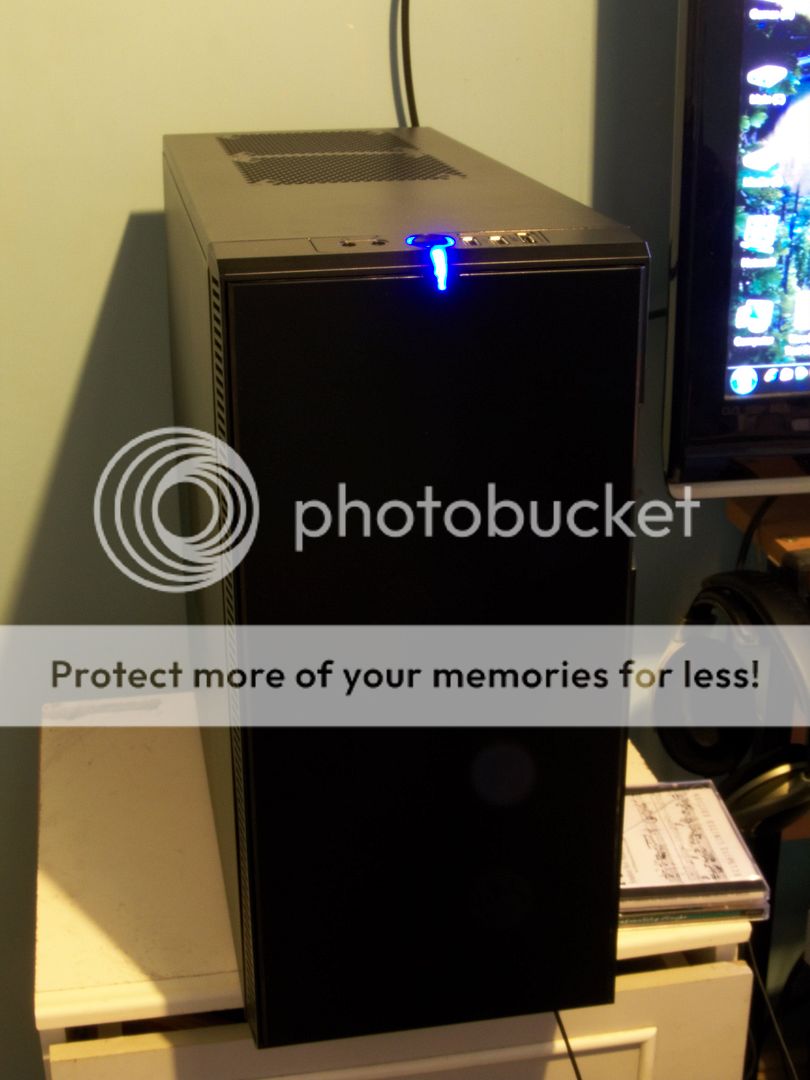
This isn't an update, it's just a few more finished pictures because I never took any of the gaming tower.
Decided to get off my bum & try out the bits for a photo boothe, gaffer taped a washing line to a wall, gaffer taped the black cloth to the wall draped the cut in half shower curtain on it & stapled them to the washing line & clipped the light fittings with daylight bulbs to a table & a dvd rack either side & had the above light in my main light fitting & started taking pictures :D lmao.
One thing I do know is it would be much easier to set up the boothe & better for a normal sized case.
Only change internally for the air cube is a 9800GTX for dedicated physx which I'll upgrade to a GTX460 next week.
looks great. now you need to do something about that black PS3. ;)
what did you use to polish that alum angle so well?
Thanks billygoat :).
It totally crossed my mind to paint the ps3 but going to wait for the warranty to expire ;).
I use a bench grinder with a spindle to adapt polishing mops, I use coarse medium & soft mops & 3 different polish compounds which can usually be bought as a pack with a spindle but I think you can attach the same to a drill, bars are quite easy to do with a bench grinder, it's sheet aluminium which is more difficult & would be better suited for a drill :up:.
awesome. thanks for the tips. I am debating whether to brush the alum in my mod or to polish it. I'll prob do a test piece of both and see what looks best against my hickory.
Really love this build as I said before, its a must for any gamer!!! Mod on brother!
@billygoat, I found a mix of brushed & polished can look nice together, also used the bench grinder for the brush efect on some parts by using a wire wool mop, makes doing brush effect on bars ultra easy, polishing generates a lot of dust if done with a power tool so it's a good idea to use a respirator, the day I polished those corner angles my face & arms was dark grey from dust, got a picture & I looked like a chimney sweeper lol :D, but not something I'd want to do regular, if I did I would definately invest in a decent respirator or even just an ok respirator.
Thanks AnG3L, appreciate the comment :), always looking forward to your updates m8 :):up:.
Are you gonna add a monitor to the top?
Could do but no lol :D, I have the monitor on my desk with the keyboard & mouse :).
The weather is getting cooler now & I updated the temperature reading pic for load & idle, took these print screen pics the other night when my room temp was 20c, to get the clock higher & stable I have to bump the volts quite a bit causing it to use near double power so it will be left at 3.8ghz.
Also bought a second 5870 to do crossfire & the temps are nice & the performance nicer :), only games at 1920x1200 I have to tone down settings for it to run smooth is Metro 2033 & GTA IV (my idea of smooth is a constant 50 fps upwards).
Also got my 1st copy from my subscription of CustomPC today with the Air Cube featured inside woohoo :banana:.
Pretty chuffed :D.
I think up next is a rematch with my first scratch build that was based on the Lian-Li X2000, after that a new original :up:.
congrats!
Congrats on geting published!! :up:
A very nice OC mate, congratz on the mag feature also, very cool :D.
Thanks very much guys :):up:, I'm still stoked to see a mod of mine in a mag lol :D:banana:.
May as well use this moment to let you all know what I should be up to in the coming months.
All this idle time I have since finishing it is making me eat & smoke too much so I'm getting fat & unfit so it's time to get my bum to a gym or start another mod I'm weighing 240lbs & want to get down to 210 so thats either a hefty amount of sawing/filing/sanding to be done or a month of daily gym sessions or half & half, it would be cheaper & more fun & constructive to get a load of aluminium & mod so I'm leaning more towards doing a mod, have the rematch with my first scratch build done asap but without rushing it (something I've learnt along the way do not rush a mod) so I can do a new original next year :D.
I do have the majority of a rematch with my first scratch designed, so shouldn't be too far off before I get into it, only trouble is I think I cracked the best air cooling layout possible with the air cube so any future mods will have to be better or at least match the performance of it.
The only way I'll beat the air cube performance wise is by going with faster louder fans if I stick with air which I want to for the Lian-Li X2000 alike (180mm silverstone penetrator's spring to mind) so I'll need to come up with a good sound & vibration dampening solution or a good fan controller, be more of a challenge to sound proof it :D.
Over the next couple of weeks I'm going to mix up designing & checking out more mods here TBCS as I've not done so for a while & this is my favourite modding community :), guess it's because it's a pure concentrated modding forum, I've grown to really like bit-tech since signing up there but this just feels like home for modding to me :):up:.
Sorry this took so long, I had to clean the jealousy off of my keyboard before I could type it: CONGRATULATIONS.
Excellent end product, you deserve it.
Congrats man!
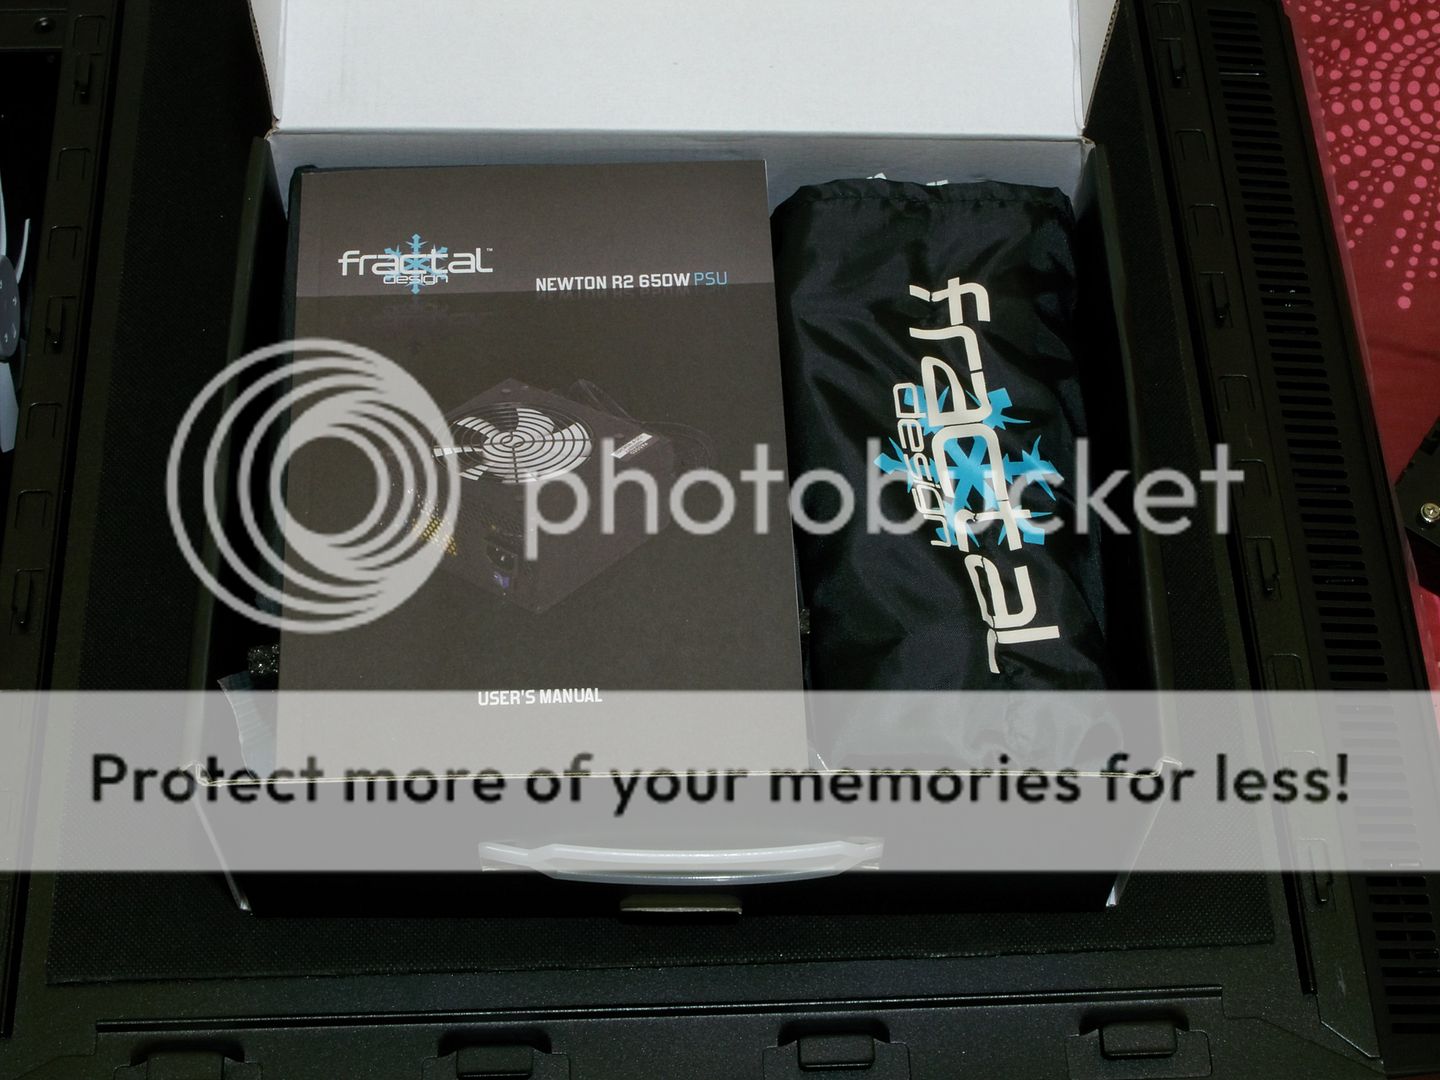
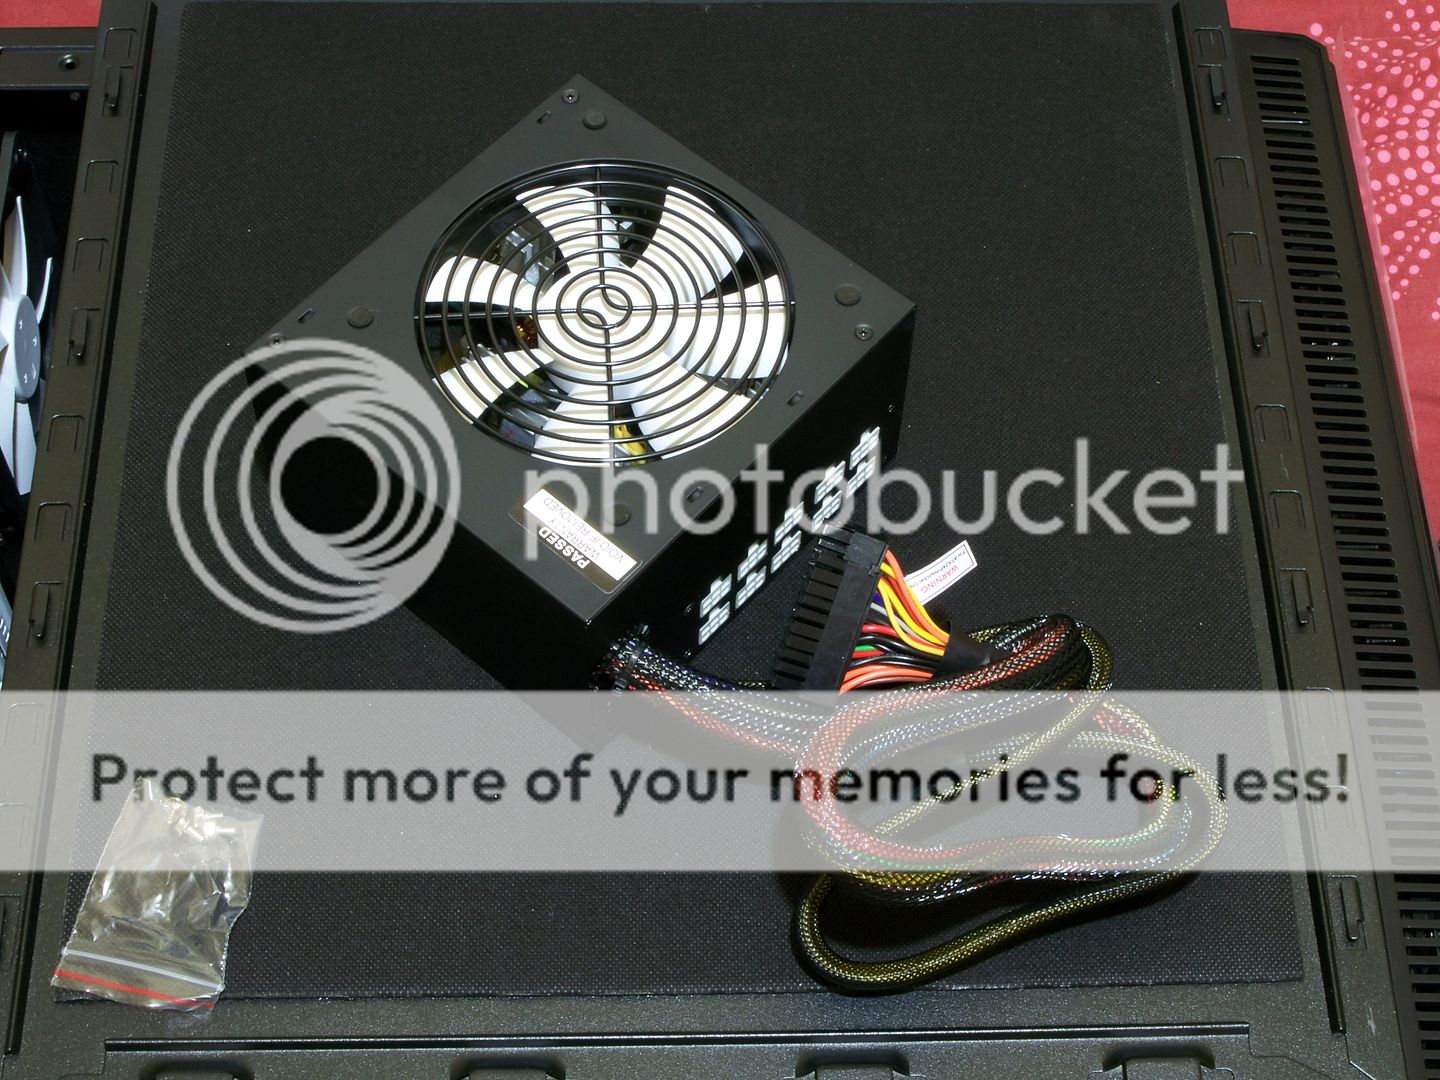
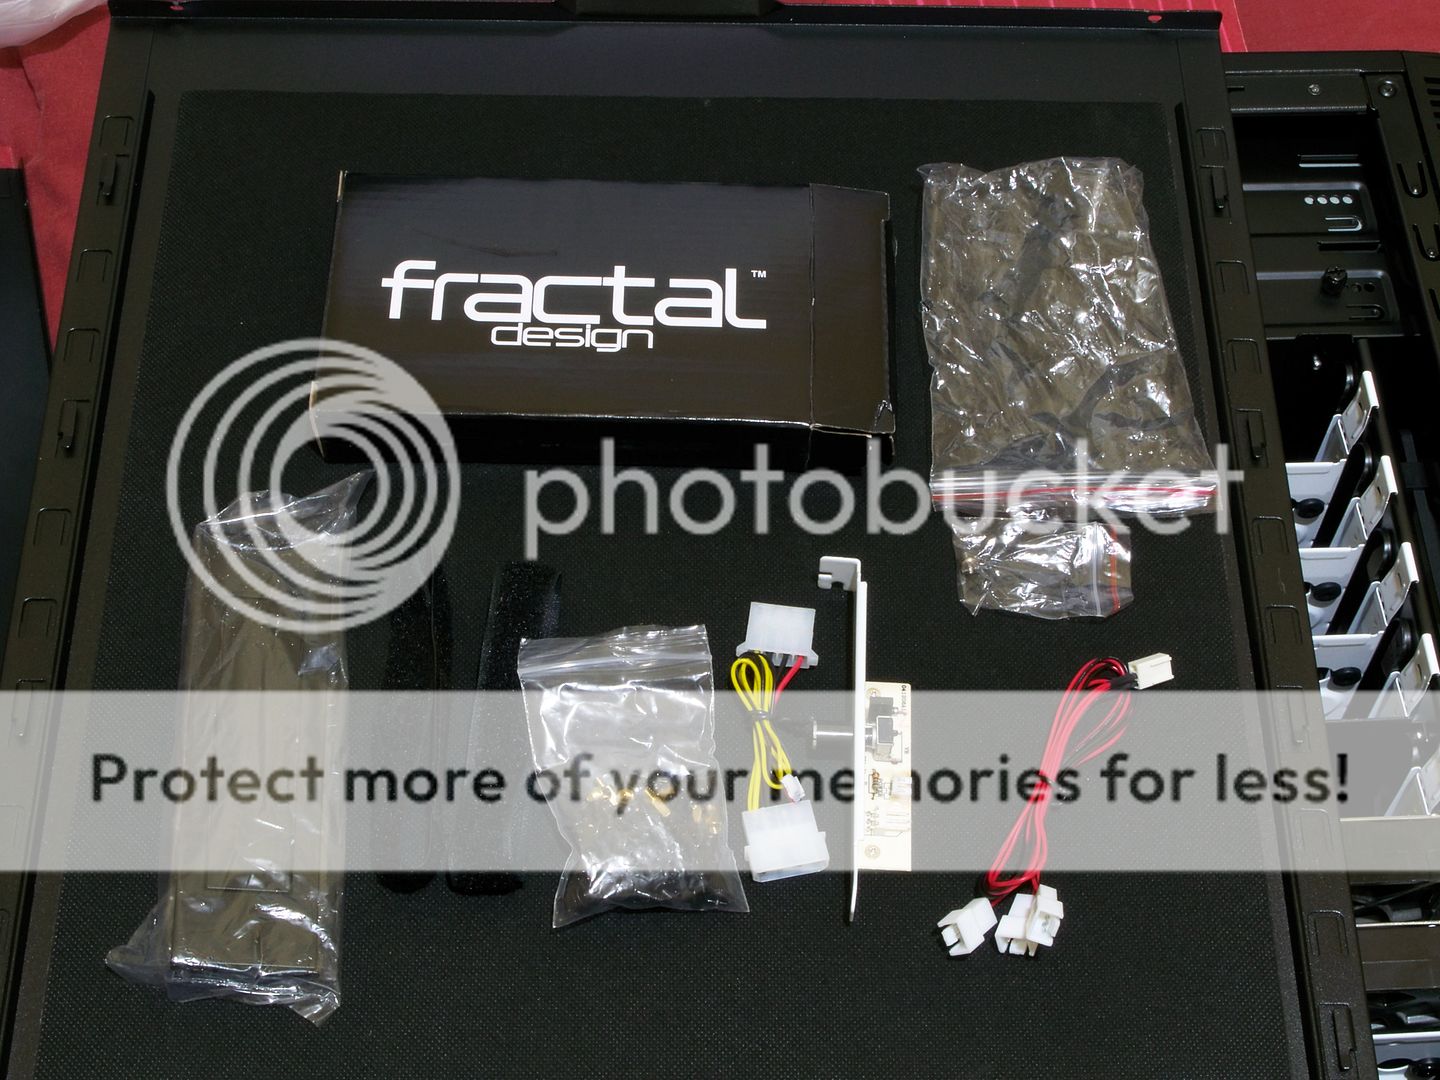
Hi blue & billygoat hehe :) thanks mates I was going to get started on a remake of my first scratch build but it's being postponed for a bit, according to the mag article the prizes I won was.
Fractal design newton r2 650w modular psu
Fractal design define r2 case
Biostar TA870+ motherboard which supports the six core AMD cpu
4gb ddr3 corsair dominator 1600mhz c8
So all it needs to make a complete system is a cpu, optical drive, possibly a sound card, possibly a tv card & the rest I have spare sat in boxes.
So I'll make this my first forum displayed pre-made case mod, on bit-tech's own review of the case they say it is pretty poor on cooling but good on everyhing else so that'll be the first thing I focus on improving & I'll get a better idea of what to do to it when I get it, to me it looks quite a nice case inside & out so I'll be careful & hopefully tasteful on how I mod it.
Looking forward to doing my first case mod on a forum with parts I have not bought woohoo :D, I'll give it my best though, not a rush job :).
Currently in the design process for my Lian-Li x2000 alike rematch Just doing a few hours here & there & figured a nice simple way to make my own pci/io back expansion piece which I shared the sketchup file on bit-tech, it includes a standard ATX & XL-ATX, it's a simple piece made from 3 layers so no complicated bending needed.
I believe it's one of those sooo simple ideas that no one thinks of it lol :D.
The sketchup 7 file is here.
http://www.mediafire.com/?zilaf6qd6cjzicy
Thought I'd share this simplised pci back piece I made in google sketchup 7, I seen a solid billet pci back piece on bit-tech recently & was inspired me to make this & I'll be doing these in all my upcoming cases.
Took precise measurements from a good Lian-Li one & made a layered version which would be easy to make, for it to hold together it would just need cutting, drilling, countersinking & tapping & use small countersunk bolts or even sticking together.
The idea is 3 layers.
First layer that attaches to the case would be 1mm sheet aluminium with a 5mm gap for mounting holes.
Middle layer 12mm acrylic which both sides attach to with either tapped holes or thread inserts for expansion cards.
Final layer would be 2mm aluminium the one with the slots cut out.
Thought why not share, I think this could put an end to salvaging a main part for scratch builds :).
Here is what I have been busy designing over about a month doing bits here & there, then recently finished it up when my internet was bad for nearly a week, vents & other bits will be added when I'm actually making it as my sketchup skills are more limited than my practical skill, but I have the basic structoral form of what I want to make so I have the specs at hand as a good guide.
This was going to be a rematch with my first scratch build & still is but with more flair & a steeper challenge as I attempt to lose the squareness of my cases :D, I know making a square box is easy to me now so if I stuck with square cases there would be minimal challenge for me so wouldn't be learning anything new, don't get me wrong building a perfectly square case is not as easy as some might imagine especially the first time with no previous experience but when you've done it once or twice it gets really straight forward & easy.
Anyway it's going to cost me about £100 more than my last case for aluminium because I'm using a range from 1mm sheet to 4mm sheet & various flat bars & angle bars, I'll need to buy a 12" disc sander so I can make perfect joints & get perfect edges, I've worked out the cost & it's pretty scary compared to my previous cases.
£220 for aluminium with vat & delivery if using sheets :(, but about £80 to £100 if only using bars :).
£50 for plastic with vat & delivery
£30 round about for high tensile bolts & bits.
so £300 or £200 for absolute basics & this is going fully diy.
£50 upto £200 for finishing (paint or powdercoat or anodise or a mix of all 3)
£70 for 10 Enermax UCTB12 T.B.Silence fans or could re-use some I already have but fans keep evolving to be nice & quiet with enough airflow & nice looking which is why I'd prefer to get new ones.
I could do a budget version by using flat bars fixed together which would seriously lower the aluminium cost which I may do + it would be a chunkier case, it'll be interesting to make a case like this purely from flat bars & angle bars while being inspiring to others wanting to make a bada$$ case with a nice small budget, just needs a slight redesign which I'll sketch up before I commit to starting.
So this would be an even higher premium case than anything I've done before, but still cheaper than a top level consumer case, this time when designing I totally disregarded budget & just designed then worked out how much it'll all cost, I did design a water cooled case like this but I just don't like the size it has to be to hold all the water cooling gear not to mention the awkward tubing when it comes to maintenance so I'm skipping water cooling & staying with air for 1 last time ;).
£120 for the sanding disc machine, but this will be a great purchase as I know I'll always have a good use for it, the manual mitre saw I have would go perfect with this.
Met my saving goal so I could go all out on doing this now, but a 32" sharp led 100hz 1080p screen is highly tempting me, but if I got the screen I could sell my 24" led monitor & my 26" samsung monitor putting me close to my budget goal again so I'll probably do that :).
About the design:
All but the rear fan would be mounted independantly to the mobo tray not being screwed into the exterior panels, the bottom storage section will be like an air tunnel, the mobo cooling section will have imediate airflow right next to the mobo & the fan below will give just enough space for the ridiculously long ati 5970 just so it's an option, there will be a fan mounted between the psu & mobo tray & a fan above the mobo tray with a duct to go out the rear, I don't think xl-atx or the like is going to be a new standard so I'm sticking with standard atx, a 10 slot mobo tray is huge & guess it's only applicable to 4x gpu users which I'll never be.
So the only cables that will be slightly visible would be the mobo power cables, sata cable, power switch/led cables & gpu power cables so should look & be really clean on the inside & out.
The hdd tunnel is nice as each hdd cage slides in being held down by flat bars, then a flat bar slots in front of them & they are secured.
The pci expansion piece will involve a chunk of aluminium with pins sticking out to act as a 1 piece lock down for all the pci slots & screwed in from behind.
I'm doing it this way instead of making a new thread because no orders have been made yet so this is fresh off the design stage, then I'll add all this to the first page of the log with some actual progress :), so just think of this as a hazy preview of whats to come next from me.
And now the design pics, any suggestions for a name are welcome, I'm all thought out after designing this for the time being :).
Could be a couple of weeks to a couple of months away before I start.
:):up:.
I like the sketches. will watch out for more!
That is a very interesting design, I like it :D.
Thanks billygoat & Jase :up:, to be honest I'm absolutely itching to get started on it :D, but have to save up for a bit longer before I can make an order for the materials but at least it gives me a bit more time to get the design plan to perfection.
Well there was nothing wrong with this prototype of the air cube, easy to work with, perfect air cooling, a tad on the noisy side & tiny bit on the flimsy side but...
It had some kinks like the original design had a psu in mind that had a big fan on the side, but my bro's psu only had a fan on the rear so the flow didn't work as I planned.
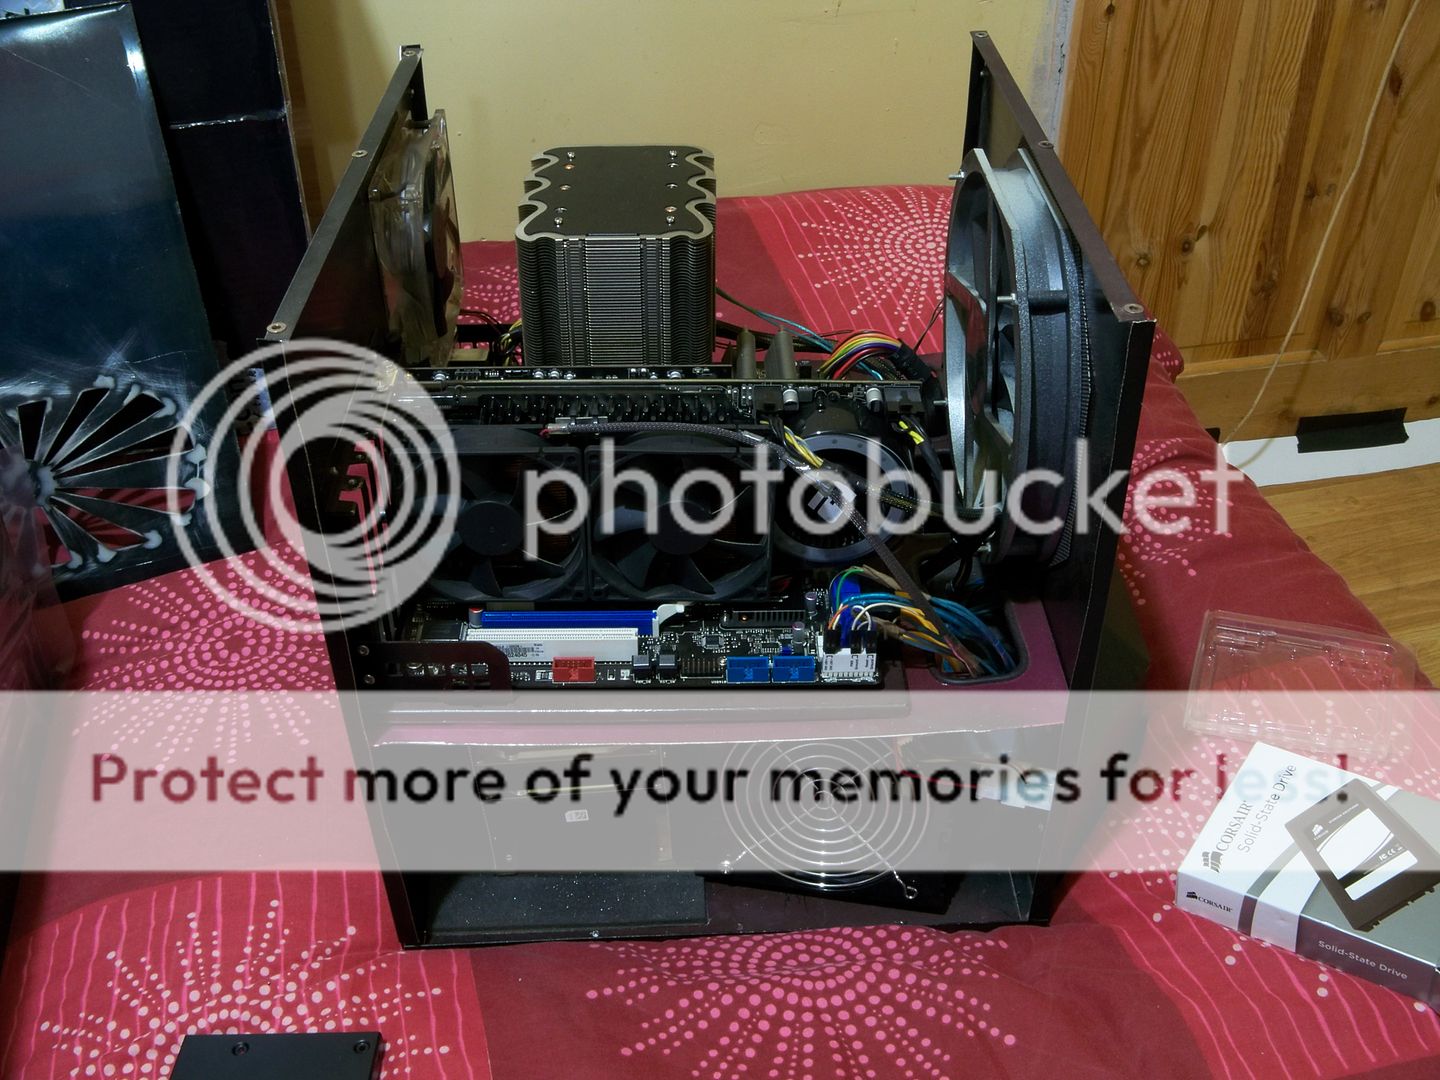
So with me getting the prizes from the mag feature & me not exactly wanting to switch from an overclocked q9650 to an AMD cpu at extra cost I figured it's about time I did something with the prizes, the case & psu is great & quiet, the memory is great, the mobo is low end, I'm sure it would be good for a media pc project at some later time.
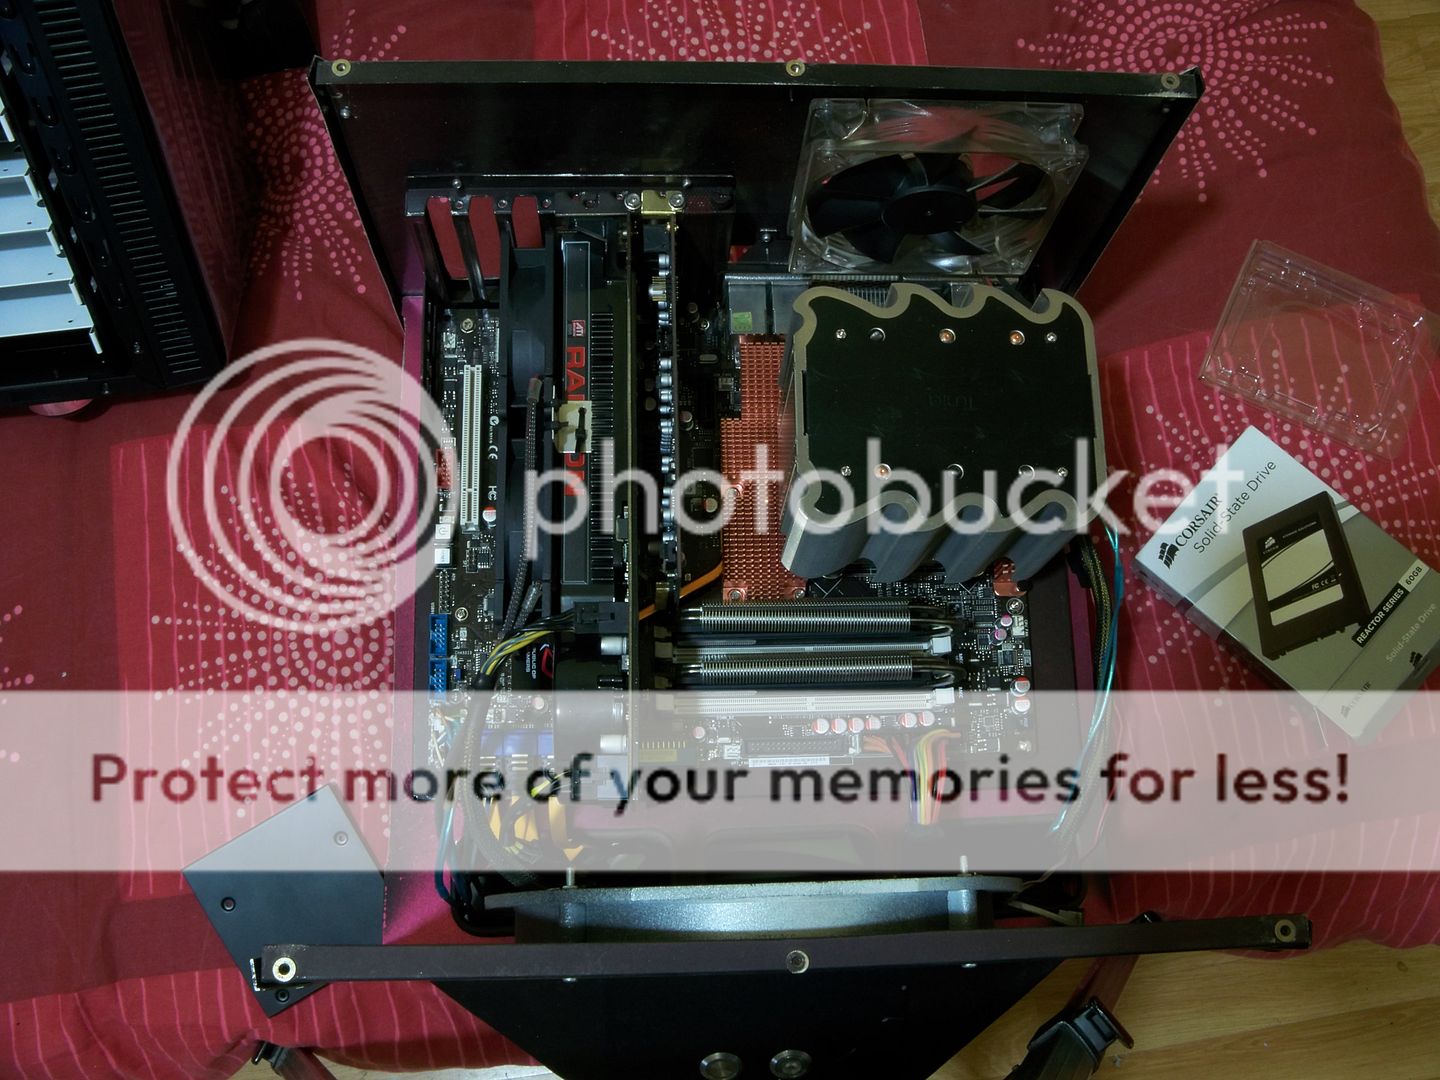
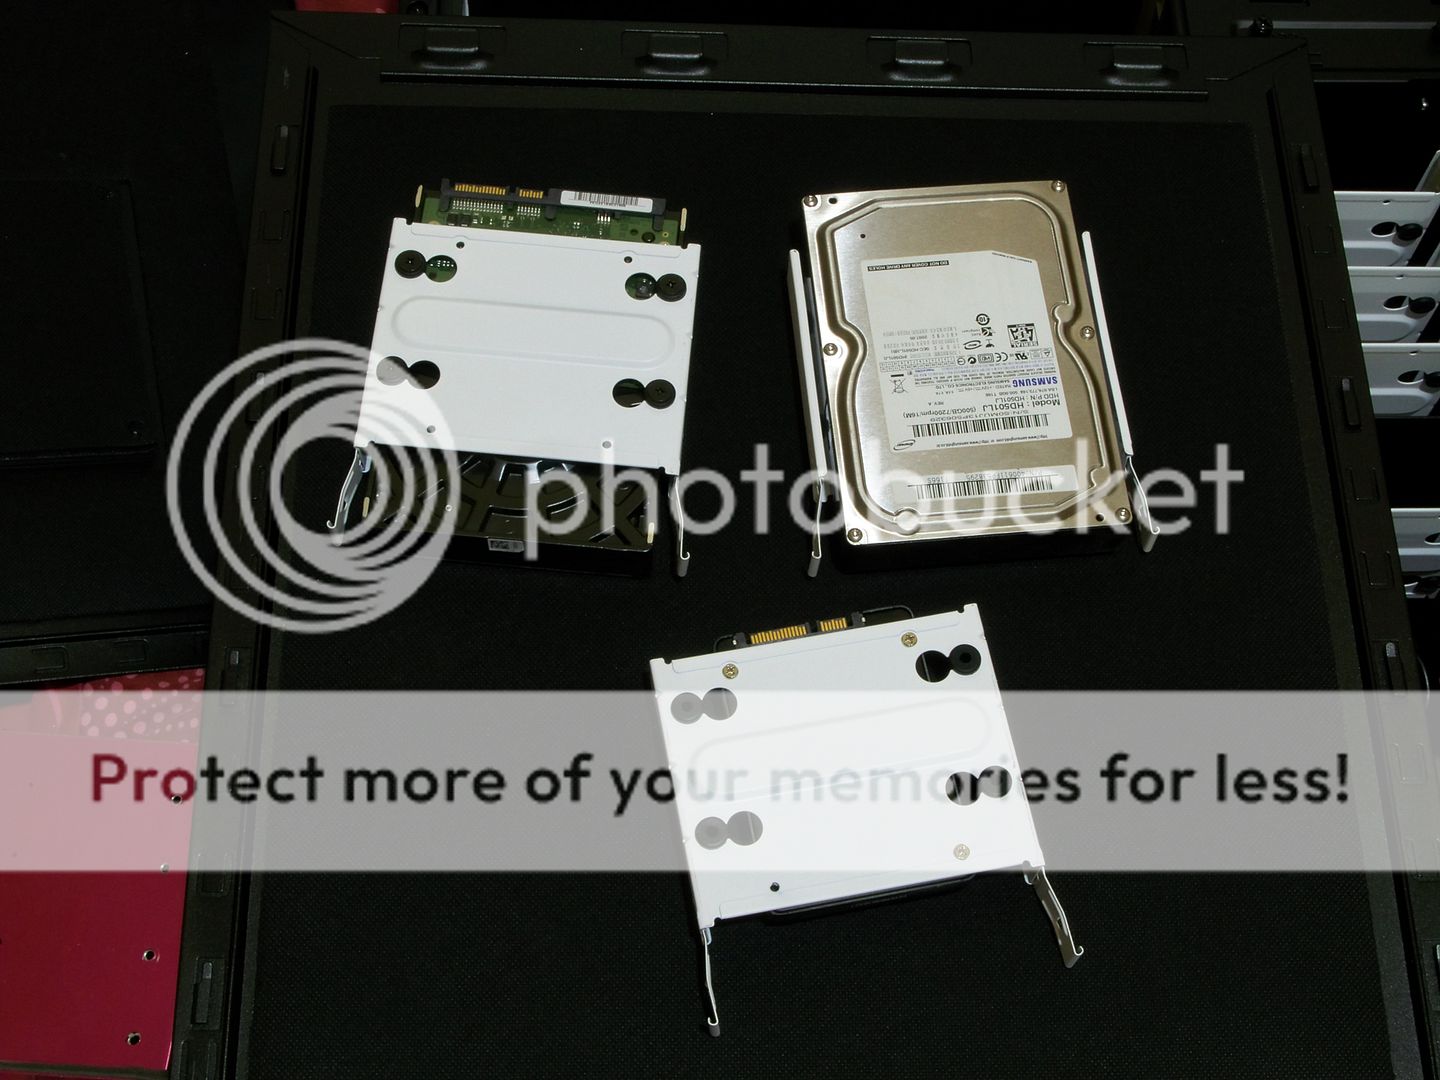
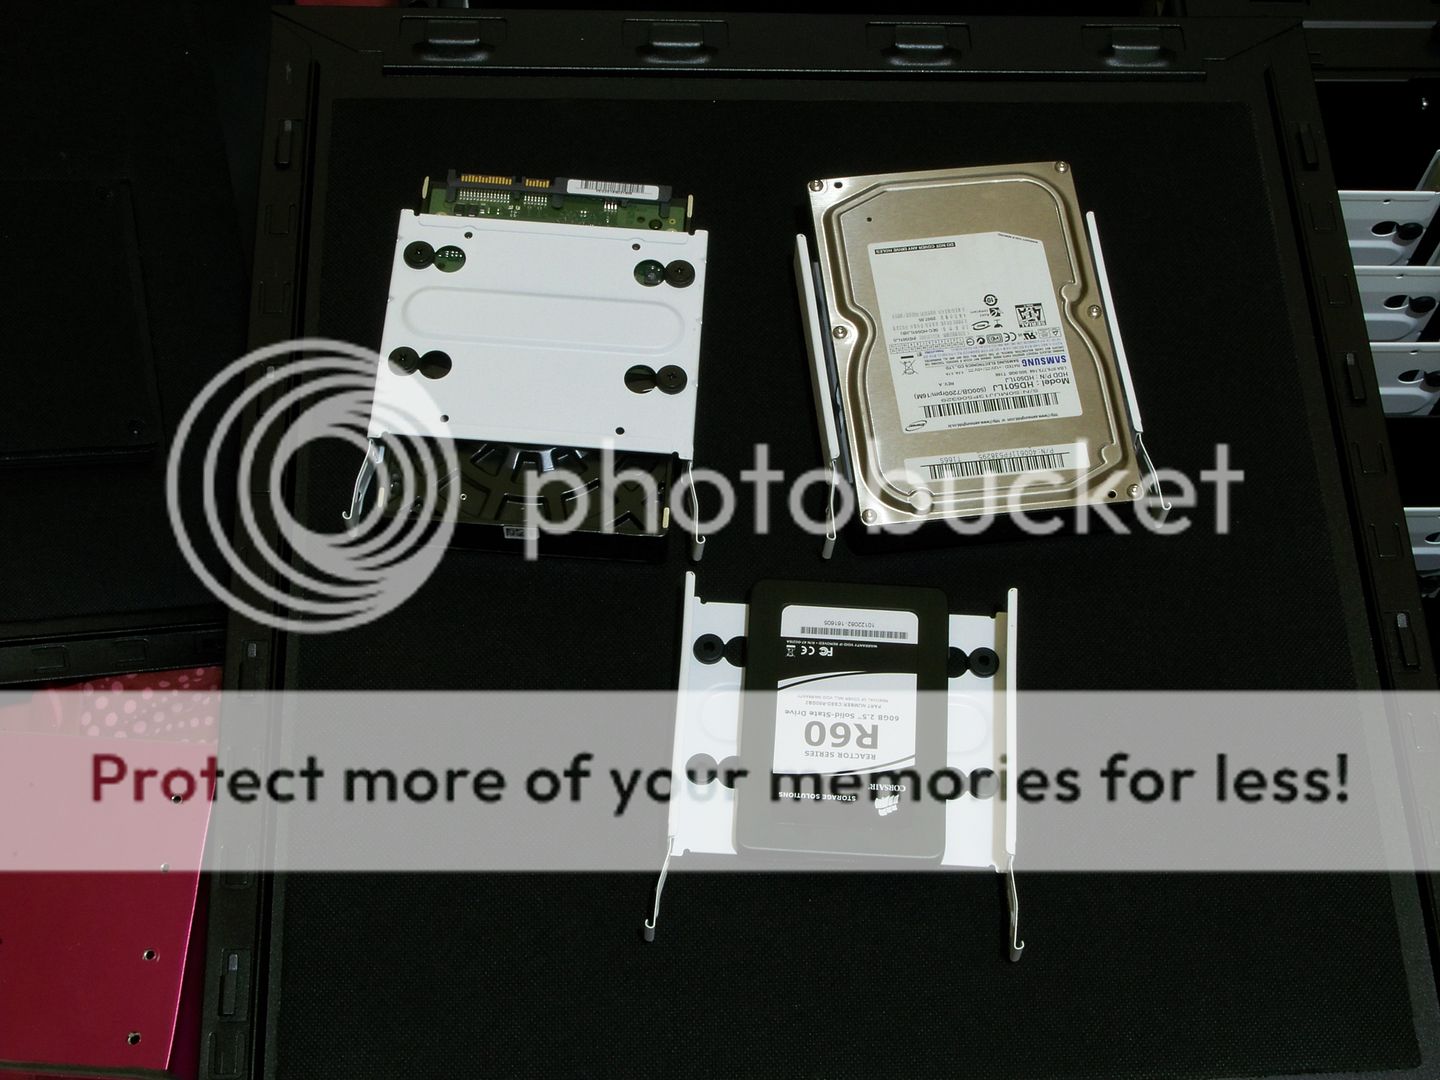
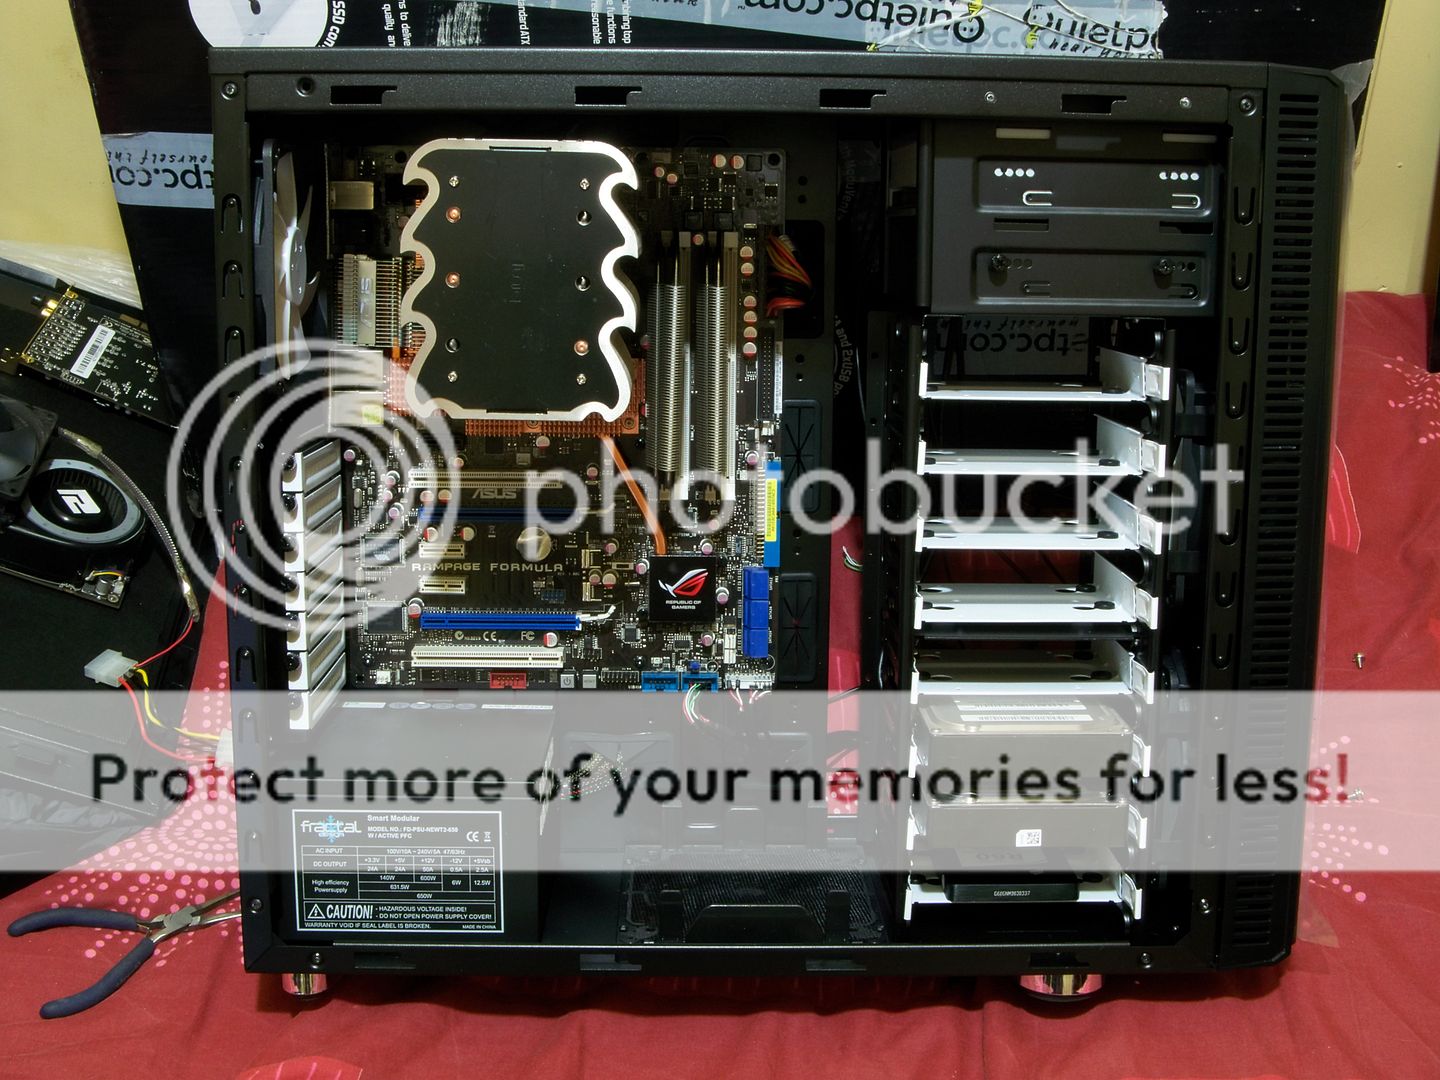
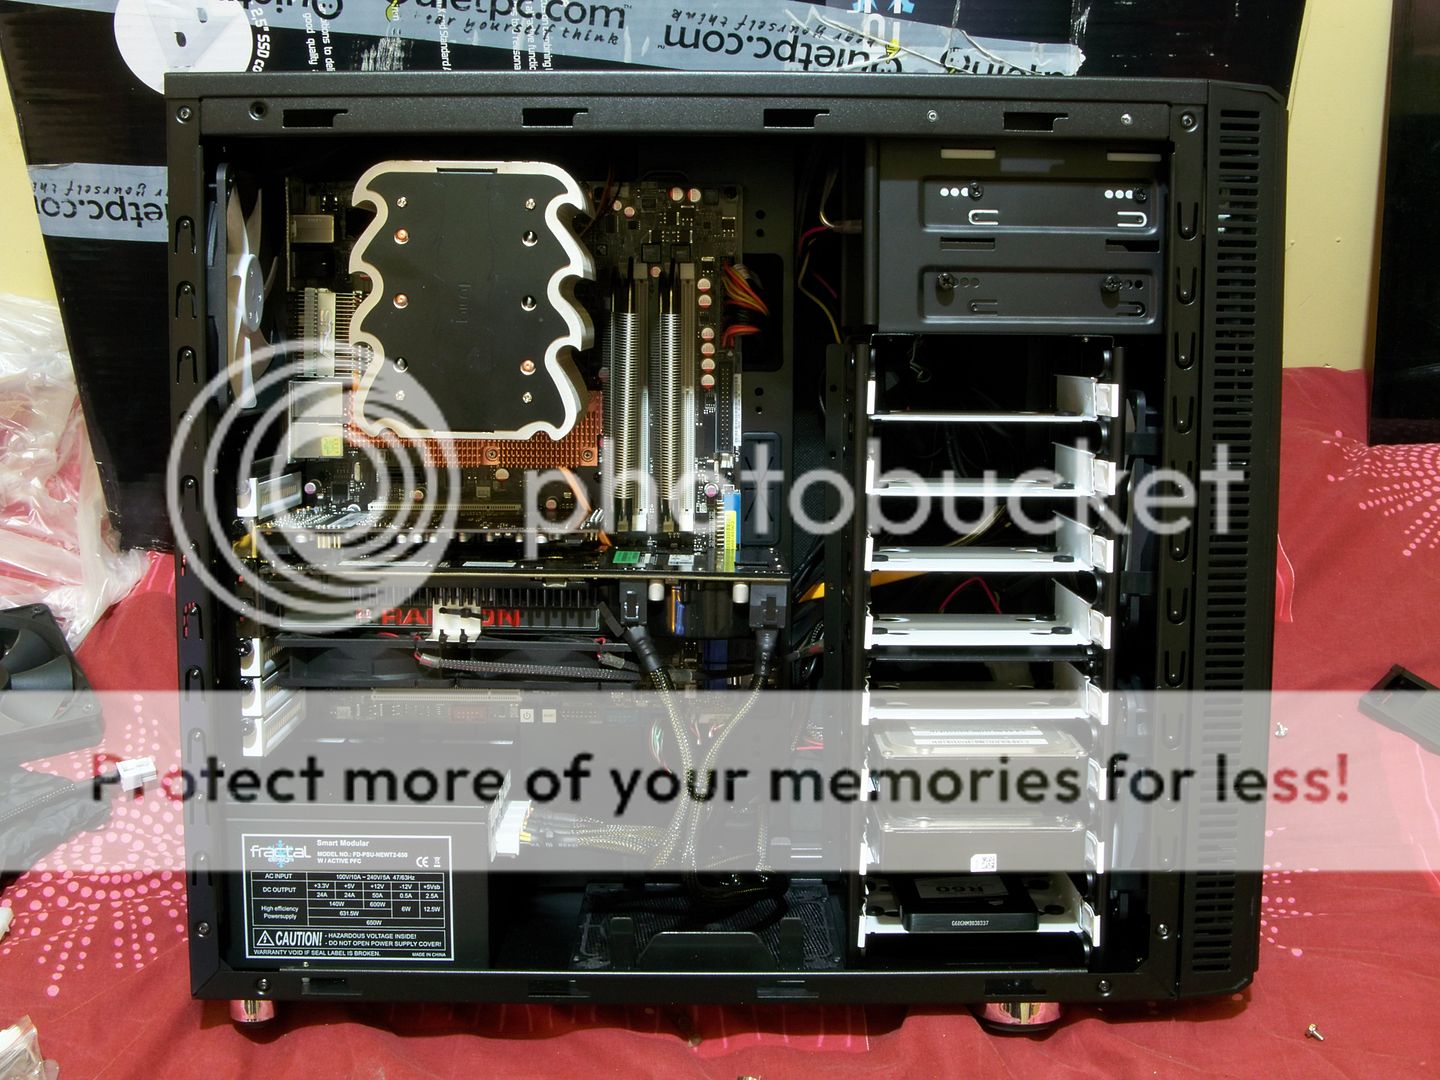
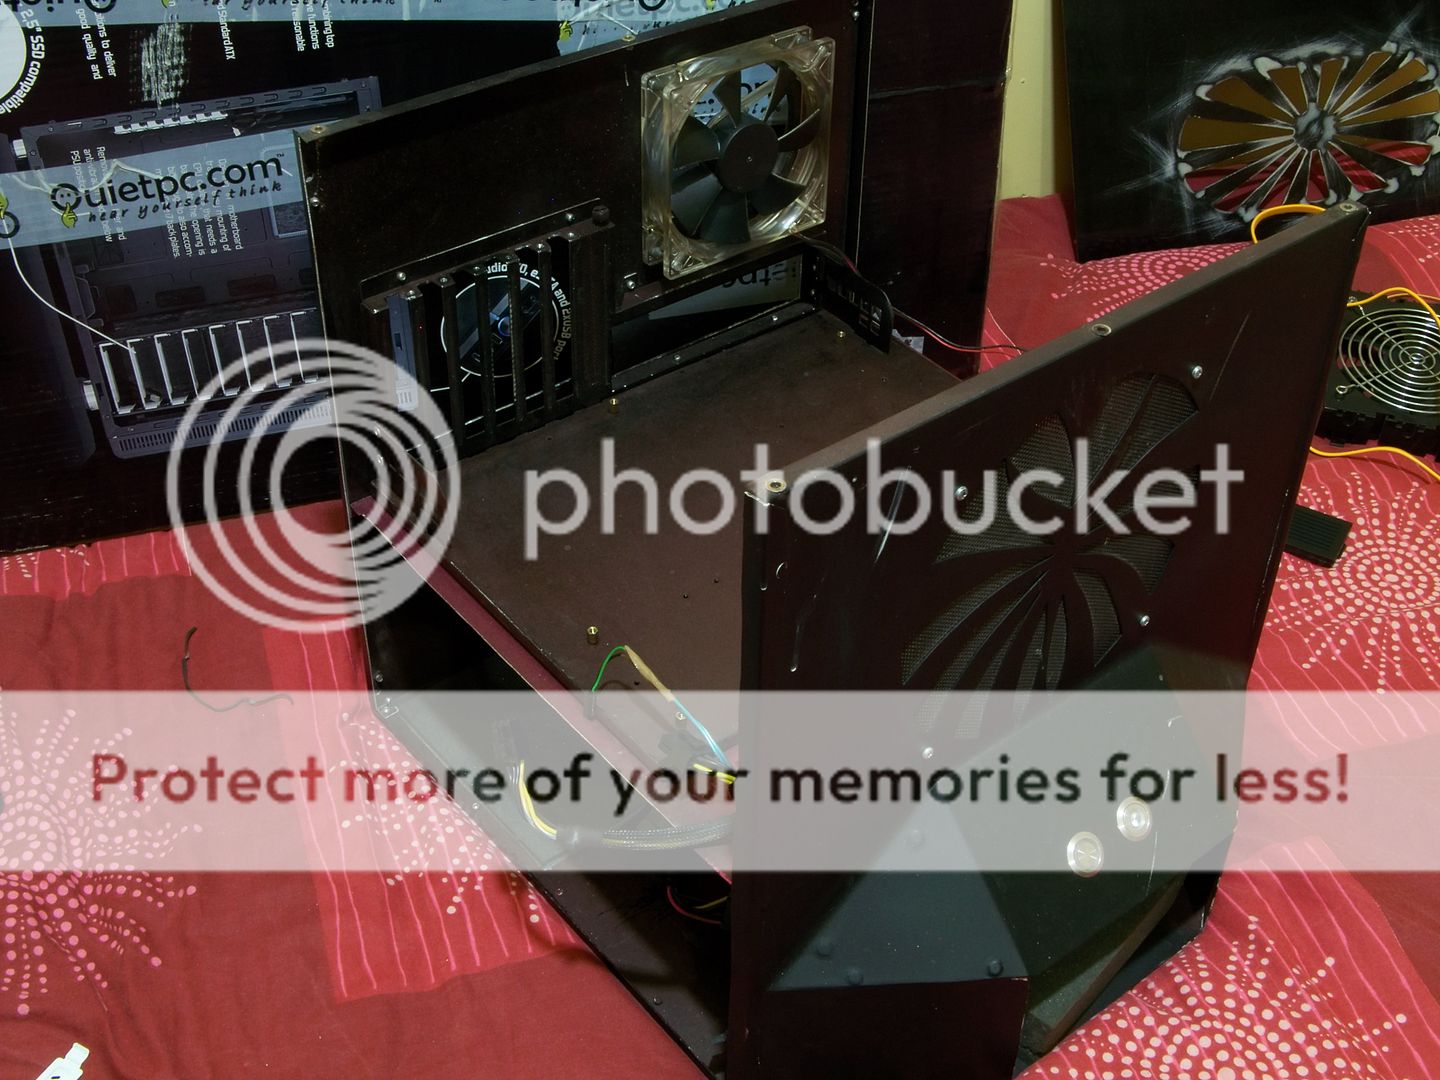
So I sold the case & psu to my bro, he wanted a quiet pc so I cleaned all the components with the air compressor & spent the evening switching over the gear from the prototype to the fractal define r3, all went quite smoothly, the soft rubber cable pass throughs fall out easily so were a bit fiddly but got there in the end, I added an extra quiet fan to the front, Also I switched the stock fan from the heat sink with a low rpm one which helped reduce noise a bit more, didn't bother with the fan controller, I really like the hdd mount system, ready for ssd's too.
And the bits from the case.
One thing I would change with the design on this case is make it 10mm wider so the side panel goes on easier when all the cables are hidden behind the mobo tray was quite a struggle getting it on.
It seems kind of crazy to me to have such nice internals & no window lol.
Got it all up & running, nice, quiet & cooling is ok but it's definately not silent, I'd say it's about the same noise as my air cube v2 which was definately surprising, but anyway it's a nice quiet system + can't hear the hdd's, it is a very nice case & has the option for 2 extra fans in the top & another at the bottom & another on the side.
I give it 8/10 & would get 9/10 if there was 10mm extra space behind the mobo tray for less cramped wire management.
Would have done a tidier job on it but he's a bit stingy so no colour coordination going into this lol so had to use spare cables & such that I have in a bits box.
Was a fun quick project & a reminder why I like making my own :), a normal build is a tiny woo hoo moment, but a scratch build completion is a massive woo hoo moment :D.
The money from the case & psu will go towards my next project in the form of a 12 inch disc sander which I know I'll use a lot.
And now this will sit next to my frankencase in the cellar but it will make appearances in my mod evolution pics at the end of each scrach build :D.
And I made a wallpaper of the air cube in 1080p if anyone wants. Just click the link, hover over zoom & select high res image :up:.
http://s433.photobucket.com/albums/q...paircubewp.jpg
Thanks for the wallpaper :D.
Just erased the backgrounds of the project from a few of the best pics, resized them & plonked them on this 1080p plain barn door background & used a font to try & give it a burnt on look.
After seeing Attila's wallpaper of his latest but at the wrong res for me I figured I should see what I could do for a wallpaper, so hope you all like it :), I made a few others but my bro says they are too busy & he's probably right lol :D.
I missed Attila's wallpapers, I must go and double check :D.
I'm pretty much useless when it comes to photoshopping things lol.
Was my first go on it, couldn't grab what I wanted so instead just zoomed right in and erased around it all, that was the longest part lol, then it was just a resize copy & paste job :D.Quote:
Originally Posted by The boy 4rm oz
----
Wow, spent an entire day deciding what to do.
System upgrade / 12 inch disc sander for next project / frittering the money away like an idiot :D.
Done a ton of research about if I upgraded from my skt 775 q9650 @ 3.8ghz with ddr2 to a i7 930 or within my budget i5 760 & honsetly doubt I'd feel an appreciable difference from my current gear so after figuring out what to do over an entire day I had a good sleep, woke up & yeah I've dedicated myself to my next mod instead by getting the disc sander, then all I need to buy is the materials :D.
The disc sander will be a massive help in many areas like perfect clean mitre joints, perfectly straight edges from material I cut, perfect bevels, it was Frenkie who got me interested in this new tool after seeing the nice bevels he achieved on his stealth mod.
I know very well it will get used a lot in my mods so as far as I'm concerned I've signed the contract with myself to mod on so it shouldn't be too far off before I start but I'll save the new thread for when I've actually started :) which if I'm careful enough with my money could be within a month (gotta be optimistic lol :D).
Disk sanders are fantastic, they can be used for so many different things. I used one to strip back all the stock paint in my Alpha mod, works great. You can also get ultra fine disks for them so you can wet sand or fine sand really large areas. I can't wait for your new project to start mate, also can't wait for mine. My last exam finishes on the 25th so I think it's time to bring the old Dremel out from retirement :D.
:D Looking forward to it mate :up:, all the best with uni too :up:.
Thanks mate :D.
So, I made the rough design which I already shown & just spent all day rebuilding the design from the ground up (trimming things down & squishing things in basically just readjusting the design for the changes) so it will now have full length panels instead of separate ones & will be a bit more sturdy, also I'm going to do a 2 tone tint that will all fit flush to the alu so will be a heck of a lot more difficult to do but I believe the higher the challenge the more you learn, sure I could get the acrylic pieces laser cut but there's no fun in that :D & it would bump the cost very high, oh & it would be over all too soon :D.
Already ordered the acrylic & the clear acrylic adhesive.
So now it's just a case of saving & raising the cash for the aluminium.
Base panel & motherboard tray is 4mm, 2nd panel, back & sides is 3mm, acrylic is 3mm with a 2mm layer of clear acrylic to properly support the 2 tone flush fit.
I'll be aiming for a whisper quiet case with this by using these fans throughout, they are only 41cfm so are lower than what I'd usually go for but with the orientation of the fans should do the job fine to enable a nice overclock too, they also fit the colours of this build perfectly.
120mm Enermax UCTB12 T.B. Super Silent 11 dBA
http://www.enermax.com/home.php?fn=e...&lv1=32&no=108
Also with me doing windows on both sides I'll be having my first proper go at custom length sleeved cables so it all looks neat on both sides & possibly take a leaf out of Attila's book & make little wire cover boxes to completely hide wires.
The reason there are no vent holes on the curved piece is I have no idea how to do what I want on curved pieces in sketchup, also if you think I've done away with the optical drive I haven't I will make a new bezel for it which will blend with the stripes :).
I might get the aluminium anodised black once all the metal work is done rather than paint it this time, depends if I can get it done at an ok price.
I just hope I don't have too much trouble making the curves as I want them, there will be 3mm aluminium flat bars which should be quite easy to do, originally had it designed for 5mm bars which may have been a nightmare to do right, 3mm acrylic should be very easy considering it will be 3 separate fairly slim strips, the 2mm clear acrylic should be a doddle.
I'll be taking my accuracy to a new level too by getting some digital callipers which I'll need to go along with the disc sanding work.
OK after all this blah blah explanation :D next time I post will be with actual progress on a new thread :), so hopefully this year, if not then early next year, so I'd say either in December or January.
This will probably be my last big project for some time as I'm liking the tiny pc's that are popping up, much cheaper on materials & awesomely small yet powerful & not thirsty for electric, seems the way to go imo but I feel I must whoop my first attempt of a tower pc before I go there :D.
For now though here's a bunch of the revised design pics, say what you think (positive or negative any opinions appreciated) :).
So until I get all the materials I'll just keep cheerleading for other modders lol :D.