"MybadOmen's" New NZXT Phantom Evolved Build !
The project has now begun !
New INDEX added below !
Take Care and hope you guys Like this one, as most of you know I Love NZXT Cases and Parts !
MybadOmen
Sponsors so far:
http://www.nzxt.com/new/product_all.php
http://www.ekwb.com/shop/
http://www.primochill.com/
http://www.enermax.com/
http://www.mod-smart.com/
http://mnpctech.com/
http://www.avexir.com/
More Sponsors to come !
Re: "MybadOmen's" New NZXT Build ?
Just a title.... jibbed haha
hopefully some progress soon and some more progress on the bench mod too
Re: "MybadOmen's" New NZXT Build ?
Re: "MybadOmen's" New NZXT Build ?
There are no Pictures the case is under NDA for 10 more days. Trust me will be tons when its possible.
Re: "MybadOmen's" New NZXT Build ?
That's the NEW Phantom teaser pictures they've been sending out. Let me know if you need help with paint.
Re: "MybadOmen's" New NZXT Build ?
UPDATE 1 !
I know its been a long wait but yes its true ! Update #1 is here and its a very small update but also a HUGE update. Reason this update is going to be small is because the updates following this will be in depth and something new from me if it all works out.
Anyway not much more to say then October 26th 2012 the NEW NZXT Phantom in Matte Black has arrived and is ready for Modding !
Quick look for now but it will stay in the box until i open it with you guys and give a quick review and my thoughts on the case. Seeing i have owned and built many many Phantoms and a Switch 810 i think i should be able to give you guys a really nice review from a Modder / Water coolers point of view that is very familiar with NZXT.
Here she sits till i open here with you guys:
Thank you NZXT and all my friends that come back to watch another Mod . This should be good.
Take Care and be back Very soon
MybadOmen
Re: "MybadOmen's" New NZXT Build ?
Update 2 !
Here is my first ever Video UN-Boxing and Review .They will get better as i go but i don't want them to become professional either.They are meant to be from a Modder /Enthusiast to other Modder's and Enthusiast . Also didn't realize there was such a short video time on YouTube so i had to post it on Veoh which seems to be pretty nice.
My first ever Review was of the NZXT Phantom 820 and i feel pretty good about the video besides some improvements i need to make.
Also i want you guys to know i waited 2 days as i had the Phantom 820 sitting in my house to even open it till i did it with you guys watching.It was very difficult to hold out but i wanted it to be a special thing i did with you guys that follow my work so in the long run was very much worth the wait.
Please watch the Video and let me know what you think as i plan on continuing to make them if you guys like them.Will try to make them shorter to fit on YouTube though from now on.
Take Care and Enjoy guys !
My First Ever Video Un-Boxing & Review "" NZXT Phantom 820 ""
http://www.veoh.com/watch/v393656918kgBZzBS
And Keep watching guys Parts are on the way and tools are ready to go !!
MybadOmen
Re: "MybadOmen's" New NZXT Build ?
If you guys are wondering why not updates on either of the 2 Sponsored builds i am doing its because i am Human like everyone else and struggling with something on each of them right now. Normal process usually in my Mods but will jump the hoop soon and keep on moving with them. Some of the things i think up just don't work and i don't want to do what i know everyone else would.I try to as much as possible to keep everything Unique which we all know is almost impossible at this point on a Case Mod. So i have to totally rethink it. But in the end it will all come together. I just need to think and get past the issues.
Just being straight up Honest on why no updates. Its because i'm currently stuck on both and back to the drawing board. Just once again proves i no different then anyone else.
There you have it. As soon as i have a full update together it will be posted immediately.
Take Care,
MybadOmen
Re: "MybadOmen's" New NZXT Build ?
Update
Just want to show you guys im in the middle of a bunch of things at the same time on the build so once i post some updates there will be allot of them and then i will have the thread moved back to the Build Log section.I am currently working on 4 builds right now well actually 3 as i just completed one for a client 2 are the Mods you guys see posted here and the other is a new test bench that i badly need for product testing and my own research. I also have been putting together guides for everything i have been doing which you will also see soon but right now im focused on the Phantom 820 and the JukeBench Mod.
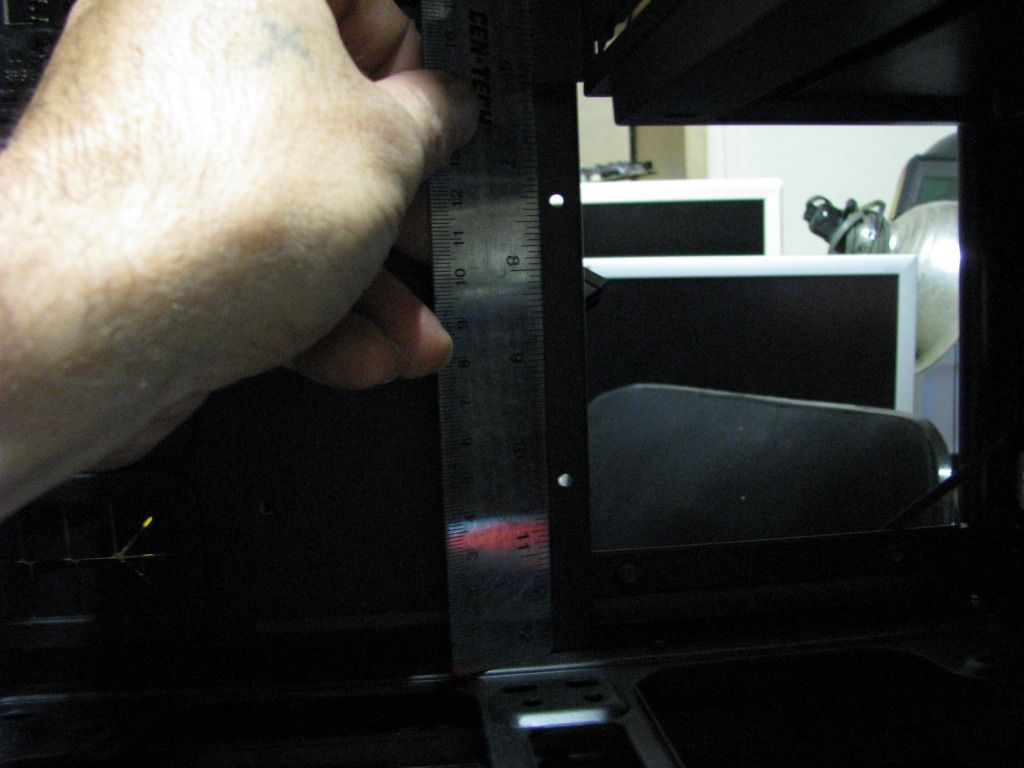
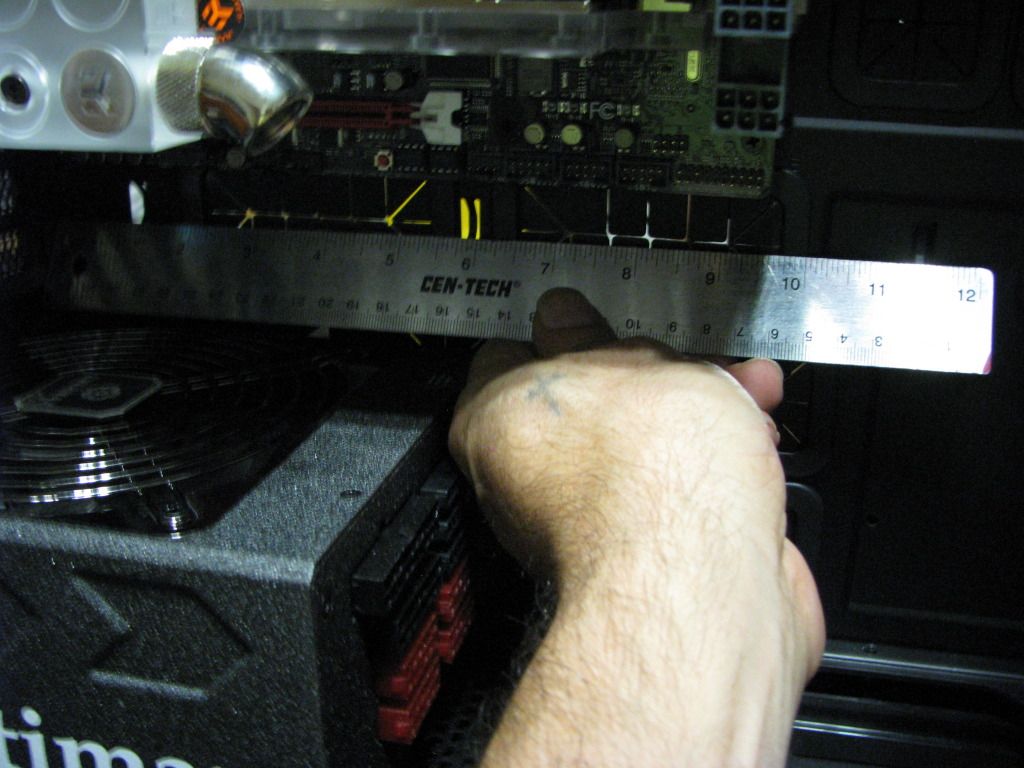
Here is what i am working on now as well as my Google sketches and some designs i left out that would give the project away.
First i will start with just a few Photos of the first phase of the design (Not to exciting but in a way it is because i see what it looks like done and you will also soon).
Taking measurements on Paper and then i transfer them into Google Sketchup and then order what i need and start cutting.
As most know from my previous projects i dislike the stock motherboard trays so here i am designing the fix for that.
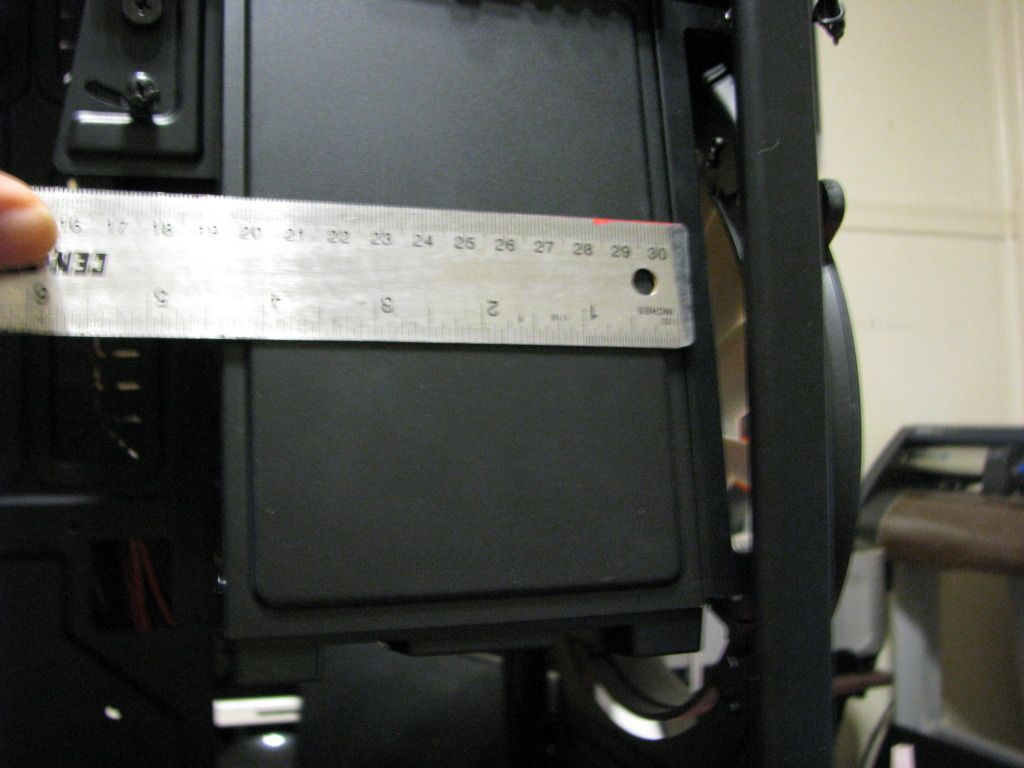
5.25 bays will be Modded but i want to try to keep them usable in this build but if not i already have a plan be for that. Plus a bunch of mods going into the drive bays.
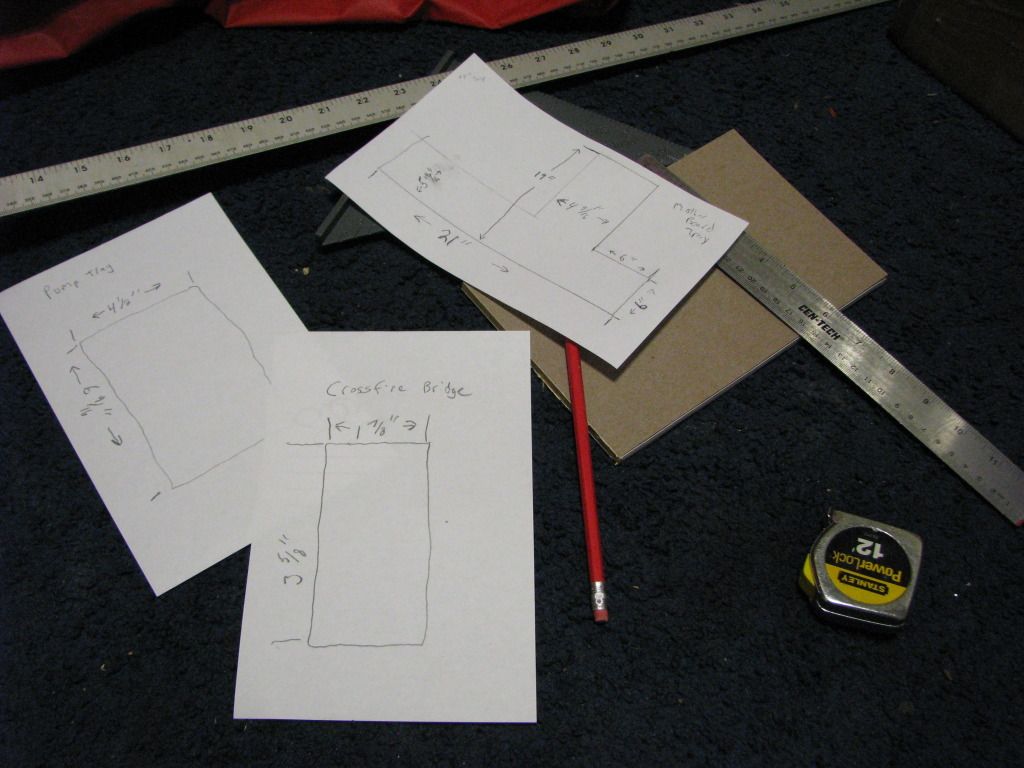
Messy scribbles but this is how it all begins every build.
Thats about all i can share on that part right now without giving away the whole theme of the build and its way to early for that..
Next some work to the Pump
Getting the Pump Ready.And i made it sorta a Tutorial at the same time for those that never seen inside a D5 Pump before.
This is the Pump going in this build and before its asked yes the wife will be sleeved also :)
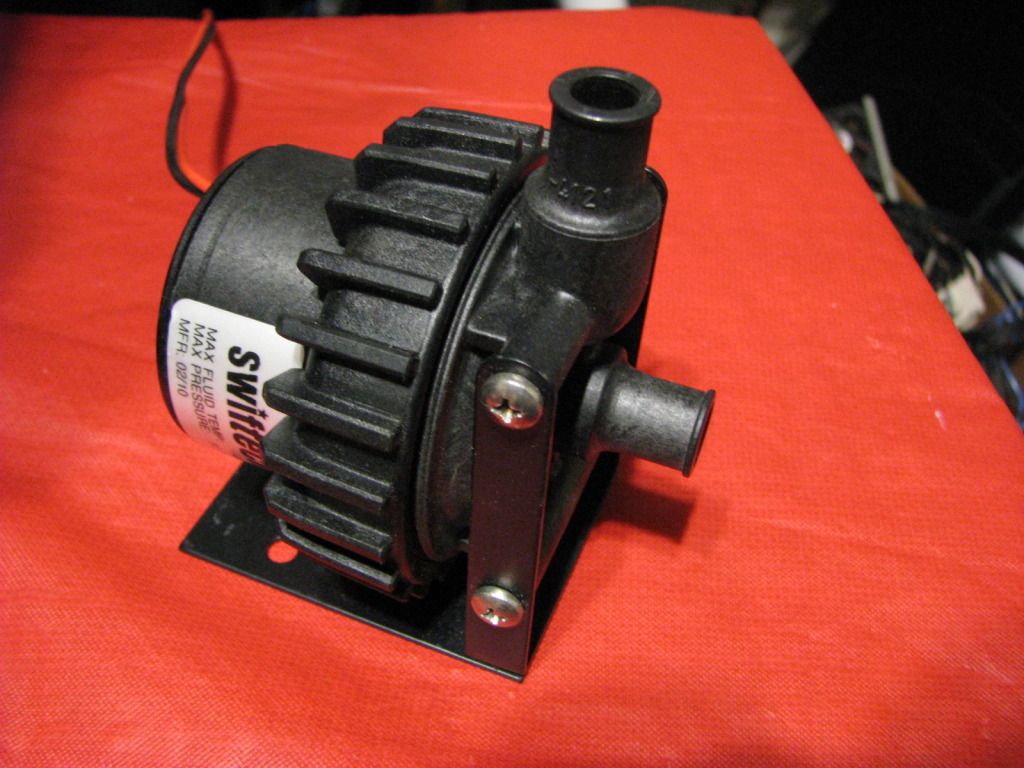
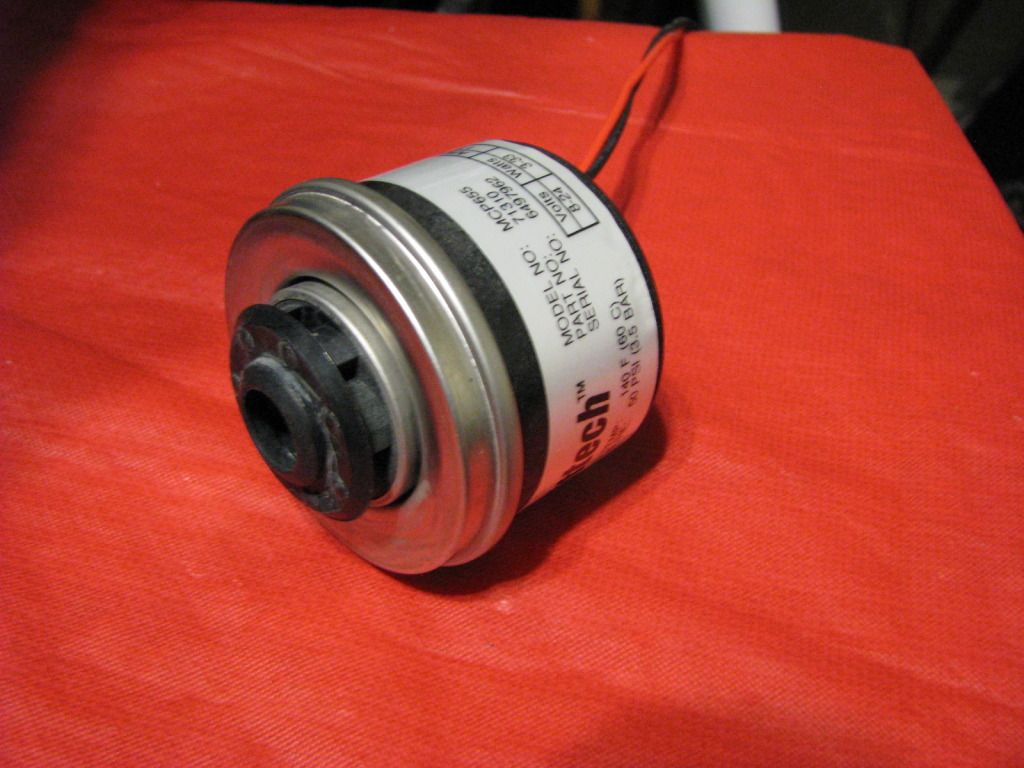
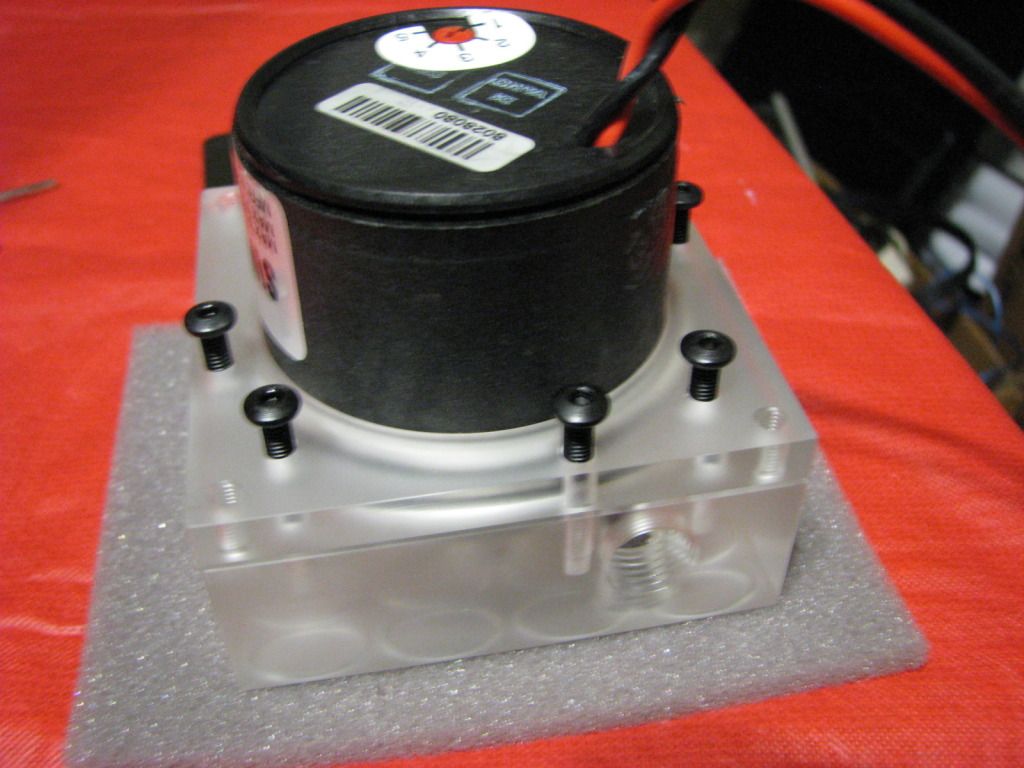
Here is a Stock D5 (MCP655) which come in many flavors , Single speed,Variable speed, and just about every brand name carries the D5 under a different name. One in this little guide is Swiftech variable speed, but like i said brand and speed control doesn't matter its all the same.
D5 stock pump:
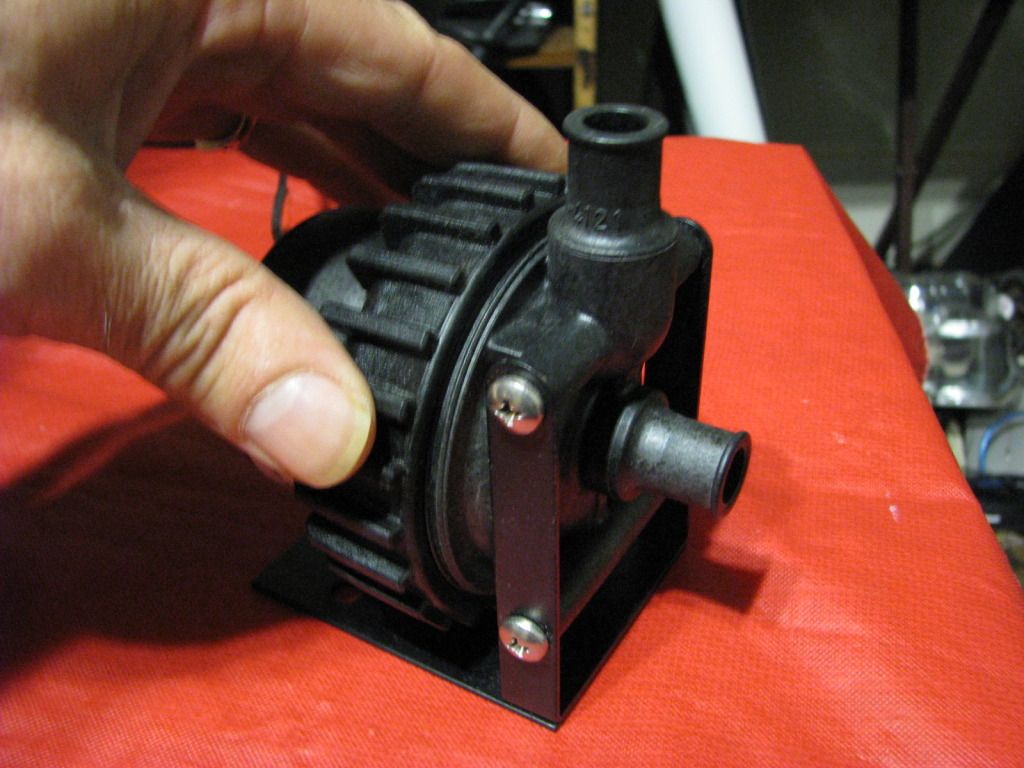
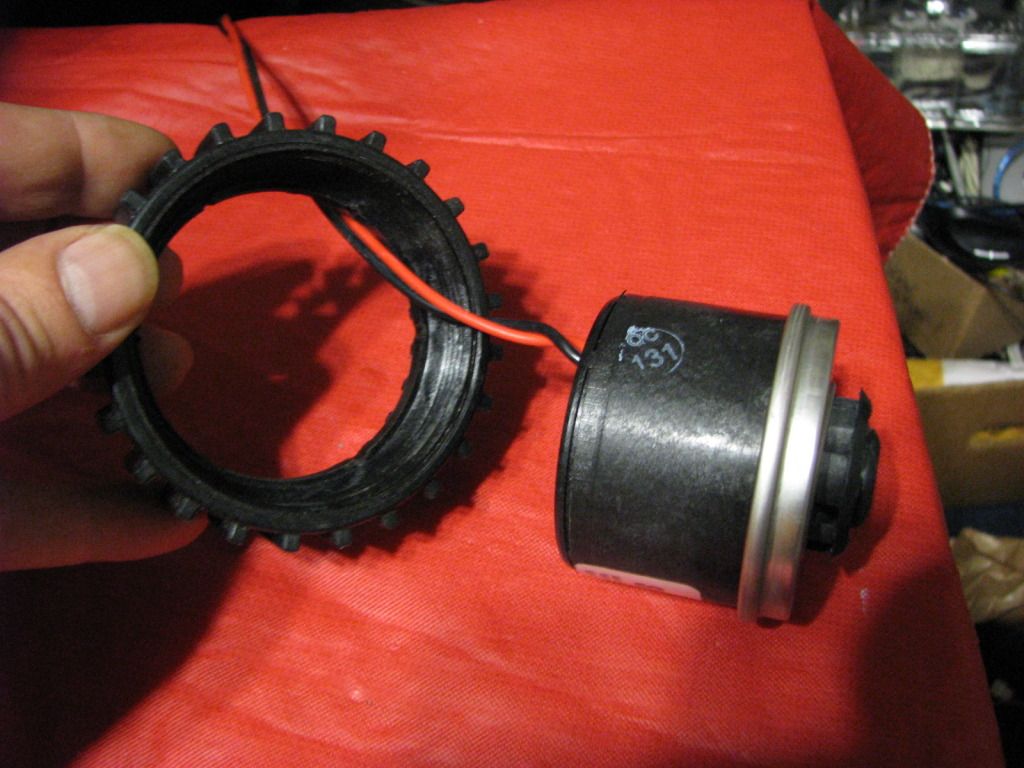
First spin of the big plastic nut that you see me taking off now. Left to loosen it.
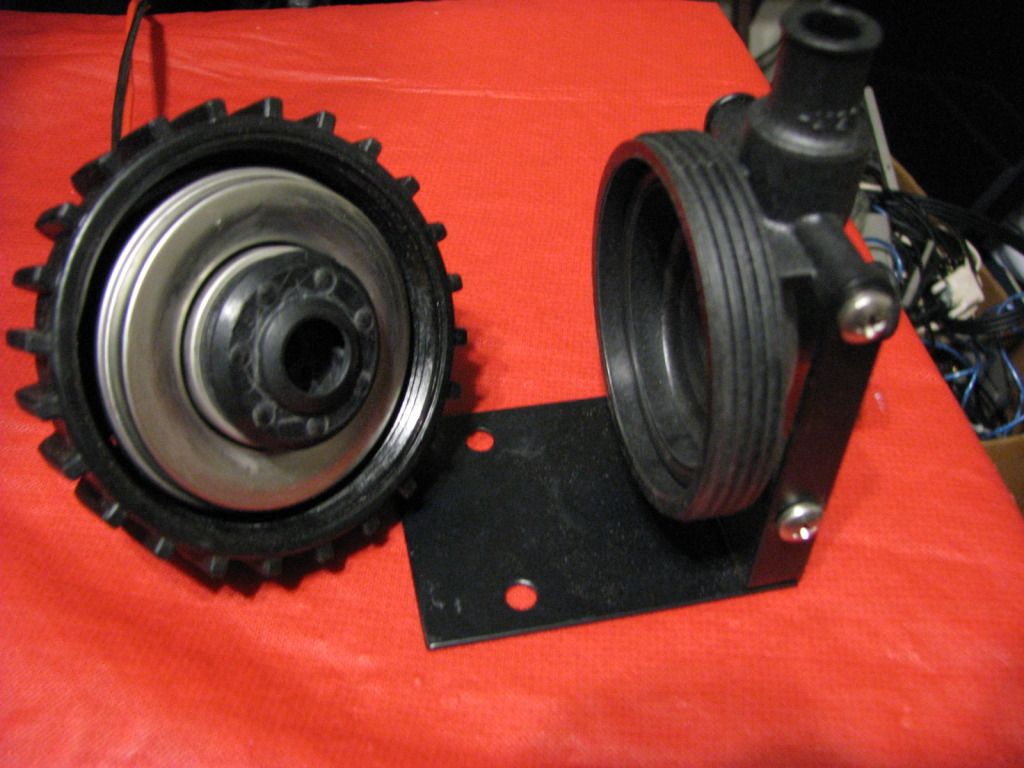
The Pump should now Split in 2 parts as shown:
The old top we can now put away because we will no longer be needing it.(Make sure you save the O-ring that is inside the old top in case you plan on putting it back together later.)
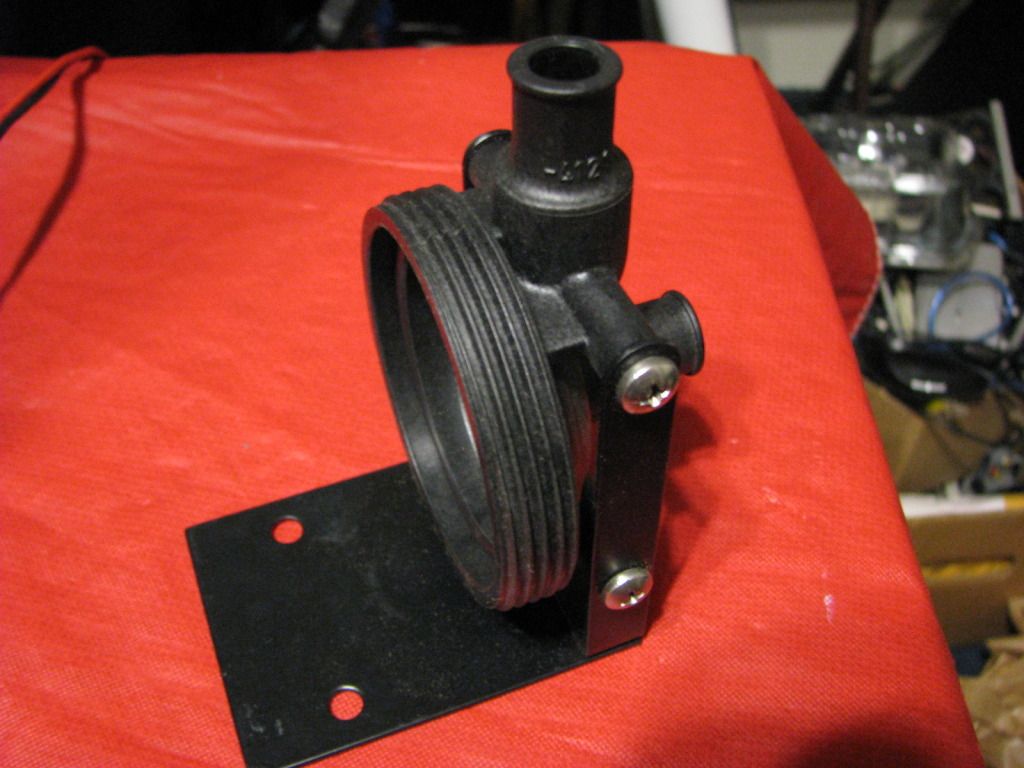
Now we simply remove the plastic nut from the wire by sliding it down over the wire. We will no longer be using this either.
And here is what we are left with the actual D5 pump itself.
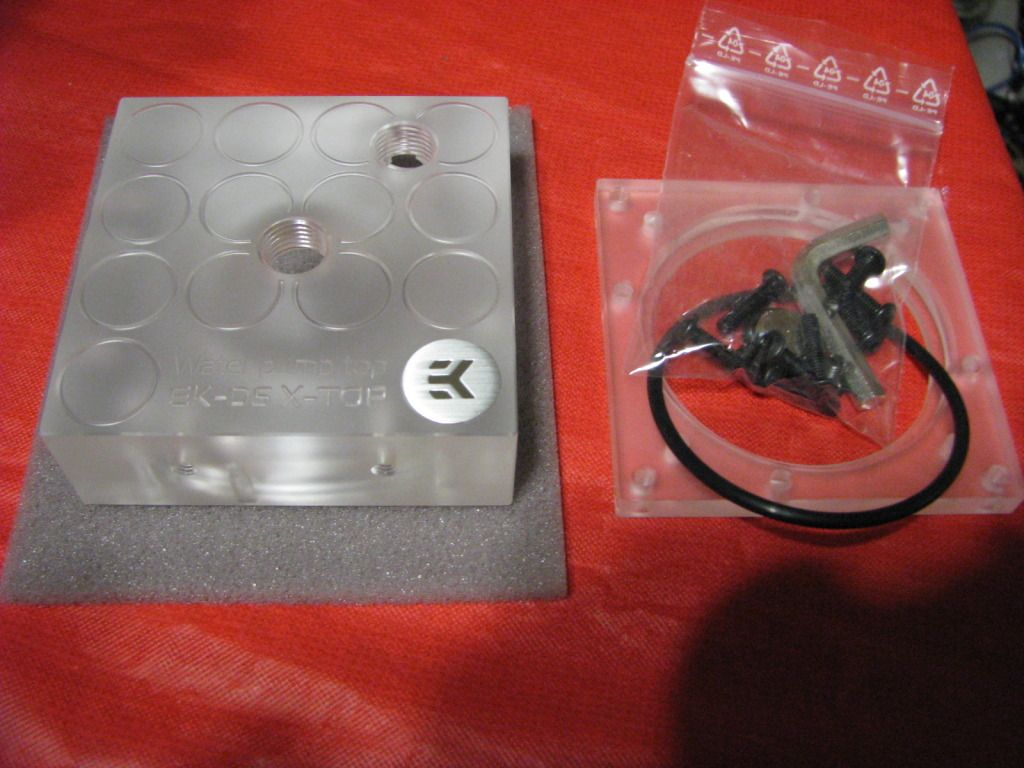
There are a bunch of different tops on the Market to choose from. I just happen to be using the EK CSQ Plexi Top for this pump which is a high flow top so not only do pump tops improve the looks of a D5 but also the performance.
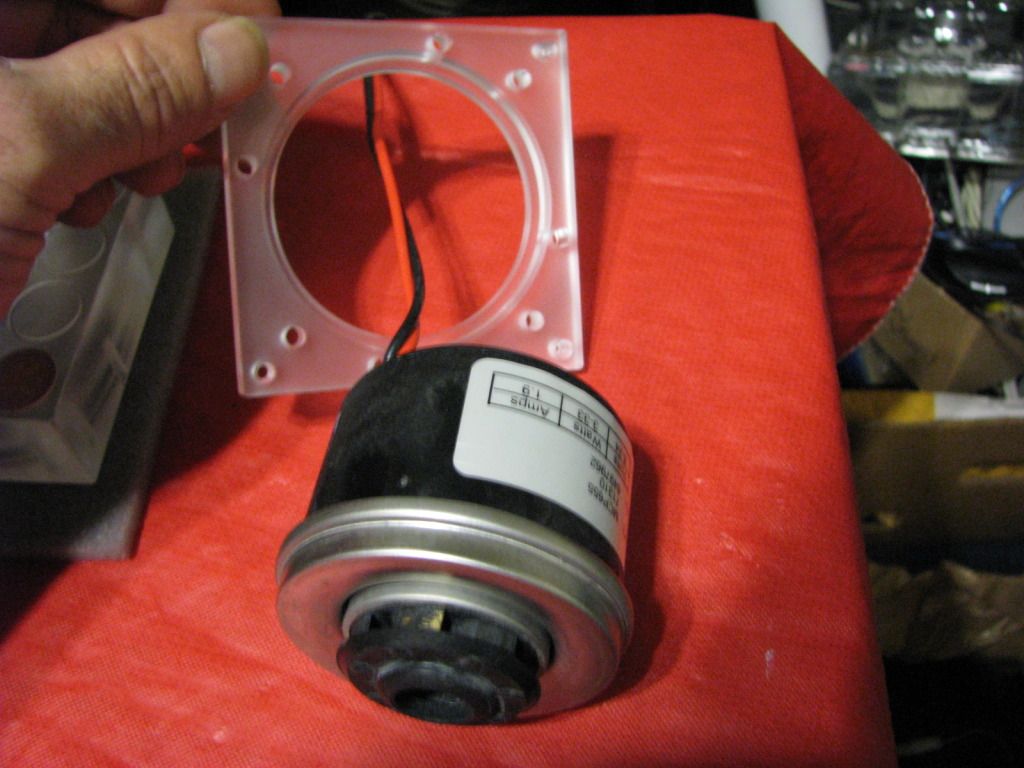
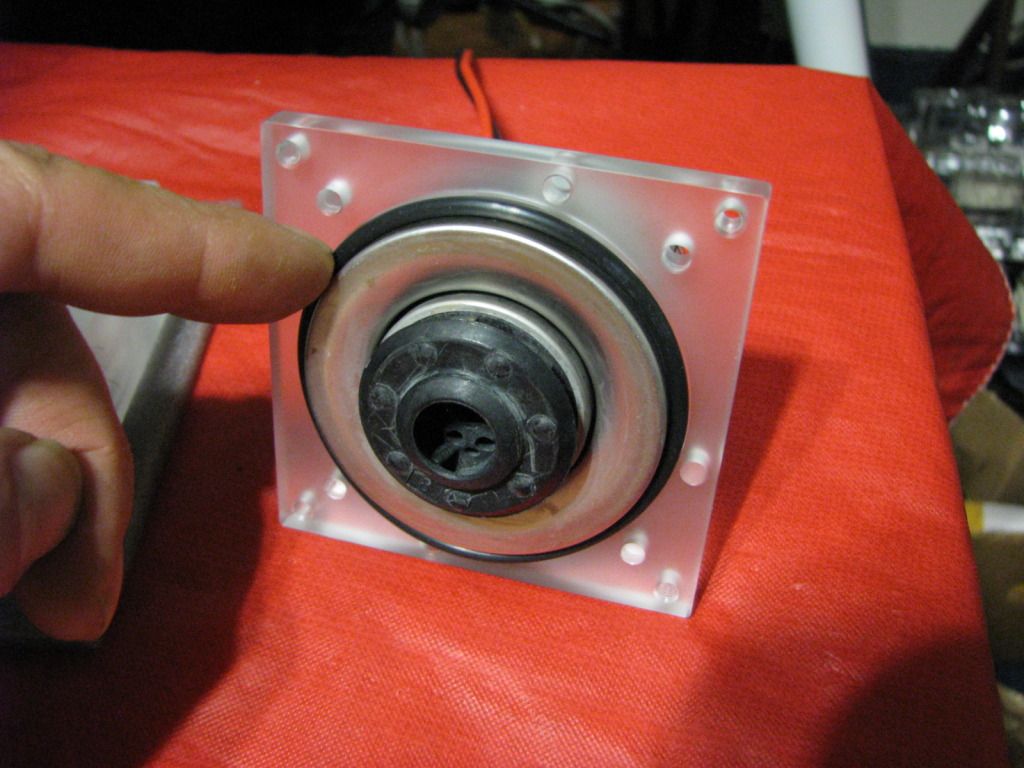
First i slide the new back plate over the wire with the inside groove facing the front of the pump. This back plate takes the place or the Plastic nut we removed earlier.
The new Top should come with a new O-ring which simply slides over the pump as shown.
Next since i don't want to scratch the pump top i place it face down on a piece of soft foam in the direction i want the top to sit when i place the pump into it.
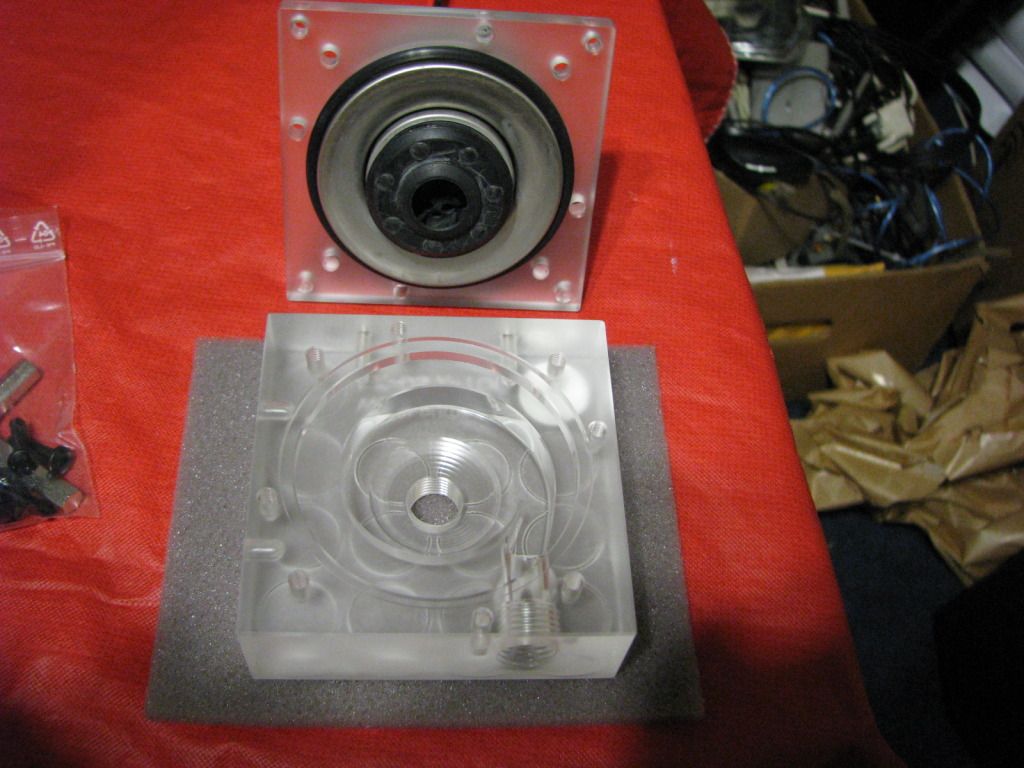
Simply Place the pump assembly onto the top lining the screw holes up at this point.
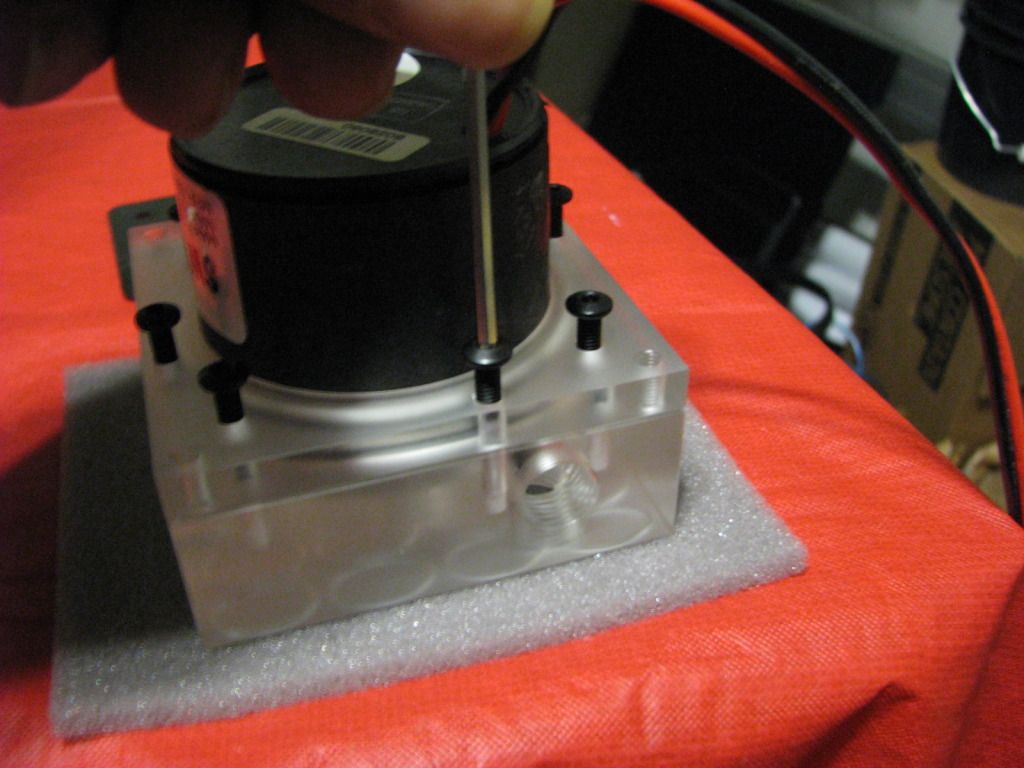
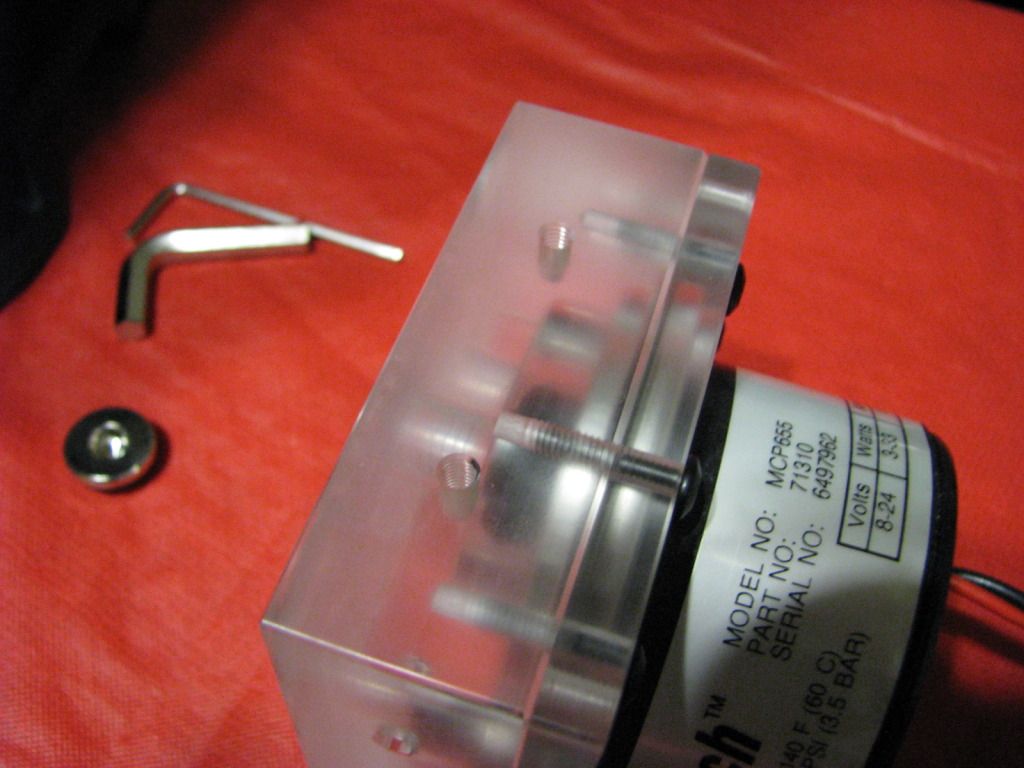
Most Pump tops will come with all the tools needed and the hardware to assemble it. So take the small Allen wrench and the long screws as that's what we will need next.
This part is rather important since the Plexi or whatever top you are using can easily be stripped.Turn all the screws in with your fingers a good 5 threads before using the Allen wrench to avoid stripping the delicate threads.
Now use the Allen wrench and tighten the screws evenly in a criss cross pattern. Just snug them don't crank them down as you will destroy the top. All you are trying to do is compress the O-ring which don't take much pressure.
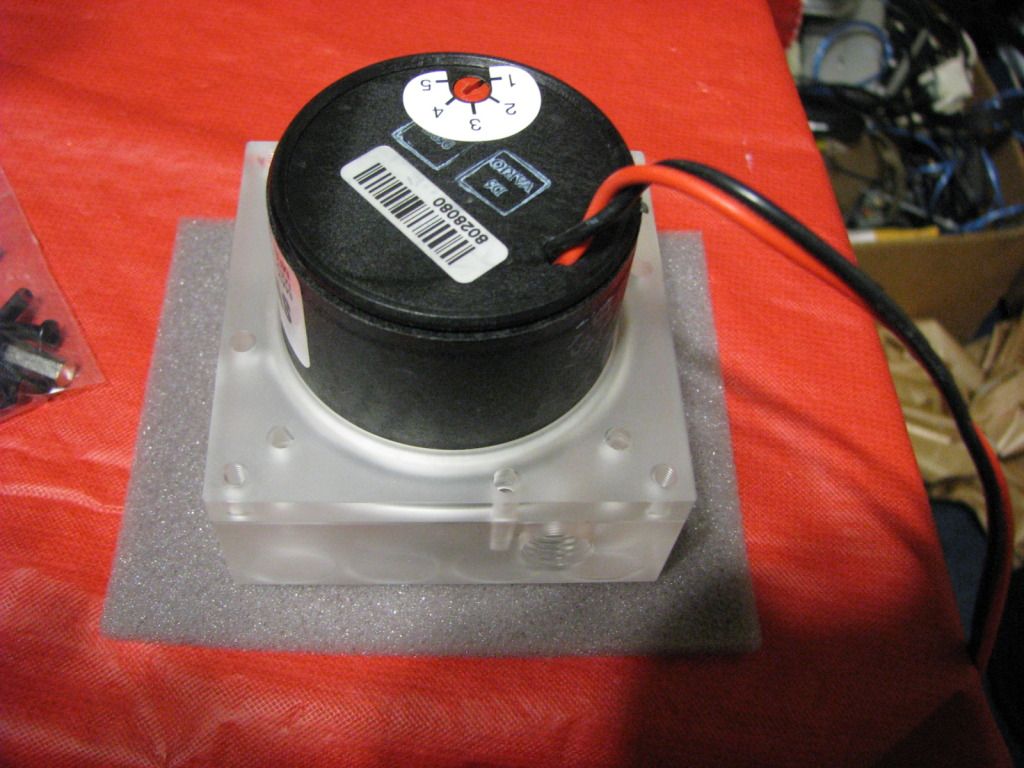
And there we go ,Not done yet but starting to look like a much better pump then what we started with and we should only be minutes into this project.
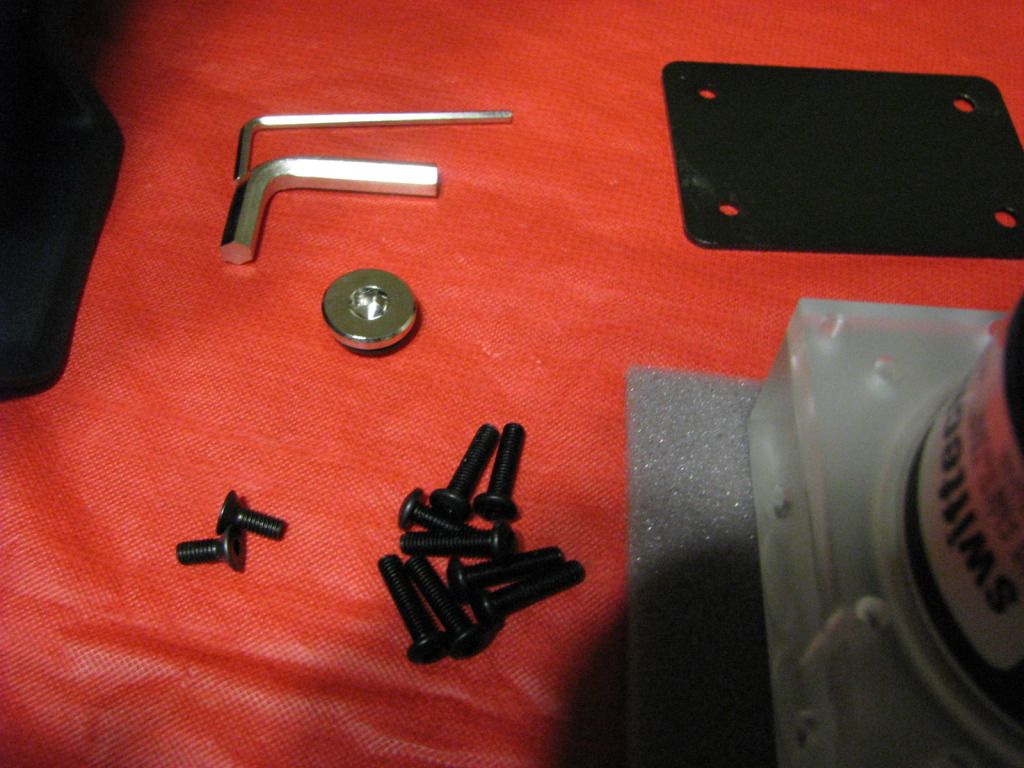
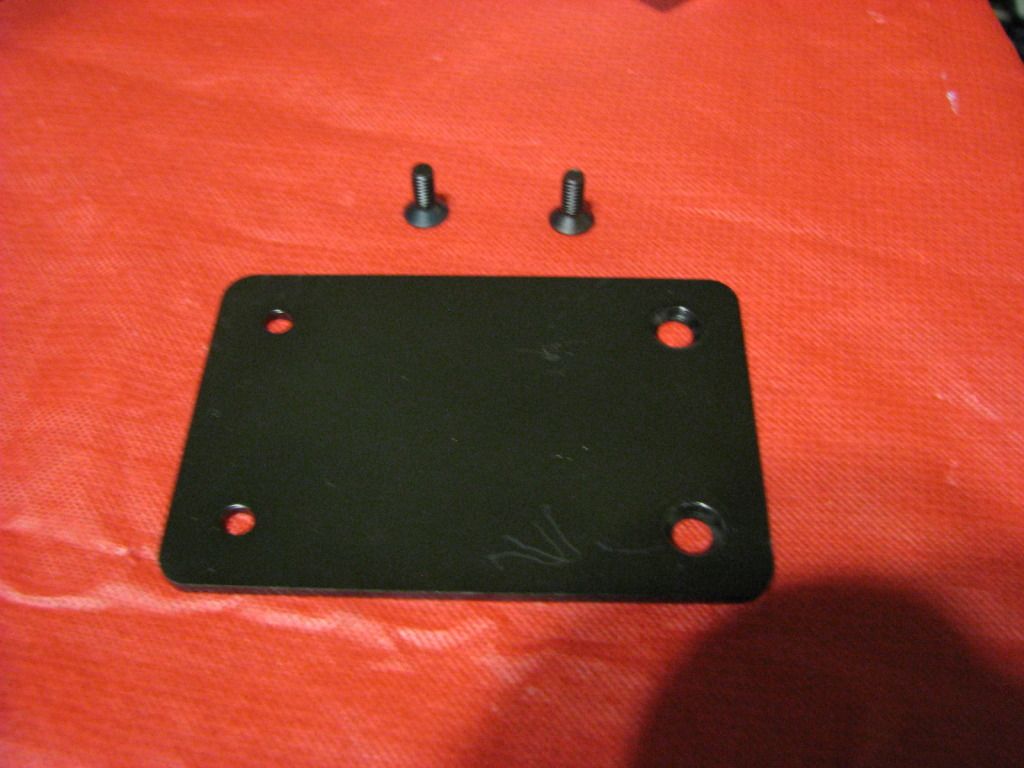
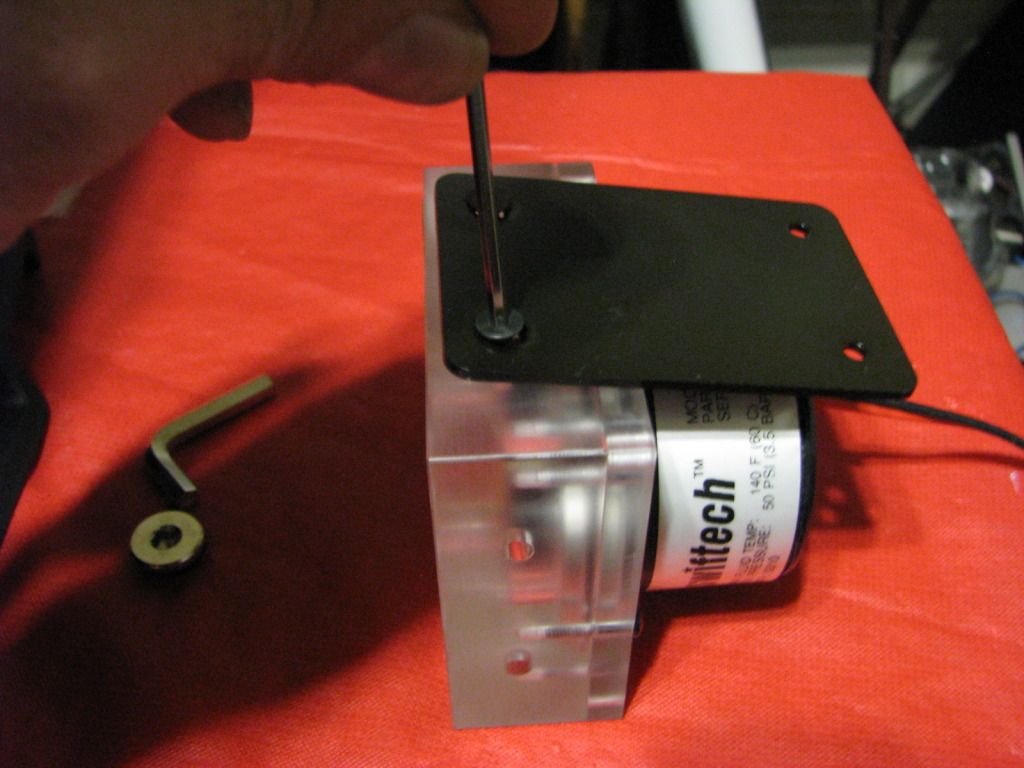
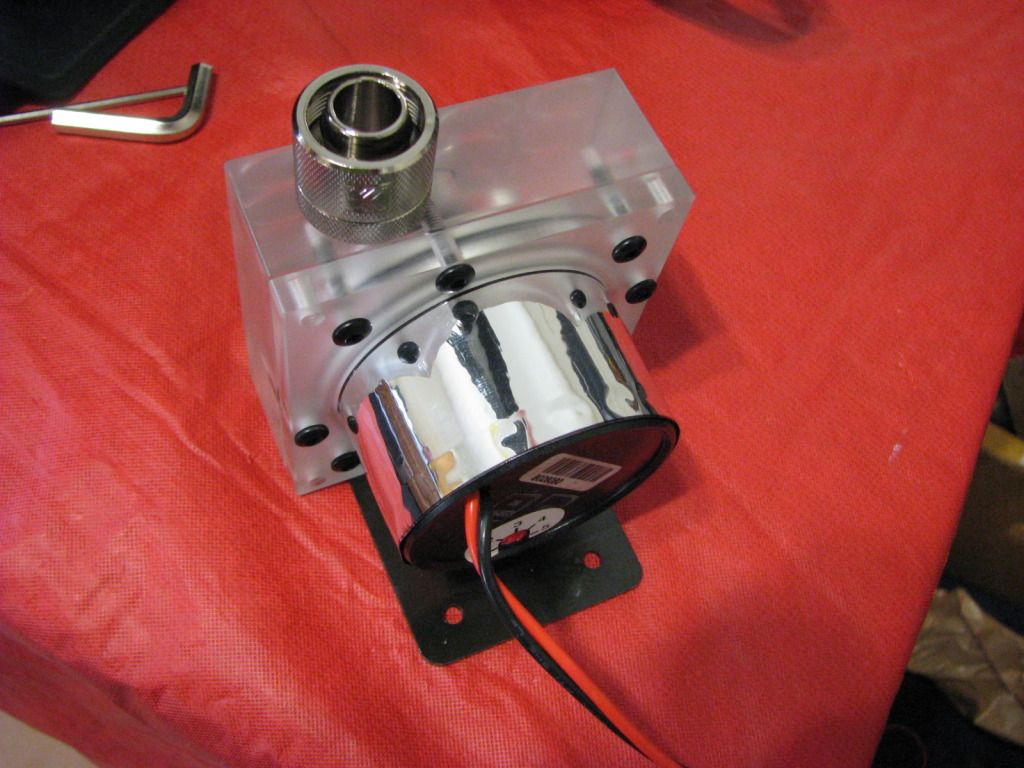
Next we need this Plate that comes with the kit. This is the Mounting plate to actually mount the plat inside the case. Optional mounting kits are also available again from different manufacturers.But this is what comes supplied. Also the last 2 screws (The short ones) are used in this step.
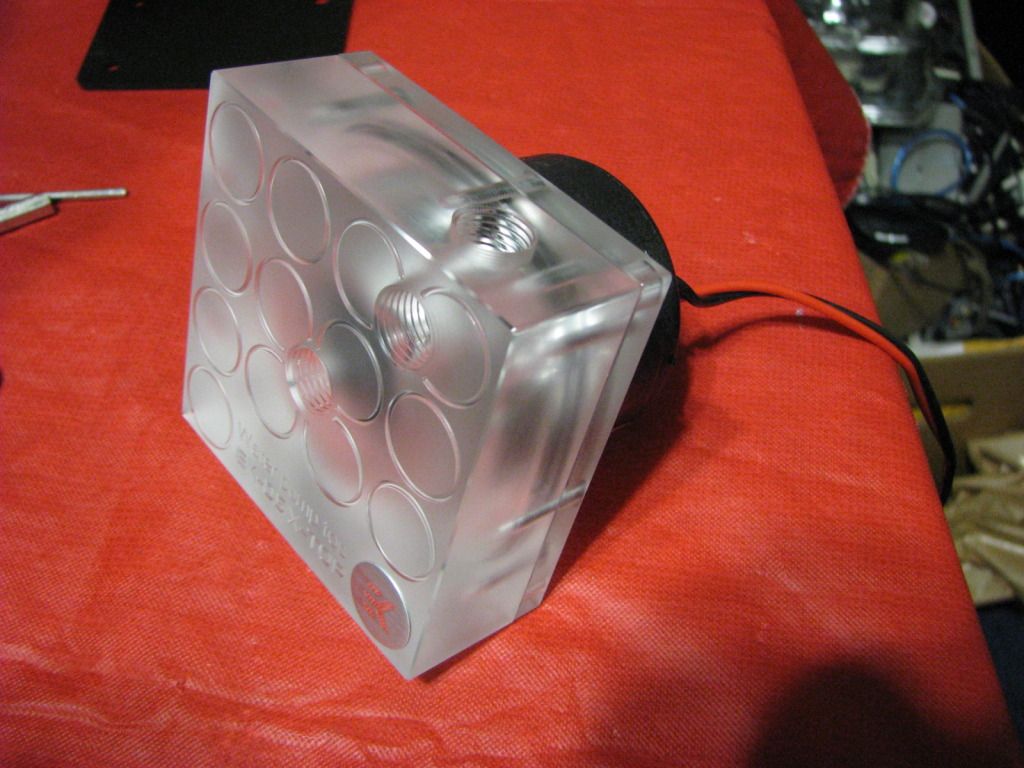
On the Bottom of the Pump Top you will see 2 holes.Make sure you are looking at the bottom as the other 2 holes on the side are for LED's if its a Plexi clear block.Easy way to tell is to make sure the holes have threads inside as shown in photo.
Next the same thing start the screws with your fingers first and then snug them with the Allen Wrench.
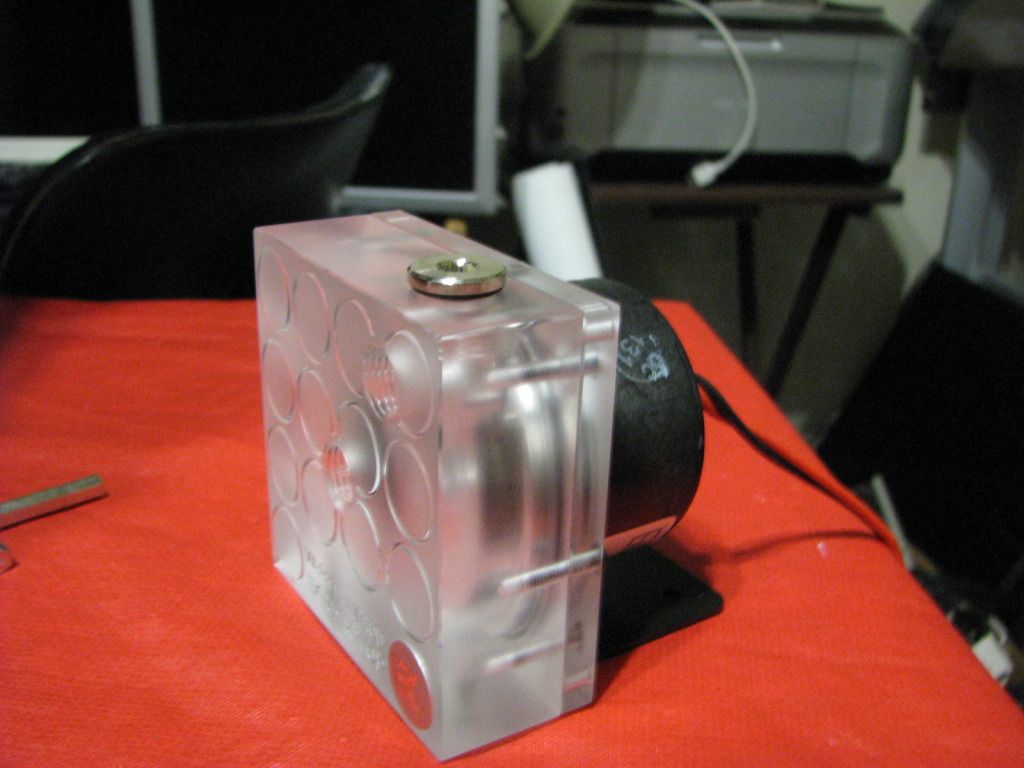
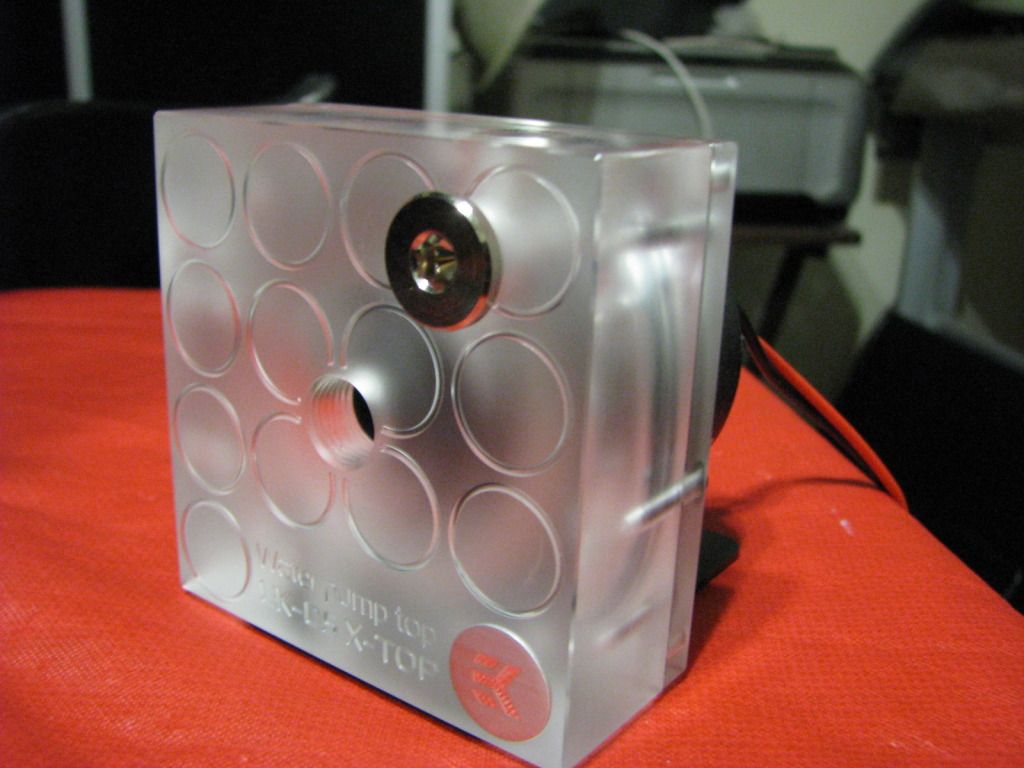
On the EK tops there are 2 outlets and 1 inlet so the Pump Top comes with 1 Plug so you can choose which outlet to use. I will show both outlets blocked so you know which are the outlets.
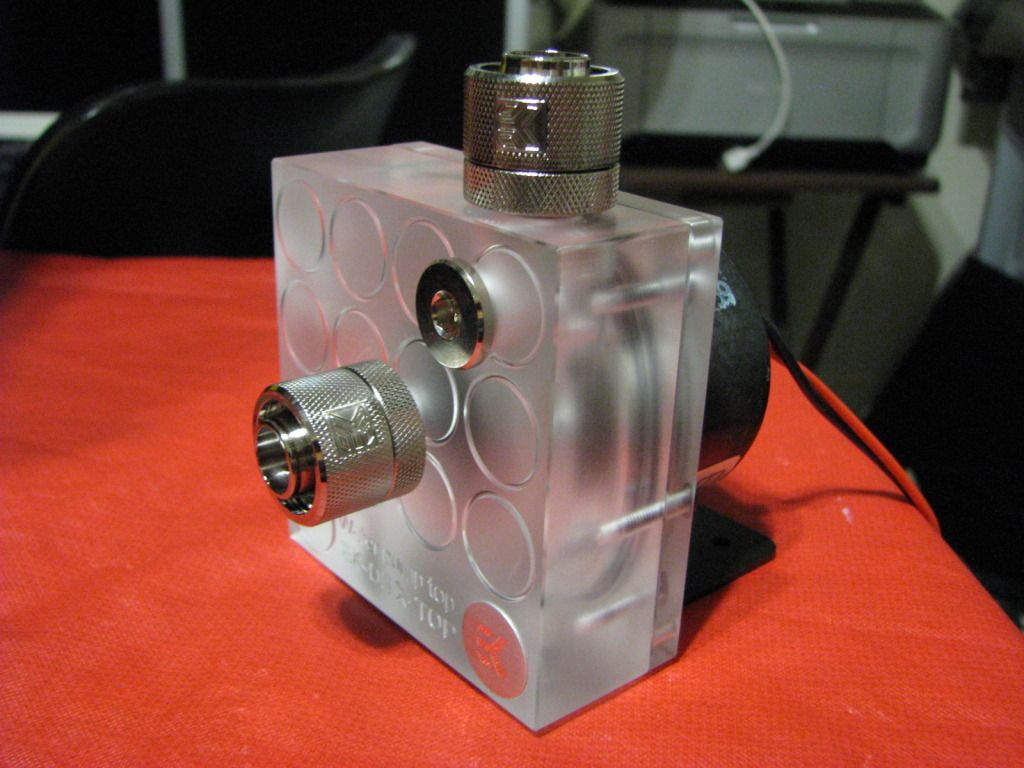
And finally drop in the Fittings and there you have it. Allot better looking pump with a higher flow rate and the use of G1/4 compression fittings or barbs.
If you actually followed this guide you would see the whole precess only takes a few minutes tops.Its a very simple Mod that any one can do to their pump thats make a huge difference in both looks and performance..
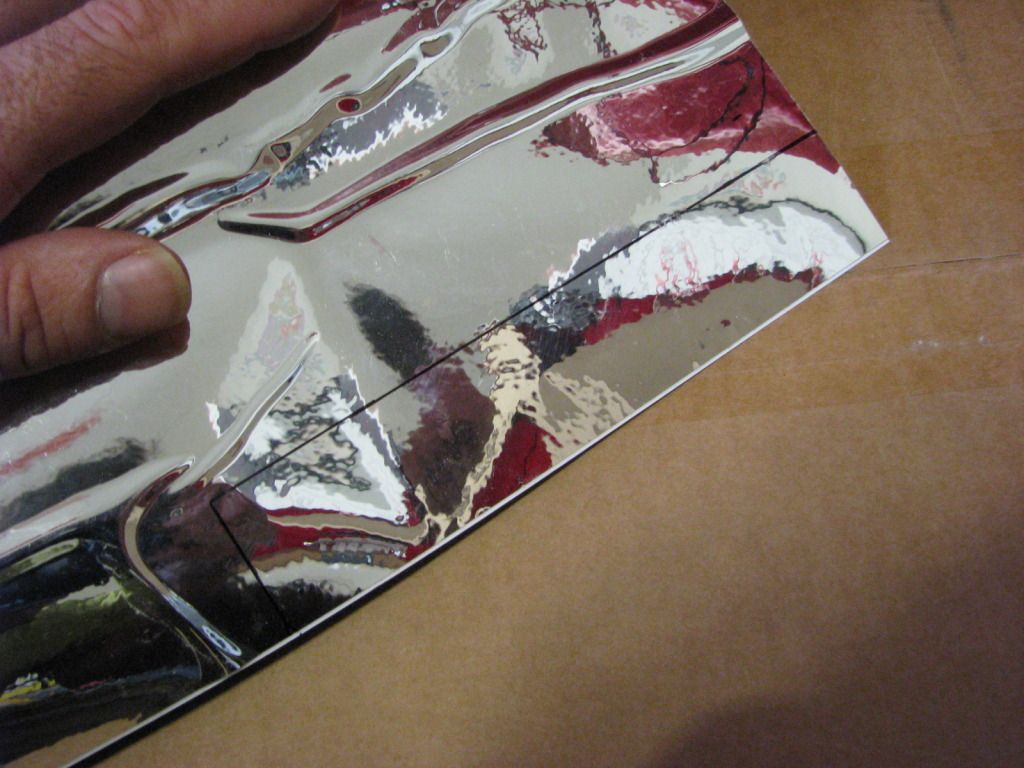
Now i am just going to do a simple Mod that makes a huge difference. This is only optional and you can use your own creative ideas on yours. I decided i wanted to make the back of the pump Chrome as i had some old Chrome Vinyl i had for using on cars. Its kinda like a stick on Chrome used for decorating cars. Any auto shop should carry it.Or you can simply paint your pump or even use Di noc its basically whatever you want to do.
This took 2 seconds to do and made a huge difference:
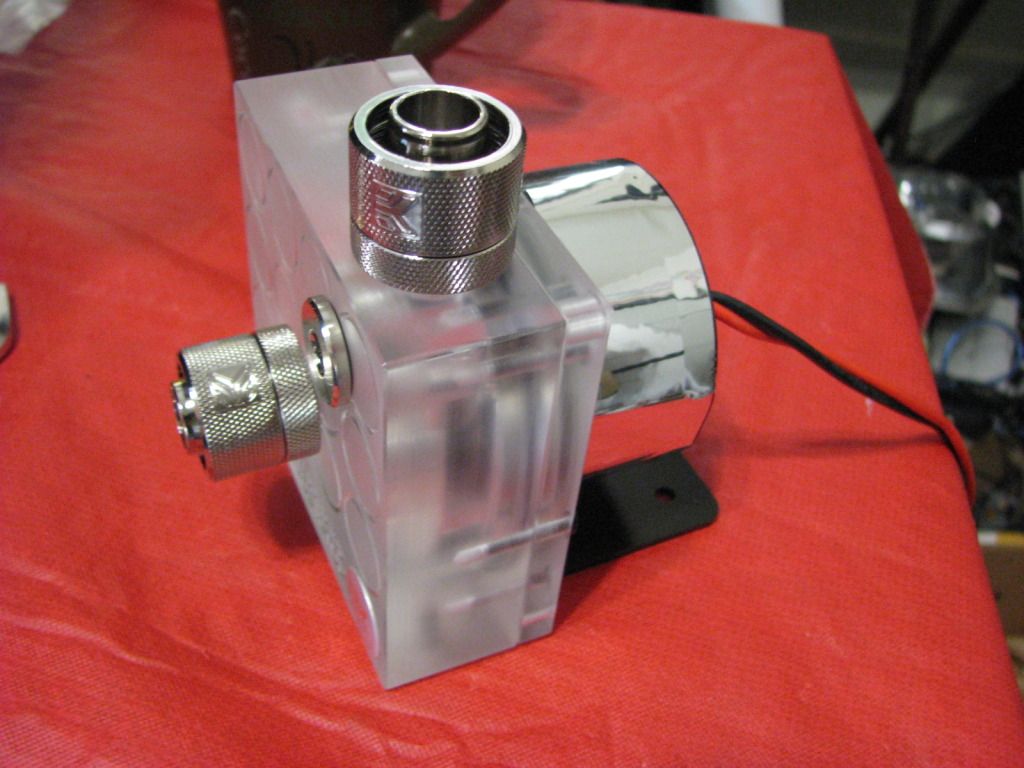
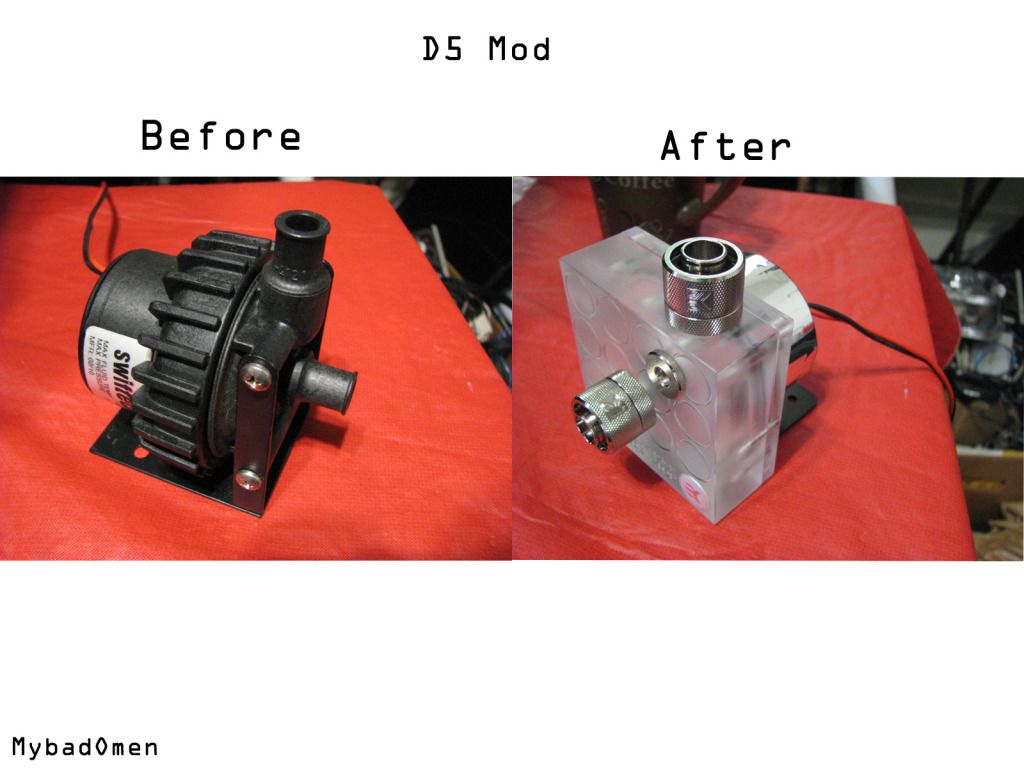
And finally a side by side before and after or what we just did.
Hope you guys enjoyed the Update/Guide and hope it helps someone out there.
MybadOmen
Re: "MybadOmen's" New NZXT Build ?
Very cool. What a difference...