-
Project: Reality Bytes
Hello Everyone,
My first post on TBCS Forums so what better way to start than with a few details of my current project.
I have called it "Reality Bytes", because well sometimes it does. Also it is to be a custom watercooled case to house my gaming system which can serve as a nice escape from reality every now and then.
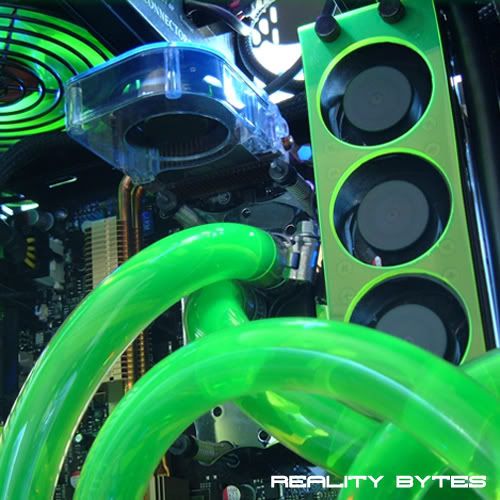
For the case I went for a very plain, simple and above all small case, the Antec NSK4000 and choose a black / neon green colour theme. The main feature of the project was to be a clean, effective and functional watercooling loop.
The system specs are as follows:
Quote:
AMD Athlon64 X2 5200+ @ 3.2Ghz
Asus Crosshair nForce 590 SLi AM2
OCZ 2Gb Platinum Revision DDR2
Nvidia BFG GeForce 8800GTS OC2 320Mb @ 700/1000
Internal 320Gb Seagate & External 400Gb Freecon
Asus 5.1 Surround (supplied with motherboard)
Liteon Litescribe DVD/RW
Jeantech 600w Modular PSU
Quote:
4x ACRyan 120mm Blackfire UV Green Fans
Corsair Memory Cooler
Asus Aux System Fan
2x Zalman Fan Controllers
Lang DDC 12v Pump with Alphacool Plexi Top & Tank
EK Multioption 250ml Res Rev2
240mm BlackIce Pro GTII Stealth
D-Tec FuZion CPU Block
EK 8800GTS Full Cover GPU Block With Acetal Top
Tygon 1/2' Tubing
Feser One Coolant & UV Green Dye
I did start this project over 2 months ago now, so have made quite alot of progress with it. Still alot to do though so I hope to update this log as I go.
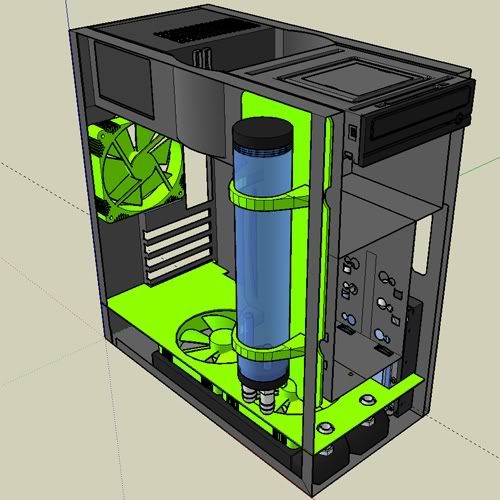
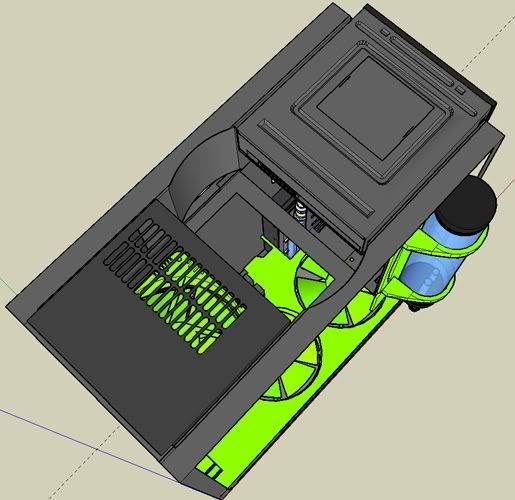
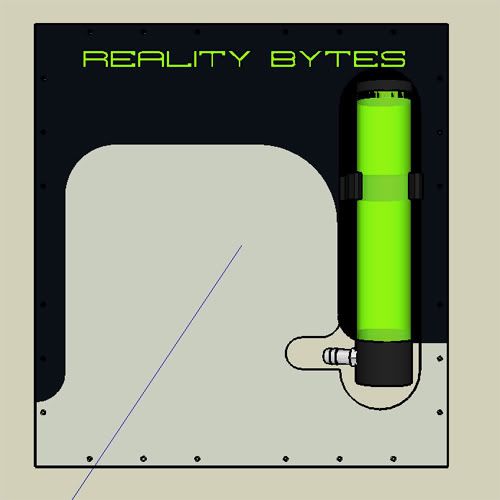
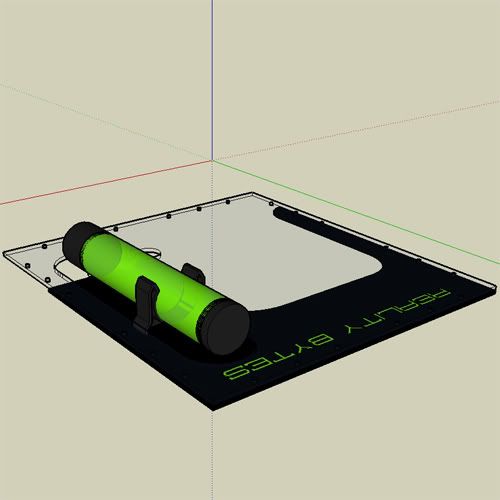
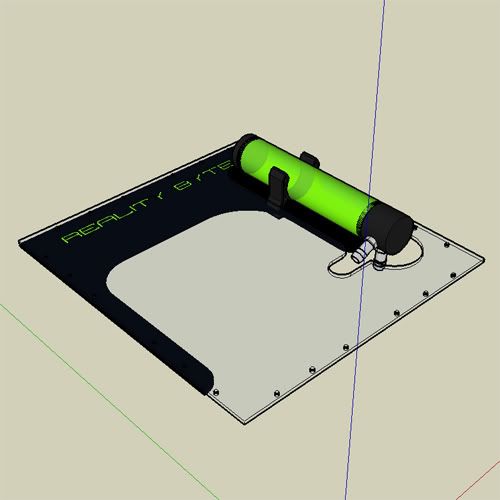
On the Immediate todo list is the side panel. I want to make one 100% from clear Perspex after hiding some interior parts with the green perspex used throughout the case.
Also the Seagate HDD, which is sat onto of my DVD Drive on a square of Perspex. My intention with this is to have it mounted sticking out the top of the case with a heatpipe/heatsink cooler mounted to it. Hopefully to keep it nice and cool and also for a bit of eye candy to an otherwise dull top panel.
Here are the sketchups of the original idea (my first time on sketchup so not perfect)
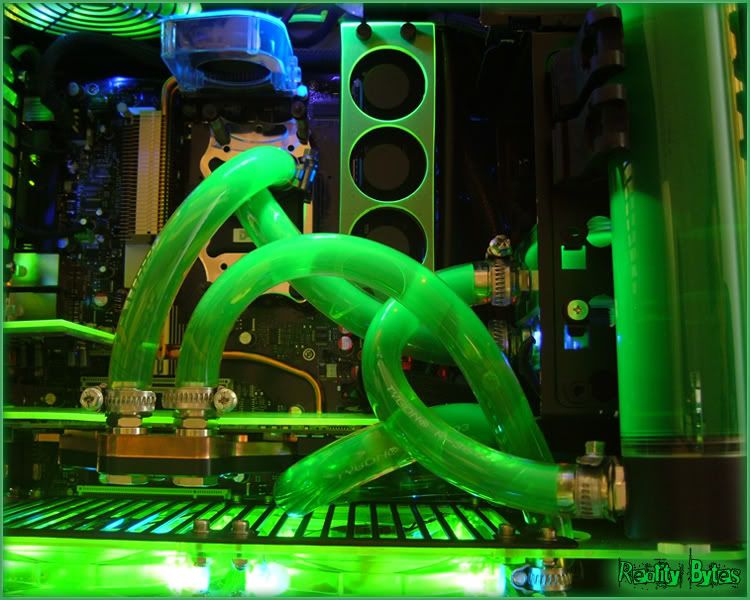
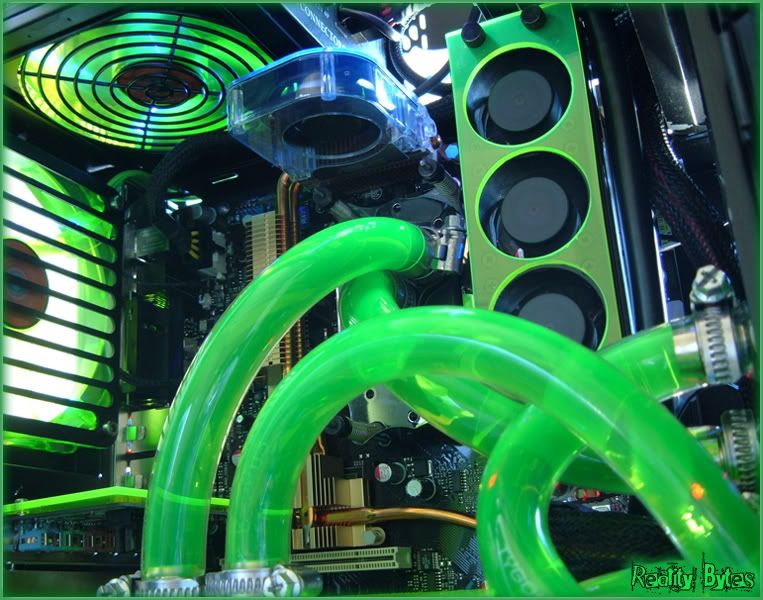
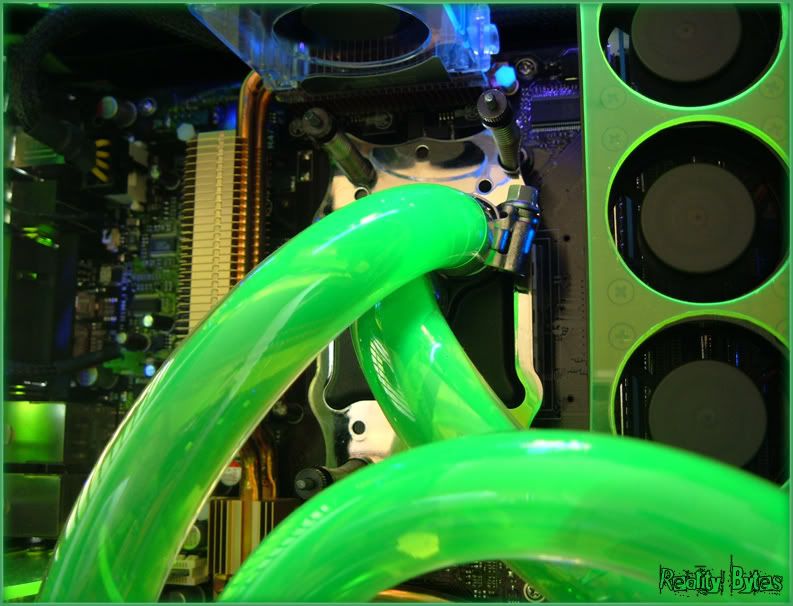
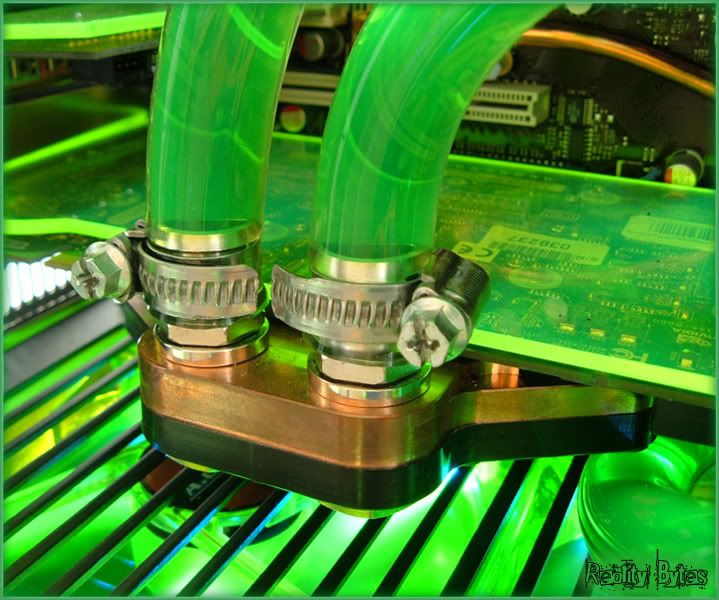
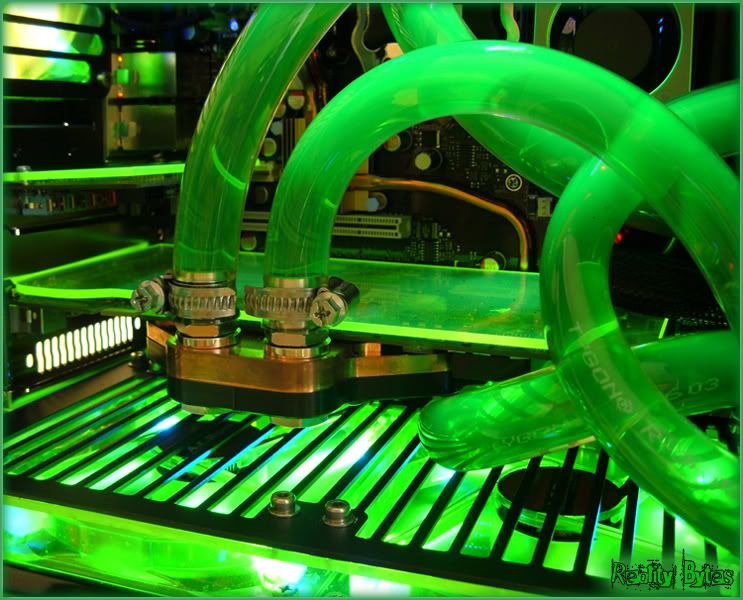
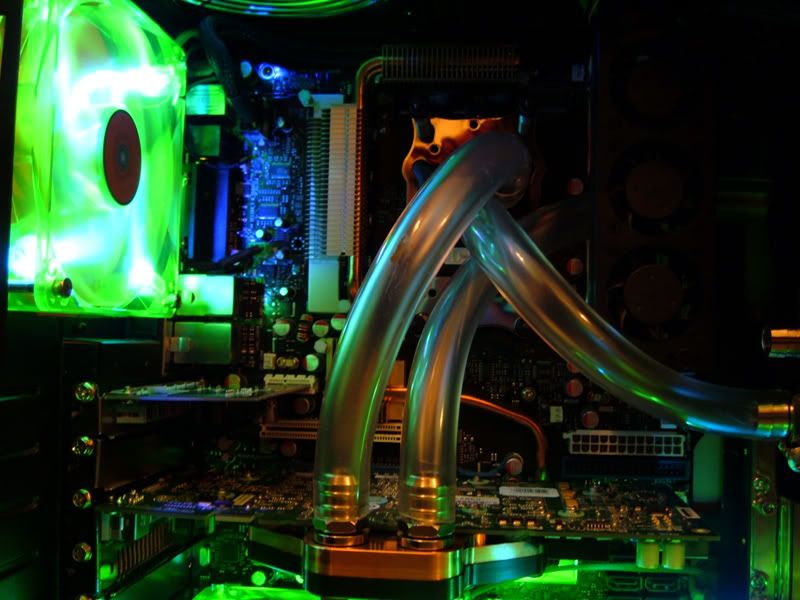
Now here are a few pictures of the interior as it currently stands. The interior is pretty much done now, the work to be done is mostly on the exterior so this is what will follow in future updates.
Well thanks for reading, hope you have enjoyed it so far. Funds are a tad tight at the moment but I hope to be making an update asap.
In the meantime any comments, good or bad are welcomed. Be nice to know what poeple think.
-
Re: Project: Reality Bytes
Looks great! Very clean, and very attractive! Welcome to the board!
Now, how about some pics of the build process? :D
-
Re: Project: Reality Bytes
Firstly welcome to the forums.
Secondly that is one amazing setup im loving the colours. The whole rig is so clean :D
Thirdly, lets hope this goes well.
Fourthly +rep for it being so awesome.
-
Re: Project: Reality Bytes
Wow! What a way to start on TBCS! That really does look good. Have a +rep.
-
Re: Project: Reality Bytes
@ Luke122 - Thanks for the welcome. When I first started the build I didn't really intend to make a full project log so dont take many pictures as I went along. Hence not posting any pictures of the build process.
My intention now is to fully log everything from here on in. Hopefully when working on it I will be stripping parts back down to make amendments so will be able to get some pictures then.
@ Scotty - Thanks for the welcome and the rep points, glad you think the build is worth them. Nice to see someone on from the UK aswel.
@ Bucko - Thanks for the welcome and the rep points. BTW love the work you have done on your current project. Obviously love the green, but the work on the front panel is amazing, such attention to detail. Keep it up.
-
Re: Project: Reality Bytes
LOL... better watch the "stupid Scotland" posts around here.. hahaha
-
Re: Project: Reality Bytes
yea, dave will be down on you like a ton of bricks, some of us scottish here may take offence, i know it may be intent as a joke, but some might not take it like that.
But Welcome, your doing an excelent job, keep it going, here have a +rep on me.
-
Re: Project: Reality Bytes
i relle love what u did to with the plexi very well placed on the graphics card it looks sweet
-
Re: Project: Reality Bytes
Quote:
Originally Posted by
XcOM

yea, dave will be down on you like a ton of bricks, some of us scottish here may take offence, i know it may be intent as a joke, but some might not take it like that.
But Welcome, your doing an excelent job, keep it going, here have a +rep on me.
I think he said that cause, under scottys name, it really does say "England (NOT stupid Scotland :P )"
-
Re: Project: Reality Bytes
Quote:
Originally Posted by
NamesAreUseless
I think he said that cause, under scottys name, it really does say "England (NOT stupid Scotland :P )"
Yeah that was the reason. My appologies if anyone takes offence, be assured it was only meant in 'jest'. Comment withdrawn.
@ armadilloben - Thanks, wasnt sure if it would look right when I first had the idea, but it did turn out quite nice in the end. Nice and simple too.
-
Re: Project: Reality Bytes
Mate this is fantastic, very cool mod. +rep
-
Re: Project: Reality Bytes - SIDE PANEL
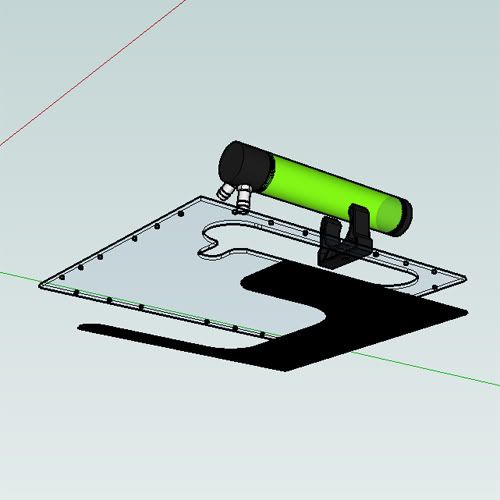
I have been planning the side panel today. The plan is to make it from a sheet of clear plexi the same size as the original side panel. I was going to go with a simple window mod, but this way all the areas of the inside I want to be visible will be.
However there are areas I don't want visible. The area the PSU and DVD drives are located. So I will be using black plexi to cover these areas.
I have used sketchup to make the plans before I buy the plexi. Some screenshots are below. I hope to get building in the next week or so.
Thanks For reading.
-
Re: Project: Reality Bytes
That looks great, hope it works out fot you.
-
Re: Project: Reality Bytes
still looking sweet, how did you fix the plexi to your gfx card, gives me an idea.
-
Re: Project: Reality Bytes
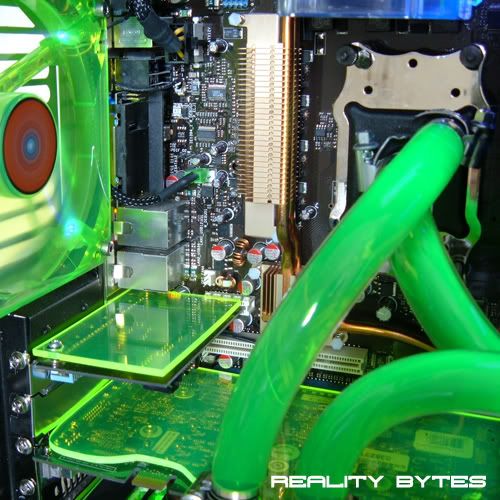
@ XcOM - ATM its just resting ontop of the card held in place by the plastic clip on the mobos PCI-E slot. But I will be using M3 bolts/nuts to secure it through the 2 holes where the backplate is attached to the card and also the 2 holes at the opposite end which have nothing in them. To insulate the bolts/nuts/washers I will use the small cardboard washers that come with some cases to be used when mounting the mobo.
Hope that makes sense.
-
Re: Project: Reality Bytes
How did you cut your plexi, I was thinking of etching mine but it is hard to keep a straight line.
-
Re: Project: Reality Bytes
I used a jigsaw (fine tooth blade) to cut the straight lines and then used a dremel (sanding drums) to add the curves. To make sure the striaght edges are perfectly straight I used a block of wood, held in place with clamps, as a guide to run the jigsaw against.
I tried etching, using the dremel, but I too had the same problem. I think you need a very steady hand and alot of practive to get etching right.
-
Re: Project: Reality Bytes - PSU Modding
As you can see from the previous posts in this project I have started the log halfway through the build, due to not intending on doing a log when I started out. I have been through the few pictures I did take in the early stages of the build so I can 'track back' on some parts of the build.
So here we go first off the PSU.
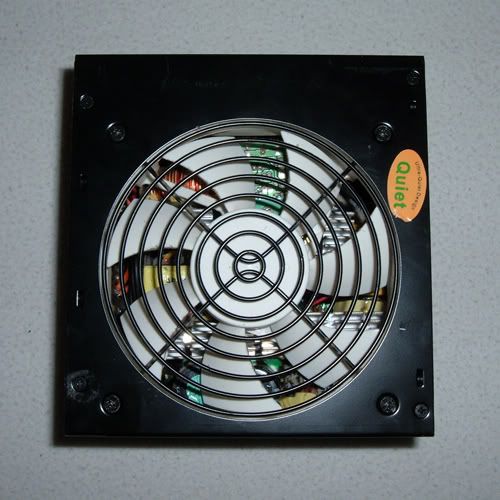
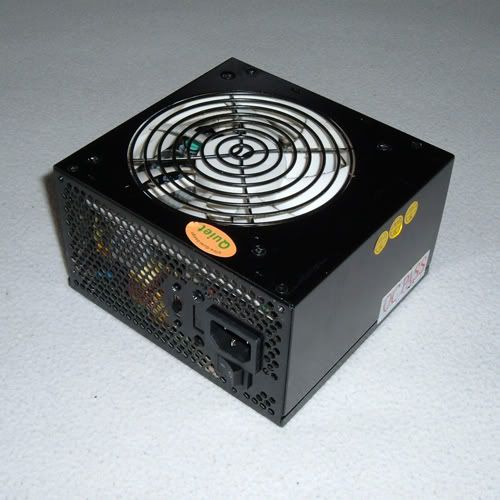
I started out with the stock PSU (Jeantech 600w Modular). Now the PSU was pretty much how I wanted it to look, all that needed changing was the 120mm fan. Here it is in all its stock 'white' glory, not quite in keeping with the green/black theme.
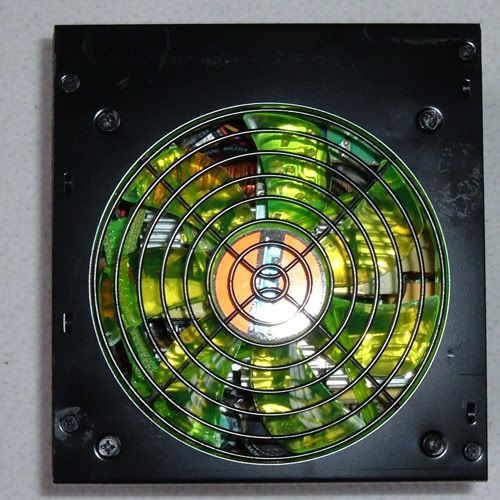
So I took it apart and switched the white fan with an AC Ryan 120mm UV Green Blackfire fan. Now these fans come with separate connectors for the fan power and the UV Leds. So I connected the UV Leds to a constant 12v supply to keep them nice and bright. The fan power is connected to the fan power wires from the PSU. I didn't connect the Leds to this supply as the PSU has a smart fan feature which lowers/increases the fan speed dependant on the PSU's temperature.
Here it is with the new Fan in place, much better I think you'll agree.
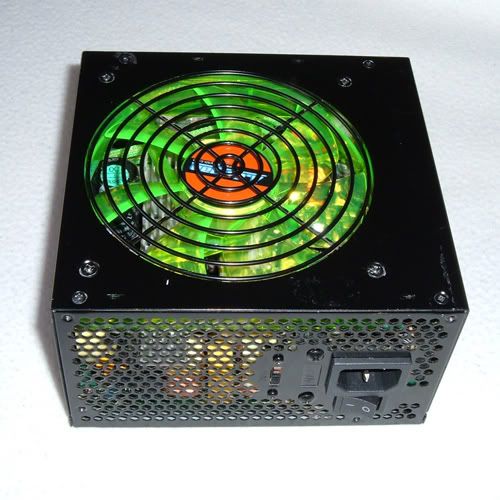
Here you can see the PSU mounted in the case with the Leds on full brightness whilst the fan itself remains at a low speed.
Thanks for reading, next is the memory cooler.
-
Re: Project: Reality Bytes
This mod is top-notch man. It's actually given me some ideas I might try out (don't worry though, I won't rip off your mod ;)). That video card cover is so simple, yet so effective.. I wonder why I haven't thought of that before! Also, I really like the idea for the res. I've been trying to think of how to mount one, and that is a really good way! This thing is off to a great start man, +rep.
-
Re: Project: Reality Bytes
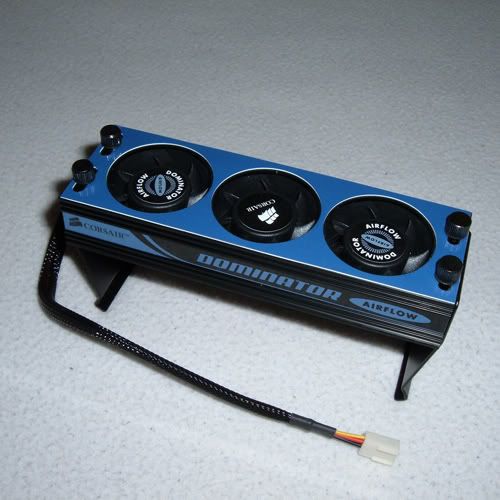
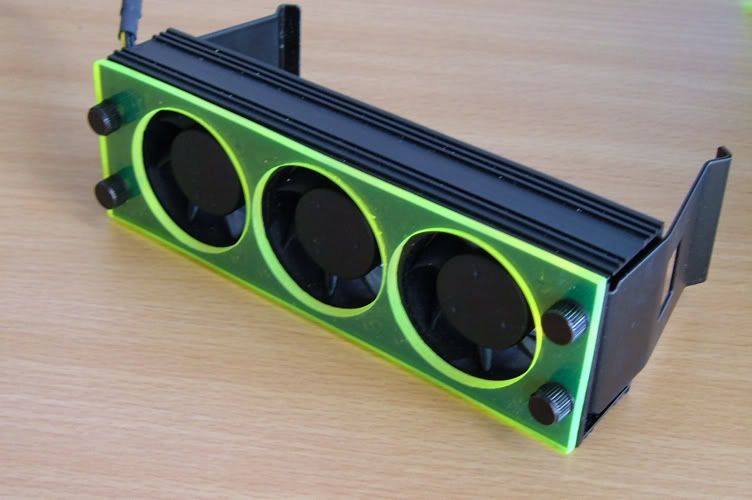
I decided on using an 'Air' memory cooler over a watercooled one due to space/flow limitations. I chose to use the cooler from Corsair as IMO its by far the best memory cooler to look at and looked to have some potential for modding.
Here it is stock just after being delivered.
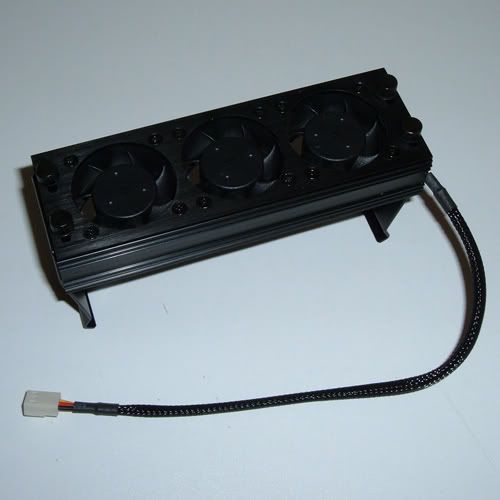
First on the list to do was to remove the Corsair 'branding', seemed senseless to have the Corsair logo in the case when I am using OCZ memory. So I removed the fans/wires and soaked the metal frame in hot soapy water for 30 minutes or so to loosen up the adhesive. Then once it was loose enough I peeled back the stickers on the top and sides. Dried it out and remounted the fans. Leaving it looking like this.
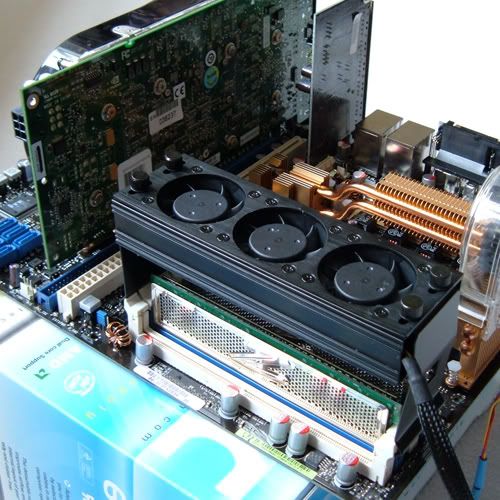
Now I did debate leaving it all black, a somewhat 'stealthy' look when mounted over the memory as seen below.
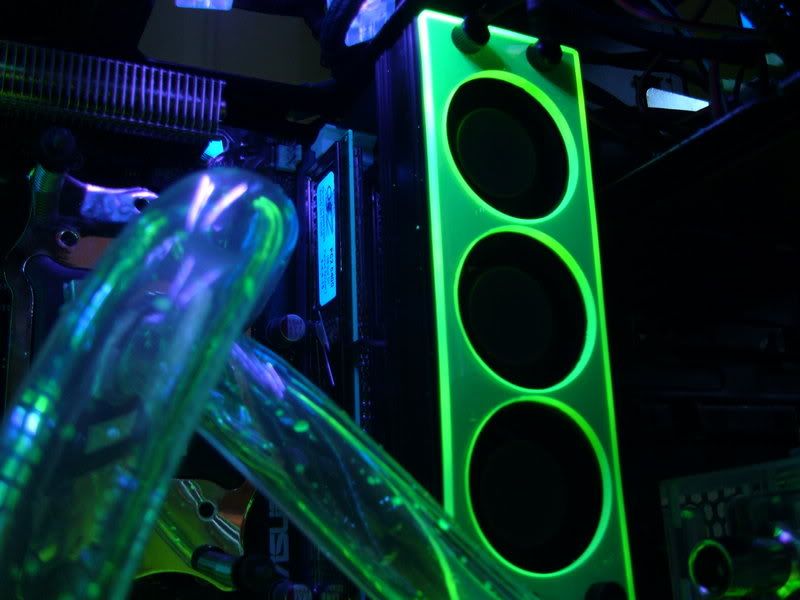
However once the case started to take shape and the green theme became ever more present, I decided that the cooler also needed some 'green' to help it fit in with the theme and also to make it visible in the case. Being all black it became too 'stealthy' and in certain lights was difficult to even make out. As I think this next picture shows quite well.
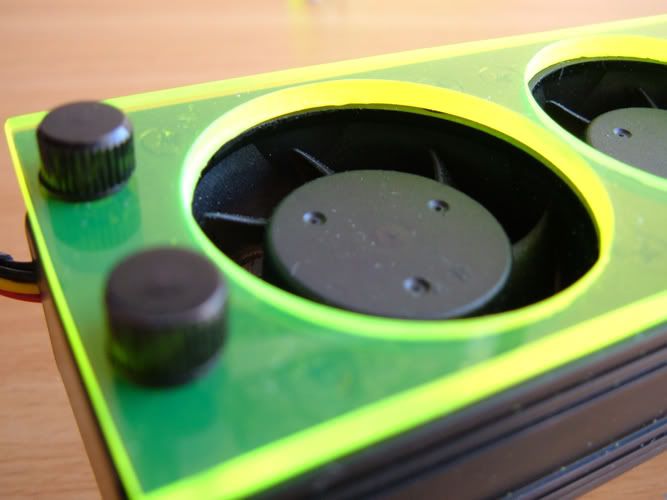
So I took an offcut of 3mm UV Green perspex I was using and cut it to the same size as the top of the cooler using a jigsaw and then a dremel (sanding drum) to tidy up the edges. Then using a hole saw I cut the three circular holes needed to allow air into the three fans. After a little sanding it was a simple case of mounting it to the top of the cooler using the, already present, four screws.
This is how it turned out, much more visible and in keeping with the theme of the case.
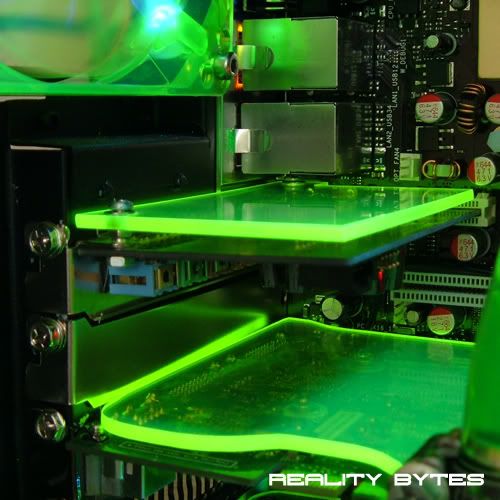
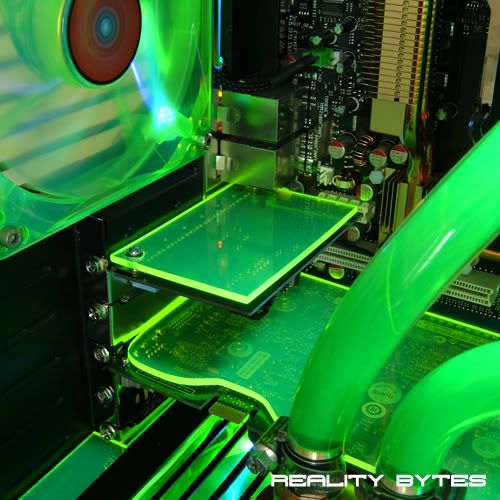
But it was at night that it really came into its own, being UV reactive and having had the edges sanded (dispersing the light more) I was really impressed with the effect it created. This giving me the idea to mount plexi on the sound and graphics cards. The picture below captures the effect quite well.
Again thanks for reading, next the GPU waterblock
-
Re: Project: Reality Bytes
I brought my Nvidia 8800GTS around 3 months ago and put quite simply, she was my baby. I had never owned a 'good' graphics card before and this one was a huge step up for me. However even though the performance was more than I needed, being only human, I wanted to push it that little bit further. The only limitation to this was the temperature, it ran so hot. Under a full load it would often reach 80'c. This to me was unacceptable so the best option would be to add it to the watercooling loop.
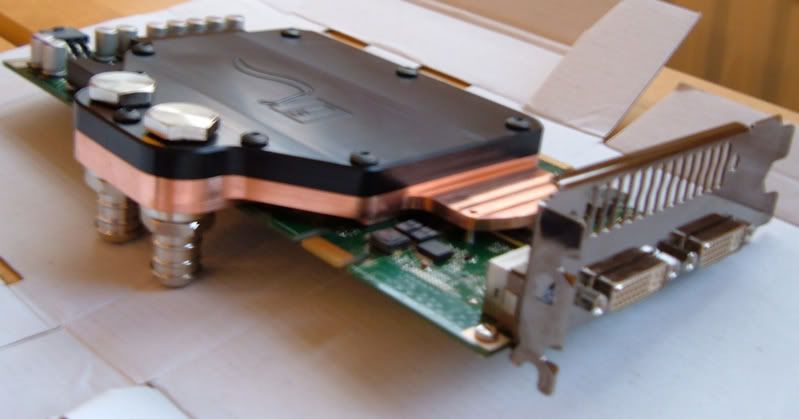
There are so many waterblocks on the market nowadays it took quite a while to decide which one to go with. In the end I chose the EK Full Cover Block with the Acetal Top. It seemed to have very good overall performance for several reviews and also IMO looked the part.
And here it is a couple of days after being ordered
And here is my beloved card (I couldn't help thinking the man on the graphic was holding his head in a desperate panic seeing me with a screwdriver and a waterblock, having never fitted one before lol)
So anyways after reading the instructions several times over I took the plunge and carefully removed the standard heatsink to expose the bare card.
After cleaning off the thermal paste from the core and taking the thermal pads off the voltage regulators and memory I began to prepare the waterblock. I had all the nuts, washers and screws laid out before me in the order I would need them in a desperate attempt to make sure nothing went wrong. Applied the thermal paste (Arctic Silver Pro) and placed on the thermal pads with a pair of tweezers, then began mounting the block to the card. I have to say it was one of the single most frustrating this I have ever done. I haven't got tree trunk fingers but they are by no means small and seemed incapable of holding onto the tiny screws and washers. But after quite some time I finally got there and now had a high end graphics card setup for watercooling. Needless to say I was very happy indeed.
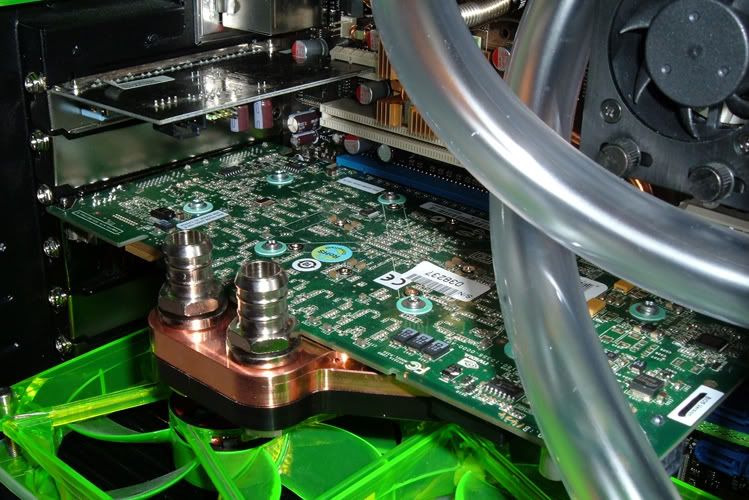
Here it is fitted (apologies for the low quality pictures)
Last thing to do was to pop it into the PCI-E slot out of harms way.
Thanks again for reading, Xperiment
-
Re: Project: Reality Bytes
Thanks for the advice with the cutting, that's pretty much how I was going to do it anyway. Did you polish the cut parts of the plastic, if so how? I will be starting some of my plastics work tomorrow with pretty much the same color plastic, check out my mod (Project LEXA).
-
Re: Project: Reality Bytes
Quote:
Originally Posted by
.Maleficus.
This mod is top-notch man. It's actually given me some ideas I might try out (don't worry though, I won't rip off your mod ;)). That video card cover is so simple, yet so effective.. I wonder why I haven't thought of that before! Also, I really like the idea for the res. I've been trying to think of how to mount one, and that is a really good way! This thing is off to a great start man, +rep.
Thanks for the kind comments and the rep Maleficus. The GPU card cover, like so many good things, came about by complete accident but yeh it did turn out quite nice. Also feel free to use my project for ideas, I am glad people deem them worthy enough to do so.
:D
@ The boy 4rm oz - NP, no i didnt polish any of the plastics. If im honest I wouldnt even know what products to use. I just sanded the edges to allow them to difuse more light, this seemed to help alot give the glow around the edge. Good luck with the plastics work, best advice I can give is to take it very slowly.
-
Re: Project: Reality Bytes
Thanks for the luck lol. I am covering all of my drive bays with the plastic so there is a lot for me to do. Just some advice, if you use some UV CCFL's the green plastic glows more intensely (if you aren't already doing this).
-
Re: Project: Reality Bytes
Yeah I have a few dotted about the case, they do give a nice effect.
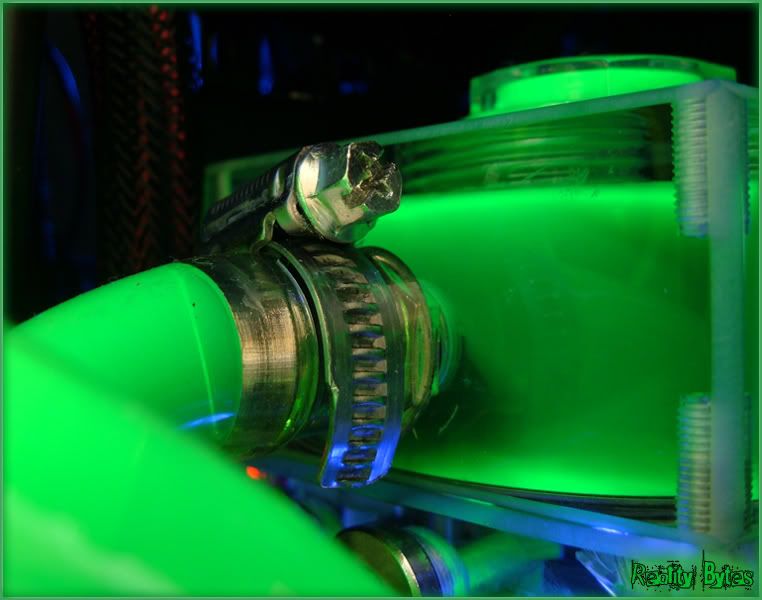
Also they will be very handy for you when filling you waterloop. (if using UV Dye) they are excellent to look for leaks with, like this ....
-
Re: Project: Reality Bytes
Thanks for the advice, yeah I'm using UV green coolant.
-
Re: Project: Reality Bytes
I really love the look of that watercooling setup, great work you've done so far. +rep
-
Re: Project: Reality Bytes
Very clean and professional! :up:
I'd love to see how you're cutting your plexi and your work area setup.
-
Re: Project: Reality Bytes
Quote:
Originally Posted by
Mach
Very clean and professional! :up:
I'd love to see how you're cutting your plexi and your work area setup.
When im next working on some plexi I will be sure to take pics (only a workbench in a garage mind you). Glad you like the build, thanks.
-
Re: Project: Reality Bytes
-
Re: Project: Reality Bytes - Card Plexi Covers
I had the soundcard out of the system today whilst I was taking some measurements, so thought I would show you how the plexi cover was added to it.
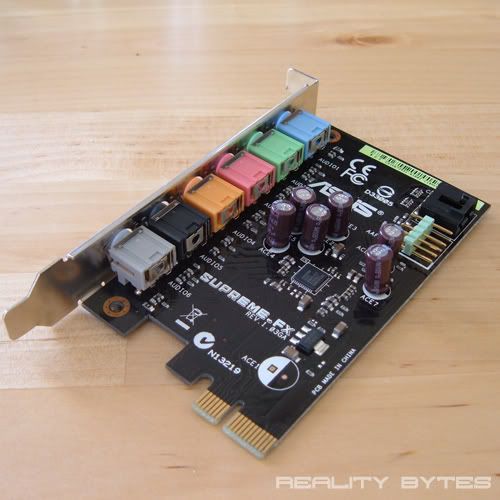
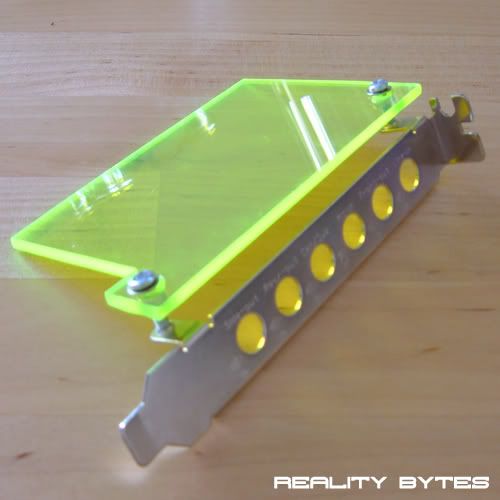
To get started here is the original soundcard that came with the motherboard. Notice the small screws that hold the actual PCB to the backplate have been removed.
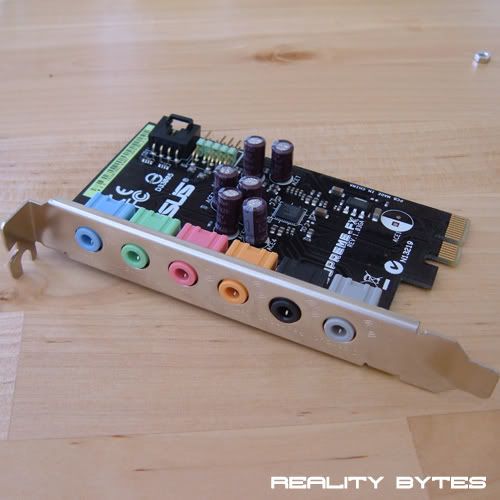
This is to allow the backplate to be removed form the card so the holes can be used to mount the plexi, like this.
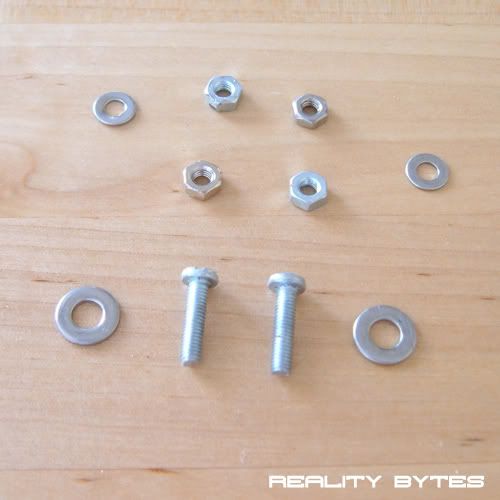
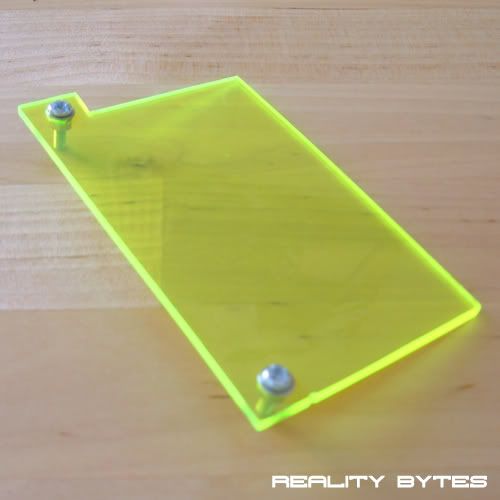
Now to cut a sheet of the 3mm Plexi in the same shape as the PCB, making sure it will cover the PCB itself and also the screw holes for the backing plate. 3mm diameter holes also need to be drilled through the plexi to allow mounting through the backplate. I will be using M3 bolts, nuts and washers.
Then simply place a washer on each of the bolts and place through the plexi. I then tightened a nut on the bolt to raise the plexi off the top of the PCB and to keep it straight. Next the two bolts thread through the holes in the backplate and then thought the PCB, before lastly tightening the ends with the remaining nuts.
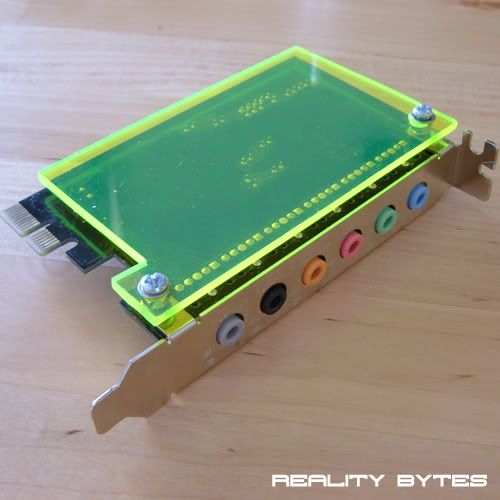
Now just pop it back into the motherboard and secure in place. Here are some final shots. Both under UV light in a dark and light room.
Thanks for reading.
-
Re: Project: Reality Bytes
UV glow is just about as badass as it gets. That, and pearlized paint.
It's the simple ideas that make a mod really shine, and you upped the own 10-fold with those covers. Keep up the great work man. This is one of my new favorite mods.
-
Re: Project: Reality Bytes
Mate that looks fantastic, do you mind if I do the same thing to my wireless LAN card? I would do it to my 8800GTX but it is too damn long, I got something else in store for it though ;)
BTW: that RAM cooler your looking at looks great, will suit your mod perfectly. I looked at the Thermaltake Cylo but opted not to get it cos it was rather bulky.
-
Re: Project: Reality Bytes
Two things..
1. That looks fan_freakin_tastic!
2. What kind of camera are you using? Your pictures are amazingly clear even up close.
+rep
-
Re: Project: Reality Bytes
Quote:
Originally Posted by
The boy 4rm oz
Mate that looks fantastic, do you mind if I do the same thing to my wireless LAN card? I would do it to my 8800GTX but it is too damn long, I got something else in store for it though ;)
BTW: that RAM cooler your looking at looks great, will suit your mod perfectly. I looked at the Thermaltake Cylo but opted not to get it cos it was rather bulky.
Thanks, yeah NP fell free to use the idea. I looked at that one too and the OCZ XTC Cooler, but as you say, a little to bulky.
Quote:
Originally Posted by
SgtM
Two things..
1. That looks fan_freakin_tastic!
2. What kind of camera are you using? Your pictures are amazingly clear even up close.
+rep
The camera is nothing special, its a Fujifilm Finepix A340. I am using it with a tripod though and always use the self timer to take the pictures. That way there is no camera shake so the pictures always seem to come out very clear and sharp.
-
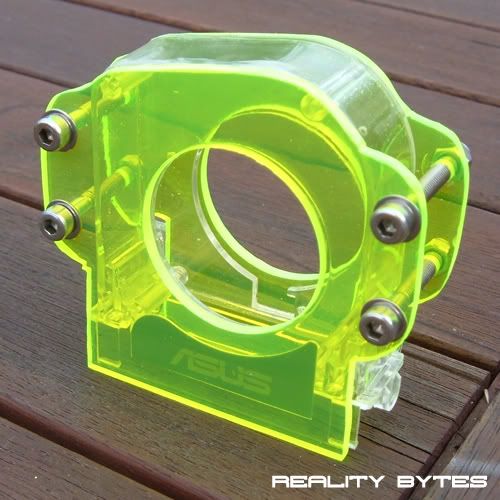
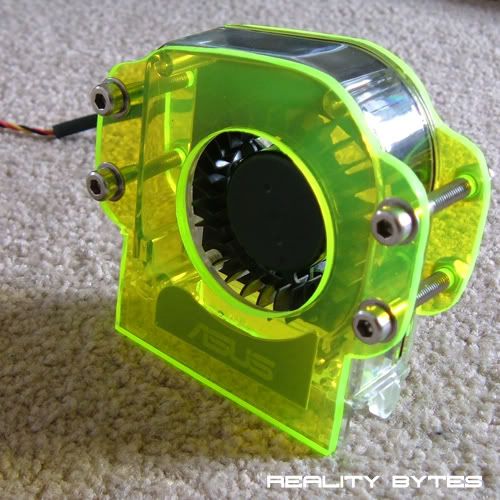
Re: Project: Reality Bytes - Mobo Fan Cover
Small update from todays time spent in the garage.
It was the motherboard fans turn today to have a new plexi suit made. By motherboard fan I am talking about the ASUS one which came with my motherboard and is used to cool NB, SB and the voltage regs via the heatpipe.
My problem with the standard fan was that it seemed to like catching UV light and glowing purple, which in a green/black project just isn't good enough.
Here is the fan before (hard to tell from the picture but it does glow bright purple)
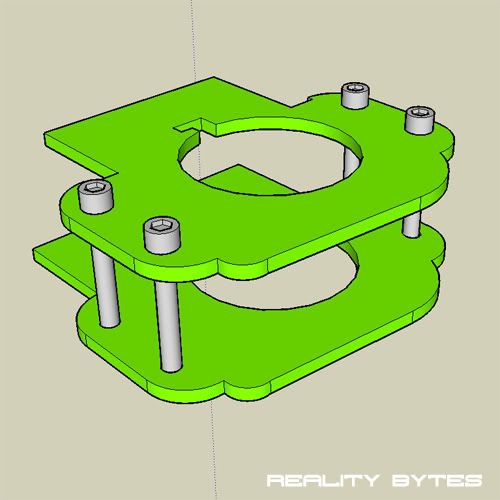
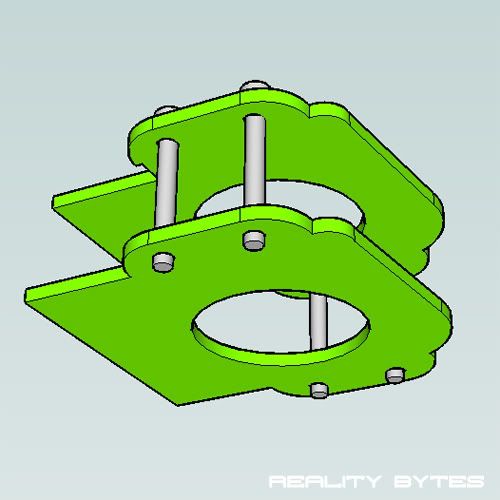
So my plan was to cover each side of the fan with UV green plexi held in place by some socket headed bolts. Like in the simple sketchups below.
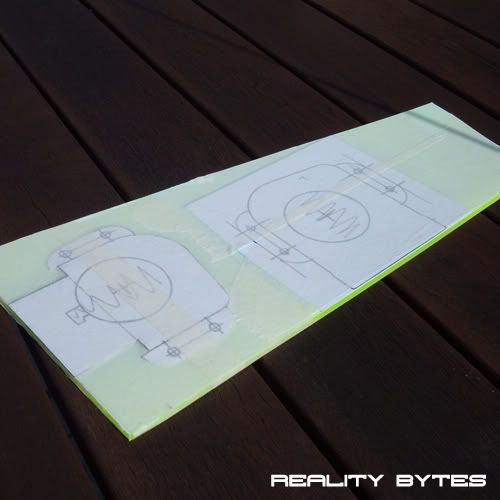
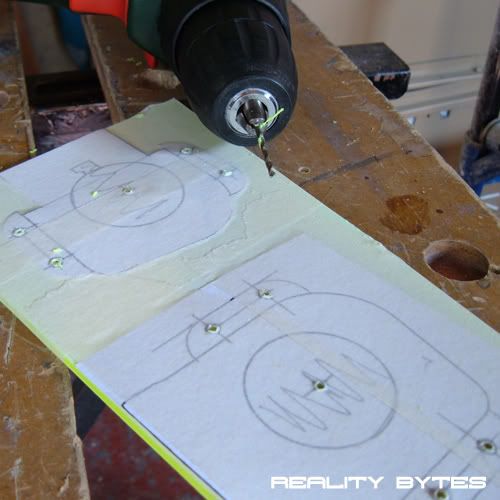
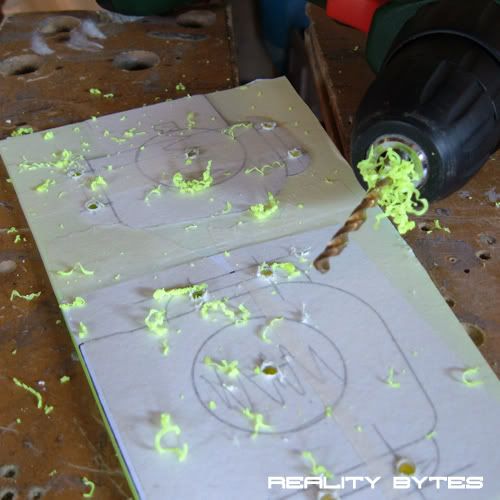
I started by marking the designs out on some 3mm UV green plexi. Then drilling 2mm pilot holes for the air intake and the 4 bolt holes.
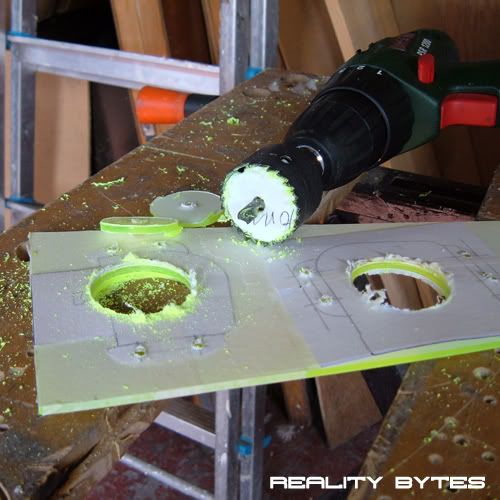
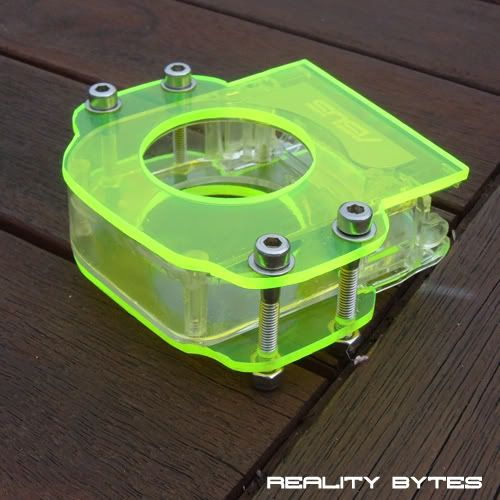
Next I increased the hole sizes to 4mm and lastly the air intakes to 37mm using a hole saw.
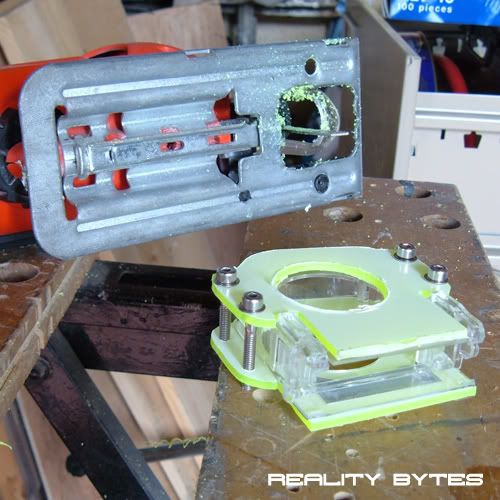
This is how it looked after cutting with a jigsaw and fastening together using M4 socket headed bolts, zinc washers and nylon locking nuts. I used the empty shell of an ASUS fan to line it all up.
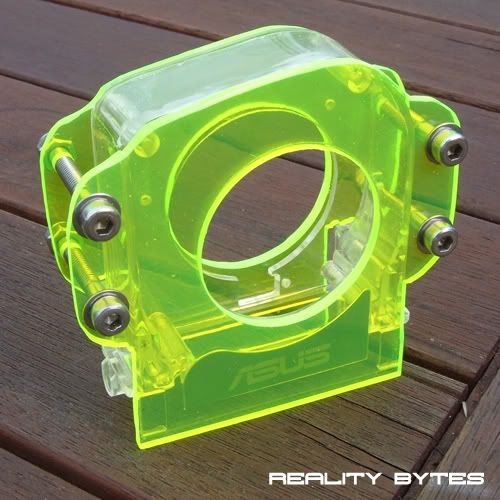
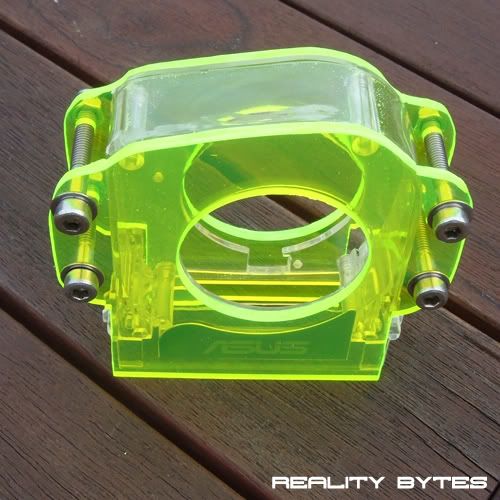
After quite abit of sanding and some touching up with the dremel the plexi parts where complete, a few pictures
Next I switched the empty fan case for the fan from the system leaving it now finished and looking like this.
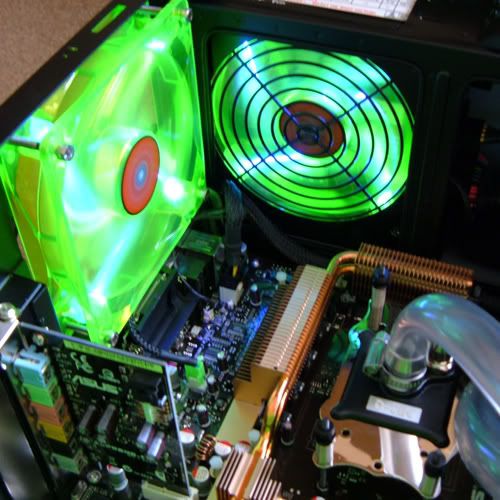
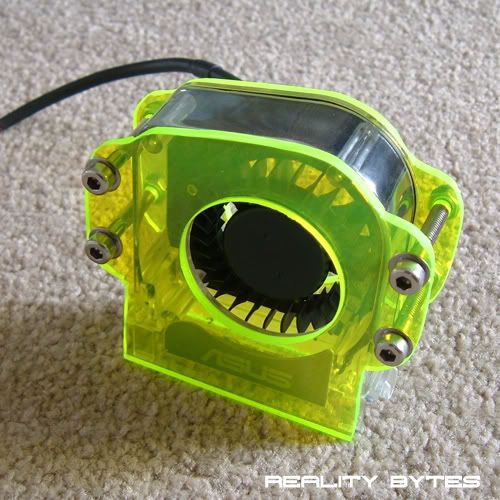
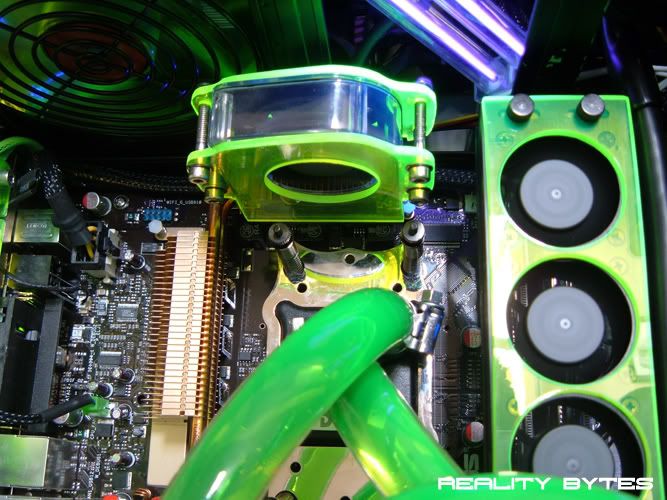
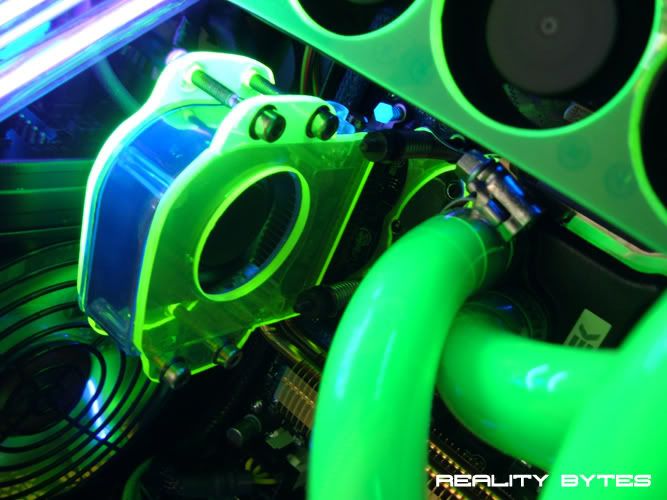
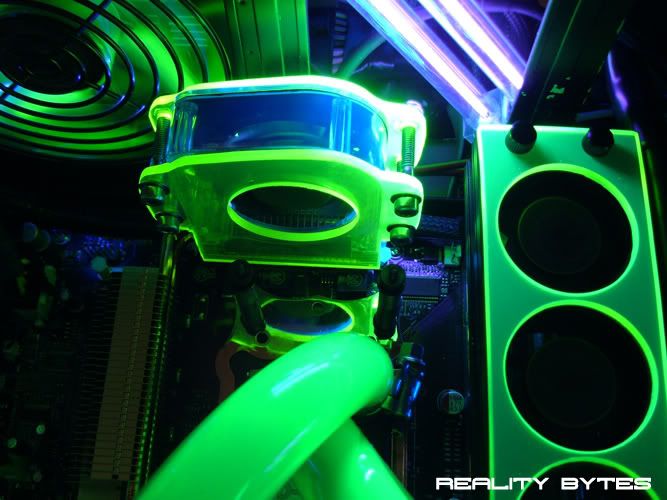
Finally here it is fitted into the system and fired up.
Overall I am very pleased with the outcome of this 'mini mod'. The cutting is by no means perfect but mounted in the system I think it looks much better than it did 3 hours ago.
Just itching for my black and clear plexi to arrive so I can get cracking on the side panel. Until next time,
Thanks For Reading
-
Re: Project: Reality Bytes
-
Re: Project: Reality Bytes
-
Re: Project: Reality Bytes
Quote:
Originally Posted by
Xperiment
Thanks, yeah NP fell free to use the idea. I looked at that one too and the OCZ XTC Cooler, but as you say, a little to bulky.
The camera is nothing special, its a Fujifilm Finepix A340. I am using it with a tripod though and always use the self timer to take the pictures. That way there is no camera shake so the pictures always seem to come out very clear and sharp.
That's the exact same camera I have. I guess I need to play around with it more.
ON Topic:
This is looking GREAT! +rep
-
Re: Project: Reality Bytes
Mate that looks fantastic, would give you some rep but I "ave to spread some around first" lol. Clear plastic tends to glow a bit, the plastic "T" and 90 degrees I'm using in my water cooling loop glow blue , it's a great contrast to the green coolant due to the other blue parts of the case.