-
mightyMite
Well, I've been sitting around here just reading long enough, methinks, so here we go :devious:
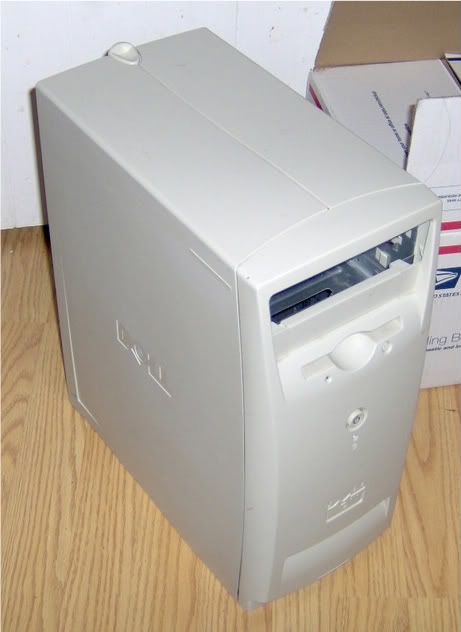
I've always loved the design of the Dell Dimension L700CX. The slim sub-tower form-factor, combined with the simple, minimalistic drives and decoration (or rather, lack thereof) just always appealed to me. Well, I recent came into possession of one... and so it begins.
I've been a computer enthusiast for a long time now, but this will be my first real mod..and also my first adventure into watercooling.
In the interest of keeping images to a sane level, here's links to my PhotoBucket and MediaFire folders. Pics will be in the PhotoBucket album, SketchUp models will be in MediaFire folder.
PhotoBucket
MediaFire
Ok, so this is what I'm starting with:
My current rig is in an Aerocool m40, which to be honest is starting to feel a little big :devious: At first I was thinking that I would maybe be able to get everything into the case, but I started making some mock-ups, and found out there was more space in there than I thought there was.
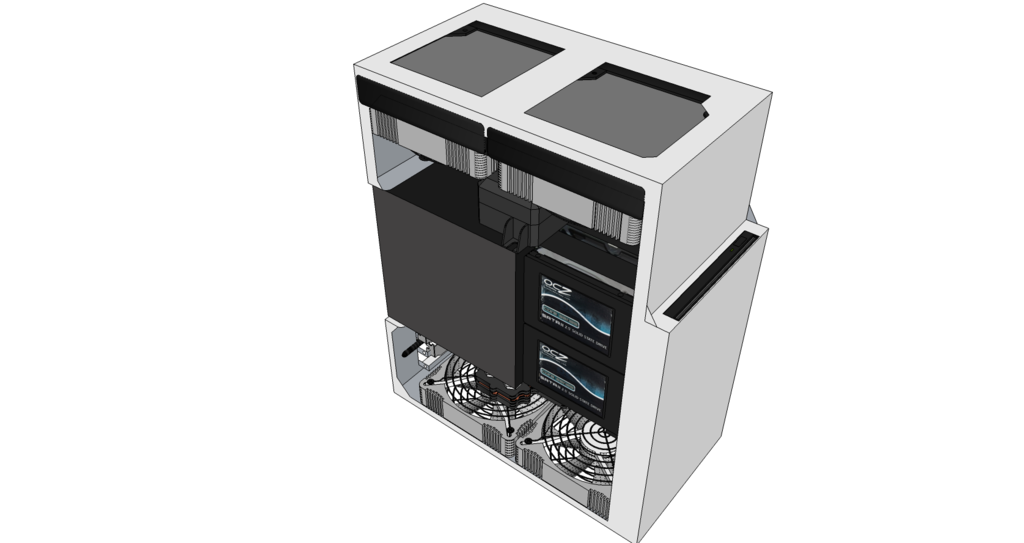
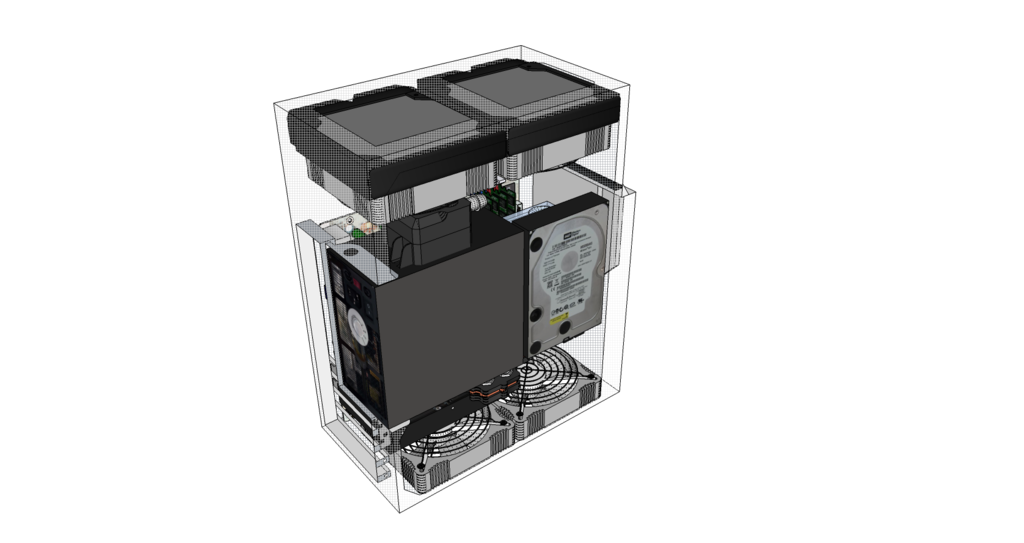
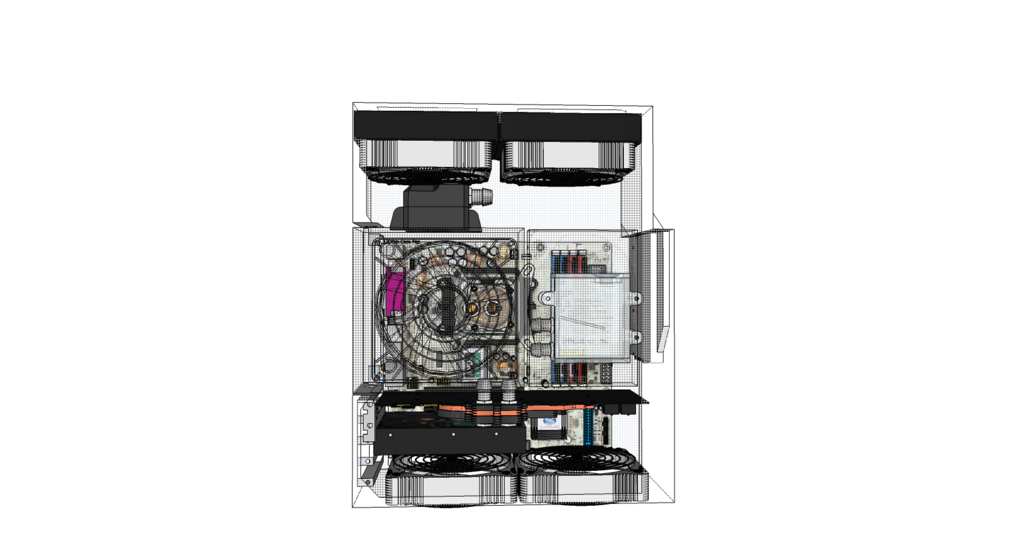
My basic idea with this is to get my whole system, plus a watercooling setup in there, like so:
Sealing off the side, front, and rear panels so there is a constant airflow stream pulled in the bottom, up through, and out the top. I will also be modding the PSU, sealing the back panel, heavily meshing or possibly even removing the side and front panels, removing all unused cabling and shortening all cabling that is used to the minimum possible length.
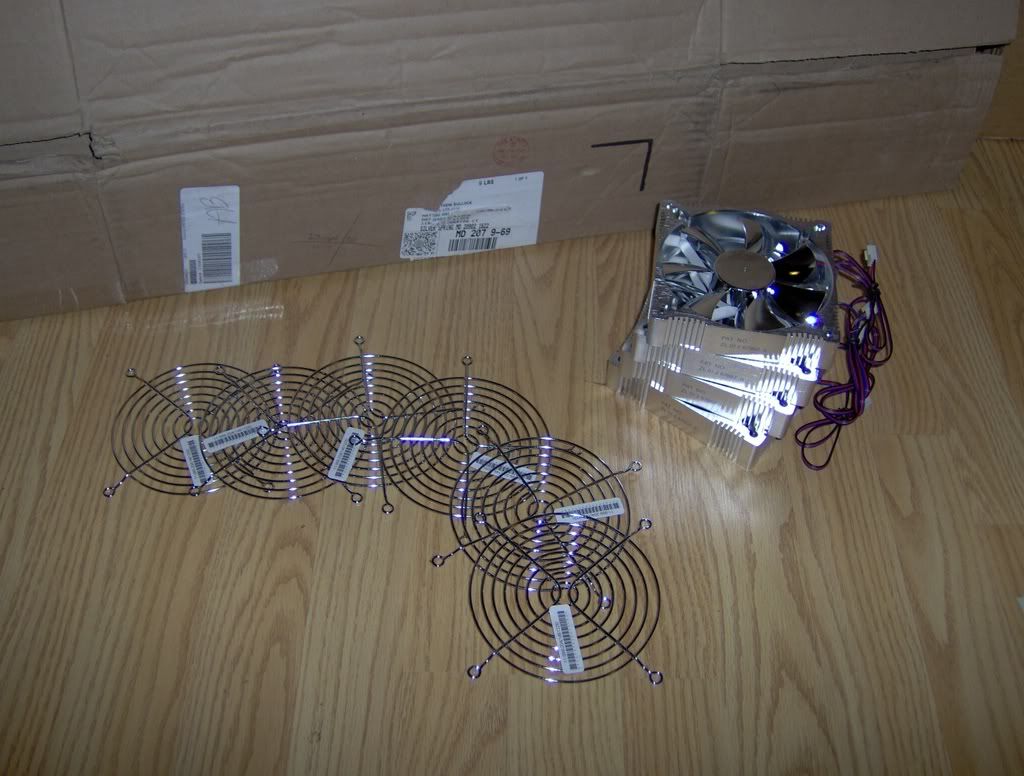
I found that the top of the case was not quite long enough for a 120.2 rad, but dual 120.1 rads will fit. (well, kinda. really, I'd rather cut out the side than one end)
For fans, I chose the Evercool AL12025, which came today! (along with the grills)
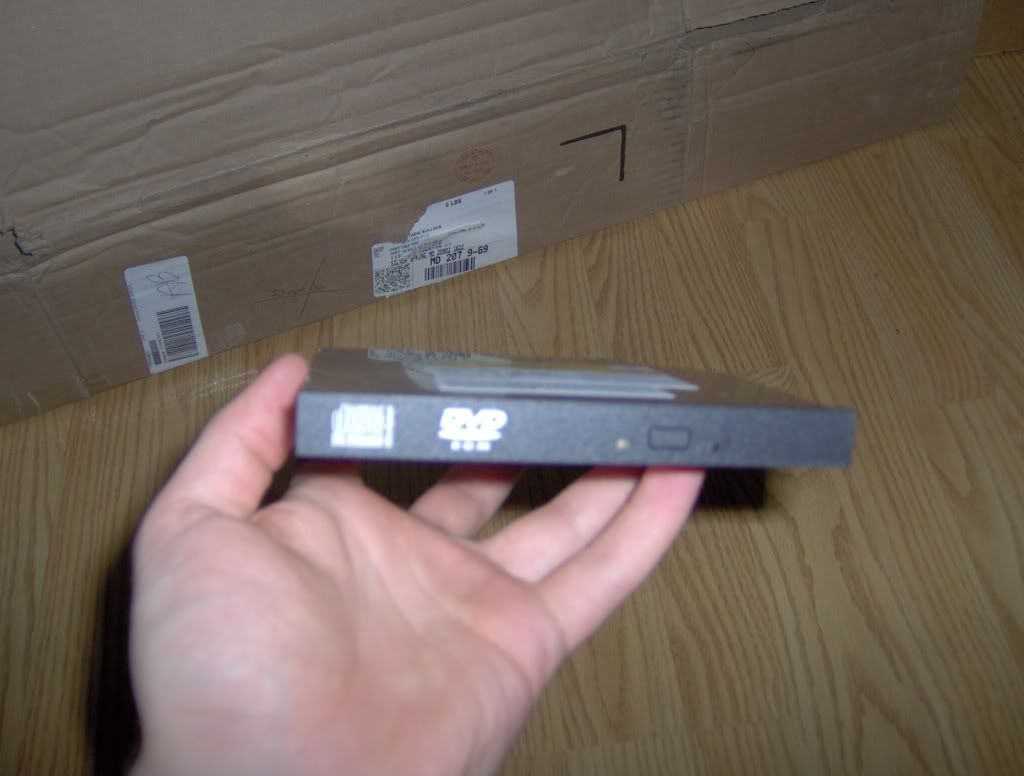
I wrestled with putting in an ODD or bigger rad(s) but after reading through craigbru's Rogue and L.O.S.I.A.S., it occurred to me that I could use a slim drive (yeah, yeah, I know..it just honestly never occurred to me), and I took a page out of cases like this odd thing, took advantage of the change in case length, and I will be putting it in so the tray comes vertically out the front of the case, which will fit almost perfectly. Eventually I want to put in a slot-loading drive there, but for now I'll be using a slim tray-loader (which also got here today!).
I've got a pretty good idea what I want the inside to be like, but apart from smoothing over the current front bays and logo insets, I have no clue yet what I'll be doing with the outside. Internally, I am a little worried about the airflow, with everything stuffed in the middle, and the power of the pump to push liquid through some of the tight corners that are going to be required with my current design.
Like I said, this is my first real casemod, so any input would be greatly appreciated.
note: The SketchUp model incorporates some parts that I wouldn't be getting right away (mainly, the 3 SSDs), and consists mostly of parts that I was able to find models of, that, while not what I'll be using, are close enough for the purposes of the model.
-
Re: mightyMite
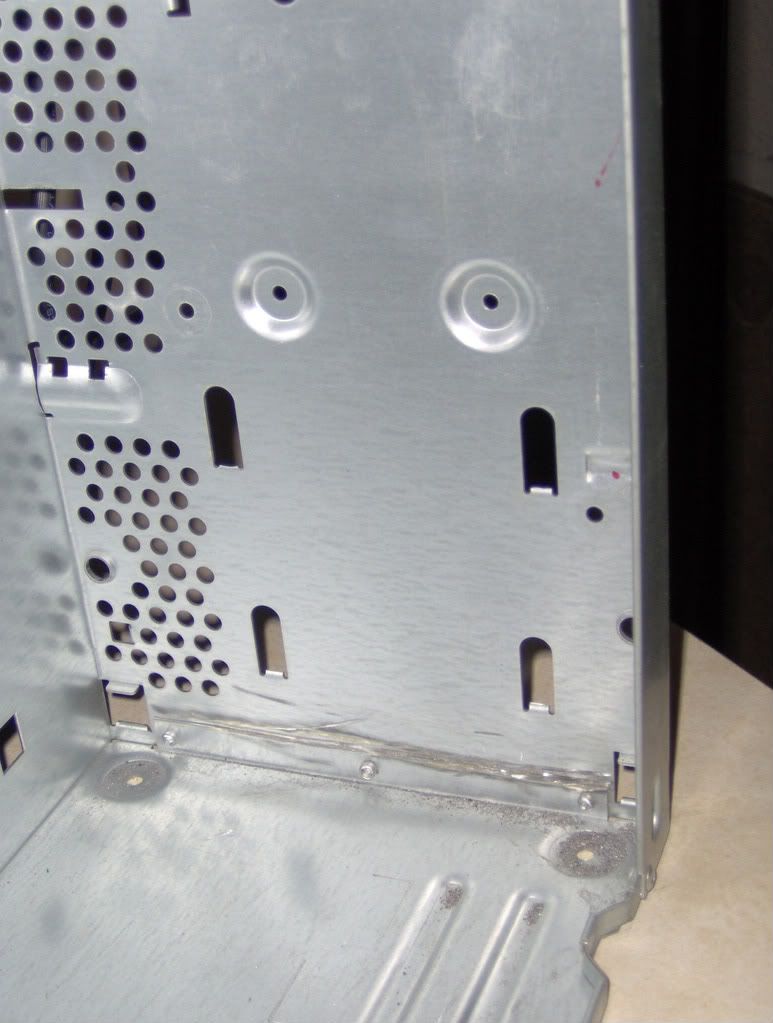
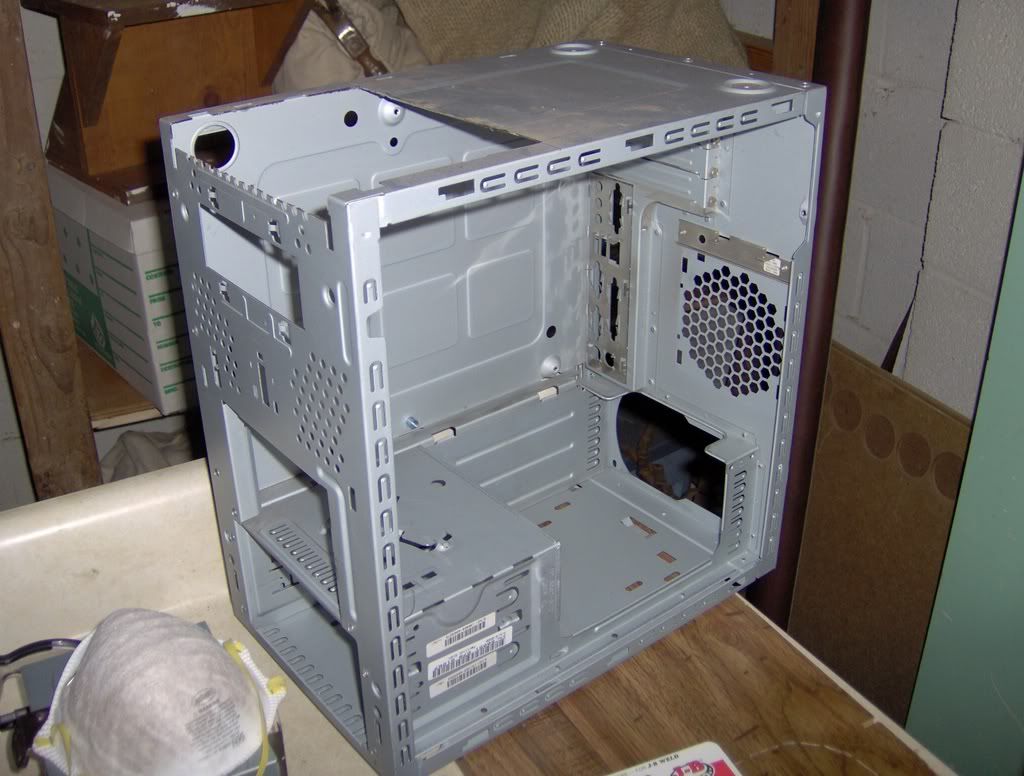
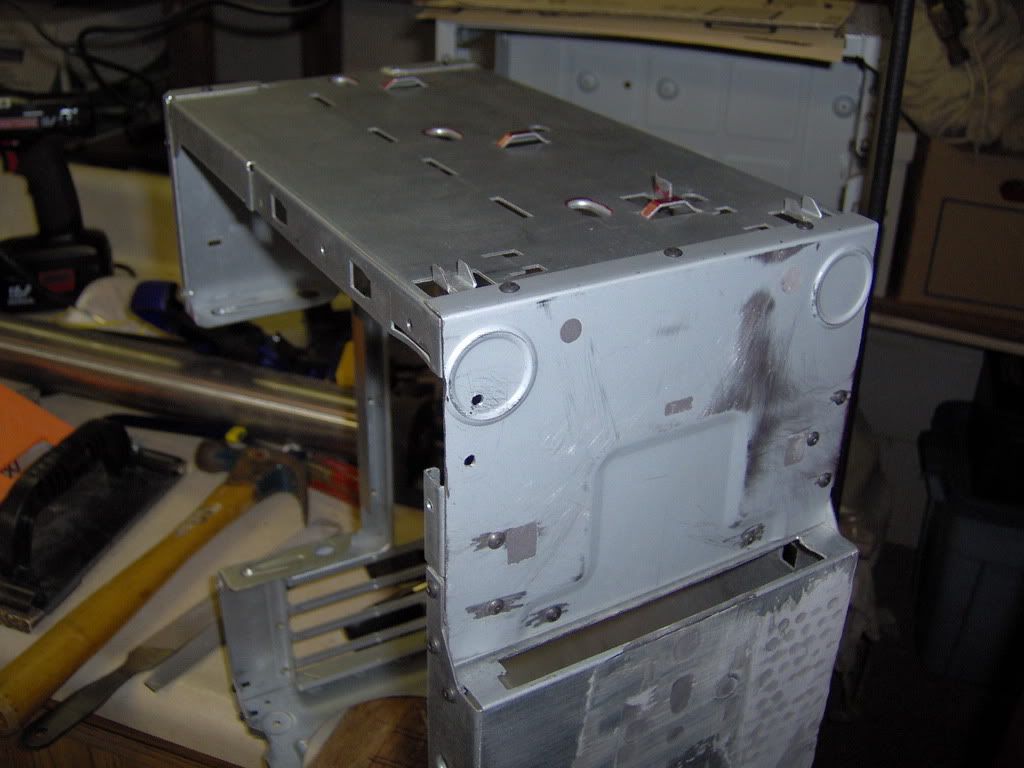
Ok, finally got started on the actual modding today. I cut off the old HDD mount:
before (well, kinda..I forgot to take a pic of it, so I'm holding the mount in place)
after
I got rid of it for two reasons: 1) I wasn't going to use it in the mod, and 2) it got in the way of my graphics card fitting in :p (eVGA GTX 260 SSC)
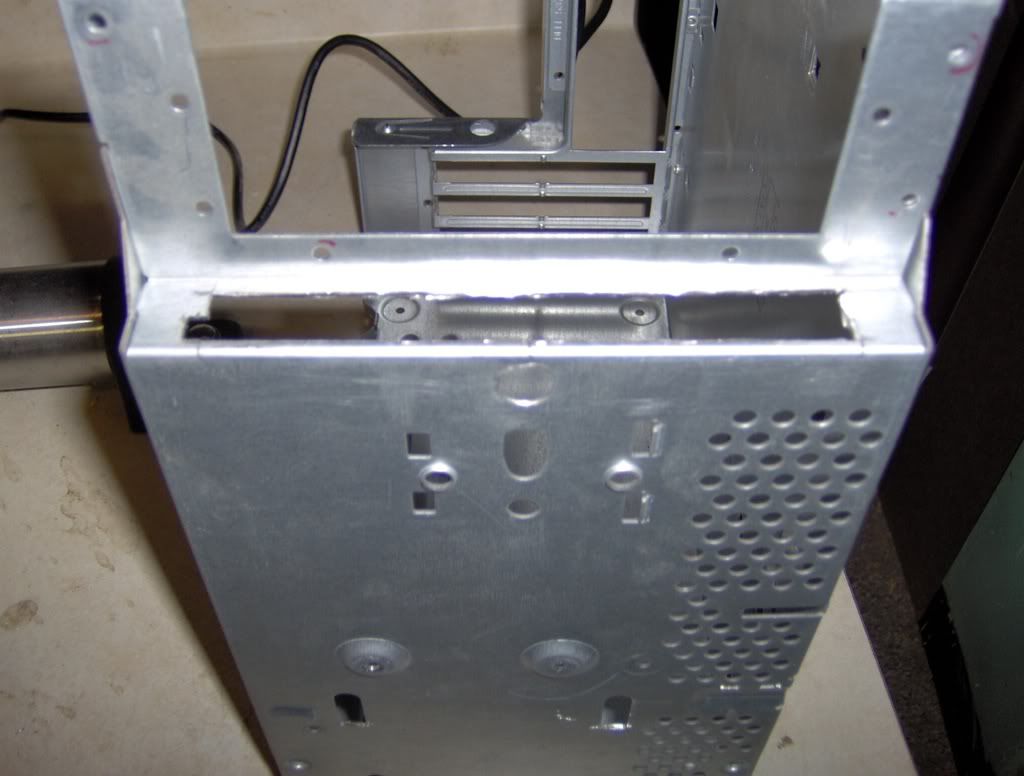
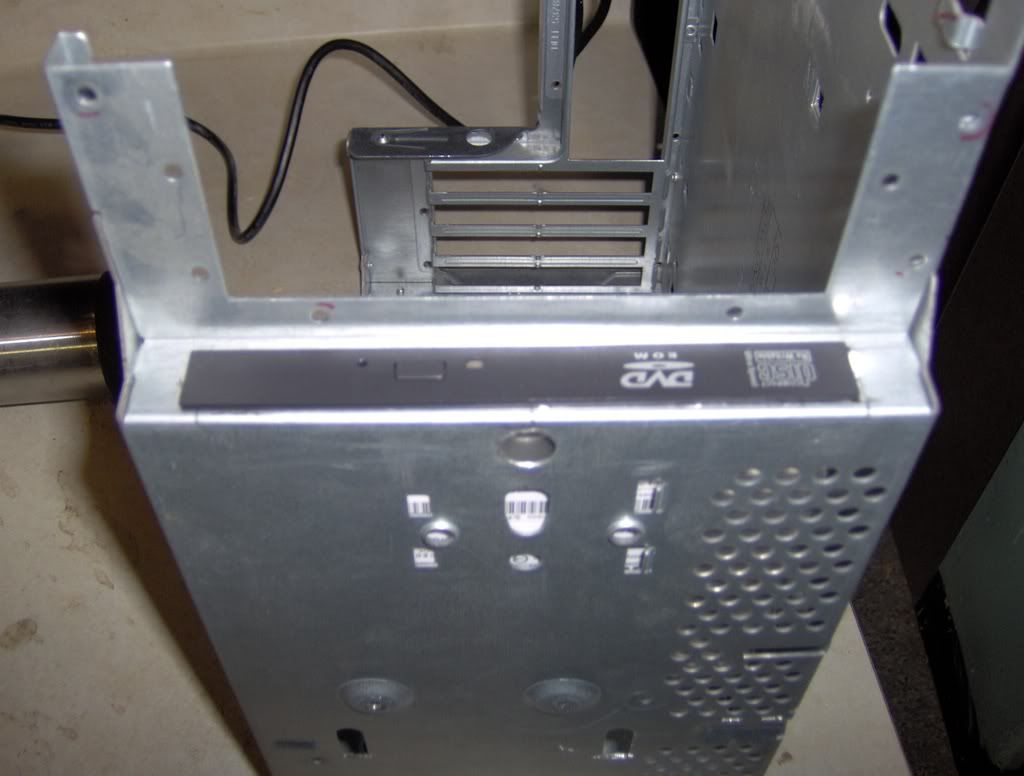
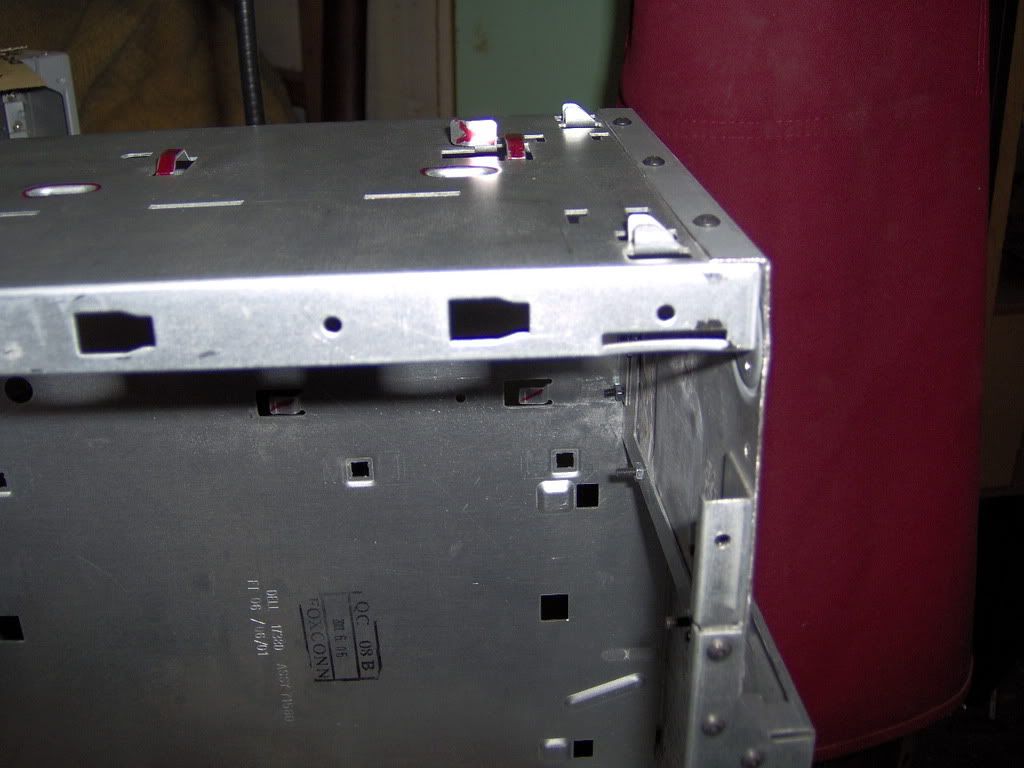
I also got the hole cut for the ODD:
I've also dismantled the computer that's going in here, both for actual dry-fits of the hardware, and also to give me more motivation to work on the mod >_> (posting from my laptop)
On another note, I'm curious. Along the way, I'm going to be removing all of the rivets on the case and replacing them with domed-head hex socket screws with anti-slip nuts...I hate rivets...not sure why, I just do *shrugs* Anyone else out there with an irrational hatred for rivets in their case?
-
Re: mightyMite
Looking good and it is off to a very clean start. I am really diggin the vertical mount for the optical drive. +rep for the design and a warm welcome to TBCS.
-
Re: mightyMite
Hi.
Like the vertical mount and overall design.
-
Re: mightyMite
Thanks both, I was a little apprehensive about the vertical drive mounting, but looking at it in place, I think it'll work really well (not as well as it will once I have a slot-loader in there, but hey, what ya gonna do).
I made a little more progress tonight, I got the initial holes cut for the bottom holes:
...and promptly realized that the flat file I have isn't gonna work very well for finishing off the holes...*adds to list of things to buy tomorrow*
(I also drilled out the rivets holding the back panel on)
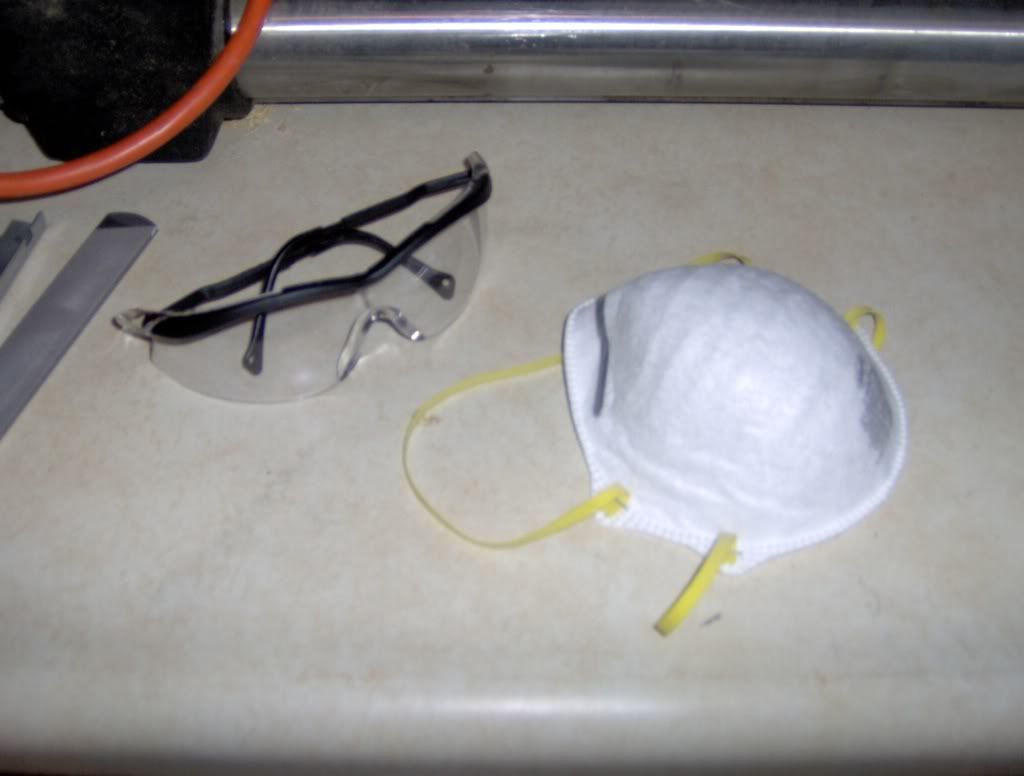
Also, after coughing up metal shaving this morning...*kicks self for not realizing before starting yesterday*, I went and bought a nice dust mask and safety glasses (which I didn't already have why you ask? well..that is a very good question.)
And surprise surprise, it doesn't hurt to breath this time :banghead:
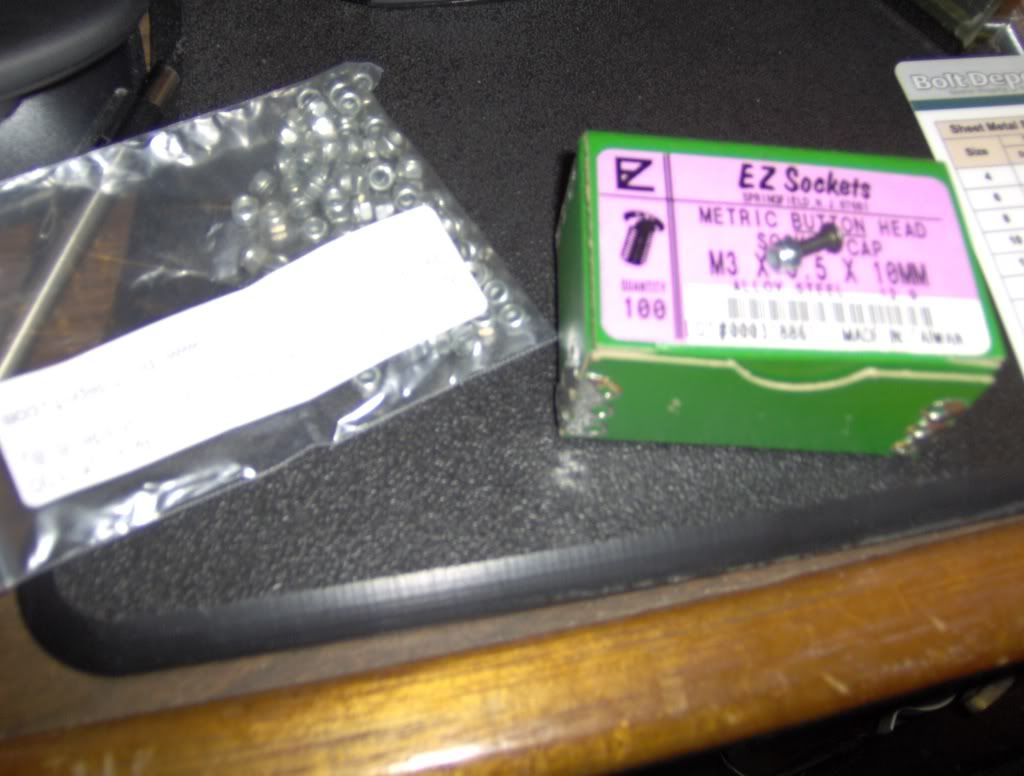
Anyways... I'll be out of town this weekend, so I won't be able to get any work done till maybe Sunday night. I did order the screws and nuts for replacing the rivets though. Nice little button-head hex socket bolts with matching lock-nuts :D
-
Re: mightyMite
I am liking how this started and your preliminary SketchUp. Eagerly waiting for more.
-
Re: mightyMite
Well, I've been away over the weekend, but I'm back now and got some more work done on mightyMite tonight.
Oh, but wait, what's this waiting on my doorstep? Bolts! Yay bolts! :bunny:
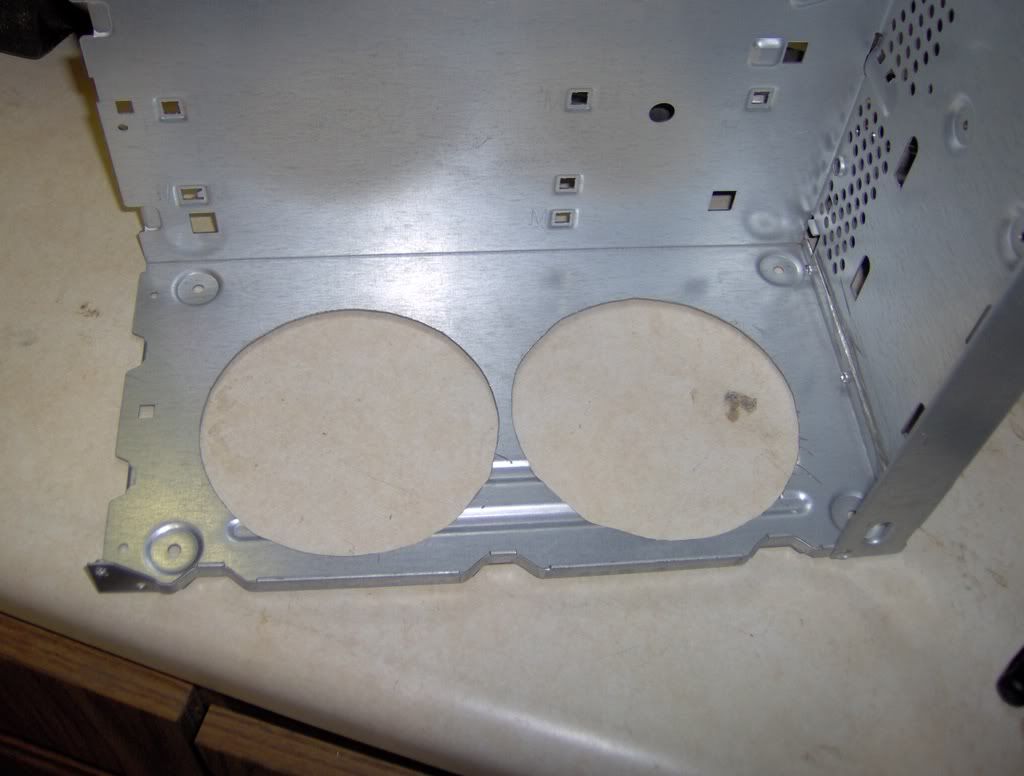
Ok, now on to actual mod work. Tonight I finished off the two holes in the bottom of the case, as before I had just kinda cut rough holes (well inside the circle I wanted) with large fiberglass cut-off wheels.
comparison:
I forgot to grab any pics of the progress on the first hole, but on the second one I got this pic of the process I used. Like I said, I had previously cut smaller, rough holes, so this time I used some thick cutting wheels to cut slots in the hole, radiating out to the hole border I wanted.
like so (sorry, kinda a blurry pic...camera can't seem to focus that close very well):
By the way, anyone out there looking to buy a new dremel, my 300 died recently and I replaced it with an XPR 400. This project is the first I've been able to use it, and I must say, it is sooo much nicer to use. I never would have thought something as simple as an on/off switch independent of the speed control would make such a big difference, but it really does. Also, the flex extension is, I think the single best accessory Dremel has ever made :D It makes working in confined spaces sooo much easier.
Anyways...
I got both holes cut out:
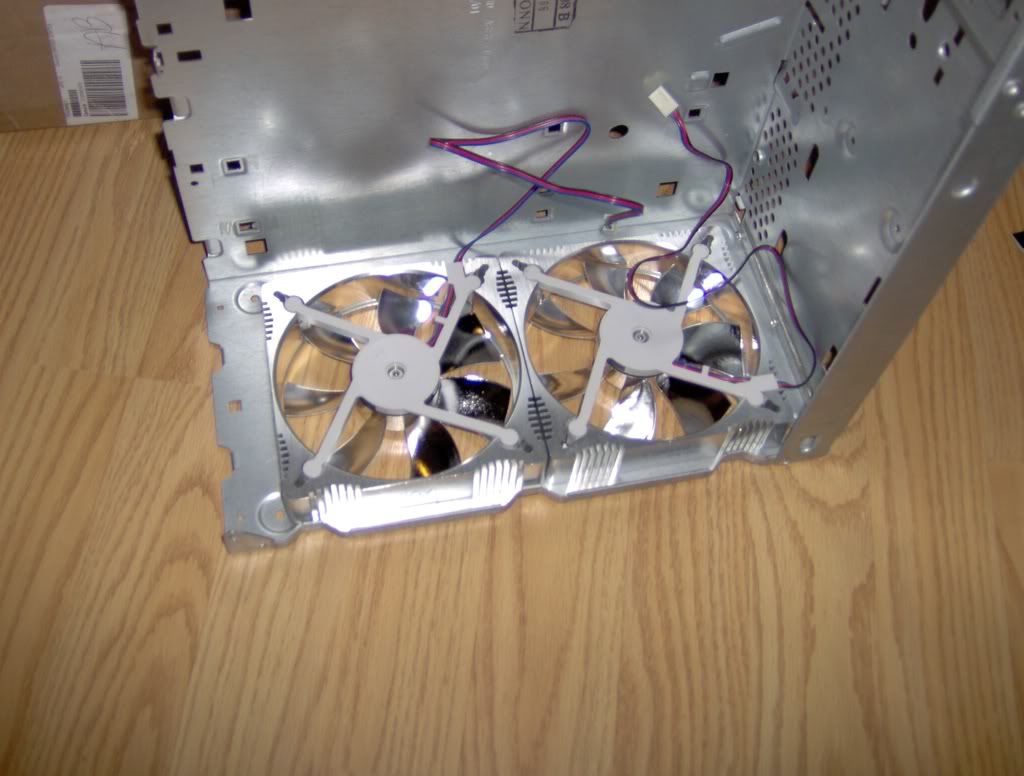
with fans set in place:
After cutting the holes out with the dremel, I used a big hand file with a curved edge to get it to exactly what I wanted, and a small, straight hand file to smooth out out the edges. I must say, they really turned out a good bit nicer than I thought they were going to.
Well, that's it for now. I will be doing a bit of work on the sketchup model tonight to add in the control panel, so that should be up soonish.
edit: Ok, apparently my laptop's OpenGL settings are screwed up or something, b/c SketchUp keeps crashing...well, tomorrow I think I'm gonna be putting my desktop back together (had it pulled apart to gauge some component sizes) and I'll work on the model then.
-
Re: mightyMite
project looks promising in these early stages. looking forward to see where it goes =o)
-
Re: mightyMite
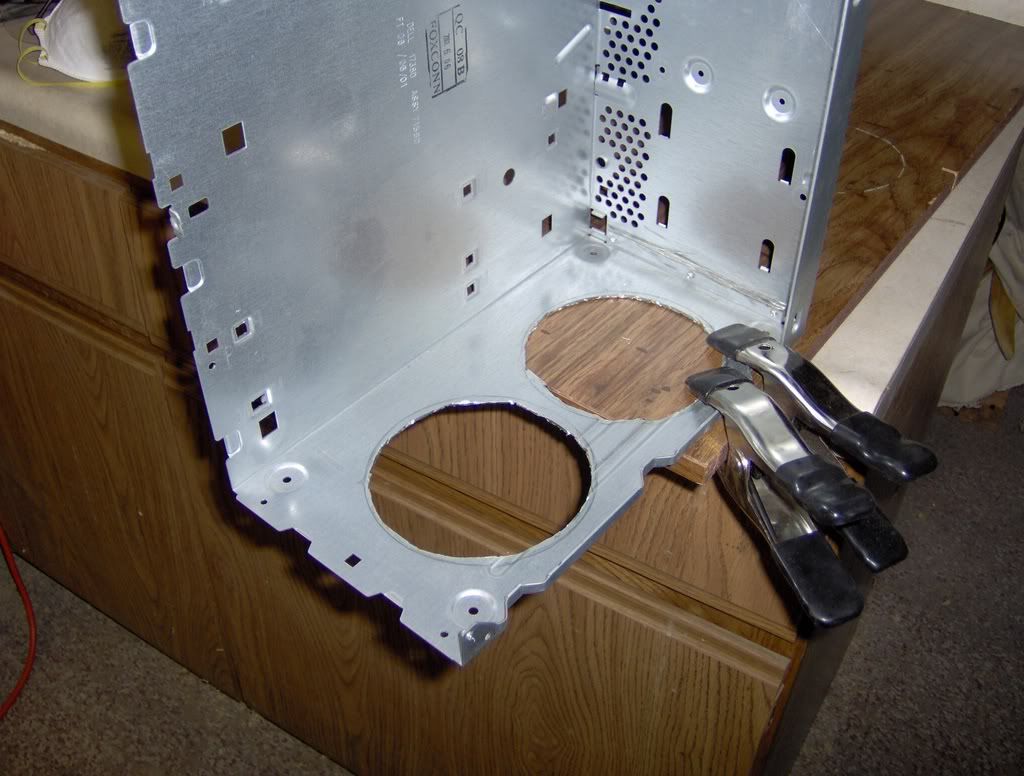
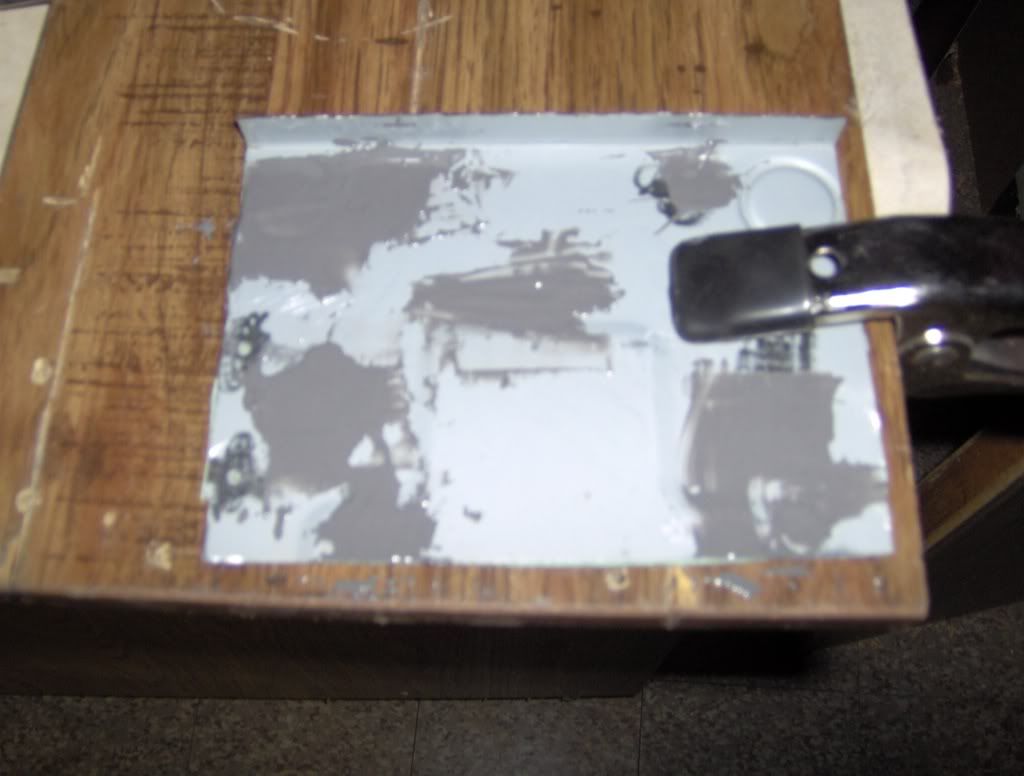
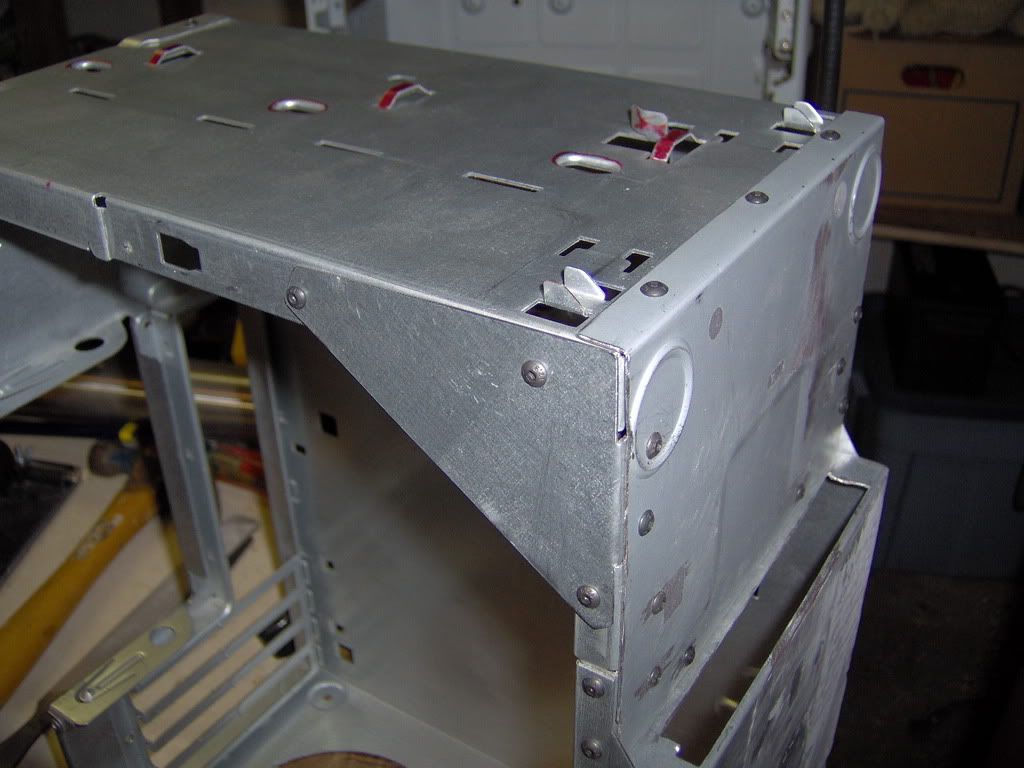
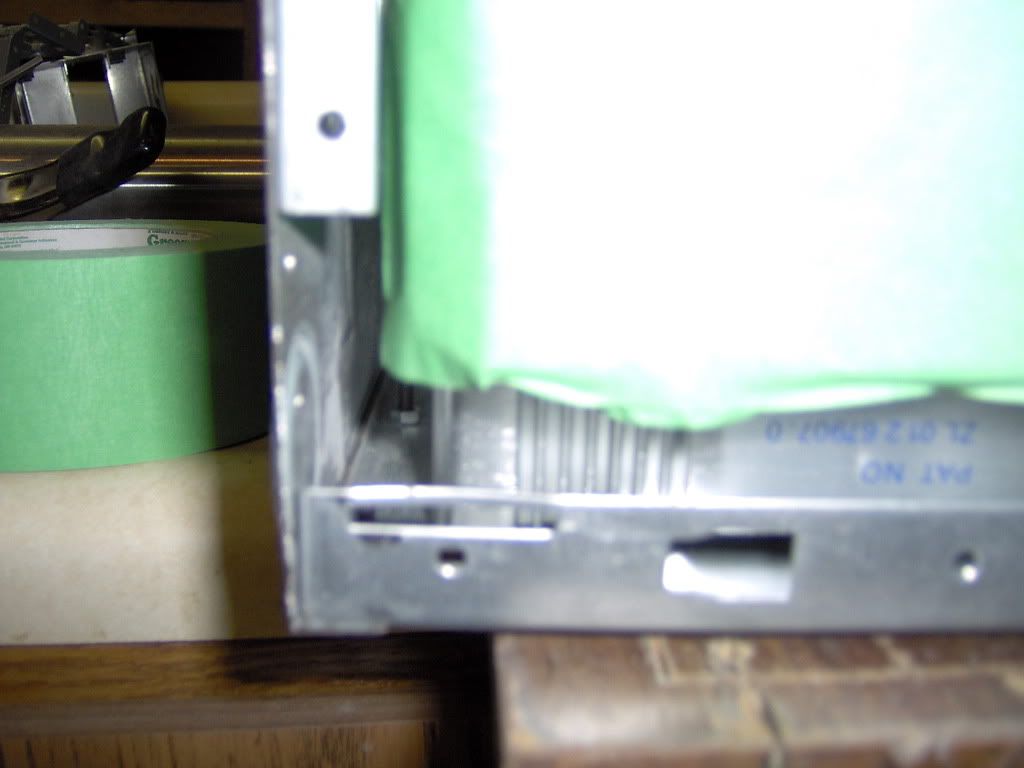
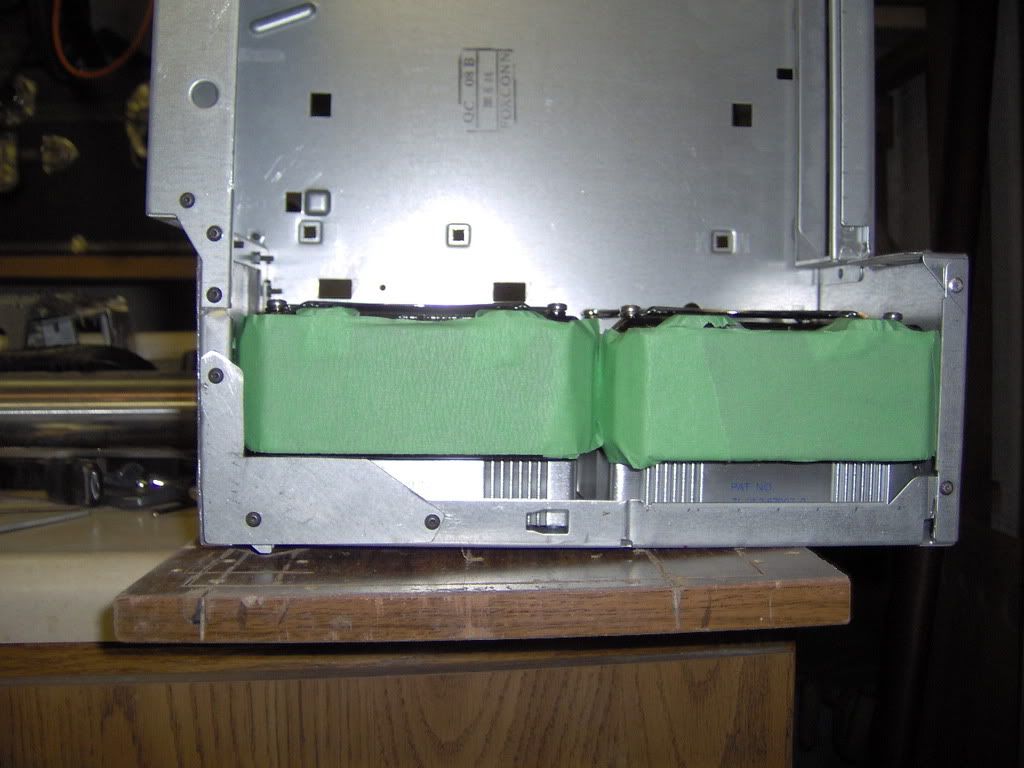
As you may have noticed, there's this big hole in the front of the case (almost like they wanted me to put drive there or something...weird :D ). There's also a bunch of supports that are going away to make room for the radiators, so I figured I'd kill two birds with one stone and just make a solid panel to cover the hole and reinforce the case.
It's already taped off for tomorrow I'm gonna start filling holes with JB-Weld. If it works well on that panel, I'll use it to fill in all the old ventilation holes in the chassis. If not, I'll go get some body filler for that.
-
Re: mightyMite
coool nice work good start
-
Re: mightyMite
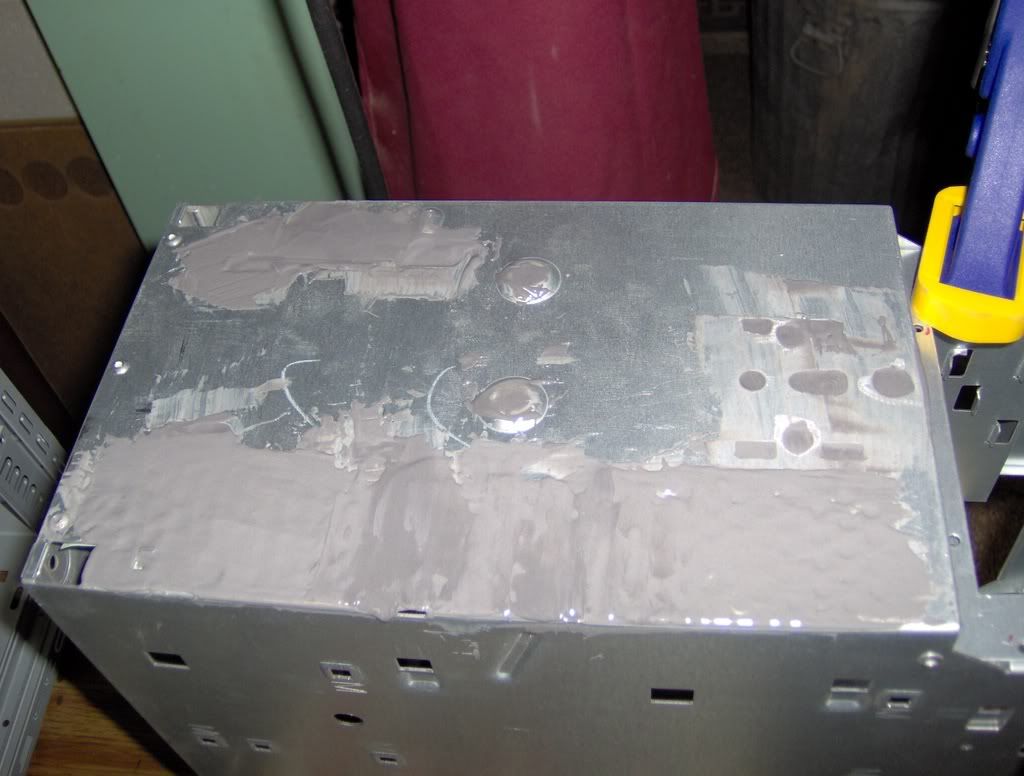
Well, I didn't get to Ace for the JB-Weld till today, so not much updates.
Holes filled in, waiting for stuff to set:
Also, last weekend I was up visiting some friends at my old college and found a random computer case in the trash. Yay donor case :p
More to come tomorrow once the JB-Weld sets.
-
Re: mightyMite
-
Re: mightyMite
Wow, it's been 6 days already? Whoops... Anyways, classes started this week, so life has kinda been getting in the way of modding :(
I finally got around to filling in the front panel:
-
Re: mightyMite
looking good mate, im glad your going to fit a slot load drive, as i feel yiour vertical drive would require two hands to change disc
-
Re: mightyMite
Yeah, probably, I just didn't want to sink that much cash into that part of it until I know it's going to work.
-
Re: mightyMite
I have one of these Dell cases, I would start a mod on it if I A) had parts and B) didnt have 3 other mods going :twisted:
The plans and progress look great. +Subscribed.
-Indybird
-
Re: mightyMite
Sorry, no pics tonight. I should be able to put in some modding time tomorrow, but for now I just wanted to run an idea by some of the members with experience with water cooling. What I'm thinking for the loop atm is
....CPU -> Rad -> GPU -> Rad -> pump -> CPU....
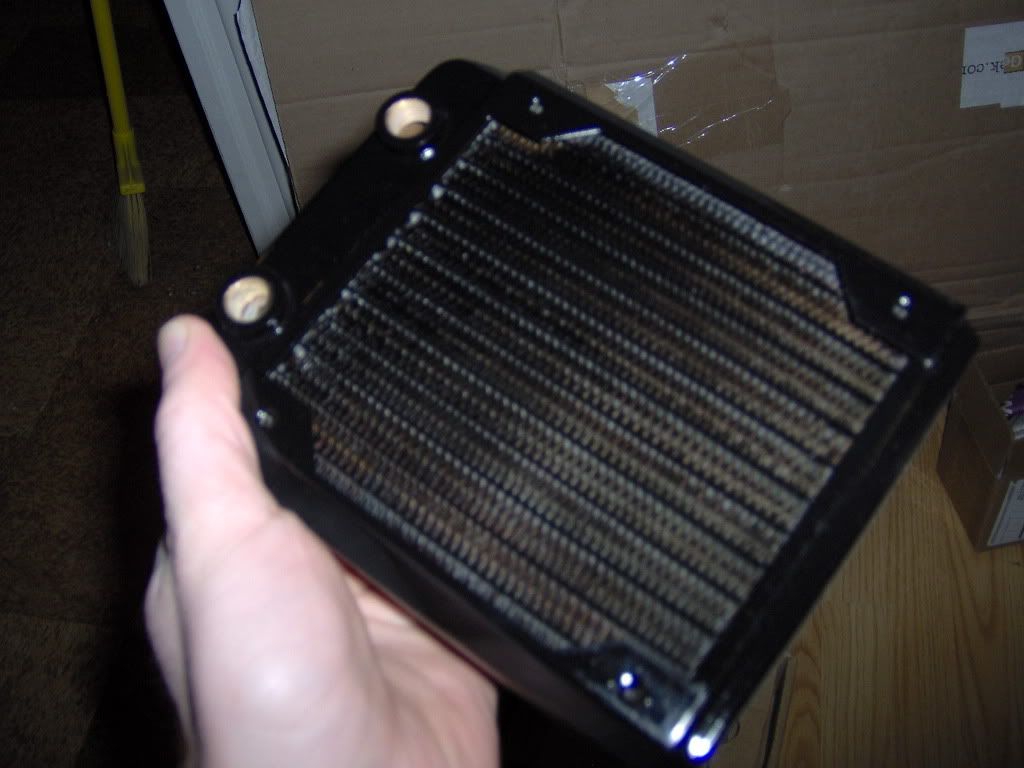
Cooling a Q9450 and a GTX260, using two Black Ice GTX120 radiators, driven by an 18W DDC-12V. Do you think this will keep the components cool enough? I haven't seen many people using 120.1 rads, but I feel like two should keep the loop cool enough. Another thought; should I try to squeeze a small reservoir in there or should it be fine with that loop, using 1/2" OD tubing?
-
Re: mightyMite
My loop is res>240mm rad>pump>CPU>GPU>120mm rad>res
I use a BlackIce GTX120 and an Alphacool NexXxos 240mm rads.
I get temps of about 36c idle for my Q6600 and about the same for my 8800GTX. Do you have space for a 240mm rad instead of one of the 120mm rads? Cos you are cooling a high end quad and a hot graphics card the extra wouldn't hurt, especially for over clocking.
-
Re: mightyMite
I'm trying to keep everything inside the confines of the original design as much as possible, and a 240 would stick out the back (or front) about 3-4mm, thought it would fit better for width. This was why I originally decided to go with dual 120.1's. Turned sideways, I think they would just barely fit. Do you think a single 240 would provide more dissipation than dual 120's? I'll try messing around with sketch-up model, try and see if I might be able to fit more rads in there. Thanks for the pointers.
-
Re: mightyMite
Yeah there is always the space issue with radiators lol.
I dunno what performance gains a single 240mm rad would have over duel 120mm rads. If you use full thickness rads like the Thermochill PA120.1 or the Feser radiators you shouldn't have a problem, even BlackIce GTX radiators work really well.
The configuration in your Sketchups look good and should work fine.
-
Re: mightyMite
Ok, that's good to know. I probably won't be overclocking on this system, so it will only have to deal with stock heat....though that's still something like 300W at peak usage... The Feser and Thermochill radiators look nice, but really, even 157mm depth is pushing it, so I don't think theirs would even fit. Maybe I'll try them for my next project... The Black Ice GTX radiators are 2-pass radiators though, so hopefully that'll help. Since there wouldn't be a boost in dissipation going with a 120.2 over dual 120.1's, I think I'll stick with that; it lets me cool off the coolant between the CPU and GPU...or would it be better to have them both run after the GPU to have the coolant hitting the CPU as cool as possible...hmmm. I did play around with the model, trying to see if it would be feasible to switch to a 120.2, or even 2, and while it could...maybe...be possible, the amount of modification I would have to do to the case is such that I might as well just go with a scratch build (which I think is the direction I'll be going with my next project, but one thing at a time, right?).
-
Re: mightyMite
I think the loop you should be looking at is pump>CPU>rad>GPU>rad>res. That will best utilize the radiators you have at your disposal. Rule of thumb is to always cool the CPU first cos it puts out less heat than the GPU.
-
Re: mightyMite
Ok, I was thinking that would be a good route to go. I had been hoping to be able to get away with no reservoir, but I think I might be able to squeeze something like this in. Thanks for your help.
edit:
So, I worked Sketchup around a bit more, and I think this is where I'm heading atm. I dropped the SSDs (at least for the moment) because I honestly don't see this system ever getting that upgrade. I think I might go ahead and build in a mount for one or two between the vertical HDD and the reservoir though, just in case.
So, on the to-do list:
Seal back of case
Seal side of case
File/sand down the JB-Weld on all surfaces to make smooth and ready to paint
Get PSU and prepare it for modification
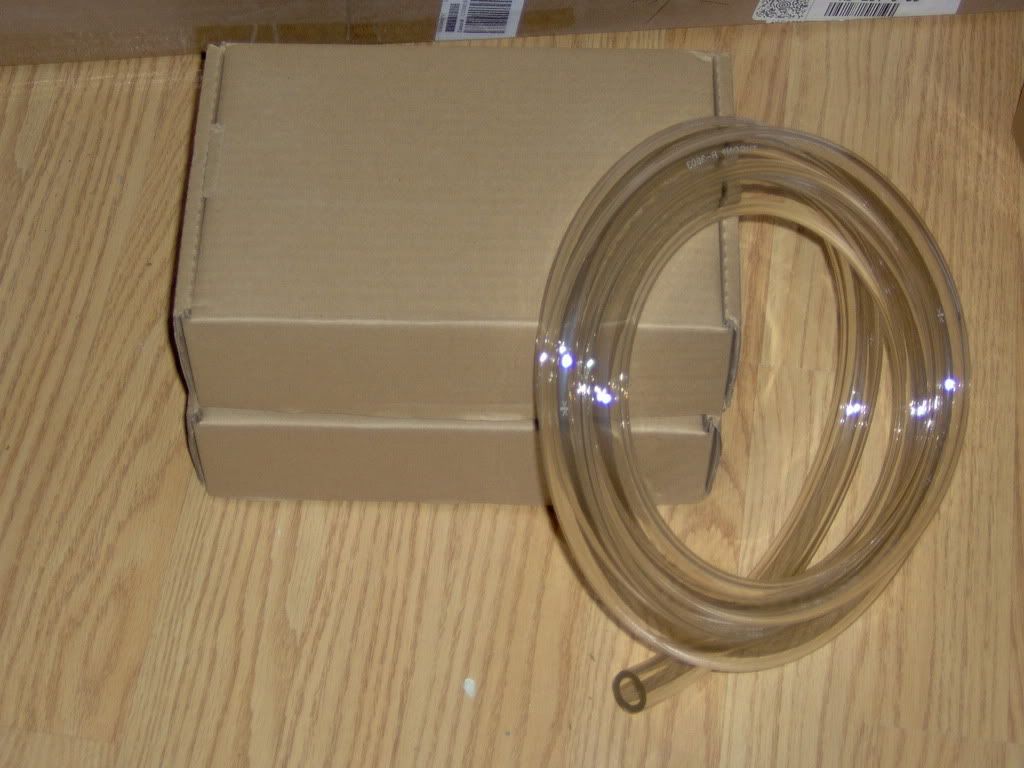
Get various water-cooling parts
Design/Make CD/HDD/SSD/res/PSU/pump mount
Design/build control electronics
...yeah, ok, so I've got a ways to go
-
Re: mightyMite
Yeah those Swiftech reservoirs work very well, Make sure you do get the V2 though, it has more inlet/outlet options.
The cads look very good. If you have the space you could always attach the pump directly to the res. That would give you some extra room above the PSU. I know you can get acrylic tops for that particular pump which allows for a vertical inlet rather than the 2 horizontal ones. You could make a compact res/pump combo to save space.
*EDIT*
This is what I mean
-
Re: mightyMite
Ok, not much of an update, but a little bit... it's been too long. Anyways, the front panel is looking pretty good, I've still got a couple little holes I want to fill in, but overall I'm happy with it. As a side note, 25-grain sand paper is freakin course! :eek: well, granted, the last time I bought sandpaper, it was for lapping a heatsink, and was stuff ranging from 800-2000-grain, but still..dang. Anywho.... I realized as I was trying to fit stuff together, that, while the locking nuts will be nice once I get it together, they kinda suck now...b/c I can't hold stuff together... so I put in an order with boltdepot.com (awesome site, btw) for some normal nuts, and also some 6mm bolts instead of the 10mm I got before. The 10mm are nice for testing b/c they give me more leeway to work with, but once I get stuff finalized, I'll want something shorter (yeah, I know I could just grind them down, and I will probably end up grinding some down, but considering I'm replacing all the rivets in the case with these, I really don't want to have to grind down ~40-50+ bolts).
I think tomorrow I'm gonna take the plunge and order the radiators (would do it tonight, but DangerDen's website is down). I've kinda been putting this off, but I really need them to get the top of the case planned/done, and plus, it'll give me more motivation to work on it more :D Also, I have more free time on Wednesdays, so hopefully tomorrow I'll be able to get started on the center mount.
-
Re: mightyMite
-
Re: mightyMite
Sorry for the slow/small updates recently...I rather underestimated how much of my time my two classes + 30 hours/week at work would take up :dead:
Anyways, pics! I got the front panel finished up, and the bay cover mounted.
One thing I didn't really think about before I actually got it assembled; the drive-bay assembly actually provided a lot of support, which my cover plate doesn't. Main point of interest was here:
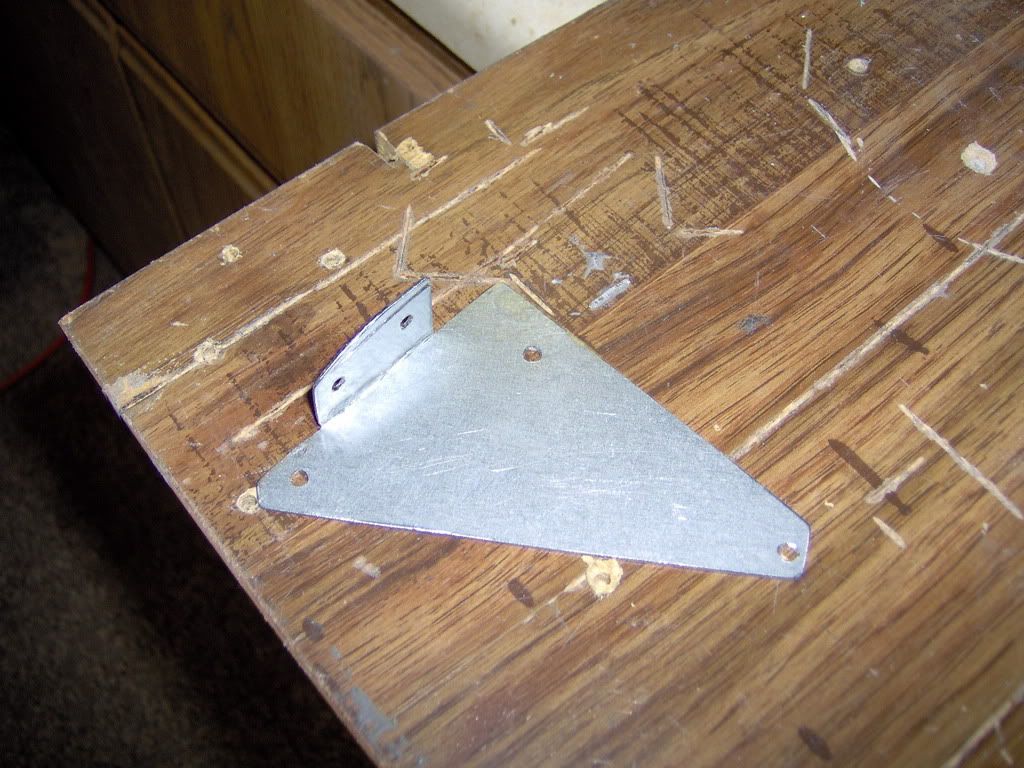
There used to be a huge assembly here, bracing the top, front, and side, and that's gone now.... Solution: make a better brace.
Mounted in place:
The brace was actually made out of the left-overs from one of the big holes I made in the bottom. It's amazing how much stability that one little piece adds; I think it might actually be stronger now than it was originally.
The rads are scheduled to get here on Thursday, so hopefully Thursday or Friday I'll be able to get started on the top. I've got some plans laid out for the center structure, and while I'll need the PSU before finishing them, I should be able to get at least the front section done. I have another donor case that I'll be cannibalizing for the mounts. Whoever threw away the other case took the panels, the only large pieces of flat sheet in the case. :evil:
Anyone know of a good source for the Swiftech MCRES Micro V2? I found it here, but it's a bit more than I was expecting ($25, vs $15 for the V1 @ xoxide). Is about what would be expected for the V2 or is that just Sidewinder price-gouging?
-
Re: mightyMite
The V2 seems mor eexpensive because they are trying to clear the stock of the original. Personally I would go for the V2, I have seen many of the originals crack and leak, they seemed to fix the problem with the V2.
Progress is going smoothly. Your doing Uni aren't you? I am starting at the end of the month, got 4 subjects first semester, no time for modding :(.
-
Re: mightyMite
Ah, ok. I was wondering if there was something more to the difference than just the extra port. Yeah, I'm in college. I went for 2.5 years one place, took a year off, got a job, and now I'm going back part-time somewhere cheaper/more local to where I work. I'm only taking 2 classes this semester, but it's still kinda a shock going from just working full time to 2 classes, plus 30 hours/week working, commuting a good distance for each. Life gets kinda full when some days it's a full 12 hours from the time I leave in the morning till I get back at night. On the bright side though, I can actually afford to fund more of my projects :D
-
Re: mightyMite
nice bracket... looks strong
-
Re: mightyMite
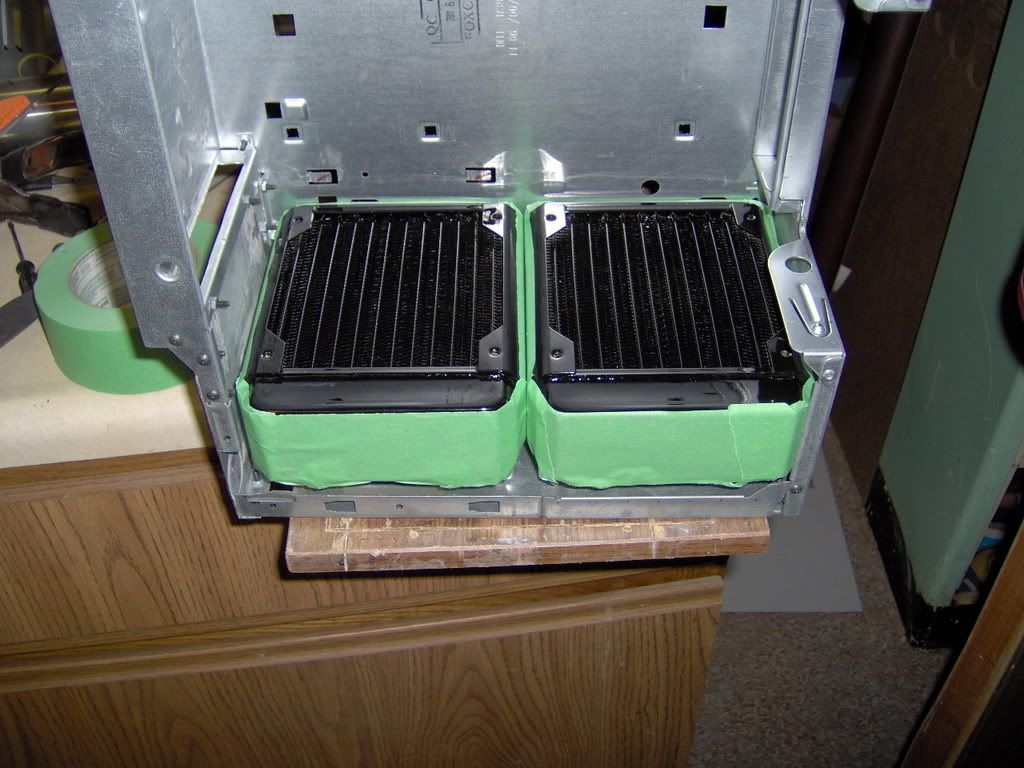
Well, I got home today and what do I see, but an unexpectedly early package from Oregon. Yay new parts :banana:
As you can see, it's a really tight fit, but they do fit, though it turns out the brace I made was a bit too big (I should have realized that sooner, but oh well, not a huge problem).
A little cutting/filing later, I had a revised brace:
That's all for today because I've got a big pile of homework I've kinda been ignoring for a few days, that hasn't magically gone away (funny thing about that). :( But yesterday I cut/filed/sanded out a panel to bend into the ODD mount (no pic, just picture a smallish rectangular sheet of 1mm steel). Turns out the vise I've been using isn't quite wide enough... *ponders building a metal brake*
EDIT:
(ok, so I lied about that being it for today >_> )
Back to thinking about my loop, I was thinking... (Please, correct me anywhere if my thinking/facts are wrong) IIRC, reservoirs serve three main purposes, to facilitate filling the loop, to hold extra liquid in the loop, and to give that liquid a little extra time to cool, before entering the loop again. I would think that the last function would be minimal, considering what I know of thermodynamics and the properties of plexi, and the other two functions I have frequently seen substituted for by adding a fill-plug and a bit of tubing branching off from the rest of the loop at a T, to go to the plug. Now, looking at the parts I am considering, most of my loop is currently 1/2", narrowing to 3/8" at the pump, and 1/4" at the reservoir. I played around with SketchUp a bit, and if I took the reservoir out, and rearranged the HDD/SSDs, I would be able to fit in a DD12V-D5, which has 1/2" fittings. What I'm wondering, anyone who has more experience with these things than I (read: most everyone here), would this improve my flow, or do radiators and blocks restrict flow to the point that it wouldn't make any difference? And if it would increase my flow, would it improve or hurt cooling? Or have to affect? (If I do use a D5, I would also put in a short T-line to a fill-port somewhere)
-
Re: mightyMite
Really you should keep the diamiters of your tubing all the same. There is a big stigma about the bigger bore the tubing the better the cooling, this generally isn't true, it doesn't really make a difference. The tubing may be gigger but the liquid has to go through the same hole ;).
For a case your size I wouldn't use 1/2" tubing. It is big, cumbersome and has a very poor bend radius forcing you to use flow restricting adapters "T, Y and L connectors" I had enough trouble using 1/2" tubing in my NZXT LEXA mod and can tell you next time I will be using smaller tubing.
Now I think you may be a bit confused about the barb sizes. Most water cooling components come tapped at the standard G1/4" sizing. This allows for any barb with the G1/4" thread to screw into it. I know for a fact that the BlackIce GTX120 rads you are using come tapped at the G1/4" standard so you can easily use 3/8" barbs in the threads. Now the reservoir. I am also pretty sure that res is tapped at G1/4", not supporting 1/4" barbs so you can use 3/8" fittings on that also. I would stay with that pump (it is a very good pump) and addopt the 3/8" fittings on your rads and res. Over all the loop will be tidier and have better flow due to the lack of right angle bends you will need to make with the 1/2" tubing.
Boosting flow rate isn't always a good idea. If the fluid is running too fast it wont be able to effectively draw the heat from the water blocks and disperse it through the radiator. If the fluid is moving to slowely you will have very bad temps.
As for the use of a reservoir. The primary use of a reservoir is to collect and store extra fluid in a loop and to make it easier to fill, drain and top up a loop. The more fluid you have the slower your temps will (theoretically) rise. However this all depends on the orientation of your loop, if the fluid is comming from a radiator to te reservoir the fluid will stay coolerlonger than if the fluid is comming from a water block.
Personally I use a "T" line and a Dabger Den fillport the fill my system, my bay res has a fill cap but I find the "T" line easier. If you are using the Swiftech V2 res than you don't need to worry about the "T" line, you should be able to attack the fill port directly to the fillport on the res by simply replacing the cap with a barb.
So basically, keep the pump you have, addopt 3/8" barbs all around and if you want attach a fill port the the fill port on the res.
I hope that info helps.
-
Re: mightyMite
nice gear mate looks good so far
-
Re: mightyMite
Hmm, ok, I was wondering if that was the case for the blocks. Is the G1/4" standard referring to the ID bore of the fitting? With everything having the same bore, it seems rather odd to me, then, that 1/2" tubing would actually be used much, unless that's just because of people (like me) thinking that it would give better flow. Maybe with a big loop it could kind of act like a small distributed reservoir? Ah well, thanks. That cleared a lot up for me. :D
edit:
Another thing I just remembered. What kind of affect do different type (not size) fittings have on the loop? I like the look and idea of compression fittings, but would they have an adverse affect on the flow compared to other fittings?
-
Re: mightyMite
The G1/4" standard refers to the size of the tapped hole the fitting screws into.
I don't see fittings playing a massive hole in performance, it's just personal taste. The main fittings you see are the high flow fittings, perfect seal fittings and compression fittings. High flow fittings are the fittings you see most commenly. they slip on the hose easily and require a clamp/zip tie to hold in place. Perfect Seal fittings are harder to get onto the tubing but generally don't require a clamp to secure in place. Compression fittings are basically like your garden hose. You slide the collet onto the hose, plug the hose into the fitting and then screw the collet in place, no clamp required. Danger Den (and a few others) also make a FatBoy fitting, these fittings are a hybrid between a high flow fitting and a perfect seal fitting, you get the best of both worlds. As far as I know different fittings really don't make much difference.
-
Re: mightyMite
Ah, ok, that makes more sense (about G1/4"). Thanks for the explanations :D
If the fittings don't affect the performance significantly, I think I'm gonna go with the compression fittings. I really like the smooth, unified look, and I over-engineer stuff so much I would never trust Perfect Seal fittings without a clamp.
-
Re: mightyMite
Interesting start man! I love how you mounted that DVD drive, the radiators also seem to fit well where you have them. Good luck with this.
-
Re: mightyMite
Not really an update, just a peak at things to come....
I've got a bunch of these sitting around.... One of them will be sacrificed. :twisted:
More to come once I get time to work on the top.
-
Re: mightyMite
I have several of these internal drive bay enclosures myself.
I gutted one of them for the frame and bolted a cd player motor to one side in the front.
I created a barrel or squirrel fan out of 1½" acyclic pipe. I simply cut several slots into the pipe at a 45° angle, glued styrene strips into the slots, then attached it to the motor with pieces of a toilet paper holder.
Worked great as a intake fan for an unoccupied drive bay.
-
Re: mightyMite
lol /\ pics?
you have them laying around... send me one :P