-
Project - Air Cube v2
Hi all, time for my imaginatively titled Air Cube v2 to get done :D sorry could not think of a good title so it is a spare of the moment title.
I got the flat bars and angle bars today of the aluminium, and I should have the sheets tomorrow. at last woohoo :D lol i'm a tad excited for my next modding fix.:banana:
The flat bars are 20mm wide by 3mm thick / angle bars are 12.7mm x 12.7mm x 1.58mm
the sheets are 1mm thick for components like any add on parts and cages and 1.5mm thick for top, mid, bottom, front, sides and back panels.
insert completed project pic here ;)
Here is the new small 2-5mm hss countersink bit I just bought and these are the little m3 countersunk allen head bolts and half nuts, I'm hoping I will not need rivets at all for this so it can all be dismantled easily for painting and further mods.
Here is the main structure I will be making 1st of all which I hope will be strong, probably got over 30 120mm fans in bags lol, so 3 for the front instead of the 200mm fan this time so it will need to be about 30mm wider than planned but that can be a good thing for hdd wire space, 2 for the true, 1 at back and 1 in front of the hdd's.
I'll be swapping all the fans when I can afford to with the akasa apache 120mm fans as they are 57cfm at only 16db and are rated to last 50,000 hours so should make for a nice very quiet well air cooled case.
I'm going to have my 1st go on a drill press with this project and plan to use it quite a bit, hope it is as good as I imagine it would be, I'll be sure to very carefully do the measuring and marking and it should be fine I hope :D, lucky my dad is into motorbikes and has done a bit of restoration work on them so he has a few very useful tools to compliment the ones I have bought. He has a powerful air compressor that is outstanding for making a dust clogged pc look like brand new :), still yet to get into using quality paint with a paint gun and air brush, annodising seems quite hazardous unless you really know what you are doing but I think it would be my prefered choice or I could just pollish it to a mirror finnish.
I'm very tired from over exercising every day for the past month I'm shattered lol so will start on the project in a couple of days when i'm a bit more sparky :D as long as the aluminium sheets come tomorrow.
So hopefully I will not bore you all any further and just post pics with as short as possible descriptions whenever I progress a bit further :D.
Compliments & pointers are very welcome ;) if you think I'm doing a good job once I have some actual work in progress shots.
-
Re: Project - Air Cube v2
Quote:
Best suggestion for those is a fence
:? How do you mean a fence :? I'm baffled lol :D
Or is that what you meant
Quote:
you can clamp a board to the factory table
-
Re: Project - Air Cube v2
Ahh :facepalm: I see how that would make it even better for what I want to do, thanks for the suggestion:up:.
Did not get the aluminium sheets the next day and I'm expecting them today, it is now 2 weeks ago today when I made my aluminium order, they said the sheets got damaged in transit but still, 2 weeks, wish I paid a little extra for next day delivery :neutral: I'll know for my next order :).
-
Re: Project - Air Cube v2
WooHooo Got the rest of the aluminium today and its all in perfect condition :D
Not quite prepared to start on it yet, but by friday I will.
-
Re: Project - Air Cube v2
Thursday evening
Made a start & I measured & marked the 2m bars ready for cutting.
---
Friday mid day
Only got all the bars cut to size with a hacksaw with 1 slightly wrong, good thing I bought a little extra for if I mess up made another 1 and here is how it will be going together.
Was really getting stuck into it but was getting aggravated quite easily so I called it a day as I figured I'd end up making a pile of mistakes with not being nice and calm :).
Received 1 akasa apache fan in the post, tried it out & it is nice and quiet with very good air flow for an almost silent fan so I'll be ordering another 6 close to the case being complete, then I'll have to do something about my enermax galaxy to use a quieter fan setup.
---
Saturday morning
Very late start at 15:00 lazy day :)
overlapped the bottom angle bar pieces and marked the bits that needed to be removed so the angles slot together for a flush connection, hacksaw and file used.
Here is one of the angle ends which I cut and filed.
here is the lowest base loosely fitted together
here is the 1.5mm thick sheet snugly fit inside the frame with little angle bars which will support the corner angle bars, I'm happy with how its going so far but kind of dreading the drilling I'll be doing tomorrow lol, as you can see I'm going to have to get through 3 layers precisely or it will mess up, but I'm hoping to at least get this bottom base complete and bolted together tomorrow.
1 more thing, the camera I'm using olympus fe-170 6mp, I have noticed it is giving a fish bowl look about it as some parts look slightly curved, but the actual bars are definately straight, pretty strange :think:.
-
Re: Project - Air Cube v2
Did not wake up til 15:00 because of watching ufc 100 in the early hours :).
Did want to start early today so Made no progress on the case, but made a fence from a shelf that my dad had lying around and now I can see how useful it will be, the drilling will be 100% more easier now, thank you blue for recomending a fence :).
-
Re: Project - Air Cube v2
This is the progress made today.
The bottom panel was easy to drill with the fence I made, it was the little corner bits that was hard to pull off while keeping it all square but got there in the end phew :), I am considering countersunk rivets instead of the little nuts & bolts in some areas like the corners for extra sturdyness :), but they will do for now as I can dismantle and rebuild whenever needed, but I'm definatley using the nuts & bolts for the front & top panel.
The countersink bit was well worth getting for the nice flush fittings, I'll probably turn all the bolts the other way round on the bottom panel so its all flush inside and add some nice big custom case feet underneath.
Building from the ground up so could be made shorter when I get to that point.
The corner bits were tricky to pull off, they would be better riveted for extra strength.
Underneath, the base is really sturdy :).
-
Re: Project - Air Cube v2
Bummer :mad:, got to put it on hold for at least a week until I can buy an extra square and some clamps, I was attaching the mid panel angle bar but needed a 3rd square and clamps to hold it all in place while I mark it up for drilling, could have carried on but it may have turned out a little wonky, so I'll just put it aside for a week, oh well :neutral:.
Let me know how you all think it is coming along for the time being:).
-
Re: Project - Air Cube v2
Ahh was able to make an order yesterday for some clamps, squares and a couple of smaller steel rulers, I only had a 1 metre ruler and was arkward to use in some areas so should hopefully be able to carry on with it today once I receive them :).
-
Re: Project - Air Cube v2
Nice, got the bits I needed to make it good form, yay :).
Didn't get much time on it today but it progressed a little.
Took all the corner bars off and layed them flat so I could make the mid angle bar spot on with 4 squares and a flat piece to line it up on so I could mark them accurately.
Got both front and back mid angle bars done and 1 flat bar half done, the reason for the 20mm gap is for if I choose to put in a window it will have no obstruction and should come in useful for hiding wires also, the front and rear angle bars have 2mm gaps either side to hold the slide panel in place nice and firm, it is also still very light but I'm only half way through making the frame.
I'm hoping to have the frame finished tomorrow.
-
Re: Project - Air Cube v2
Thanks blue it will be very solid when I replace the bolts with rivets, it is already but rivets are easier to remove than a socketless screw.
Frame done and is nice and square, just needs cleaning up and replace all the screws & nuts with countersunk rivets which I do not have yet, the screws I used 3 of them lost the socket and went round, was a nightmare getting them out, this is why I am going to use rivets for the entire frame would be easier drilling rivets out than the struggle I had getting the srews out, anyway now I can work on the panels I'm going to take my time for a good design still not designed the shell, definately happy with the frame thou.
On with the pics
-
Re: Project - Air Cube v2
Made a little more progress today
Got the side panels to fit so they can slide to the bottom they just need to be cut to size at the top and bent over.
Cut a sheet for the motherboard tray and aligned an old motherboard tray over it, aligned it how I wanted it and taped it together and pressed my perm marker through the holes and pci slits and it was ready for drilling, tapping and cutting.
From the front
A bit closer front shot
From the back
Closer back shot
Sliding slot for side panels
Done the mounting holes and started on the pci slits
Almost done, just needs filing and tapping.
Needs filing with precision files
Slight error in design to form, I made the little corner angle pieces smaller in my sketchup and left the angle pieces same dimensions as the main corner bars so the little bars stick out a bit, so I cut the bottom corners out of the panels, this shot is in close up and does not look bad unless you get very close to it.
I just got the idea whilst writing this to file the little angle pieces to be flush with the main angle pieces, But would have to order 2 new sheets of aluminium to fix this, Doh!, so I will have to put up with this for now and may as well do a no thrills design for it and when I get the 2 pieces and have filed down the angle pieces, then do a nice design on it.
What would you guys do, would you settle for this result or would you get 2 more sheets?
-
Re: Project - Air Cube v2
:D TY DonT-FeaR
Tried using my cheap tapping kit, there was no size right for the standoffs, then tried drilling a hole slightly smaller than the standoffs and put the standoff in driver and let it make the thread, it worked for some and did not work for most others, then tried a bolt that had similar thread same problem, then tried some rivet nuts, the rivet nuts would have been ok but the thread did not start soon enough for the short thread on the standoffs so was in a pickle for a while until my dad mentioned about some square nuts he had, they worked a treat :banana:.
WooHoo :) got them to mount with some square nuts on the other side.
Also got the front and back panels cut and filed to size and put a guide for where I can drill holes for mounting
-
Re: Project - Air Cube v2
:) thanks for comments
I've got the time, just not really the spare money, if I could just go to the stockist in person I would happily get 2 fresh sheets as it would only be £16 the £10 postage is good when ordering a lot, but just 2 sheets, I over ordered with the bars just wish I did with the sheets:facepalm:, but this is my v2 and want it to look good and be my final cube case before doing something different so I think yes I will order them tomorrow, at least the sheets that will be coming out of this project will come in handy for other something else some time, its always good to have some scrap.
The tray I used for aligning the holes was from a cheap atx case, the back expansion I/O piece is from the last case I bought, a Lian-Li PC-A70A, I mounted an old motherboard on the tray I made last night and the standoffs I bought off ebay are taller than regular ones so the back panel is too low and does not line up correctly so I need to order some normal standoffs.
Wow and duh I just got an idea, the side panels have not been cut down to size yet so I can just cut the bottom bit down, again blue you stirred a good idea for me by making me think about it TY :D.
-
Re: Project - Air Cube v2
This update is tiny but took a fair bit of effort to get right so here goes.
Luckily I had not cut the top ends of the side panels to size, so I went and took all the little angle bars off and filed them down so I could re do the side panels, I messed up twice so could only afford to make 1 more mistake, it took me hours to get it right because on my last chance I filed a little then fit the panel on over and over a whole load of times before it was just perfect, I'm just glad I progressed a tiny bit today so it was not a waste of time and effort :).
Had 3 chances to get it right from here and was getting worried I'd have to order more alu by my last chance.
This is how it looks from the inside.
External, Just perfect imo.
-
Re: Project - Air Cube v2
Got my new vandel switches blue ring and blue dot, ordered proper motherboard standoffs & screws, ordered countersunk rivets, ordered the other 6 akasa apaches, only other thing I will need to order is paint but I have some deciding to do and cutting on the panels before I get there, had a good day modding today :).
Rather than take the frame apart over and over I built up a platform from a crate, a load of beer, some planks of wood and a chopping board lol so I could use the drill press directly on the case, it worked flawless, saved a lot of messing about :D.
With side panels
Top shot with all panels on, still yet to make the top panel :D
Shot from front :D
-
Re: Project - Air Cube v2
Thanks will do :).
Today I found out the hard way that my sheet metal folder can not bend 1.5mm sheet aluminium precisely, it bended on one end better than the other, I stupidly took it for granted that it would be fine.
So it kind of messes up the plan for the side panels also, I do have 4 x 750mm x 500mm x 1mm sheet aluminium and a couple of metres of angle bar and a couple of metres of flat bar.
So I cut the bent part off and filed it flat and will have to be screwed into the top of the frame or slotted on.
Or
I could make what I had planned (angle flap on each side and side panels with an angle to hold down the top) but with 1mm thick sheet as I know I can bend 1mm no problem.
The side panels I have an idea to attach an angle bar to the top and file it down so it has something to grip to pull the panels off and still keep the slight gap covered, thats for tomorrow.
The motherboard tray has turned out ok with the normal sized standoffs.
More tomorrow hopefully.
-
Re: Project - Air Cube v2
Thanks Will.
I went to do some on the case and only got the inside angle bars drilled for going up against the side panels to hold them in place well at the bottom, but was feeling a bit tired to drill the case & mount them inside the case as it all needs stripping down to the bottom panel so I'm having the day off and possibly tomorrow from the project, only got 3 to 4 hours sleep last night because of having to be up early for deliveries, got all the fans now and the ocz freeze thermal paste.
Still waiting for the countersunk rivets and some nutserts for the top panel, will hopefully have them by tomorrow.
I'm thinking of getting some nice draw handles and cutting them down a little to place near the bottom of the side panels so they can be pulled into place easier, that is only if I have any trouble getting them to slot in thou.
-
Re: Project - Air Cube v2
:D Couple more steps forward today and the countersunk rivets arrived, saving doing the rivets for the final build after it has been painted, I have everything now except the paint so no more waiting for deliveries yay :).
Got the bottom angle bars installed for holding the side panels up against the frame.
Took all the mid panel bars off and filed them down a little because some of them were a smidge over the edge but took a little too much off but they work the same as before.
Marked and drilled the motherboard back piece mounting holes, and cut with the dremel and filed the hole for the back piece and attached the tray.
Thats all for today, more tomorrow :).
-
Re: Project - Air Cube v2
Thanks Mark :)
I thought about making my own mesh now I'm using a drill press, this is a rough example on some scrap I did with a few different size drill bits, if I do try this I will mark the piece for a good guide and can get pretty close to where the pci slots are.
This is how close I can get to the pci slot area.
I had to come up with an idea for using the reinforced cutting discs as the hole was too big for my mandrel so the discs were cutting ok but shortly after went flying off, here is my beta :).
The dremel fix works great and was able to do the whole psu hole and there is still plenty left on the cutting disc :), only bad thing about the dremel in the summer is it heats up fast, when I did my last case in winter it could go all day and not get a bit warm, so I will have to come up with something to cool it down faster.
My dad said he wanted to use the garage so I packed and cleaned up for the day, so More tomorrow.
-
Re: Project - Air Cube v2
:D Well my dad did not use the garage so I thought why not get back at it :):banana:.
Here is roughly how the psu is going to be mounted.
Well I went for it with trying my own mesh lol, the drill press was getting hot so had to have regular breaks from it so I would not damage it, these pics are spread out over quite a few hours, I used a 6.5mm dewalt drill bit, I think it turned out pretty good :).
1st marked the hole which the drill press could reach to and then made marks every 6mm down and across.
On with the drilling :).
I'll replace the final pic with a better one tomorrow when I have good day light, was getting dark when I finnished.
-
Re: Project - Air Cube v2
Thanks for the feedback m8s :) it was a gamble doing the mesh I know, but I have to say it looks damn good, so relieved :).
Tried using a hole saw I bought a while ago, I was had as it is for wood not metal, price for a good near 120mm metal cutting hole saw is close to £30 I paid £10 so my fault really.
So had to go back to my dremel for doing the fan hole, got about a 3rd of the way round and it was too hot to hold, so thought ok I will make a cooler for it right away with a couple of noisy high cfm fans and a bit of scrap aluminium, it works very nice :D, it takes a minute or less to get it nice and cool again, where if I just let it cool off by itself it takes up to an hour.
And here are a couple of shots with the plastic pulled back a bit :).
Only the edges need sanding so it is nice and smooth then the back panel is done and ready for painting or pollishing, Woohoo :).
-
Re: Project - Air Cube v2
Thanks for comments everyone :).
On the google sketchup the frame alone was 360mm wide, 360mm deep, 423mm high but I decided I will be mounting 3 120mm fans on the front so had to make a simple change of width to 390mm which will give better space for hdd's also.
I just measured the form of it now and it is 387mm wide, 365mm deep, 442mm high. That is with panels on.
But I will be putting an extension on the front also like my last case only better I hope :).
After I made the frame, it is mostly all freestyle pretty much althou I am also thinking what will be best before I actually go for it.
Here is my method for marking a mountable piece, I used this method for the front of my last case. Mark around the piece and cut Cotton buds to size and push them into the holes on the piece I want to mount and put a blob of paint on the ends, then carefully press it against the panel and we should have perfect marks for working on :).
Here is my psu stand wip, since this pic I have siliconed the bars together and I'm leaving them clamped until tomorrow and then sand them down and mount.
And here is a few shots of the 3 fans mounted (not these fans, akasa apache's are going in the final build), I'm yet to cut the holes for the fans, I found out about the Dremel 545 Diamond Wheel and is supposed to be awesome, long lasting and is nice and thin for detailed work so have ordered 1 and just after I ordered it I seen 1 on ebay for £6 so ordered that too :).
Just about perfect fit for 3 120mm fans, ultra close.
And finally I have decided not to paint it and try to polish the whole case to a mirror finnish, should be quite a mission :).
-
Re: Project - Air Cube v2
Late update today, been busy with other things.
Thanks DF & b4o :).
Got my new diamond dremel cutting disc, not tried it yet also got very little done today.
Been in a bit of a pickle about what to do with the top ends of the side panels and how to mount the top panel, the flush rivet nuts I have do not mount well at all infact they are terrible I tested on scrap, and the flanged rivet nuts would raise the top panel by 1mm so not good.
So I searched the net and eventually found rivet nut bushes, or clinching nuts lol in size M3 18 & 20 swg, these I have seen on some retail cases including lian-li cases, I have always wondered where the hell would I get those from so I have ordered some, here is a pic of one of them.
I have cut to size & placed angle bars on the inside at the top of the side panels, I'm going to put 1 bolt into the side panel and have the top panel countersunk & bolted up from underneath so I can just remove the side bolt, remove the top frame bolts & the top would slide off, any of the exposed bolts will be covered with dome nuts when I get some except for the side panel ones which have to be removable.
Now I have thought up a plan I should be able to push on forward without scratching my head so much lol.
And here is 1 of the psu stands stuck together with silicone, it is 6 90mm long x 20mm wide x 3mm thick flat bars, filed & sanded, I will be sticking them down rather than bolting them to the bottom panel, want to leave space for the case feet.
And this pic is from a guide I came across which got me interested in polishing the case.
Credit due to Jani 'Japala' Pönkkö for the pic.
Original article
-
Re: Project - Air Cube v2
Yeah, that will be the main con about it being polished, needing a bit of a clean more regular but it should be worth it :).
I doubt I'll have an update today, I sprained my neck the other day and has got worse today so unless it gets better over the day, I'm just gonna relax and hope it is a bit better by tomorrow, I can barely move my head without pain but I'm gonna draw my cut outs for the front fan grills so they are ready for trying out my new dremel diamond disc :).
-
Re: Project - Air Cube v2
Been relaxing today as I sprained my neck the other day and was really bad today, could barely move my head but got a design made for the front fans thou :).
Used a fan grill to make a circle on paper and tried a few ideas and thought Yep that looks good for a 120mm fan hole, I'll go for that and alternate the cut out bits, this should take a while to do & be hard to polish later :).
Snow flake flower type thingy :).
More tomorrow my neck is a fair bit better right now :).
-
Re: Project - Air Cube v2
Good suggestion msmrx but I don't have the polishing supplies yet, so I'll do around the grills by hand when it comes to polishing it, be a lot more effort and time but I don't really mind.
Had to take a break while the drill charges back up.
The diamond coated dremel disc is no where near as good as I was expecting it to be:(, It must be meant for other materials, it would take me a week to do the grills with that bit, just does not cut 1.5mm aluminium good and the disc overheats so I doubt I will use it again, I switched over to a reinforced disc and they just sink into the alu real easy.
I'll be using a combination of the smallest drill bit I have as there is no disc small enough for cirtain areas, the reinforced discs for initial cut where I can and the easy break discs to catch the fine detail.
-
Re: Project - Air Cube v2
I used the reinforced chunky discs entirely for doing this, Just needs filing & sanding smooth now, took hours to do.
-
Re: Project - Air Cube v2
Mark the diamond disc were dremel branded and cost me £15 with delivery, I could have ordered another big bag of reinforced discs from america for the price of it, I'm sure the diamond discs are good for something, just not 1.5mm alu or thicker, they do cut but takes much longer and they get very hot.
1.5mm has been like re learning using my dremel almost compared to 1mm but is definately stronger.
I'm definately going to buy a good face mask respirator for any future projects as I got alu dust all over me while doing the fan holes, I'm seeing a good respirator just as important as goggles now cheap ones are no good as they steam up the goggles.
-
Re: Project - Air Cube v2
LOL, it took 2 hours to get 1 of them to this point and still needs a little more work, my creative zen mp3 ran out of juice so micro update while it charges back up, can't do this without my music :D, forgot to charge it up last night.
I seem to have taken a smidge too much off the top piece to the left, I was trimming a bit here and there with the dremel so I could get the needle files in and seems I have messed up a little.
This pic is from the back side.
-
Re: Project - Air Cube v2
My clinch nuts came so now I can have permanent nuts in place so it won't be so fiddly.
I just gave up after hours of filing with the needle files, was driving me mad, still more to do on them, I don't mind filing but needle files on detailed parts like this is incredibly tedious, it takes forever to do.
To be honest the only way I think these grills will look good is if I fill any imperfections and paint it, I did want to polish but they would look pretty poor as they are, if only I dremeled from the other side, the other side is much better, this piece of the case is turning into frankencase II.
And here is a shot from the other side.
Orbital sander would be too big so I looked around the house for a tool I could modify and found a panel sucker for pulling out dents in panels it is of perfect size for the holes after I trimmed the edge off, I'm thinking of attaching a round piece of sand paper to it and rotate it clockwise and anti clockwise until it gets down by about 0.8mm so it would get rid of surface imperfections, because if I am to polish the whole case they would need to be as close to perfect as can be or they will stand out pretty clearly.
It will still need more filing before I can do this to get it spot on, kinda wishing I did plain old lines instead would have been cleaner, 120mm grills are much harder to do than the big ones I have previously done, so I will have a go at doing this and maybe it will look even better unintentionally with the grills being sat into the panel :), but if it turns out poor, I can just have plain holes and I think that is how this is going to go.
Just before I posted this I had an idea to put the diamond disc to use, maybe I could trim the imperfect bits off, kind of slimming it down some, seems like these grills are going to take a while before they look nice.
-
Re: Project - Air Cube v2
Only some of the holes line up correctly if I flip it over unfortunately and they are countersunk pretty deep into the panel so the holes would have become bigger, so I will have a go at slimming the pattern holes a bit which will let more air pass through also, maybe it is salvagable.
I still have 4 x 750mmx500mm x 1mm sheets, so should have quite a bit spare after making the front optical extension & hdd cages, I guess 2 or even 3 sheets left over, so if worse comes to much worse I could re do the front panel but with 1mm thick.
-
Re: Project - Air Cube v2
Thanks for the info on the extra noise blue, :) thats picked me up a little after todays modding, you'll see why.
They were slight overcuts in some areas, the edge joints were weak in the left and right grills, the middle grill was very good.
here is the back side, the mounting holes for the front panel did not align 100% and would have required drilling the case making it in to a mess.
Simply too scuffed up for looking good after polishing.
When I started trimming the rough areas down, I thought I'm gonna pull this off and was looking good, But when I nearly completed filing 1 of them, 1 of the spokes broke off so I cut every other spoke off and shortly after figured they would not be strong enough to be polished so as gutted as I was I cut all of the grills out, filed and sanded the holes down to a smooth finish and that is that, just wish I chose the simple grill of lines.
I have enough spare mesh to cover all 3 holes so it is back to being basic now.
I don't drink but I think I'll have a few tonight to refresh :).
So next up will be to make the front optical extension.
-
Re: Project - Air Cube v2
Yes it does suck a bit, but oh well on to the next part, the front optical extension.
Quote:
Those were too damned Christmasy anyway. (j/k, they looked very good)
lol :santa::D.
I'm over it already, the booze helped get my mood better, baileys in coffee :) doesn't get me drunk but mellows me out :), the lined template is the one I should have chose over the complex one, just put it in the pic as example of what I could have done.
-
Re: Project - Air Cube v2
After the nightmare with the grills I'm keeping everything else simple as possible except for the front extension, seems everything I have been doing since then has been a bit shabby, maybe I need a bit of a break from it, dunno.
The front extension
1st I made a paper version of what I wanted & cellotaped it together and lay it flat and taped it down and marked around it on some sheet alu so I could do it in 2 pieces rather than 4 for a nice clean look, but because I really should have designed it 1st in google sketchup so I could get accurate dimensions, it turned out wrong.
So for this case I will be doing the front extension in 4 pieces like my last case, I designed it on google sketchup this time to get accurate dimensions.
I have all the parts cut to size and bent properly, I'm currently working on the angle bar connetors for holding the 4 pieces together, its not going to be easy getting this part spot on, I have countersunk rivets so they won't stick out like my last case.
Pictured is the 2 piece version I badly made with the 4 piece version I'm working on, doing all the parts are pretty easy except for the mounting brackets, rather hard to mark correctly, the normal angle pieces are pretty easy it is the different angle pieces which are hard to get right.
The metal bender I have came with 1 full length steel slab for putting on top of the piece to be bent and only allows for simple bends, I tried using 1 of the flat bars cut to a perfect size to allow me to do tighter bends right next to each other but the only flat bar I have is 20mm deep so it leaves a print of a 20mm bar but bends my piece really well so when I get a 70mm deep bar and cut to size I will be able to do this spot on.
I would even be able to make my own pci/io back panel so I won't have to recycle or source another motherboard tray and back pci/io part again except for 1 to flatten out so I can use it as a template.
The countersunk rivets are very hit and miss if they connect good, the countersunk bit on the rivets are not as deep as the screws I have been using so some of them are not staying firm, this is my 3rd attempt and looks like I will have to re do the upper part and the sides on the extension again, either I got lucky when I did this first time round on my prototype or I'm just having a bad few days, the bottom piece is perfect so I can use that at least.
-
Re: Project - Air Cube v2
New progress, seems a long time since I've been able to say this :).
My dad told me about this stuff he had after my 3rd failed attempt on the front extension, so I gave it a try and left it over night, when I went back to it today I tried pulling it off by hand, it stayed completely secure so then I tried ripping it off with pliers and it is rock solid so I went and bought a fresh 1 today.
These are the angle bar pieces bent to correct angle in vice and filed flat.
Here are all 4 pieces dry fitted after I positioned and sticking the angle bar joints together with drives in.
Here it is after I stuck the pieces together, I just used whatever I could find to keep a bit of pressure on it while it sets, I'm leaving it until tomorrow and hopefully it will be strong and ready for mounting, if this fails for a 4th time I will try 1 more time before designing a different front extension.
Also, I have ordered the polish :).
-
Re: Project - Air Cube v2
Thanks boy 4rm oz and dont-fear :)
Ordered the polish just before 3pm yesterday and recieved it the next morning and it came with a bonus microfibre cloth which I was not expecting :).
I used an old soft rag to test this stuff out, this shot is what a minute of using the metal prep with a tiny blob did.
These shots is with using a tiny blob of the mirror finish, again with an old rag which is why there are fine scratches, of course I will be using quality soft new rags to apply this to the case.
1st impressions of this stuff are "ohhhh yeaaaah" :) especially since I used a poor quality well used rag and hardly spent any time on it, just a quick test.
When I ordered the switches a bit ago I bought black ones 1 with blue dot and 1 with blue ring, but with me now going for a mirror finish I decided to get silver switches 1 white dot and 1 white ring by lamptron and also got a lamptron white cathode set 1st impressions of it are it seems the best pc cathode I have seen, it has a knob on the inverter which is for sound activated sensitivity but can turn the sound sensitivity off and keep the light on, the wires are a bit short but I'll easily extend them if needed, also got 2 quad fan connectors for keeping all the fan cables together 1 for front and side fans and 1 for cpu and rear fans, the cables underneath the switches are pre made cables for the switches by lamptron so no messing about for me, I'm so glad they started doing these as I can't stand doing soldering and braiding :).
And these are the parts I went window shopping for lol, wish I had the money for them to put in this case, one can dream :).
-
Re: Project - Air Cube v2
Here you go boy 4rm oz :).
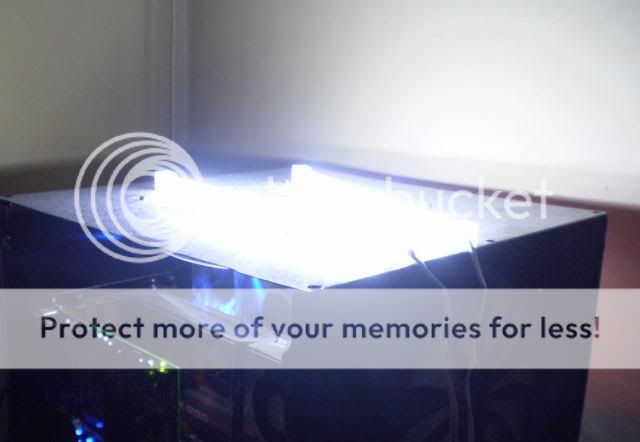
Much brighter than any other cathode I have ever seen.
been a while since I cleaned my rig with being busy.
Show you pictures of light I will, now you know the power of the force lol :D.
On with todays update :).
Wow at last I got the front extension 99% perfect and mounted, the dvd drives fit so perfect the bezels are stopping the drives from going any further, I used the cotton bud trick for aligning, just need to put the holes for the power/reset switches in place and the front is done except for polishing, phew :D 4th attempt was worth it I'm happy to say and is detatchable whenever I want it to be without having to drill rivets out.
The extra cut outs on the back side I could use for stashing unwanted wires out of the way .
Been at it virtually everyday for close to a month now so if its sunny tomorrow I'm chilling in the sun :), been cloudy all july and so far for august, reminds me of last year.
-
Re: Project - Air Cube v2
Thanks for comments m8s :).
Ahh I seem to be picking up momentum again, another day another update and I caught a little sun woohoo :)
Now the front extension is out the way, I started working on the sides and top panel, as I said a load of updates ago I was unable to bend accurately with the cheap metal folder I have at 1.5mm so had to come up with an alternative, well here it is :).
Sides joined up to the top panel so sides and top slide off together as 1 piece, it was flimsy and tricky to get it on at 1st, but I put another angle bar underneath on both sides to keep it square so it all goes on a lot easier now :).
Also the mesh I made I put a little countersink in all the holes so it will be a little easier to polish because I'm put off sanding it and there was some rough bits that needed sorting from when the drill went a bit crazy.
I tend to start off really slow and start getting really productive the later it gets, I wrapped it up at 10:30pm
So all that is left to be done what I can think of right now is filing and sanding the top pointy corners, power/reset switch holes on the front, vents on the left side so the hdd fan can get fresh air, and a window or 3 and last but not least a lengthy polishing task.
I tried wet sanding a piece of scrap from 80 grit then 240 then 800 then 1200 then 2000 grit, it got ultra smooth but when I used the metal prep stuff it got quite messy leaving dark grey dust ground into the metal and took some really hard work to get it clear, probably spent an hour getting it semi clear so I'm not so sure I want to polish the exterior now unless I settle for a dulled mirror effect by not doing any sanding so would get a mirror effect like the 1st sample test I showed, but I know for cirtain I will be polishing the interior and the corner angle bars, that alone would look cool with windows so all the parts get reflected eh :), so possibly going to be painting the exterior panels not 100% sure yet.
-
Re: Project - Air Cube v2
:), Thanks boy 4rm oz, here is another update.
OK today I started using a tripod, wish I used it from the start, every picture is coming out nice and clear now.
Here it is just before I started.
I got the the top bits that stick up filed and sanded smooth, got the switch holes made and caught more sun :).
And found that I will need to make a mount for the dvd drives 7.2mm high