Re: WHS 2011 Build - The Maw
As promised, this update will contain pictures!
Hardware for this build:
Xigmatek Gigas case
AMD Athlon II X3 445
Gelid Tranquillo 2
Asus M4A785-M
Corsair XMS2 2x2GB
Corsair Force GT 180GB SSD
2x Hitachi Ultrastar Enterprise 1TB drives in RAID 1
2x Wester Digital Green 1.5TB drives (no RAID)
2x Seagate Barracuda ES 750GB drives
Sans Digital T5MP+B 5-bay eSATA enclosure with 5x 500GB Hitachi Deskstar Enterprise drives in RAID 5
I can't remember if I'm still using the Themaltake 500W Purepower that was in Odin or if I swapped that for the OCZ ModXStream 500W I had spare (edit: It was the TT but it doesn't have enough SATA connectors so I will switch to the OCZ).
Anyways, enough talk, more pictures right?!
This is what it looked like when I last finished tinkering with it.
I'll start with the breakdown of the new case. Since this case seems to be fairly uncommon I'm going to spend a bit more time showing it before getting into the modding.
The Xigmatek Gigas is the only case I could find that would take a mATX board, have 160mm CPU cooler clearance, and hold more than 4 hard drives, while still fitting in the dimensions I needed. This compact cube will be going into a small side table that my printer and main PC sit on top of.
Shots of the glossy box with specs.
Well packed with none of the usual disintegrating Styrofoam.
The cardboard over top of the foam meant that this is the easiest case I've ever unboxed. It probably helped that this is one of the lightest cases I've ever used since it is pretty much entirely aluminum.
Solid right side and solid top, fan intakes on the front at the bottom for two included 120mm intake fans.
Two 5.25" drive bays on the front, one of which has an unfortunate flap cover for a full sized optical drive. Luckily I've got a nice Lian-Li bay converter for my slimline optical, which also provides one 3.5" bay or two 2.5" bays and another USB 2.0 port so I will take the flap off. I haven't decided what to do with the USB 3.0 port yet as I don't have USB 3.0 on the board.
Left side is perforated for PSU intake and expansion cards, while the back has two more 120mm exhaust fans that are included with the case.
Box of goodies includes a number of different types of black screws for hard drives, optical drives, motherboard, and PSU (which is a nice touch IMHO). A 3 channel fan controller is included as well which seems odd given that four fans are included in the case. A very detailed instruction guide with photos is included which I will touch on later.
The top was hard to photograph. It's held on by six low-profile thumbscrews and has the Xigmatek logo silkscreened in the middle. It's not actually scratched up, there is a fine powder on the case that really shows up in photos but is hardly noticeable in person. A quick rub down with a rag and rubbing alcohol and it's gone.
The underside of the top has foam strips at front and back to help stop vibration, the strips on the sides are on the case itself on the lip that the lid sits on.
The top is the only removable panel and the motherboard sits flat on the bottom of the case with the drive bays fitting in around the upper half supported by the center rail. This complex configuration is what allows for full length GPUs, tall CPU cooler and space for 6 HDDs + 2 SSDs. It's also why the manual is one of the most detailed pieces of documentation I've ever received with a case as it lays out the order in which things need to be installed.
Drive bays removed. Two 3 HDD + 1 SSD cages and one 2x 5.25" cage.
2.5" mounts are on the bottom side of the cages.
Now with the drive cages removed you can see the bar they are supported on and the motherboard standoffs on the bottom of the case.
That big bunch of wires is going to get some treatment. This is the first time I'll be sleeving with paracord so I'm excited to see how it turns out.
The inside front of the case actually has a plate installed for the fans to attach to as well as support the front buttons.
Xigmatek branded fans that come already installed.
Last shot for this update, the black paracord I bought to test out sleeving with it on this build.
Next up, time to mod it up!
Re: WHS 2011 Build - The Maw
Love that case, so simple but well thought out too.
Oh and you can get a USB 3.0 to 2.0 converter so you can plug the 3.0 port into the USB 2.0 pins on your mobo
Re: WHS 2011 Build - The Maw
Nice start - nice base for a case too. Paracord is AWESOME - helpful hint - get one of these threading tools (or something similar) as it makes sliding the paracord on SOOO much easier. http://lutro0-customs.com/products/p...-tool-threader
Re: WHS 2011 Build - The Maw
Quote:
Originally Posted by
SXRguyinMA

You could use a coat hanger too. Straighten out a thin wire one and then solder your wire to one end and push it though.
Re: WHS 2011 Build - The Maw
Ha ha ha, you guys need to get out of my head. The day I posted the last update I spent most of my free time looking at Lutro0's work and shop. The little bit I didn't I was looking into USB 3.0 to 2.0 converters as a co-worker had mentioned that they should probably exist. I will probably end up picking one up eventually but funds are a bit short at the moment and shipping to Canada is usually more expensive than the adapter.
For the sleeving I have been wrapping the pins in Scotch tape and feeding them through. Maybe Santa will be nice enough to visit Lutro0's shop this year but for now I'm pretty good at feeding wires by hand.
I realized that this project would make a lot more sense if I had some photos of the piece of furniture it will end up in. This used to hold an old stereo so the cutout in the back is pre-exisiting and I've been told I can't make it bigger, just work with what I've got.
The front hinges down so I will still have access front and back but it can be closed to hide the server, UPS, disk array and switch from view.
Normally when I get a case there are a bunch of things that I want to fix or improve but, as commented, this is a simple and well-thought out case. That being said, I can't just leave it untouched so I will be addressing the one issue I have yet to see any case address... It's dark on the backpanel when you have to plug things in! After looking closely at the backpanel, there is just enough room for an LED strip without blocking any connectors. So I ordered a couple of reels of white strips off Amazon and waited for them to arrive from China.
Since the tape they are on is white, and painting is out because it's been too cold, I used a new Sharpie to turn them black.
Then I thought, "This would really suck if they don't work" so I plugged them in to a spare PSU to test.
There should be no issues with darkness anymore, these strips are pretty bright. I don't want them on all the time so I salvaged a reset switch out of an old case and set about making a mount for the switch. As the plunger was small enough to go through the vents on the side of the case I made a spacer out of old cue cards for a course I took in the summer and traced out the pattern of the holes so that I could insert rivets to hold it to the case. The switch was then going to be zip-tied to the mount.
Once I had test fit it to make sure the spacing was right I used a Sharpie Magnum (Warning: Use only in a very well ventilated area, it's the same smell but enough to make you slightly high) to make the cue cards match the case.
One last test fit after making it black and trimming it down.
And finally, riveted to the side of the case with black rivets.
Having spent a considerable time prepping all of this I then switched to wiring the switch into the circuit only to realize that a reset switch is momentary and not latching. Which meant that I could have light, as long as I could hold the switch down. As I would only be able to reach the switch from the front of the table, and the connections only from the back, this setup wasn't going to work. There are no pictures of me undoing the process as I was not saying nice things at the time.
Back to the spare parts bin resulted in a nice, black toggle switch from an old PSU which I tested thouroughly to make sure it would stay on. Since it wasn't going to fit in the same spot I now needed to make a hole to mount it in. I decided to put it on the back of the case as it would mean the shortest distance to wire things. I measured where I wanted the hole and penciled it in so that I could mask off around it. Apparently my hands were shaking when I took the photograph as there was actually only one set of lines.
I guess I forgot to take pictures of the finished hole but I had a lot of aluminum shards to clean up at the time. I did test the switch again, then spent a while figuring out how to best sleeve the wiring before installing it.
Pressed into place around the backpanel, and connected to a spare PSU to test.
Switch mounted perfectly and it blends in nicely with the overall look of the case in my opinion. The Sharpie on the light strips in these shots looks purple under the flash but it's black in person.
Next up the sleeving the fans and adding in vibration reduction mounts.
Re: WHS 2011 Build - The Maw
I don't have time for a full update at the moment but needed somewhere to vent my frustration about this build right now. I started assembling things and I knew it was going to be tight but when I put the bottom drive bays in there is less than a centimeter between the backs of the drives and the intake fan for the CPU. This wouldn't be a big deal except if that was after the connectors are plugged in. The SATA power connectors will stick out at least that far as I have all drive slots full now. :mad: I'm too tired at the moment to rip out everything to reverse the CPU cooler so I'm going to sleep on it for a bit and try later. I'll try to get the worklog caught up this weekend for the rest of the progress.
Re: WHS 2011 Build - The Maw
that sucks about the connectors. might have to get some new ones with a side input to work.
anyway, i love the led strip around the i/o panel. i may have to steal that idea from you sometime.
Re: WHS 2011 Build - The Maw
I had a similar issue with a customer build and used the flat connectors that were inline. like this:
You can buy those connectors, but I ripped them off of some leftover modular PSU cables and built the cables to the right size.
Re: WHS 2011 Build - The Maw
Quote:
Originally Posted by
xr4man
that sucks about the connectors. might have to get some new ones with a side input to work.
anyway, i love the led strip around the i/o panel. i may have to steal that idea from you sometime.
Feel free to use the idea, I'm a little behind in my updates to the log but I can say that it works even better than I hoped. I'll have some photos of how it looks when the case is in place that give a pretty good idea of the brightness.
Quote:
Originally Posted by
Airbozo
I had a similar issue with a customer build and used the flat connectors that were inline. You can buy those connectors, but I ripped them off of some leftover modular PSU cables and built the cables to the right size.
Thanks Airbozo, I have a bunch of dead power supplies at work that I can grab the connectors off before they go to e-waste. I can't believe that didn't dawn on me before as I had thought about making some custom extensions. I've got to put in an order to Digi-Key soon so I'll throw a couple female connectors on and make up some extensions.
I've fallen behind in updates for two reasons: first, the pictures come off my camera and go directly onto the server for storage and backup so with the server on the desk I haven't unloaded my camera in a while, and second, because I've been dedicating all the time I can to working on getting the server out of my workspace so that I could finish up another project. It's a collaboration with SgtM on a custom Xbox that I'm hoping to be able to give my father for Christmas. I fly out at the end of the month to visit so things were getting tight. Expect a worklog on that one sometime in the next month.
So the way the fans were mounted originally, was with really long bolts that went all the way through the frame of the fan and had a clear plastic washer beneath the head of the bolt to make it the right length. Since I really don't want to be able to hear this case I decided to put a rubber spacer on the other side of the frame to isolate it from the case. I couldn't find rubber washers or o-rings in the right size but I did find rubber grommets that I could cut in half. The first photo is the stock mount, the second is my new quieter mount.
Once I finished sleeving the fan cables, I removed the front panel PCB and began trying to clean up the cables there. With all of the header wires being twisted pairs it was a bit of an unsightly mess to start.
Once those were done it was time to clean up the audio headers. Not really needed for the build as WHS 2011 doesn't install the audio service but I didn't want to leave them unplugged. As I will never use an AC'97 only board in this case, I trimmed the second header off, leaving only the HD header.
Before sleeving the HD Audio header I took a couple of photos of the pinout to make sure I could put it back together properly when I was done.
Being very small gauge wires I was able to sleeve them all within a single strand of paracord, which while not traditionally how paracord is used it helps cut down on the total number of cables to route in this build. This turned out to be a great decision later on.
After a few good successes I was feeling brave enough to sleeve the USB headers. These were tricky due to the ground sheath of woven metal that wraps the length of the cable. A little Scotch tape to keep the ends from fraying until I could get the heatshrink in place and I was able to make them look like all the others.
I tried really hard to sleeve the USB 3.0 plug but didn't have anything that would expand enough to go over the external end and still look good on the cable. Not sure what the solution to this would be but I decided that because it was blue, I could live with it not being sleeved. Once I re-attach it to the board, the whole thing is ready to go back in the case.
One more thing to sleeve before I'm ready to start putting things into the case is the fan controller wires. The case came with a PCI bracket 3 fan controller with one of the ugliest looking mess of wires I've seen.
While I sleeve the power splitter I will also switch to black plugs from a few spare ends I have around.
Looks way better now.
Now, the fan leads were an odd design. Rather than have all three leads as individual pairs they were all woven together so that you couldn't separate out any plug from the others. I'm not sure I'm doing a good job explaining this but it meant that all 3 fans had to reach to the same point in the case. So I will separate them out while I sleeve them so that they work properly.
End result with both sets of cables sleeved looks a lot better in my opinion.
Next update will be starting to put it all together.
Re: WHS 2011 Build - The Maw
Nice work on the sleeving! Haven't tried that myself yet, but I'd be happy with results like those.
Re: WHS 2011 Build - The Maw
Quote:
Originally Posted by
blueonblack
Nice work on the sleeving! Haven't tried that myself yet, but I'd be happy with results like those.
Thanks blueonblack! I've been pretty happy with the results overall though I have learned the importance of a jig for sizing heatshrink the same. You can notice the difference in the last photo with the left connector. Not a terribly big deal for this build as there is no way to see any of this once the case is closed but it's something I think I can improve on for the future. The one drawback I've noticed is that they don't seem to be as durable as my previous results with plastic loom sleeving. I think that might be due to the fact that I'm using cheap heatshrink though.
So with the sleeving done, it was finally time to take the server out of service and start actually swapping parts. For some reason (I must have lost my mind), I thought this would be a quick and easy swap. I was wrong.
Here's the old on the right and the new on the left.
All the parts out of the old. Not shown are the extra 4 hard drives that will be added.
A large pile of cables out of the old case. I'll sort through them as I go and only put back in what I need.
First step is to install the motherboard at the bottom of the case. It's a pretty close fit as you can see from the second photograph. There is just enough room to bring the headers around from under the board.
Pop in the eSATA RAID card, the PCI 2-port SATA card and the fan controller.
Starting to get tight with the PSU in place.
Decided that this would be a good time to plug in the fan controller before I added anything else in and wound up with too little room to work. The rear lights are plugged into the fan controller pass-through and the whole assembly will sit hidden just under the center rail.
The main ATX power supply cable is a bit of a tight fit in such a small case but I won't shorten it since it's not modular and replaceable.
At this point I was feeling pretty good about how it was all coming together but that quickly changed when I went to install the lower hard drive cage. This is what I was referring to earlier in my picture-less rant update.
Hard to get a good shot of the size of the gap but it's too small for SATA power connectors that aren't a perfect custom fit. Since I tried to fix it before the comments people left here, I decided to swap the CPU cooler around since the excess cable between the connectors would have wound up in the fan blades.
Thankfully, the GELID Tranquillo 2's overhangs weren't symmetrical so I actually gained a decent amount of space when I turned it.
Satisfied that it would fit I next routed the plethora of SATA data cables that will be needed to connect all the drives.
It was way easier to do the power cables with the drive cage out of the case and then plug cable into the PSU after installing the cage. The excess cable between drives is what would have been the biggest problem before I turned the CPU cooler. Not a lot of room in the end but enough and the fan is very protected on the other side.
The top drive will be powered of a Molex->SATA adapter for the time being until I can make a custom power harness.
The top drive cage was another close fit but there is just enough room between the PSU and the center support rail to feed the power and data cables through.
The DVD drive turned out to be another challenge which I'll save for the next update.
Re: WHS 2011 Build - The Maw
Not dead yet! Just busy with the holidays and neglected to post any updates.
With the hard drives finally fitting into the bays, I moved on to the slimline DVD drive as the 5.25" cage is the one closest to the top. The biggest downside to slimline drives in my opinion is the super tiny screws that secure them. In case you've never had to deal with them, here's a shot so that you can feel my pain.
The screws to hold it in the adapter may have been annoying but at least they weren't as bad as the holes in the cage. Somehow, I don't think that's going to fit...
As this is a modding forum, I did what most of us would do and made my own :D Masked off the area so I didn't scratch it, measured 4 times before drilling, and still had to adjust the position of one of the holes afterwards. If only I had done this after Christmas when I got a set of digital vernier calipers... Oh, well. It's off by less than the head of the screw so it's only noticeable when the drive isn't installed.
After a few tweaks, it all lined up nicely.
At this point I was back to having a working system so I slapped the top cover on, took a few finished shots and dropped it into the spot in the side table.
Once I booted it up, I learned that the add-in PCI SATA card used the same chipset as my on-board controller and so I could choose between 2 ports or 6 ports. Back onto the work bench it went and when I opened it up I realized that I had a fan that wasn't spinning. The other two that were plugged into the fan controller were spinning really slowly, even set to max, so I picked up a four way splitter with PWM.
I re-packed everything back in and made some improvements to the cable management, having learned that hiding fan connectors under the motherboard is a REALLY bad idea in this case.
I took some shots to try to illustrate how close the entire setup is to the wall and why I wanted to install the lights on the rear. It was tough to photograph but there is enough room to reach behind to plug things in but not enough to also let in light while reaching back there. The lights make a huge difference in how easy it is to plug stuff in.
I've accidentally left them on overnight and didn't notice walking past the door to the office as it's a nice soft glow. I can't wait to make the same mod to my desktop as I really hate how dark it is behind it as well.
I'm mostly done on this project in terms of appearance but I will be doing some internal changes now that I have a USB 3.0 to 2.0 converter, a new SATA slimline cable for the DVD drive, a new 2-port SATA add-in card with a different chipset, and most of the supplies to make my own custom SATA power harnesses. Hopefully, I'll get that done in the next little while once I can clear off my workspace again.
Re: WHS 2011 Build - The Maw
Okay, I finally got around to trying to finish up the things I listed at the end of the last post since I had some space on my workbench and I needed to use the two 750GB drives that were not hooked up in order to have room for client computer backups.
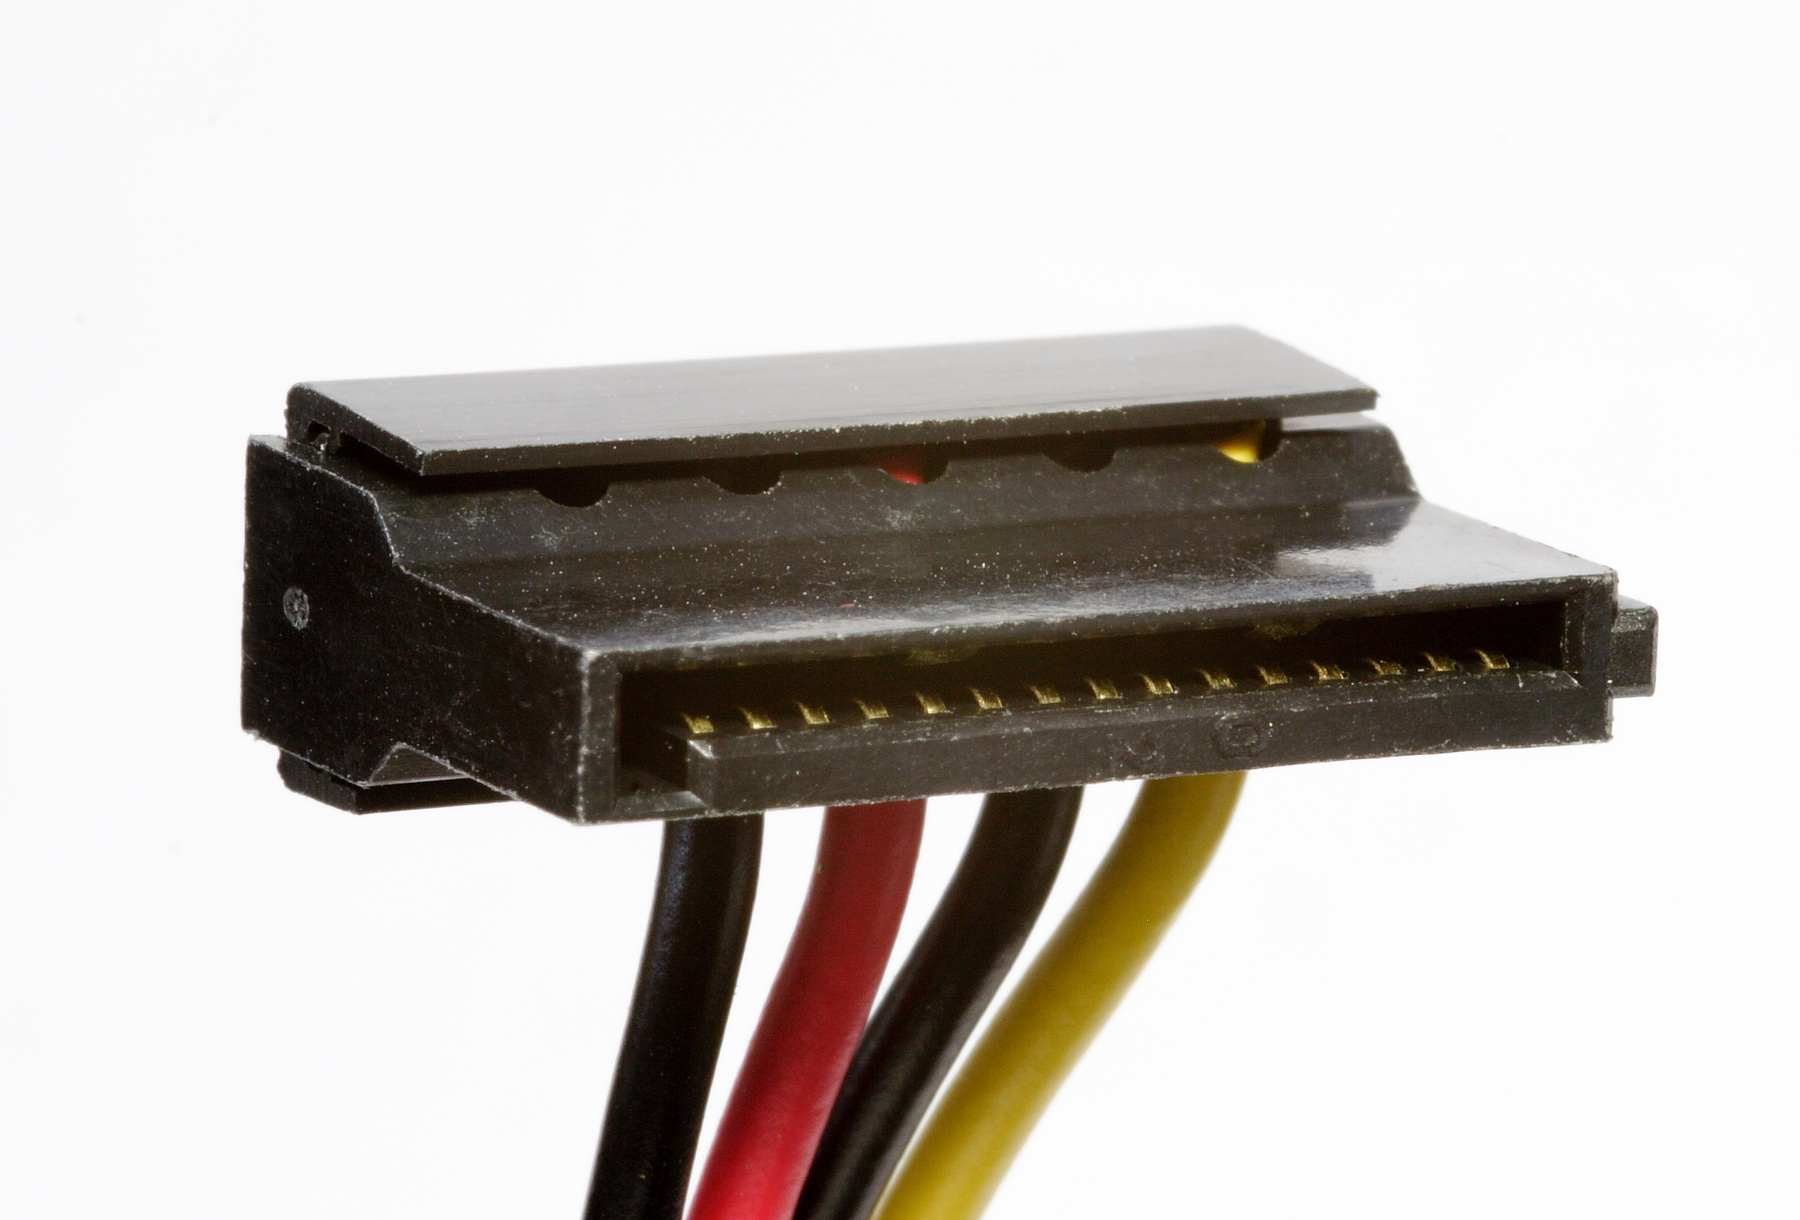
The old slimline SATA cable and the new one replacing it, plus the USB 3.0 to 2.0 converter to allow the front USB 3.0 port to work on my older mobo.
I had originally put a 4-pin molex connector on the slimline cable thinking that the connector it came with was a proprietary HP connector. After doing that I saw the male plug and realized that it's simply a floppy power connector. Since there won't be a floppy drive in my server (that would be so wrong) I can use the 1 connector the PSU comes with and free up a molex plug. Combined with custom SATA power, it meant I could take one of the modular 4-pin cables out entirely.
Old cable on the left, new on the right. I had also removed the locking tab on the old cable but have it in a port where it can be used now so that's a bonus for the new cable.
Trying another 2-port SATA RAID card to see if I can find one that works WITH the onboard chipset AND doesn't use the same controller chip as the eSATA card. This one is an Adaptec 1220SA.
For the first custom SATA cable I started with the furthest connector inserted into the drive since that was an existing connector on the cable and would be used to reference where the new ones should go.
Placed the other connectors on the drives and laid in the wires.
Stripped and tinned the ends so that I could add an extension in between the 1st and 2nd plugs.
Once everything was soldered together, including the end for the modular PSU, I took the three end connectors off so that I could do some simple sleeving. I thought about using paracord but decided against it as I wasn't planning on sleeving all the other PSU wires as well.
Once that end was done, I took the PSU connector off very carefully (used a pair of pliers to hold the staple to release the pins) and put heatshrink on the joins and then sleeved that end.
Testing the fit on the drive cage. There is a hole on the bottom of the cage that is unused but is perfect to run a zip-tie through to route the cable.
The sharp-eyed among you may notice a small issue with this picture compared to earlier photos. I thought I was done here but had to take everything apart and correct the outside wires which I had accidentally swapped while sleeving. Drives didn't seem to suffer any damage but they sure didn't work either.
Clearance is a lot better on the main cage now.
Secondary cage was pretty easy to make a cable for as I only needed to relocate the original connectors closer to the bottom one.
Once I was done correcting the error in the SATA power cables, I plugged in all the hard drives and fired the server up... and was quickly disappointed when the Adaptec card did the same as all the cards prior. It takes over from the onboard controller and the only drives that show in the boot menu are from the add-in card. Since the SSD is in the onboard ports I can't specify to boot from it and the server won't boot. I spent a day or so thinking about what to try next as I've gone through the 3 cards I had access to without success. I was working on an HP DL380G6 at work that was spare and realized that I could try the HP P400 card that was in it. Cleared it with the boss and brought the card home for a test which went beautifully. So I've ordered the card, two SFF-8484 to 4x SATA fanouts and an PCI-E 8x extender cable, which I will explain with pictures once it all arrives. Total cost was less than $60CAD so I'm pretty happy with the result, and I get to do some more modding.
Re: WHS 2011 Build - The Maw
Sorry for the poor lighting in the photos, one of my next projects is to make a better work area light from the leftover LED strips that I used on the back of this case. Should make the future photos more evenly lit.