-
casemod: AlumaxX
I posted some pictures in the show your computer thread, but some people think it is better to give it its own thread. I didn't start one because it is a finished project.
I will start with some photographs of the finished mod.
In april I was a contestant in the Dutch Casemodding Championship. Because of the weight ( about 40 kilograms ) I had to tranport it like this
There is a worklog on Bit-tech, but if you guys want to know more about this case I can post a log and give some answers to any questions you may have.
I already started a new project, not a casemod, but a caseconstruction. I will start a worklog here on TBCS soon.
-
Re: casemod: AlumaxX
I will post the log in parts.
Started on the casemod in december 2004. Yes a long time ago, but it took me more than a year to finish it. Several reasons for it, it is my first mod, don't have much time and only use simple tools.
The case I started with is the Lian Li pC-V2000
First thing I did was removing the original harddisk rack
I had to make some room for the radiator grill at the top of the case. Some tape and a good planning were needed before cutting the case with a Dremel clone.
The firts cuts in my expensive case.
One of the reservoirs will be mounted in the top of the case, just behind the radiator grill.
After removing the harddisk tray I had to come up with a new custom made Harddisk tray. Because I want to know whether my handmade parts will fit and how it will look I make some paper models before using metal or acrylic.
Both harddisks will be watercooled with Aquacomputer coolingblocks.
Started working on the aluminium, just using a saw.
and removing the corners by drilling holes
After some filing it already looks better.
-
Re: casemod: AlumaxX
After making two aluminium pieces it needed some acrylic, just for the looks. Again some paper models of the parts.
Needed some curves on the corners and used a file for that.
one side of the HDD rack is finished.
I wanted to use three radiators, two BIX radiators and one BIX II radiator. The small radiator in the front wasn't a problem. The second BIX radiator didn't fit at once. The case needed some modding. I wanted to use the original mounting holes for the fan taht was attached to the radiator, something like this.
I had to make some room underneath the radiator to lower it a bit.
After cleaning the case up and removing the tape.
Now it fits.
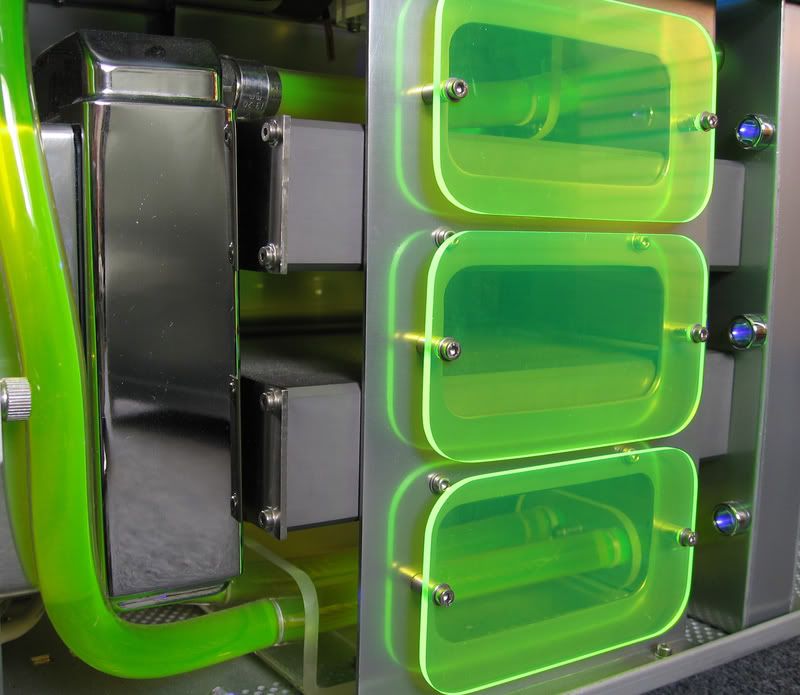
In a German webshop I found a watercooled Enermax PSU.
It looks fantastic on the inside so I had to come up with an idea to keep the waterblocks visible in the endresult.
The green acrylic will cover the hole.
-
Re: casemod: AlumaxX
The front
I removed all the bezels because I wanted to create a frontpanel that covered everything that was mounted in the drivebays. I'm using two DVD burners, a reservoir and an Aquacomputer Aquaero. First things first. I needed some acrylic that fitted in the opening.
Made some holes in it for the Aquaero, reservoir and the two DVD burners.
Because I don't want to see through to front I also had to create the same panel in aluminium.
drilling holes in the aluminium sheet.
Drilling holes alone isn't enough to remove the material.
and the last pieces with a saw.
The two layers for the front.
I used two bezels to attach the acrylic and aluminium together.
The three buttons from the Aquaero were not long enough to come through the new front so I needed the help from a friend, he made som buttons to extend the original ones.
For the DVD and the DVD buttons I used the same sandwich from acrylic and aluminium.
The DVD stealth was mounted with some bolts.
The aluminium had to be cleaned. After cleaning it it needed some wetsanding up to grid 2000 and at the end some polishing.
I only will have to attach the ejectbuttons to the frontplate with some thin rubber sheets.
this it what the ejectbuttons look like. The layers are glued together.
and with the acrylic back in place.
-
Re: casemod: AlumaxX
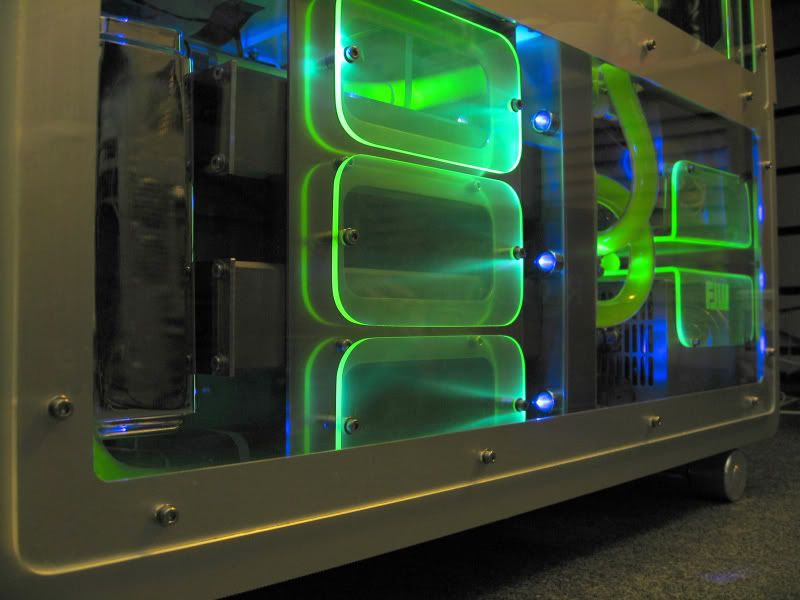
Watercooling
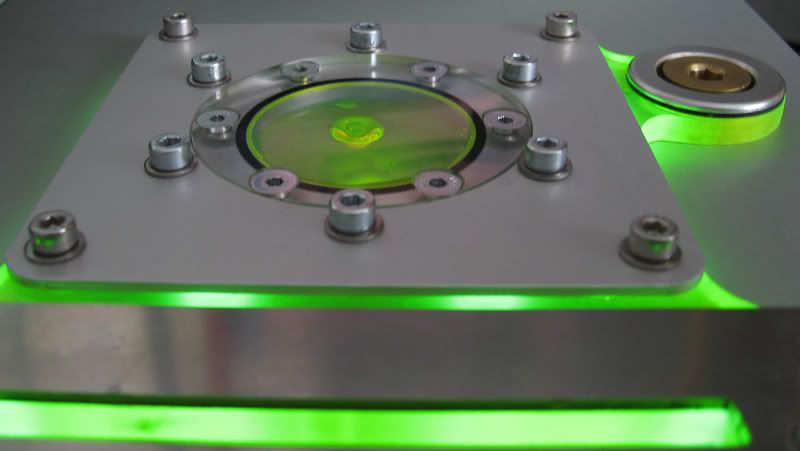
I use two seperate waterloops. The first one cools two PSU's and two harddisks. The second one will cool the CPU, mosfets, Northbridge and GPU's. So this means I'll also put in two pumps in there, two Eheim 1048 pumps. These pumps will be covered with Aquacomputer metal housings. Normally these things are black, but I had them chromed to match the theme.
The first pump will be placed in the upper compartment off the case on some aluminium profiles. Between the profiles and the pumphusing there is some UV acrylic.
The bolts that I want to use don't fit, so I will make them fit in there.
I use Aquacomputer coolingblocks, that's small bore stuff, but it is German perfection and it is perfekt with the theme.
I love to see hoses from the watercooling, but I hate cables, so I experimented with some paper covers before building it from aluminium.
It needs some openings for the hardware.
It was not possible to use one piece of aluminium, I wouldn't be able to get it in. So I used several sheets of metal. Some of these sheets are for the covers that will come in the lower part off the case.
The first metal cover is ready and in place.
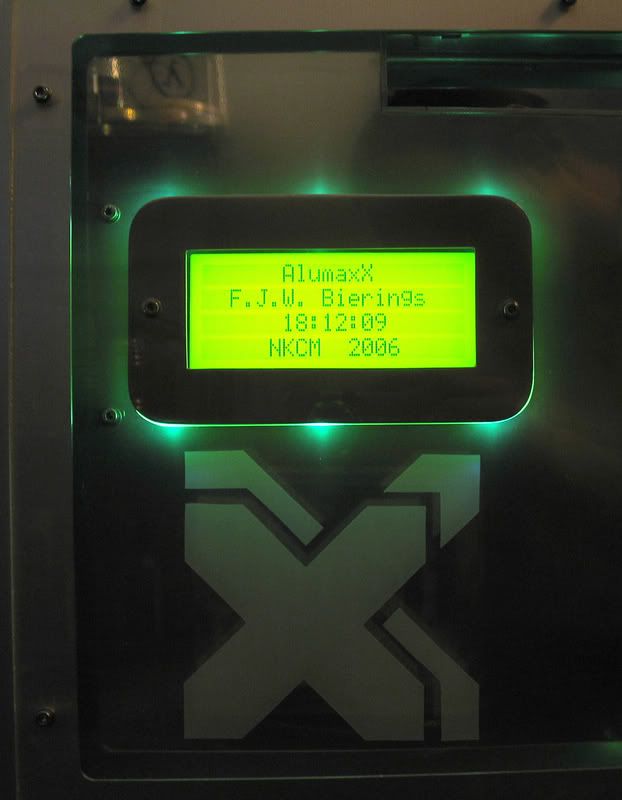
The white paper on it was another idea. It is the place for a Crystalfontz lcd.
The screen needs an aluminium cover and some green acrylic.
The other covers need to be mounted.
I already drilled and tapped the holes in the aluminium plate. But now I will have to get the places that have to be drilled marked in the Lian Li. So I used a bit of paper.
Put the paper in the case and mark the drilling spots.
After drilling the holes I mounted the plate from underneath with some bolts. Notice that the bolts are behind the aluminium plate.
Next thing to do is the left plates. I attached the plate with the LCD cover to the smaller one with 4 bolts.
and an overview. I think it will look very good after it all has been polished.
To empty the watercoolingsystem I wanted to use a draining system with valves at the bottom of the case.
Time to testfit and mount the valves. I use a handdrill in small spaces. With a drop of oil this works perfectly.
Let's see if it all fits.
and from behind
Later on the PSU will be placed back again, so I also have to make sure the hoses will be able to go underneath the rack the PSU rests on.
-
Re: casemod: AlumaxX
I think the complete case costed about 3500 euro, that includes all the moddingmaterials and hardware.
There are two waterloops in this system. The first waterloop with the reservoir in the top of the case was very easy to fill. The second loop was very difficult, but I knew that while I was building it. The fillcap should be placed at the intake from the pump, but I didn't do that because it gave me some problems with the lay-out and looks. I don't have to refill this thing everey week so I don't mind.
watercooling 2
The valves are mounted, but now I need two points in the case where the hoses come out of the case. Needed some acrylic to modify the case for it.
Before I can finish and mount the acrylic part I will need to make some room at the back of the Lian Li.
I glued the acrylic part. When the gue has hardened I can file the edges.
Here the part is finished and mounted.
Aluminium covers
I wanted to see as few cables as possible. The cables from the harddisks will be hidden between two sheets of aluminium.
One of the pumps will be mounted on the other aluminium sheet.
and with the pump in place.
Now I will need some aluminium covers at the compartment at the bottom of the case to hide the other cables.
The metal and the paper models.
The first cover is ready
it fits
With all the covers in place.
The cables from the second PSU are still visible, but not for long. I used some aluminium U-profiles to hide them.
Only the open end will need some more attention.
-
Re: casemod: AlumaxX
Most covers are almost ready now
The memory modules needed a cover that also allow the air to flow over them. This is what I came up with.
and all the covers connected.
The black fans also needed some covers, aluminium ofcourse. I used some wood to bend the aluminium around.
and the finished cover.
All the metalwork needs a finishing touch. Wetsanding.
This took me many hours to do. The metal I used were leftovers from a metalshop, so not scratchfree at all.
But not finished yet. Polishing by hand takes even more time. But the result makes it up.
bling bling
-
Re: casemod: AlumaxX
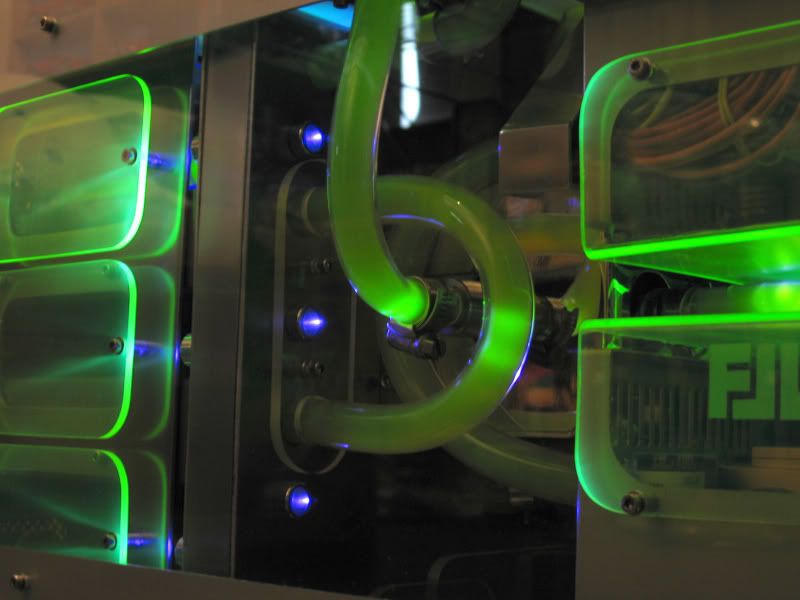
Seperators
Hoses never do what you want them to do. If you want it to make a leftturn it goes the other way, that's why I made acrylic seperators to guide the hoses.
Here are those valves again.
The original Lian Li case is divided in an upper and a lower section. Thre are some holes in this divider fot cables, but I will not use those, so I want to cover it with some acrylic with the holes in the spots I need them.
The radiator grill
I use an Aquacomputer radiator grill on top of the case, but I needs some pimping. There are also a reservoir and a Danger Den fillcap.
It all looks like seperate parts, another acrylic part will solve that. Started with this piece.
Finishing the edges of the acrylic part that comes at top of the case.
Only the edge of the acrylic will be visible underneath the grill, reservoirplate and the fillcap.
And from another angle
Not finished yet, the most difficult part will start now.
After making room for the radiator air, the fillcap and the reservoir.
It looks good, but it will look better with some leds.
I drilled holes in the acrylic and in the case to be able to place all the leds.
-
Re: casemod: AlumaxX
wiring up the grill leds
The holes for the leds.
putting the leds in and wiring them up
Only wired the kathode, the anode needs to be wired as well.
What is the general idea for mounting the leds? From top down
- Aquacomputer grill
- acrylic plate
- aluminium from the case
- another acrylic sheet
something like this.
All these leds ( and lots more in the rest of the case ) need wires and resistors.
To orden the wires a bit I made something simular for it like the hoseseperators.
and mounted it in the case.
Let's see what it looks like in the dark.
-
Re: casemod: AlumaxX
The case is ready for the other leds. I found the perfect LED holders, chromed.
The first LEDholders are in place.
I think these holders look great with the overall style from the mod.
and the leds that will light up the LCD cover
LEDholders between the PSU's
and two LEDS under the pumphousing
Two LEDS in the compartment of the PSU's
Because the room between the aluminium is very small for all the cables I need to shorten every cable when possible. Like the cables to the harddisks.
shortened them a bit.
and reconnect the wires.
This computer will be for daily use. All the light effect are nice, but I want to be able to switch the lights on and off. Isn't very difficult to do. I've got soom room at the back of the case for the switches.
The only problem is the see through acrylic. Now it is possible to see all the wiring behind the aluminium covers. No problem. Just use some stuff that is normally used for blinding windows.
-
Re: casemod: AlumaxX
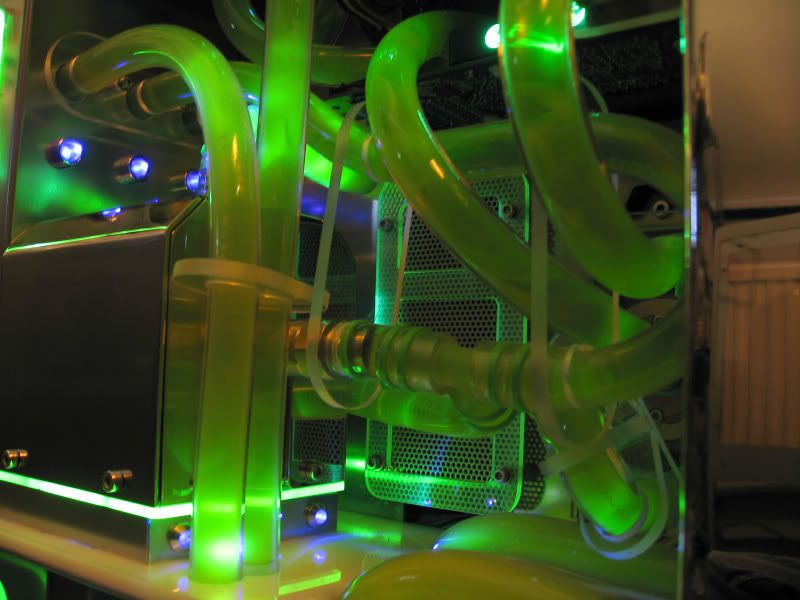
Hose
Before I could start with the hose I had to solve a problem. I have got an ASUS A8N-SLI Premium motherboard and want to watercool the norhtbridge, CPU and mosfets. The Tygon hose needs to go from he CPU to the mosfets.
This is the place of the mosfets, but it is behind the radiator. There is enough room to use an L-fitting on the cooler.
The problem is that the hose will have to make a VERY tight bend. Tygon is great stuff, but this bend was just to tight. I no springs sometimes are used for tight bends, but I didn't want to use that. Don't think it matches the overall looks of the case. That why I came up with this.
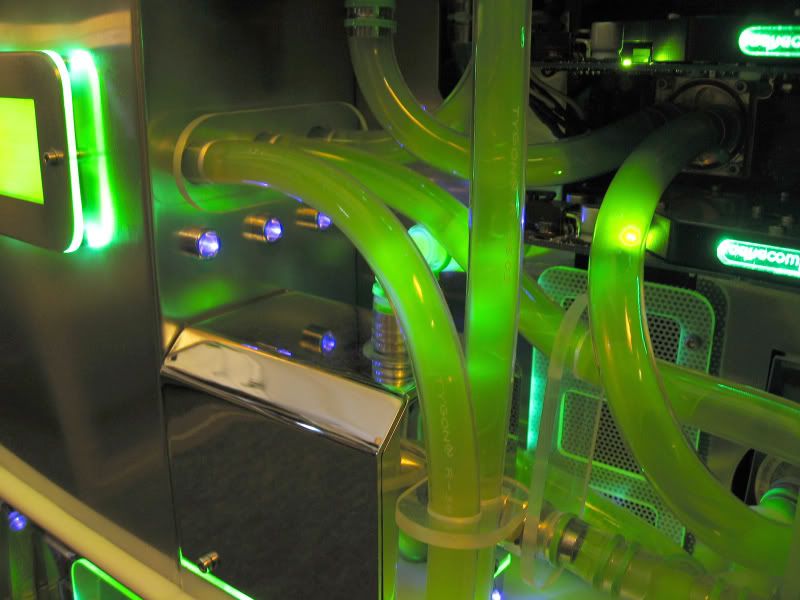
And yes it works! It took me about 30 minutes to get the hose through, but it works perfect. I can start putting in the hose.
It wasn't easy to pull five hoses through two aluminium plates. but the result is worth it.
This took me many hours to finish.
Some small details
Now all the hoses are in, I can start finishing some details. First of all the leds under the grill can be soldered. My bird Bert is giving me a hand.
The two PSU's will have to be connected. I'm using a relais.
Just like all the other wires this relais will be mounted behind a aluminium cover and not be visible. When I push the powerbutton, both PSU's start simultaniously.
Next thing was the window. I thought a simple window would fit the theme the most.
Next thing to do is the window itself.
It will be mounted on the outside of the sidepanel, so it will also need a small detail to give it that finished look.
-
Re: casemod: AlumaxX
Time to fill the watercoolingsystem
The project was almost finished. Time for the water.
Some things look like they aren't straight, but that just my old digital camera. The testrun.
I also needed to take care of some small things now. Like this opening.
Nothing some aluminium wouldn't fix.
Another detail is the white acrylic that covers the aluminium plate that devides the upper and lower part of the case. In front of the aluminium baydrive cover there is no acrylic yet.
So I made one.
and placed it.
The cover for the PSU cables, it still was open at the end.
Needed some aluminium.
made it at the right size
and after polishing it
-
Re: casemod: AlumaxX
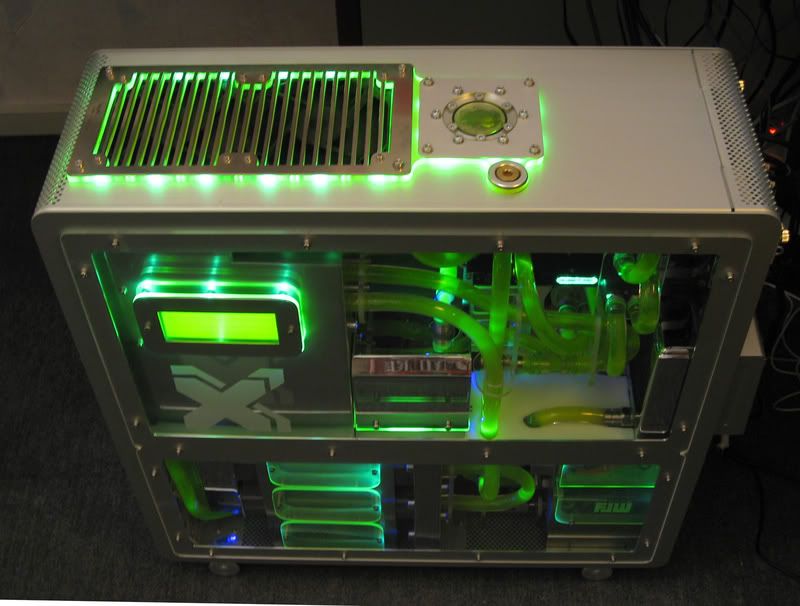
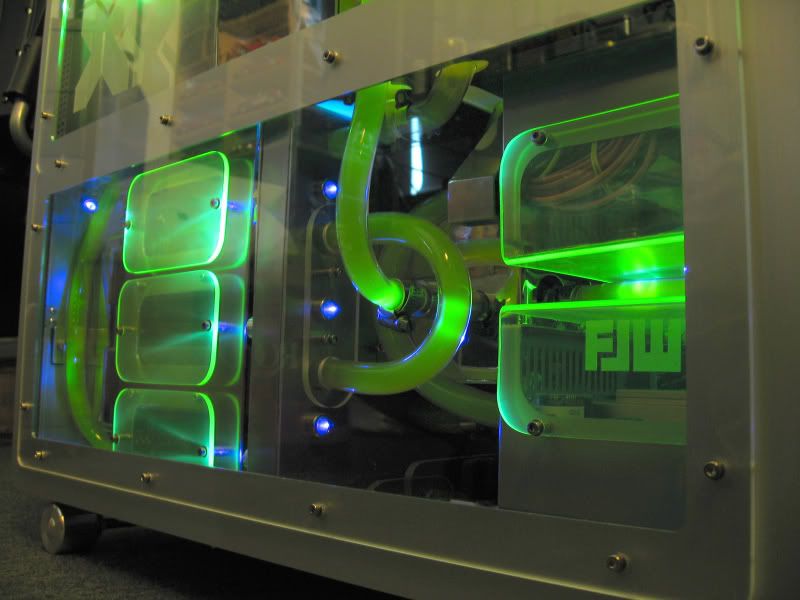
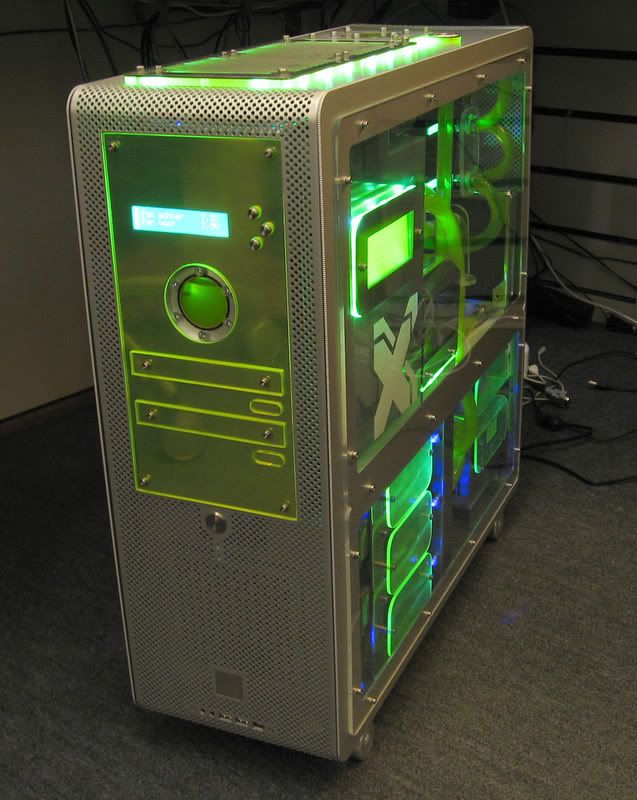
Finished case
Before I put the case together I cleaned all the parts. This are some pictures of the finished case. ( made with my old camera, so some parts may look bend )
The case was almost ready for the Dutch Championship casemodding. But I needed to add two more details. First the AlumaxX logo, a double X.
and my own logo I normally use to sign my drawings, FJW.
In April I won the Dutch Championship Casemodding with this case. Even some (computer)magazines and newspapers were interested in the championship.
Thanks for all your comments. This isn't a real worklog ofcourse, the case was already finished. I just wanted to show some photographs of this mod befoe starting a worklog with my next casemod over here. There are so many forums about casemodding that I didn't know about this one when I was building this case. The Doom project brought me here. I already started with my new project, but will start the worklog some later. Only have some sketches, bought the first materials I will need and build the frame for the next case. From januar till februar the 16th I will be in Australia, so no modding for some time. When I'm back in the Netherlands I will start with the project "Evolutionay" and show the progress in this forum.
-
Re: casemod: AlumaxX
I will give some specs from this computer.
ASUS A8N-SLI Premium motherboard
AMD FX-55 CPU
Corsair TWINX1024-4400C25PT memory
2x XFX GeForce FX 6800GT PCI Express x16 Videocards
2x Maxtor DiamondMax Plus 300 GB SATA 150 16MB harddisks
2x Plextor PX-716A DVD-Rewriter
Creative SoundBlaster Audigy 4 Pro soundcard
2x Enermax EG465AX-VE PSU ( watercooled )
Hardisks are watercooled with two Aquacomputer aquadrives
CPU is watercooled with an Aquacomputer Cuplex Evo
The videocards are watercooled with Aquacomputer AquagraFX 8600 coolblocks
I use two waterloops, both with an Eheim 1048 pump and a Innovatek Fass-O-Matic reservoir.
The first loop.
Reservoir-->flowmeter-->pump-->BlackIce Xtreme II radiator-->Northbridge-->CPU-->videocards-->reservoir
Temps in degrees Celcius:
water in the reservoir is 23.1 degrees at the moment
GPU 47 degrees
CPU 36 degrees
second loop
Reservoir-->pump-->BlackIce Xreme radiator-->Blackice Xtreme radiator-->PSU-->PSU--.Harddisk-->Harddisk-->flowmeter-->reservoir
water in the reservoir is 22.8 degrees
Harddisks 28 and 29 degrees
Room temperature is 20,5 degrees
and Doomfest your Dutch is very well. Casejunkies is a website for casemodders in the Netherland ;) www.casejunkies.com They organized the casemodding championship. The guy from the newspaper is responsible for the text and the word futuristic. I only told him how many hours it took me to build it and some stuff about casemodding in general.
Link to full thread