Ok, for those just tuning in, this is a new worklog for a build I’ve been working on for several months now. I got some work done recently and was going to post the progress when I realized what a bewildering mess the worklog had become. I had changed the design of the thing several times, done things that weren’t even in the project any more, and just generally made a muddle of the whole thing. So, to make it easier on everyone (and to calm the OCD) I’ve decided to start a new worklog, call it Clockwork vII. (Notice I did not call it Clockwork 2.0? God I hate that.) If anyone wants to slog through the quagmire of my old worklog, feel free.
----- Let's Try This Again -----
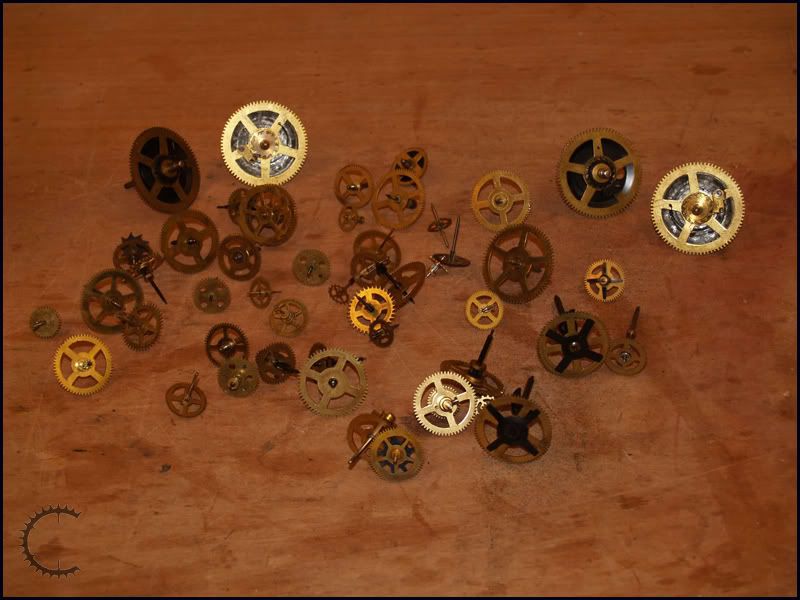
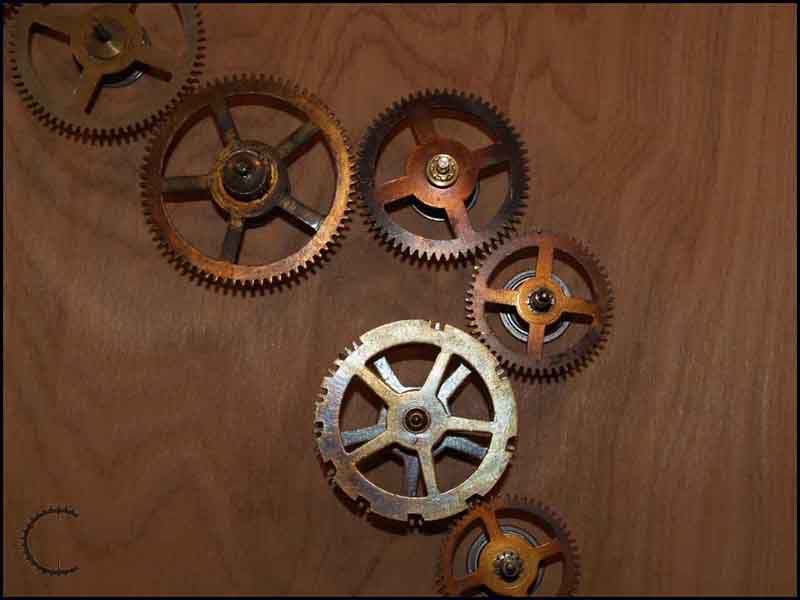
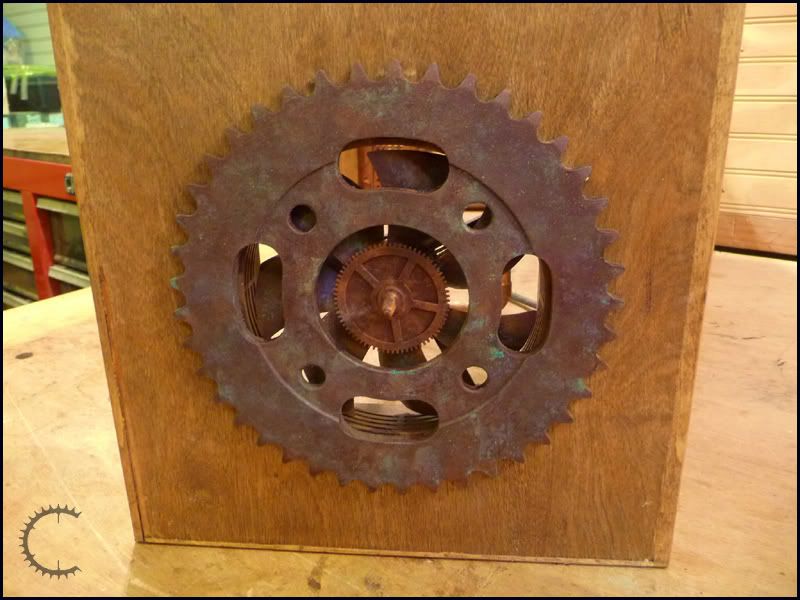
Ok, it’s time for another build. This one will be a lot different than my last sleek smooth glowing plexiglass construct. It’s another scratch build, because no matter how I try I seem to be incapable of simply modifying an existing case. In contrast to that last build, this one will be made primarily of wood, with some brass and copper accents. Here is the first inspiration for the case:
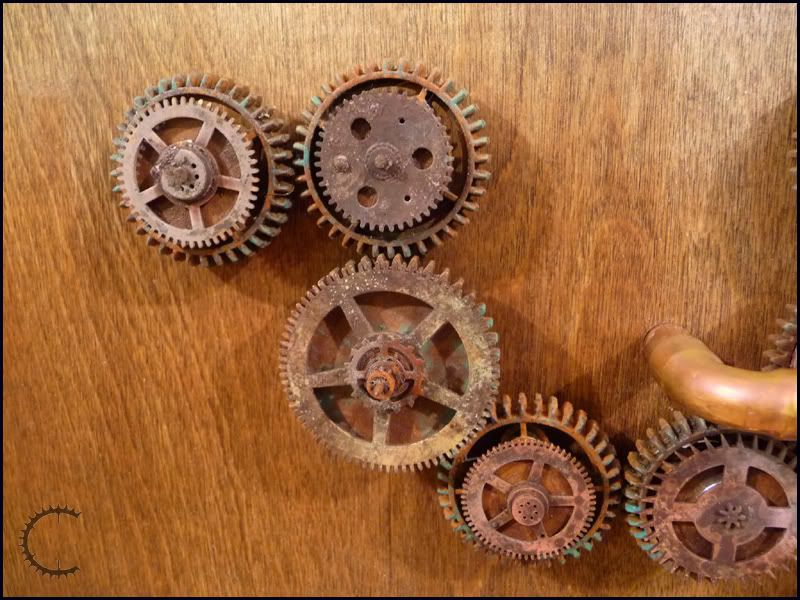
The gears from five clock movements I scavenged from various sources. I love gears and cogs, and thought it would be a cool contrast to the machine itself.
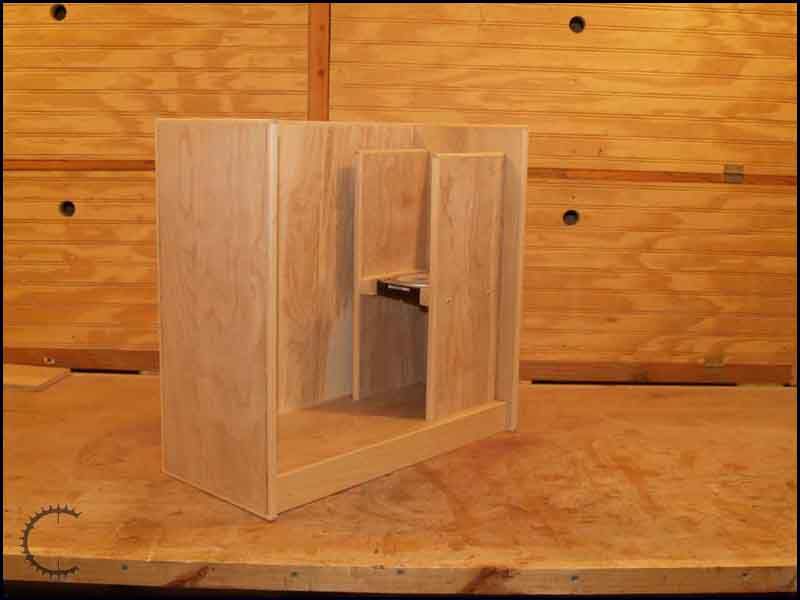
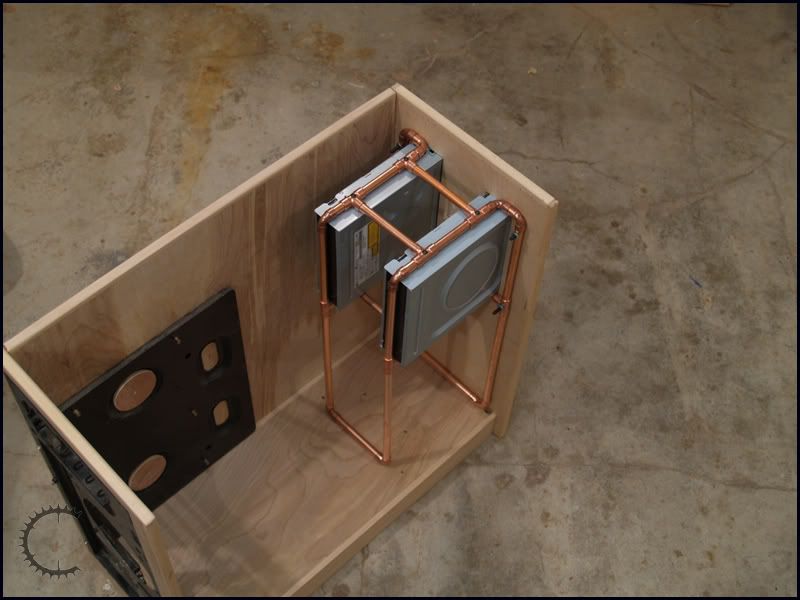
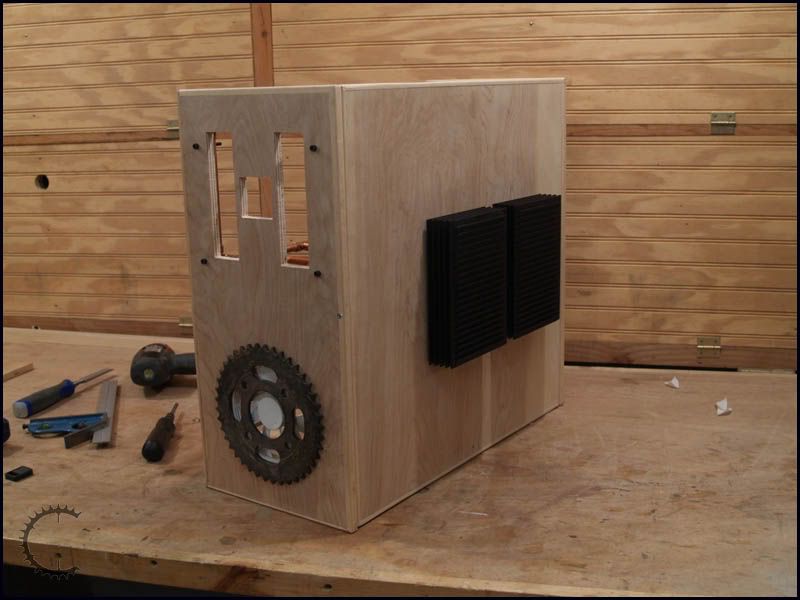
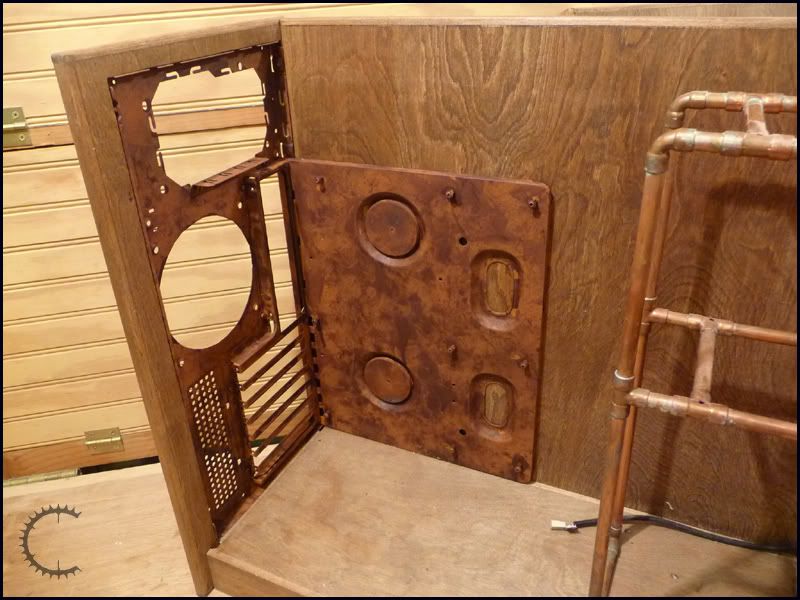
This is the initial construction of the case itself. I had originally planned to install the drives as usual, two optical drives stacked horizontally above two hard drives, so I built a wooden “tower” to house them. This has since been phased out, but I think it looks very good in the pic. :D
I’m using a motherboard tray from an Apevia case that I dissected, with some wooden circles cut to fit the depressions and screwed into brass inserts to hold it in place. (Does that count as a mod, since it’s a major part from an existing case?)
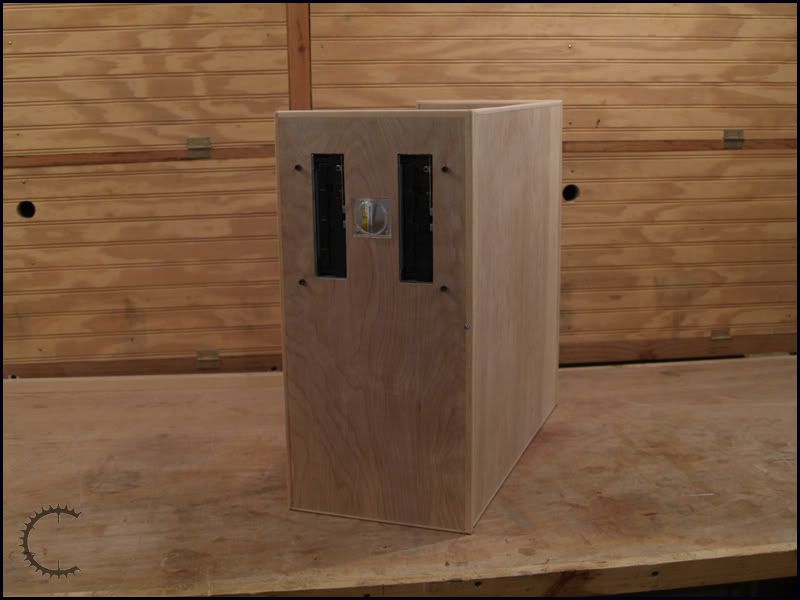
Shortly after I had the drive tower finished I had a turn of mind and decided to mount my hard drives externally on the side of the case. That gave me a lot more room to work, and I didn’t need the wooden drive tower. I also decided to turn the optical drives on their sides, just because they look cool that way. The lens in the center is the cover for the analog temperature gauge that will eventually fit there (also scavenged from the Apevia case.)
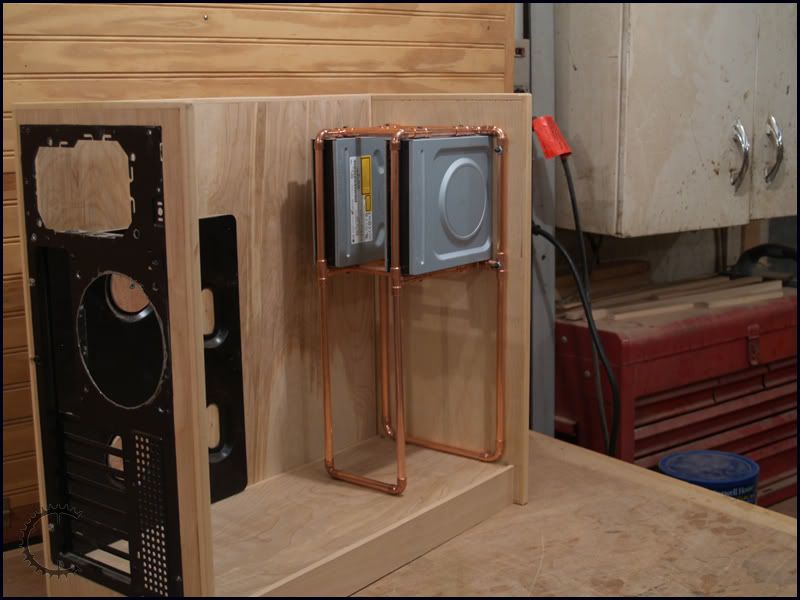
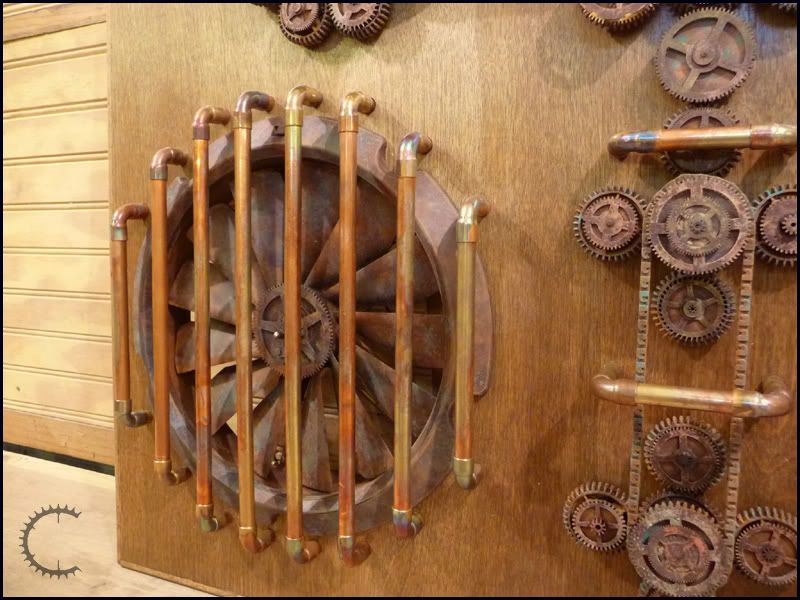
Since I did away with the wooden drive tower I made a new cage for the optical drives out of copper pipe.
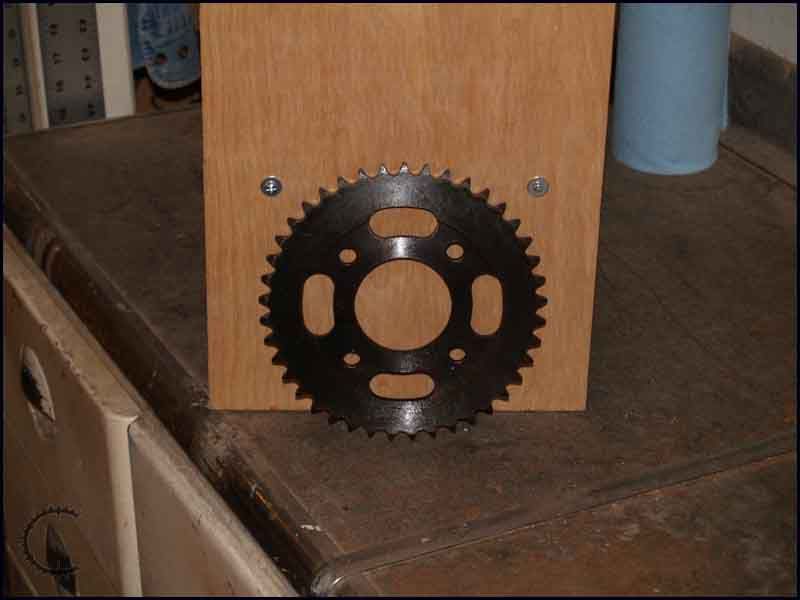
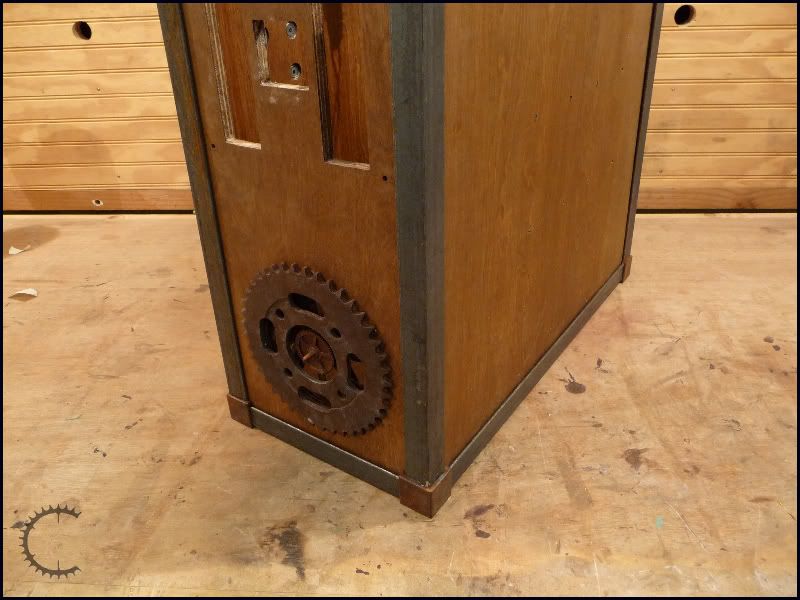
Turned out pretty well. For the front intake fan I’m using a motorcycle sprocket I picked up on Ebay. I got really lucky with this find, the measurement between the outermost edges of the outermost holes is exactly 120mm.
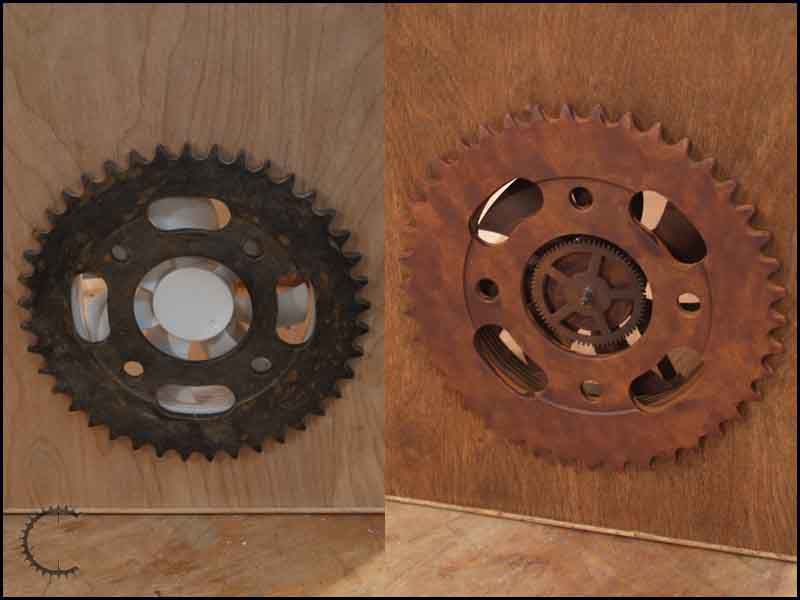
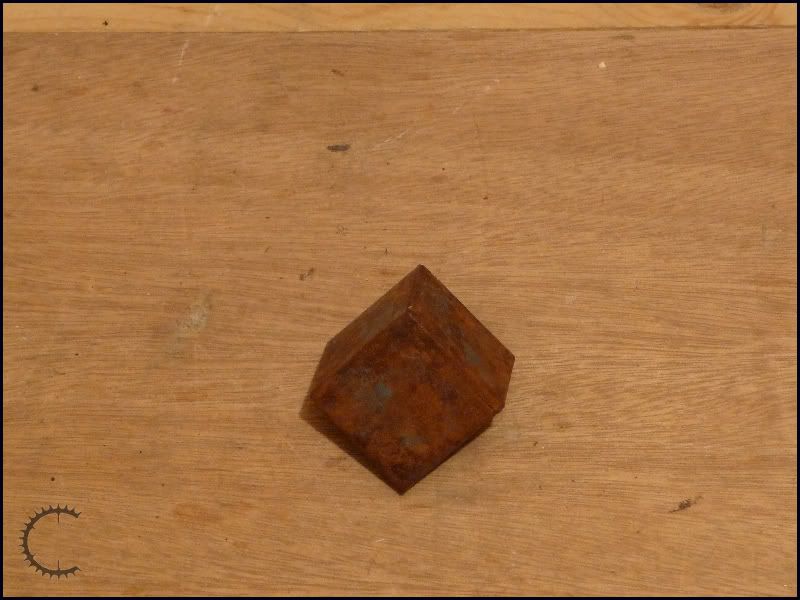
This build will be what I like to call pseudo-steampunk, mainly because I don’t want to be categorized, but also because I plan to have a couple of more modern elements than are normally found in steampunk work. I plan to get the look mostly from corrosion, making all the metal parts look old and neglected (most steampunk I’ve seen looks old but at least cared-for). Here is my first attempt at aging the front sprocket:
Not too bad, but not exactly what I wanted either. It’s too uniform, and actually looks more like leather than rust. It’s a start.
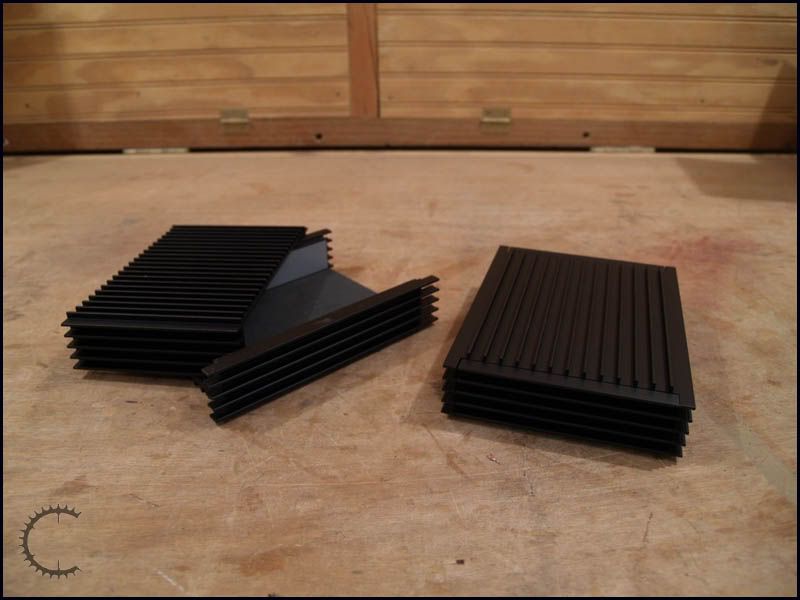
It took me a while to find hard drive enclosures that were in the plain simple industrial style that I wanted, but I finally came across these:
Perfect. I bored out countersunk holes in the bottoms and mounted them with screws into brass inserts on the right side of the case. Very solid.
Don't they look pretty there?
07-30-2009, 03:45 AM
blueonblack
Re: Project Clockwork vII
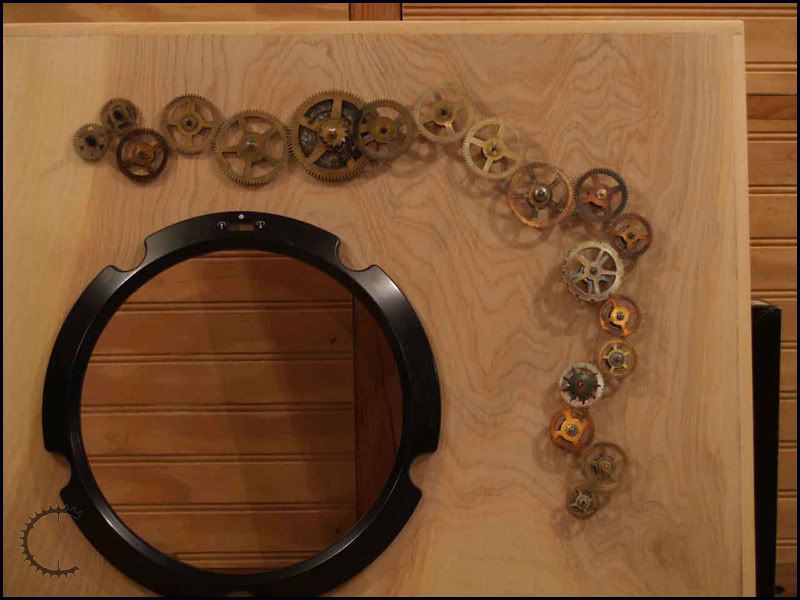
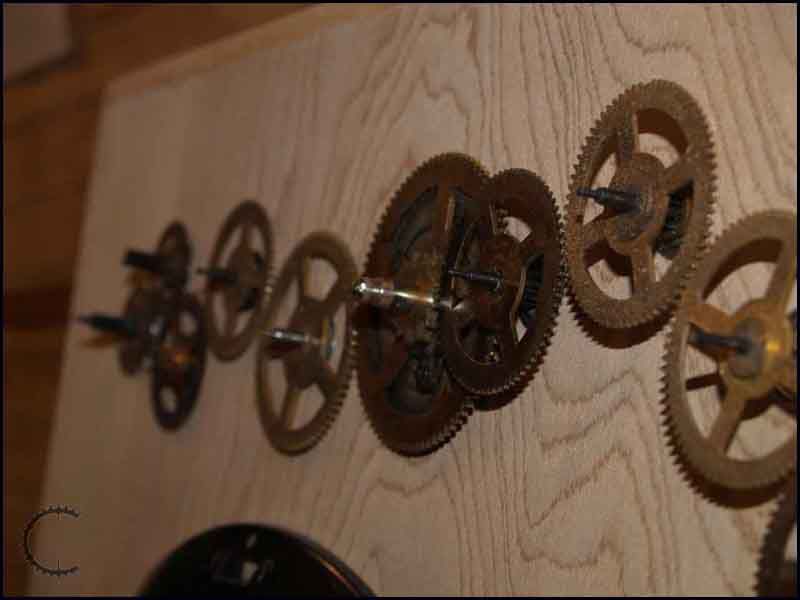
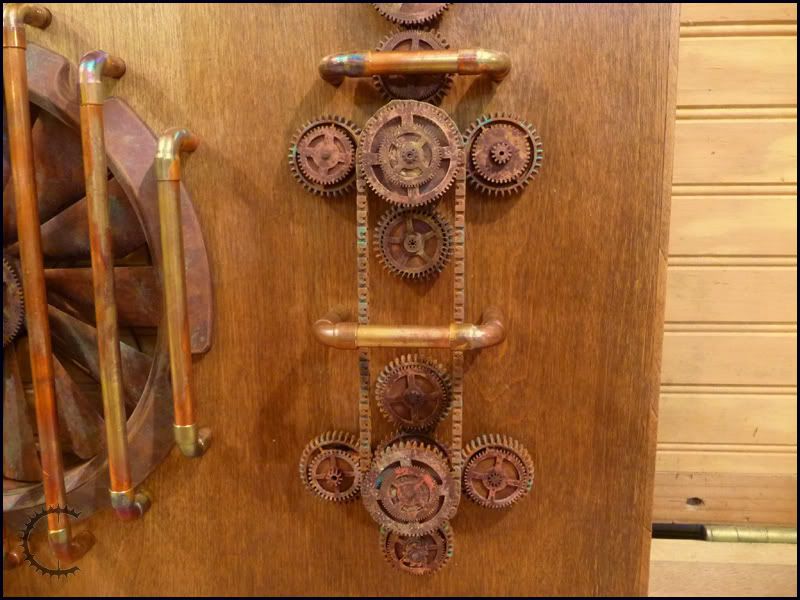
Ok, on to the gears. The plan has always been to put them together on the left side of the case in a geartrain powered by a small motor inside the case so that they turn when the power is on. I pondered and worked a long time to make that happen. Remember these are clock gears. They’re already mounted on a shaft that’s perfectly centered on the gear, and they are designed to have that shaft held in place on both ends inside a metal cage that is custom-machined for these gears. What I was trying to do turned out to be a huge puzzle in three dimensions. And since I was using the gears from five clocks it was like using pieces from five different puzzle boxes.
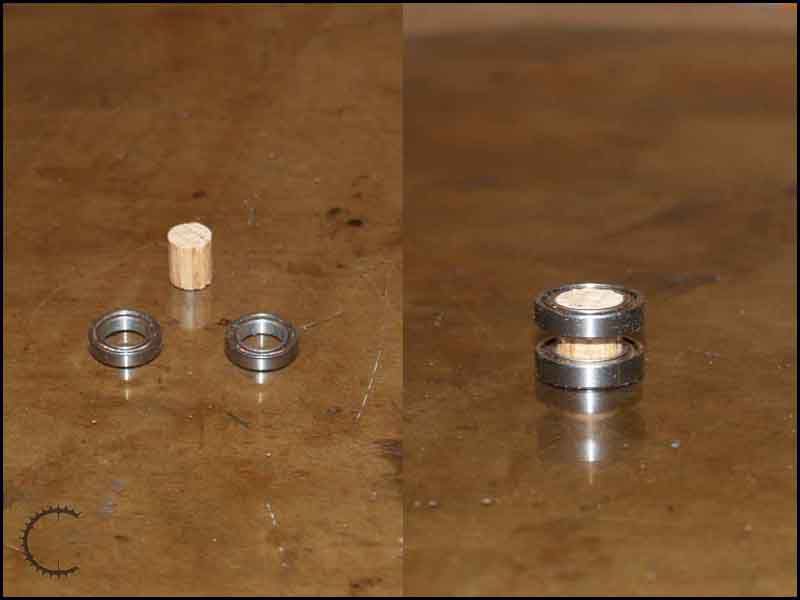
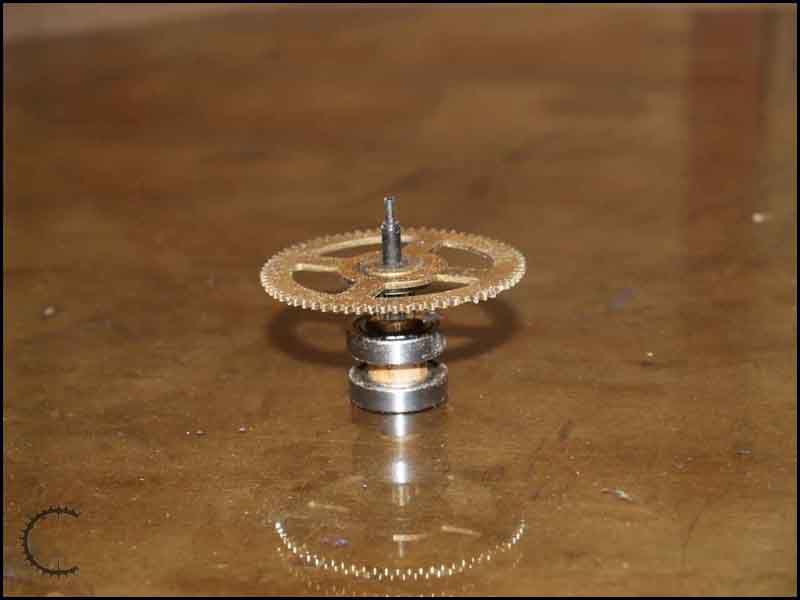
The first problem was drag. I couldn’t just slide the gearshafts through the wood, as they would either wobble or bind and not turn freely. I solved that with roller bearings. I bought a bunch of bearings that were 3/8” ID and 5/8” OD. I bored 5/8” holes in the side panel and pressed 3/8” oak dowels, cut to length, into the bearings.
So far so good. I then pressed the gearshafts into the exact center of each dowel.
It was a lot of work and I won’t go into it all, but here is the finished result:
Beautiful. I absolutely love the way it turned out. BUT, it was not to be. Even though all of these gears turned perfectly when these pics were taken, the holes in the oak dowels wallowed out quickly and they started to wobble. Not a lot, but these gears are very thin. Even a tiny wobble will cause them to come unmeshed and then the train is broken. I had to come up with something else.
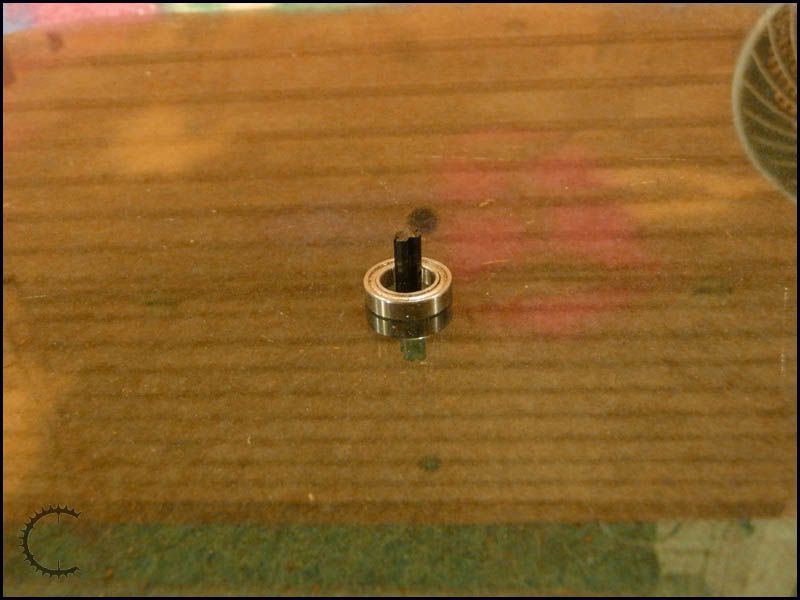
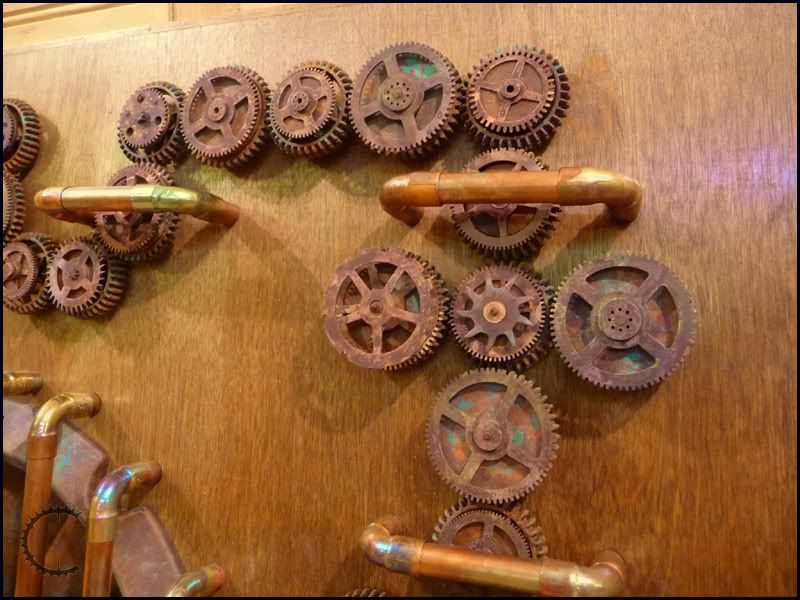
The new geartrain uses different gears for the actual motion transfer, with the above gears on top of them for cosmetics. The gears I’m using now do not have shafts in them, they have separate shafts that are customizable. Problem is, they don’t come close to fitting the bearings I have, and I'm not spending another $50 on different-sized bearings.
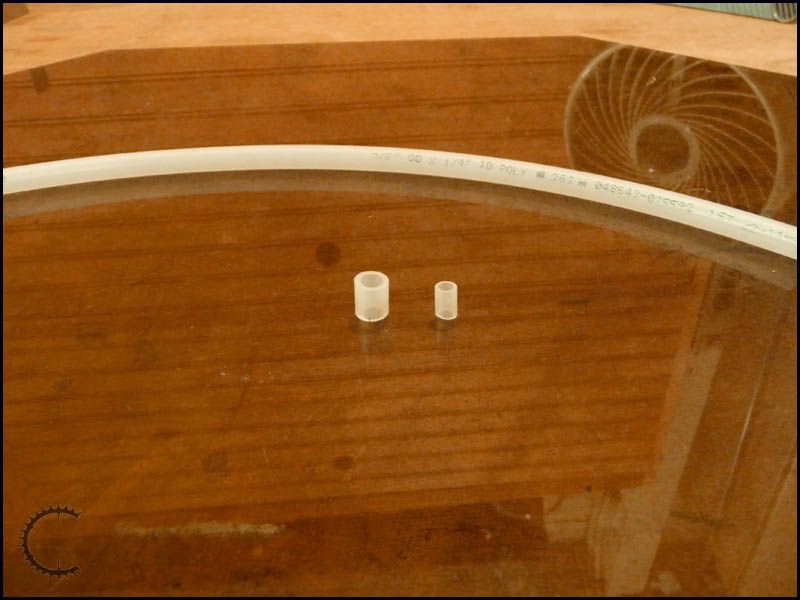
So what I needed was a way to get these shafts to fit tightly in the exact center of these bearings. I needed bushings, but to find bushings the exact size I needed wasn’t going to happen. So I improvised. ;)
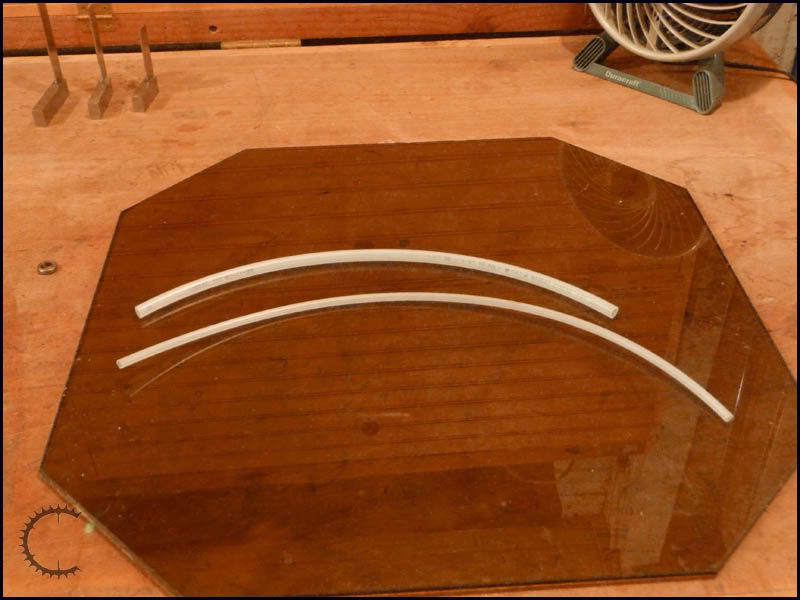
Two sizes of nylon tubing, usually used as water lines.
The smaller fits snugly inside the larger. Cut a piece off of each:
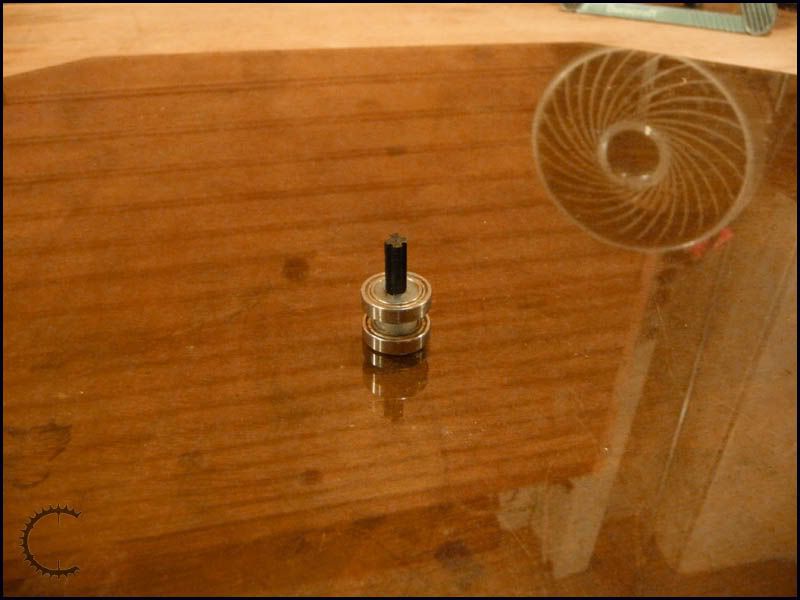
Put them together, press them into the bearings and press the shaft into the center. Perfect. :D
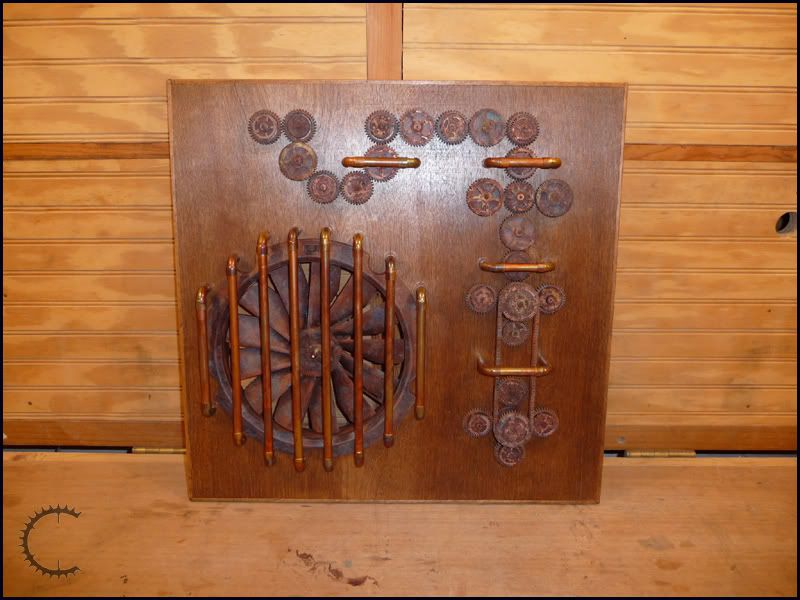
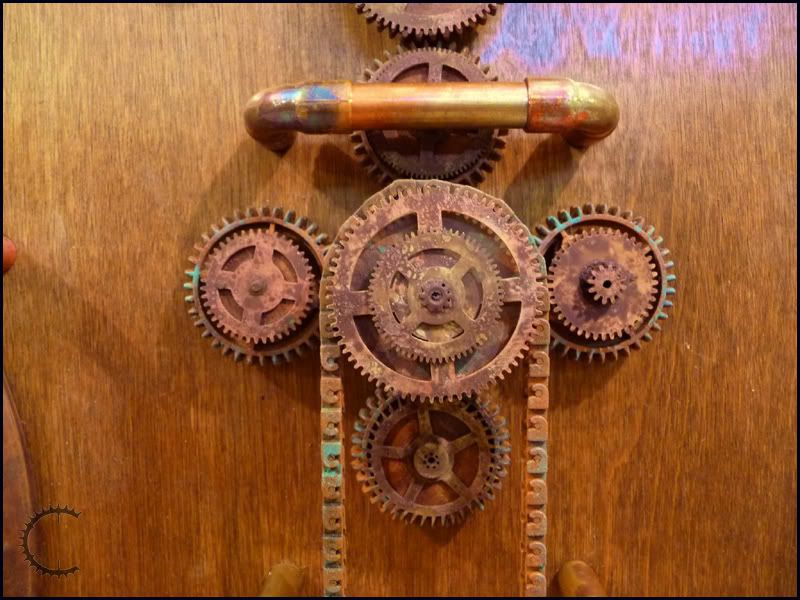
This whole system has worked out very well, finally. As usual it took some work and some (gasp!) modification, but in the end, the drive gears are WAY better than the clock gears were. BUT (there always seems to be a but), since they aren’t brass there is no way I can get them to the burnished brass finish that I liked so much in the original geartrain. I CAN get them to look old, but the old will be of a different nature. Think Shadows of Chernobyl instead of Bioshock. Old and neglected. After a great deal of experimentation and work, I finally got the thing done. That’s right, the side panel is finally complete. It’s a lot different than the original, but I actually like it better. :D
I got the copper to look that way with simple heat. I hit the pieces with a mapp gas torch until they were almost glowing and dunked them in a water bucket. Beautiful. The gears were a combination of a rust paint system from Rustoleum, two shades of blue-green paint from Lowe’s and the trusty mapp gas torch again. I love the final result, and the inclusion of the chain was a huge benefit.
I was also able to improve on the front fan sprocket:
And got the first stage of the rusting done on the motherboard tray:
I have the motor for the geartrain almost mounted, have already motion tested it all. I have also recently acquired a digital camera that will take video. Now I just have to figure out how to post video here. :D
07-30-2009, 05:03 AM
DonT-FeaR
Re: Project Clockwork vII
wow i forgot how cool this was.!!!! repppppp
07-30-2009, 05:36 AM
The boy 4rm oz
Re: Project Clockwork vII
I was lik OMG WHAT!!! he closed the worklog, until I read your last post lol. Glad to see this is still alive mate, I really do love this project.
07-30-2009, 05:38 AM
blueonblack
Re: Project Clockwork vII
Glad you're still with me. :) Share your opinion of the new look?
07-30-2009, 05:53 AM
The boy 4rm oz
Re: Project Clockwork vII
I'm really liking the look, the rusty/weathered look is really well done and the gears and cogs add a very unique look, very very cool.
07-30-2009, 12:14 PM
Kayin
Re: Project Clockwork vII
LEGOS!!!! Nice implementation of LEGO Technic...
07-30-2009, 03:34 PM
blueonblack
Re: Project Clockwork vII
That is correct. They are the *best*. Anyone who needs absolutely *anything* Lego, by the piece or by the lot, needs to check out bricklink.com. If Lego makes it, you can buy it there.
I looked long and hard to find something for this deal. It was the chain that finally decided it. :D
07-30-2009, 04:22 PM
Mark_Hardware
Re: Project Clockwork vII
lol I was literally just looking through your clockwork worklog yesterday. Nice to see it going again. Those hard drive enclosures are sweet. They would look good on my computer lol. Great work man, the gearing, the chain, way cool!
07-30-2009, 04:26 PM
Kayin
Re: Project Clockwork vII
Go to hobby lobby, go to the craft paints. They have a real iron surfacer and rust developer that will put REAL RUST on anything. Same with verdigris. It's the same stuff PilouX used on the two HL2 cases. I have it for some projects I'm working on...
07-30-2009, 06:38 PM
blueonblack
Re: Project Clockwork vII
I've tried Metal Effects paint in copper, bronze and iron with four different oxidizers (green, blue, black, and rust) and didn't like any of it as well as this.
07-30-2009, 11:40 PM
Mach
Re: Project Clockwork vII
Ahh glad to see this one back. Looks as good as I remember. I'll be watching!
07-31-2009, 02:37 AM
Mark_Hardware
Re: Project Clockwork vII
hey try muriatic acid. it will corrode the metal. then add poolshock to nuetralize the acid.
07-31-2009, 03:49 AM
DonT-FeaR
Re: Project Clockwork vII
i like it mate :P
07-31-2009, 04:19 PM
Waynio
Re: Project Clockwork vII
8) Looking very awesome m8 keep it up :up:.
08-01-2009, 07:00 PM
madd0ct0r
Re: Project Clockwork vII
ahh. this case truly put me off building gear trains for mine, but it looks so good...
08-04-2009, 05:05 AM
blueonblack
Motor Mounted!
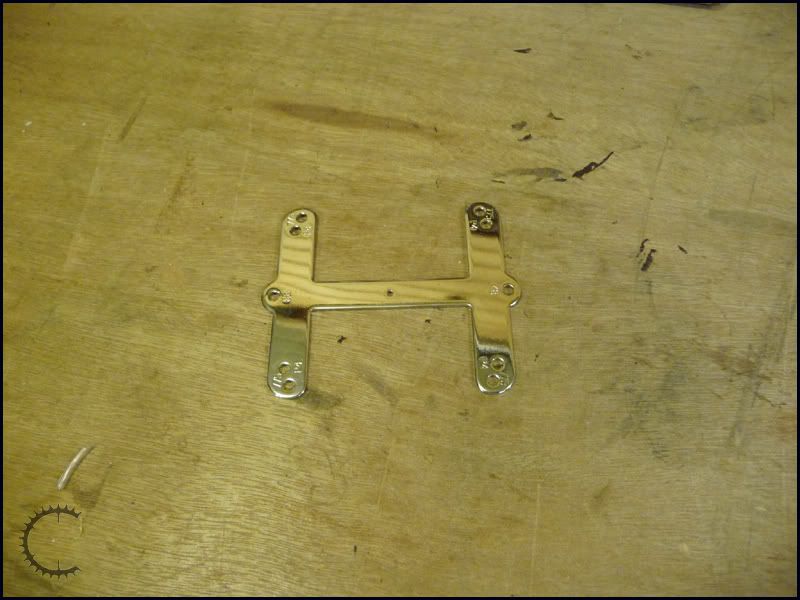
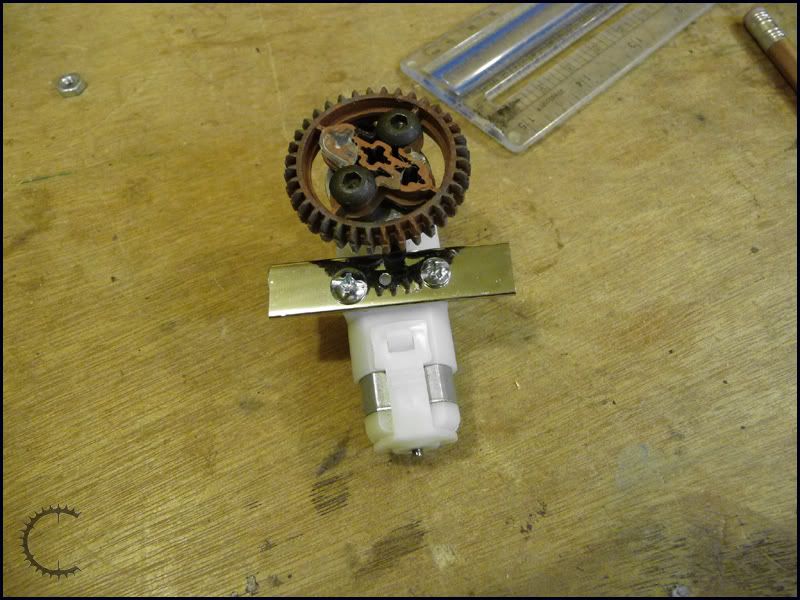
I finally got the motor for the geartrain squared away. :) Been trying to figure out how to mount it. I *knew* all that Intel mounting hardware would come in handy someday!
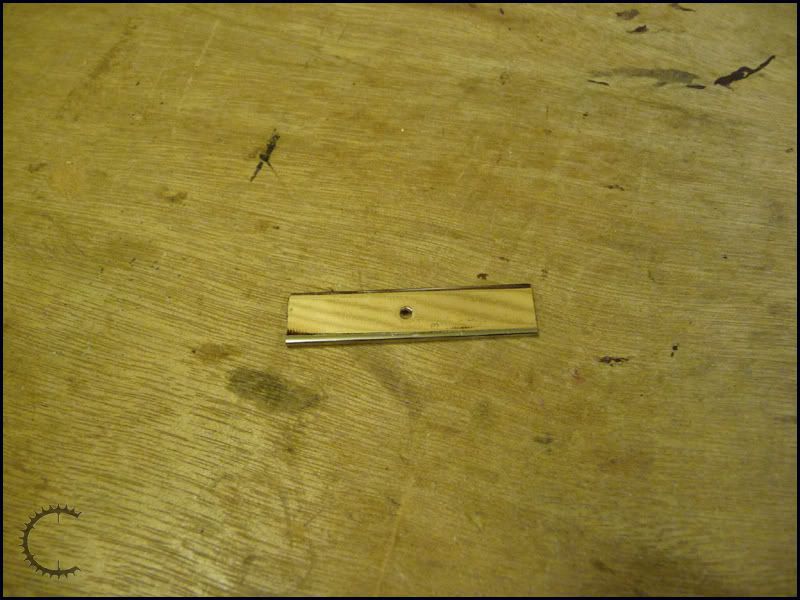
Too big of course but it's a nice piece of flat stock to work with. Cut off what I needed:
The motor I got from Solarbotics actually has two smooth-bore mounting holes in it but I wanted to mount the bracket from the inside, so I tapped them to 6-32 machine thread and ran bolts through the bracket and into the motor. The threads are plastic, but the motor is an inch and a half thick and the bolts go all the way through, so there are nearly fifty threads on each bolt holding it in place, very solid.
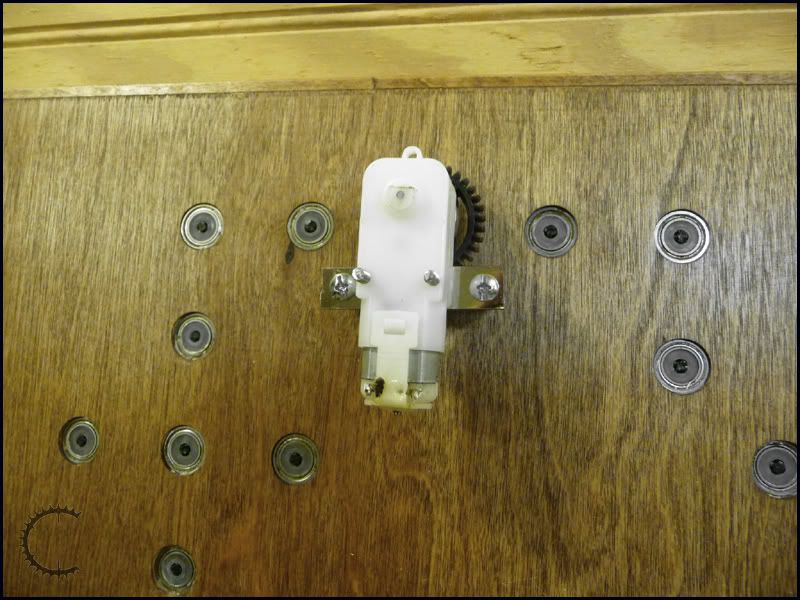
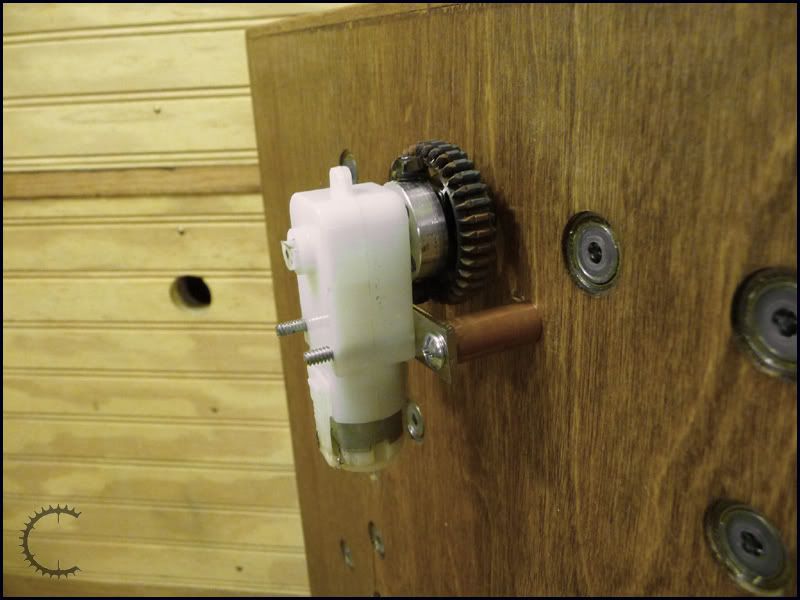
The shaft on the main drive gear runs all the way through the panel and sticks out an inch and a half into what will be the interior of the case. I mounted another Lego drive gear onto the motor, slid it onto the shaft and bolted it in place with machine screws, brass inserts, and some pieces of copper tubing as spacers. It turned out to be extremely solid, I'm very happy with it.
I plan to build a box to put over it so the plastic isn't showing when the case is opened, and it looks like it's going to have to be larger than I had planned originally, but it will work.
Video to come! (Waiting on youtube to "process" it, whatever the hell that means. #$^&*#@^&*!!!!)
08-04-2009, 05:13 AM
blueonblack
Re: Project Clockwork vII
Got it! :)
The chain is flopping a little bit, but I'm pretty sure it's just the paint in the links grabbing the teeth on the drive gear, it will smooth out as it wears in. So far so good.
08-04-2009, 06:08 AM
The boy 4rm oz
Re: Project Clockwork vII
Dude that is soooooo cool. Yeah I think the problem with the chain is due to there being paint i nbetween the links, it will move more freely with time, or put a little drop of grease or oil on every joint, that will loosen it up. +rep
08-04-2009, 06:38 AM
DonT-FeaR
Re: Project Clockwork vII
/\ yea
one thing tho .. is that the speed ur gunna keep because i imagined it slower..
08-04-2009, 06:42 AM
The boy 4rm oz
Re: Project Clockwork vII
Hmm, slower would look better also I think after watching the clip again, would also help with the chain kink a but.
08-04-2009, 07:13 AM
blueonblack
Re: Project Clockwork vII
I thought the same thing, I'll be putting a speed control in, probably with the shaft connected to a gear on the outside of the case. I had planned to have it turn more slowly without the need for a controller, but space constraints forced my hand on the motor I used. No big deal, turn a gear and it slows down or speeds up, however you want it. :)
08-05-2009, 05:46 PM
Waynio
Re: Project Clockwork vII
:banana: Fantastic, looks sooooo nice and authentic :up:.
08-06-2009, 02:49 AM
DonT-FeaR
Re: Project Clockwork vII
ahh resistor? not a controller.?
08-06-2009, 02:54 AM
The boy 4rm oz
Re: Project Clockwork vII
Controller would be a better option, resisters eventually burn out.
08-06-2009, 04:41 AM
DonT-FeaR
Re: Project Clockwork vII
then replace the resistor.. small price to pay if he has no room or if it will wreck the look
08-06-2009, 06:05 AM
The boy 4rm oz
Re: Project Clockwork vII
Very easy to conceal a variable switch plus you have the option to tweak the speed if need be, with a resister you have a set speed, although you would do testing before hand to get the speed right. You could always make a software controller and eliminate the need for a switch or a resistor.
08-06-2009, 07:19 AM
blueonblack
Re: Project Clockwork vII
Software controller is not gonna happen. :) As for the controller, I haven't decided yet. I could always add it later if I want one, but for now I am actually looking at a different motor with a lower RPM and higher gear ratio. At $7 each I can afford to try a different one. Space is my main limitation, forcing me to use a motor with a 90-degree output shaft (or make some kind of gearbox to transfer the motion 90 degrees). I'll see what this other motor does. The one in the video is rated at 46 rpm at six volts, the new one is only 30 rpm at six volts and 12 rpm at 3 volts. We'll see.
08-06-2009, 07:32 AM
The boy 4rm oz
Re: Project Clockwork vII
Whichever way you go about it I'm sure it will turn out great ;).
08-07-2009, 03:47 AM
DonT-FeaR
Re: Project Clockwork vII
/\ yeah for sure!
09-21-2009, 03:52 AM
blueonblack
New Parts!
Just a small parts update (and to keep this worklog from drowning in page 5 or 6 or wherever it had sunk to)...
During the recent demise of Xoxide I scored a couple of great deals for this build. :D I'll be replacing the Scythe Musashi air coolers on my HD4870 cards with Swiftech MCW60 waterblocks.
This obviously frees up a LOT of room, and also allows me the space to use better ramsinks than the aluminum that came with the Musashi.
I also scored a 1000-watt modular PSU!
I've also made a minor design modification. I'm going to chop up the motherboard tray I have a little bit and mount the new PSU on the bottom of the case, sliding the motherboard up several inches. This will not only free up a lot of room on the bottom, but it will make power routing easier, I think.
This project isn't dead, it's just sleeping, as I have a lot of other stuff going on right now. Stay tuned, more news as it happens.
09-21-2009, 04:30 AM
DonT-FeaR
Re: Project Clockwork vII
sweet. cant wait to see this going again
09-21-2009, 12:02 PM
The boy 4rm oz
Re: Project Clockwork vII
I use an MCW-60 to cool my 8800GTX, it's a fantastic block.
09-21-2009, 12:43 PM
Vanille
Re: Project Clockwork vII
Nice project espacially all those little wheels are sick !
10-10-2009, 06:22 AM
blueonblack
And the work goes on....
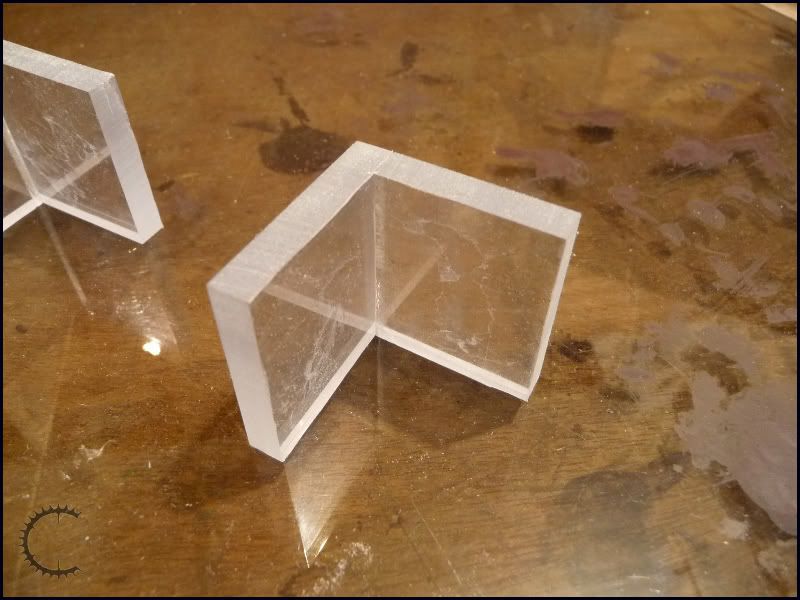
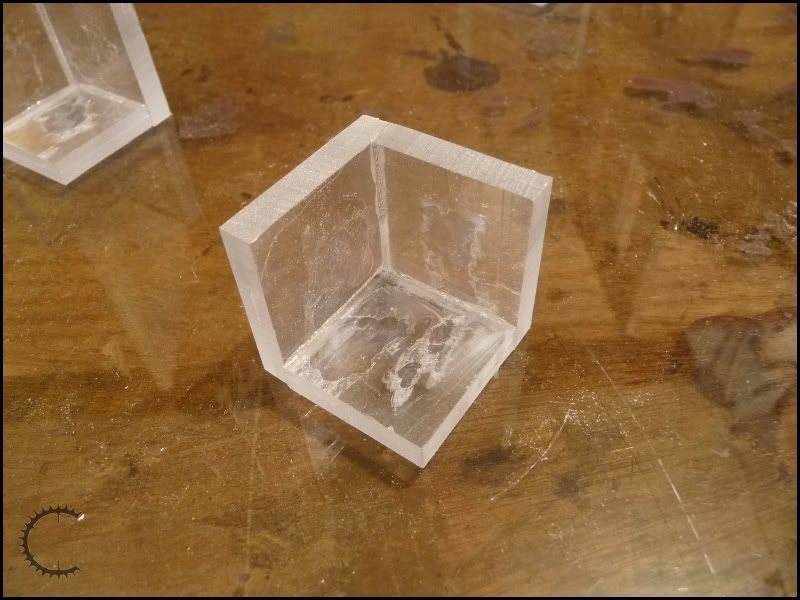
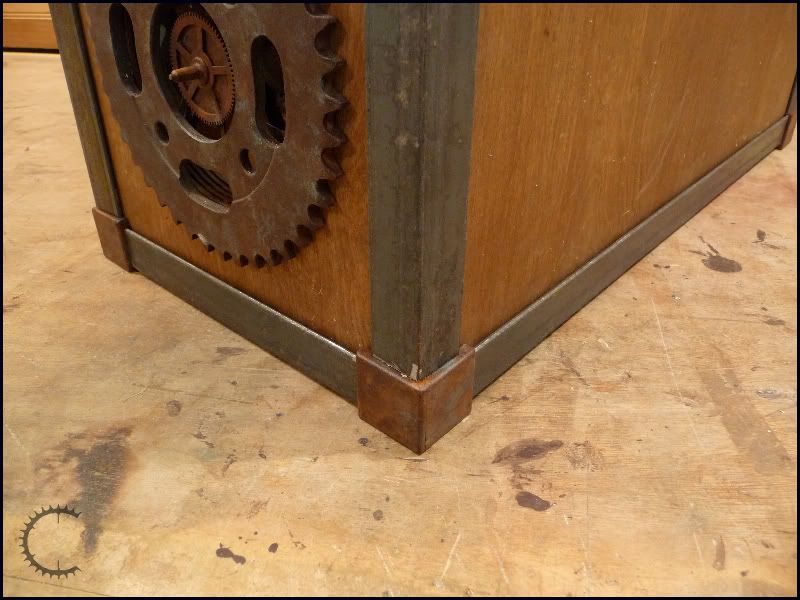
I finally got some of the corners made for it today. I love acrylic, it's one of the most versatile materials I've ever worked with. I made these corners out of some 1/8" sheet acrylic I had left over from some old storm windows. :)
The corners I had in mind needed to be more than 1/8" thick, so I doubled them up and glued them together. Then cut four sets of material: four squares, four rectangles matching the squares on one side, then four more squares matching the shorter side of the rectangles. I put these together to form the corners of the case:
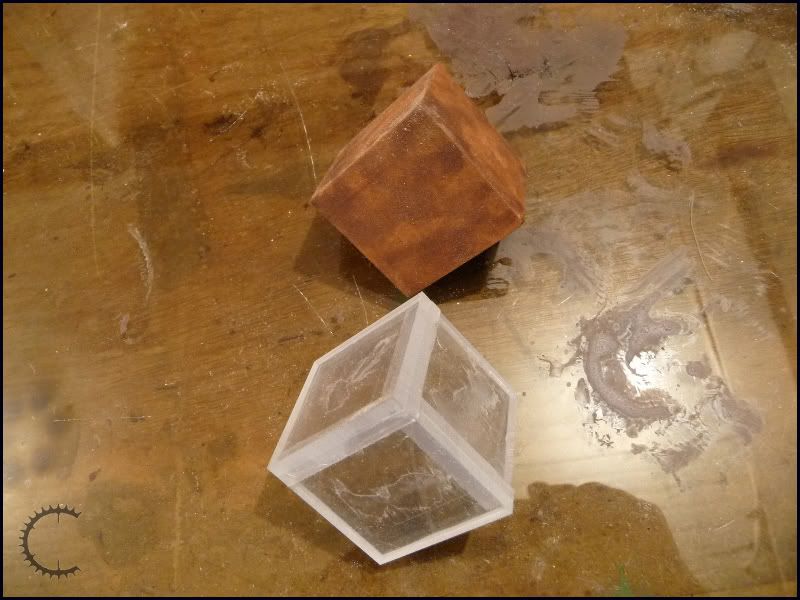
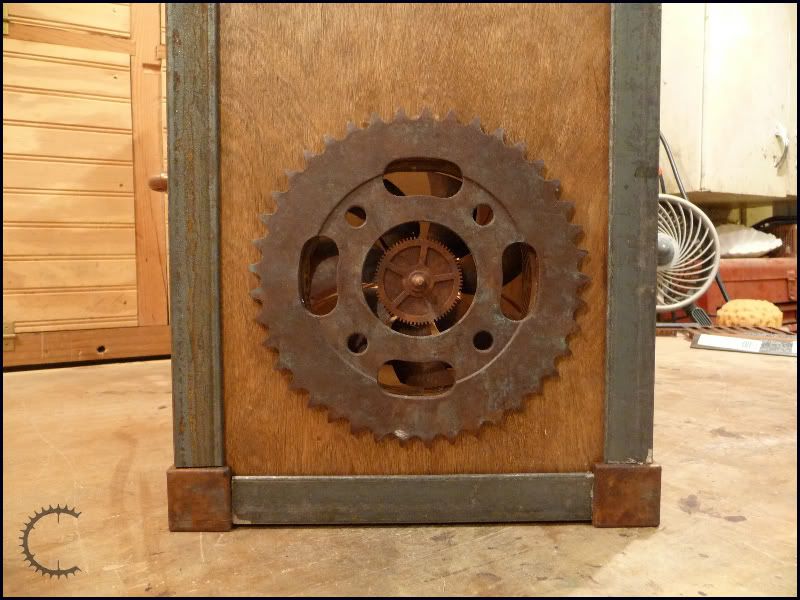
These will be the base corners, I have to make four more for the top, but that can wait. I also finally got ahold of some angle iron to use for the edges. I don't have enough yet for all the edges, but when you put together what I have it looks like it's taking shape!! I don't have the angle iron painted yet, but I took some pics to show how it will look. (The finished product should look exactly like the corners.)
You can tell in the pics that the back panel isn't stained, I built a new one so I could cut the hole for the PSU now that it will be mounted on the bottom. Got that hole cut and the hole for the fan on the bottom also. I still have to cut holes for the I/O plate, the secondary 110 connection (for the water pump and possibly the lighting - still deciding whether to use LED lights or 110 lights with a dimmer switch), and the fan, though I haven't decided how I'm going to do the radiator yet so that will have to wait.
Opinions on the corner/angle iron appearance?
10-10-2009, 03:48 PM
msmrx57
Re: Project Clockwork vII
Looking awesome. That angle iron almost doesn't need to be painted. Great job on the corners they look incredible. :up: This one just keeps getting better and better. :up:
10-10-2009, 04:26 PM
Liquid_Scope_99
Re: Project Clockwork vII
Man that looks cool as he,... i wish i had that vision man . Great job i will take one in cherrry lol . +rep
10-10-2009, 06:22 PM
blueonblack
Re: Project Clockwork vII
Quote:
Originally Posted by msmrx57
That angle iron almost doesn't need to be painted.
That thought had crossed my mind, actually. I was planning to make all the "metal" look the same, but this does have a nice contrast. Anyone else have an opinion on leaving the angle iron as is?
10-10-2009, 06:36 PM
Xpirate
Re: Project Clockwork vII
The angle metal looks good as is. But I'm sure it will look good if you change it as you originally planned as well.
10-10-2009, 08:48 PM
SXRguyinMA
Re: Project Clockwork vII
lookin awesome man! cant wait to see more progress