Re: Doom3: Project Mars City
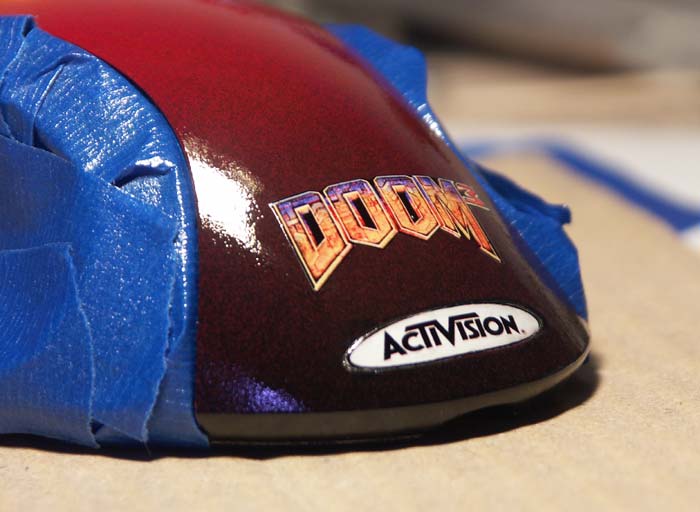
The finishing touches are a couple of custom made waterslide decals
Re: Doom3: Project Mars City
I finally have time to finish this monster of a case so lets get to it!
Plenty of details need to be added to the side panels, so I began filling in the sparse areas with some Plastruct architectural pieces and some parts from my scrap bin. I also have a chance now to try out the new Iwata Eclipse airbrush I bought last week. Should be a decent upgrade to the Passche workhorse I have been using for years.
Small (1/4" NPT) copper elbow was used here:
This area will take lots of hand painting and airbrushing as you can see. The magic is in the details:
Re: Doom3: Project Mars City
Adding just the right amount of detail is really important when scratchbuilding and kitbashing on a project like this. It's easy to add too much detail, creating a confusing pallet of shapes that simply adds confusion to the overall look. Picking the right parts for kitbashing comes from lots of trial, error and experience, and literally hundreds of rejected parts and configurations pile up before I commit to gluing them on. Even then I may rip pieces off if it doesn't seem to fit later on as the work progresses.
Tamiya models are among the very best kits you can buy. The detail is amazing, and the quality of their molds are unsurpassed for producing clean, crisp injection molded parts. Although pricey, these kits have been used for kitbashing by master model makers for years--even back to the first Star Wars. If you come across any production shots of the ILM (Industrial Light & Magic)model shop, you'll be sure to find dozens of boxes of Tamiya military kits in the background.
Re: Doom3: Project Mars City
I finally found a solution to making the blast doors and airlock open--make linear actuators from old cdrom drives! RC Servos just dont have enough travel in the arms to open the doors I made properly, so by taking the high torque gears and motor that open and close the tray to a CDROM, voila, a linear actuator. I have a short video showing how it works, I'll get it up asap.
Here is a shot of the motor assembly disassembled that will be mounted to that tambour style blast door that covers the LCD on the front of the case:
This pancake motor is perfect because it is of course, 3-5VDC reversable. It's also designed to last a long time:
Here is the track assembly. The plastic geared "track" was taken from the CDROM tray and mounted on my aluminum rail:
The slide assembly has a built-in spring (inside the round alum tube) to prevent the motor from sliding off the geared track when it reaches the ends of the travel. The springs also make sure that the main motor gear is always in contact with the first tooth of the geared track, and ready to move in the opposite direction:
Here is the unit assembled:
Here is where it will be mounted inside the blast door structure:
Re: Doom3: Project Mars City
Here is some video of the door after i installed the actuator:
Blast Door (DivX)
Blast Door (Win media)
Re: Doom3: Project Mars City
Mechanical airlock? OK!
This nice little challenge is finally complete from a mechanical standpoint. The motors from a CDROM would not be powerful enough to open and close these airlock doors, so the logical replacement would be to use hobby servos. For those of you familliar with these high torque gear boxes, you know some of them pack serious strength--
What I did was create another linear actuator to open and close the doors. Unfortunately the standard servo arms only rotate 45 degrees, and this would not give me enough linear "travel" along the gear bar to open and close my airlock doors. Hmmm..
Solution was to use these specialized servo motors called "retract servos"--these are used to raise and lower the landing gears on flying model aircraft. Not only do they rotate 170 degrees, they also have a higher torque rating than standard servos--perfect for what I need.
You can see I created a "scissor" type mechanism to open and close the airlock doors--sometimes the most elegant solutions are the most basic in design--I had to be extremely accurate with measuring/cutting/drilling in creating this mechanism, and it took some serious tuning to get it running like buttah. The entire mechanism is very robust, so it should last for years without needing adjustments.
I'll have a video up ASAP showing the doors in action
Enough gab, on with some pics:
You can see that i also made the cut-out for the 120mm Panaflo fan--Airlock opens, fresh air comes in--Here is the airlock module bolted onto the case. I'll be making a housing to cover the scissor mechanism, as well as all the wires for the servo and lighting:
Here is the mechanism, top view. All painted and plastic parts (and gears) are lubricated with Lithium grease, as anything petroleum based would eat the plastic:
Here you can see the Hitec HS-75BB Retract Servo, and b\gear bar i took from a CDROM tray. The gear on the servo is also taken from the CDROM motor, then it was mounted with tiny screws onto a standard servo wheel:
Inside the airlock, I did some kitbashing and scratchbuilding to add details to the back of the doors--Inside will be a light fixture (red LED) as well, pics for that coming up soon:
Re: Doom3: Project Mars City
Here's a short video showing the motorized airlock in action. The retract servo is controleld by a small single channel servo controller board that runs at 5v DC. The airlock LED light changes to red once it is fully opened and then to white when closed--i may change this to green but i didnt have any on hand.
Airlock Door DivX
Airlock Door Windows media
Re: Doom3: Project Mars City
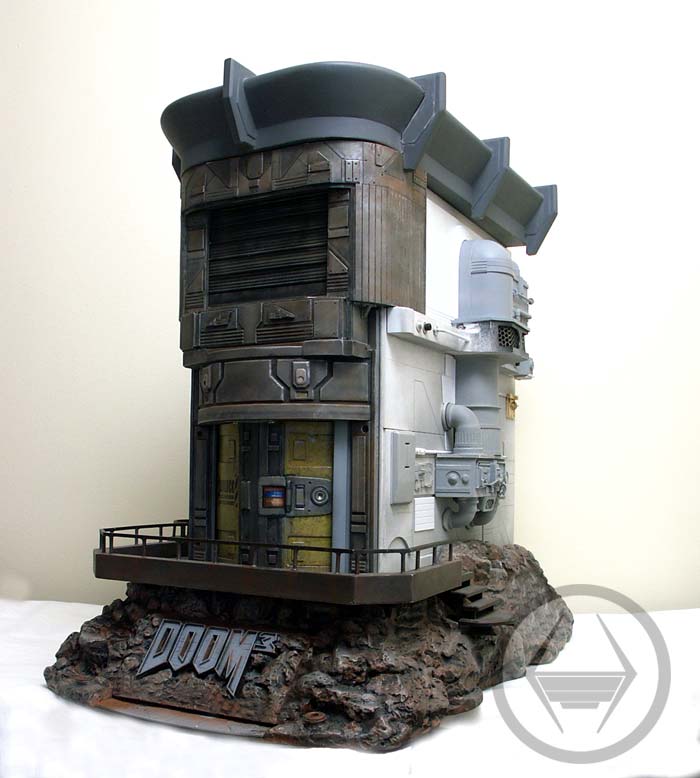
Here is a shot showing the case mocked up thus far--Just a bit of scratchbuilding, wiring, watercooling, lighting and hardware installation left to do--and of course--some airbrushing and hand painting :)

.jpg)
.jpg)
.jpg)
.jpg)
.jpg)
.jpg)
.jpg)
.jpg)
.jpg)
.jpg)
.jpg)
.jpg)
.jpg)
.jpg)
.jpg)
.jpg)
.jpg)
.jpg)
.jpg)
.jpg)
.jpg)
.jpg)
.jpg)
.jpg)
.jpg)
.jpg)
.jpg)
.jpg)