How to: Make your own sig with Gimp
Gimp signature tutorial.
IF YOU FOLLOW THIS TUTORIAL AND MAKE YOUR SIG AND WANT TO SHOW IT OFF, PLEASE POST IT IN THIS THREAD OR 'the sig thread'. THIS IS TO STOP THE FORUM BEING OVER-RUN WITH SIG BASED THREADS. THANK YOU.
My first tut... be gentle...
There are loads of tutorials on the web about making a forum signature (hereon called a sig), but most of them seem to be quite overwhelming, badly explained or presume an amount of knowledge.
This one's different.
I will presume NO PRIOR KNOWLEDGE and no expensive software. I will use only free software, and give download links as appropriate.
In short, this is a BASIC tutorial, for someone who wants to make their own sig and doesn't know how, not a 'turn you into a pro' tutorial.
Disclaimer: I am a long way from a pro, and no doubt better people will be along to put me right, or just flame me for being a moron. To these people: It's for the greater good, we're not all graphic designers. I'm just trying to give graphic newbies the help I never got.
Here we go, on with the tutorial.
----------------
Graphics package
You will need a graphics package. I use The Gimp, and I suggest you do too. You can download it here...
http://www.gimp.org
You will need the GTK+ runtime and the Gimp (install the GTK+ runtime first).
The latest release is Gimp 2.2, and that's what I use.
The Gimp has some cool filters too - more on them later.
------------------
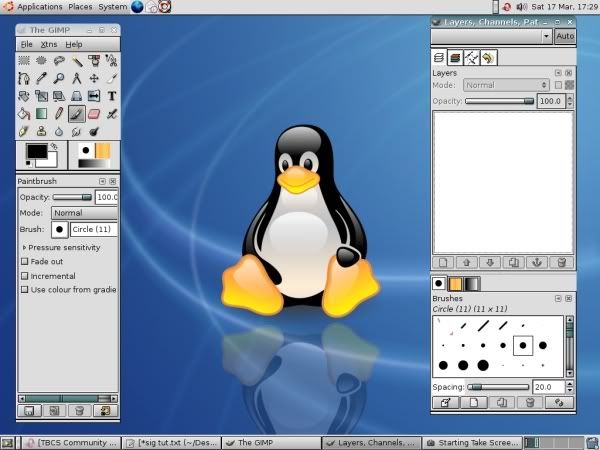
Once you have your graphics package installed, it's time to fire up The Gimp. If you've used any graphics packages before, you might find the interface a bit... weird (I did) as you have a load of floating windows, and no background (don't worry, it's not broke).
Looking something like this...
Ignore Tux (the penguin), he's my wallpaper (so you shouldn't have him).
You should have:
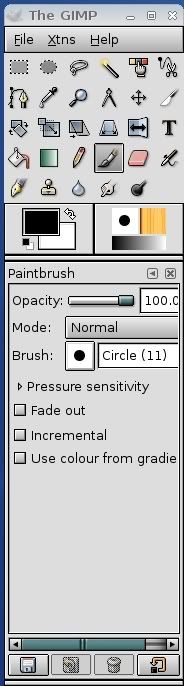
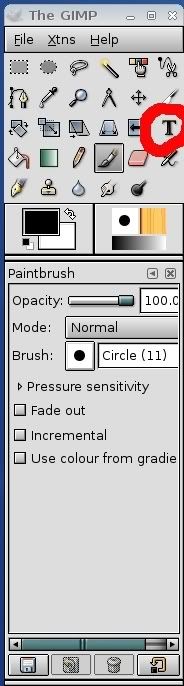
The 'Gimp toolbox' - looks like this...
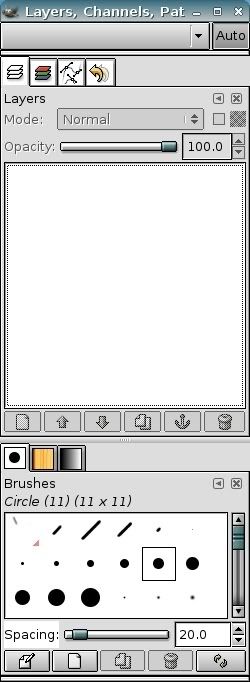
and the 'Layers, Channels, Paths, Undo, blah, blah' window - looks like this...
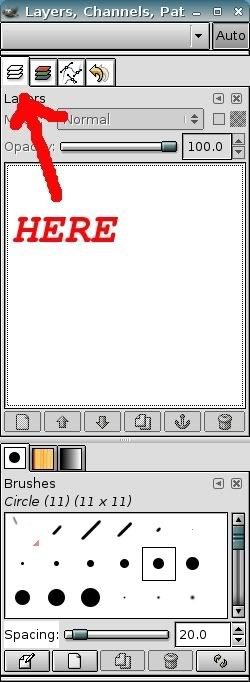
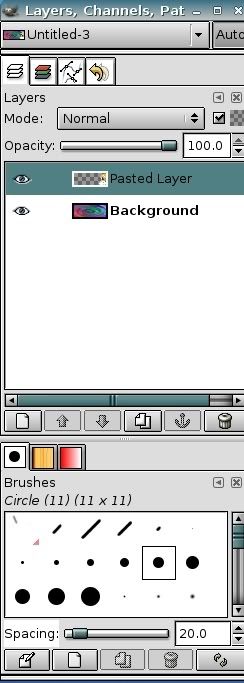
To start with, you probably want the Layers menu open (that's this one)...
------------------
Making your first sig.
Step one. Making your new image.
Now the good bit.
Create a new image by going to
File > New
In the new box specify the size (for the TBCS forums, you want it 400 pixels wide or less by 150 pixels tall or less). If the measurement isn't in pixels, click on the box with the measurement unit (mm, cm etc.) and select pixels.
When you click on OK, a new window will pop up, the size you specified with a plain white background.
Step two. Building your background (make your own - or you can find an image you like off the 'net and crop it to suit).
Remember this is going to be a simple sig, nothing too flashy.
All these bits are going to be slightly different for everyone - don't panic if yours looks different to the screenshots.
Most of the menu commands you use from here are using the menu bar in the window with your new image (named something like 'untitled-1.0 (RGB, 1 layer)) - if not I will say.
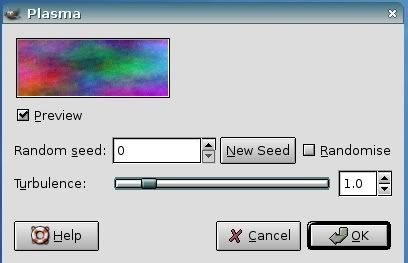
Create some randomness by going to -
Filters > Render > Clouds > Plasma
You'll get this box...
If you leave the settings at the default, that'll be fine and dandy, so click on OK.
Now you've got some nice random colourfulness, we can play with it.
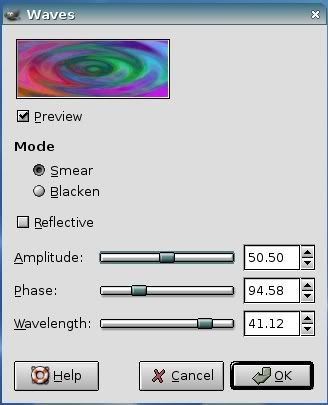
Try -
Filters > Distorts > Waves
You'll get this...
Have a play with the sliders and see in the 'Preview' box what you'll end up with. Try other distorts too, and play with the sliders and numbers. You'll find something you like...
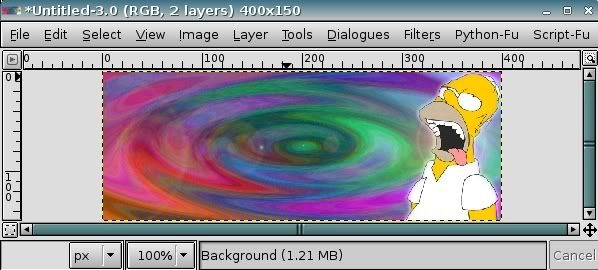
When you've finished playing, you should have something that looks like this...
The more you play with these filters, the more you'll find. Cool, 'aint they?
If you're happy with the rippley thing (or whatever you came up with) then we'll add a picture of some sort.
I like the Simpsons (Homer is my role model) so I've grabbed me a homer pic off t'interweb and saved him on my Desktop (save your pic wherever you like, as long as you can find it). You'll be best off with a pic that has a plain background - makes it easier to cut out later.
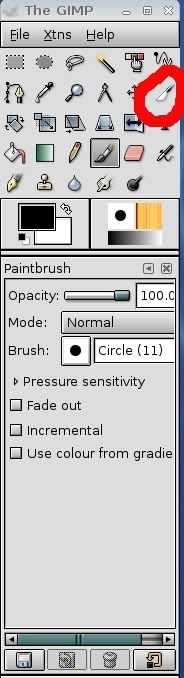
You'll probably need to crop your pic, to get rid of the bits you don't want.
So go to the Gimp toolbox, and select the knife picture (Crop or Resize), here...
And click and drag over the bit to want to keep. The cropped (got rid of) bits will get greyed out and the 'Crop' window will pop up (probably right where you dont want it). If the 'Crop' window is in the way, just release the crop handle and move the 'Crop' window out of the way - the crop isn't set yet.
The top right and bottom left crop handles will move the entire crop around your picture, and the top left and bottom right ones will allow you to resize the crop.
Click on 'Crop' when you're happy.
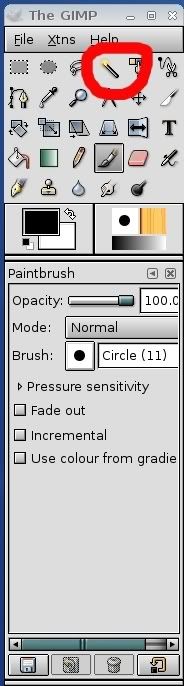
Obviously, you don't want the ugly white background, so lets get rid.
Click on the Magic Wand in the Gimp toolbox here...
This will select all contiguous regions of a similar colour. In english, thats all pixels that are next to each other and a similar colour.
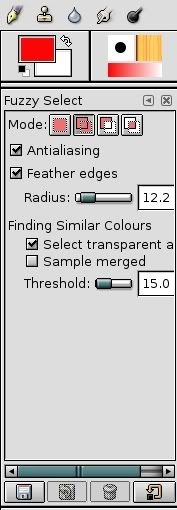
When the Magic Wand is selected, the toolbox will display that tools options, like this...
You want Antialiasing on, and Feather edges off (or you'll get a faded white line around your selection).
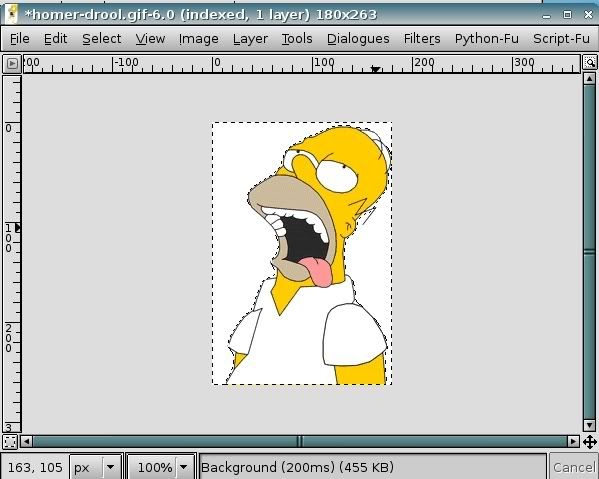
When you click on a part of the background, it should select all the similarly coloured pixels. If it's not selecting enough, slide the Threshold slider (in the bottom of the Gimp toolbox) to the right a bit and if it's selecting parts of your picture you want, slide it to the left.
You should end up with a selection similar to this (might be hard to see)...
Now we want to cut out the pic, but we want to make the bit we cut out transparent. To do this, we need first to add an Alpha channel.
We do this thus -
Layer > Transparency > Add Alpha Channel
No, I don't know what an 'Alpha Channel' is either. But it allows us transparency, so it's our friend.
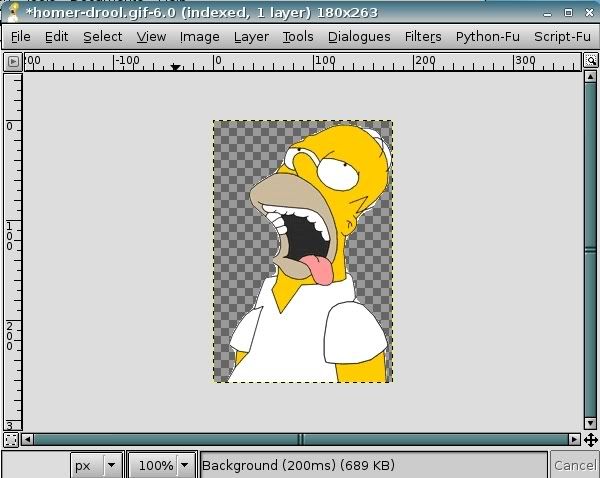
Now we cut out our selection, with the cut out bits being transparent (shown by a grey chessboard pattern).
Edit > Cut
We should end up with something like this.
Note I didn't do between his hairs... yeah, I'm a n00b.
Now we got the pic we want, it needs resizing, to make sure it fits. Now, some people like to resize the layer once it's on the background, but I like it to fit first time (and I like smaller images, my PC is a POS).
So we go to -
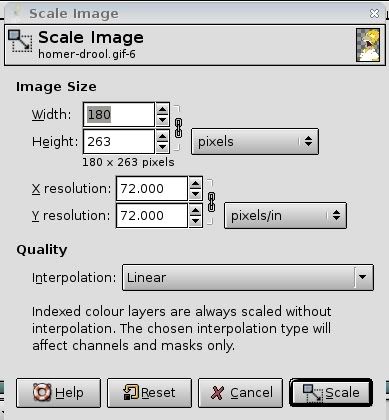
Image > Scale Image
And we get this...
The chains between the dimensions indicate that the proportions will stay the same (if you adjust the height, the width will be automatically adjusted so that the pic doesn't get stretched).
I adjusted the height to 150 pixels (to match our background) and clicked on 'Scale'. Now it should fit perfectly onto the background.
Now we need to cut out the pic, and stick it onto our background. We do this thus:
On the 'Homer' pic:
Select> All
Edit > Cut
Now Homers gone.
On the 'Background' pic:
Edit > Paste
Now we can move Homer around by clicking and dragging on him, or anchor him by clicking off of him. I always put him on another layer so that I can play more with him later. Do this like this -
Layer > New Layer
Re: How to: Make your own sig with Gimp
Now we should have two layers, one with our background, and one with our new pic. You can see this here on the Layers window...
This means we can apply effects, filters and stuff to the background without effecting the top pic. Clever, eh?
I want more cool effects on the background though.
Lets play with some filters....
Make sure the background layer is selected (highlighted green or grey in the layers window. Click on it if the pasted layer is still selected. One of my fave effects is the Lens Flare one.
Go to -
Filters > Light Effects > Flare FX
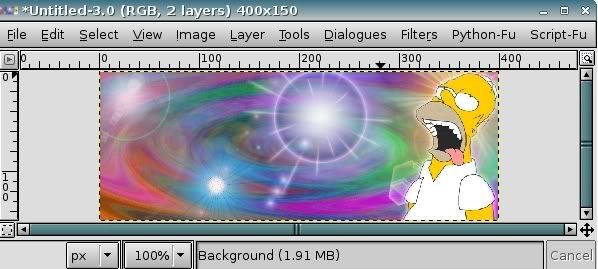
On the preview box you can click to move the flare around. I stuck it behind Homer to hide my crappy cut, and got this..
This is a basic flare, if you want to play with the settings, you can get all sorts of flares by going to -
Filters > Light Effects > GFlare
There are 2 tabs at the top to adjust different things.. have a go, go mad, it's your sig...
I spent a minute playing with the options and got this...
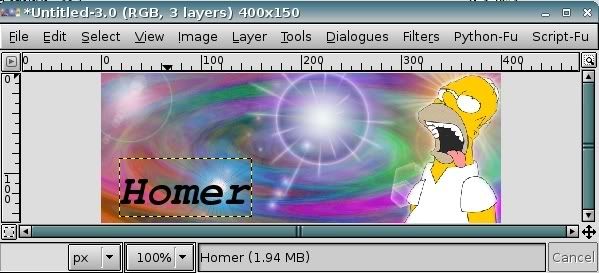
You'll want your name on it too.
Heres how....
You should be getting a handle on this now. Click on the text tool in the toolbox.
Now change the foreground colour to the colour you'd like your text. Do this by double clicking on the front coloured square in the toolbox, and selecting a colour from the box that pops up.
And click on roughly where you want the text (we can soon move it around a bit).
You'll have noticed that when you clicked on the text tool, thata load of options came up at the bottom of the toolbox. these only work when you have the text selected. they include text colour, font and size.
Type your text into the little box that pops up, and close it.
If it's too small, click on the up and down arrows in the toolbox next to size. To change font, click on the two as (Aa) next to where it says font.
When it's the size you want, click on the move tool in the tool box (four pointed cross) and drag it to where you want (CAREFUL: it will only select the text if your pointer is EXACTLY on the text, otherwise you'll move the background - Edit > Undo to put it back).
Now I'm here...
Let's have a border, just to tidy it up a bit.
First, you want to flatten the image (get all the layers into one).
To do this -
Image > Flatten Image
in the layers window, you should now see that it's just one layer.
Now go to -
Script-Fu > Decor > Add Border
I chose border sizes both 2, and colour Black and got this...
It will put your sig just over the max allowed size by 2 pixels on each size. You can resize (Image > Scale), allow for this at the start or try your luck on the forum.
Well done, you made your first sig.
When you save it, gimp is a bit funny. You'll want to save it as a .jpg, so when you put in the filename, you need to put .jpg on the end or it'll spaz out. Oh, and it'll want you to export it 'cos .jpgs can't handle transparency. Just click on 'export' and all will be fine. :D
---------------------------------------
Conclusion.
Now you know how to make a unique background, crop, cut, paste, use layers, use transparency, use filters and all sorts of useful stuff.
Depending on how this is recieved I may do a couple of other tutorials, with bump mapping and custom brushes and fonts and stuff.
If this bombs, I probably won't :p
Play and have fun!
---------------------------------------
Disclaimer: remember, graphic designers, this is a tutorial for n00bs, by a n00b. Don't flame me too hard, I was just trying to help....
:edit: Respect to all who have put tutorials together. It's harder than it looks...
----------------------------------------
If this tut has helped you put together something you're proud of, feel free to post it here and show off... it's all good fun.
IF YOU FOLLOW THIS TUTORIAL AND MAKE YOUR SIG AND WANT TO SHOW IT OFF, PLEASE POST IT IN THIS THREAD OR 'the sig thread'. THIS IS TO STOP THE FORUM BEING OVER-RUN WITH SIG BASED THREADS. THANK YOU.
Re: How to: Make your own sig with Gimp
Very well done. I was going to uninstalling Gimp from my GF's Mac but this has changed my mind. Great tutorial, I hope to see more. I like how you geared it towards newb's. It makes it easy for me to understand.
Re: How to: Make your own sig with Gimp
+rep great write up. I have been using photoshop but that is because I had it. Same general idea for either program.
Re: How to: Make your own sig with Gimp
+rep! Nice tut! Combined to Photoshop, it should do some miracles. Thanks :D
Re: How to: Make your own sig with Gimp
Re: How to: Make your own sig with Gimp
Cool, thanks for the +reps people.
Looks like I'll be starting on some more then.....
Re: How to: Make your own sig with Gimp
Bump Mapping
Sounds terrifying, doesn't it? Dont worry, I'll talk you through it.
Using bump maps, you can get embossed or stamped effects on your sigs.
It's how I did the TBCS logo on my sig...
It means playing with layers and filters, and isn't as hard as it first seems. Let's dive in.
------------------------------
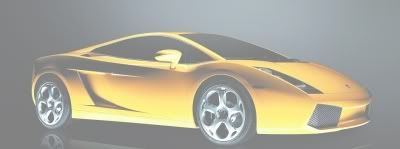
First, sort out your background. for the purposes of this tutorial, anything will do.
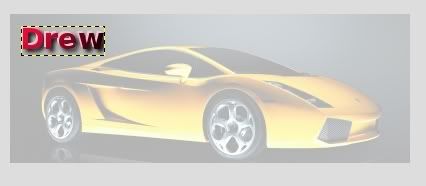
I'm using this... again...
For the bump map, you will want something with quite bold edges so that it maps well (the blurring later will give a softer emboss effect).
I'll use this as a map for example 1...
And this for example 2.....
Both stolen from TBCS.... hope no-one minds..
So...
Open your background. We need to put the source of the bump map into our image. So open your source, and paste it into your background, and make it a new layer.
If you've forgotten already it's -
On bump map source -
Select > All
Edit > Cut
On background image -
Edit > Paste
Layer > New
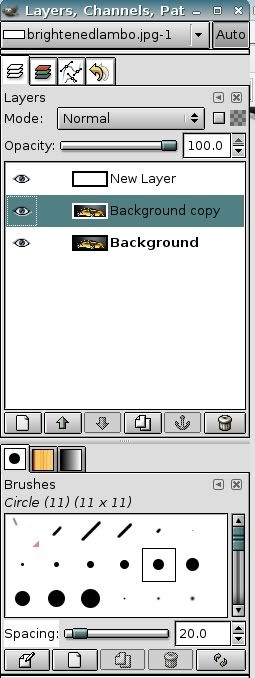
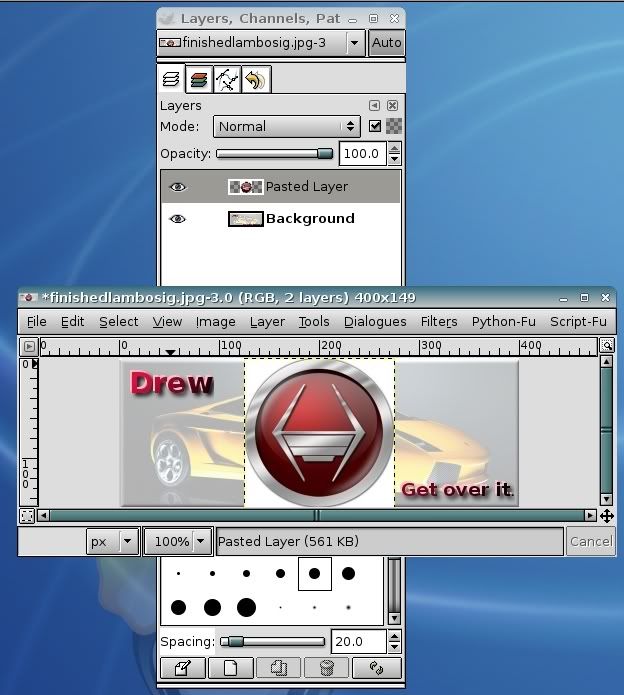
Now we should have 2 layers, the original background and a new pasted layer above it with your bump map source on it, like this...
Like the last tutorial, we need the bump map source beneath the background. So like before, we need to duplicate the background by right clicking the 'Background Layer' in the layers window and selecting 'Duplicate Layer'.
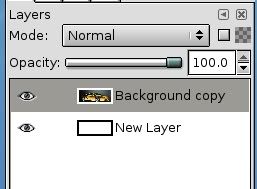
Now drag the 'Pasted Layer' beneath the new 'Background Copy' layer.
Here's the cool bit.
Make the topmost layer the active layer by selecting it in the layers window (this is important).
Then go to -
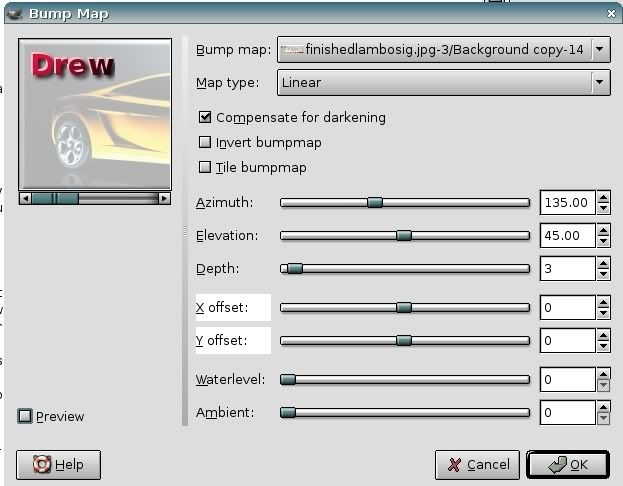
Filters > Map > Bump Map
And you'll get this..
At the top where it says 'Bump Map', click the down arrow and select the layer you want to be the source. If the Preview box has a tick in it, you should see the effect there.
play with the sliders, and see what you get.
When you're happy, click on OK to apply the map.
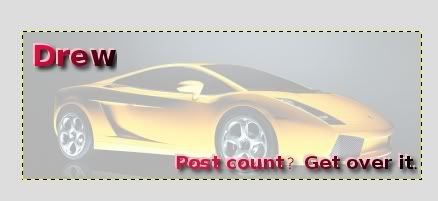
With a bit of fiddling I got this with the logo...
And this with the text......
If you apply a, say, 2-3 pixel gaussian blur (Filters > Blur > Gaussian Blur) to the text layer before you apply the bump map, you get this...
You can use just about any image you like, and even use the same image as your top one. You get this...
Have fun, play with the settings and make yourself some lovely bumpmappy goodness.
-------------------
Drew
IF YOU FOLLOW THIS TUTORIAL AND MAKE YOUR SIG AND WANT TO SHOW IT OFF, PLEASE POST IT IN THIS THREAD OR 'the sig thread'. THIS IS TO STOP THE FORUM BEING OVER-RUN WITH SIG BASED THREADS. THANK YOU.
Re: How to: Make your own sig with Gimp
Custom brushes and fonts.
A good way to make funky looking backgrounds is to use a custom brush. Sometimes they can be called grunge brushes or something similar.
I had no idea what they were, or how to install them. I do now.
And you will too.
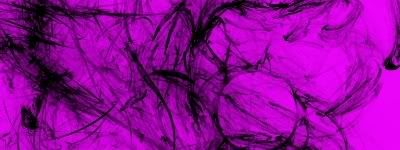
First of all, here's the sort of thing we're talking about...
Remember, a brush isn't a hairy thing you use to spread paint around a bit of paper, it's more like a mini picture that you 'stamp' the canvas with.
Custom brushes can be found here, at deviant art -
http://browse.deviantart.com/resourc...=9&alltime=yes
There are loooooooooads there, have a browse and see what takes ya fancy.
Installing custom brushes.
Took a while to figure this out, but it's actually very simple.
Most of them are in .zip files. when you've extracted them (I extract them to the desktop) they need putting in a specific folder.
Windows: C:/Program Files/GIMP-2.2/share/gimp/2.2/brushes
Ubuntu (and probably other Linux Distros too): username/.gimp-2.2/brushes
------------------------------------
Installing custom fonts.
I get my fonts from here:
http://www.1001freefonts.com/
The Gimp comes with a load of fonts, but I find them quite boring.
Once you have downloaded and extracted the ttfs -
If you are running Windoze follow these steps:
{start of stolen content}
Go to Control Panel.
Click on your Start button and select
Settings > Control Panel (or Open My Computer then Control Panel)
Go to your Fonts folder.
Open (Doubleclick) the Fonts folder.
Go to Install New Font.
Select
File > Install New Font.
Find the directory with the font you want to install.
Use the Folders: and Drives: windows to move to the folder on your hard drive, a disk, or CD where your new font is located.
Find the font you want to install.
Highlight the font to install from the List of fonts window.
Install the font.
Click OK.
{/end of stolen content}
(I stole that bit from another site - http://desktoppub.about.com/cs/fixfo...ll_fonts_w.htm - I'm on Linux and couldn't check it).
If you are running Linux, stick the unzipped .ttfs in the username/.gimp-2.2/.fonts directory.
You must have TrueType Core Fonts installed first to use .ttf fonts (they're a windoze thing).
If you can't find the folder you want, try enabling 'view hidden files'.
Have fun people.
If I've missed something, please let me know so I can update...
Drew
IF YOU FOLLOW THIS TUTORIAL AND MAKE YOUR SIG AND WANT TO SHOW IT OFF, PLEASE POST IT IN THIS THREAD OR 'the sig thread'. THIS IS TO STOP THE FORUM BEING OVER-RUN WITH SIG BASED THREADS. THANK YOU.