You're gonna be a busy bunny :bunny:

Printable View
You're gonna be a busy bunny :bunny:
So it would seem.......Quote:
Originally Posted by Drew
:devious:
Minor update:
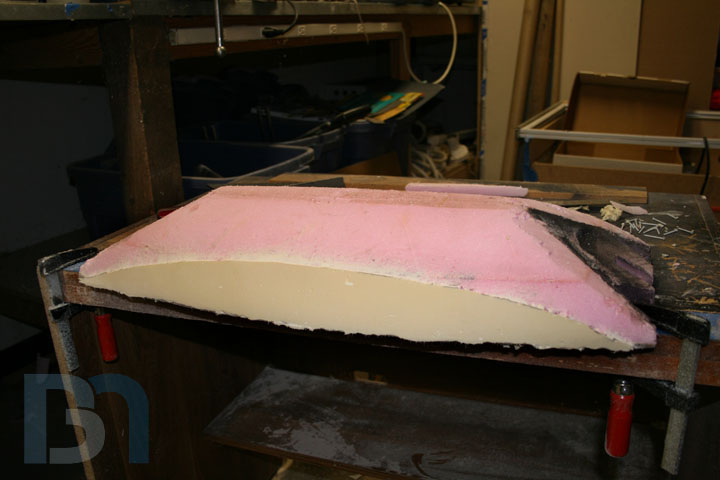
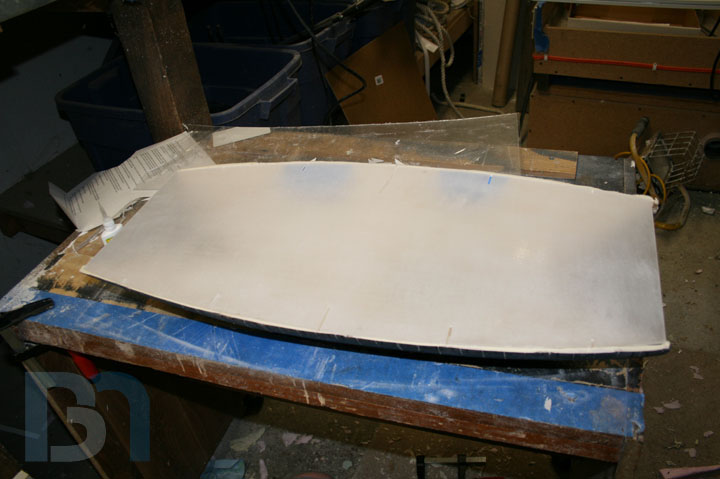
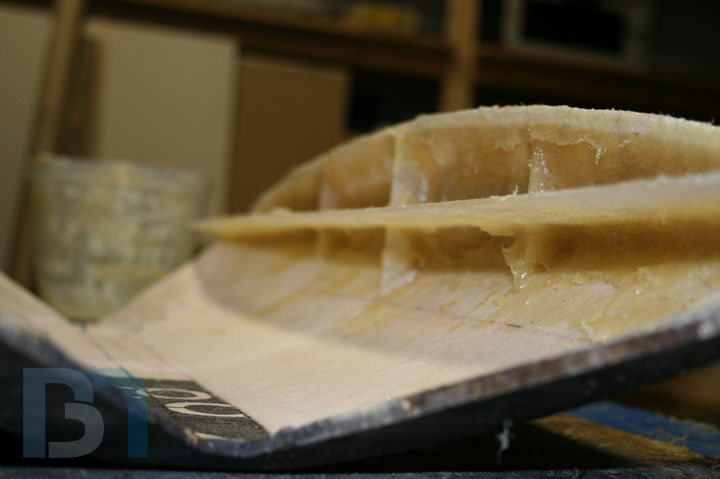
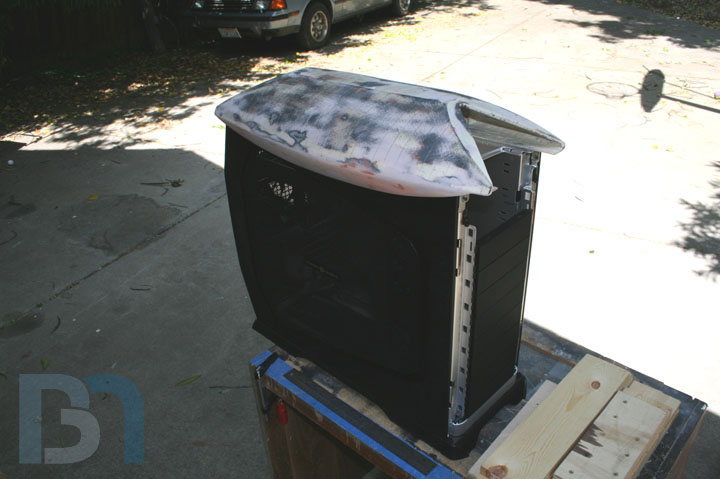
Did some work on the side skirts. Got them smoothed down,
and trimmed. This is how they will fit onto the main piece.
I taped them into place, and will add some support braces for strength. Once those are in, I will bondo up the seam and smooth out the edges.
8)
Looking good. This mod is turning out real well.
Another productive weekend! :D
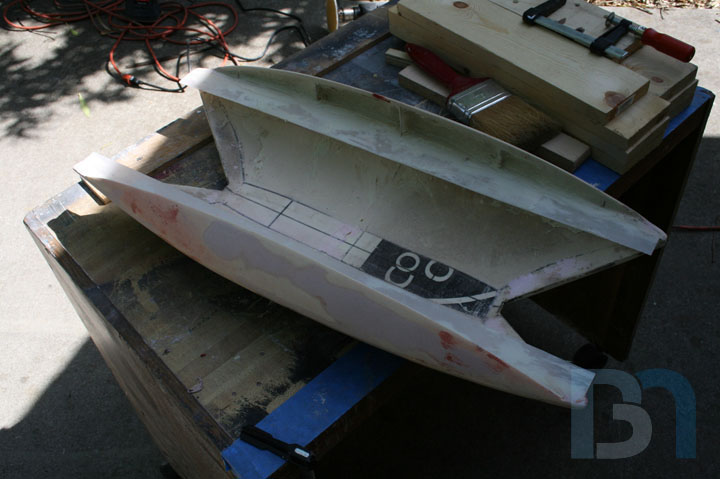
I managed to get the side skirts integrated onto the main piece. Here's how I did it:
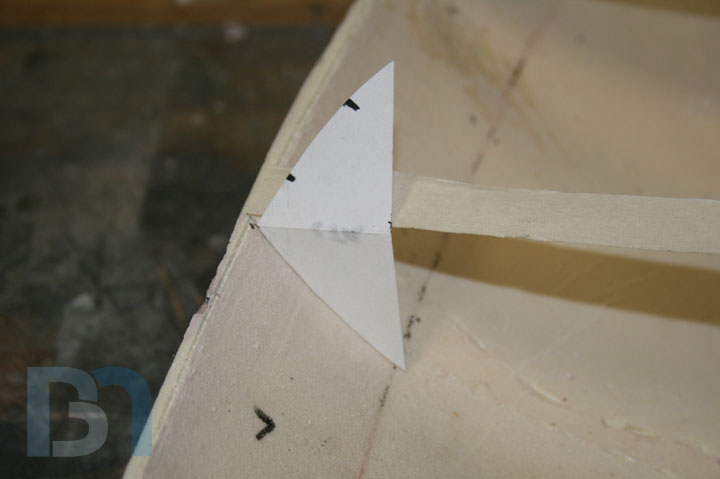
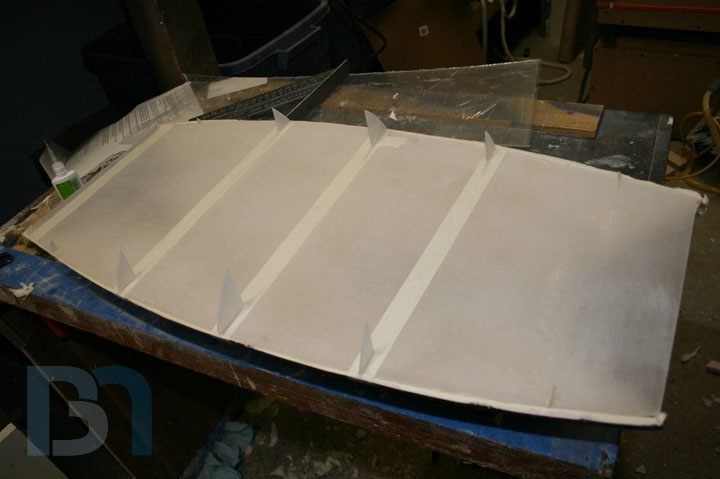
First I needed to make a paper template for the inner braces that will hold the side skirts in place.
Since I formed them on the same foam buck as the main piece, they should be a mirror image of it.
So I took a piece of paper, folded it in half and cut it to fit the curve with the fold facing up. I strung a
piece of tape across for something to square off of.
I unfolded it and cut my braces. Made two of those, then made two smaller shapes and cut four
of each so I ended up with five braces per side.
Next was to cut a floor with notches for the braces. I used the built-in line in the plastic (made from the
wood base of the foam buck) as a guide to glue down the floor.
Then I glued in the braces, making sure they were square.
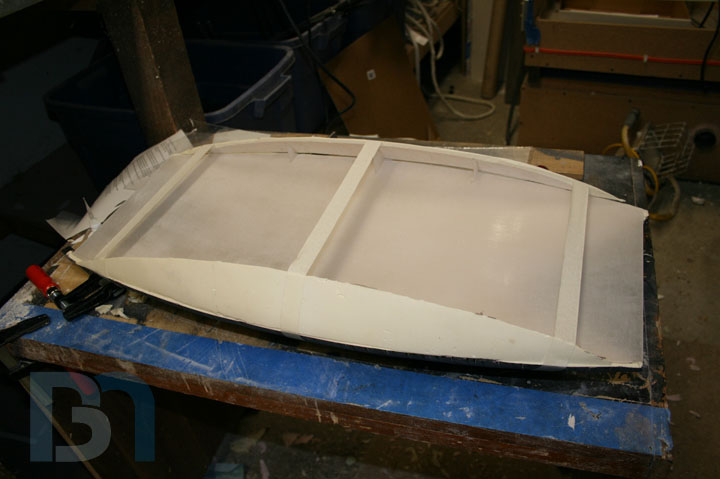
When those set up, I tacked down the side skirts. It didn't matter too much that there were some
gaps here and there, as you'll see in the next step.
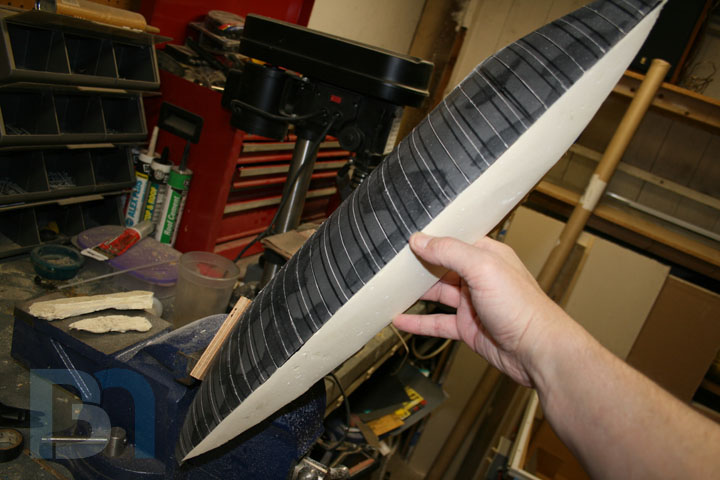
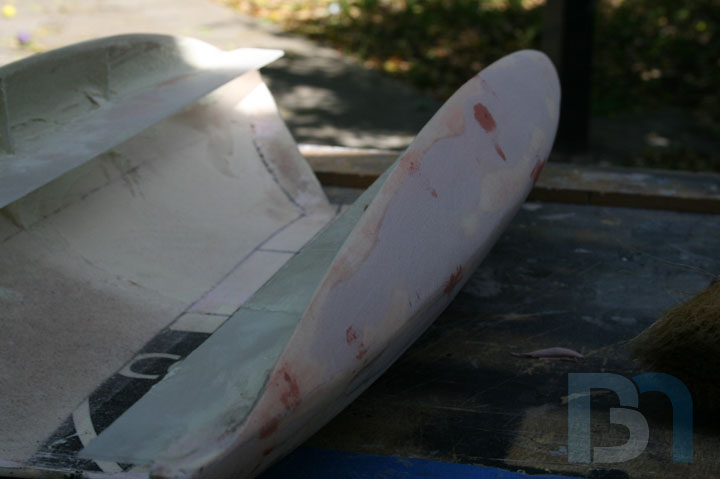
Out came the Plasti-Paste once again for a good helping of reinforcement. I cut the floor out temporarily
so I could get to both sides.
Even so, it was a bear getting the stuff in the inner pockets. That was a good stopping point,
so I let it set up overnight.
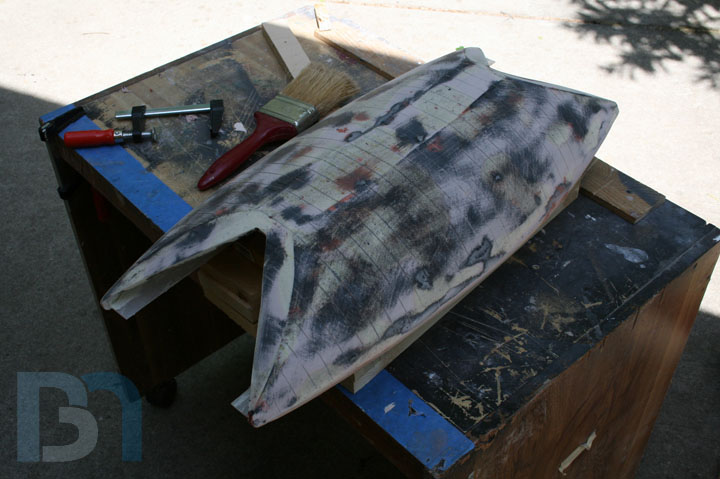
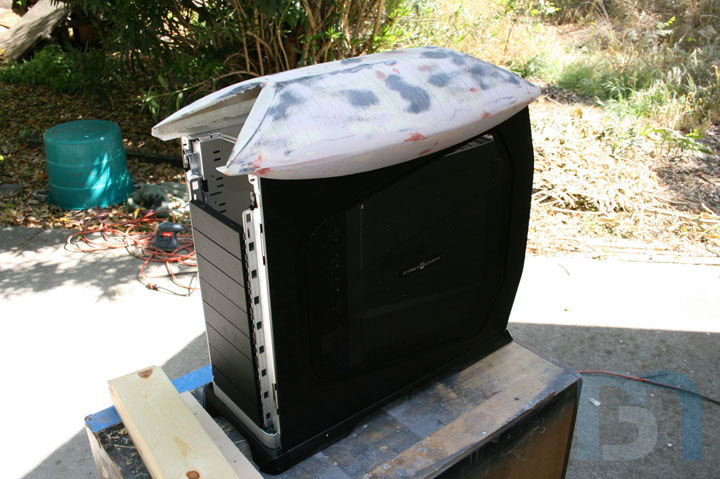
The next day I rolled the table out for some more sanding and bondo filling. Oh what fun.
Didn't need much, and only a few areas needed minor spot putty.
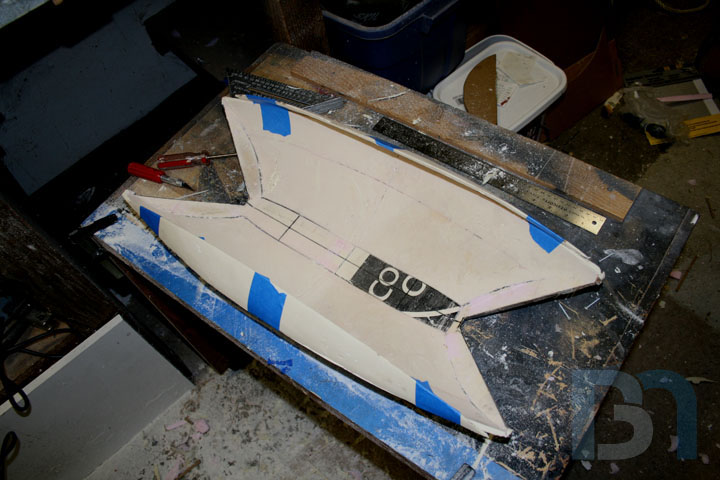
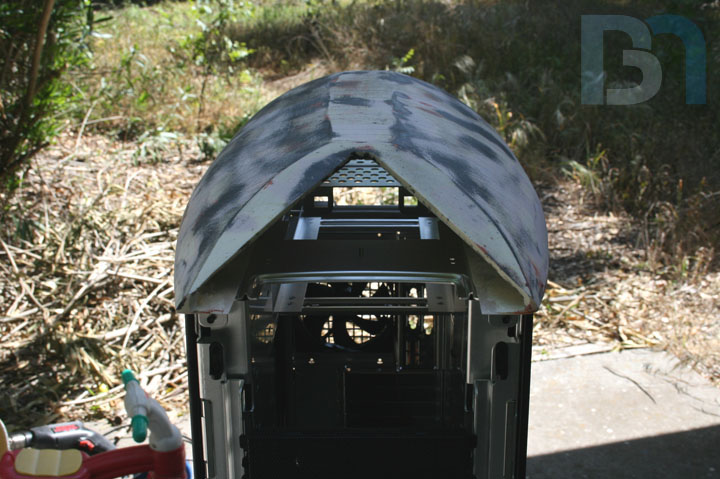
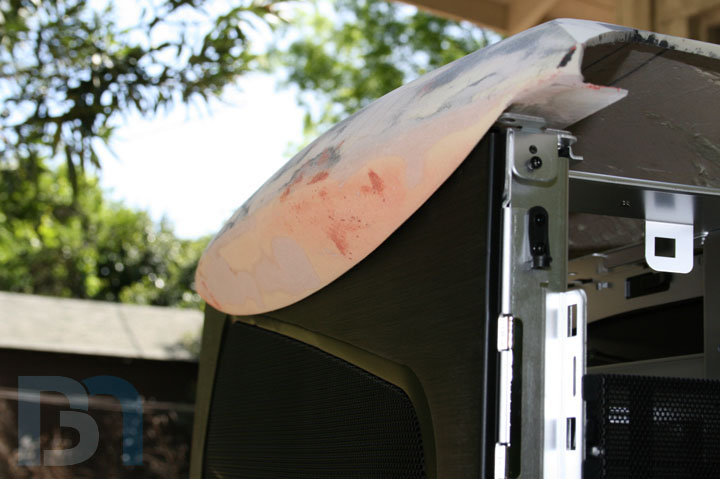
After working the edges a bit more, I blew all the dust off it and brought the case out for a test fit.
Not bad! I may not even have to shave anything off. :)
You might think I can put the ribs on now, but there's one more thing I have to do first. I want to
add some detail to the surface: Pipes, various sized squares of paneling and such. It will be much
easier doing it now, than trying to work in between the ribs. If all goes well, I can get that done this
week, then rib next weekend.
8)
This is taking shape so fast. Incredible stuff.
-Dave
You should leave that hollow and rig up an HD mount or some thing in there. You could use it as a channel for cooling by adding a hidden fan(s) to it with the hanger bay as the opening.
That is looking great so far though!
Yes, the landing bay will be totally hollow throughout, complete with running lights. Being such a large case, I can fit most/all of the components inside, so the bay's functionality might just be limited to ducting exhaust. I will get all the internals finalized though before I commit to building the floor and mounting it to the case.Quote:
Originally Posted by chaksq
8)
Time for my Sunday evening update. Not much has transpired since my last significant update.
Last time we left off with finishing up the side skirts and preparing the surface for the detailing.
Well I got most of it done over the last two days. It was good because this type of work could
easily be done in the living room with the wife and our 3-yr old. :) Although when my pile of
styrene piping disappeared, I knew who to ask!
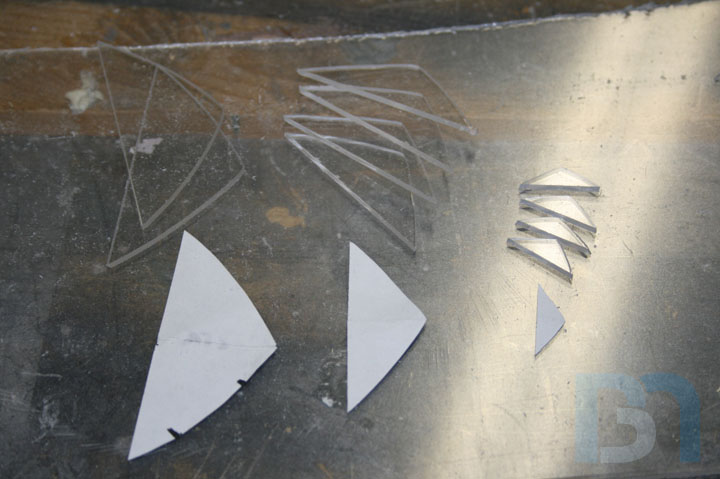
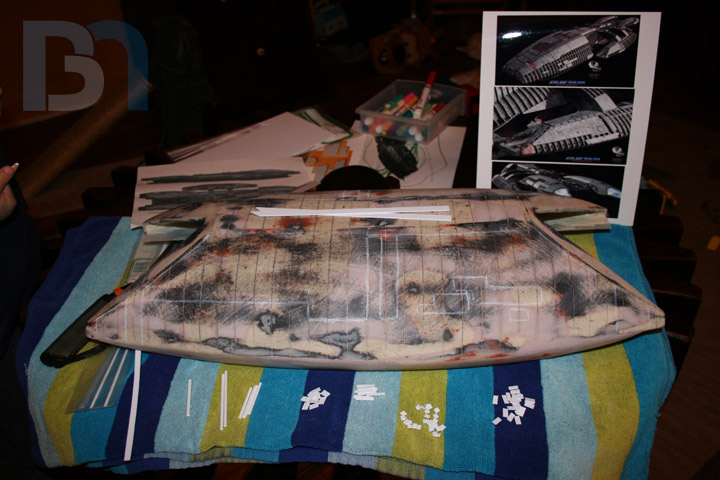
Here I had just finished cutting up the first batch of squares of various sizes and shapes. You can
see the printout of high res reference photos of the Galactica on the right (thank you Starshipbuilder.com). :)
In order to save myself some work, I drew a rough outline of where the outer armor plating will be,
so I knew where not to add the detail (since it will be covered up anyway.)
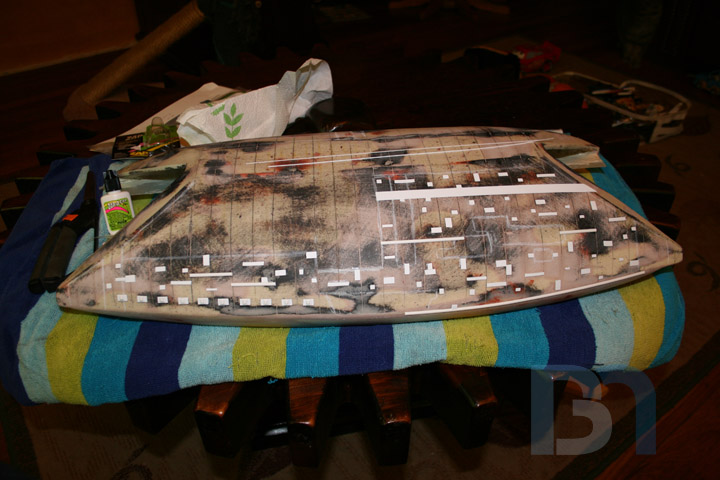
...And after I got one side completed. I basically followed the ref photos loosely, just using them
as a general guideline. I proceeded in a random fashion so as not to look too uniform.
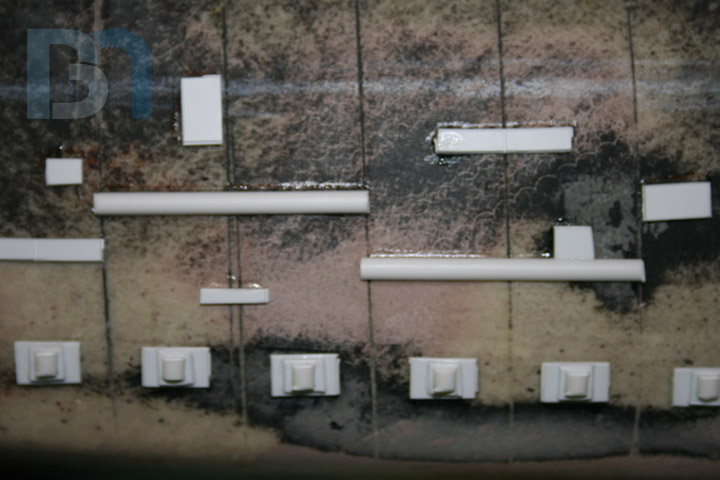
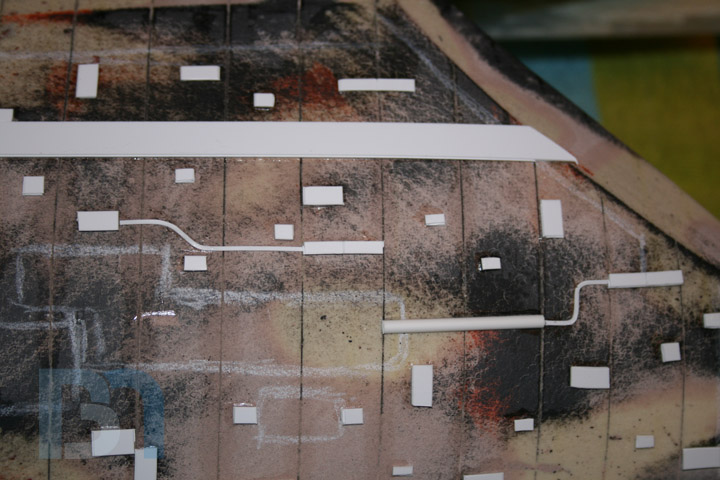
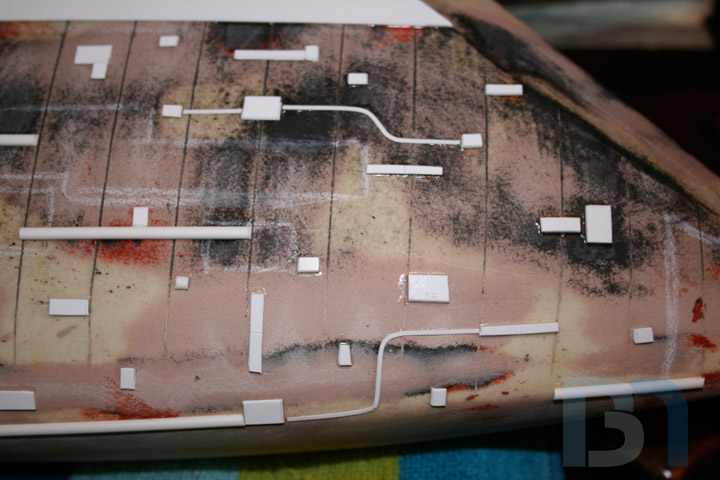
Some close up shots. Keep in mind all this will be painted the same color in the end.
For the detailing I used .040 Styrene sheet, and half-round styrene rod for the piping. The sheet came with
ultra-thin flexible strips, so I decided to use them as well for a smaller size pipe.
After adding a bit more detail on the side skirts, I think I can finally prepare the landing bay for the ribs.
If it works out, it's going to look awesome! Stick around.
8)
Looking Real Good! :up: :up:
Way to be detailed. I know this one's gonna turn out Kewl!