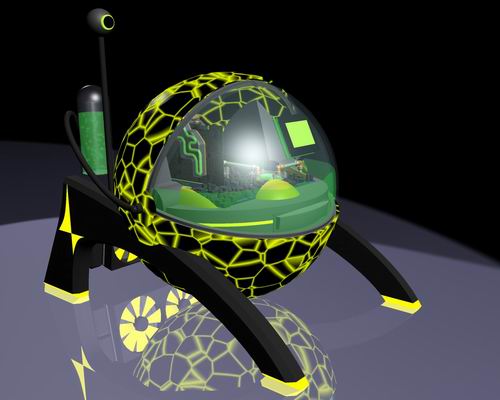
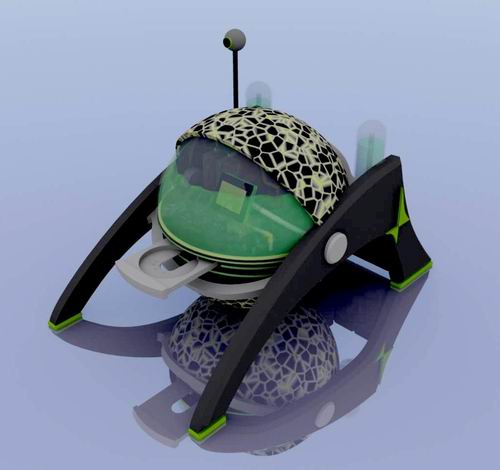
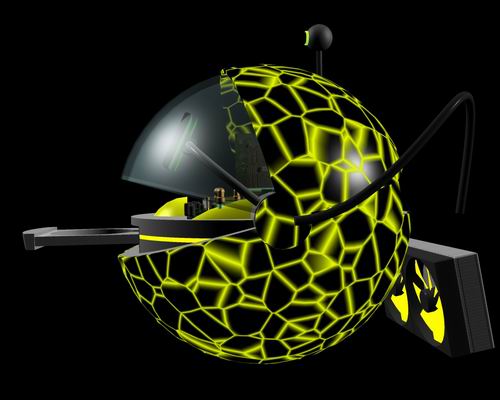
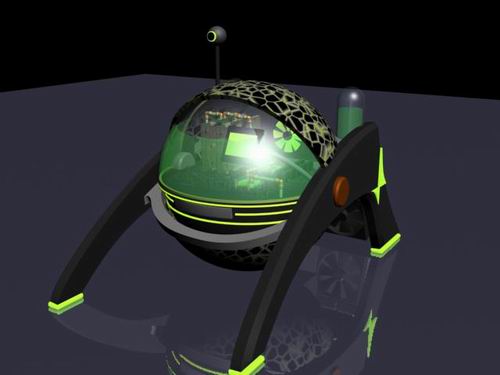
after completing two Casecons (Reactor and CUBE) and making the 10th place on the German Case Modding Cometition I thought it would be nice to get away from the cubic cases seen everywhere. As I am a fan of straight geometrics, what would be nicer than a sphere?
TBCS is simply the coolest place in the web, when you want to see mods that go far beyond some LEDs and windows in a standard case. So I hope to find some helping "hands" in here with good suggestions and experience.
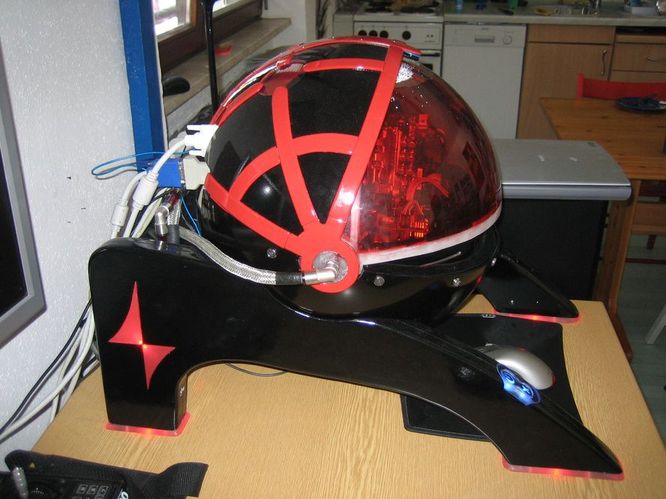
Hope you like my Orb
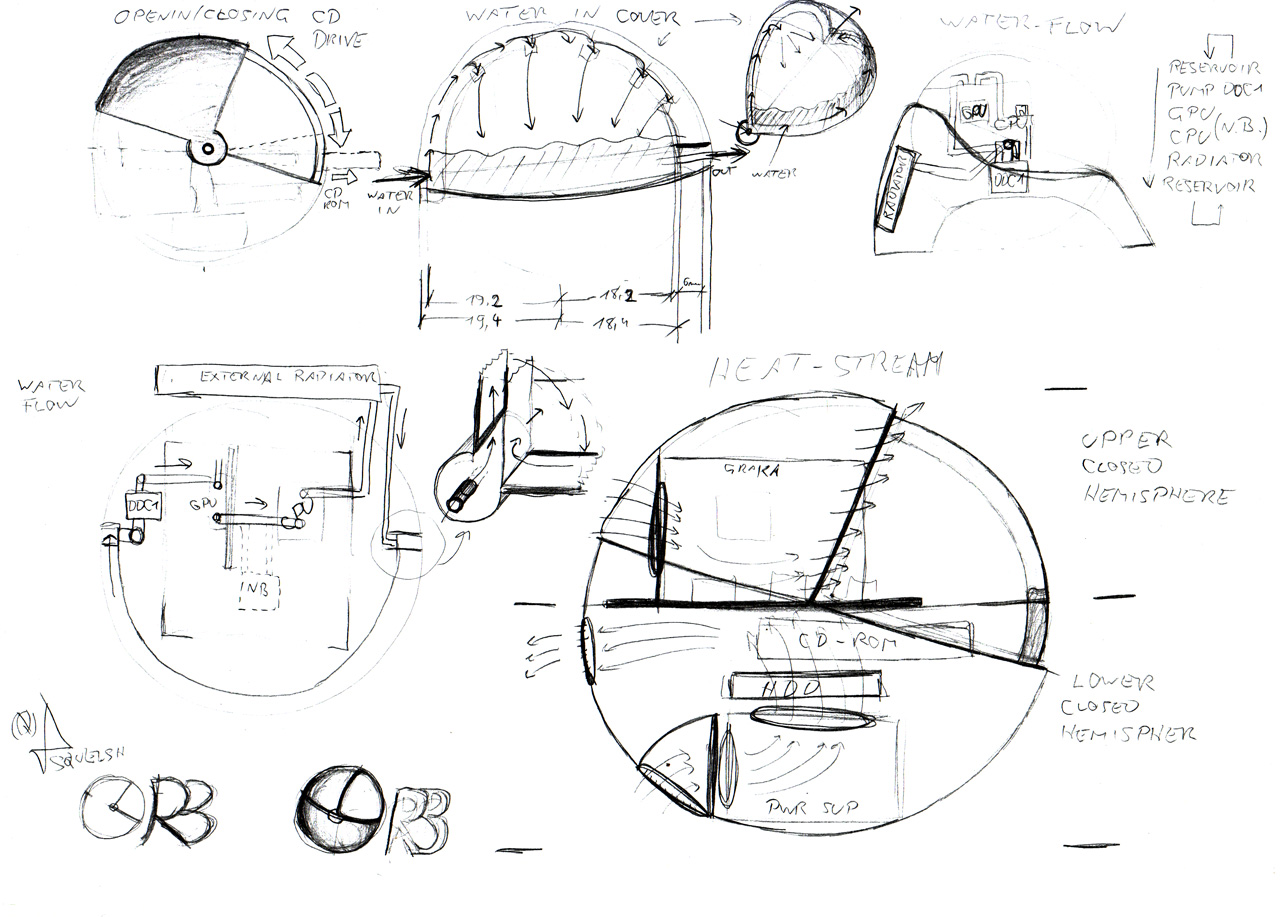
The basic idea is to construct some kind of Pacman or motorcycle-helmet that can open a visor driven by a motor. And to make it really challenging, I wanted the cooling-liquid inside this visor
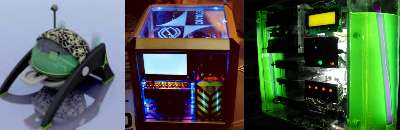
I will start with some renderings from the plans I did:
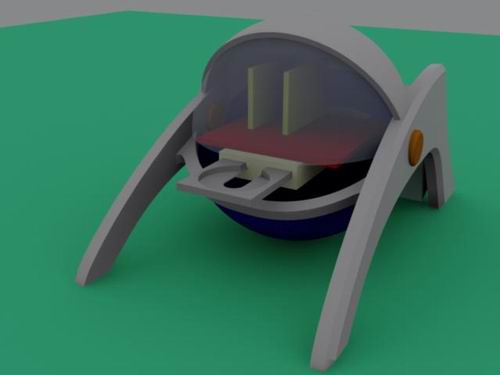
I am not quite sure, if I will build the feet this way, because the Orb has to fit on my desk and with those feet it will be huge.
The diameter of the spehre is about 40cm, giving me enough space to hide all hardware, waterpump inside. Only the radiator will be outside of it.
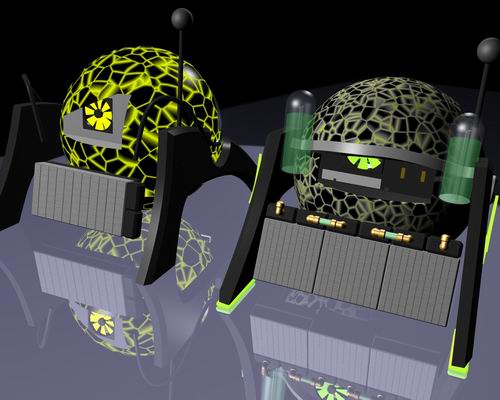
As you can see, I planned two versions (in fact some more), once a realistic one and one I could build with unlimited cash
So, what do you think? Top or flop? Worth to spend time and money on it or rather a stupid Idea to build a spheric PC? I love to hear your comments!
---------------- EDIT -----------------
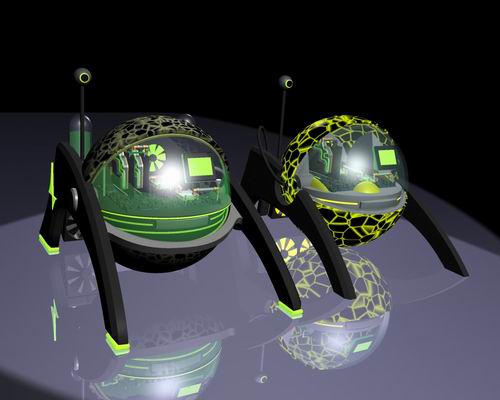
This is how far I am at the moment:
Well, I have to admit that I have been working for about two month now on this project and that I put a lot of time and quite some money in this project. So I'm going to write a log about the work that is already done, show you some big set-backs I encountered and how I solved them.
And hopefully in some month I have a finished Orb and a nice worklog
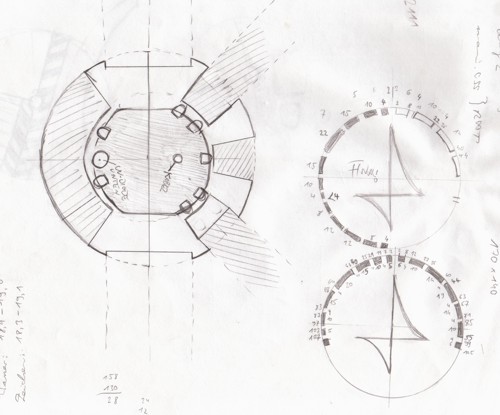
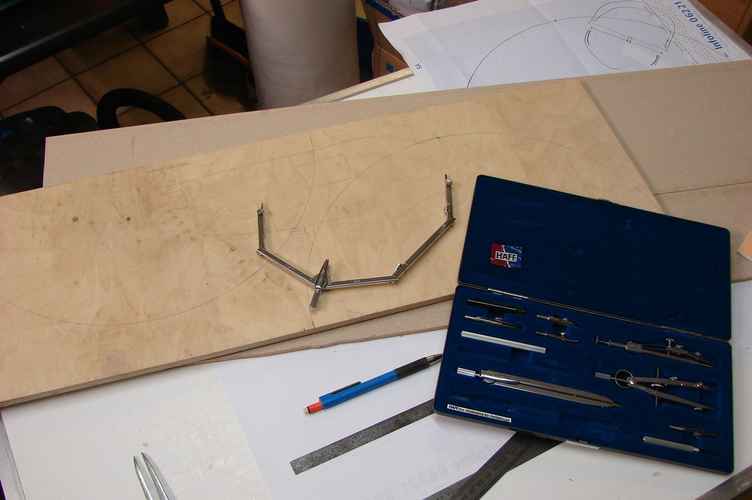
First of all, here is a little sketch and some drawings I did:
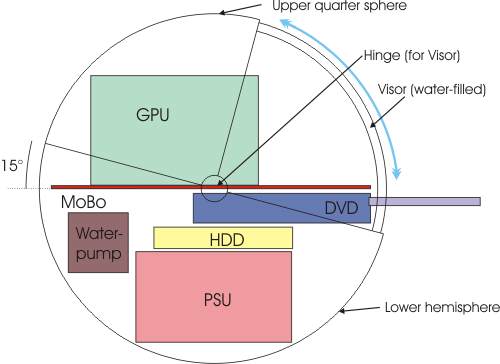
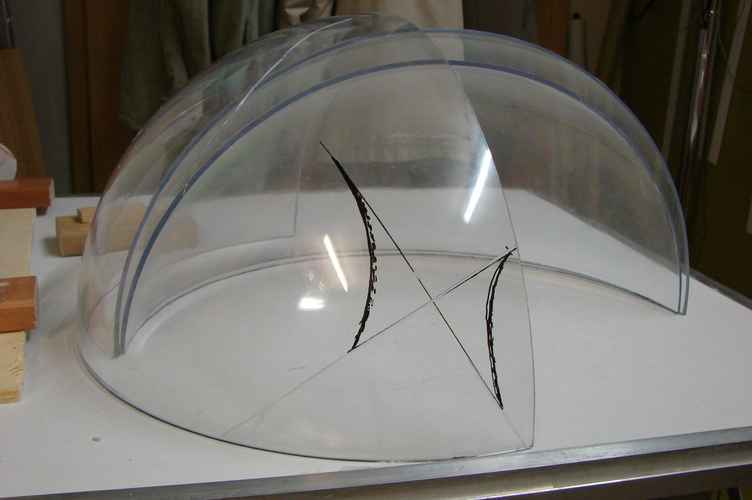
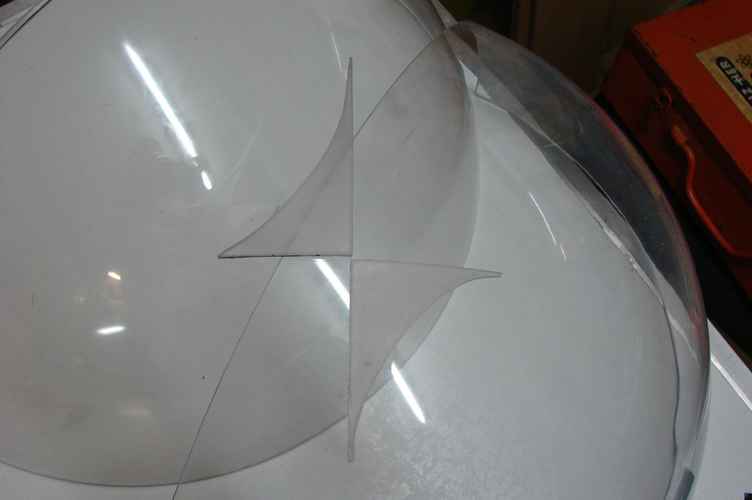
The visor is made of two quarter-spheres, one a little smaler than the other. Glued together with about 5mm of space for the water. This will definitely be the hardest part to create...
One critical problem I had:
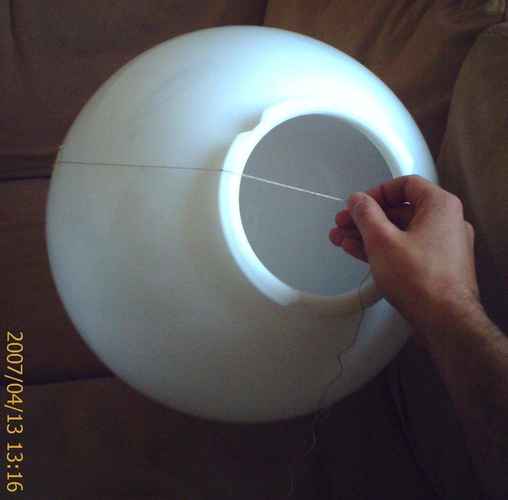
Where can one buy spheres with 40cm in diameter?
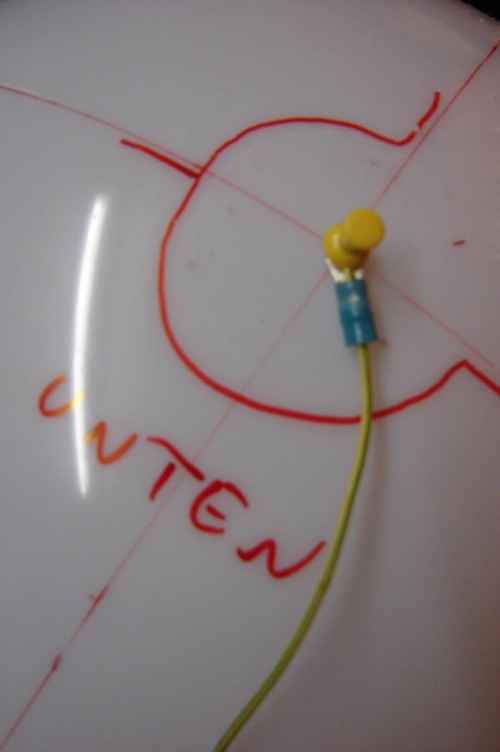
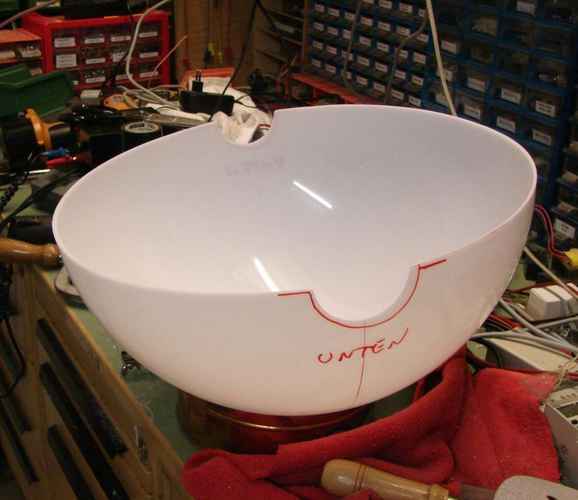
It took me about 3 month of hard search till I found a manufacturer of garden-lamps who sold a plastic lamp with exactly 40cm in diameter! So I ordered one. When it arrived I needed some tries till I figured out a way to mark an equatorial-line... The sphere had one open "side" which I needed to cut out. I finally drilled a small hole and attached a string in it with the lengh of 1/4th of the perimeter. With this I could draw the equator:
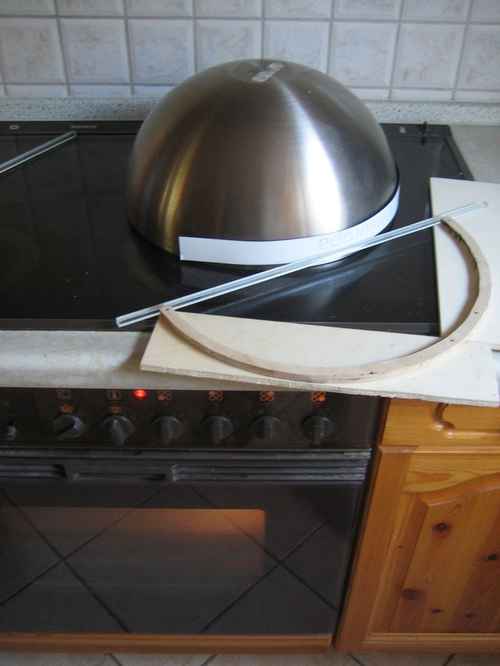
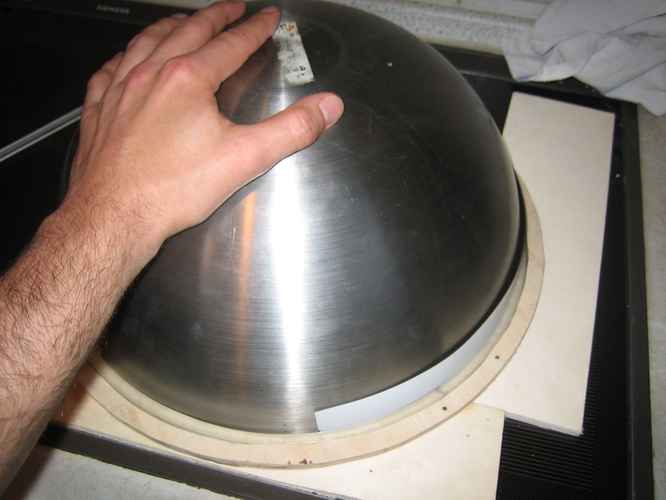
Here you see the mounting of the garden lamp.
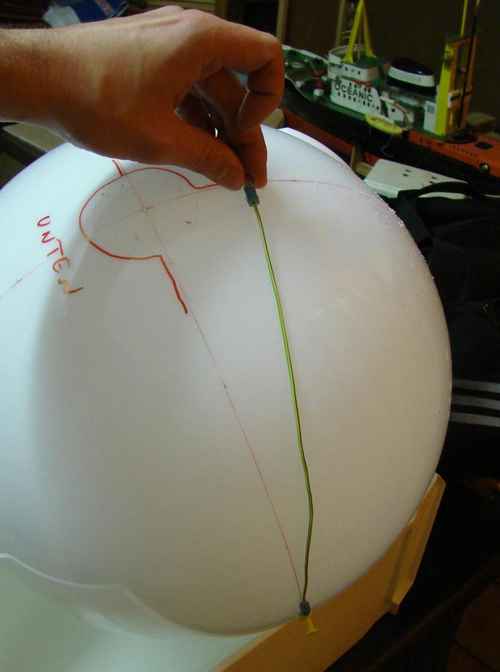
My first try to mark an equatorial line.
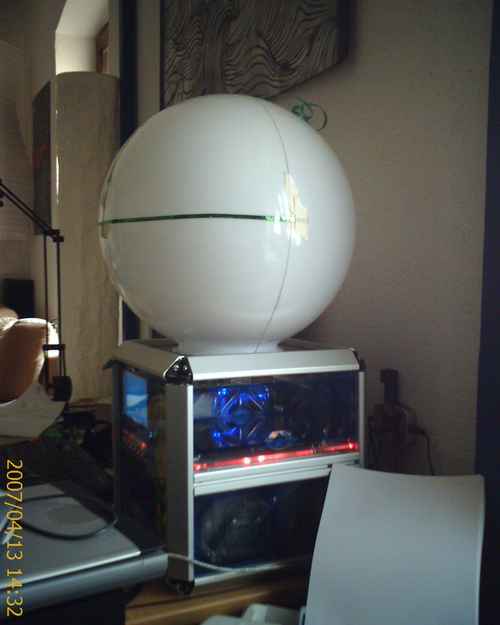
The Orb sitting on my last casecon CUBE2.
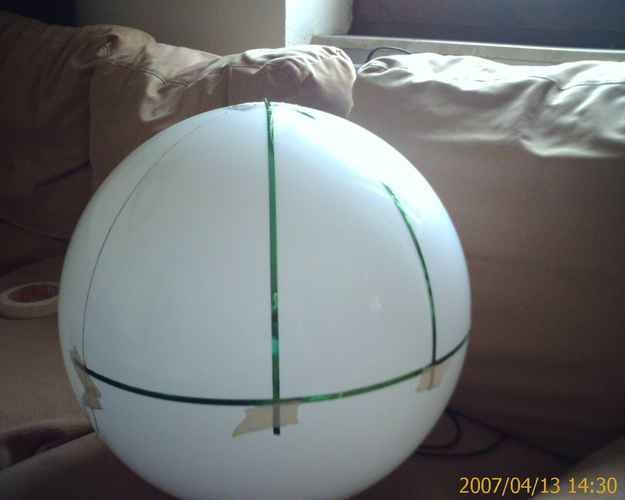
All the red lines are only for orientation. The lines I cut out were marked with a thin cutter. You can see my tool for marking is made of a cable...
... fixed with a pinboard-pin.
Drawing the lines. I corrected them with a bending ruler.
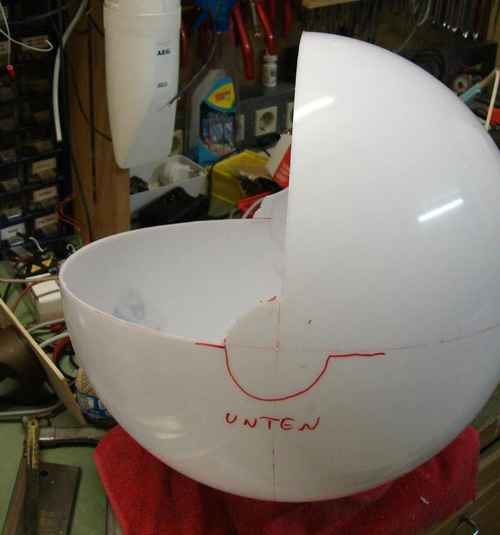
The result:
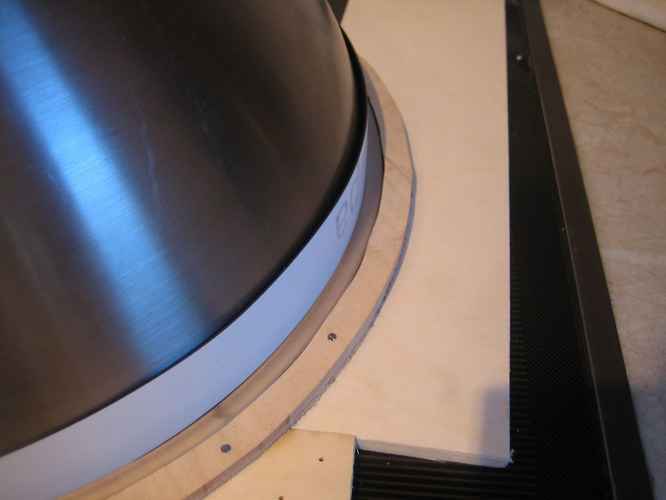
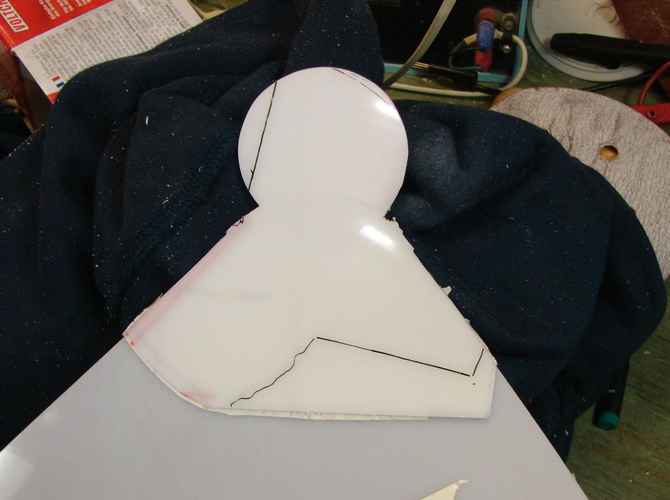
Unfortunately the sphere is made in a way that the material has not the same thickness all over ): At some spots it's only 2mm thick and somewhere else it's 5mm.
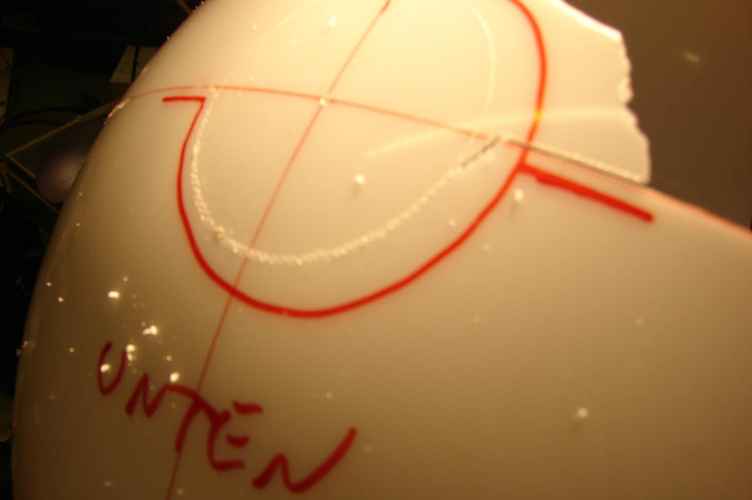
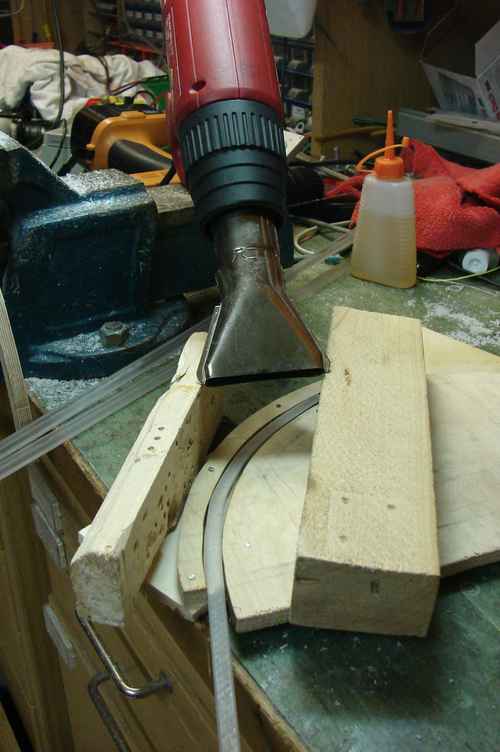
Drilling many 0.5mm holes to get this special form where the hinge for the visor will be built in.
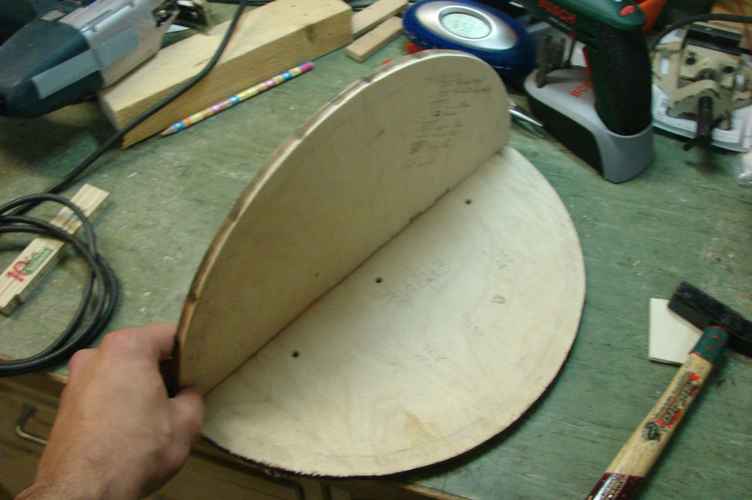
The case is made of three parts: One half spehre at the bottom, one quarter sphere for the top rear and one quarter made of plexiglas for the visor. Here you see the bottom.
This is the upper quarter with the circle that hides the hinge of the visor. It's not final in this shot. Has to be filed off.
As I mentioned above, the material-strengh differed a lot which led to a crack in the upper quarter, I had to fix with some plastic left from the mounting.
I added a video to the first post. Unfortunately you can berely see the water in the Visor. I think I have to render it again...
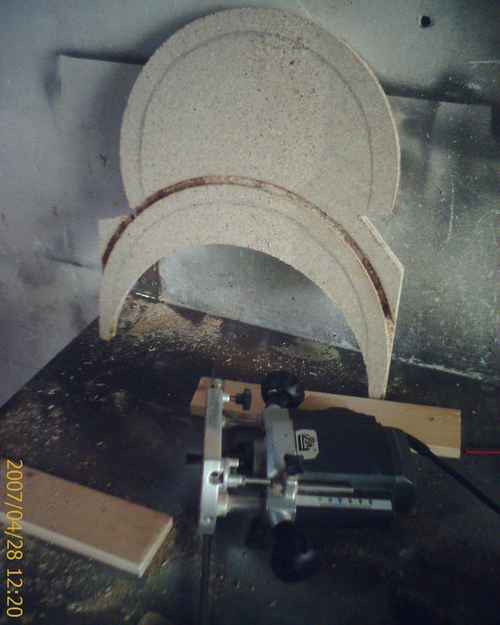
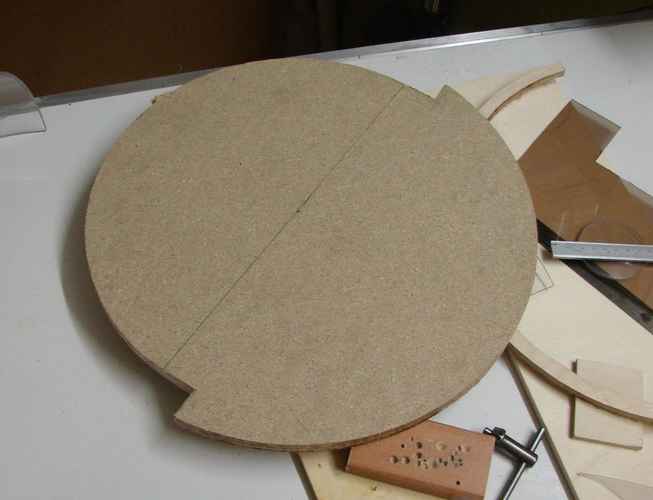
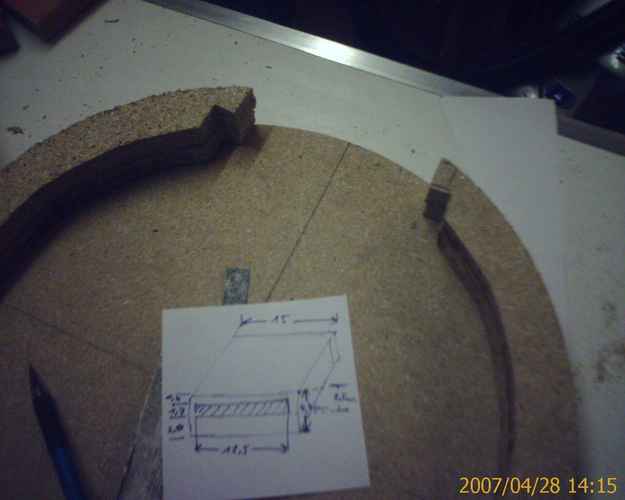
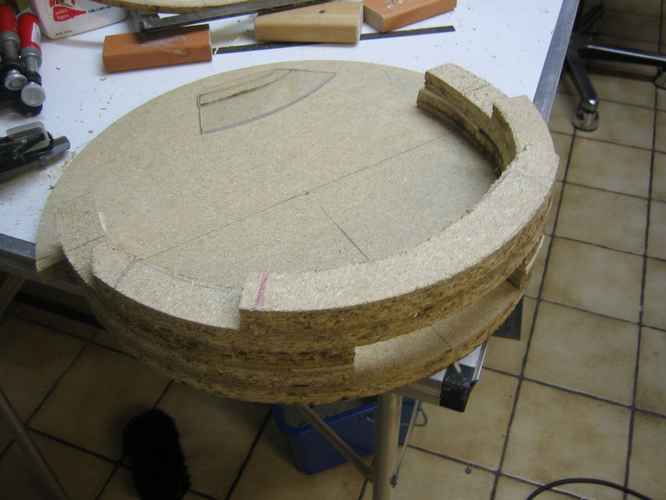
All right, lets move on. In this post I show you the first version of the basement-plate. I spent some thoughts on making it from fiberglass but dropped this thought. Now it's made from pressboard.
With a milling cutter mounted on a kind of compass I milled the circels from the pressboard. At one point, I got this funny piece. To me it looks like a rocket
I really annoyed my neighbors, because the mill is horribly loud. And I needed some time for the circles:
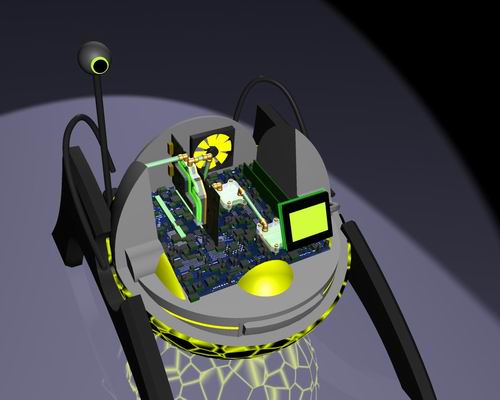
This is the top of my sandwich, where the motherboard will be mounted on.
I plan to mill in an area exacly as big as the motherbord and 3mm deep so only the chips will overlap the wood. I think this looks much better, when you look into the visor.
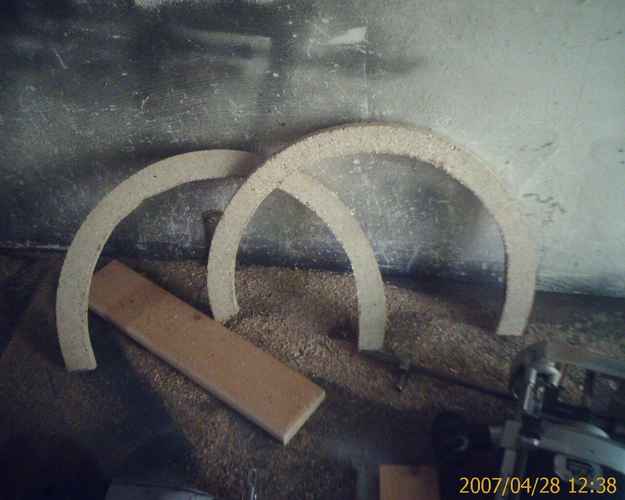
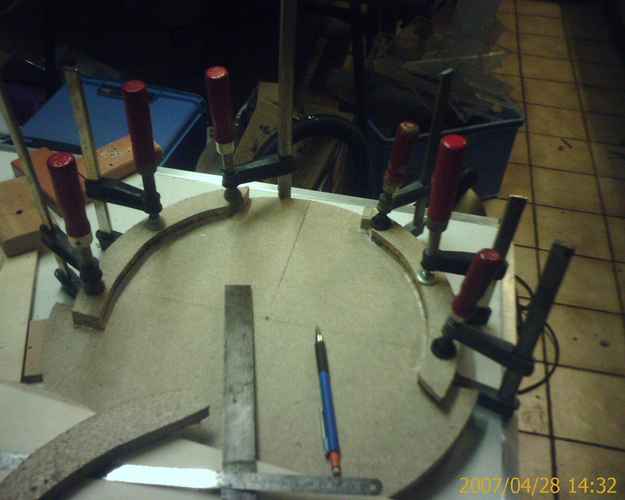
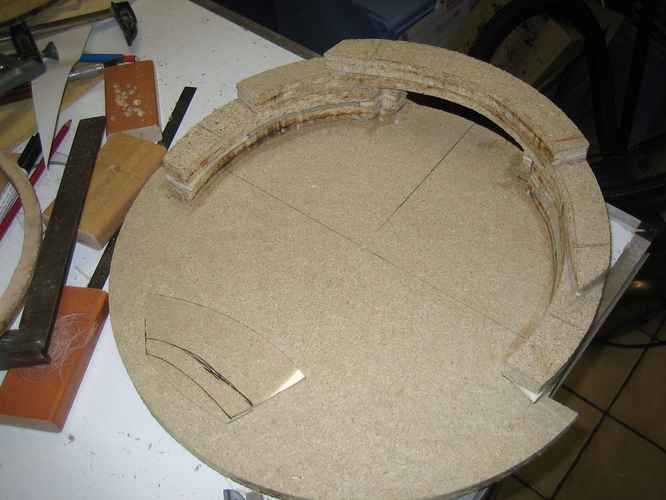
Next two sandwich layers with a space for the DVD-Rom:
Glueing it together (fortunately the glue takes only 15 minutes to harden):
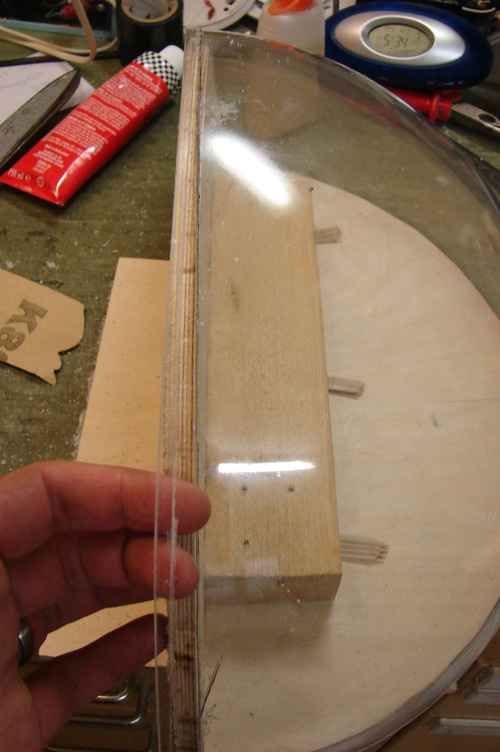
The result (top down). The piece of plexiglas you see is going to be mounted in the slits left and right to the DVD-Rom and will be illuminated by LEDs.
Wood is really a nice material to work with (even if it's pressboard): All you see above took me one afternoon. If I tried to make this piece of fibreglass, plasic or something I would have needed some days. I hope, that after filling, sanding and painting it will look like plastic.
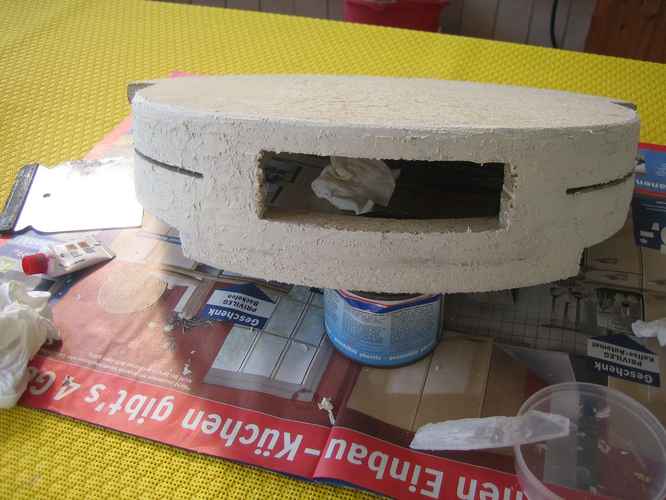
The filling:
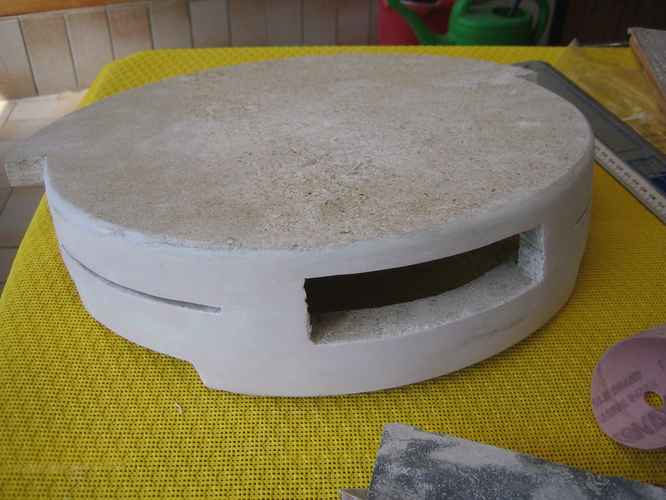
And after sanding and filling and sanding and filling and.... Smooth like plastic!
Here you see the slits for the illluminated plexiglas.
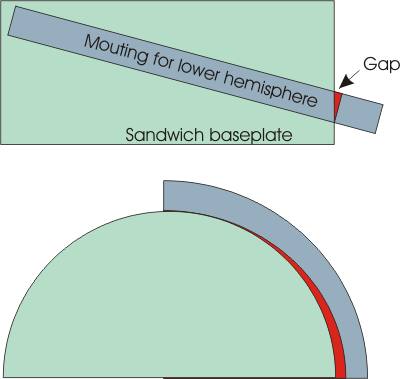
As you have probably seen in the sketches from my second post, the whole case is rotated about 15 deg but the motherboard lies horizontal. So I need the mounting for the lower hemisphere glued to the base in this 15 deg angle.
So far no problem. BUT: If I had cut this mounting circle with the mill in the same way as the other circles and fixed it with 15deg to the base, it would have left me a big gap...
My first try to solve this, was a selfmade 15 degree mounting for the mill. But this didn't work. So I milled the circle 5mm bigger and carved the form I needed by hand. This was annoying: Carvin, holding it to the baseplate in the right angle, marking some spots, carving them away, holding it to base and so on...
Finally I could glue it:
And that how my first version of the baseplate looked like:
I don't know, if you can tell from the pictures. But I made a huge mistake, and glued the outer ring in an angle much bigger than 15 degrees
Another problem was the filling I used on the wood: The mixture was wrong and it did not harden right
So, thats why I say "first version"... I had to tear it.
In the next version, the outer ring will be made of some harder wood, so that the screws fixing the hemisphere to it have a better hold. And hopefully the filling will harden out right!
I am curious about your comments. Perhaps you come up with an idea to build this baseplate in a much easier way! It would be welcome. If someone can offer me an industrial mill, where I can carve this whole thing from one big block of plasitc, it would also be welcome
Tomorrow I will upload the pictures and the story from the Visor.
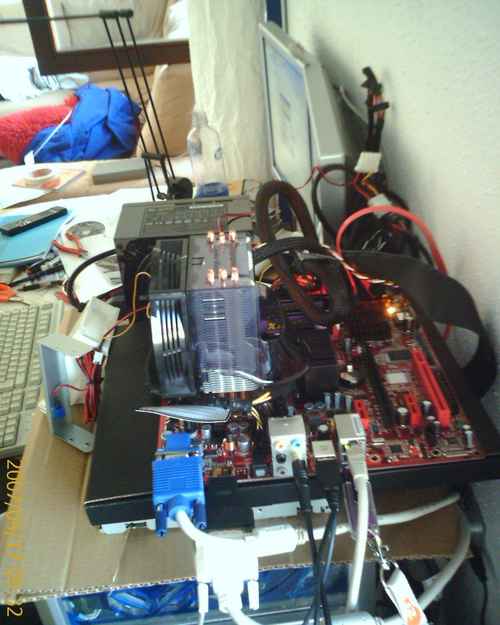
Only a quick update on my new hardware now, pics from the visor will follow later this day.
A friend of mine was on a big computer fair here in Germany and signed in to almost every lottery on this fair. The result was quite amazing: He took home hardware worth more than 2000€ ! From him I bought my CPU and RAM.
So what I got so far is:
ABIT Fatal1ty Micro-ATX Mobo
Intel Core2Duo 6600
Cooler Master Hyper TX Intel CPU Cooler
2GB Corsair 800MHz DDR-RAM
500 Watt Be Quiet PSU
WesternDigital 2500KS, 250Gig, 16MB Cache HDD
It rocks!
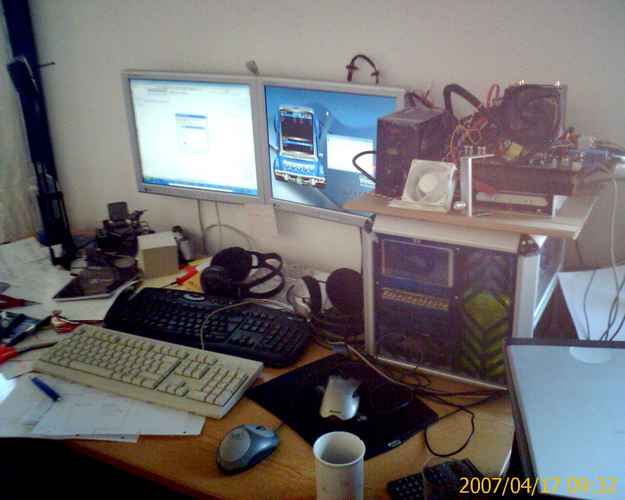
Sorry for those crappy handy-pictures...
Those scattered parts are my current workstation, lieing on my CUBE2 case
As long as CRYSIS is not out yet, I will wait with buying a new DX10 GPU. The on-board GPU supports DX9 and dual screen by using the HDMI-to-DVI adaptor. Thats all I need for work.
When I'm back from office-work, I will post visor pics. So stay tuned, you will probably like them
All right, here we go with the visor:
- Pre-Story:
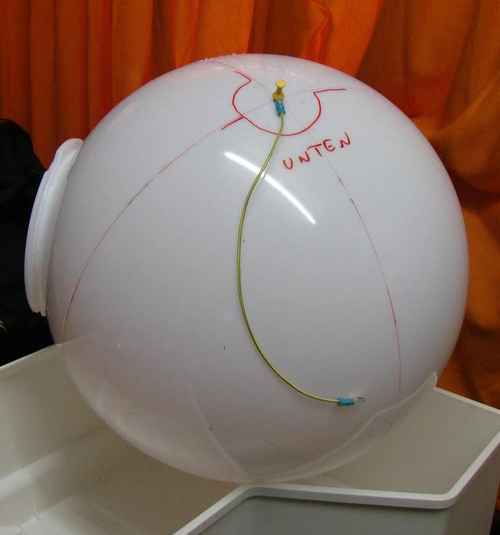
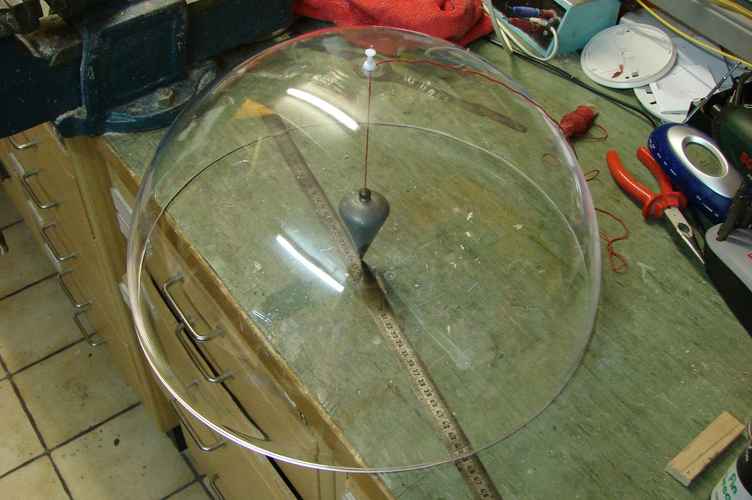
I found a german store that sells decoration material for shop-windows. They sell 40cm hemispheres made of plexiglas. This time it was not as complicated to draw a aequator line, as it was a hemisphere and not a whole sphere.
The hemisphere had a little mark at the center. So I drilled a little hole there and marked two points that were exactly on the opposite "end" of the sphere:
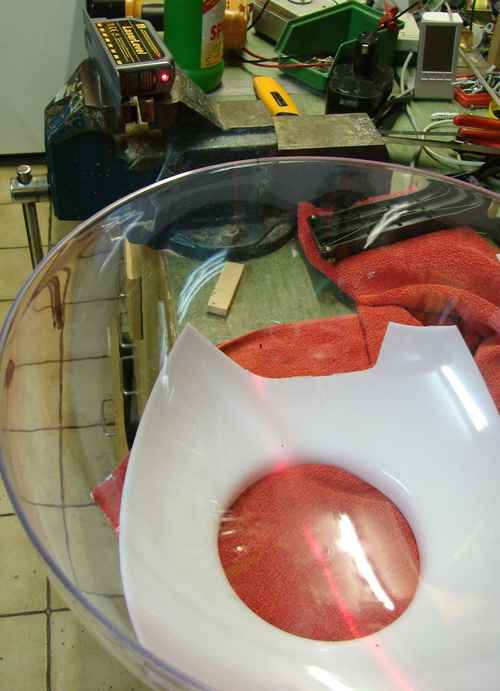
Then I tried to draw lines from the center to those points. First try was a laserline but it got too scattered by the round plexiglass.
So I used a bendable ruler. The white thing under the plexisphere is the cut-out from the garden-lamp I used as a support and ended with this:
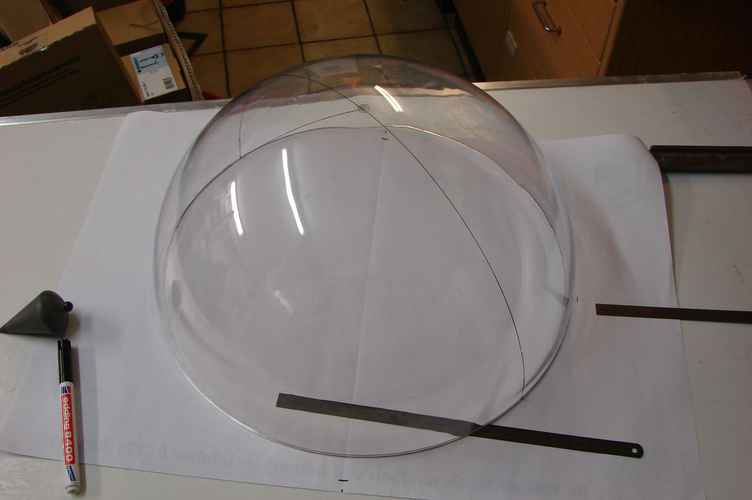
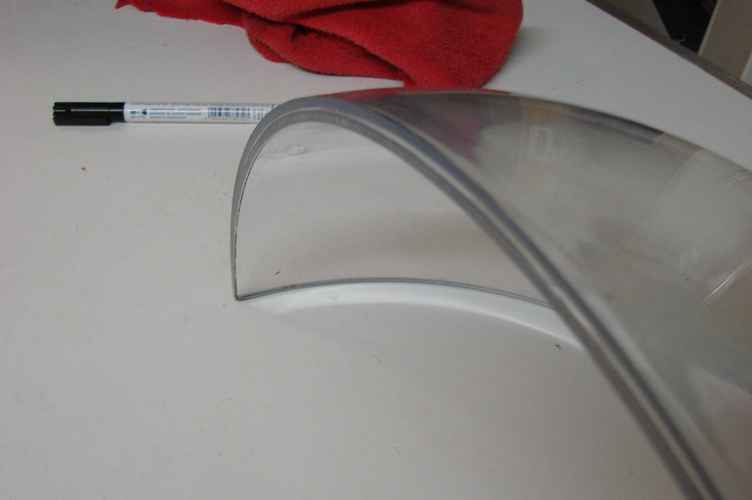
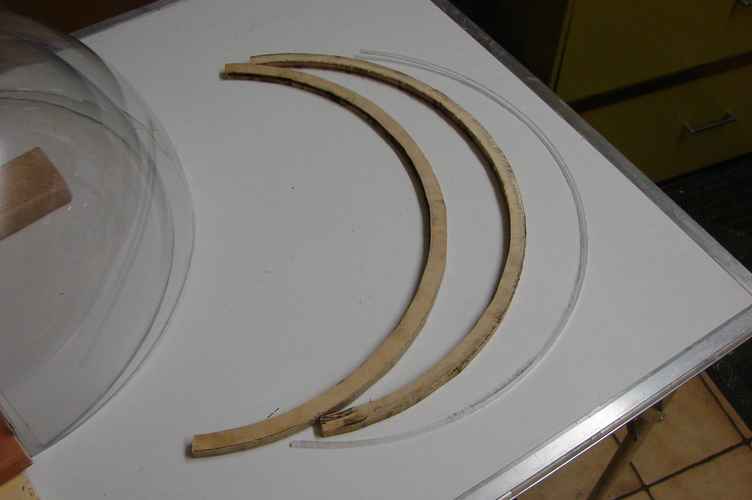
Next step was to build two templates for the quarter-spheres. They had to differ in size, as one of the quarters sould lie inside the other one and had to be smaller.
I could then cut the plexiglass exactly:
Then I dissassembled my template, cut the wood smaller and repeated the process.
This gave me two quarter spheres of the right size:
At this point, I stopped working and left the workshop. When I came back the next day, some stuff that fell from a shelf over the workbench had destroyed one of the quarters From all the sawing the stuff must have been shaken a bit and crashed down in the night.
So I had to order a new sphere and wait a week for the delivery
- Restart:
After slicing another sphere it had to be sanded a little but I was quite happy with the result.
These are the left-overs from the work. They were used later:
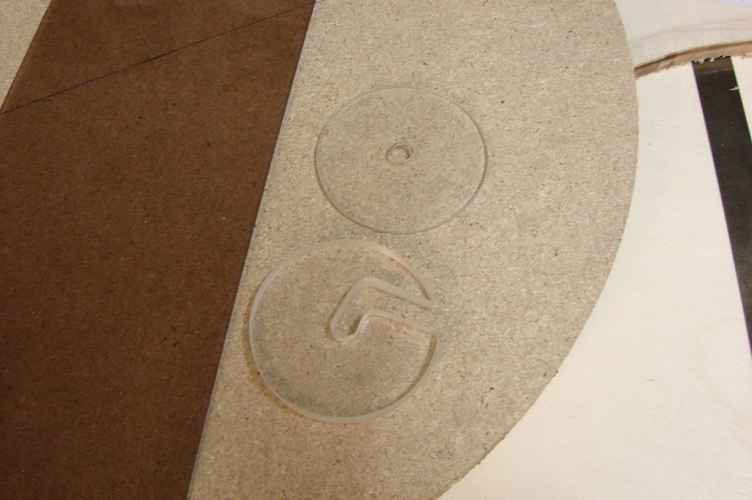
- The Logo:
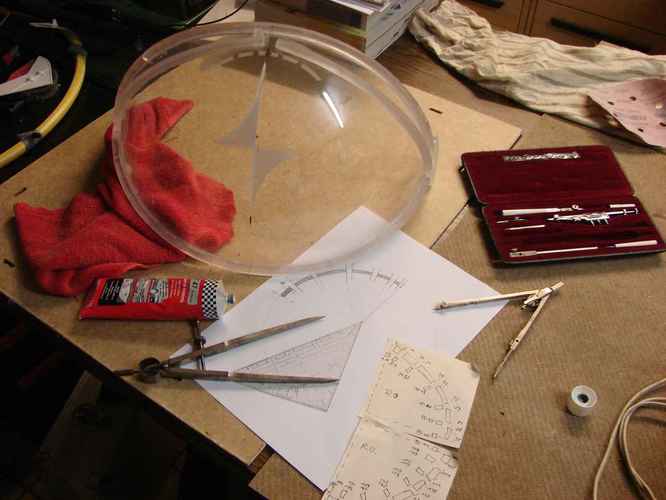
From the destroyed quarter-sphere I started to carve out my logo:
I glued 3 layers together and let the sanding machine do the rest
- The bending:
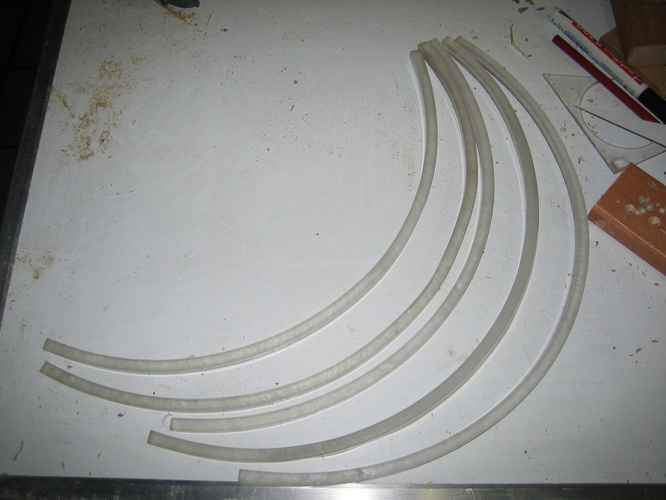
I needed some kind of spacer that had to be placed between the quarter-spheres. For that I used quadratic Plexiglas bars with 8mm side-length.
Of course they had to be bended in a 39cm diameter. I experimented with a hot-air-stream and a template made of the leftovers from the template mentioned above:
Results were unusable
After searching the whole house, I found a really huge saladbowl made of aluminium. Guess the diameter: 40cm I used thick tape to produce an edge on the bowl, so that the bars could not slip to a wrong position.
Then I put together a new template and threw the plexi-bars in the oven. 3 minutes at 80 degrees celsius made them flexible enough for bending.
With two more helping hands from my sister and some burnings at my fingertips I got nice circles:
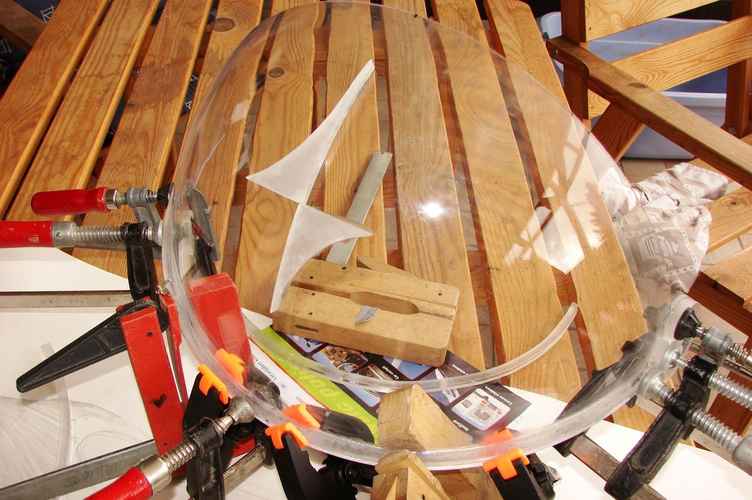
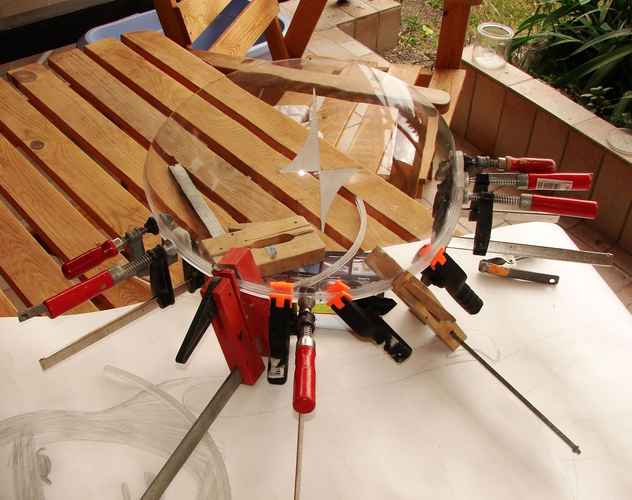
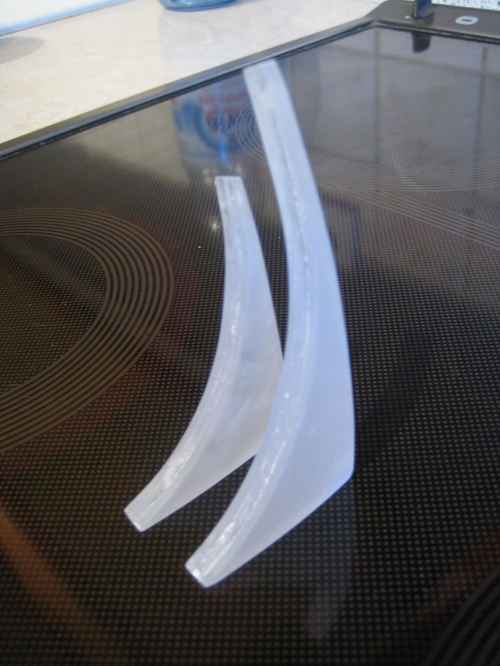
- The hinges:
As the visor should be able to rotate for opening and closing, I built two plexi-pieces where the water flows through in the center and then gets in the right direction in the visor:
- The glueing:
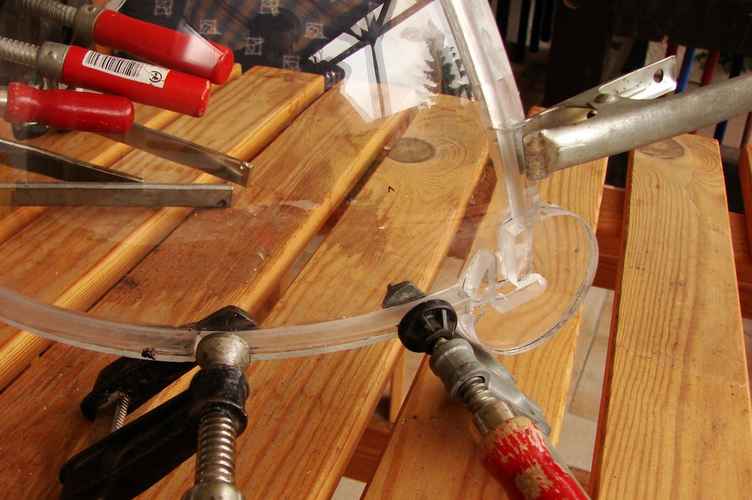
For that I bought special plexiglas glue in an onlineshop. I came in two componets: The glue itself and a hardener. I ordered some pipettes too, to be able to mix the doses right. But I had to recognize, that even the pipette was not the right tool for measuring 0.3 millilitres! Thats the amount Somewhere I had read that about 24 waterdrows make one mililitre, so I used 8 drops of the hardener and it worked.
Piece by piece the parts found their place:
After each piece I had to wait one day for the glue hardning.
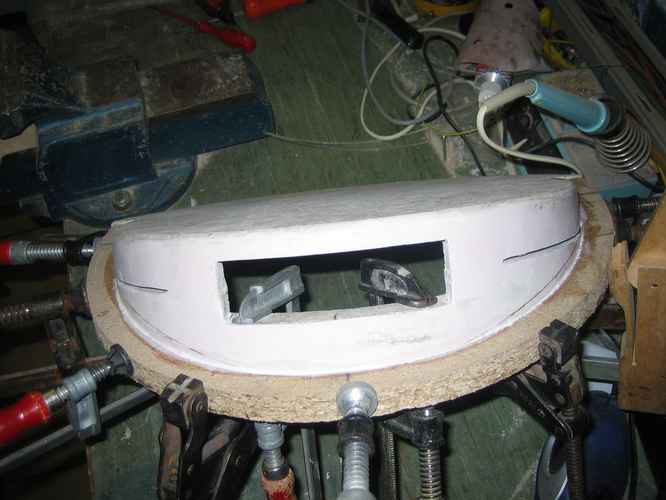
Here you see the duct where the water will flow upwards:
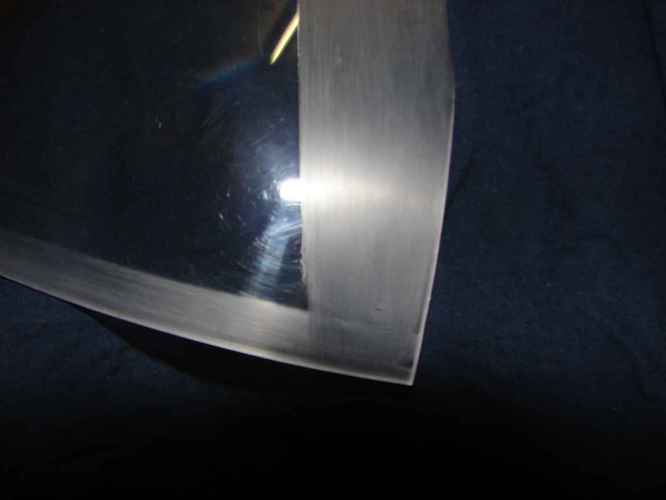
Here you see one corner with the hinge and the water-duct inside the hinge.
I was quite happy, that I got so far without breaking any parts
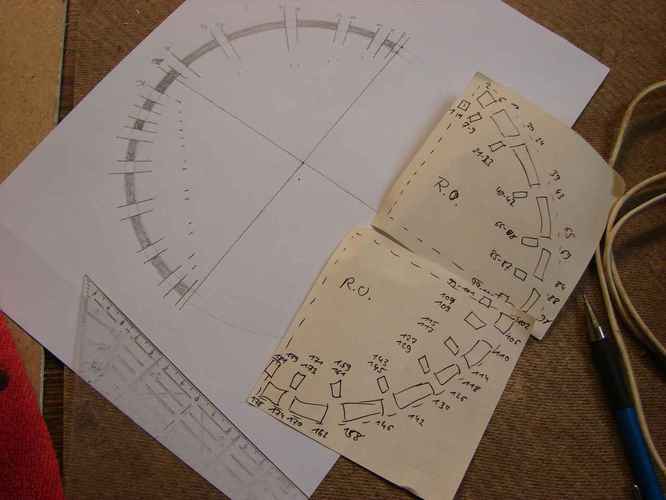
As the logo needed some touch-up, I constructed some kind of pattern on paper (the thing on the left will be discussed later):
Then copied it with a pair of compasses to the plexiglass:
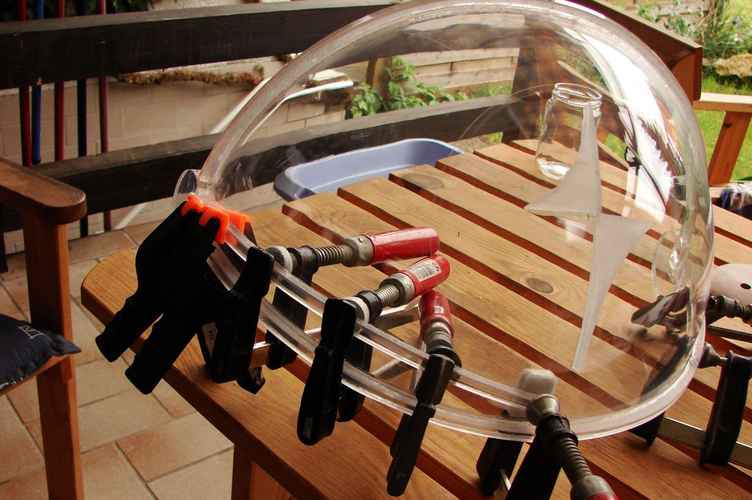
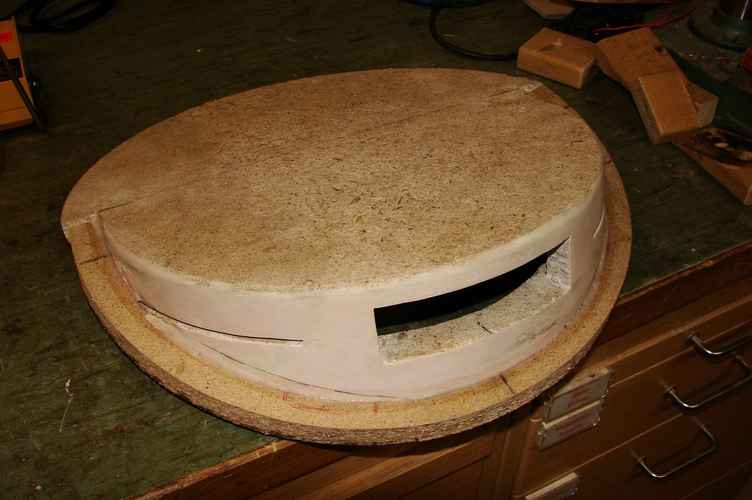
- The outer hull:
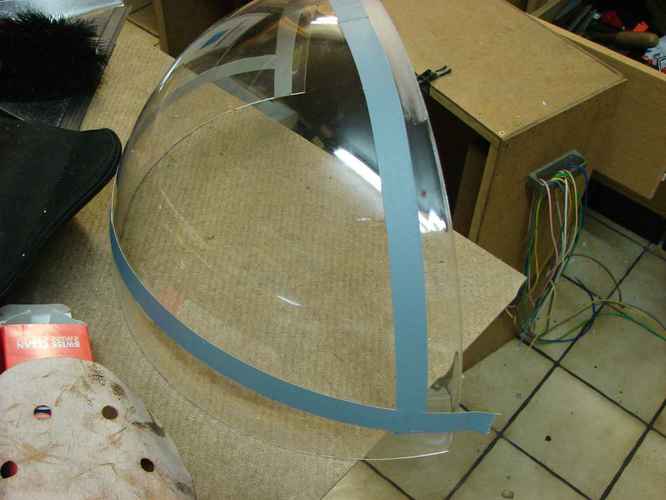
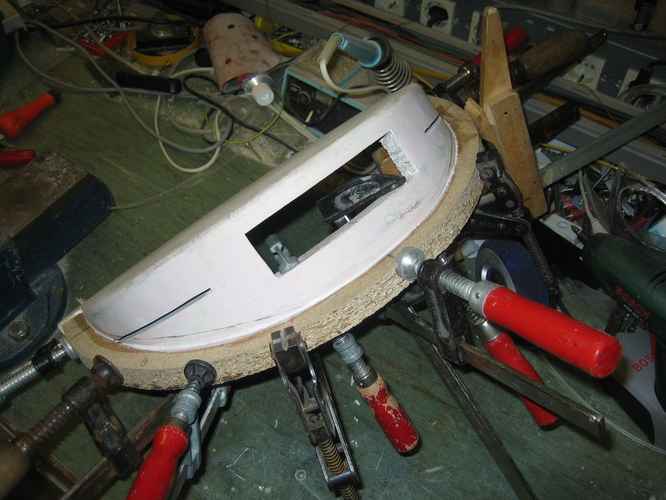
Even if the glueing edged did look better then on former projects, I wanted to hide them. So I fixed the outer quarter-spehre with some tape to the inner one and masked the glueing areas with tape:
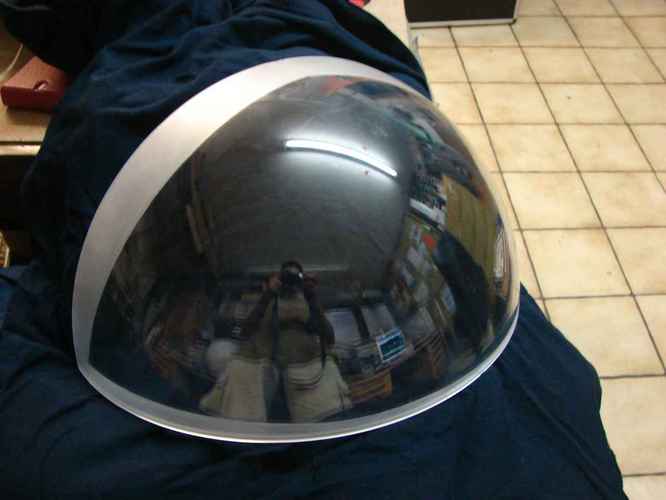
And sanded the plexi so it got opaque:
I think, the result is pretty cool
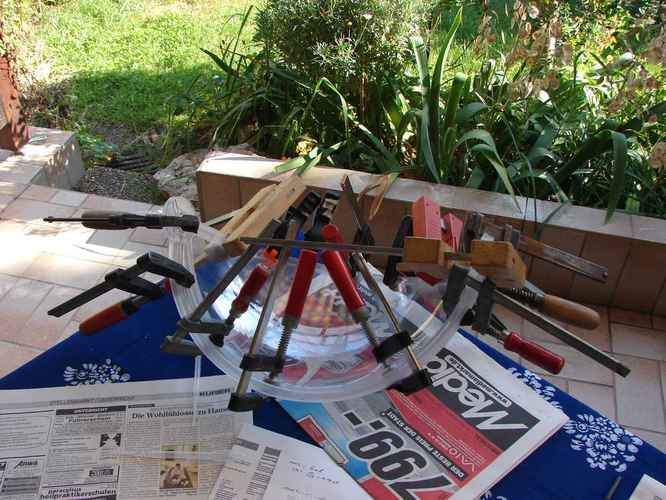
Last pic shows you the hardest step of all: As I got only some minutes to work with the plexiglass glue, I really had to hurry. Putting the glue to the spacers in the inner quarter-sphere, then placing the outer sphere and fixing it with all screw-clamps I could find. All within some minutes...
Tomorrow I will show you the latest pictures of the visor and with this the bitter end of the story (at least for some weeks)
At this point, you I will have shown you all the work I have done to the current time.
I would be really happy about some posts and your thougths of this project so far. I need some encouragement at this point


 From all the sawing the stuff must have been shaken a bit and crashed down in the night.


 I used thick tape to produce an edge on the bowl, so that the bars could not slip to a wrong position.