crazy


crazy
Arctic Cat * Maximum Security * Cribbage Board * Rockin Case * Armor Redux
Tempest SXR * Power House * Red Comet * ICHIWZ * Acrylic Headphone Hook
Continuing sponsorship support from PCBoard.ca


crazy, yet soooooo sexy,
i want to do the best wire job anyone has ever seen on my next computer, but i don't think its going to be as clean as yours there,
I might get an old board and try soldering the ATX power to the back.
keep up the good work man
Mary had a little lamb. It bumped into a pylon. Ten thousand volts went up its arse and turned its wool to nylon!

Thanks a lot guys.
Today I added another 144 pcs to the list.
I spent the past 5-hrs using a mini 22mm pipe cutter to fabricate 144x 17mm long spacers.
My hands are now crippled and blistered.
I used some old copper pipe I had laying around - the scratches and corrosion made the job about 10x harder than it needed to be.
The spacers were cut from 10mm OD copper pipe and will be used 72per side to keep the copper fins evenly distributed.
Here are the fins in question:
*click for big*
Here's a really quick Teaser:
Thanks for reading - tune in soon.
PROMETHEUSCU - powered by: AquaComputer, Corsair, MiPS, and Watercool
July 2008 MOTM Nominee - TBCS: Front Page Article - TBCS: Featured Worklog

Dude I really feel for your crippled hands but the end result was perfect.
Project: Elegant-Li *NEW*
Project: Alpha FINISHED
Project: LEXA Revival FINISHED
Project: LEXA FINISHED Bit-Tech MOTM Nominee October 08
Here are some detail shots showing the pain in the ass that was.
Here's the making-of the spacers:
First up some dimensions:
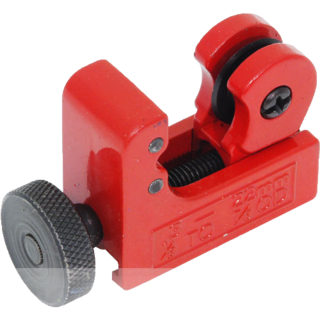
Here are the tools involved:
The stages of construction - because I used a displacement style cutter I'm left with a large burr on the edge. I used a countersink bit to ream out the inner edge.
Note the funky looking tool on the right.
I made this little device using some plastic washers, some old hardware, a micro nut driver, and a broken dremel bit. (The nut driver was replaced with a drill for most of the sanding). When you tighten the screw the rubber expands ans holds the spacer nice and firmly to make sanding easier:
Repeat process 144 times... and as my joints stiffened and as the blisters grew in number I soon learned to loathe these items:
PROMETHEUSCU - powered by: AquaComputer, Corsair, MiPS, and Watercool
July 2008 MOTM Nominee - TBCS: Front Page Article - TBCS: Featured Worklog
The spacers do look damn good though.
Project: Elegant-Li *NEW*
Project: Alpha FINISHED
Project: LEXA Revival FINISHED
Project: LEXA FINISHED Bit-Tech MOTM Nominee October 08
indeed, +rep for your hard work
Arctic Cat * Maximum Security * Cribbage Board * Rockin Case * Armor Redux
Tempest SXR * Power House * Red Comet * ICHIWZ * Acrylic Headphone Hook
Continuing sponsorship support from PCBoard.ca
That is an awesome little invention you have there! I feel you on the blisters and what not. Copper can sometimes be a pain in the but to cut, and those pipe cutters suck sometimes haha. They look awesome man, great great work!
If I hadn't pushed my physical limits on my poor hands enough this week...
I was trying to remove the inner burrs on 1 last errant spacer.
I had already disassembled my little assembly line and figured I could just hold onto it.
This method worked on the first end of the spacer - making it razor sharp in the process.
The second side grabbed the countersink bit and drove itself into my hand.
Specifically it got to the 'pad of fat' on the palm, at the base of the index finger.
The result... I took a nice core sample of my hand. OW!
==== Morning ====
No breaks...I can honestly barely move my left wrist and my joints on my right hand are all but seized but there's work to be done.
There are 25fins along each side of the case, 50 total.
Each fin has 3 holes for support rods.
Each hole had to be drilled larger...
If not enough I had to step my hole size 3x to ensure they remained centered...
That which makes for a total of 450 holes.
Then -oh yes there's a 'then'- to clean the edges of each hole I had to go at them with a countersink bit (on both sides of the fin no less) which makes for another 300 'holes'.
To wrap it up - last night I made a whopping 750 'drills' and needed to cycle my 12v DeWalt battery 6xtimes.
For now I'm going to soak my hands. I've been working at it all night. More progress later I'm going to rest for a couple hours.
==== Afternoon ====
I ordered another sheet of copper this morning as well.
The weight of the pieces would be far too great if I went ahead and cut them from the 1/8" plate I have now.
You'll note that my latest part revisions focused on copper layered over carbon fiber... well there's method to this madness.
I'm going to now use 1/16th inch copper plate (48"x48") to fabricate my parts - and it'll be reinforced from behind with carbon fiber where necessary. This works two ways structurally and most definitely aesthetically as well. This will also half the weight of those parts.
==== Evening ====
Spacers are all complete now - they have been given a coat of Varathane and are currently drying. Pics will follow tomorrow - or soon after.
I ordered a special gauge of threaded rod. 1/32" larger than the ID of my spacers.
I put the rods in my drill and filed them to the exact size of the spacer ID.
The size of the holes I drilled in the carbon fiber fins is 1/32" under the ID of the spacers.
This means that I actually have the "thread" the rod into the fins and the copper spacers fit between.
I did a test fit before I cleaned and painted the spacers - the fit is so perfect that it becomes quite a pain in the ass to assemble. 0 tolerance. =)
I estimate 4-5solid days on this fin assembly (from cutouts, to cleanup) but I'm very pleased with the results.
Thanks for reading... much more to come. Copper arrives Wednesday.
PROMETHEUSCU - powered by: AquaComputer, Corsair, MiPS, and Watercool
July 2008 MOTM Nominee - TBCS: Front Page Article - TBCS: Featured Worklog
OMG, you have been busy haven't you.
Project: Elegant-Li *NEW*
Project: Alpha FINISHED
Project: LEXA Revival FINISHED
Project: LEXA FINISHED Bit-Tech MOTM Nominee October 08
 Posting Permissions

 Reply With Quote