OMG just put this thing in featured


OMG just put this thing in featured
Last edited by Drum Thumper; 02-09-2009 at 11:52 PM. Reason: Excessive omg, spelling error
Originally Posted by Drum Thumper


lol thanks Jeff.
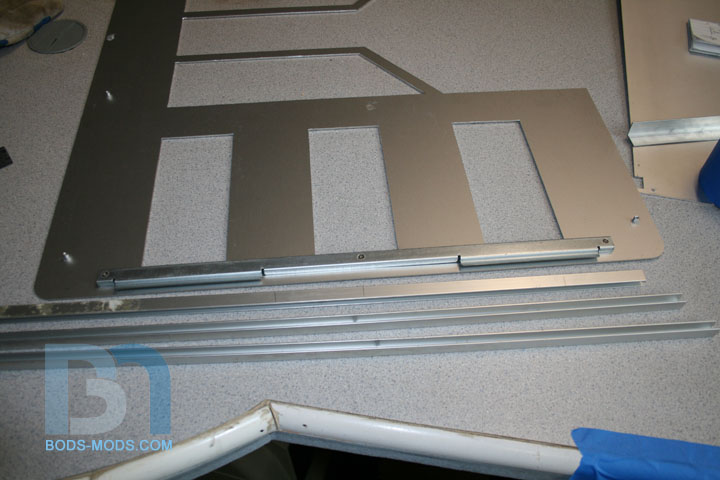
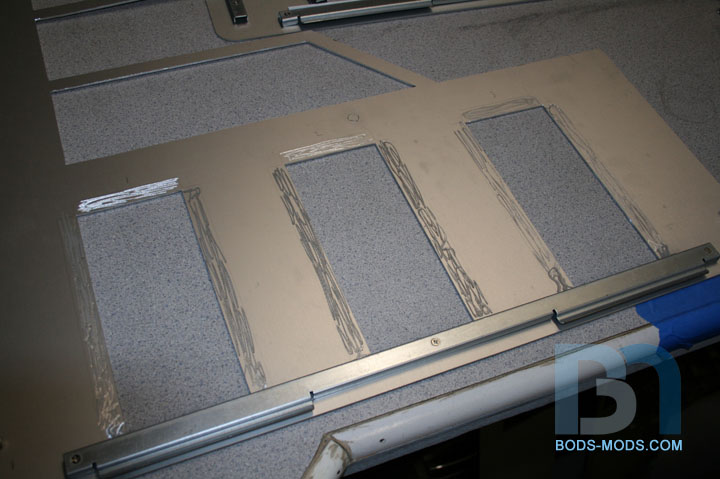
Work continues on the side panels..
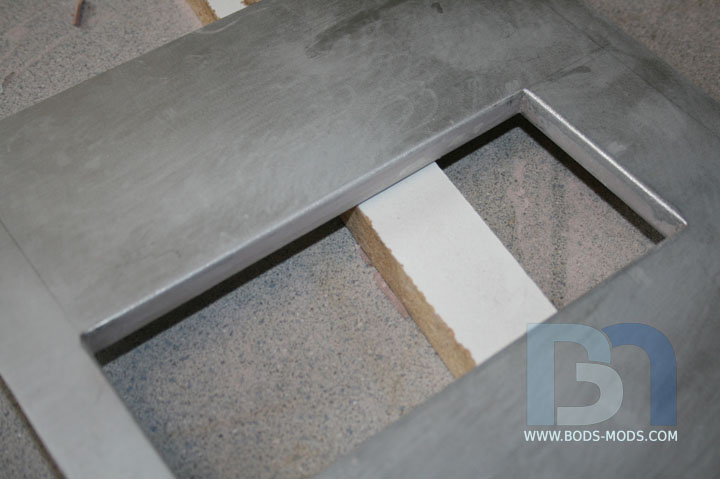
Ok, so these three pass-through holes are becoming more tricky than I thought at first. In order to get a nice clean transition
through the side panel, I need to add a lip around each hole. You can see in this first pic there is already a bottom lip, which is the
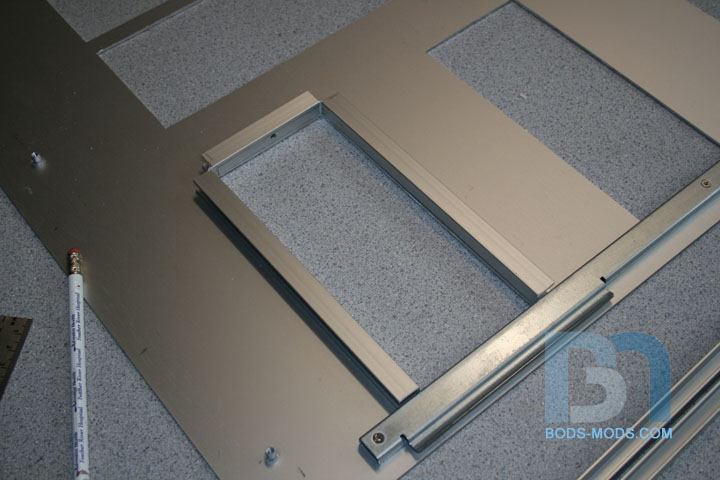
channel used to secure the panel onto the case. So I had some U-channel lying around, and will continue the lip around each hole with it.
All I had to do was make a cut into the open end of the channel, leaving the back side in tact, then bend 90° for each corner.
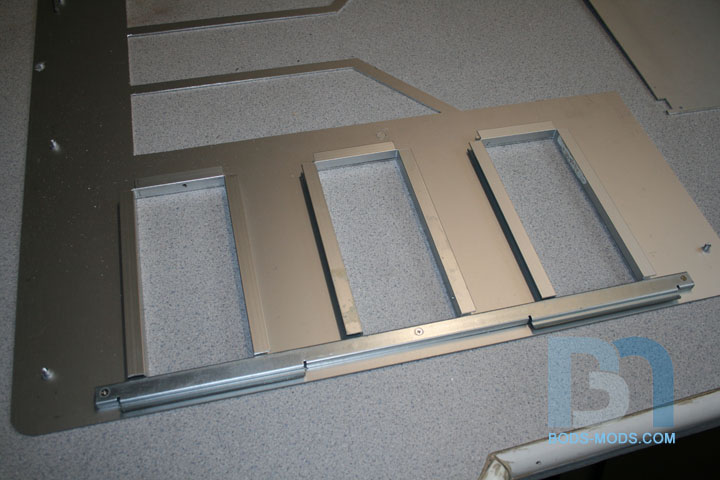
Three done, three to go for the other side panel.
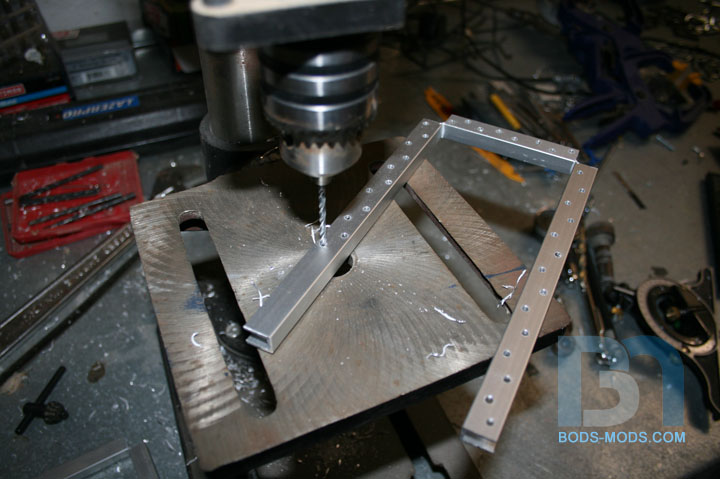
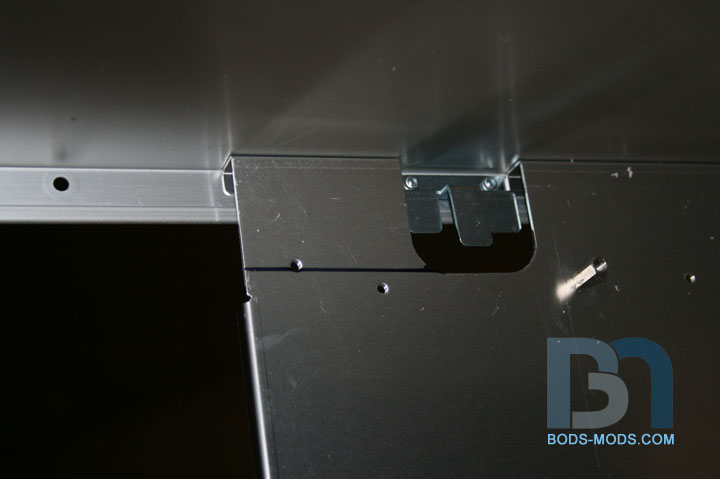
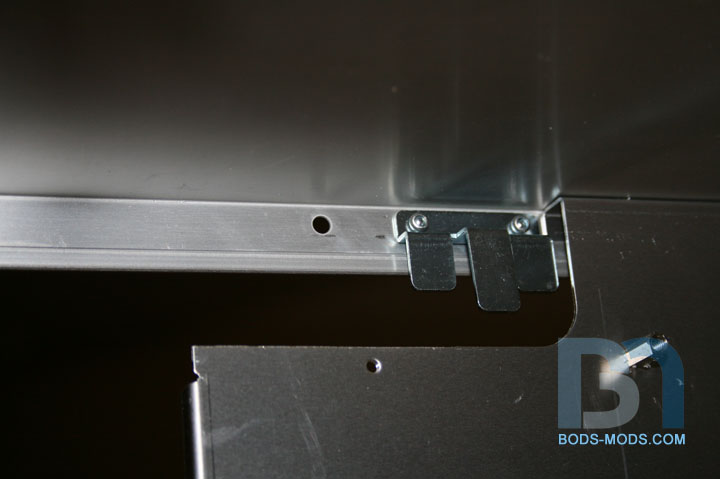
To secure these to the side panel, I will be using some cold weld epoxy. I'm drilling a bunch of holes to give it something to grab onto.
And on the panel side I ground it up a bit, again for better adhesion.
Once I get it all epoxied up, I'll add some bondo around the seams and smooth it out. From the front it will look like the
side panel is 1/2" thick.But more importantly, I will have a flat surface to which the rectangular tubes will mate.
Honey Roasted Peanuts Ingredients: Salt; Artificial honey roasting agents; Pressed peanut sweepings.

Looking good Bod. Keep up the fantastic work.
Project: Elegant-Li *NEW*
Project: Alpha FINISHED
Project: LEXA Revival FINISHED
Project: LEXA FINISHED Bit-Tech MOTM Nominee October 08
/\ agreed man... ur so... explainatory its great i learn lots from you lol

Looking good Bodkeep it up.
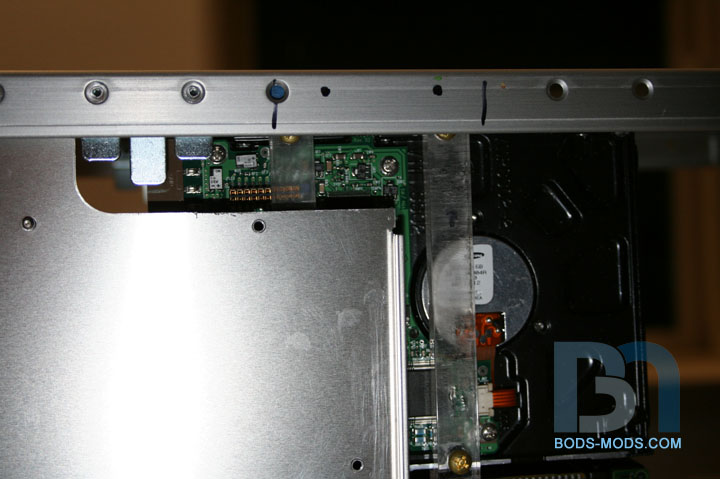
Getting back to the hard drive rack today, I was able to get it mounted to the case.
I wanted to position the hard drives evenly in between the reservoirs and the motherboard. As such, it turns out that I will have
to notch the tray a bit at the top. So I marked the area where I needed to trim,
..and cut it away.
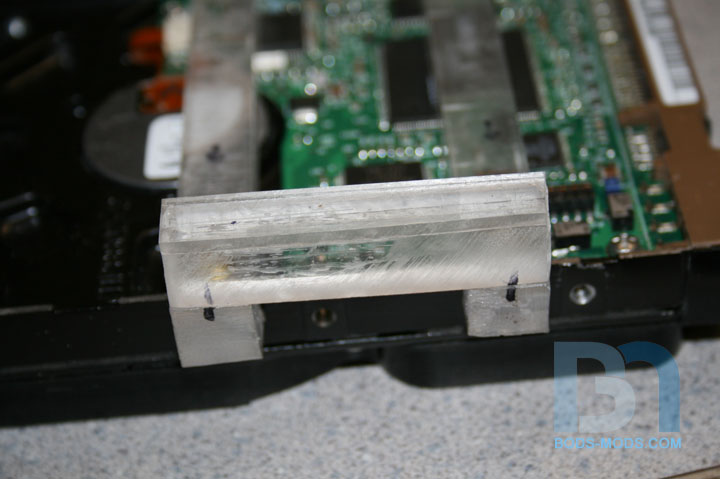
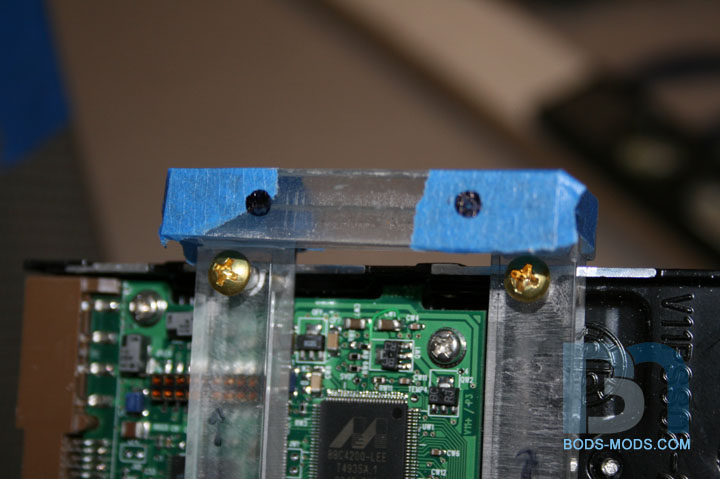
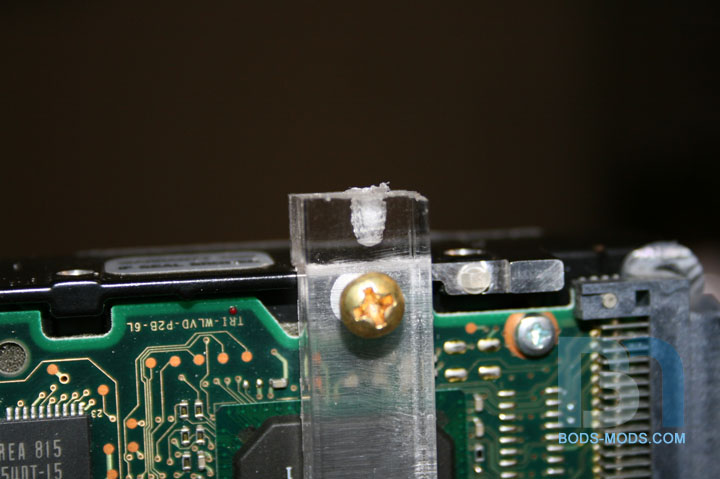
Then I made an acrylic spacer to fit the lip of the case.
Here's a shot from behind. I marked two spots for new holes,
..then once they were drilled out, I marked the spacer.
Once that was drilled out, I glued it onto the hdd posts.
Using countersunk fan screws, I secured the top to the case.
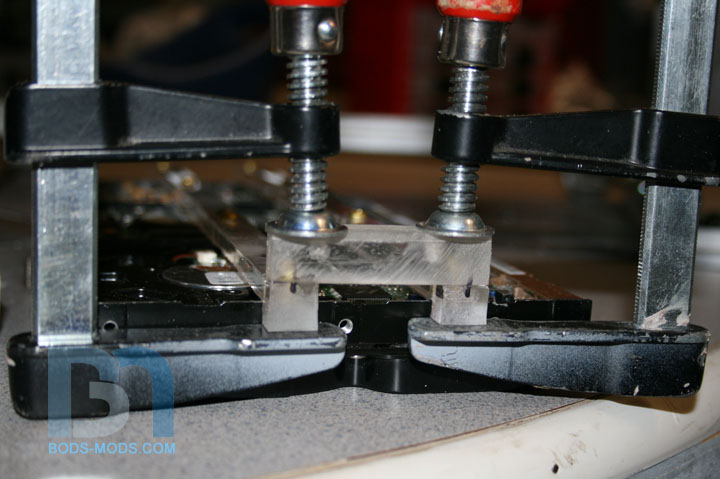
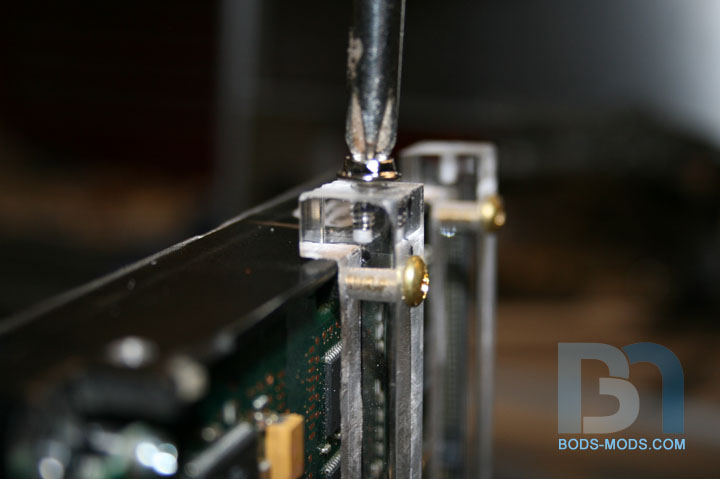
For the bottom of the posts, I just marked the area of contact on the floor, drilled a hole and marked the bottoms of the posts.
I seem to have misplaced my 6-32 tap, so I just used one of the screws instead. No, they weren't self-tapping screws.
Since I was screwing into acrylic, I took my blow torch and heated up the screw a bit,
..then just screwed it into the hole, waited til the acrylic solidified, and backed it out again. Voila! Instant threads lol.
Here's a shot from below showing the bottom screws in place.
And a shot of the drive rack mounted in the case with drives.
Honey Roasted Peanuts Ingredients: Salt; Artificial honey roasting agents; Pressed peanut sweepings.
The rack looks really good mate. I like how you tapped that plexi, I will have to try it one time.
Project: Elegant-Li *NEW*
Project: Alpha FINISHED
Project: LEXA Revival FINISHED
Project: LEXA FINISHED Bit-Tech MOTM Nominee October 08
top work once again
Ok I have an update for ya.
For the last week and a half I've been chuggin away at these side panels. The last side panel update I left off with prepping
them for the cold weld epoxy for the edging around the holes.
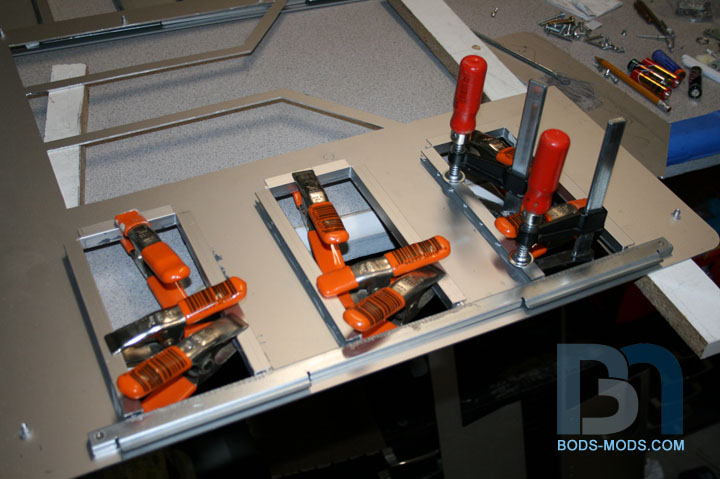
So here is a shot of the edging being epoxied down, held in place with as many clamps as I could find. ;-)
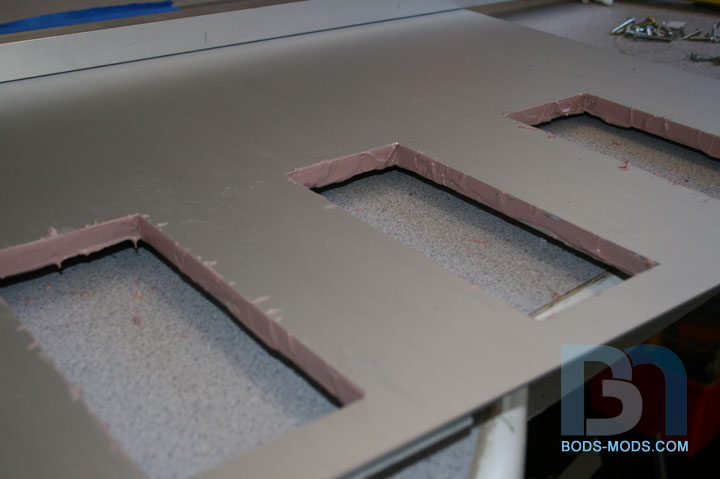
It's been pretty cold up here, so I brought the panels inside to set up overnight. After that, I applied a bit of bondo to smooth
out the transition between the panel and the edging.
After the requisite amount of sanding and filing, here is the result. I also went ahead and rounded the corners for a nicer look.
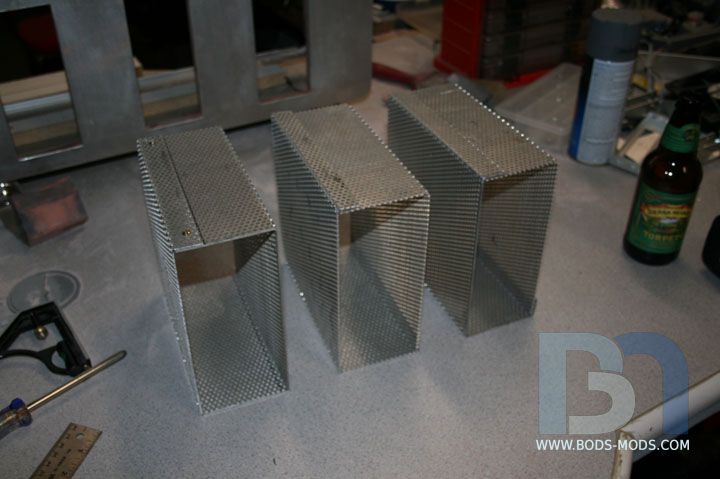
Since it's too cold to paint, I set the panels aside and started on the three mesh boxes. I scored a sheet of aluminum
mesh from a local metal supply warehouse. 12x48 for $20. So in order to get three 7"x3" boxes out of that piece,
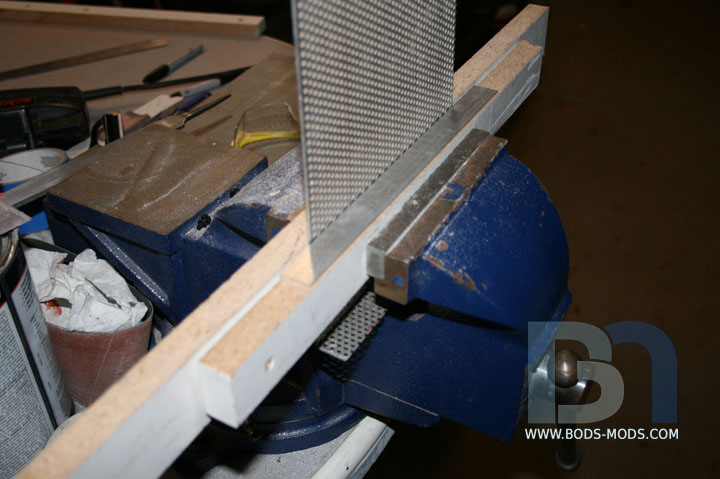
I had to do two parts per box. So I cut the first piece and measured out my bend lines.
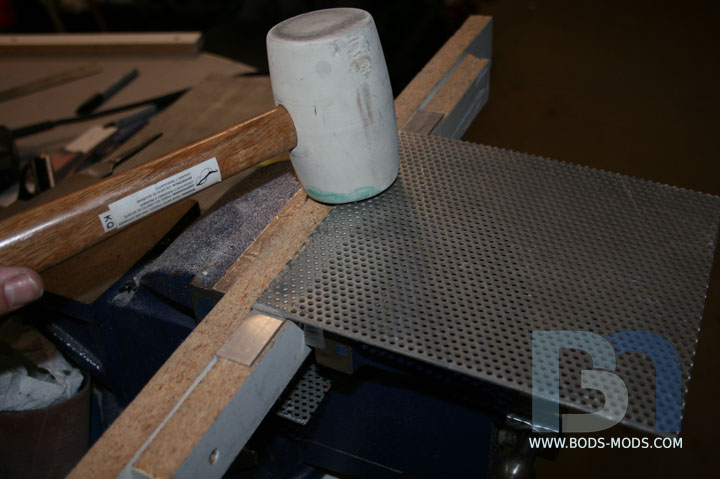
Using a couple pieces of mdf and a piece of L bar, I started my bends.
I used a rubber mallet to bend the mesh over.
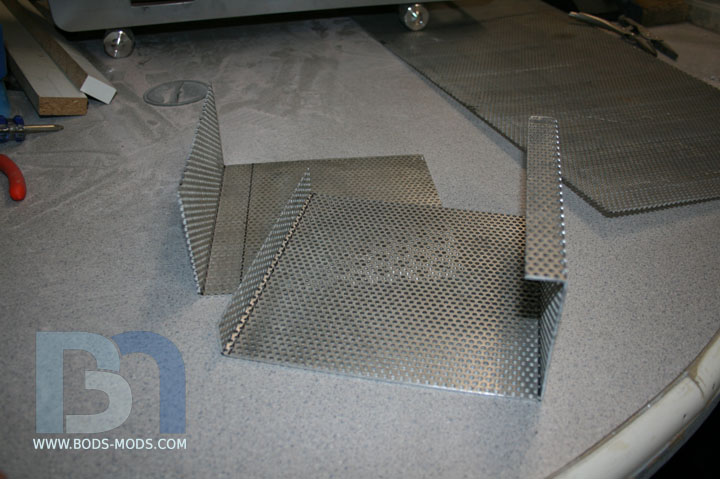
Got the first two-part box cut and bent.
They slip together like so. Since the inside of the boxes are what will be seen, I made sure my overlapping ends were on the outside.
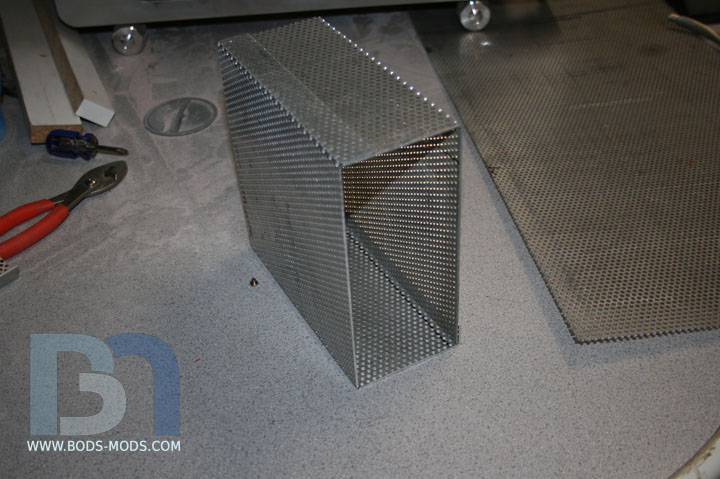
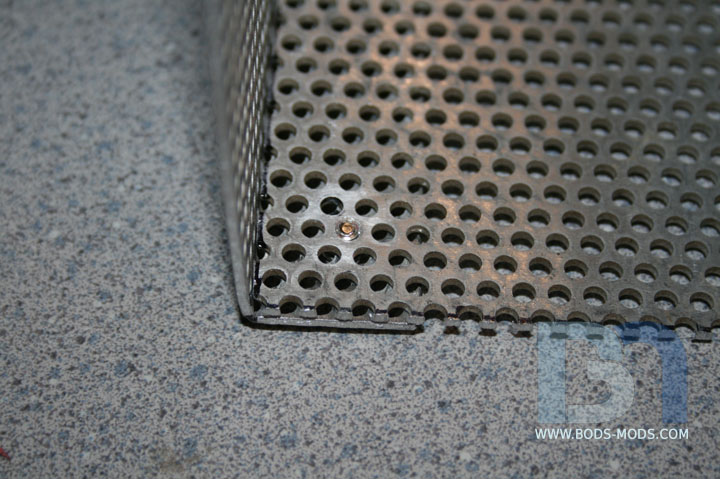
I'm securing them together with some short screws that fit perfectly into the 1/8" holes. The mesh doesn't line up,
so I drilled out the outside to match the inside, and screwed them together.
A shot of the screw from the inside. Pretty subtle, and once painted, will be unnoticeable.
Got all three boxes bent.
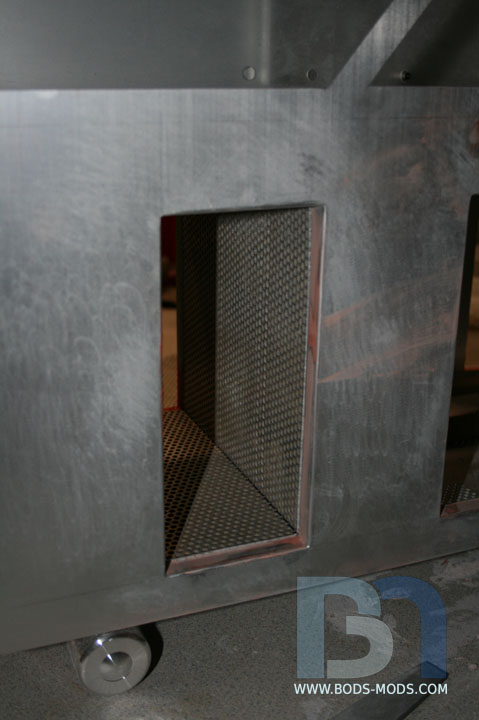
And here's a shot of them inside the case with the side panels on.
A closeup of the first hole.
I got them propped up on some wood pieces right now, but they will eventually sit on the custom rad/fan mount I designed. Will show that when I get it in.
:cooldude:
Honey Roasted Peanuts Ingredients: Salt; Artificial honey roasting agents; Pressed peanut sweepings.
Damn that looks slick. The boxes look great, I have never seen a case design like this before.
Project: Elegant-Li *NEW*
Project: Alpha FINISHED
Project: LEXA Revival FINISHED
Project: LEXA FINISHED Bit-Tech MOTM Nominee October 08
 Posting Permissions

 Reply With Quote